Tag Archives: completed

Completed: Floral Butterick 5526

4 Feb

What’s that, you say? This is Butterick 5526 overkill?

deal with it
noragrets

~I DO WHAT I WANT~

B5526 Floral

In all seriousness, though, I did have a small internal debate about posting yet another shirt of the pattern I’ve talked about to death, but ultimately – I mainly use this blog as a sort of digital diary of my projects (truth: the entire purpose behind my tagging system & the Lurk My Closet pages are specifically so I can quickly find old projects without having to spend a lot of time searching haha), and I think this particular shirt has earned a spot in the archives. I’m really pleased with the resulting fit and finish, and I feel really good about the particular fabric I used (print aside – although, I gotta say, it’s pretty gorgeous!).

B5526 Floral

B5526 Floral

Unfortunately, that means I have less to talk about as I think I’ve pretty much milked this shit for all it’s worth. Fortunately, I feel really really confident in my shirtmaking skillz. I’ve pretty much got my construction down to a science, I know what fabrics are best suited for this style + the way I like it to look, and, dammit, I just really really love shirtmaking. So precise! So clean! So wearable every day basics!

B5526 Floral

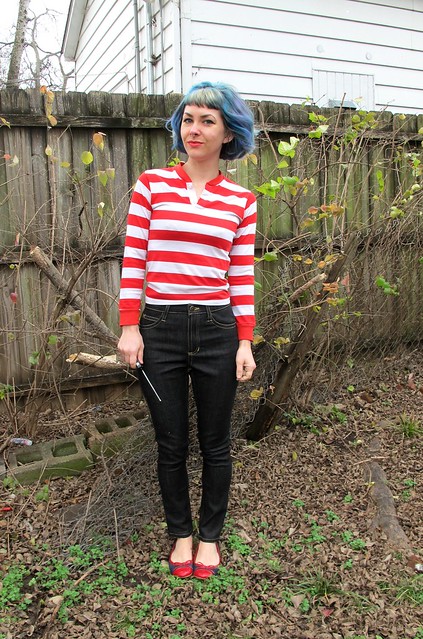
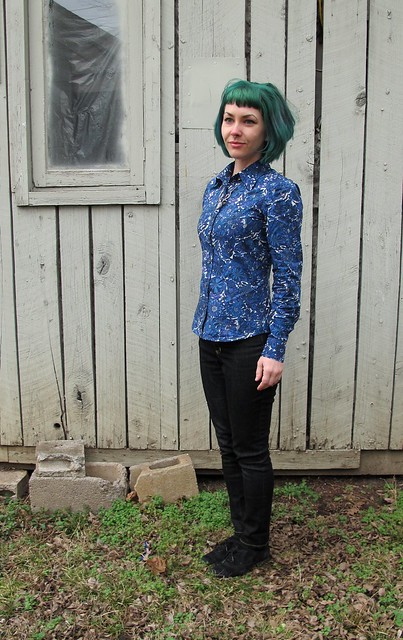
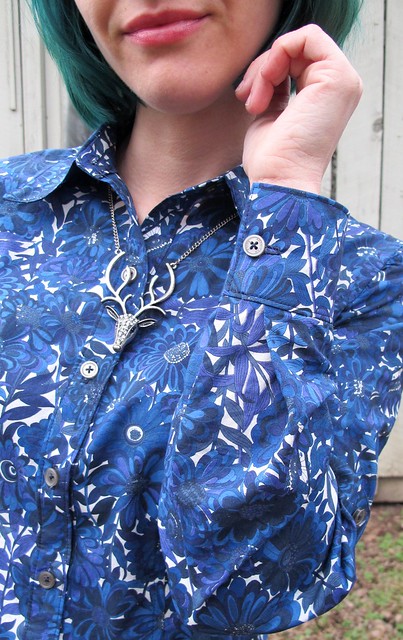
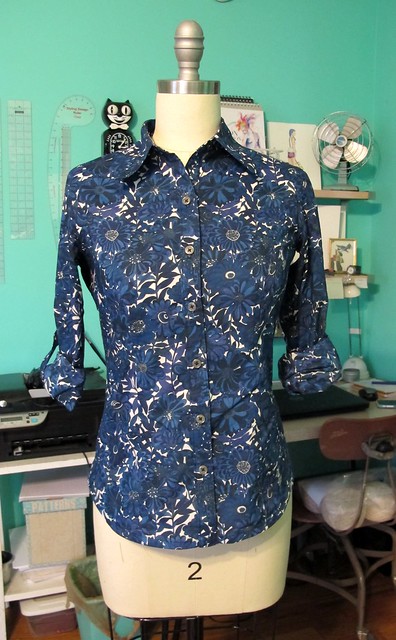
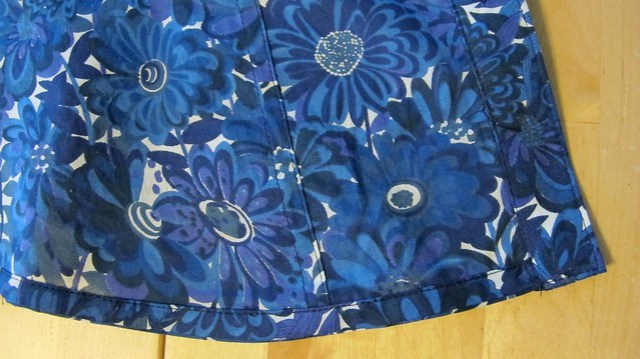
As I mentioned, this is Butterick 5526, sewn up in a beautiful cotton shirting that I bought on Goldhawk Road in London. A lot of people have pointed out that the print resembles a Liberty print – and, while I agree, I also am pretttty sure it’s not the real deal. For one, I don’t remember exactly how much I paid for it, but I know it was less than the £25 they charge per meter at the Liberty store. Also, the selvedge is blank, if not missing entirely. That being said, it’s a very fine, soft shirting cotton – so maybe it fell off the truck? Maybe it’s an end bolt? An ~inspired~ knock-off? I dunno.

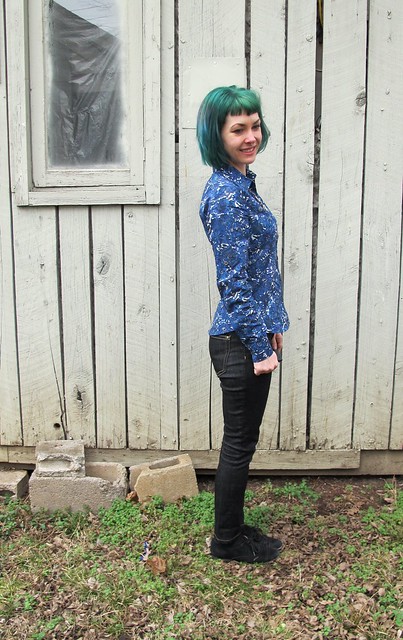
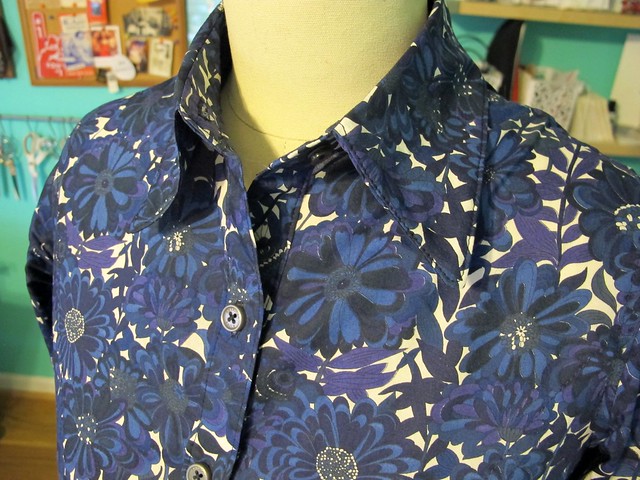
At any rate, it’s gorgeous. I just love the colors – the florals are a little less girly here, a little more of that 60s groovy that I’m really drawn to lately. The fabric itself is soft and has just enough drape to really make the shirt hang nicely. I’ve learned that I don’t care for true cotton shirtings in this pattern – when they’re stiff, I don’t think they look right on me. Give me something softer with a little bit of drape, like a cotton voile!

B5526 Floral

I don’t have any ~special tips~ for working with this fabric. Same as it ever was – just use a new needle, take your time with cutting and sewing, enjoy the ride, etc etc.

B5526 Floral

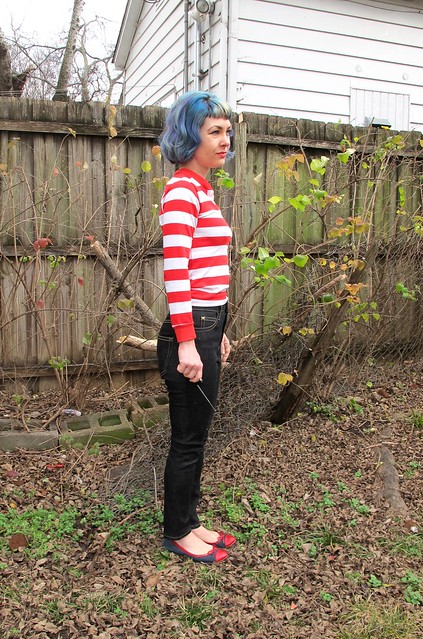
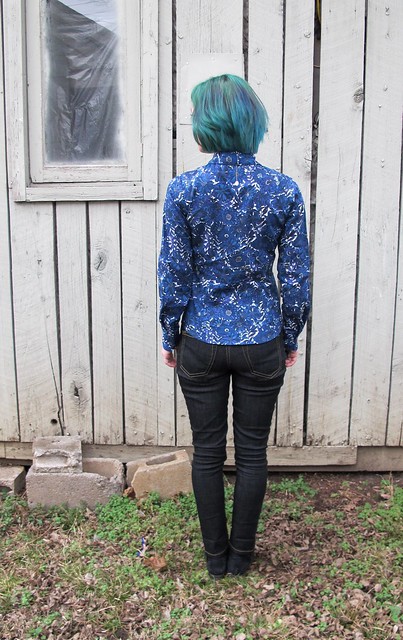
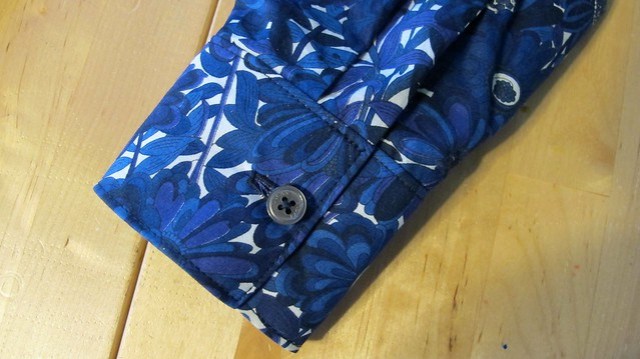
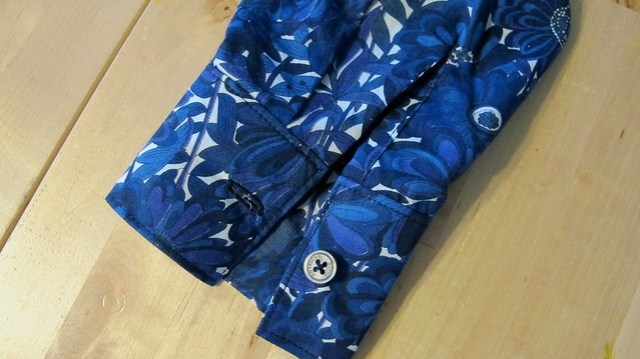
Oh, I think I nailed down a good sleeve length! Butterick 5526 in polka dot chambray (that’s my favorite one and I wear it ALL THE TIME. I have to hide it from myself so I don’t have too much of a good thing, ha) started out with sleeves too long, and I debated shortening them – but after a conversation with Landon, he brilliantly pointed out that they might shrink up a little after a couple of washes (even with prewashing, this can happen – which is always something I consider with pants, but never shirts. Which is why all my flannels have sleeves that are too short now haha). So I decided to leave the sleeves long and wait – and I’m so glad I did, because that’s exactly what happened. They shrank and are the perfect length now. So for this shirt, I used the same sleeve length and I think it’ll shrink up just right. The placket fits and it’s the right length (unlike my silk georgette B5526, wah), which is pretty prime if you ask me.

B5526 Floral

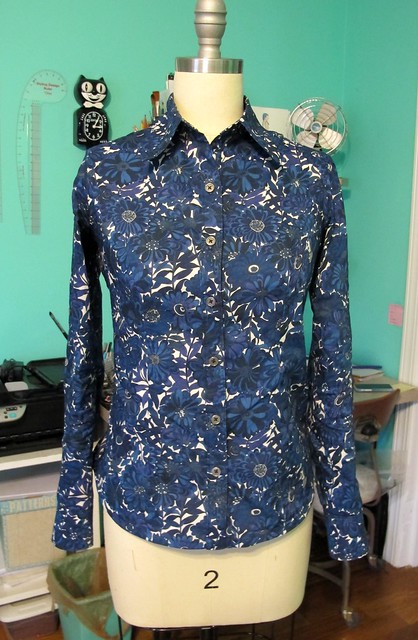
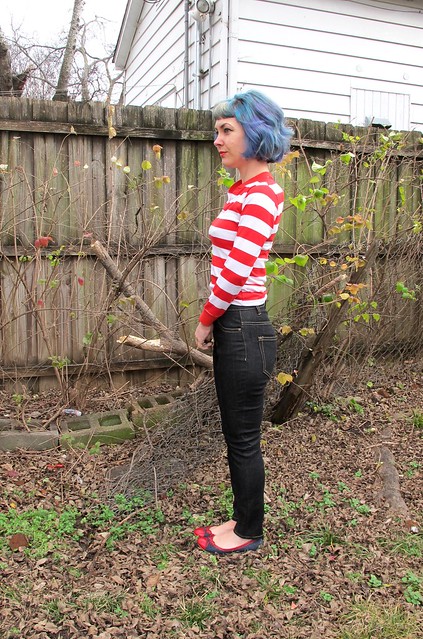
The only change I made to this version was to remove a few inches of length. I’ve always felt that my collared shirts were a little too long, at least when worn over my higher-waisted pants (and no matter what I do, they look weird tucked in. Half tuck, full tuck, no tuck, doesn’t matter. I get this weird tuck gut and, ugh), so I copied the length from my Liberty button up and transferred it to this pattern. I am MUCH happier with the length now; I think it works better with my proportions.

B5526 Floral

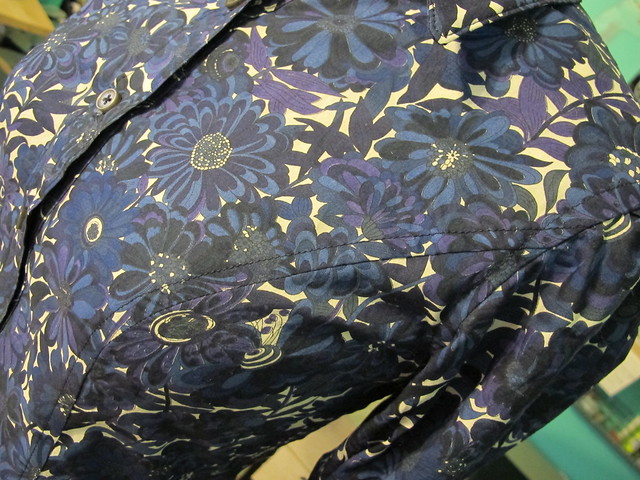
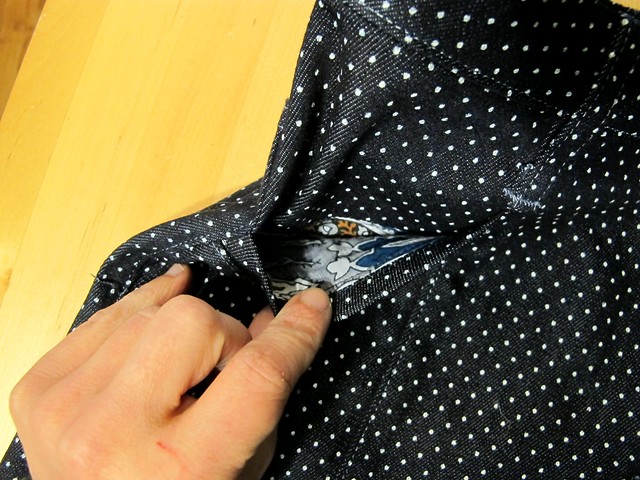
The shirt is constructed entirely with flat-felled seams. Here is a flat-felled boob for your perusal.

B5526 Floral

B5526 Floral

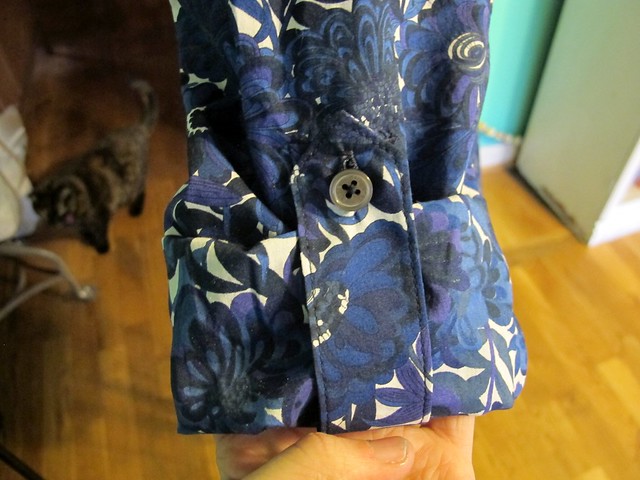
I also added sleeve tabs, so I could roll up the sleeves when the weather decides to warm up. Didn’t want to choose between long or short sleeves, so I chose both! Also, bonus background cat. I think she was screaming for me to feed her at that point (I’m sure you can tell just by looking at my portly feline that she is indeed not starving, but she would lead you to believe otherwise).

B5526 Floral

Here it is with the sleeves rolled up. I love these tabs because I think the rolled up sleeves look neater when buttoned into place. Of course, that means there is a visible button and some stitching on the outside of the sleeve, but I can deal with that. I was curious as to whether I’d find the tab annoying when it’s not being used (aka rubbing against my arm on the inside of my sleeve), but I have some pajamas that use the same concept and they don’t bother me at all.

B5526 Floral

B5526 Floral

B5526 Floral

B5526 Floral

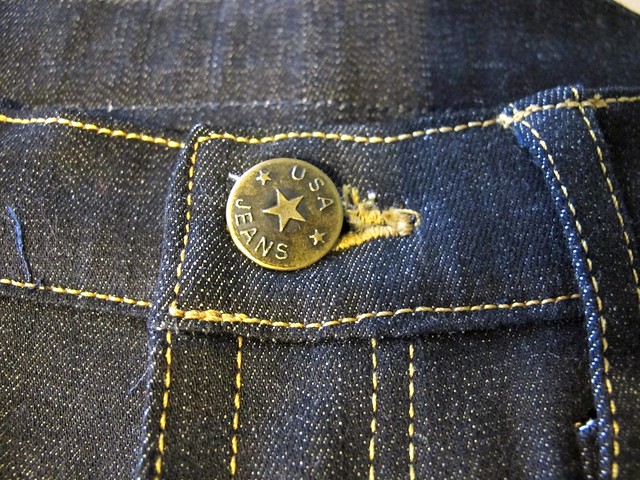
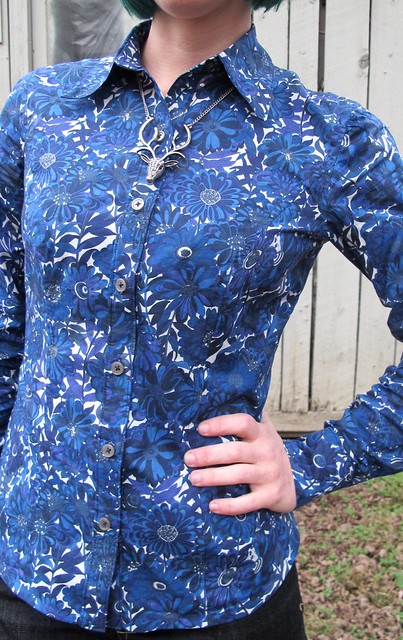
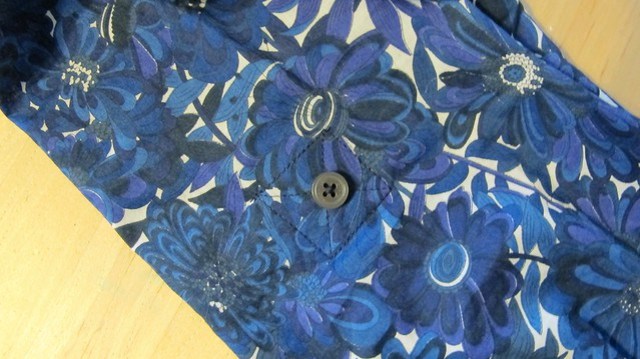
Did you notice the buttons? Here’s a close-up:

B5526 Floral

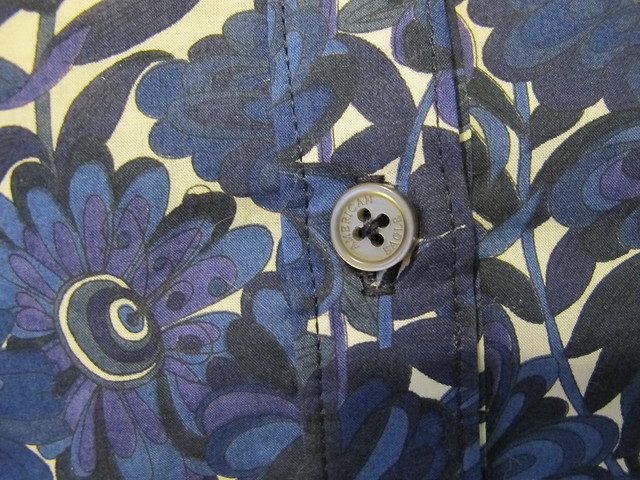
Haha! I always save the buttons from Landon’s shirts when they are getting thrown away (we are talking super worn out to the point of not being worthy of donated), since I tend to be pretty conservative with my button choices and, hey, free buttons. I almost didn’t want to go with these because I’m not crazy about the branding on them, but, whatever. They match the print really well. Can’t argue with that. And I do love American Eagle – or, at least I did when I was a teen (yes, this is the same teen/same time when I was wearing black vinyl pants. What can I say, I like their take on the classics haha), I haven’t been in there recently enough to form an judgement opinion.

B5526 Floral

That’s all I got! Kind of a boring post, but quite a useful garment. I am really enjoying making the same pattern over and over – no need to reinvent the wheel with my fitting, and it’s kind of fun to see the obvious improvements with each make. I’ve had a few people ask me if I have plants to make the new Sewaholic Granville Shirt, and while the pattern looks beautiful, I think I’m just going to stick with what I know I already love and has been fitted to my liking. Again, not trying to reinvent the wheel here! Although, I’ve been watching the shirtmaking posts with great interest. There’s always so much to learn, I love it!

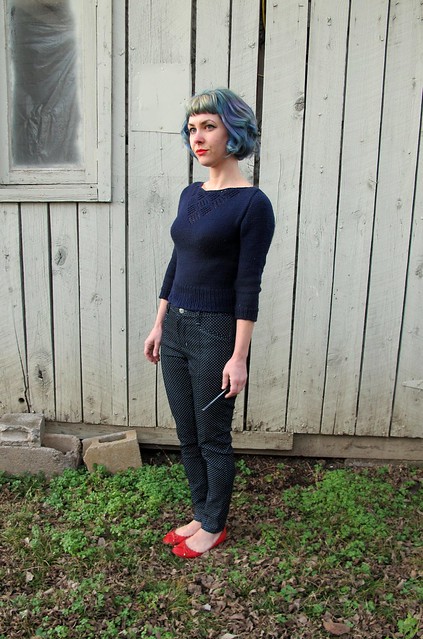
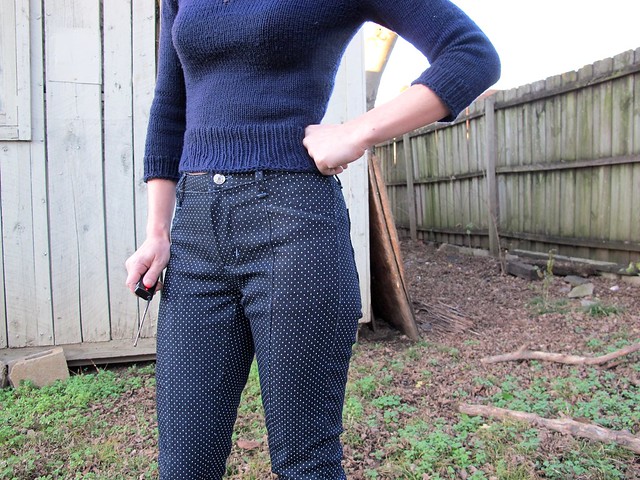
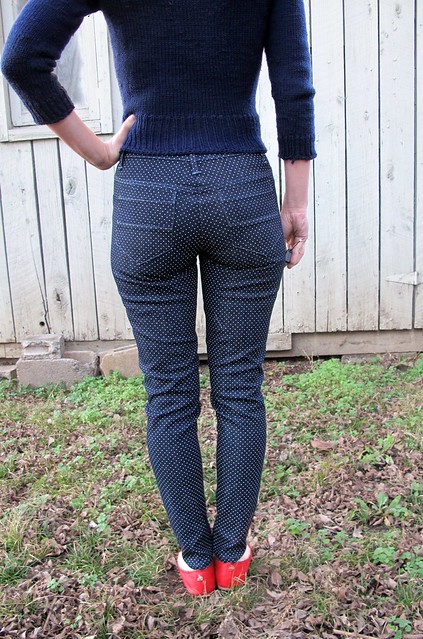
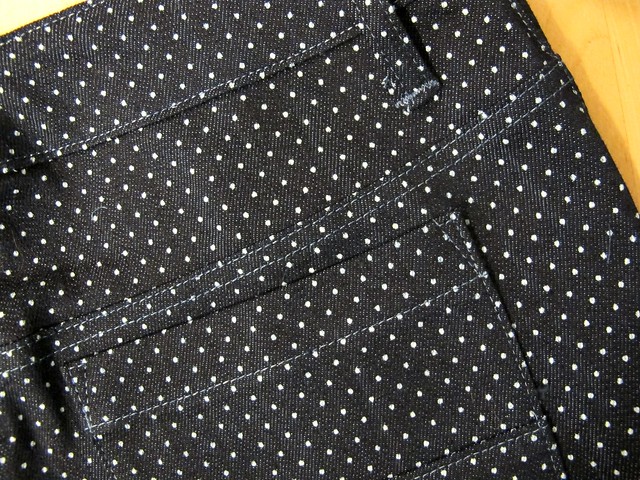
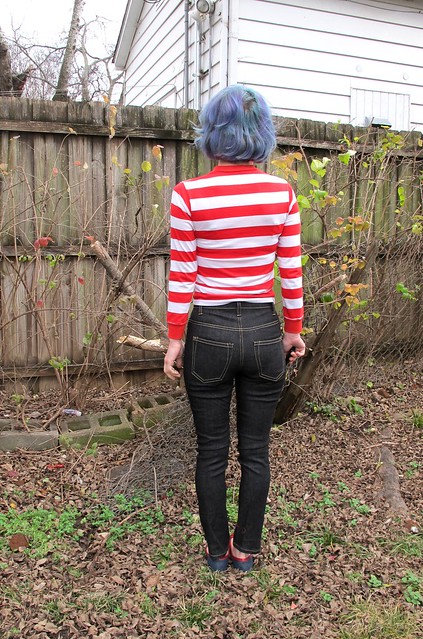
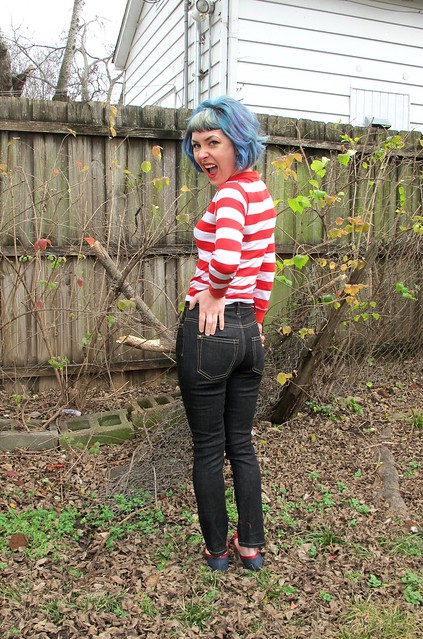
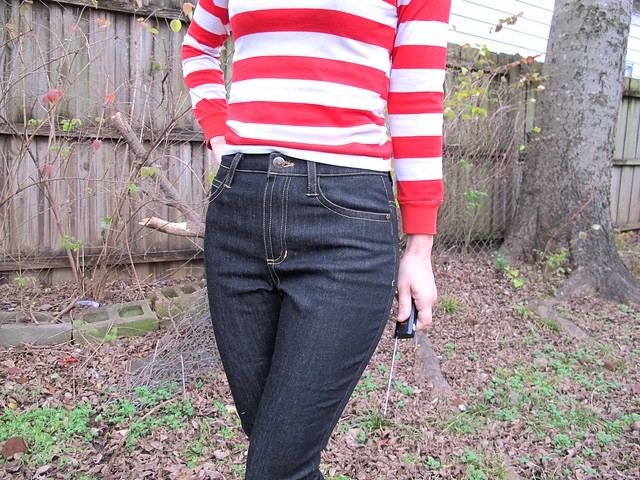
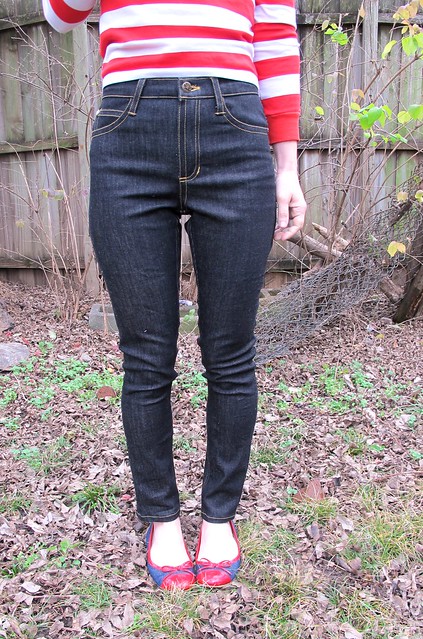
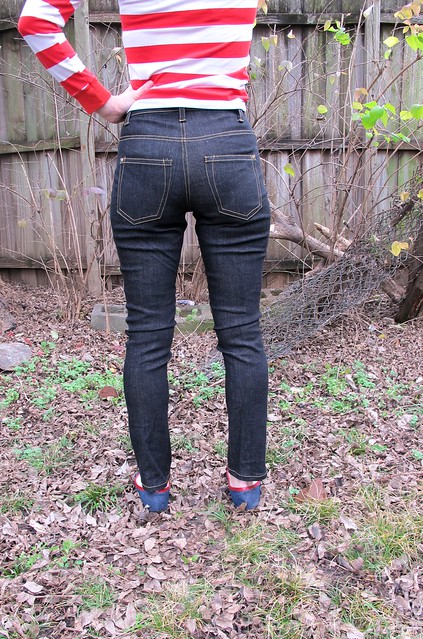
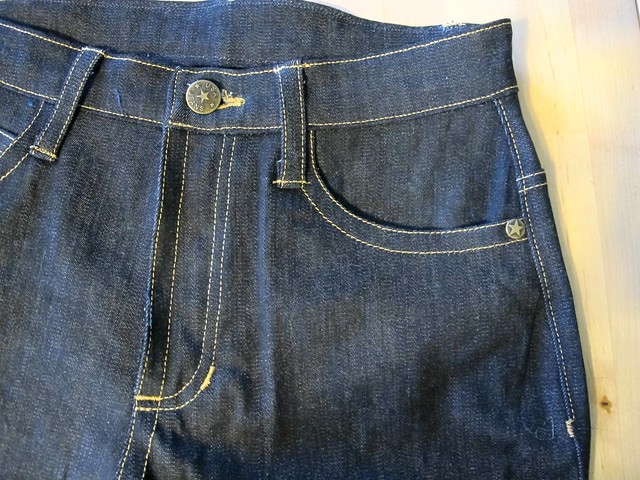
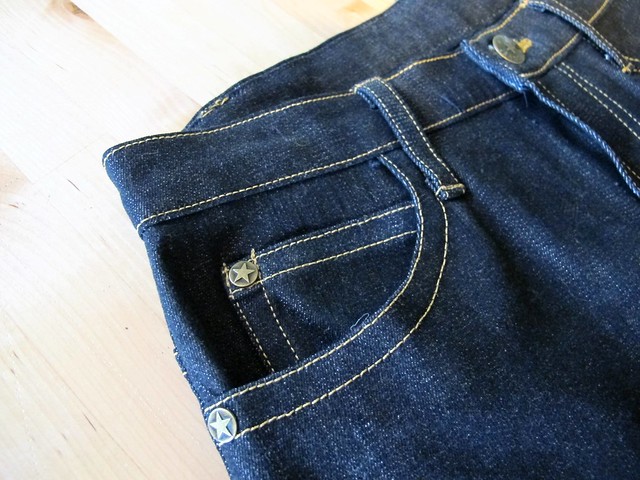
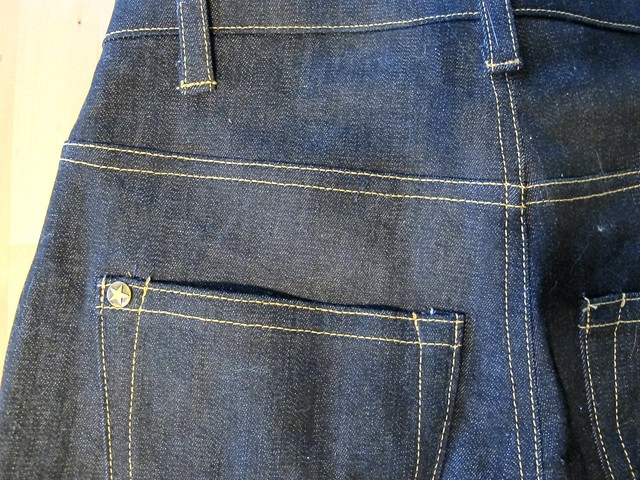
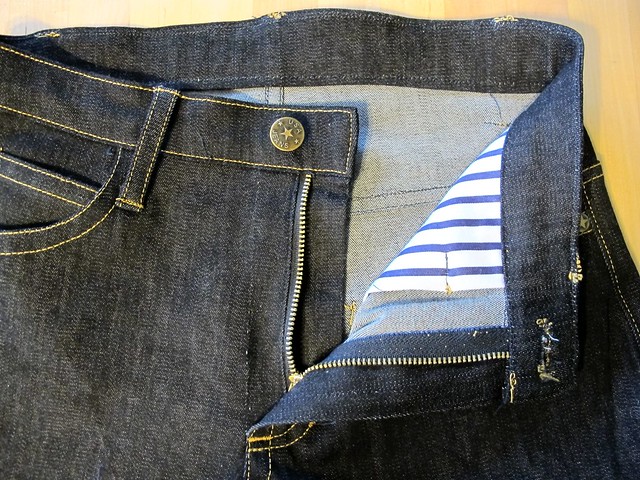
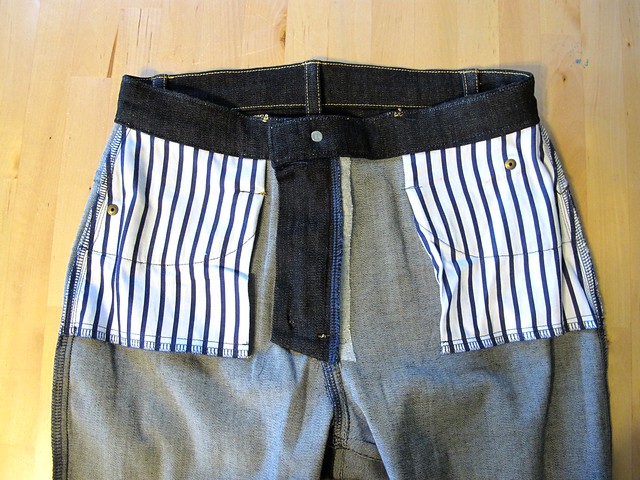
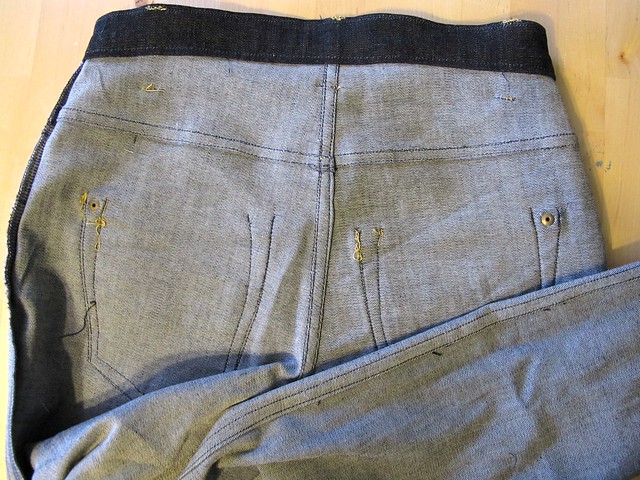
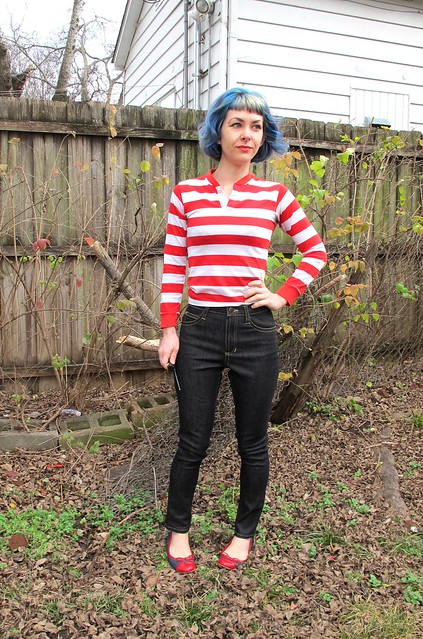
As a side note – those are my Ginger jeans I’m wearing in these photos. I’ve been wearing them off and on for about 2 weeks, and they’ve held up their shape really nicely. I’m actually pretty surprised – most of my handmade pants need to be washed after about 2 wears because they stretch out all crazy and don’t recover until they hit the dryer. The denim I used for these jeans is nowhere near the quality of my I+W jeans, but I don’t have any complaints (except for that I didn’t consider shrinkage when drying, and now they are a tiny bit short. On the flip side – this might be the first time pants have ever had too short of an inseam on me, which is sort of exciting it’s in own way). Now if only I had more… Heather, will you pls go denim shopping with me again? Thnx.

Completed: Ooh La Leather Leggings

26 Jan

Ok, so, the title of this post is a tiny bit misleading – these aren’t leather leggings so much as they just have a panel of faux stretch pleather. BUT, it sounded catchy (as long as I ignore all the weird Google search terms that will likely lead people straight to this post, aiee), so it stays.

Leggings & Ensis Tee

Anyway, like, ~Ooh La La Leather~ or some shit, amirite?

Leggings & Ensis Tee

In all seriousness, I’ve mentioned before that this is my favorite leggings pattern. I have a couple more patterns in my stash that I haven’t even bothered to try because I JUST CANNOT QUIT me some Ooh La Leggings. I love the way they fit and I love the seaming detail. Made up in a thicker ponte, they almost pass for actual pants. Made up in a thinner material, they are great for lounging and sleepwear. Made up in some crazy lycra, they make amazing workout/yoga pants. Basically, they are my dream leggings and you will have to pry this pattern out of my cold, dead hands.

Because I love this pattern so so much, it goes without saying that I’ve made a metric Shit Ton of these leggings over the past two years. Obviously most of them haven’t made it to the blog – after sharing a couple pairs, they kind of get redundant. And y’all know how much I hate redundancy, at least when it comes to my own blog. So while you might occasionally see a pair pop up in a post (without needing to be the center of attention), they spend much more time in the real world than they do the blog world. And I do wear the shit out of all my pairs, so there’s that.

Leggings & Ensis Tee

With that being said, I think it’s ok/non-redundant to post about this pattern if I’ve done something ~unique with it. Which is exactly what I did. Check out my (faux)(p)leather (paneled) leggings, y’all!

Leggings & Ensis Tee

I found this stretch pleather on Goldhawk Rd while fabric shopping in London. It was one of the very few things I had on my list to buy, as I knew I’d need to be able to actually touch the fabric to make sure it stretched enough and wasn’t toooo shiny. Not that I’m against shiny pleather pants – I had a pair when I was in high school, back when I worked at Hot Topic and thought I was sOoOoOo punk rock (and no, I have no idea why my mom didn’t veto those things! HAHA! I must have looked like such a little baby hooker!) – but, being nearly 30 now, I’m an adult and I have to tone things down just the tiniest bit, at least when it comes to my pants. ANYWAY, this pleather is pretty good, I think – as far as pleather goes. It’s very stretchy, it’s not too shiny, and the wrong side has a nice fabric backing so it’s actually quite comfortable against the skin. Or, rather, as comfortable as pleather leggings can get.

Leggings & Ensis Tee

Since my pattern was nice enough to already have all the piecing done for me, I just cut the side panels in the stretch pleather, and the remaining pieces (front and back legs, as well as the yokes) in this black polyester Ponte de Roma. The Ponte de Roma was pretty shiny on one side – like, way more shiny than I was expecting – so I sewed it with the wrong side facing out, which looks a bit more polished. I sewed everything on my serger, as I do, and omitted the topstitching as I was afraid that piercing the pleather would cause it to wear holes that would eventually tear.

As far as actually sewing the pleather, that part was surprisingly easy! Keep in mind that stretch pleather (as well as non-stretch, as well as leather, etc) does show pin holes, so you need to be reeeeeally mindful of your pin usage (aka, don’t use ’em if you can’t pin inside the seam allowance!). I traced my side panel piece with a Chaco liner before cutting on a single layer. I did not pin my pieces together, except for one part at the hem just to hold it in place while I topstitched (I usually don’t pin my hems for knits, just press them – but you can’t press pleather! One little pin hole at the hem is ok with me, anyway). The sewing part did not require any special forethought or tools – due to the fabric backing of this material, it went through my machine just fine without the need for a Teflon foot. I used a regular stretch needle. Et voila!

Leggings & Ensis Tee

While I’ve got your attention, I guess I’ll also talk about my shirt – because y’all know I made that shit too!

Leggings & Ensis Tee

The pattern is the Ensis Tee, also from Papercut Patterns (ooh, I just heart me some Papercut!). I’ve made this before, albeit in a thicker/less drapey knit, so I think this version deserves a little bit of spotlight 🙂 It’s amazing how different it looks with a drapier fabric, yeah? Honestly, I like this version a lot better – I think it’s a lot more flattering (plus, it’s wool, so it’s pretty snuggly!). The top yoke is a piece of wool knit I bought in Paris, and the bottom is this cool steel grey sweater knit. I bought that knit on a whim, and it’s pretty cool – it has a lot of dimension to the color, and you can really see the knit stitches due to the somewhat loose gauge. It’s also wide and VERY stretchy in both directions – I might use the rest to make a pair of tights. Also, I need some kind of grey knit intervention. I keep buying pieces and this shit is getting out of handddd. Like, I really want that pewter grey but I’m gonna resist. I must resist.

Leggings & Ensis Tee

This is basically the same picture as above, just without my head.

Leggings & Ensis Tee

This tee whipped up fast! I had it cut and sewn within a couple of hours – and honestly, it took that long because of all the topstitching I added. I topstitched the colorblocking at the yokes and sleeves, as well as the neckline, using my stretch twin need and wooly nylon in the bobbin. I think it adds a little extra to an otherwise plain tshirt. Oh, and that yellow tab at the neckline is my laundry reminder not to wash this in the machine – because it’s wool 🙂

Leggings & Ensis Tee

I kept the curved hem, left off the hem band, but added cuffs to the sleeves. Happy sweater-hybrid-tshirt-thing!

Leggings & Ensis Tee

And here are my leggings again, because I know you’re just dying to see them one more time. As a side note – I used a different method to attach the elastic waistband (rather than feed it through a hole like the pattern instructs). I took some pictures while I was doing this, which I’m hoping to make into a tutorial at some point later this week.

Leggings & Ensis Tee

Anyway, that’s mah new threads! Basics with a lil’ twist! What do you think? Am I going to burn someone’s eyes out with my leather leggings? Should my mom have not let me leave the house in those pleather pants? Man, I wish I had pictures of that ensemble. Sooo glad the only social media platform we had back then was makeoutclub.com HAHAHA.

As a side note – if you think my hair looks green, it’s because it is! It was due for a redye, and I decided to go green 🙂 I’m using a new dye that I bought in London, at the suggestion of Nicole – we’ll see how it holds up! I gotta say, I’m not looking forward to the fading… green always fades so ugly. Also, these pictures are REALLY deceiving. It’s much brighter and more emerald in real life. I took these pictures on a grey and overcast day, so the color is kind of sludgy here. I don’t know how to color correct my photos, so this is what you get. Sorry, not sorry 🙂

Completed: The Portside Travel Set

22 Jan

For the past couple months, I’ve been planning to up my luggage game. Over the years, I’ve made do with a fairly old suitcase (handed down from my parents – I’m not sure exactly it’s age, but I know there are receipts in the pocket from when we went to Disney World in 1994, so at least 20 years!) and a really ratty/cheap duffel bag. My travel schedule is starting to ramp up this year, and one thing I don’t have is a duffel bag that is suitable for a weekend getaway. The aforementioned ratty bag was pretty small and difficult to carry comfortably. Also, I broke the zipper while I was in Paris – rather than repair it (it was really REALLY cheap – even down to the hardware, which I also threw away with the bag haha), I decided to make a new set, courtesy of Mood Fabrics.

Portside Travel Set

The Portside Travel Set is the perfect pattern for my casual luggage needs – a roomy duffel bag, plus a matching dopp kit and a small zippered pouch. The pattern is designed so you can really play with color blocking and fabric options, and it’s not difficult at all to put together. The duffel bag is nice and big (20″ x 11.5″ x 12″), and includes both hand and shoulder straps (the shoulder is adjustable, as well as removable!), a zippered top, and two exterior pockets. The dopp kit has both a zippered top and a zippered exterior pocket, plus a small handle. The little zippered pouch is one of the most basic things ever – like the kind of pouch you’d make in a ‘learn to sew zippers’ class – but I can see it being very useful. And it all matches! Yay!

Anyway, let me also point out that making this set gave me an excuse to peruse the home decor section of Mood Fabrics. I rarely sew with home decor fabrics (I know some people love them for clothing, but I’m not much of a fan, unless it’s for a very specific purpose), but I totally jumped at the opportunity! There are SO many cool designs, it was really hard to narrow it down to just 3! I started with this cool turquoise geometric print, matched it to a charcoal grey faux suede, and lined the inside with grey and white polka dots (I’ve been eyeballing that polka dot fabric for over a year now – so glad to finally have an excuse to buy it!).

Portside Travel Set

Portside Travel Set

Portside Travel Set

I went over all this briefly in my post for the Mood Sewing Network; here I’d like to talk a little more about the pattern itself. Overall, it’s a great little pattern – good instructions, the pieces fit together, and I think the end result is really nice. There were a few points in the pattern that I found a bit confusing, though. For one – I completely mixed up the main and contrast fabrics when I was planning my fabrics! I assumed the contrast was the bottom half – i.e., the part I’ve made out of suede. That’s actually the main fabric, as far as the pattern is concerned. The contrast is the top part. This isn’t marked anywhere on the pattern except on the pieces themselves, which meant I ultimately ended up marking the line drawing with a map of what piece was what before I knew what piece to cut from which fabric. The contrast and self changes for the dopp kit and pouch, so I would really recommend at least mapping out the design before you start cutting. I know I would have been PISSED if my bag had ended up with the suede being the top sections, ha.

Speaking of the suede, that wasn’t difficult to sew at all. I used a standard 80/12 needle and my normal machine feet (no need for a special Teflon foot or anything), and since my iron has a shoe, I was even able to press it and fuse interfacing to it. The bag is lightly interfaced – more so to keep the cotton from wrinkling, less for structure. It’s pretty floppy when it’s empty.

Portside Travel Set

The instructions, like I said, are pretty good. The only part that really confused me was assembling the shoulder strap for the duffel bag. I have made plenty of stuff with sliders – hell, even all my bras have adjustable straps with sliders – but this bag uses D-rings for the sliders. I could not figure out how Jen did this, and even googling didn’t really help (turns out everyone else uses sliders too, who woulda thought?). I just ended up playing around with the straps and rings until it worked. Couldn’t tell ya what I did to get to that point, sorry! At least they look good now!

Portside Travel Set

Also, sewing up the little dopp kit was… interesting. Not all the pieces matched up perfectly (I read this in a random google review of the pattern as well – so either we cut it wrong, which is possible, or there’s a minor drafting error. I know Jen is really precise with her drafting so I hesitate to believe that it’s an error on her part, but I thought I would point that out), but I just trimmed off the excess. We are talking about rectangles that form a bag, after all – no crazy fitting or anything. I really struggled to get the bottom sewn on square – it’s passable as it is, but it’s not my best work.

Then again, it’s a dopp kit. I’m not unpicking that shit hahaha.

Portside Travel Set

Portside Travel Set

Portside Travel Set

Portside Travel Set

I love all the neat details in this tiny bag, though! The front zippered pocket is a personal favorite – also love that little leather zipper pull! And check out that print-matching at the top zipper! That was actually unintentional, but it worked out amazingly well. I’d be lying if I said I wasn’t super impressed with myself haha.

Portside Travel Set

Portside Travel Set

Like I said, the pouch was really easy – like, sewn up in under 20 minutes easy. Since it’s unlined, I serged the inside with matching aqua thread (it was almost navy because I didn’t feel like re-threading the serger, until I reminded myself that I paid for this serger specifically because it self-threads haha). The zipper pull – as well as the pulls for the dopp kit – is loosely based on the pattern included in the travel kit. I had to change it up a bit to get it to fit my smaller-than-normal zippers.

Portside Travel Set

One thing I did not anticipate when I started this project was how much all the materials were going to cost me – and how difficult they’d be to source. The fabric wasn’t terribly expensive (and since it’s a project for the Mood Sewing Network, it was free for me), but all those little extras add up! I found my swivel hooks and D-rings at Joann’s – not in the sewing section, but in the… dog-leash making section? Joann’s, keepin’ it weird as usual. I bought my cotton webbing from A Graff Supplies on Etsy. This was after shopping around quite a bit – Joann’s didn’t have the right colors and widths, Mood was sold out of most everything, and any other supplier I found only carried one of the two widths I needed. A Graff Supplies had both widths, with a great selection of colors – and while I did spend $15 on JUST WEBBING, I can’t imagine it being that much cheaper anywhere else. I would have loved to find nylon webbing, but cotton was much more prominent in my searches. All my zippers are from my stash – the black zip on the duffel bag is new (I bought it for a dress, which I obviously never made haha), the rest are vintage. Been looking for a use for those turquoise zippers 🙂 Oh, and the little leather scrap for the pulls is from a shop on Goldhawk Road in London. I bought it because I loved the color, bonus that it matches my bag!

Portside Travel Set

The bag is REALLY floppy when it’s empty (to get these photos, it’s stuffed with every pillow from my couch, plus a couple of blankets), so it was hard to get an inside lining shot! The lining is all polka dots – the self fabric at the bottom is actually a fabric-covered removable piece of thin plastic, to keep the bottom from sagging open.

Portside Travel Set

This isn’t in the instructions (hence why it’s self-fabric – I ran out of lining!), but it’s a trick I learned when I made one of those Amy Butler Weekender bags years ago (which I still have, and yes, it’s too small for a weekend! More like an overnight bag haha). You cut the plastic the same size as your bottom, remove the seam allowances, and make a fitted sleeve to cover it. I like that it’s removable because now I can roll the duffel up if I need to. As far as sourcing plastic – I ended up buying it on Amazon. The EZ Quilting Template Plastic is 18″ x 24″, which I needed (anything sold at a craft store is usually 12×12) for the base. It’s quite a bit flimsier than what I wanted – I doubled up and bought two, but it’s still not as rigid as my Weekender. Still, it’s better than nothing. Plus, I have quite a bit left that I can use for bra pattern templates, yay!

So, in case you couldn’t tell – this bag is pretty big. Like, I could probably squish myself into it if I tried hard enough:

Portside Travel Set

But, like I said – it folds down pretty flat for storage (or putting in a suitcase, which is what I usually do – then I have a bag for all the fabric I buy hahahahaha):

Portside Travel Set

Anyway, I’m happy to check this off my to-do list – and I can’t wait to put it to good use! It’ll definitely come in handy for my trip to Philly at the end of this month. Now I guess I just need to start looking for a new suitcase – mine is starting to give signs of wearing out (wires poking out, the zipper is struggling, corners are threadbare – I told you it was old! And very well-used 😉 ).

Portside Travel Set

Just look at that unintentional print-matching. If that doesn’t make you want to run out and SEW ALL THE DUFFLES, then I don’t even know who you are anymore.

** Note: All fabrics for this project were provided to be as per my involvement with the Mood Sewing Network. Notions and pattern were purchased by me!

Completed: The Watson Bra & Bikini Set

19 Jan

Hey look! I made another bra! And matching undies!!

Watson Bra

I’m loving my Marlborough bras so so much (yes, plural. I actually have two now, but I’ll save #2 for another post – this post is all about Watson), but I was really intrigued by the new Watson Bra pattern from Cloth Habit. Instead of a low movement fabric, this baby is sewn up in a fabric with lots of stretch. The cups are higher and more modest and there is no underwire. What really got my attention was the longline option, as well as the included bikini bottom pattern. SHUT UP AND TAKE MY MONEY!

Watson Bra

Since I’m still pretty new to this whole new world of lingerie, I let the pattern hold my hand when choosing a size and following the instructions. I measured to a 30D (to recap, in case there is anyone new here, I usually wear a 28DD), which fits pretty spot-on. Which is good, because other than hold the little cups up to my boobs while I was sewing them – I wasn’t able to actually try the thing on until I was completely finished with it. Talk about a bummer if that hadn’t worked out! Thankfully, the fit is pretty good. One cup has a tiny bit of sideboob action going on – but that breast is also slightly bigger, so I’m at the point now where I’m trying to decide if it’s worth tweaking the fit for a really custom bra. I’m pretty happy with the fit of the band – it’s nice and tight, like I like it, but it’s also very comfortable.

Watson Bra

The pattern has you cut the cups and cradle in a stretch fabric, the band in power mesh, and then the cradle is lined with a non-stretch to stabilize. Lining that section was obviously a little difficult for me – and I ended up getting quite a few folds as a result. Wah. For my next make, I am going to try fusing my stabilizer to see if that helps. It’s not the end of the world with these folds – but of course I’m always looking to improve.

Watson Bra

The bra includes standard bra hardware – hooks and eyes, adjustable straps, and decorative elastic. I do like that about the pattern, because it makes it look a lot less like some kind of soft training bra that a pre-teen would wear, and more like… a cute bra without underwires, I guess.

Watson Bra

Because of the needed stretch fabric, this bra doesn’t require the same sort of fitting that a structured bra would command (such as the Marlborough). It’s very soft and forgiving. The pattern is rated as being pretty easy and a great way to introduce beginners to bra-making. That being said – while I didn’t find the bra necessarily difficult to make, I do think that the Marlborough was easier to sew! Mostly because that lycra was stretching and sliding all over the place, and getting the cups in just so required quite a bit of precision. Still, it only took me a couple of hours to make, so that should count for something.

The instructions are pretty good! I might be biased – because I’ve already made two bras, I have my copy of Demystifying Bra Fitting and Construction on stand-by, and I’ve had enough bra-making conversations to know at least a little of what I’m talking about – but I found them very easy to follow along with. One part that was missing was determining strap length, but it’s my understanding that the pattern was updated with directions on how to do this (I personally just cut two 18″ straps. Worked perfectly! They are adjustable, after all). There were a few minor parts of the pattern that I changed based on preference – such as trimming the excess fabric before topstitching the elastic to the wrong side – but what’s included with the pattern is great as-is. There’s a lot of helpful info for choosing fabrics and trims, and tips for stitch settings when choosing your zigzag stitch. Also, there is currently an entire Watson Bra sewalong happening at Cloth Habit right now, so there’s that if you need even MORE hand-holding!

Watson Bra

Here’s an inside shot. As you can see, I did not finish my seams – just left ’em raw. It seems to work fine for my other bras, anyway. In the future, I’d love to learn how to properly finish my seams – or even line the whole thing – but I really want to nail down fit and technique before I start going too far down the deep end.

Watson Bra

Watson Bra

Rather than try to source all the materials and notions myself, I decided to splurge on a Watson kit from Blackbird Fabrics. The kit includes everything you need – 4 way stretch lycra, matching powermesh, elastics and trims, metal strap rings and sliders (stupidly, that was my favorite part haha. THEY LOOK SO GOOD), even the aforementioned cradle stabilizer and cotton knit for the crotch lining (for the undies, obviously). There’s enough in the kit to make both the bra and the matching bikini, and you can choose if you want a kit for the standard band or the longline. Since my boobs run on the small side, I’d reckon I could probably make 2 or even 3 bras with how much fabric I have left over (and maybe even a little bit of trim!). This color set is sapphire blue with black trims – and it’s soo beautiful! I can’t wait to see what other color combos Caroline comes up with.

Watson Bra

Watson Bra

Here’s the matching underwear – sorry it looks so unimpressive haha. I cut the XS based on my hip measurement (I was very apprehensive about this, as I normally wear a small), and the fit is pretty good. I think the butt area needs… something. Maybe I didn’t stretch the elastic enough. I feel like it makes my butt look flat, but Landon tells me I’m being ridiculous. Either way, they’re pretty comfy. I wore them all day yesterday and didn’t get a wedgie, which is awesome haha.

Since these posts are somewhat useless to me without a live model wearing the goods (if you want THAT, go holler at Heather Lou), here’s another floating bra photo for your consideration:

Watson Bra

For a non-underwired bra, it’s surprisingly supportive! I also wore this all day yesterday (with the matching bikini, bc, duh), and it’s really really comfortable. Way more comfortable than those Bambi bras I made. And it’s REALLY cute on – I am thinking that with a couple minor tweaks to the strapping and back hook, this would make a fabulous bathing suit pattern. I just need to figure out how to stabilize that cradle – it has to stay rigid, and I think the stuff I’m using isn’t really water-friendly (and definitely wouldn’t hold up in chlorine or salt water). Any suggestions or ideas?

Also, it’s not lost on me that I would consider making a bathing suit from this pattern, but can’t bear to show my skin with the bra in this blog post. Oh well.

Watson Bra

Watson Bra

Bra making is SO MUCH FUN, you guys! Good thing that happens to be a hole in my wardrobe, because I really love making them and I definitely want to do more! I’m really looking forward to the Bra Making Workshop in Philly next weekend – I have sooo much to learn, and I know Maddie is going to be an amazing teacher!

Completed: Dotty Jamie Jeans

12 Jan

In case you couldn’t tell, I spent the first weekend of 2015 making pants. You already saw my Ginger Jeans – now let’s revisit an old favorite! My beloved Jamie Jeans, I knew we’d meet again! ♥

Dotty Jamie Jeans

Ever since I made my first pair of Jamies in black stretch twill, I knew I wanted to make this pattern up again. I had a couple fitting changes that needed to be addressed – mostly reshaping the crotch (which I did on my original pair after they were sewn up, so it wasn’t reflected on the flat pattern) and pinching out some excess from the inseam. Knowing that the fabric I was using had considerably less stretch than the twill I used for the first pair, I decided not to remove any additional sizing/width, as that can be fairly easy to tweak during final fitting.

Dotty Jamie Jeans

I love this dotty fabric! You can’t see it too well (wait for the close-ups), but it’s a dark navy denim with tiny white pindots all over. LOVE IT. Been looking for something similar to this for yeeears. I actually found this magical piece of beauty all the way in Paris – it’s one of the fabrics from my coupon haul. I can’t remember exactly how much I paid for it, but I think it was around 10€ for 3 meters, give or take. A few other fellow meet-up-ers were also lurking on this shit, but thankfully there were quite a few pieces to go around, so everyone who wanted some went home with one 🙂 Yay!

Dotty Jamie Jeans

Dotty Jamie Jeans

Dotty Jamie Jeans

It’s kind of a peculiar fabric – a medium weight denim twill, and the dots are painted on (not printed). I can’t be 100% certain, but this may be the piece of fabric I accidentally dyed all of Landon’s undershirts with (sorry, Landon!). The back side does look like it bled a lot, but I also threw some black silk into that load – so who knows? Anyway. The fabric does have stretch, but not nearly as much as the twill – so I’m really glad I left off my additional sizing changes from the original pair (I believe I took out 1/2″ at the side seams, and even more at the center back and down the legs), because these are pretty snug as is! The denim is very stiff, but I’m hoping it relaxes a little more as I wear them. As of this posting, the only time I’ve worn them was during a really cold day, and I had on tights underneath to stay warm. Tights don’t make these pants super comfortable, but, then again – no pants are comfortable with tights underneath. So there’s that.

(Don’t look too closely, but I accidentally gave myself a weenie in one of those pictures lololol. Y’all are just lucky that I have no idea how to photoshpo that shit out haha)

Dotty Jamie Jeans

Dotty Jamie Jeans

I think they fit quite a bit better than the black pair I made, but there’s still definitely room for some improvement. Need to shorten the crotch length just a little more, and also remove some more width from the upper inseam. I also need to add some width to the calves – they are REALLY tight, like painted-on tight. It’s not uncomfortable, and I don’t think it looks bad – but I also can’t wear tall socks with these pants haha. Which I guess doesn’t matter for this particular pair, bc I think they look best with ballet flats, but, you know. Future Jamies. Fuck. I’ll get it eventually!

Dotty Jamie Jeans

Dotty Jamie Jeans

Having made these before and writing such a long post about the construction and fitting process, I don’t think there’s much else to add. I guess it bears noting that I didn’t bother with flat-felling the seams like I did on my jeans – I just serged and topstitched and called it a day.

Oh! I can talk a little about the waistband. Since the denim wasn’t as beefy as the denim for my Ginger Jeans, I did interface the waistband. I used lightweight knit fusible for the facing side. I love this interfacing because it gives a minor amount of support (enough to keep the waistband from collapsing on itself), but it doesn’t affect the stretch factor. Which means they’re still comfy, woohoo! Also, one fitting change I made for this pant – and possibly future pants, maybe – was to cut the one piece waistband into two pieces, so they can angle right at the center of my lower back (pretty much the same waistband as is on the Thurlows). This produces a much better fit than the single piece waistband does for me. There is a seam there now, but it’s covered by the back belt loop.

Dotty Jamie Jeans

NOW you can see the dots! And isn’t the topstitching pretty? I used light blue denim topstitching thread (it ain’t anything fancy – just a spool of Gutterman that I picked up from Joann’s), which gives an interesting contrast to the dark blue fabric. The silver jeans button is also from some class of big box fabric/craft store (either Joann’s or Hobby Lobby, I don’t recall) – I bought a pack after the button on Landon’s Gap jeans wore a hole through the waistband and fell out. You know what, after typing that, I don’t feel bad about dyeing his tshirts now. Who do you think sewed a patch on those jeans and hammered in a new button? ME, that’s who. Just don’t tell him how much I secretly enjoyed it hahahahaha

More gut pictures for your perusal~

Dotty Jamie Jeans

Dotty Jamie Jeans

Dotty Jamie Jeans

Dotty Jamie Jeans

Dotty Jamie Jeans

Dotty Jamie Jeans

This is me trying to show you the cool pocket fabric haha. Leftover from one of these dress, by the way!

Dotty Jamie Jeans

I think I’m about pants’d-out for the next couple of weeks (until I get my hands on some red twill, anyway, heh heh heh), but I feel pretty good about the two I’ve accomplished! Big ol’ snaps for ringing in 2015 with two successful projects! Hopefully that’ll be a recurring theme for the rest of this year 🙂

As a side note – WOOF, my hair color is faded. Can you believe the photos were taken maybe 2 days after I shot the Ginger photos? I didn’t do anything to my hair during that time (I only wash it once a week), other than style it – the only thing different is the lighting. Kind of crazy how much of a difference it makes!

Completed: Ginger Jeans!

8 Jan

Ok, now for the forreal first finished project of 2015 – jeans!!

Ginger Jeans

Damn straight I made jeans! And pretty good-looking jeans, if I do say so myself 🙂

These are the Ginger Jeans, by Closet Case Files. Full disclosure right here – Heather sent me this pattern, gratis, as a friend-gift with no strings/review requests attached. While I did not pattern test for this particular pattern, I was involved with fitting tweak email chains waaay back before this shit went into testing (because you know me, and I love talking about crotches).

Anyway, I was excited to try this pattern because – one, JEANS!; and two, JEANSSSS!!!

Ginger Jeans

Ginger Jeans

Y’all, this is a really really good pattern. I know I sound biased – and maybe I am, because I lurve me some Heather, and ESPECIALLY because I had a really good almost-out-of-the-envelope experience with making these. It can be hard – if not impossible – to design a pants pattern that is going to fit and flatter every single body it comes in contact with, considering how wildly different everyone’s bodies are. I think the fit of these seems pretty good across the board – I’ve been watching everyone’s finished Gingers popping up all over the place, and most are great right out of the envelope (or with very minor changes). Personally, I had to make a few small tweaks, but they’re not any different than what I do to *all* the pants I make.

Ginger Jeans

I started with the size 2, which corresponds closely with my measurements, and made view B with the high waist. Having participated in this rodeo before, I went ahead and adding my personal ~Lauren~ fitting changes directly to the pattern pieces – which means, I scooped out some of the crotch to give it more of a J shape (more info on that in this post) and added a 1/2″ wedge to the back crotch for some extra bum room. I compared the pattern pieces to some well-fitting patterns and RTW jeans to make sure the crotch lengths and depths were good, then I cut straight into my denim. No muslin this time – which was risky, but I feel pretty confident in my fitting at this point, so I was willing to take one for the team if necessary.

Ginger Jeans

SPOILER: It worked out just fine! Yeehaw!

Ginger Jeans

There are a couple more things I’d like to improve on for my next pair – all up in dat crotch (sorry that you have to look at it). I think this photo illustrates that pretty well – see how the front is just a little too long when I stand a certain way? You can also see it in the photo below – what looks like a really really poorly photoshopped thigh gap is actually just excess fabric bending all weird. I need to pull some excess out of the inseam, maybe about 1/2″ (like, maybe what I added to the back crotch haha!). Honestly, that’s something I could do to this existing pair of jeans as it is – but I also flat-felled that damn inseam, and realistically, I know I probably won’t unpick and fix unless it starts annoying me way more than it does right now. I also need to take a small wedge out of the center back of the waistband – it’s a one-piece curved waistband, but I’m starting to notice that two-piece darted waistbands fit my backside much better. This one isn’t bad, it’s just a little loose. Something to fix for the next pair! The calves are also prettttttyyyy tight – like, these are not the pants that I will be wearing knee socks underneath! I guess I have big calves, though, because that’s an issue I have with all pants (sewing patterns and RTW). Overall, though, I’m really happy with the fit of these. I didn’t have to do ANY changes to the legs, and I think they look pretty good!

Ginger Jeans

Ginger Jeans

Construction on these was pretty straightforward and not at all difficult, although it was time-consuming to do all that topstitching. I followed the instructions on the pattern, as well as the sewalong for places where I needed a little extra clarification. I decided to go balls to the wall with this make and treat them like a real pair of jeans – contrast gold topstitching, flat-felled seams (everywhere except the side seams), proper rivets, the works. Doing all these extras definitely added time to how long it look to make them, but I still finished over the weekend 😛 Go me!

For fabric, I used a denim/lycra blend that was purchased a Paron’s Fabrics in NYC last year. Heather actually helped me pick this one out, and I am surprised at how much I like it. The recovery is okkkk – it’s not the very best, like my RTW jeans (which are from Imogene + Willie, and WHEW that denim is – as my dad would say – THE BOMB DOT COM) – but it’s better than some stuff I’ve used in the past! The photos you see here were taken before I’d worn them for a day, so they’re at their tightest. As of this posting, I’ve worn the jeans twice and they haven’t bagged out much at all, which is a pleasant surprise. That being said, I really really really want to get my hands on one of Heather’s denim kits, because the Cone Mill denim included in those is basically the same shit as my $200+ I+W jeans. I missed the last sale due to financial restraints, but I’m saving my dollars and waited with bated breath for the next shipment, because you best believe imma be all over that shit like white on rice. NEEDS MORE JEANS.

At Heather’s advice, I did not interface the waistband of my pants. I think I might actually be a convert to this method – the waistband is still stretchy (so it’s super comfy), but the denim is thick enough to give it some structure. I did interface my button and button hole area, as well as the parts noted in the instructions (the fly, the tops of the pockets… I think that’s it?).

Ginger Jeans

For the topstitching, I used Gutterman jeans thread (the gold color, obviously) in my needle and regular ol’ navy polyester thread in the bobbin. At the suggestion of my sewing machine mechanic, I revved up the needle tension to a 7 and lengthened the stitch length to a little over a 3 to get a nice stitch. I used my #10 edgestitching foot (favorite foot ever, holla) to create even lines, and a 90/14 denim needle to pierce through all the layers. Since the guts of the jeans are assembled with the standard navy thread, this meant that I did a LOT of thread-changing to make this pair of pants. For future pants, I’ve lugged out my old Pfaff so I can keep both machines threaded and just switch back and forth, but the changing was ok for this first go-round.

Also, speaking of topstitching – I loved all the bartacks involved with making jeans. So much fun and SO satisfying! My machine actually doesn’t have a setting for bartacks, but I just reduced the zigzag stitch length and width until it looked good.

Ginger Jeans

If you have super eagle eyes, you may notice that the double topstitching is slightly different at the pockets vs the yoke/crotch seam. I had to widen the lines to properly catch where I folded the pockets under, but I really don’t think the wide-set stitching looks as good as the narrower set on the back. Oh well, just something to change for the next pair 🙂

Ginger Jeans

Ginger Jeans

I looove the star rivets, though! And check out my cool jeans button! All the hardware (including the zipper) was purchased at Pacific Trimming in NYC, same time as when I got my denim. All that stuff was sooo cheap (I want to say the rivets were, like, $0.10 a piece of something crazy like that. I bought a whole bagful HAHAHA), wish I had better access to it on the regular! To set my rivets and my button, I used the good ol’ hammer-and-cast-iron-skillet combination. Worked like a charm!

Ginger Jeans

Ginger Jeans

Fun pocket lining! Also, I think I cut the fly interfacing too wide – bummer that it peeks out. Oh well, again – something to change for the next pair 😛

Ginger Jeans

Proof of flat-felled seams, and also machine thread snarls. Whoops.

Ginger Jeans

I’m pretty happy to have officially made LEGIT jeans (I have made “denim trousers” in the past, but nothing with topstitching and rivets and all that fun stuff!), and even more happy that they are super wearable! Now I just need to bang them out in all the colors my wardrobe requires and I’ll be set for life, at least as far as my denim is concerned 🙂 I really want to try some different topstitching colors and details – looking at my I+W jeans, I really love the multiple colors of thread they used, and the little plus shaped bartacks. I also want some wacky insides – printed pocket fabric and colorful serger thread, anyone?

Would you ever make jeans for yourself, or does this fall in the camp of things you’d rather buy? Have you made this pattern before (if so, lemme see dem jeans, ladies)? As someone who’s literally worn the same pair of jeans for a solid year, how many pairs is too many?

Completed: The Bruyère Top

29 Dec

Now that’s one plaid flannel top that definitely doesn’t look like something a man would wear, amirite.

Deer & Doe Bruyere

This is the Bruyère top from Deer & Doe. I’ve actually had this pattern for quite a while – I bought it immediately after it’s release. I LOVE the cute and feminine twist it gives to a plain button down, and I knew it’d be beautiful in a plaid flannel. I’ve been sitting on it for this long because I haven’t been able to find the right plaid flannel – either the plaid was unbalanced (get out of my nightmare), or the colors were ugly, or the flannel was shitty. Or maybe a combination of the three. Either way, no Bruyère for me 😦

Deer & Doe Bruyere

This plaid flannel actually came from the same place that the pattern did – aaaaaall the way from Paris, France! Yup! It was the first piece of fabric I bought during my shopping spree, from Les étoffes du Sentier. The shop had a 3 meter minimum, but it was only 5€ a meter and I figured 3 is a safe number for a button up, so I went with it. It’s a nice soft cotton plaid flannel and I like how the colors are so un-girly, especially with this pattern. And, bonus – even after plaid-matching, I have leftovers to make something else with! Yes!

Deer & Doe Bruyere

First, though, check out those matched side seams! Ahhh yeah!!

Deer & Doe Bruyere

And the other side!

Deer & Doe Bruyere

And the back!

Deer & Doe Bruyere

Hi!

Deer & Doe Bruyere

Seriously, though, I’m pretty happy with how this turned out (if you couldn’t tell 😛 ). I cut the size 34, and the only fitting change I made was to remove a little bit of length from the peplum and sleeves, because I am so short. Other than that, it fits pretty well! I’m surprised at much much I like the collar – I was afraid it would look flat and dumb, but the flannel gives it some lovely body.

For cutting the plaid, I cut on the single layer and cut the waistbands, cuffs, placket and back yoke on the bias. Since the bias tends to stretch, I also cut my second yoke on the straight grain, as well as a second set of waistbands. Further, I interfaced my waistbands (to be really sure they don’t stretch out), as well as the cuffs, collar, and placket. I’m not sure why these aren’t included in the instructions, but my guess is to keep the overall look of the shirt very soft and unstructured. Which is fine, but, I do think anything that has a button will need a little extra help from interfacing. I’d definitely make some test button holes before you commit, at any rate!

Deer & Doe Bruyere

I spent a really long time trying to decide how to order the construction steps for this. The instructions are fine as they are – the process for attaching the placket/collar/facing is very clever (and clean!) and it works. However, I’m a diehard who wanted flat felled seams. In addition – I wasn’t 100% on the fit of the side seams, and I wanted to sew that last so I could tweak it after attaching the placket (when sewing flat felled shirt seams, once generally attaches the sleeves before sewing the side seams. Sewing a flat felled seam in the round just sounds like a painful thing I don’t want to do). Because of how the shirt is assembled per the instructions, you can’t really switch them out – you have to have the hem sewn to add the placket, but the side seams need to be sewn to add the hem. I know this sounds really vague and probably doesn’t make sense, but if you look at the instructions for this shirt vs ones for, say, the Negroni, it will. Anyway, this is what I ended up doing:
– I left the side seams open and sewed about 2″ of the shirt hem by the placket
– Followed the instructions for adding the collar, placket and facing
– Attached the sleeves with flat-felled seams
– Sewed the side seams with flat-felled seams
– Finished the remainder of the hem

That worked out great! My shirt is finished with flat-felled seams and it looks beaaaaaauuuutiful on the inside as well as the out 😀

Deer & Doe Bruyere

What else? Well, I added PEARL SNAPS. God, I love those things – nothing like being able to Hulk out of our clothes at the end of the day amirite. I feel like the very top needs a pearl snap (it’s not marked on the pattern), however, I couldn’t get the prongs through all the layers so no pearl snap there!

Deer & Doe Bruyere

Here’s the inside. I finished the edge of my facing with pinking shears – I think anything else would show a ridge on the right side. Of course, I probably should have first sewed a line of stitching before pinking, because it’s already fraying like crazy, but whatev.

Deer & Doe Bruyere

Deer & Doe Bruyere

I guess that’s it! Glad I finally got this finished – plaid flannel shirt of my dreamssss ♥

Deer & Doe Bruyere

Hope everyone had a Merry Christmas! Just a couple days left until the end of the year – aiee!

Completed: I Knit Socks!

24 Dec

I cannot believe it’s been 3 years since I learned how to knit! Where has time gone?

When I was first starting my journey into knitting, there were really only two things I was interested in making – sweaters and socks. The sweaters, as I’m sure you’ve noticed, have not been a problem – as of last count, I’m working on #18 (yes! I looveeee sweaters!). Socks, on the other hand, have remained a bit of a mystery to me. I made it worse by trying to be picky about every pattern I considered – I wanted to learn to knit socks on Magic Loop, I wanted to do two at a time, I wanted the yarn to be fingering weight, etc etc. I am pretty sure it was less that I wanted a ‘specific pattern’ to make my first pair of socks with, and more that I just wanted some more excuses to allow me to push everything to the backburner! Needless to say, I haven’t knit a pair of socks – or even attempted to knit a pair of socks – since I first started my Journey of the Knit ‘way back in 2011.

Dancetty Socks

UNTIL NOW HEH HEH HEH.

Dancetty Socks

Sorry about the pictures! It’s surprisingly hard to take photos of your own socks – who woulda thought? As you can see, my reupholstered chairs are well used and loved, and, yes, that is a ladder with a plant on it under an American flag in the background (results of some drunken “how hipster can we make this wall?” night. I always laugh when I see the Hipster Wall. It stays.).

Anyway – socks! My first pair, go ahead and feast your eyes!!

Dancetty Socks

Dancetty Socks

Every time I think about how ridiculous this must have looked to anyone who might have happened to peer in my window (Truth: We don’t close our curtains. At least not in the dining room, where this took place), it makes me laugh more. Oh, the things I do for blog photos.

Dancetty Socks

Imma try to keep this short and sweet, because it’s Christmas Eve, after all (sorry to give y’all socks for Christmas! Am I the worst ever or what?!). The pattern is Dancetty by Abbey Morris (keep reading for a coupon code!), and I used one skein of Berroco Ultra Alpaca Fine for both of them (with tons leftover). I’m just going to be totally straight and upfront with y’all – I ultimately chose this as my first sock pattern because Abbey offered it to me in exchange for a review. Otherwise, without that gentle push, I might still be spiraling down the endless turmoil of “I don’t know what sock pattern to knit fiiiiiiirst!!” Abbey assured me that, with my knitting experience (17 sweaters, man!), I would find these easy enough for a first time. The ladies at my local yarn store, Haus of Yarn, were confident I’d have these finished in a week. In reality, these took me two months. One month per sock. Ha!

Dancetty Socks

I knit these socks with size 0 DPNs (double pointed needles) – the 0 was based on my gauge swatch, and the DPNs are how the pattern is written. I actually really appreciated the way the pattern was written, because it kind of dumbed things down enough to where I could easily follow the instructions (pretty much blindly on my first sock, ahaha) and still get a good result. Each section tells you how many stitches to have on each needle, and there are separate lace patterns to follow based on what part of the sock you’re knitting. Apart from the whole lace sock thing, this was a somewhat mindless knit. The lacework… woof. That’s where things got interesting (and why these took me so dang long!). On at least the first sock, I think I unknit every other row, because I kept making so many mistakes. I’ve never been one to think lacework was super difficult, but something about it being in sock form was just ruining my brain (that, and I was trying to do this while watching TV and/or drinking. Whoops?). That being said, I was really happy to turn the heel – I’ve always heard that turning the heel is magical, and it kind of is!

Sock #2 took about the same amount of time as sock #1, but the process was much smoother. Since I already knew what I was getting into, I didn’t make as many mistakes – but I did take a lot of breaks, which was why this was so slow-going! I know that Second Sock Syndrome is a real thing for sock knitters, but for me, it was nice to be able to try again the second time around and make improvements when possible.

When I finished both socks, they were initially a little short in the foot. An overnight wet block (I used sock blockers, mostly because I wanted to buy something new, but you could just block them like a sweater too I guess, and pin the heck out of them) solved that problem. I’m also wondering about the cuff – see how it’s scrunching down? How can I get it to stay up? (A knitter’s lament) Should I thread thin elastic through the edge like I do with my hats?

Dancetty Socks

Dancetty Socks

Dancetty Socks

Anyway, this was a fun pattern to knit up! If you can do simple lacework, short rows, and knit in the round – you can knit socks. It’s really not much different than knitting a sweater (although it might take as long! Oh no, wait, that’s just me 😛 haha!). Next up, I want to try knitting socks with Magic Loop – while I didn’t think the DPNs were fiddly to knit with, it was hell on earth trying to transport the damn things. They kept slipping out of my stitches and wreaking havoc on everything, no matter how I tried to store my WIP. Also, note to self: don’t buy bamboo DPNs, you will snap those sticks like the toothpicks they are. Good way to feel like a Hulk Woman, though.

Next sock pattern in my knitting queue? Good question! I’ve had my eye on these Little Cable Knee Highs (have you seen Michelle‘s? Oh my god, Becky.), except, ugh, the DPNs again. Any good suggestions for fingering-weight socks knit on circular needles?

Want to try Dancetty yourself? Use the code “Lladybird” to receive 50% off any pattern from Abbey Morris Designs Ravelry Shop. This code is good through January 31, 2015! Thank you so much, Abbey!

Dancetty Socks

That’s all for now! Ravelry notes are here. I hope y’all have a very Merry Christmas and a lovely end to your December! I’m just now awakening from the throes of my DEATHBED (first time feeling human since Sunday night what up y’all), and I’m looking forward to spending some time with the family, the boyfriend, and my handknit socks. Yay!

Disclaimer: Dancetty was provided to me, free of charge, from Abbey Morris Designs, in exchange for a review. All opinions are my own. And I am very happy to finally have a pair of a hand-knit socks in my arsenal. Christmas miracles really do happen.

Completed: My Perfect Tshirt

18 Dec

One neverending sewing quest of mine (that is admittedly quite stupid, to be honest) is the lifelong search of my perfect tshirt fit. Nice and fitted with good scoop neck – you’d think this would be easy to find, but nooo. I haven’t really found a tshirt pattern that was 100% exactly what I wanted, through and through. There have been plenty of “almosts” – you know the kind, you wear them around for a day, perform a little machine surgery in the evening, and after a couple of tweaks, they’re pretty spot-on. Those are nice. Sometimes, though, you want it to be right the first time. And therein lies my problem.

Heart Sweater

I do love the Renfrew pattern. Loooove it! It’s a really really good beginner tshirt pattern, and I love all the options it comes with. My only complaints are that it’s a bit too loose for my tastes (I think you guys have figured out by now that I prefer my clothing to be painted on), and I feel like the scoop neck sits a little too high. As far as super basic tshirt patterns go – that’s about the only option I’ve tried. Other patterns (Plantain, Briar, SJ, Coco, Bronte, etc etc) are lovely, but they’re a bit more specialized than what I’m going for (aka, PLAIN. Plain tshirt!). Nettie was real close, but it’s just a smidge too tight (I mean, that makes sense – it’s a bodysuit ffs) and I couldn’t get the shoulders and back to work with my body, no matter how much I tweaked them.

The really stupid part about this is that once I started my ~Tshirt quest~, it got harder and harder (or I got pickier and pickier). I admit, I even tried some RTW shirts to see if maybe I should just suck it up and buy them from now on – but those are even worse, not to mention most of them require some kind of tweaking (taking in the side seams, cutting off length, shoulder seams in the wrong spot, *something*). Which, I’m sorry, but I’m not going to pay $30 for a fucking tshirt that I have to then ALTER. That’s just dumb. So I kept looking for a pattern, kept not finding exactly what I wanted.

Heart Sweater

Soooo I *made* my own pattern. Before you get too excited – I didn’t draft this thing (I don’t want to say I’ll never draft a pattern ever, because I know things change – but, right now, I don’t ever want to draft patterns. Nope.). It’s a Frankenpattern that combines my favorite elements of my favorite patterns, and is now my favorite tshirt pattern. Yay for Frankenpatterns!

To make this baby up, I started with the Lady Skater bodice, because I really love the way it fits. I then compared the neckline to the one on the Nettie bodysuit, because, seriously, Nettie has the best neckline options. This resulted in me scooping the front neckline of the traced pattern just a bit more, to get that nice deep scoop (the kind of scoop that would show cleavage, if I still had cleavage to show off. Wah, I miss my boobs!). I kept the back neckline high, like a normal tshirt. I measured the length of the Lady Skater against the length of the Renfrew and some of my favorite finished tshirts, then adjusted accordingly (if you’re curious – I added the length via relatively straight line, aka, did not flare out into an hourglass shape. I don’t wear my shirt hems around my hips, so having the extra room there just looks silly. A straight cut looks better on me). Finally, I traced off the sleeves and bindings for the Lady Skater – this isn’t completely necessary, but I’ve learned that when I steal my pattern pieces from the envelope, sometimes they don’t make it back. It’s easier to just give the Frankenpattern it’s own pieces so I don’t end up digging and hunting later down the line, you know?

Heart Sweater

Heart Sweater

I think the resulting shirt is pretty close to being perfect for me! I probably need to redraw that neck curve – it looks a little square – and maybe add one more inch of length. The length here is fine-ish; I hemmed it that long so it would work with the skirt I’m wearing. But I sort of hate how it looks with pants. Or maybe I should just make higher-waisted pants? That would totally be easier, right?

Heart Sweater

Isn’t this fabric so fun? It reminds me of some of the ridiculous shit I wore in my early 20s – lots of cutesy patterns, hoodies, and hearts (I used to buy a lot of my clothes on the sales rack after Valentines Day and/or Halloween, because those are the best prints haha). I found it on the remnants rack at one of my local fabric shops, Textile Fabrics. There was a yard and a half waiting for me, and the price was something crazy good (I think it was around $11? Yay for the remnant rack! Too bad the normal prices at Textile aren’t that awesome 😛 haha). It’s acrylic, which is kind of lame and not at all warm (and honestly doesn’t wear toooo well – it’s already starting to pill a little), but at least I can throw it in the washing machine and not worry about wool shrinkage! It’s also fine for layering, as evidenced by my silk georgette button up underneath.

Oh yeah, I should add – if this outfit looks eerily similar, that’s because I took these photos on the same day I took the photos for my last blog post. HAHA. Whatever, my hair looked good that day and I had to take advantage of that.

Heart Sweater

Heart Sweater

Here it is without the under layer. I used a black rib knit for the neckband and cuffs (originally from Mood Fabrics, but it appears to be sold out on their website now), and assembled everything on my serger. The hem is finished with a twin needle. That’s it! Pretty sure this whole thing from start to finish – once I made the pattern, that is – took less than an hour to make.

Heart Sweater

Anyway, it’s nice to have a go-to pattern now that I know I can whip up and not have to fiddle with fitting! I think this particular pattern could use a couple more small tweaks, but it’s definitely on it’s way 🙂 I’ve already made a few lightweight undershirts with it, and those are great in this cold because they are fitted enough to keep the heat around my body where it belongs.

What about you? Do you have a perfect-fitting tshirt pattern (either one I’ve mentioned that just ~does it~ for you, or maybe you have a new love that you want to introduce me to!)? Have you ever Frankenpatterned something to suit your needs, or are you the sort of lucky person who gets their TNT from a purchased pattern? Are you sick of me talking about tshirts? Man, I love tshirts.

deal with it

Completed: Butterick 5526, in silk georgette

15 Dec

Ah, Butterick 5526. I just can’t quit you.

White Silk Double Georgette B5526

This pattern is truly a TNT//tried’n’true for me at this point. I’ve made it several times – in various fabric weights and drapes, always tweaking the fit as I go – and it’s turned out to be my very favorite shirt pattern. I am pretty sure I’m repeating myself at this point, but JUST IN CASE YOU WEREN’T READING THE FIRST TIME – I fucking love this pattern!

Since I’ve already beat this pattern to the ground as far as shirting fabrics are concerned, I figured I might give myself a little challenge for the next make. And by “challenge,” I mean went temporarily insane and decided to make this up in some silk georgette.

White Silk Double Georgette B5526

White Silk Double Georgette B5526

And it turned out pretty good! Just don’t look too close 😉 Silk georgette is a slippery little beast, after all. Also, sorry about all the creases – I took these photos after wearing the shirt all day with a sweater over it. Turns out silk REALLY likes to set itself some creases!

White Silk Double Georgette B5526

I was bound and determined to have this ready in time for my London adventure – I just knew the shirt would look great under my various sweaters, as well as on it’s own (well, with a tank underneath it. It’s pretty sheer on it’s own! It’s not so noticeable in these photos, but… trust me.). The fabric is very thin, lightweight and drapey – which meant I could even get away with wearing it under a ponte tshirt. I knew silk would be a good bet because it’s so warm, plus, it would give me an entirely different look from my white cotton B5526 (nothing wrong with that shirt, by the way – except that the weird sleeve length means I can’t wear it with long sleeves. Which is why I’m making a second white button up. No judgement here). Based on my experience with the birdy silk geogrette of my dreams (and no, I still haven’t cut into my remaining yardage – too many options to choose from, can’t decide, HALP), I thought I’d give the fabric another try. At any rate, at least it won’t be shiny satin silk. I hate that stuff when it’s not part of a lining. Sorry.

I bought this silk double georgette from the Mood Fabrics website, sight unseen, only to find out that… well, it wasn’t *quite* the same as the bird silk. It’s much thinner – it’s basically sheer. I understand that the description explicitly states that, yet I still ignored it. It also has quite a bit of stretch, which is not ANYWHERE in the description. Whoops. Shoulda ordered a swatch, but I didn’t have time to wait. And I didn’t have time to buy something else, so I dealt with the cards fabric I was given.

White Silk Double Georgette B5526

Like I said, it’s mostly good. The worst part of the process was cutting this beast – talk about a PAIN IN MY ASS. The fabric is so shifty and I swear those pieces were moving around just to torment me. I usually don’t have too much of a problem with cutting shifty fabrics – I just rip the cut edge to get a straight line, match the selvedges and pin the hell out of them (buying a decent-quality fabric that’s already on grain really helps, fyi. If you’re going to go sheer/shifty, don’t cheap out!), and then pin all my pattern pieces as well. That simply did not work as well for this fabric. It basically didn’t want to be made into a shirt, and it fought with me every step of the way.

But I ended up winning, so there’s that.

White Silk Double Georgette B5526

To sew, I used my finest needle (70/10 Microtex) and my walking foot (since, again, shifty fabric). I used French seams for every part of this shirt and omitted most of the topstitching. I say most because I did topstitch the button band, but it ended up causing so much shifty drama that I decided to skip the rest and finish the collar stand by hand.

For the hem, I used bias facing, since the thought of rolling that hem made me want to cry. Bias facing was certainly easier, but it’s not really my best work on this shirt. For one, I didn’t have the right fabric – I was completely out of georgette (used up the whole yardage cutting the pieces, go me) and I don’t have any lightweight white silk in my stash. I did have some peach-colored silk (the same stuff I used to finish my boiled wool SJ sweater neckline), which worked out since it matches my skin tone at least. I must have done some crazy witchcraft distortion on the hem because it is now VERY wavy. But, you know what? Fuck it. I plan on wearing this thing tucked in for the most part anyway.

Also, it wasn’t until after I finished the shirt that I remembered I wanted to try to draft a v-neck for it. HA HA HA! Obviously that did not happen! Better luck next time!

White Silk Double Georgette B5526

Anyway, whatever. It’s pretty. I finished it on time. I wore the shirt out of it in London. People there probably think I don’t have any other clothes. Yay!

Have some close-ups and I will point out my mistakes so we can laugh together:

White Silk Double Georgette B5526

The tag is accurate. It is also hiding a big pleat in the collar stand facing that mysteriously grew longer than the interfaced side (I dunno, either).

White Silk Double Georgette B5526

I was ridiculously proud of how nice the sleeve plackets turned out, until I tried on the shirt and discovered that the sleeves were somehow too long (they still are, if you didn’t notice). I trimmed them as much as I dared, and as a result – my placket is maaaaybe 1″ long. It’s the saddest little weenie placket ever. I mean, it’s not the worst deal because I can still roll my sleeves up, but… yeah. Fuck you, weenie placket.

White Silk Double Georgette B5526

Here is my faced hem. Hey, it actually looks pretty nice in this picture!

White Silk Double Georgette B5526

Ok, I think that’s it! I do love the shirt – it hasn’t deterred me from my beloved B5526, or even silk georgette for that matter (I will try you again, and I WILL conquer your ass. I will also buy a swatch first, because, ~*YOLO*~). Despite the dramz that occurred to make this shirt (and also the fact that it took like 2 months to complete because I was right in the midst of the V1419 sewalong, argh), I feel pretty good about it. It’s definitely a good staple for the ol’ closet, and it served me well in London.

Sidenote: I did also make the shirt I’m wearing in these photos. It’s a Colette Mabel and I used this incredible black virgin wool sweater knit that is now sadly sold out of the Mood website. It’s super thick and cozy and I LOVE it. That is all.