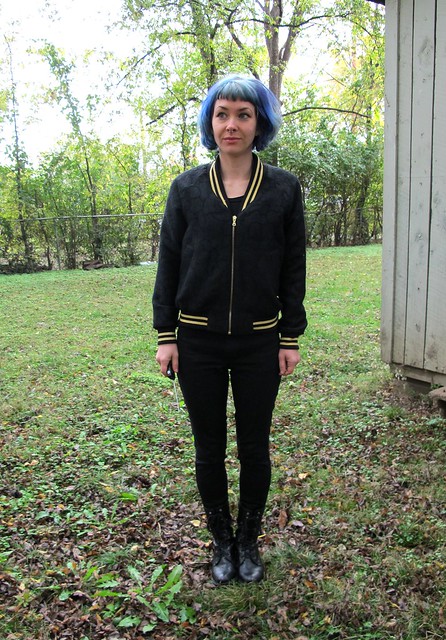
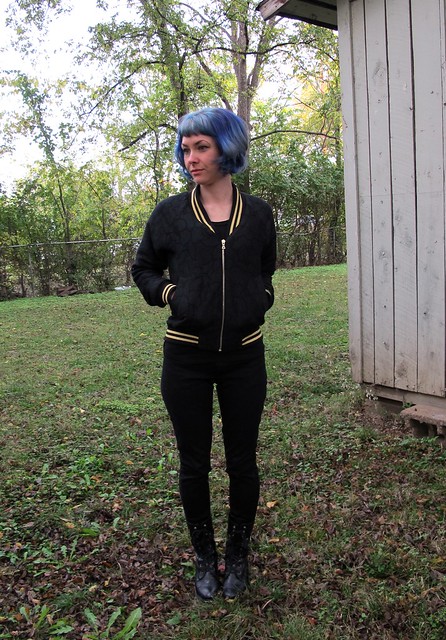
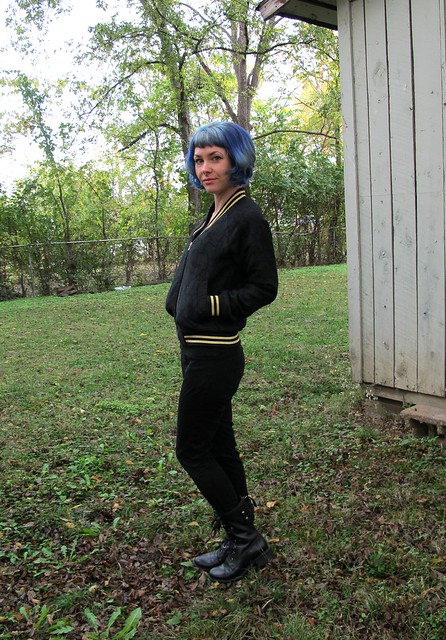
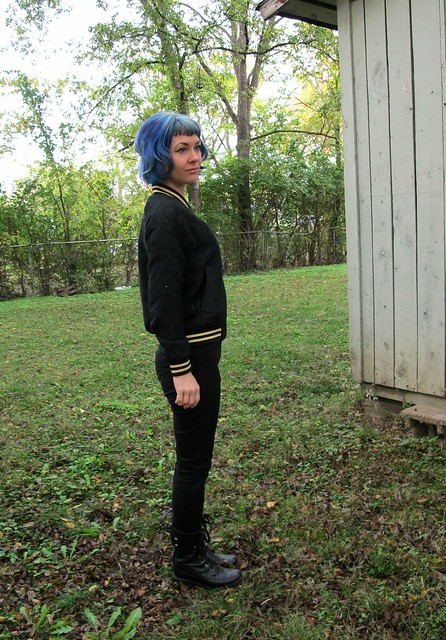
Tag Archives: jamie jeans

Completed: Dotty Jamie Jeans

12 Jan

In case you couldn’t tell, I spent the first weekend of 2015 making pants. You already saw my Ginger Jeans – now let’s revisit an old favorite! My beloved Jamie Jeans, I knew we’d meet again! ♥

Dotty Jamie Jeans

Ever since I made my first pair of Jamies in black stretch twill, I knew I wanted to make this pattern up again. I had a couple fitting changes that needed to be addressed – mostly reshaping the crotch (which I did on my original pair after they were sewn up, so it wasn’t reflected on the flat pattern) and pinching out some excess from the inseam. Knowing that the fabric I was using had considerably less stretch than the twill I used for the first pair, I decided not to remove any additional sizing/width, as that can be fairly easy to tweak during final fitting.

Dotty Jamie Jeans

I love this dotty fabric! You can’t see it too well (wait for the close-ups), but it’s a dark navy denim with tiny white pindots all over. LOVE IT. Been looking for something similar to this for yeeears. I actually found this magical piece of beauty all the way in Paris – it’s one of the fabrics from my coupon haul. I can’t remember exactly how much I paid for it, but I think it was around 10€ for 3 meters, give or take. A few other fellow meet-up-ers were also lurking on this shit, but thankfully there were quite a few pieces to go around, so everyone who wanted some went home with one 🙂 Yay!

Dotty Jamie Jeans

Dotty Jamie Jeans

Dotty Jamie Jeans

It’s kind of a peculiar fabric – a medium weight denim twill, and the dots are painted on (not printed). I can’t be 100% certain, but this may be the piece of fabric I accidentally dyed all of Landon’s undershirts with (sorry, Landon!). The back side does look like it bled a lot, but I also threw some black silk into that load – so who knows? Anyway. The fabric does have stretch, but not nearly as much as the twill – so I’m really glad I left off my additional sizing changes from the original pair (I believe I took out 1/2″ at the side seams, and even more at the center back and down the legs), because these are pretty snug as is! The denim is very stiff, but I’m hoping it relaxes a little more as I wear them. As of this posting, the only time I’ve worn them was during a really cold day, and I had on tights underneath to stay warm. Tights don’t make these pants super comfortable, but, then again – no pants are comfortable with tights underneath. So there’s that.

(Don’t look too closely, but I accidentally gave myself a weenie in one of those pictures lololol. Y’all are just lucky that I have no idea how to photoshpo that shit out haha)

Dotty Jamie Jeans

Dotty Jamie Jeans

I think they fit quite a bit better than the black pair I made, but there’s still definitely room for some improvement. Need to shorten the crotch length just a little more, and also remove some more width from the upper inseam. I also need to add some width to the calves – they are REALLY tight, like painted-on tight. It’s not uncomfortable, and I don’t think it looks bad – but I also can’t wear tall socks with these pants haha. Which I guess doesn’t matter for this particular pair, bc I think they look best with ballet flats, but, you know. Future Jamies. Fuck. I’ll get it eventually!

Dotty Jamie Jeans

Dotty Jamie Jeans

Having made these before and writing such a long post about the construction and fitting process, I don’t think there’s much else to add. I guess it bears noting that I didn’t bother with flat-felling the seams like I did on my jeans – I just serged and topstitched and called it a day.

Oh! I can talk a little about the waistband. Since the denim wasn’t as beefy as the denim for my Ginger Jeans, I did interface the waistband. I used lightweight knit fusible for the facing side. I love this interfacing because it gives a minor amount of support (enough to keep the waistband from collapsing on itself), but it doesn’t affect the stretch factor. Which means they’re still comfy, woohoo! Also, one fitting change I made for this pant – and possibly future pants, maybe – was to cut the one piece waistband into two pieces, so they can angle right at the center of my lower back (pretty much the same waistband as is on the Thurlows). This produces a much better fit than the single piece waistband does for me. There is a seam there now, but it’s covered by the back belt loop.

Dotty Jamie Jeans

NOW you can see the dots! And isn’t the topstitching pretty? I used light blue denim topstitching thread (it ain’t anything fancy – just a spool of Gutterman that I picked up from Joann’s), which gives an interesting contrast to the dark blue fabric. The silver jeans button is also from some class of big box fabric/craft store (either Joann’s or Hobby Lobby, I don’t recall) – I bought a pack after the button on Landon’s Gap jeans wore a hole through the waistband and fell out. You know what, after typing that, I don’t feel bad about dyeing his tshirts now. Who do you think sewed a patch on those jeans and hammered in a new button? ME, that’s who. Just don’t tell him how much I secretly enjoyed it hahahahaha

More gut pictures for your perusal~

Dotty Jamie Jeans

Dotty Jamie Jeans

Dotty Jamie Jeans

Dotty Jamie Jeans

Dotty Jamie Jeans

Dotty Jamie Jeans

This is me trying to show you the cool pocket fabric haha. Leftover from one of these dress, by the way!

Dotty Jamie Jeans

I think I’m about pants’d-out for the next couple of weeks (until I get my hands on some red twill, anyway, heh heh heh), but I feel pretty good about the two I’ve accomplished! Big ol’ snaps for ringing in 2015 with two successful projects! Hopefully that’ll be a recurring theme for the rest of this year 🙂

As a side note – WOOF, my hair color is faded. Can you believe the photos were taken maybe 2 days after I shot the Ginger photos? I didn’t do anything to my hair during that time (I only wash it once a week), other than style it – the only thing different is the lighting. Kind of crazy how much of a difference it makes!

Completed: The Rigel Bomber Jacket

14 Nov

This jacket has been a LONG time in the making. Totally worth the wait, tho.

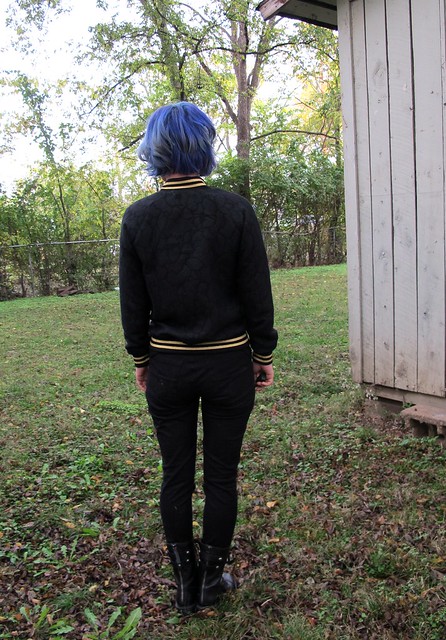
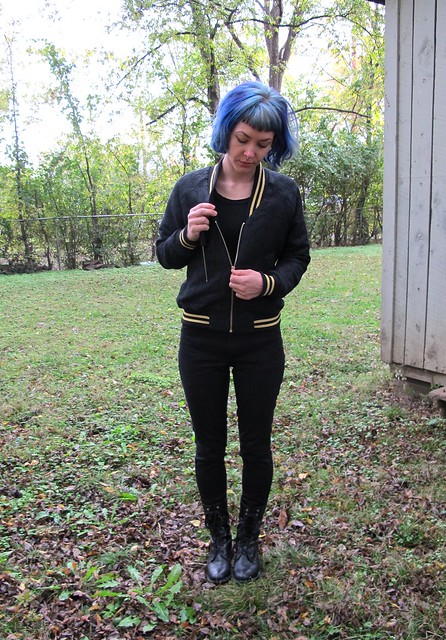
Rigel Bomber Jacket

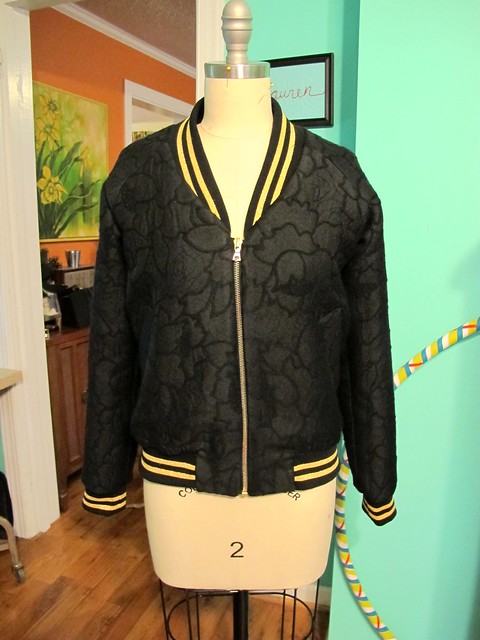
My dream bomber jacket! ♥

I swear, ever since Katie released the Rigel Bomber jacket for Papercut Patterns, I have noticed this style popping up EVERYWHERE. Talk about being on point with style trends! I knew I wanted to make the jacket when I first saw the pattern last winter – it’s a great, casual jacket and I love the short length (sometimes my Minoru just feels a touch too long, depending on what I’m wearing with it – not to mention, the cotton/poly fabrics mean it’s not the best choice for super cold temperatures!). It’s totally different from any other pattern I own, so obviously I wanted to make it. Once I saw Clare’s Rigel bomber making it’s rounds – and then saw the dang thing in person during our trip to NYC earlier this year – it became Very Important that I have one in time for this current winter. Especially since I tried hers on and it looked ace on me. As you do.

Rigel Bomber Jacket

Since I was in bomber-mode for the duration of that particular shopping trip, I made it a point to source the notions I knew I’d have the hardest time finding – rib knit and a separating zip. In the mecca that is the Garment District of New York City, these things are relatively easy to find (well, at least compared to the Limited Fabric Options of Nashville, ha!). I found both of these things at Pacific Trimming – the rib knit came from the very back corner of the store, and the zipper is a Riri zipper! I chose the colors, specified the custom length according to my pattern, and paid something insane like $20 for it. I don’t actually remember how much the zipper cost, because I mostly blocked it out of my mind – but suffice to say, it cost significantly more than the $5 zips you can pick up just about anywhere.

Rigel Bomber Jacket
Rigel Bomber Jacket

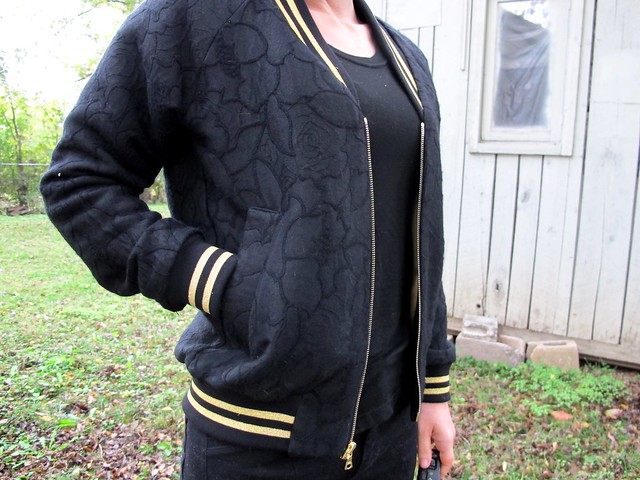
I do want to talk about the Rigel a little more before I start going on a tangent about my notions, though. I sewed up the XXS – one, because that’s my Papercut size, and two, it’s the same size as Clare’s and I liked the way hers fit on me. I did not make any length or fitting adjustments to the pattern, just sewed it straight out of the envelope. The instructions on this pattern are great – you are guided through the steps of adding a single welt pocket, attaching the ribbing, and inserting the open-ended zip. The only part of the instructions that leaves a bit to be desired is the lack of lining – which most blog posts I’ve read have mentioned. My assumption here is that Katie wanted the pattern to be as quick and simple as possible, and adding a lining to this sort of jacket is either going to be complicated (at least to write out the instructions for) or involve a lot of hand-sewing. It’s not terribly hard to add a lining, but it does require some brain aerobics before you start sewing.

Rigel Bomber Jacket

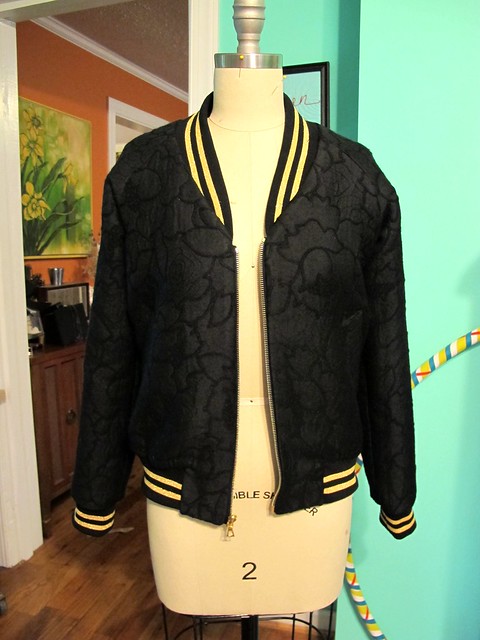
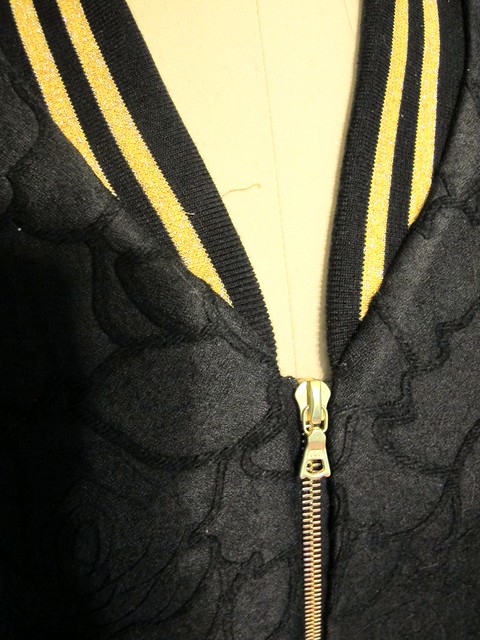
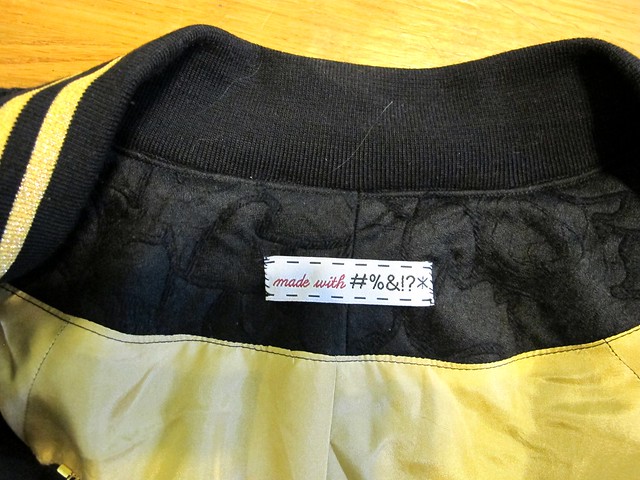
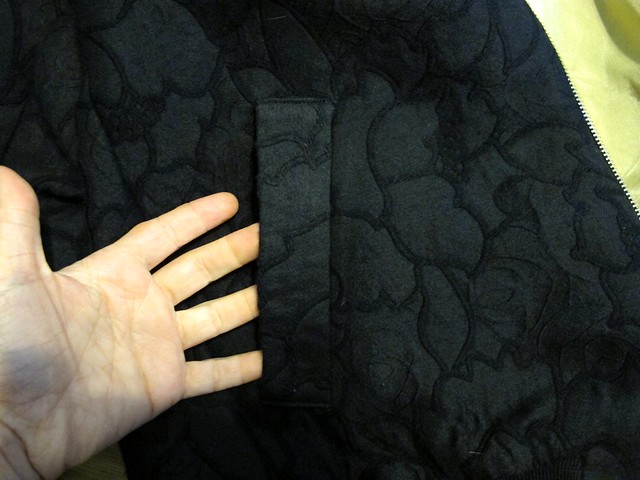
Part of what took this jacket so long to incubate was that I couldn’t decide on a fabric! I bought my zipper and ribbing before anything else, so matching a wool fabric (yes, it had to be wool) to all that gold was a little tricky. Not to mention, my notions were a bit special – if not expensive – so I wanted to make something that I’d love and actually wear. I hemmed and hawed for MONTHS over what fabric I wanted to use… this double-faced black wool coating was my #1 contender. I actually got a swatch of it back in the spring… and it’s been pinned to my bulletin board ever since (sometimes I just make myself look at a fabric for a long time, and if I don’t get sick of it – it’s mine!). I finally bought it last month, which is actually REALLY lucky because it’s sold out now! I like how the embroidered floral design gives the fabric some interest and texture, while still keeping it relatively plain (so it doesn’t compete with my trims).

Rigel Bomber Jacket

I will mention that the fabric description is a bit off. I guess it doesn’t matter at this point, since the fabric is sold out – but it definitely feels more like a light to medium weight fabric, NOT a heavy coating. The wrong side is brushed with long fuzzy strands of fabric fiber, and this fabric SHEDS LIKE A BITCH. Even though my jacket is lined, I serged every single seam of the wool because I couldn’t otherwise control the shedding. I really don’t recommend trying this fabric if you can’t serge the raw edges – a plain straight stitch won’t prevent it from eventually disintegrating.

Also, on a bit of a bummer-town note – this fabric doesn’t really wear well. It’s already starting to pill and look kind of old 😦 So this jacket might not have a super long lifespan as it is. Good thing I can always salvage that ridiculously expensive zipper! :DDD

Rigel Bomber Jacket

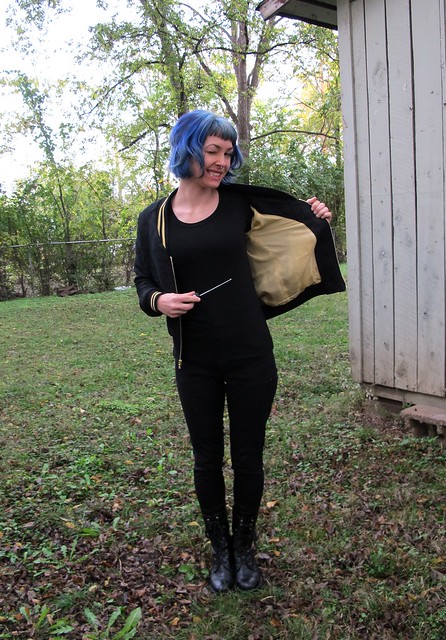
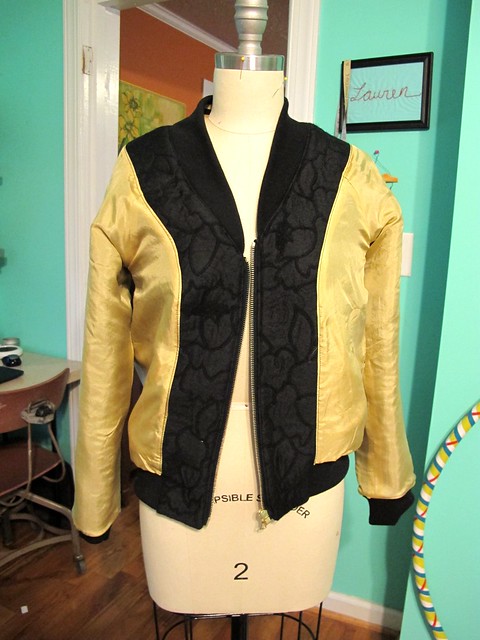
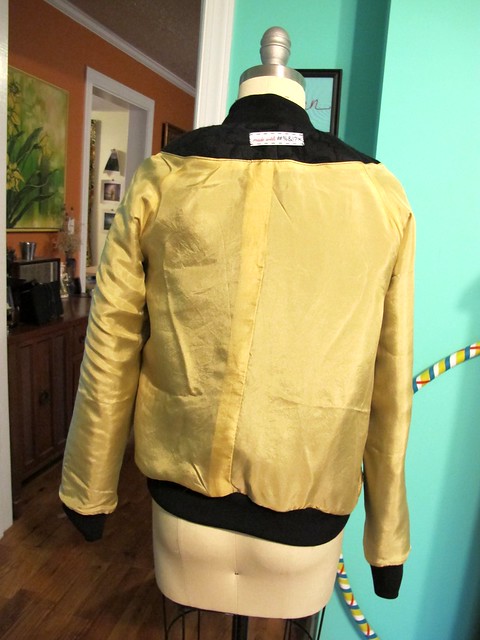
I don’t know why I’m winking in this photo (just imagine me taking my pictures with a remote and tripod and things get even creepier with the winking ahaha)? Anyway, here’s the lining! I lined the entire jacket with gold china silk, which goes really nicely with my gold accents. I love the warm combination of silk+wool – it’s lightweight, and while it probably won’t work well in the Arctic, it’s fine for our mild winters (or a mild spring up north).

I will deviate for a second here to talk about the lining. As I mentioned, the instructions don’t tell you how to do this. Further, while there are lots of posts scattered around the internet on how to line the Rigel, none of them were exactly what I wanted (NO raw edges, no hand sewing). I wanted to try bagging the lining – which, spoiler alert, that shit totally worked! I used to do this all the time when I worked for Muna last year, but my memory was a little spotty, especially since we never used written instructions for anything (I like instructions when I’m sewing – even if it’s just a checklist – so I don’t forget to do something important!). I used Jen’s tutorial on bagging a jacket lining to jolt my memory, which was extremely helpful. Here are the steps I took to get my lining in that dang jacket:
1. First, I drafted some lining pieces – using the facings as a guide, I removed that amount from the jacket pieces (the front, the back, and the sleeves), and added 3/8″ seam allowances. I also added an ease pleat to the back piece, but I haven’t ripped open the basting yet because I found that I don’t need it. Someday, it will pop open and scare me, probably.
2. I constructed the entire jacket – up to the ribbing and zipper. The lining was completely assembled, with the facings attached.
3. I sewed the two jackets together at the neckline and zipper, as instructed by the pattern (for attaching the facing), and pressed and understitched.
4. I sewed the bottom of the zipper and facing, as instructed by the pattern (some of the lining may later need to be unpicked to get it to turn correctly, this is ok!)
5. I sewed the lining to the seam allowance of the ribbing at the bottom, right sides together.
6. I attached the lining to the sleeve hems at the ribbing, right sides together.
7. At this point, I had a giant Möbius tube of jacket+lining with everything attached and no openings anywhere. It was slightly horrifying – and exactly on track. This is when you rip open a section of the underarm lining that’s already been stitched, and pull the entire jacket through the hole.
8. Press everything, and then sew up the hole. I actually close up my hole from the inside by machine as much as I can, and then sew the remaining inch or so shut on the outside (I tried to take pictures to show how I do this, but it’s really hard to understand if you’re not actually seeing it in action. Needless to say, my closed-up hole is only about an inch long, instead of the 4″ tear I had to make to get the jacket pulled through it).
9. The little sections at the bottom where the facing meets the ribbing will need to be sewn shut by hand.

Rigel Bomber Jacket
Rigel Bomber Jacket

AND JUST LIKE THAT – A COMPLETELY BAGGED LINING WITH NO VISIBLE SEAMS! Woohooo!

Rigel Bomber Jacket

Ok, now we can talk about all the fun trimmings!

Rigel Bomber Jacket
Rigel Bomber Jacket

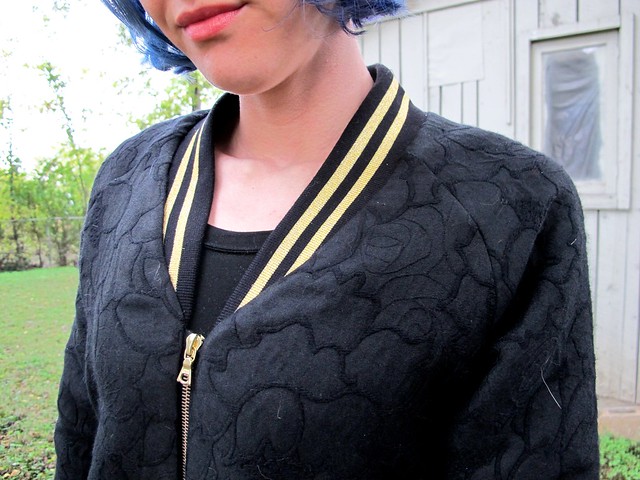
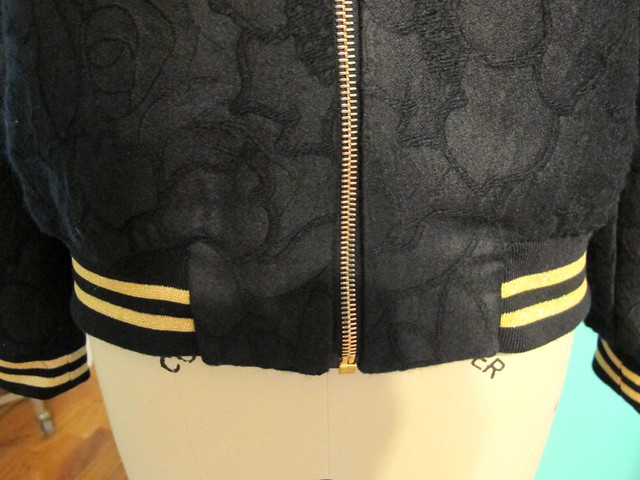
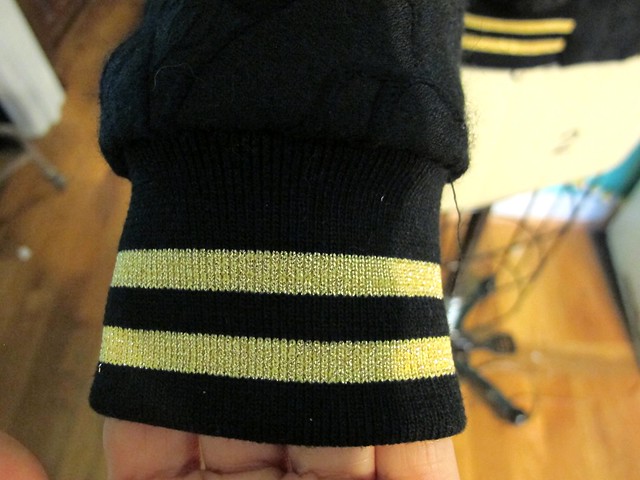
What I neglected to tell you guys about this ribbing is that is actually has sparkly gold stripes. It is amazing! Pacific Trimming sells these in 1 yard pieces – and I needed two pieces. They’re about $8 a piece, if I recall correctly (they won’t cut them down, at least, they wouldn’t when I was there!). Also, when I pressed them, they smelled like a fart (I actually wrote this in my sewing notebook, so it must be important and worth mentioning, I guess). Must be all the polyester?

The Riri zipper looks really nice with the sparkly gold, I think! I still haven’t decided if it was worth the obscene price I paid. On one hand, it was really cool to be able to pick the zipper based exactly on my specifications – color, length, everything. It does feel solid and it is really satisfying to zip up (Riri zippers are referred to as the ~Rolls Royce~ of zippers, I’m told). That being said – $20 for a zipper? Yeah. I dunno. It sure is pretty, though!

Have a photo dump:

Rigel Bomber Jacket
Rigel Bomber Jacket
Rigel Bomber Jacket
Rigel Bomber Jacket
Rigel Bomber Jacket
Rigel Bomber Jacket
Rigel Bomber Jacket

God, I’m sorry about that.

Rigel Bomber Jacket

Anyway, I LOVE my new jacket and I’m so glad I took my time with choosing the right fabric (as well as figuring out that lining!) because the end result was so worth the wait. I’ve been wearing this thing constantly since I finished it – just in time for the weather to get cold, it seems. I’d love to make a patterned version of this one – either with some floral wool (LIBERTY?!), or something polka dotted! Can’t have too many bombers amirite. I even have a couple more pieces of rib knit that I apparently bought during that shopping trip that I completely forgot about. They are black with white stripes. Thanks, past Lauren! ♥

Oh! And my pants are those Jamie Jeans I made a couple of months ago. Just mentioning it because I ended up taking in the inseam a little bit more after that last post, so you can see what they look like now. I think the fit is much better! I’ve found I can usually go about 3-4 wearings between washings on these, before the knees bag out enough to drive me crazy.

Lastly, I will leave you with this outtake. Not sure what I was doing there, but it made me laugh, so hopefully it’ll make you laugh too! 😀

Rigel Bomber JacketHave a great weekend, y’all!

Fall/Winter Sewing Plans for 2014

10 Oct

It just occurred to me that I haven’t share any seasonal sewing plans in… well, a while. Which is lame, because these are some of my favorite types of posts (both to write *and* to read) – I mean, who doesn’t like lurking inside someone’s brain, even if it’s just to see what they plan on doing over the next couple of months? Too creepy? Naw.

Anyway, now that London/Paris is looming on the horizon (less than 2 months! Omg less than a month and a half! Eee!), it’s really time that I start figuring out what I’ll be bringing with me (and making, for that matter! Don’t want to end up with another frantic last-minute sewing disaster, ugh). Especially since my luggage space will be very limited – I’m only allowed to bring one suitcase with me overseas (well… I use the word “allowed” loosely here. I can bring two suitcases if I want to – but I get to pay $130 for the second one! LOL GURL NO.), and I want to fabric shop while I’m there! So, I will be packing a capsule wardrobe, one that mixes and matches with itself, for maximum outfit options, as well as warmth. This is much different than how I usually travel (as I fly Southwest, where you can bring 2 bags free – so why the hell not, you know?), but I’m up for the challenge! 🙂 Adulting and all that 🙂

I’ve already made/chosen a couple of pieces to base my capsule around, as well as chosen my theme (like Devon, I think all vacation wardrobes should have themes, because, duh) – Minimalist Parisian Chic. Mostly because my capsule will be very minimal – or, as minimal as I can get it down to, because I am still one of those people who delights in overpacking – with lots of black. Not much on the Parisian Chic side (I’m sure Parisian women will be horrified when they see what I wear to stomp around their city, ha!), but it has a nice ring to it 🙂

Anyway – to start – I have these black Jamie jeans that I made a couple of weeks ago:
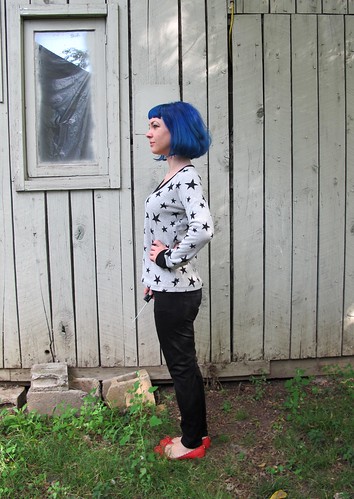
Jamie Jeans + SJ Sweater Made with Mood Fabrics
I haven’t decided yet if I’ll be bringing the star sweater. It’s a little bulky! On the flip side, regarding the jeans – I just finished wearing them for the 5th time in a row (sans wash), and they’ve stayed very close to their original shape. No bagging out, woohoo! So that makes me feel good, because I’ll be wearing these a LOT come London.

Stripey Renfrew
I will also be bringing my Imogene + Willie slim jeans (pictured here), because they are basically the best jeans ever. Oh, and probably that stripey Renfrew top. Can’t have enough tshirts!

Now for the sewing plans! Sidenote: By the time of publishing this post, I’ve already finished more than half these makes. Whoops! Guess y’all see where my priorities lie when it comes to posting vs sewing hahaha. Oh well!

Ikat Lady Skater
The Cowl-Necked Skater Dress
I’ve had this idea in my head for a while now – a Lady Skater dress // Renfrew top mash-up! This cotton Ikat knit fabric (purchased at The Fabric Studio here in Nashville) will be the perfect match for this dress – like a giant, snuggly Christmas sweater! I actually don’t know if I’ll be bringing this one to London, due to bulk factor (my capsule really only allows for one dress, which I’m thinking will be the one below – but we’ll see!), but the plans were too good to keep to myself 🙂

DVF Wool wrap
The Wool Wrap dress
Another big mash-up – I’m starting with the DVF Wrap dress pattern, but adding long sleeves (stolen from the Lady Skater, naturally) and swapping out the gathered skirt for a wrap A-line (Miette Wrap skirt – I’m looking at you). The black wool knit fabric was picked up at Mood in NY a couple of months ago – it’s SO soft! Like, cashmere soft. I’m so in love ♥

Silk v neck
The Silk Button-down
I already have a nice white button-down – made from the same pattern, Butterick 5526 (my favorite!) – but it’s not really cold weather appropriate, due to the length of the sleeves. Since they are 3/4, they don’t really layer nicely with my long sleeve sweaters! I’d love to make another one, but up the ante with some beautiful silk double georgette, and modify the neckline to be more of a v shape (likely using this V-Neck variation tutorial by Jen!)

Chambray Button down
The Polka Dot Chambray Button-down
Another thing I already have one of, but need a winter version. This one will be made using a gorgeous cotton polka dot chambray, picked up here locally at Textile Fabrics.

SJ Sweater
The Wool Sweater
Button downs need a nice sweater, yeah? I want to try sewing a sweater, using the SJ Tee as a basis (with a higher neckline, and omitting all bindings). The fabric I have is a lovely camel-colored boiled wool, that I bought from Elizabeth Suzann (aka I totally jacked her wholesale order hahaha). I think it’ll look equally good over both those button down shirts I have planned!

rigel bomber
The Bomber Jacket
I know – I’m already planning a pretty sweet coat. However, the weather in London (and Tennessee, for that matter!) can be fickle, so I’d like to bring a lighter-weight jacket for days when the temperature isn’t as low. I’ve been meaning to make the Rigel Bomber for, well, months now. Just been waiting on the perfect fabric – and I think I found it! Check out this black wool coating – to be paired with gold china silk for the lining.

Other plans I have (no photos, sorry! Use that imagination of yours, ha!)
– Need some thin long sleeve shirts for layering – maybe just a couple out of wool knit, such as this textured black wool jersey (that’s apparently already sold out?! Wah!). I wear these pretty much daily in the winter – and sometimes I like to sleep in them if it’s really cold – so it’ll be nice to have a few to choose from.
– Speaking of sleeping – I need some new pajama pants! Currently lurking Margot pj pants in Tilly’s book, Love at First Stitch, since they seem to be a pretty quick/easy make (I really want to make the Tofino pants, but right now I need quick and easy!). I picked up some really fun orange plaid flannel to make them with – I know, that fabric is ridiculous, which is exactly why I chose it. It’s nothing like I already own! When it comes to pjs, why not, you know?
– I would like to make a flared A-line wool skirt to make as well – thinking about using the Delphine pattern (also from Love at First Stitch), because I love the shape. A little stuck on fabric selection, though! My go-to is usually wool crepe, but that will be too drapey for this shape. Thoughts? I need it to be 100% wool (pretty nitpicky about this, sorry!) and I’m looking for lipstick red. Budget is no more than $25 a yard (and obviously I’d be delighted if it was less than that!)
– Bras! I want to finish at least one bra before I leave – using the Marlborough pattern and one of my kits from Bra Maker’s Supply. Obviously I want new bras, but even more – Norma will be in Paris while I’m there, and you better believe I’m going to drag her into a bathroom and make her assess and critique my fit. Haha! Man, sewing people are weird 😛

I think that’s it for now! It feels good to get everything listed out in one place. I’m hoping I can get all this done before I leave – but if not, no worries. It’s not like I’m lacking clothing or anything as it is!

As a side note, I was just notified that one of my lovely sponsors, Indie Sew, is holding a pretty sweet contest where you can win a YEAR of free patterns! Fuck yes! You can read all about the contest and the reasoning behind it on this blog post, but the general gist is that Indie Sew wants to help you transform your entire wardrobe into handmade and end the cycle of cheap/fast fashion. And what better way to jump start a new handmade wardrobe than with some FREE FREAKING PATTERNS AMIRITE? Such a cool idea, and I really really hope the winner shares their journey via blog or social media so we can follow along! Anyway, soapbox rant over – go throw your name in the hat!
What’s on the table for your fall/winter sewing plans? Do you have any capsule wardrobe suggestions for me? Tips for packing light? Are you going to judge me if you see me wearing the same thing for 3 days in a row while I’m on my trip? 🙂

Sweaters & Skinnies for Fall!

24 Sep

Ok, I’ll admit – when I first started working on this outfit, the air was a LOT more fall-like than it currently is at the moment. Stupid fickle season, ha!

Jamie Jeans + SJ Sweater Made with Mood Fabrics

Anyway, I’m totally a trooper so I’m modeling this outfit for y’all nonetheless (photos taken early morning before the temperatures got too high, because, woof.). My first real cold-weather makes – like I said, it’s a little early in the season here, but I like to get a head start so I can actually start wearing this stuff when the weather cools down 🙂 This outfit – or at least the skinnies – is also part of my London wardrobe. I’m officially less than 2 months out, EEEEEP! – so it’s time to really start cranking down and getting my wardrobe act together. Since I’m very limited in suitcase space, I’m trying to capsulate everything to mix and match. So I can bring less clothes, so I can bring home more fabric 🙂 You know – priorities!
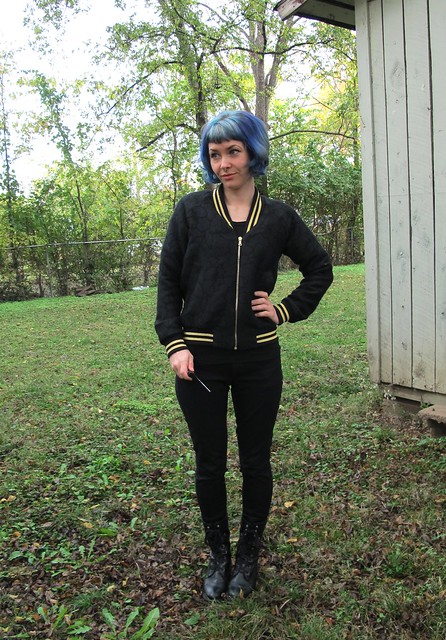
ANYWAY, I have a lot of ground to cover with these two pieces, so let’s get started! Sorry in advance for the big photo overload!

Jamie Jeans + SJ Sweater Made with Mood Fabrics

Let’s start with the sweater. I bought this fabric last month while I was in NYC. This was my first non-spring trip to the city, which meant my fabric shopping was focused on woolens and winter weights (instead of summer fabrics, which I am usually bee-lining for in March). I immediately found this star printed WOOL sweater knit, and promptly flipped my shit over it. It’s SO fabulous – and soft! Even softer than you can imagine, forreal. At $25 a yard, it wasn’t the cheapest sweater knit – but stars and wool? Totally worth it. Plus, it’s not like a sweater takes a lot of yardage – at least not for me. I bought a yard and a half (and I have some leftover.. hmm, what to make with?).

Jamie Jeans + SJ Sweater Made with Mood Fabrics

The pattern I used to make this bad boy was actually suggested by Devra (who also bought some of the prized star wool knit, after I peer pressured her into it 😉 ) – the SJ Tee from Papercut Patterns. I made a wearable mock-up before the real deal – which I will show y’all later this week – so I was able to figure my fitting before cutting into my precious wool knit. I cut a size XXS and took 1″ out of the center back. The length is the long version (aka, not cropped) and the sleeves are long as well.

Jamie Jeans + SJ Sweater Made with Mood Fabrics

I used rib knit to finish the neckline and cuffs – it was in my stash, I have no idea where it came from. This knit was way stretchier than the sweater knit, so I had to keep retrying the neckline to get it to lie flat. I ended up cutting the rib to half the length of the neckline and stretched the everloving shit out of it – it could still stand to be a little tighter, but this will do. The neckline also can’t stand to be a little lower, it’s already a little risque (which I LIKE!). The cuffs are a bit looser than I’d prefer, but I wanted to be able to push the sleeves up, like so.

Jamie Jeans + SJ Sweater Made with Mood Fabrics

I sewed the entire sweater on my serger – you could use a sewing machine (this particular knit does not unravel or shed), but serger is faster 🙂 I did use a twin needle to topstitch the raglan lines, as well as the neckline & hem. Really loved topstitching this sweater; the stitches just sink right in and look soooo good!

Jamie Jeans + SJ Sweater Made with Mood Fabrics

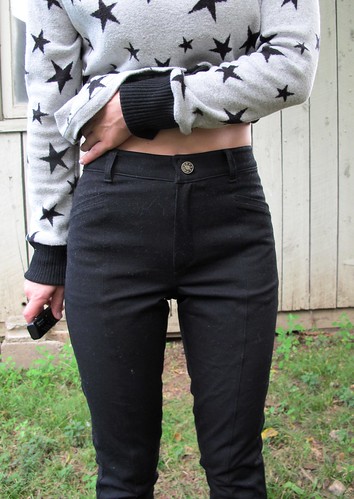
For the black skinnies, I used a really great stretch twill. I’ve had some hits and misses when it comes to stretch bottom weights – they tend to be a weird weight (either too heavy, or not heavy enough), and the stretch can bag out over time. One thing I’ve learned is that you need a pretty high spandex/poly content to get them to snap back into shape – 5-10% – and you need to make sure they are bottom weight. I actually made Heather Lou source this fabric for me, also in the Mood store. We were initially looking for black denim, couldn’t find a good one (I still don’t really know what constitutes as a good one- you’ll have to ask her! I just blindly followed, ha), and decided on the twill. We did end up finding a black denim, fyi, but not at Mood. Once I sew that one up, I’ll share more about it 🙂

Jamie Jeans + SJ Sweater Made with Mood Fabrics

Anyway, this twill is great! It’s pretty similar to what you get with stretch RTW pants – thick enough for a bottom weight, but not tooooo thick (I still only used an 80/12 needle, so no heavy denim shit or whatev). The stretch is crazy good, and it actually snaps back into shape. I can’t give y’all a true verdict on a full day’s worth of wear – the weather jumped back up to hot, so I haven’t had a chance to wear these yet. However, I tried the jeans on a LOT during construction, and they haven’t bagged out yet. So that’s a good sign!

The only drawback to this stuff is that it attracts cat hair like a magnet. It’s not as bad in real life as it is in photos (else I would have lint-rolled that shit, I mean, come on), but it also doesn’t bother me that much. When you have a cat and you wear black pants, cat hair is sorta just a way of life, you know?

Jamie Jeans + SJ Sweater Made with Mood Fabrics

The pattern I used to make the skinnies is the Jamie Jeans, from Named. I’ve actually had this pattern in my stash for a few months – my friend Carla bought me these (plus a few other Named patterns) as an early birthday gift earlier this year. Then I was a total ass and didn’t do anything with them until just now 😛 Hey, it’s been too hot! Anyway, I’m glad I put these off because there is no way I would have had such stretch twill success if it hadn’t been for Heather doing that side of the shopping for me. So there’s that.

Jamie Jeans + SJ Sweater Made with Mood Fabrics

Anyway, this was my first experience with Named. My understanding is that a few things have changed since they initially released this pattern – for one, the instructions include some diagrams now (they used to be text-only), and the prices are a little more competitive. The pieces also aren’t quite as overlapped as they were the first go-round – because, ugh, tracing patterns, ugh. I only had to trace the waistband for these. Everything else was, thankfully, not super overlapped.

I started with the size 2, and made these initial modifications, based on my muslin:
– Added 1″ to the back crotch, for butt room
– Removed 2″ of length at the legs
– Removed 5/8″ at the center back yoke, blending to 1/4″ at the bottom (where the pants meet the yoke)
– Removed 1/4″ from the center back, blending to nothing

Once I started sewing, I ended up doing a few more fit adjustments. I don’t know why these weren’t prevalent in my muslin – perhaps my fabric wasn’t quite stretchy enough? At any rate, these are my additional modifications (and now you know why I pulled them on and off so many times!):
– Sewed the side seams at 1/2″
– Took a 1″ wedge out of the center back of the waistband, tapering to nothing at the bottom
– Removed an additional 3/4″ from the length
– Did some crazy witchcraft to reshape the crotch to be a J (again, NO IDEA why this wasn’t an issue with the muslin, but argh – at least I fixed it? Mostly.).

Things I will change for my next rendition:
– Need to remove some length from the front crotch – you can see that it’s slightly too long (it’s not toooo bad – I doubt anyone will point and be all “HA HA YOUR CROTCH IS TOO LONG HA HA!” But I know it’s there and hey, it bothers me, ok?). Maybe 3/8″ish.
– Rescoop that J a little more out of the crotch. It’s still not perfect, but it’s damn good considering that I did this while the pants were already mostly assembled (for those of you who are all, “Wtf is this J crotch you keep talking about?” Here’s the post where I talk about my pants adjustments, including J crotches. Also, in case you were wondering- those crotch rulers *do* work. I found one in Elizabeth’s studio last week, immediately stuck it on my crotch – and hey, there’s a J! Cool!)
– Need to take a little pinch of fabric out of the inner leg seam – maybe 1/2″

Despite my nitpicky fit adjustments, these aren’t so bad! I’ll still totally wear the shit out of them, at any rate.

Jamie Jeans + SJ Sweater Made with Mood Fabrics

Constructing these was REALLY fun! The instructions – honestly, they’re kind of useless about 70% of the time, but I’ve made enough pants to where I don’t really need them. The seams are all finished with my serger – except the crotch seam, which is flat-felled – and I made use of my edgestitching foot to get all that beautiful topstitching. For the waistband, I used fusible tricot knit interfacing – I fused both the outside and the facing, to give it some stability but retain that lovely stretch. The button & jean zip are both from Pacific Trimming in NYC.

Jamie Jeans + SJ Sweater Made with Mood Fabrics

I really love the back pockets! And hey, that double line of stitching at the yoke? That was done with a single needle, twice. No twin needle!

Jamie Jeans + SJ Sweater Made with Mood Fabrics

For the hem, I used the lightning bolt stitch, so it would retain some stretchiness. It looks pretty similar to a straight stitch, but it, you know, stretches.

What else? Here are some sweater close-ups:

Jamie Jeans + SJ Sweater Made with Mood Fabrics

YUM!

Jamie Jeans + SJ Sweater Made with Mood Fabrics

One last thing – here’s the little watercolor fashion illustration I made for this outfit. GOD, I love painting watercolors! So much fun!

Jamie Jeans + SJ Sweater Made with Mood Fabrics

Ok, I guess that’s it! Now if the cooler weather could please come back – I hate working up a sweat while I drink my morning coffee 🙂 Oh, and in case you were wondering – that’s a fresh dye job you’re looking at, in regards to my hair! I love how neon electric is is 🙂 Yay for fun-colored hair!

PS: Ralph Rucci V1419 Sewalongers – in case you missed it, there’s a new post up on the McCall blog regarding the sewalong. Just some general housekeeping, including blog buttons (yes!) and social media chat. The burning question this week – for general sewalong chat outside of our blogs, do y’all prefer to use a Facebook page or a Flickr Group? Trying to decide which platform to us. Let us know which side you swing!