Tag Archives: bewbs

Completed: More Bras!

23 Feb

You may have heard that the south was hit with a particularly bad ice storm last week. Nashville was coated with a few inches of solid ice, that kept melting in the sun and refreezing overnight, turning all our roads and interstates into some scary-ass ice rinks for the majority of the week. Since we’re not really equipped to deal with that kind of weather (the last time we had an ice storm anything like this was over 20 years ago – it normally just melts the next day and it’s not an issue), that means that most people spent the week stuck inside their house. And by “most people,” I’m specifically talking about myself. I gotta say – it was pretty nice to have nearly a whole snow week! I wasted the first day by being sick (wah), and the remainder of the days it was really hard to get my ass off the couch because our house is REALLY freaking cold (I’m wearing a fleece robe over my clothes and sitting by a space heater as I type this. I love my old house, but man, they are drafty!). I did want to take advantage of all the free time I had from being home for most of the week, so I made a couple of bras. Bra making is great for cold weather sewing, mostly because you don’t have to strip down often for fitting. Really, just once, and that’s when the bra is finished.

I made 2 bras, but I actually have 3 to show y’all. The first one is one that I finished at the end of 2014 (yay!); I’ve had the photos for ages but I never bothered to post it because it seemed like a pretty boring post on it’s own. For each of these bras, I used a fabric+findings kit to assemble them – so hopefully this will help those of y’all who are still trying to figure out what kit works best for which pattern.

Red Marlborough Bra

Bra #1 is this sexy little red lace number. This is the Marlborough bra, and the fabric is from a kit from Bra Maker’s Supply (the lace is something I picked up in London; Bra Maker’s Supply doesn’t include lace with their kits). This is the second bra I have ever made, and while I did have a few learning curves with this one, I really learned a LOT.

Red Marlborough Bra

Red Marlborough Bra

I really love the kits from Bra Maker’s Supply – they are a good price (less than $30 USD) and the materials are pretty nice quality. I’m not super crazy about the fabric, but it looks nice when it’s sewn up (I like to use the side that isn’t shiny, so it looks less costume-y). The only thing I’ve had a problem with is that they don’t indicate what elastic is for what part of the bra – it’s kind of assumed that you already know. For this bra, I mixed up the lace edge elastic with the underarm elastic, whoops. So now the underarms are lacy, and the top of the lace… isn’t. I doubt any of y’all would have even noticed that if I hadn’t pointed it out, but, it is what it is. It’s not uncomfortable or itchy, at least.

I made this bra exactly the same way as I sewed my black Marlborough, except I left off the clear elastic and lining on the lace (I used the underarm elastic at the top of the lace, to stabilize it). I only made a couple minor fitting changes to the pattern, based on what Norma and I talked about while I was in Paris (scooping about 1/4″ off the bottom of the bridge and adding about 1/4″ to the edge of the upper cup, also moving the straps out about 1/2″). When I finished the bra, I put it on – and it was COMPLETELY unwearable. The back straps were so far apart, they were riding up the back of my armpits. Really really uncomfortable. So I threw the bra in the corner and ignored it for about 3 weeks while I debated what to do. The bra was already finished at this point – underwires inserted, hook and eye sewn in, everything – and I didn’t want to trash it after putting all that work and money into it. This here is the downside of bra making. You can’t really fit-as-you-go.

Spoiler alert: I fixed it and it’s now wearable. I had to unpick the entire back, but I made it work. What I ended up doing was unpicking all the stitching and elastic from the back band, all the way to the frame, and then removed the back band. I measured the pattern band against the band of my favorite bra, and redrew the back curve to match the RTW one. This ended up making the back band bigger as well – so I’m not sure the bra size anymore, since it’s bigger than the 30D I originally cut. Doesn’t matter, though, because whatever the size it is – it fits ME. Anyway, I recut the back pieces in power net and reattached them to the frame, pieced the elastic (since what was attached to the bra was now too short for the band – fortunately, the kits give you more than enough elastic so this was not an issue), and reattached the hook and eye. The bra now fits really well. The band is big enough – it was a smidge too tight before – and the straps are in the right spot. I’m really glad that I took the extra 2+ hours out to rip out and fix the bra, because now I have a wearable red bra!

Red Marlborough Bra

Here it is on me. This the only floaty ghost bra picture you get in this post, fyi. And only because I did this one agessss ago, ha. You actually see a bit more nipple in real life, but I was feeling modest so I pushed them out of the way. You’re welcome, I guess.

This is the bra that I showed Maddie when I was in Philly for the bra making class. I wanted her to see my fitting changes and tell me if there was anything else I need to tweak. Thankfully, the bra looks pretty good – so I’ve got the go-ahead to keep cutting this size, with my new back band piece and all that.

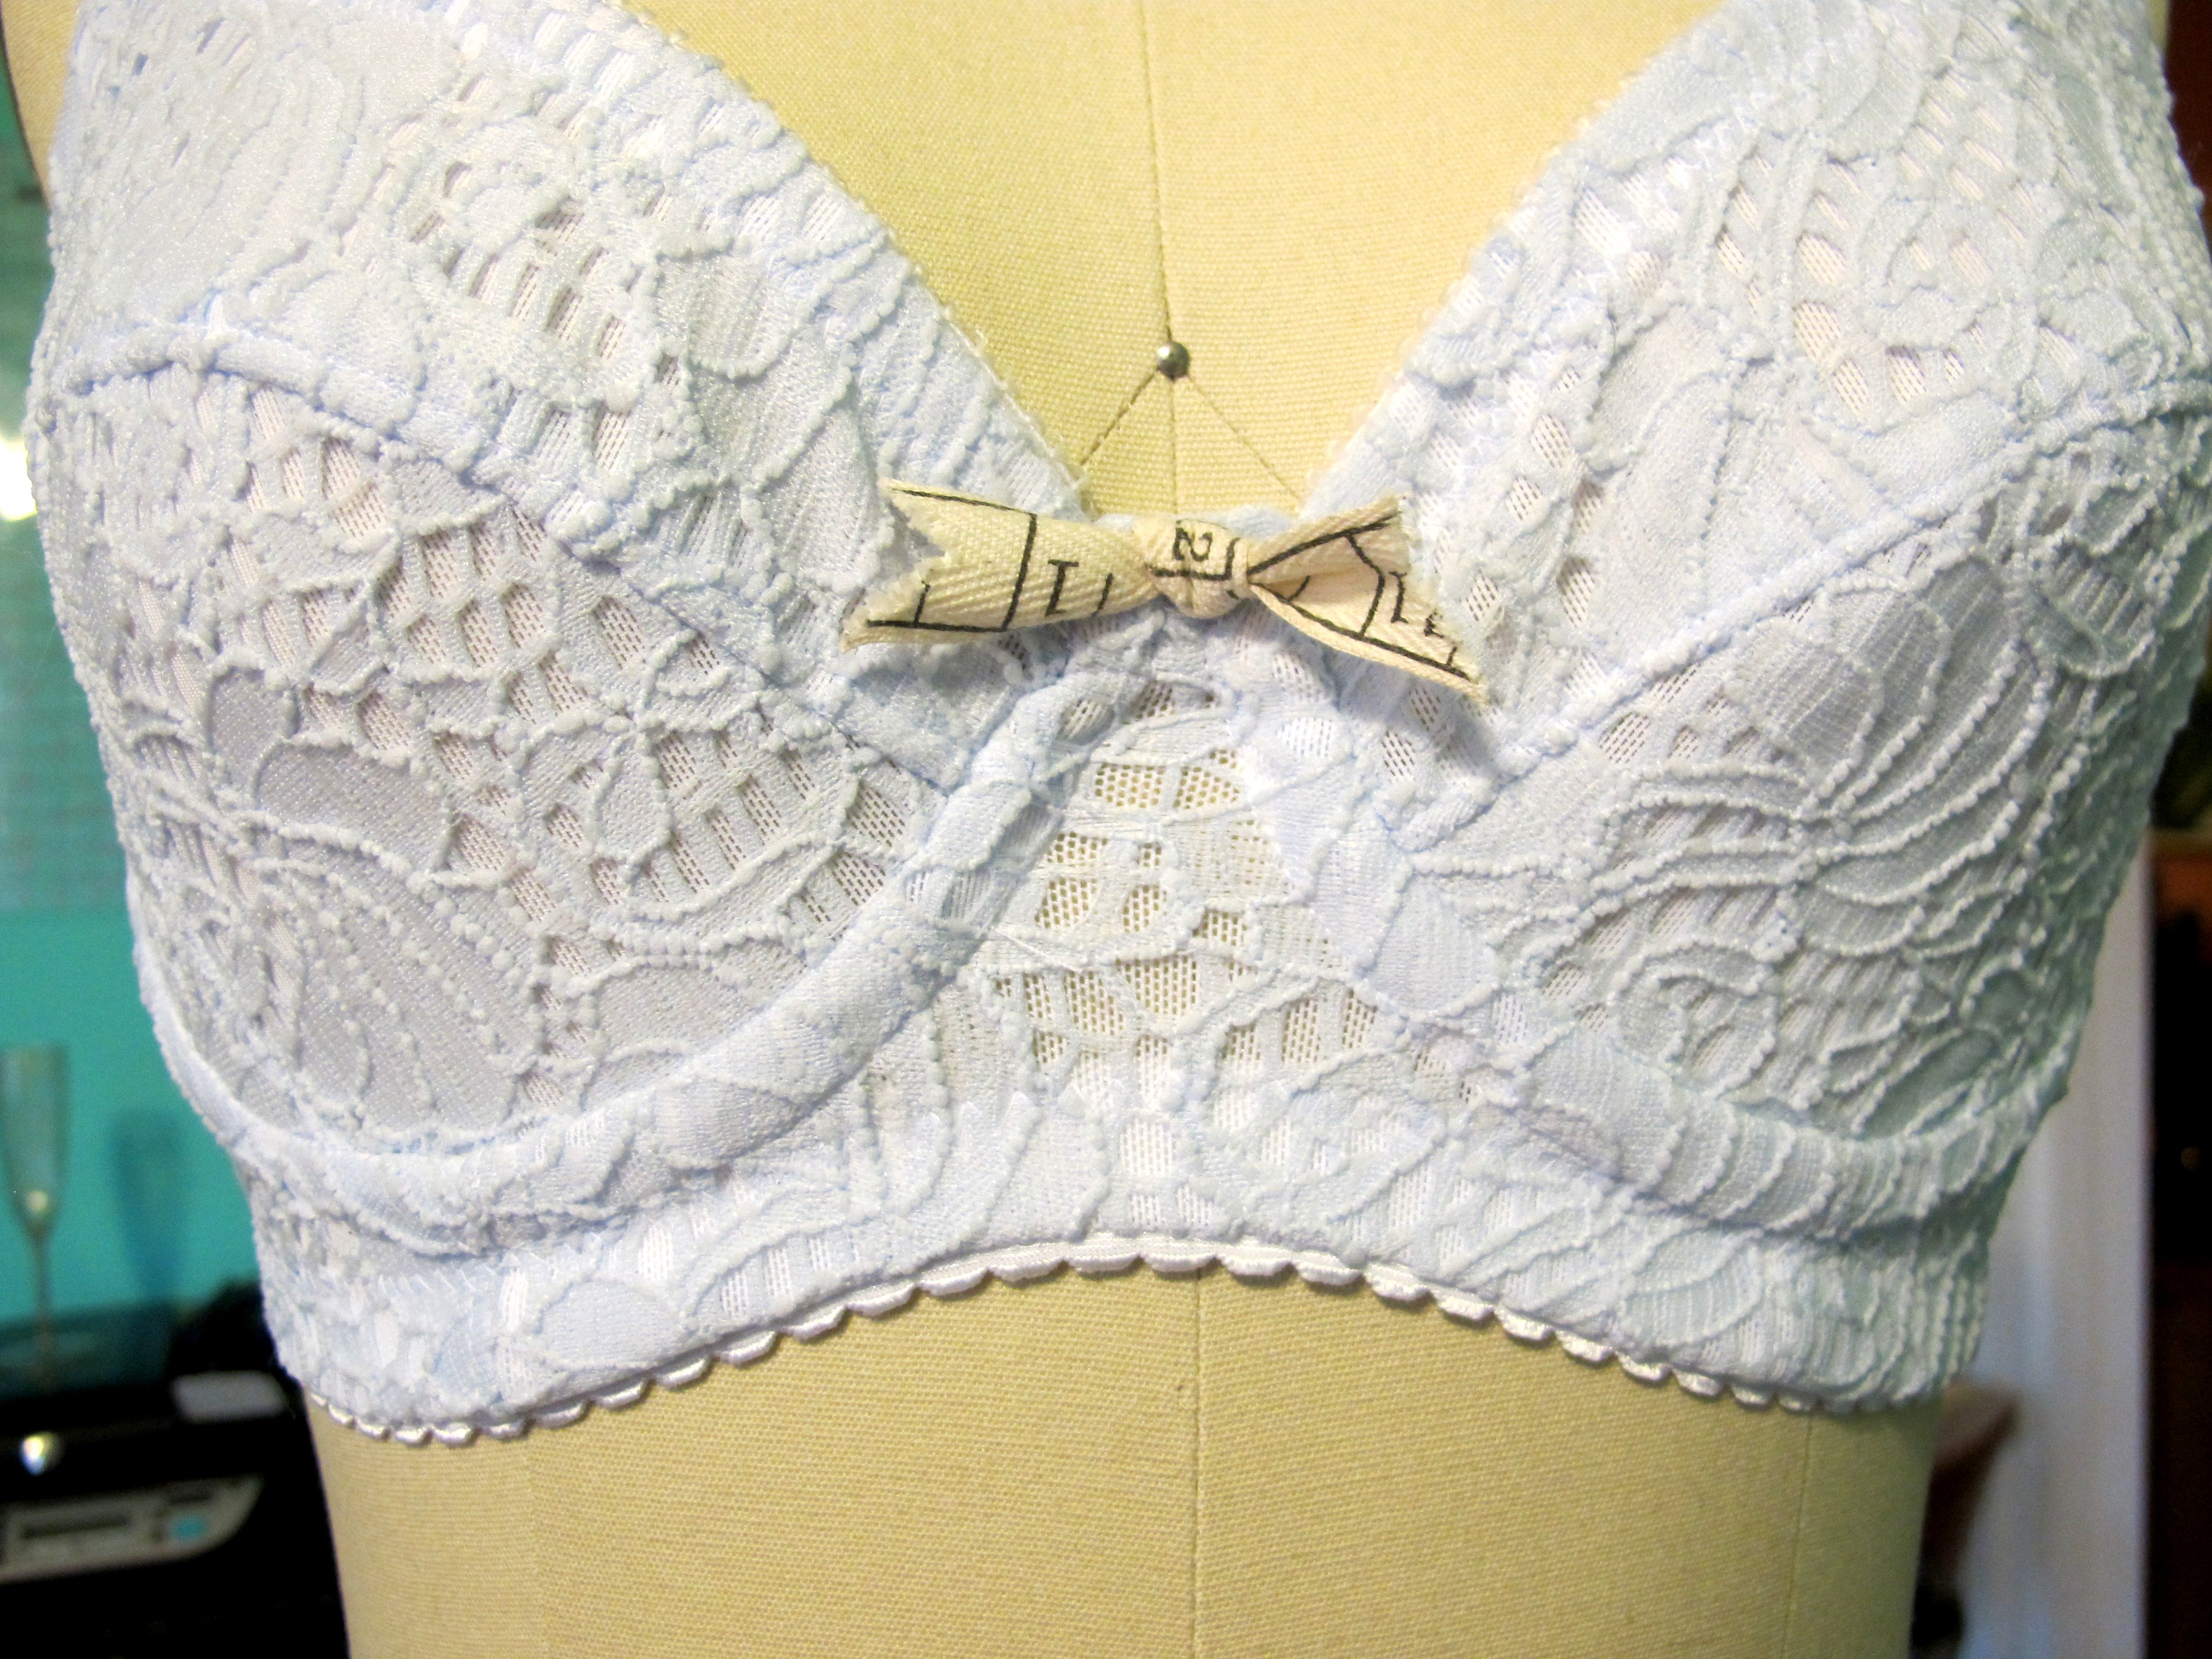
Soooo, here’s the next Marlborough that I made over the snow week!

Black and nude Marlborough Bra

No fitting changes to this bra, just fabric changes (and a different kit). I really like that red bra, but I REALLY LOVE this one! I think it turned out sooo pretty! And, while I’m not the kind of person to sit here and wax poetic about my boobs or anything (I mean, they’re boobs, there’s nothing any more special about mine than, say, yours), this bra makes them look really really good. Gives them a nice lift and shape. I’m so happy with it!

Black and nude Marlborough Bra

I used one of the kits from Grey’s Fabric to make this one up (I don’t see it on the stock page anymore, but it was black and nude). These have the same duoplex fabric as the kits from Bra Maker’s Supply, but unlike BMS – they also include the lace, underwires, and enough strap elastic (you don’t get enough with Bra Maker’s Supply, fyi! Make sure you buy extra if you order from them). I did change out the ribbon decoration to a black one – and sewed a little rhinestone button in the middle, BECAUSE IT’S ADORABLE – but everything came with the kit. I like that.

Black and nude Marlborough Bra

The major difference between this bra and the red one is the lace – the red lace is very stable, so it doesn’t stretch. The black lace here is a stretch lace that I did not stabilize. That alone made the biggest difference in the fit.

Black and nude Marlborough Bra

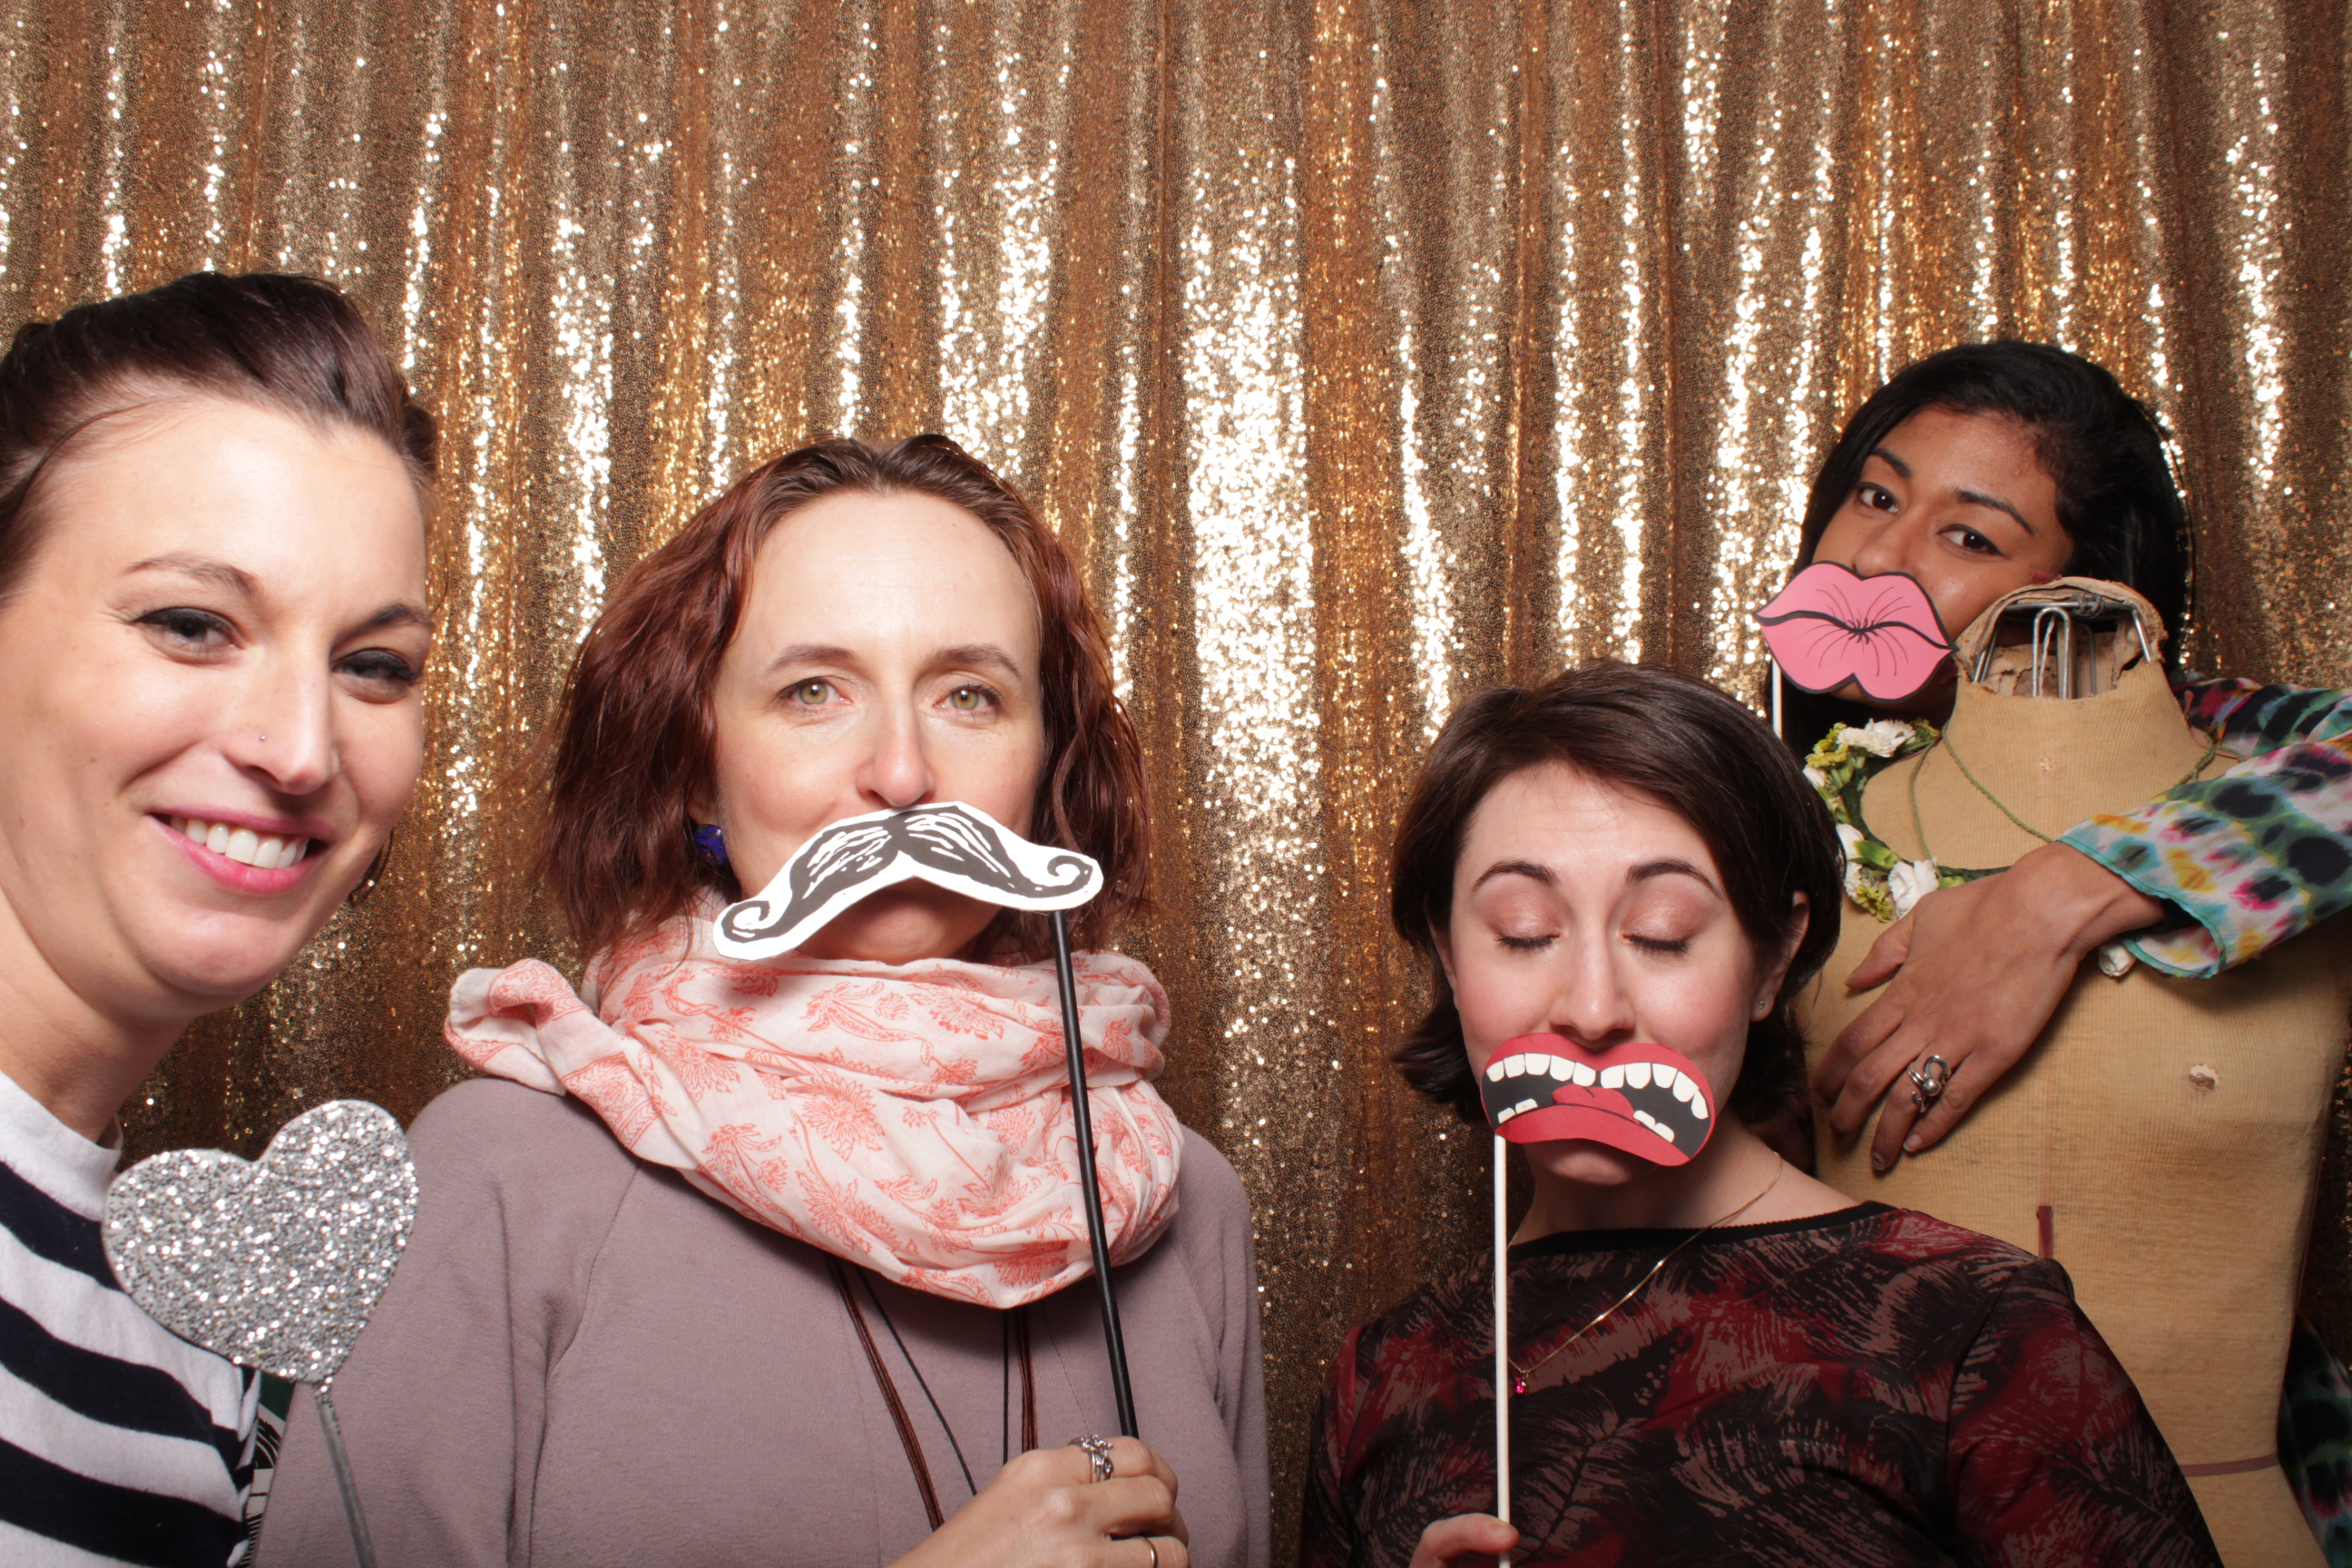
I’m just including this picture because Amelia looks like a deer caught in headlights hahaha

Black and nude Marlborough Bra

I’m really happy that this lace had a scalloped edge, so I could use that in the bra. I think it’s really pretty! I stabilized the scalloped edge with a piece of clear elastic – this wasn’t included in the kit, but I have tons of it on hand, so not a big deal. All the findings are the same nude color; the only black is the lace and the power net (and the bow I made – I thought it looked better than the nude bow).

Black and nude Marlborough Bra

Black and nude Marlborough Bra

Now that I’m feeling pretty good about the fit, I’ve started experimenting with finishing the seams. I used a 3 thread overlock for this one – at the advice of all my favorite bra makers, basically. You just have to be careful with 1/4″ seams; you don’t want to accidentally cut too much off (I know you can disable the knife blade, but me, I like to live on the edge). Oh, and you can see the little nude bow that I didn’t use! Maybe for my next bra.

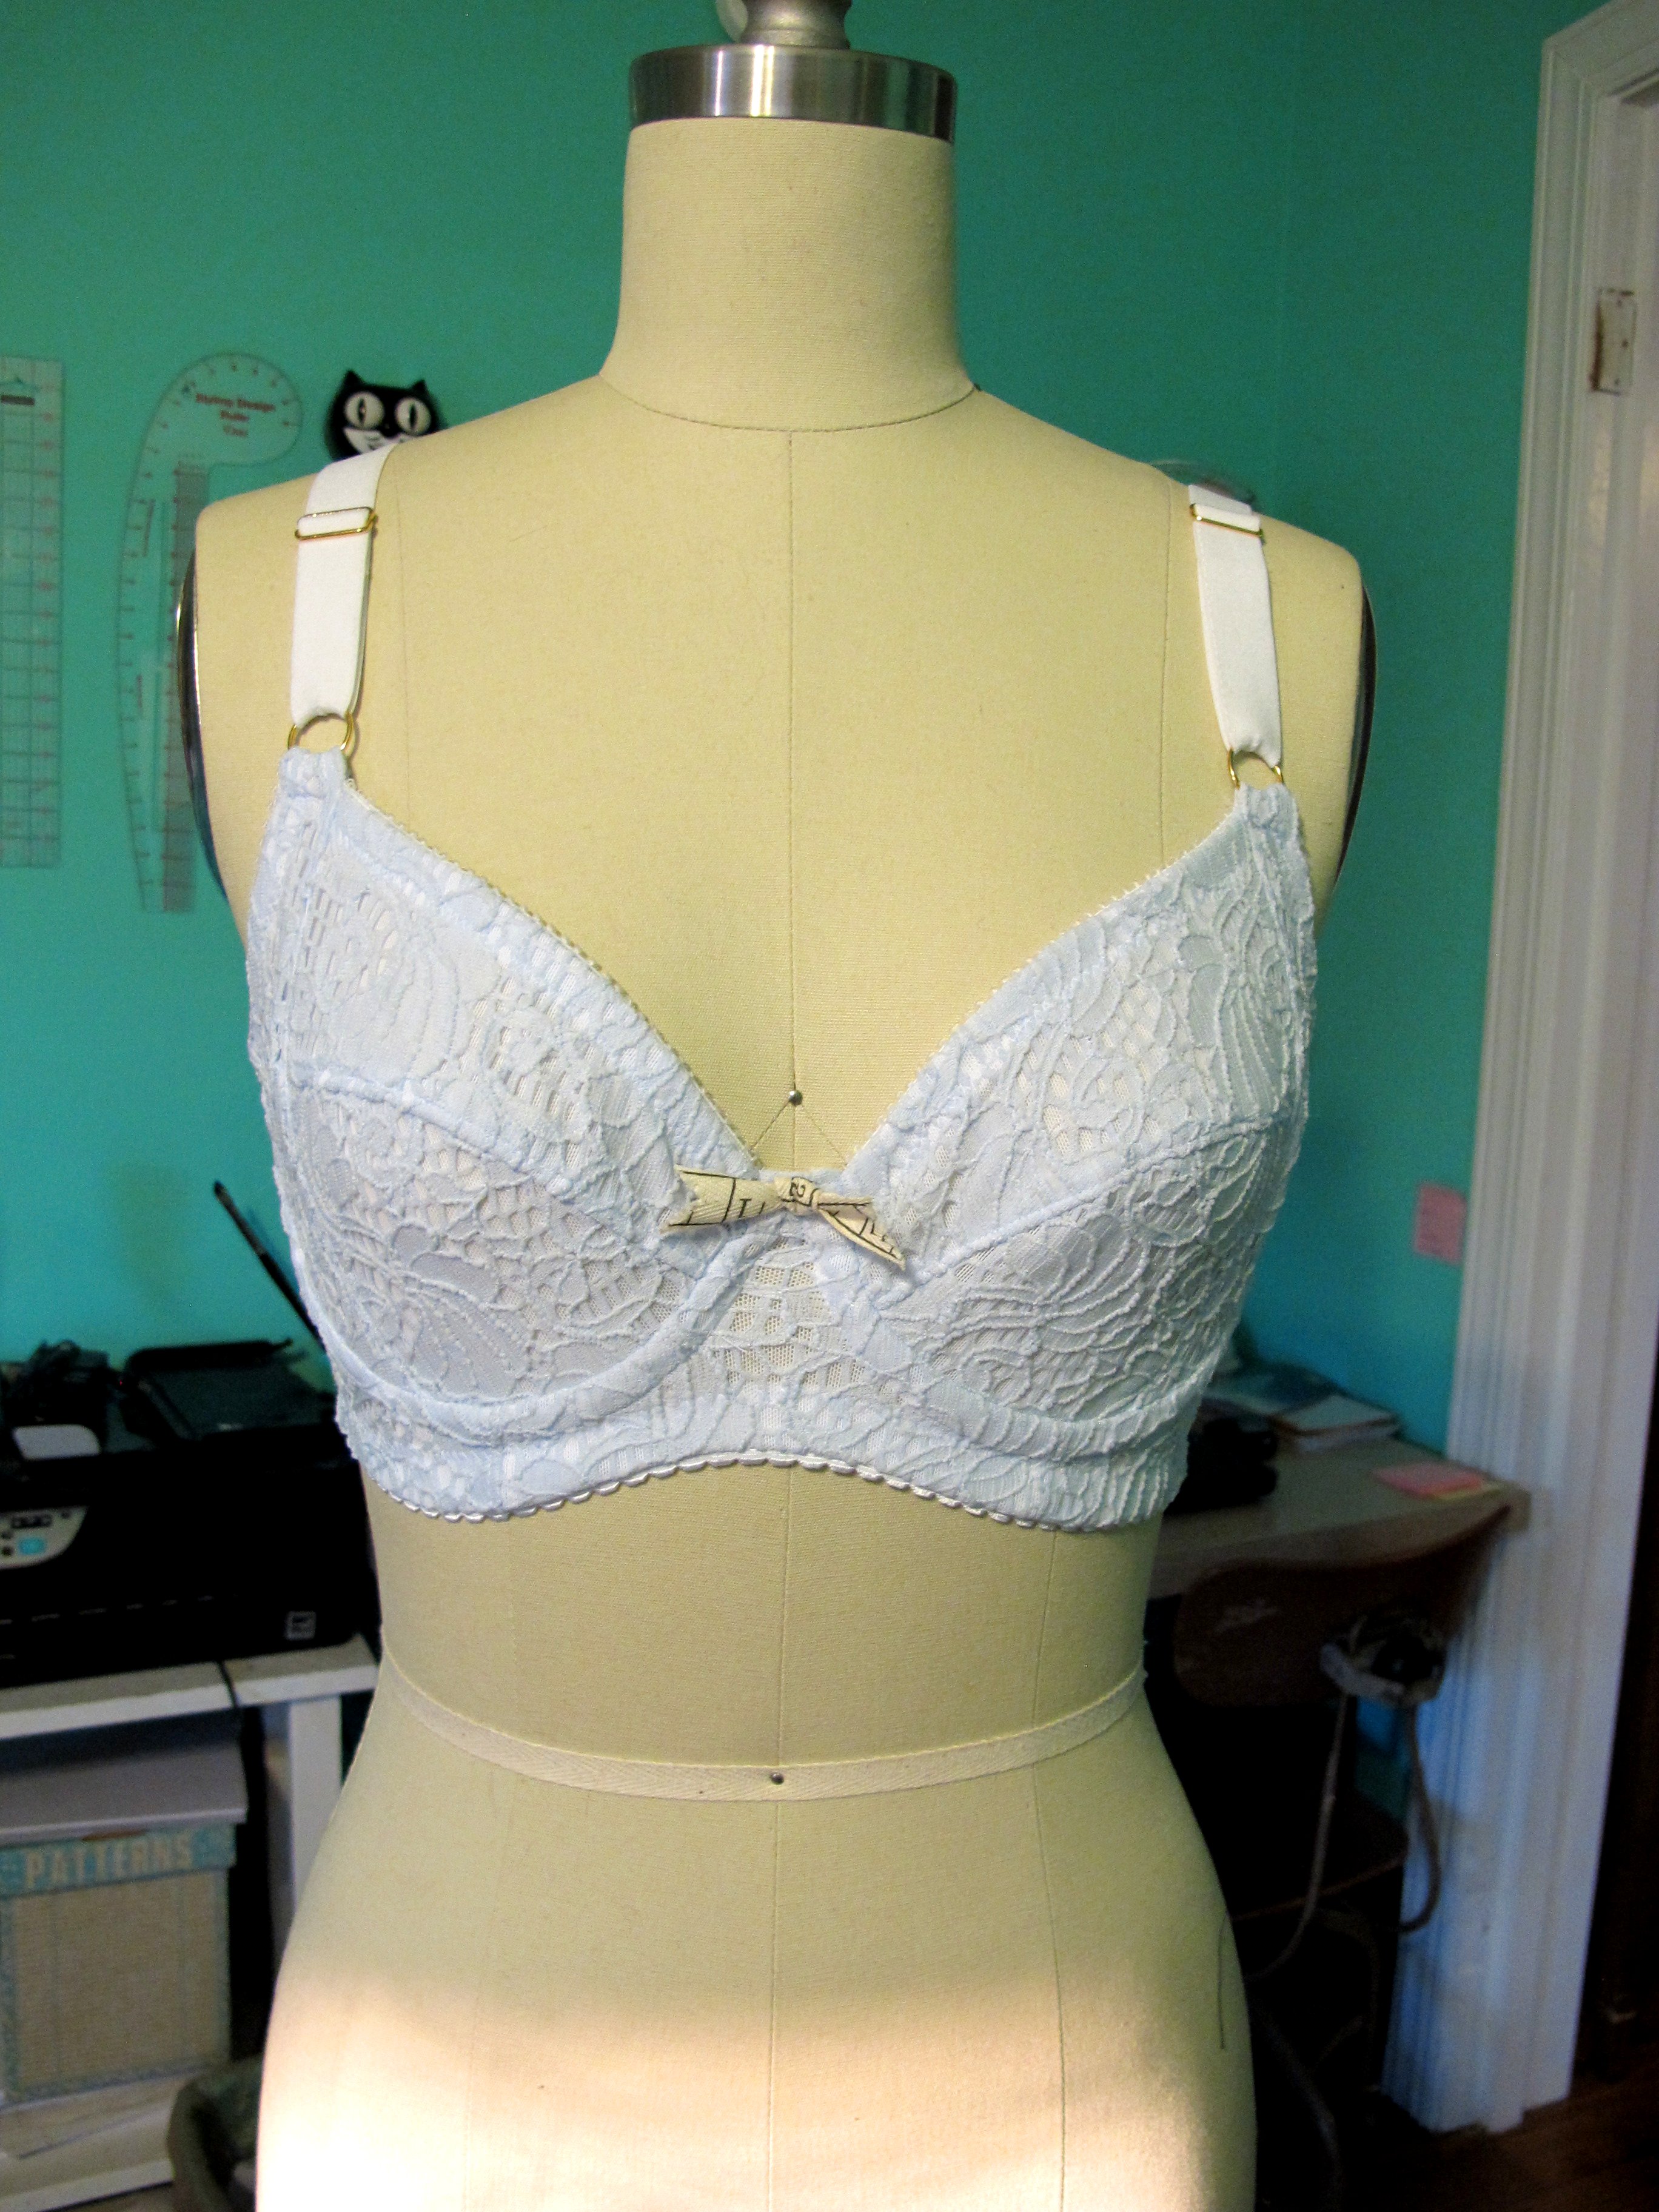
Finally, I also made another Watson bra!

Green and White Watson Bra

I LOVE this one so much! I talked myself into buying that kit one day (I don’t know why, but I was convinced that I needed a green bra – like, who doesn’t need a green bra?); the nude/black kit was actually bought at the same time so I could get free shipping, ha. I used one of the lace Watson kits (the one I bought appears to be sold out, but this one is similar).

Green and White Watson Bra

I admit – when I first received the kit, I was completely confused. The lace only has a minor amount of mechanical stretch – i.e., no spandex – and there was a TON of powermesh. I wasn’t sure if the bra would even fit, considering the blue Watson I made used a very stretchy material. I sat on this one for awhile because I wasn’t sure how to proceed, but I think I nailed it.

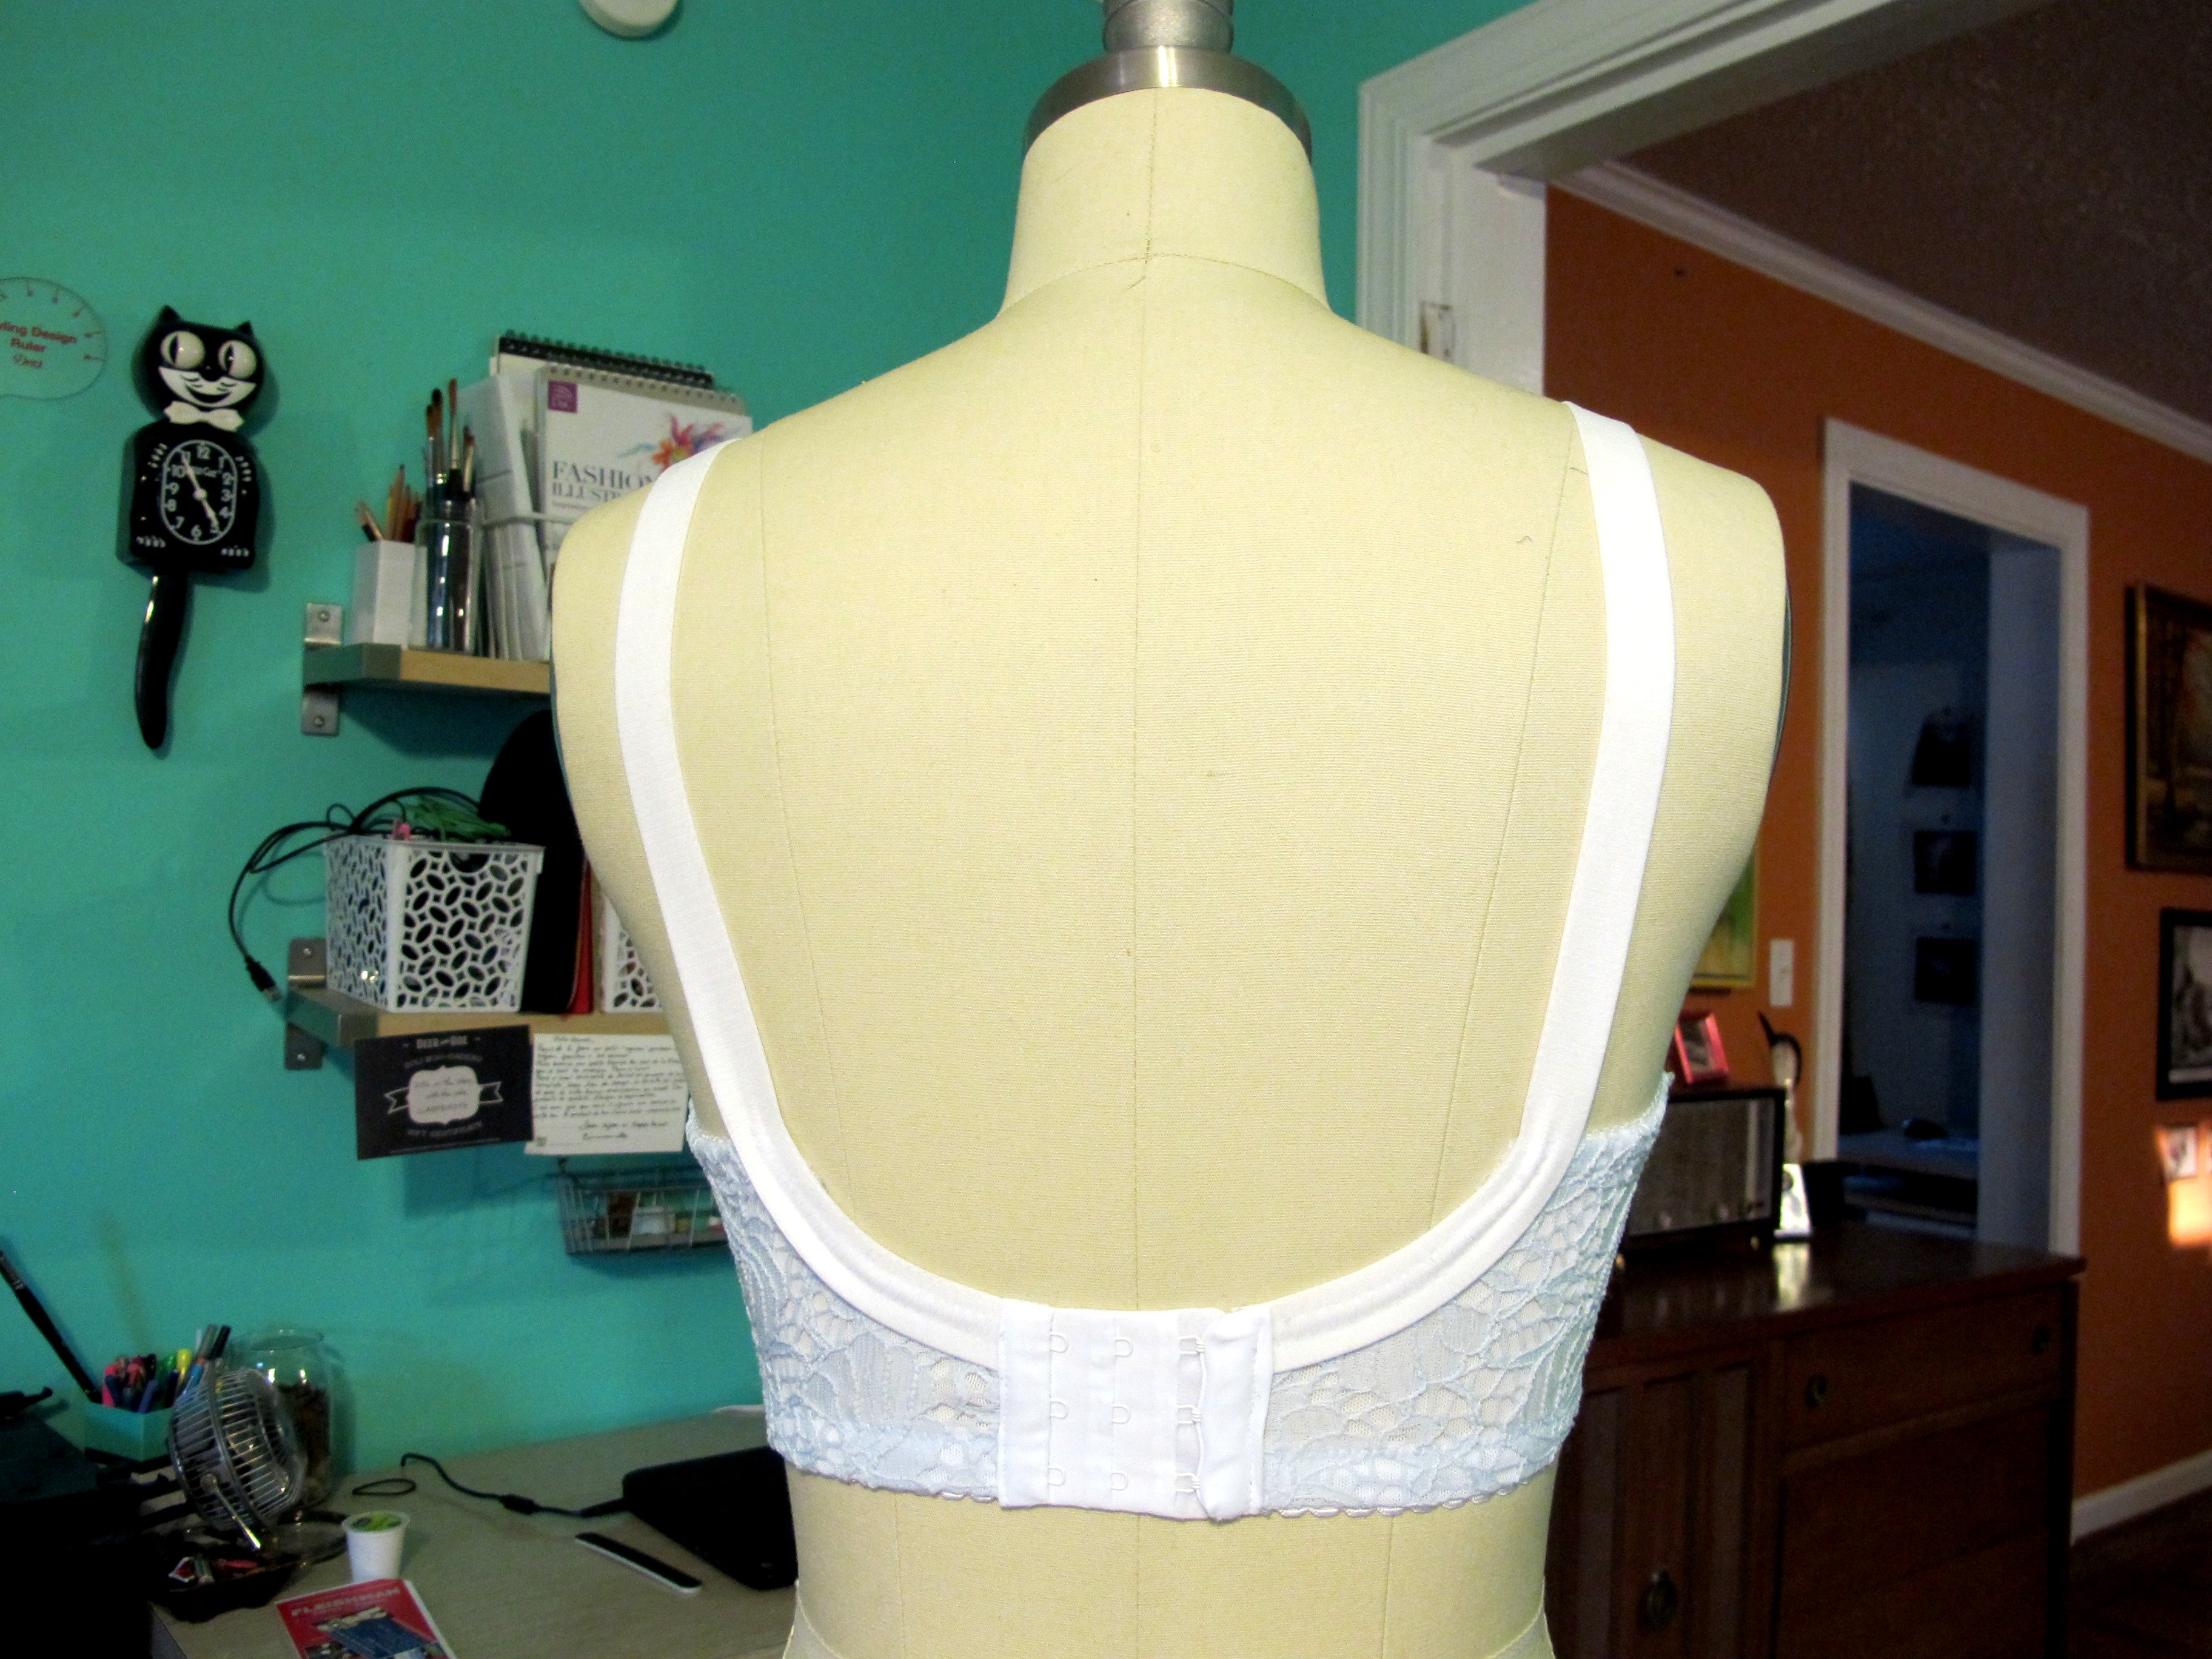
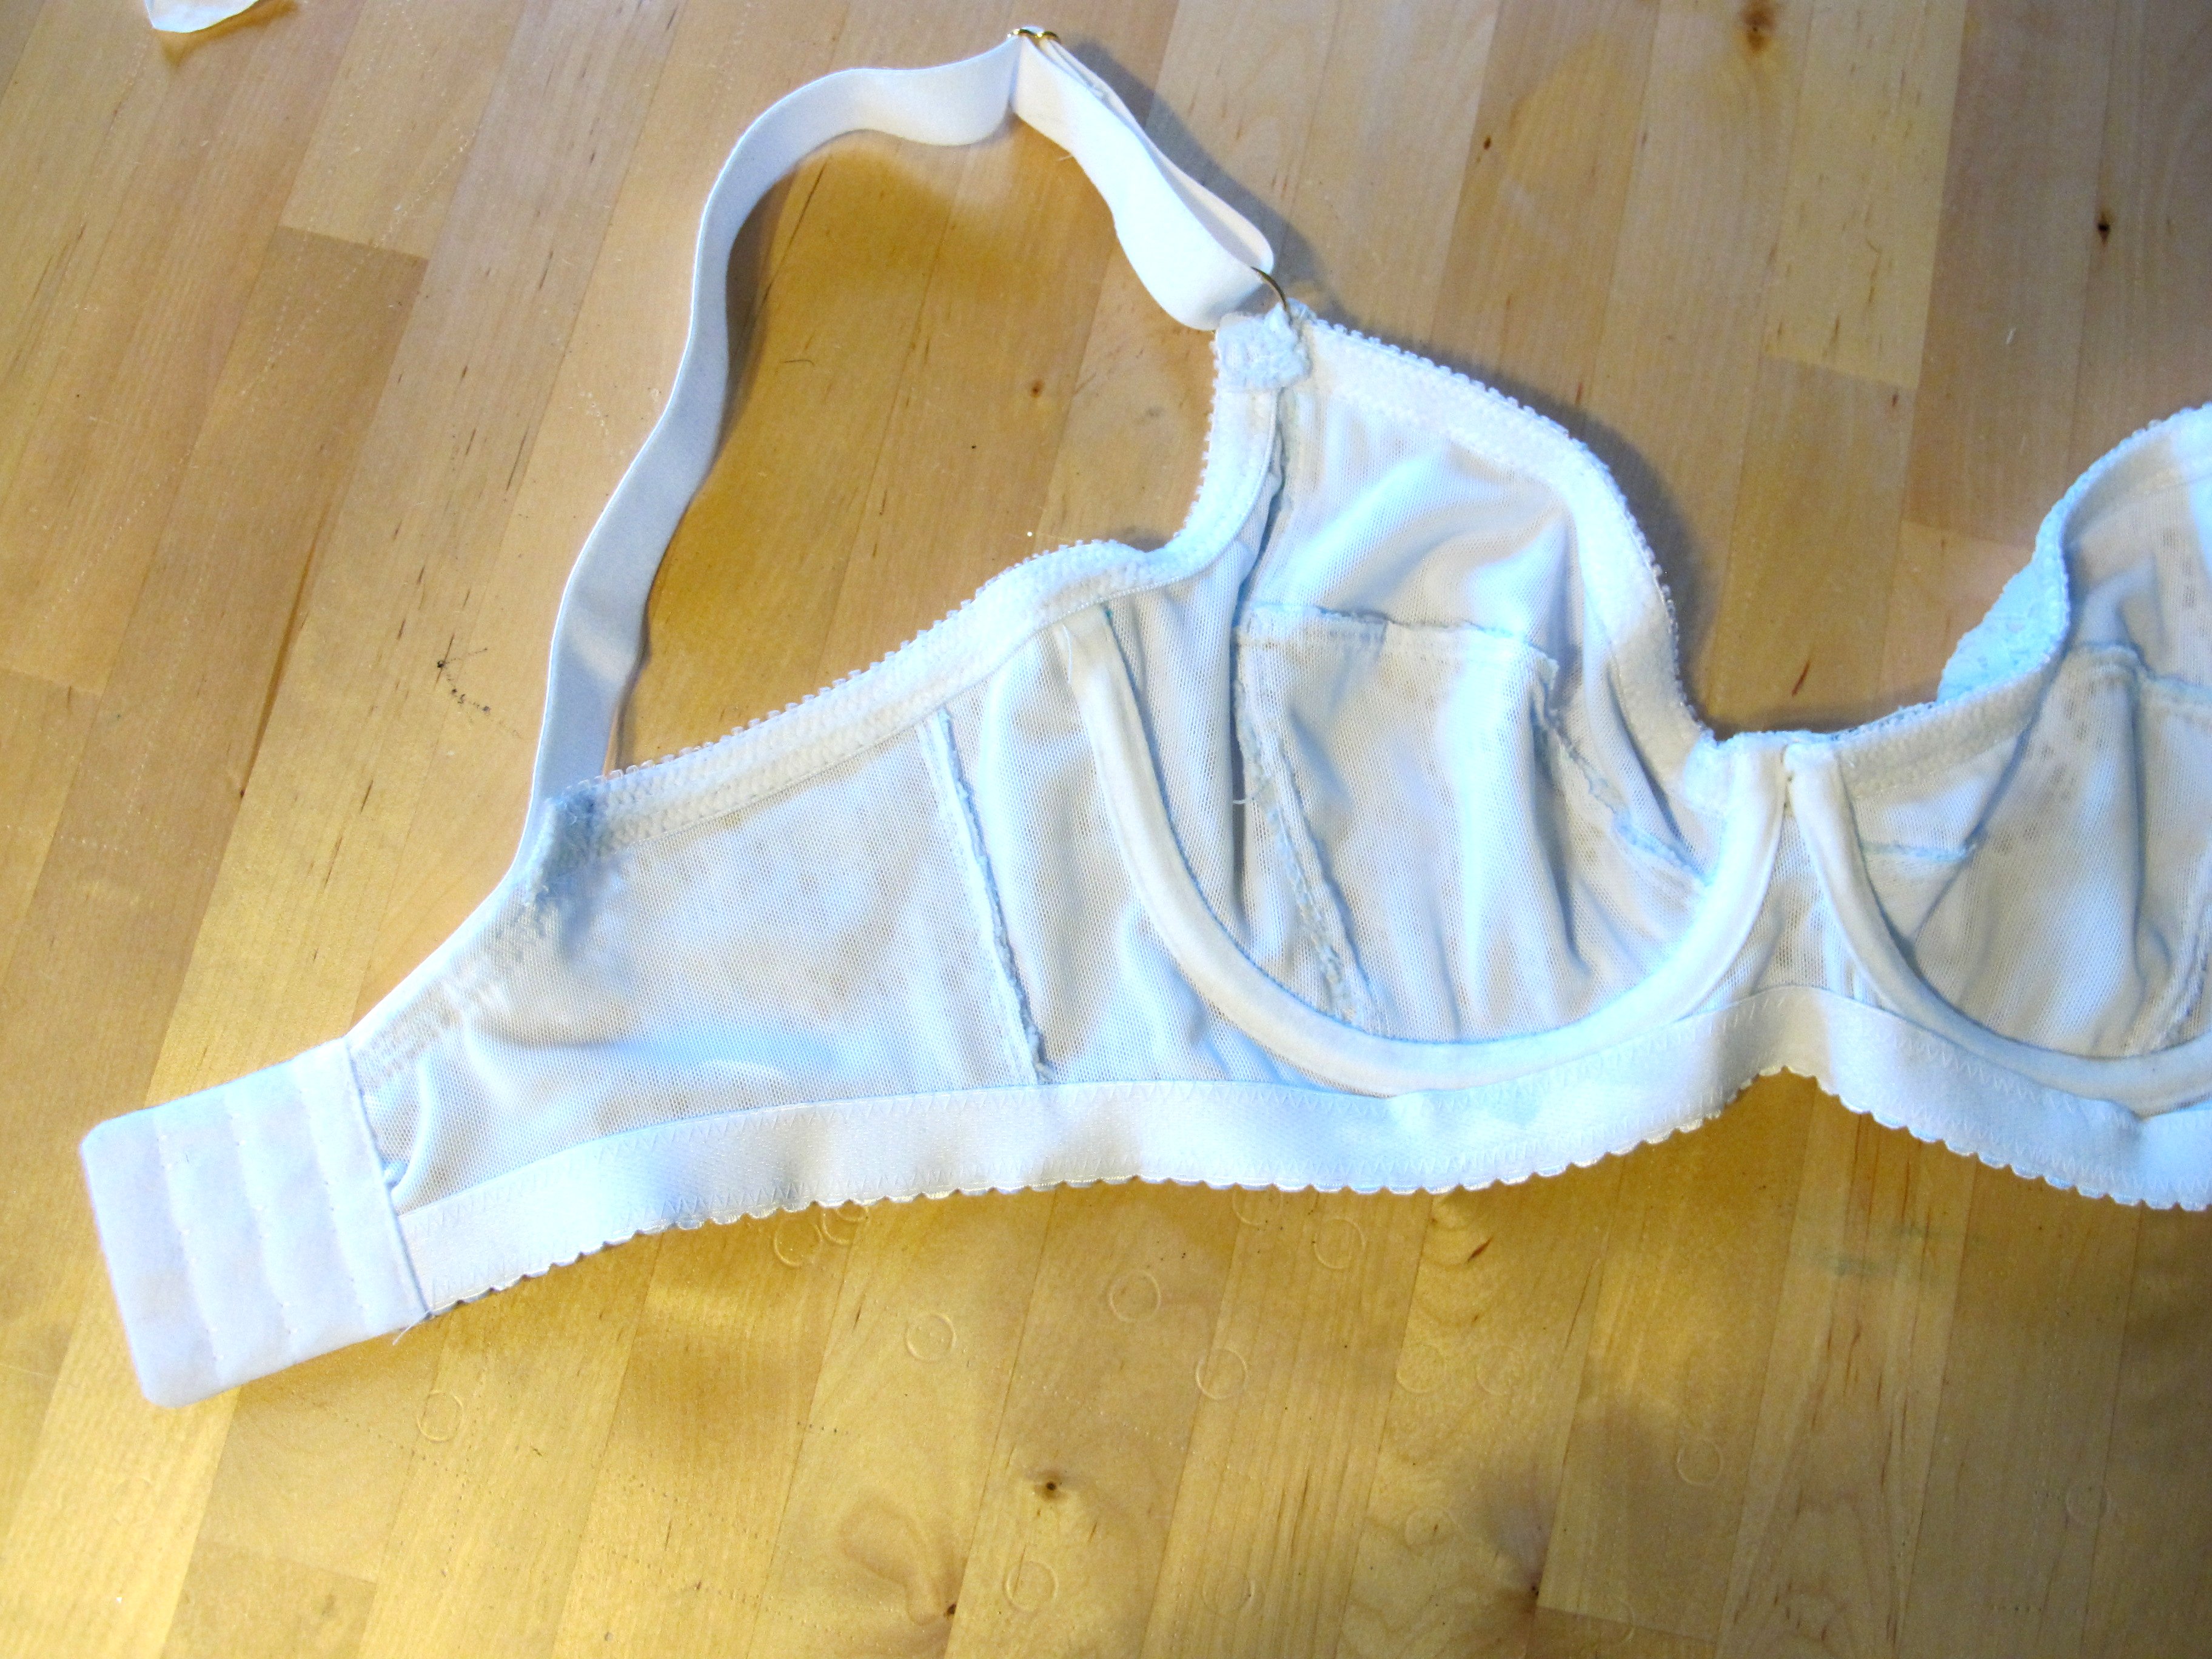
The cups and bridge are obviously cut from lace, with what little stretch there is going in the direction it’s supposed to. The bridge is also stabilized with the included lining from the kit. All the lace is lined with powermesh, and the back band is only power mesh (so it gets the stretch it needs). I’m really pleased to report that it fits very very well. The rigidity of the lace gives it quite a bit more support than the stretchier bra has, so that’s nice. Plus, it almost looks like a real piece of clothing now (I mean, not lingerie haha), with all the lace and shit. Now I’m wondering if this pattern would work with a bias-cut woven fabric for the cups and frame – that’s about the amount of stretch you get with this lace+mesh. Might be something to experiment with later!

Green and White Watson Bra

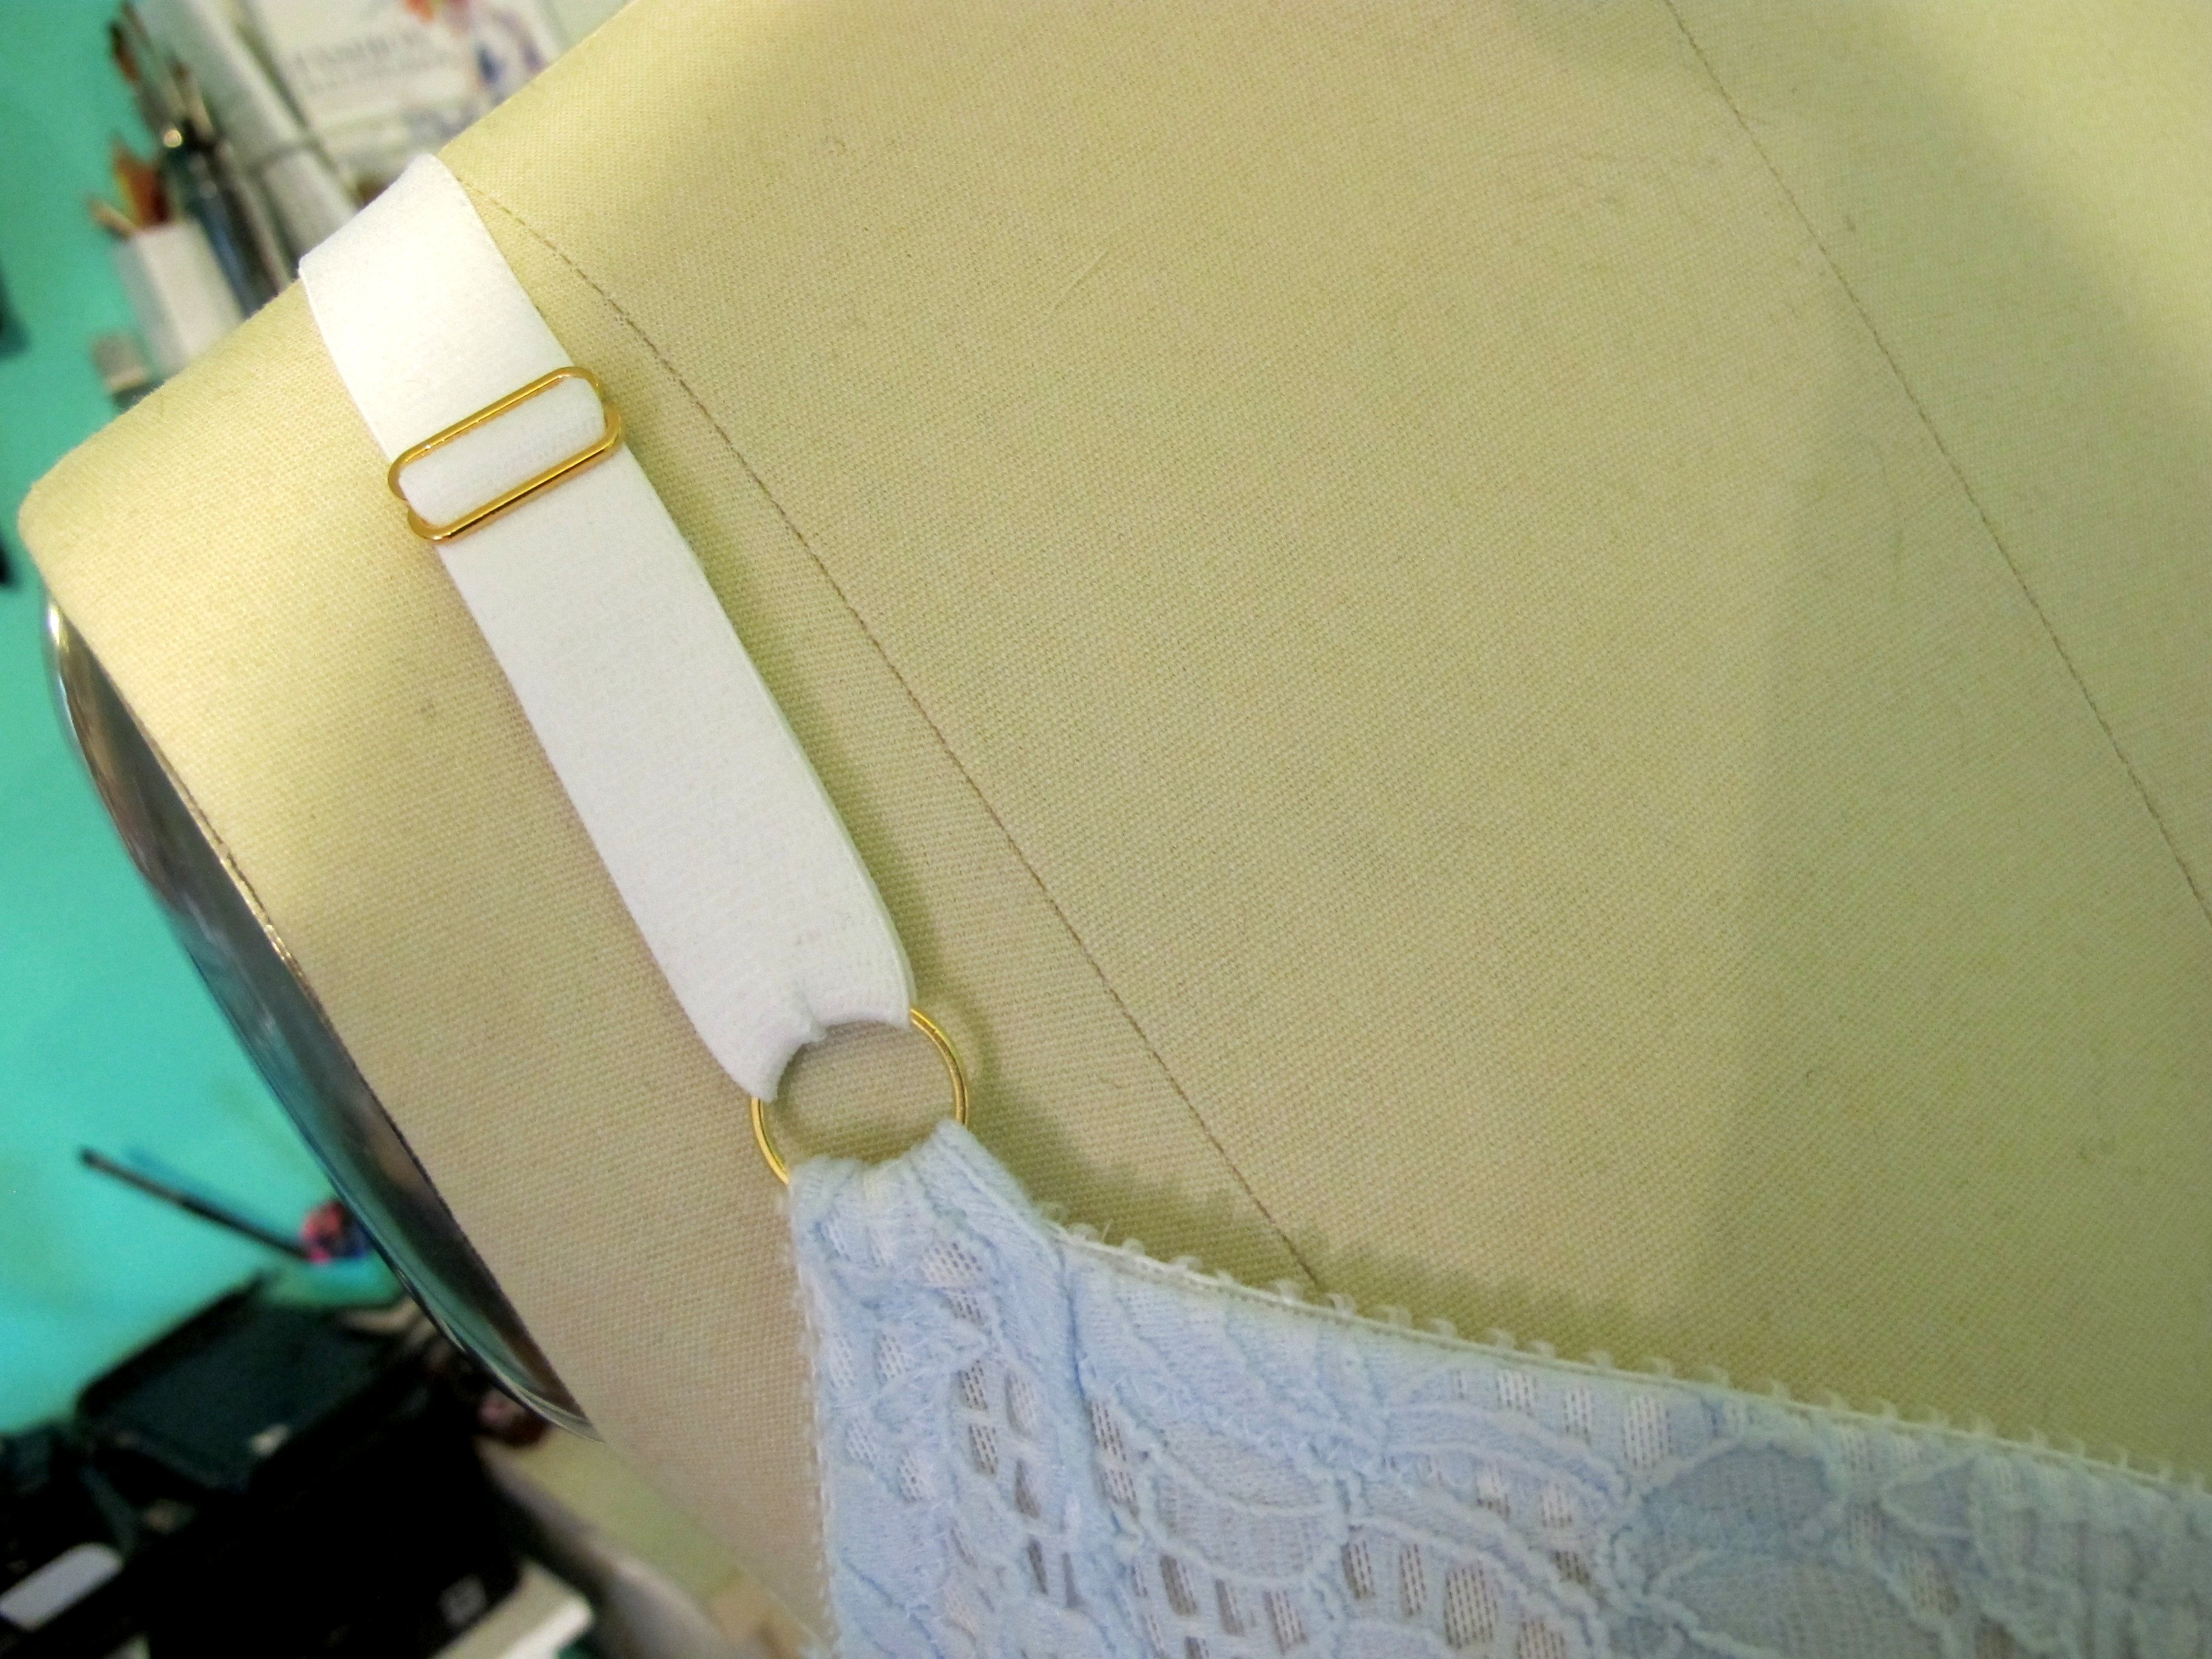
All the trim is white; pretty much the only green is the mesh. You can see that I used the picot lace elastic for the upper cups on this one, as well as the underarms. This kit only came with one trim, instead of two. I finished all the seams with the 3 thread overlock, same size and everything as with my last one.

Green and White Watson Bra

Green and White Watson Bra

I took a tip from Maddie’s bra making class and used a new method to cut this sucker out. First I used Sulky Temporary Spray Adhesive (that links to the exact one I use; but any temporary spray adhesive suitable for crafting/sewing should work), then I used a teeny tiny rotary cutter to cut all the pieces (this isn’t the exact one I used, but it’s close enough – 28mm Olfa Rotary Cutter. I got it in the bra making class I took). The spray adhesive held everything together while I sewed it, which was extremely helpful – especially when basting the lining to the cradle fabric. No wrinkles there, yay!

Green and White Watson Bra

Then I made the matching undies with the leftover! Didn’t realize the lace was supposed to be used for the front part (it’s in the project description now, but it wasn’t there when I bought it), so I just made the whole thing from powermesh. I used the wider elastic for the waist, and the decorative for the legs. These are okay; I need to practice more pulling the elastic because it’s not quite stretched enough. But it works well enough.

Anyway, that’s it! I love all these kit options for bras, because it saves me the headache of trying to source all the matching supplies myself (plus, I’m such a sucker for a good kit. Especially when it comes in it’s own box and everything is individually bagged; makes me so happy!). Now that I’ve used a few of the kits and gotten a general idea of what elastic to use in which part (and what it looks like, etc), I feel a lot more confident to buy all the supplies myself and not have to rely on a kit. That being said, I love the kits and I am looking forward to some new color options for sure!

Out of all the kits, I’m not sure if I have a favorite. I love the Bra Maker’s Supply ones because they’re really good and basic – everything is dyed the same color and it matches perfectly. The Grey’s Fabric kits are nice because they have a nice range of colors and they’re not just one solid color, plus, I like the pretty strap elastic and picot edged stuff too. I really love the hardware that comes with the kits from Blackbird fabrics, however, I think I prefer the more rigid lace + powermesh for a Watson, as opposed to the super stretchy millskin. Just a personal preference! The millskin almost feels like a swimsuit. If you’re trying to decide which kit to buy from where, I think it really boils down to your color preferences and how much the shipping will cost. There are lots of options, and they’re all really great!

Ok, I think I’ve done enough bra and boob talking for today! What’s your favorite bra out of these 3? Are you ready to start making your own now? Is there another kit option I should be looking into? I want to try the Merckwaerdigh kits next, I really love the color and pattern options!

Bra-Making with Madalynne

9 Feb

As you no doubt already know by now (mostly because I’ve talked about it to death by this point ahaha), I recently spent a long weekend in Philadelphia with Maddie, to help her set up for her bra making workshop – as well as attend the damn thing myself! I was obviously really excited for this adventure – for the hangs, to explore a new city (truth: the only time I’d been to Philly prior was for a one-way flight back to Nashville after helping my friend move to NYC when I was 22. A 14 year old boy hit on me while we were waiting for the plane to take off. I think he was the most traumatized between the two of us, though), and of course, because of boobs. And now you guys get to hear/see a recap! Yay!

049

I won’t bore y’all with a full weekend recap – I flew in on Thursday afternoon, and spent nearly the entire time up until Saturday morning with Maddie to help her prepare for the workshop. We ran errands, we prepped handouts and the (adorable) little kits, and helped with getting the machines set up in the space the night before. I was able to sneak away for a few hours with Andrea, who took me to the Mütter Museum (my request – and also this is your head’s up of knowing that Andrea is an amazing sport when it comes to visiting weird places with an almost total stranger haha) and her favorite yarn shop (where I bought sock yarn. It’s red. That’s about all that’s worth knowing :P).

089

No, what we are here to discuss is a recap of the workshop! Actually, I don’t think this post warrants too much typing – you can get a good sense of how things went just based by the photos alone (and yes, those were professionally taken. OBVIOUSLY my hands didn’t go anywhere near the camera that weekend, ha!).

029

Honestly, the entire day was more of an event and less of a workshop. I knew Maddie had something special planned when we were cahooting about this shit months ago (well, my side of the cahooting was just being a personal cheerleader. I love cheerleading my friends while they are doing amazing things 🙂 ), but I was surprised when I started seeing things coming together. Of course, I probably shouldn’t have been surprised – anyone who’s lurked up Maddie’s blog knows that that woman is all about turning everything around her into beautiful art (y’all should see her condo. I couldn’t even DEAL) – but yeah, it was all lovely. The production for the workshop, as well as all the styling and catering, was handled by The New Old Fashioned, and the event took place in the Love Me Do Photography studio. There was beautiful vintage furniture everywhere, fresh flowers, a never-ending supply of coffee (and later, prosecco. Yay!), a catered lunch, a light breakfast, adorable cakes, a photo booth – even a freaking spot to get your make-up professionally touched up. I’m telling you, this shit was an EVENT. It was amazing and there was obviously a lot of love and attention that went into every detail. Definitely not the kind of half-assed workshop that I’d throw together – but that’s what you get when you are dealing with Maddie. You get something that’s just as beautiful as it is useful.

031

To be completely honest, I wasn’t expecting to learn a whole lot at the workshop itself – I’ve already made a couple of bras at this point, and I have an ok handle on how they come together. I knew I’d be hitting Maddie up for fitting advice outside of the classroom, and I knew that the environment itself would be amazing and fun. I’m happy to report that I was wrong, at least in the subject of “learning new things.” I definitely learned a whole bunch of new tips and trips – a more effective way of cutting the fabric and lace, when to use certain zigzag stitches and widths, a way to beautifully finish the top of the bridge, amongst other things. And duh, of course the class was fun as HELL! I had such a great time meeting everyone, talking boobs, and making bras together. My kind of awesome day!

058

(I am sharing this photo because I have no idea why I’m making that expression! At least my hair color doesn’t look like swamp sludge haha)

168

167

152

Oh yeah – and the food was fucking fantastic!

065

132

085

Here are some more photos so that you can be good & jealous of our fabulous day. Our take-home goodie bags included those beautiful cookies, a tiny bottle of prosecco (again – yay!) and a fresh bouquet with a handmade medal.

104

105

111

We also had temporary sewing-themed tattoos – which, by the way, who else thinks Maddie should get a pair of shears tattooed on her neck? Amirite?!

180

181

177

I was REALLY excited to see that Carolina and Jen were also part of the class! I met both of these ladies last time I was in NY – Jen was one of my students in the Pants Making Intensive at WORKROOM SOCIAL, and Carolina randomly asked me for coffee (which clearly ended up being a match made in heaven – I mean, we make a pretty adorable prom couple). It was great to be able to see both of them – in a completely different city than before, even.

I know that my friendship with Maddie does make me a bit biased, but this workshop was seriously fabulous. I’ve never felt so pampered while in a class – it’s kind of a nice feeling (I might be kind of spoiled now! Ha!)! And, hey, the bra didn’t turn out so bad, either 🙂 Want to see?

IMG_1265

IMG_1269

If you recognize the fabric, it’s because I used it before on a Bambi bra; it was originally given to me from Maddie. Let me just say – the kits that we got with this workshop were seriously nice. Everything was included – all the fabric, notions, hardware, even a tiny rotary cutter and a really nice marking pen – and it was all super high quality stuff. I think most of it came from Bra Maker’s Supply – which, if you’ve ever ordered from them before, you know how nice their products area. No cheap plastic sliders or questionable elastic here! I would have found this very helpful had I been making my first bra – it gives you a good idea of what the good-quality stuff feels like, so you know what to shop for (plus, it’s easier to sew!).

IMG_1261

We used the Marlborough pattern for our bras; I brought my own copy (everyone got a copy with their kits) since I already had some fitting tweaks done. The lace we used is really stretchy, so everything is backed with power mesh to make it more stable. It still has more stretch than the duoplex I get from Bra Maker’s Supply, but the resulting bra actually fits pretty nicely! I’ve spared y’all the floating ghost bra photos for this post (mostly because I’m feeling lazy haha sorry), but, just trust me.

IMG_1268

IMG_1267

Our tableware at the workshop was tied with this cute twill tape that looks like a measuring tape – I saved a little piece to make a bow for my bra. Love it 🙂 And check out that pretty gold hardware! Honestly, that’s my favorite part of the whole damn bra. Looks so luxe.

Let’s see, what else? Sunday, Carolina & I walked all over Philly (ok, seriously, maybe 5 miles, tops. haha) and it was cold but also really fun! I really enjoyed getting to spend some time with her and get some bonding done. We visited Andrea at Butcher’s Sewing Shop, where she was teaching a class. Actually, we crashed that shit and drank their mimosas, but everyone was really friendly and the shop is just adorable. No ragrets. Finally, I made it home just before the next snow storm – and I’m happy to report that I wasn’t hit on by a 14 year old this time. Also, the Philadelphia airport is WAY nicer than I remember.

I had an amazing time – the workshop obviously being the highlight of the trip, but it was so wonderful getting to hang with everyone and meet some great new people (and reunite with people I know I already love 🙂 ). If you were interested in taking the workshop, but were put off by the price or didn’t know what to expect – hopefully this revs your engine a little 🙂 It’s definitely an experience! For a more in-depth recap, with lots more photos (as well as a run down of all the vendors who contributed to all the pretty that you see), check out Maddie’s blog.

175

I am just gonna leave this picture here, because I think it really illustrates the class well. There is alcohol and cookies on that table – and we can’t tear ourselves away from the machines. TYPICAL.

Disclaimer: I was given a free ticket to the Bra Making Workshop, in exchange helping with prep, set up, and trouble shooting – as well as keeping Maddie’s nerves calmed for her first class (I shit you not, she started VACUUMING her condo like 30 minutes before we had to leave that morning hahaha). I paid for all my travel and food expenses, but my workshop ticket was gratis! This review is just cos I think the class was awesome, and I wanted to talk about it.

Completed: The Watson Bra & Bikini Set

19 Jan

Hey look! I made another bra! And matching undies!!

Watson Bra

I’m loving my Marlborough bras so so much (yes, plural. I actually have two now, but I’ll save #2 for another post – this post is all about Watson), but I was really intrigued by the new Watson Bra pattern from Cloth Habit. Instead of a low movement fabric, this baby is sewn up in a fabric with lots of stretch. The cups are higher and more modest and there is no underwire. What really got my attention was the longline option, as well as the included bikini bottom pattern. SHUT UP AND TAKE MY MONEY!

Watson Bra

Since I’m still pretty new to this whole new world of lingerie, I let the pattern hold my hand when choosing a size and following the instructions. I measured to a 30D (to recap, in case there is anyone new here, I usually wear a 28DD), which fits pretty spot-on. Which is good, because other than hold the little cups up to my boobs while I was sewing them – I wasn’t able to actually try the thing on until I was completely finished with it. Talk about a bummer if that hadn’t worked out! Thankfully, the fit is pretty good. One cup has a tiny bit of sideboob action going on – but that breast is also slightly bigger, so I’m at the point now where I’m trying to decide if it’s worth tweaking the fit for a really custom bra. I’m pretty happy with the fit of the band – it’s nice and tight, like I like it, but it’s also very comfortable.

Watson Bra

The pattern has you cut the cups and cradle in a stretch fabric, the band in power mesh, and then the cradle is lined with a non-stretch to stabilize. Lining that section was obviously a little difficult for me – and I ended up getting quite a few folds as a result. Wah. For my next make, I am going to try fusing my stabilizer to see if that helps. It’s not the end of the world with these folds – but of course I’m always looking to improve.

Watson Bra

The bra includes standard bra hardware – hooks and eyes, adjustable straps, and decorative elastic. I do like that about the pattern, because it makes it look a lot less like some kind of soft training bra that a pre-teen would wear, and more like… a cute bra without underwires, I guess.

Watson Bra

Because of the needed stretch fabric, this bra doesn’t require the same sort of fitting that a structured bra would command (such as the Marlborough). It’s very soft and forgiving. The pattern is rated as being pretty easy and a great way to introduce beginners to bra-making. That being said – while I didn’t find the bra necessarily difficult to make, I do think that the Marlborough was easier to sew! Mostly because that lycra was stretching and sliding all over the place, and getting the cups in just so required quite a bit of precision. Still, it only took me a couple of hours to make, so that should count for something.

The instructions are pretty good! I might be biased – because I’ve already made two bras, I have my copy of Demystifying Bra Fitting and Construction on stand-by, and I’ve had enough bra-making conversations to know at least a little of what I’m talking about – but I found them very easy to follow along with. One part that was missing was determining strap length, but it’s my understanding that the pattern was updated with directions on how to do this (I personally just cut two 18″ straps. Worked perfectly! They are adjustable, after all). There were a few minor parts of the pattern that I changed based on preference – such as trimming the excess fabric before topstitching the elastic to the wrong side – but what’s included with the pattern is great as-is. There’s a lot of helpful info for choosing fabrics and trims, and tips for stitch settings when choosing your zigzag stitch. Also, there is currently an entire Watson Bra sewalong happening at Cloth Habit right now, so there’s that if you need even MORE hand-holding!

Watson Bra

Here’s an inside shot. As you can see, I did not finish my seams – just left ’em raw. It seems to work fine for my other bras, anyway. In the future, I’d love to learn how to properly finish my seams – or even line the whole thing – but I really want to nail down fit and technique before I start going too far down the deep end.

Watson Bra

Watson Bra

Rather than try to source all the materials and notions myself, I decided to splurge on a Watson kit from Blackbird Fabrics. The kit includes everything you need – 4 way stretch lycra, matching powermesh, elastics and trims, metal strap rings and sliders (stupidly, that was my favorite part haha. THEY LOOK SO GOOD), even the aforementioned cradle stabilizer and cotton knit for the crotch lining (for the undies, obviously). There’s enough in the kit to make both the bra and the matching bikini, and you can choose if you want a kit for the standard band or the longline. Since my boobs run on the small side, I’d reckon I could probably make 2 or even 3 bras with how much fabric I have left over (and maybe even a little bit of trim!). This color set is sapphire blue with black trims – and it’s soo beautiful! I can’t wait to see what other color combos Caroline comes up with.

Watson Bra

Watson Bra

Here’s the matching underwear – sorry it looks so unimpressive haha. I cut the XS based on my hip measurement (I was very apprehensive about this, as I normally wear a small), and the fit is pretty good. I think the butt area needs… something. Maybe I didn’t stretch the elastic enough. I feel like it makes my butt look flat, but Landon tells me I’m being ridiculous. Either way, they’re pretty comfy. I wore them all day yesterday and didn’t get a wedgie, which is awesome haha.

Since these posts are somewhat useless to me without a live model wearing the goods (if you want THAT, go holler at Heather Lou), here’s another floating bra photo for your consideration:

Watson Bra

For a non-underwired bra, it’s surprisingly supportive! I also wore this all day yesterday (with the matching bikini, bc, duh), and it’s really really comfortable. Way more comfortable than those Bambi bras I made. And it’s REALLY cute on – I am thinking that with a couple minor tweaks to the strapping and back hook, this would make a fabulous bathing suit pattern. I just need to figure out how to stabilize that cradle – it has to stay rigid, and I think the stuff I’m using isn’t really water-friendly (and definitely wouldn’t hold up in chlorine or salt water). Any suggestions or ideas?

Also, it’s not lost on me that I would consider making a bathing suit from this pattern, but can’t bear to show my skin with the bra in this blog post. Oh well.

Watson Bra

Watson Bra

Bra making is SO MUCH FUN, you guys! Good thing that happens to be a hole in my wardrobe, because I really love making them and I definitely want to do more! I’m really looking forward to the Bra Making Workshop in Philly next weekend – I have sooo much to learn, and I know Maddie is going to be an amazing teacher!

Completed: The Marlborough Bra

19 Nov

Omg, you guys! I made a bra!

Marlborough Bra

And not only that – it actually fits! It’s comfortable! And it’s PRETTY!

Marlborough Bra

Besides the little bralettes I played around with a couple months ago (which totally don’t count), this is actually the first bra I have ever made. The VERY first – it started as a wearable muslin, that is quite super duper wearable. In fact – wearing it as I type this! Can you tell how tickled I am with this turn of events? SUPER pleased with myself right now.

Ok, lemme back up a little bit and talk about the not-so-harrowing process of bra-making. The pattern I used to make this gorgeous gal is the Marlborough Bra from Orange Lingerie. I can’t even tell you how happy I am about the release of this pattern – after reading up on Norma’s (of Orange Lingerie) book Demystifying Bra Fitting and Construction after she sent me a copy a couple of months ago (as well as lurking hard on the beautiful custom lingerie she makes), I knew the pattern itself would be amazing, both in terms of fit and instruction, not to mention overall style. Spoiler: the pattern absolutely did not disappoint.

While I’ve had this pattern in my stash for a little while now, it took me a couple of months to muster up the energy to actually make it up. There is a LOT of info in the pattern – as well as on the Orange Lingerie blog – about choosing fabrics and notions. Orange Lingerie’s book, Demystifying Bra Fitting and Construction, is also a great resource, with whole chapters devoted to all the fine details. I ended up chatting Norma up via email for advice on what fabrics to buy, and she directed me to Bra Makers Supply (psst – the US version is Sweet Cups Bra Supply. It confused me at first, too, but the shipping is a bit more reasonable for those of us in America. You can click over to the US site from the main site, on the top right hand corner). They actually sell full bra kits that include everything you need to make a bra – the fabric & powernet, all the elastics and notions, even a tiny bow 🙂 The Marlborough bra was designed to be made of a fabric that has no stretch, and specifically, designed for the fabric that comes in these kits. So I bought two kits right away. There are ways to manipulate any fabric to get it to work for this pattern (which is outlined here), but for my first bra, I wanted to Keep It Simple, Stupid.

A few of things I want to point out about these kits:
– They don’t come with underwires. You have to buy those separately. I bought them from the same site to save on shipping. If you don’t know your underwire size (I did not), get your best guesstimate based on your RTW size/measurements and buy the next size up or down. I bought both the 34 & the 36. I ended up using the size 34 for this bra.
– The kits also do not come with lace. You’ll need to supply that on your own. I was all set to make this bra with my red kit, until I realized I didn’t have any red lace! So I’ll be looking for red lace in London. In the meantime, the black lace leftover from my Georgia dress worked nicely for this bra 🙂
– While the kits do come with elastic strapping, be warned that it is NOT enough for this pattern (Maddie warned me to this, and I didn’t listen to her at all because I’m an asshole. Then I had to go back and buy more strapping. Except I bought it from a different supplier, and it was a MILLIMETER more wide than what I needed, so it’s kind of hard to slide the sliders and rings. Argh!). I think the kits are cut for bras with fabric straps. Anyway, you’ll want to buy more strapping – either from Bra Maker’s Supply, or another vendor entirely. You’ll need at least a yard and a half, and the kits come with something crazy like 15″.
– Be mindful of what size kit you are buying. My bra cups are preeeeetty small, so I bought the small kits since I wanted to save on shipping as they weigh a tiny bit less. That fabric yardage worked out great, however, I didn’t think about the fact that my size really needs a 3 hook hook and eye! The small only comes with the 2 hook size. It’s not the end of the world (my bra is perfectly supportive with the 2 hooks), but you will need to recut the back band to fit the smaller size if that’s the case. Just fyi!
– I’ll also mention that the fabric that came in the kits, at first glance, looked really cheesy and cheap. It was REALLY shiny and my first impression was that it looked like a crappy Halloween costume. Ha! For one, you can use either side of the fabric (my shiny side is on the inside, so my bra is more matte). Also, it’ll look better when it’s sewn up. Just looking at a flat, shiny piece of fabric… well, it’s gonna look shitty no matter what. So there’s that.
– Speaking of shipping, Bra Maker’s Supply did refund me about half my shipping costs after they sent my order out. That kind of ruled!

Marlborough Bra

Based on my measurements and Norma’s email advice, I decided to make the size 30D. I typically wear a size 28DD or 30D in RTW, so pretty much the same. I actually compared the pattern pieces to my favorite lace RTW bra to see if they were similar, and they were almost exactly the same. Fit-wise, things are very close. The upper cups on my handmade bra are a little more snug than the RTW one, but the RTW one also has stretch lace for the upper cup (whereas on the Marlborough, the lace is rigid), so that might have something to do with it.

The Marlborough Bra pattern is very well-written and covers every step of the process, which is super helpful if you’re like me and have never sewn a bra before. There are tips on where to add topstitching, how to sew in the underwire channels perfectly, what pieces to baste on first so they don’t slip when you zigzag them on. In itself, the pattern is absolutely sufficient for making a bra. However, I did find it incredibly helpful to have Norma’s book at my side during the process. Whenever I found a step in the pattern confusing (more so confusing because this was new and alien territory to me – and less because the instructions were lacking), the book answered it right away. It’s also helpful because there are actual photos of the steps in the book, so if the diagrams aren’t doing it for you, you have back-up. Of course, I don’t think it’s necessary to have the book to make a bra – but I was happy to have it on hand.

Marlborough Bra

Marlborough Bra

The one part about the pattern that I didn’t like was that it wasn’t super clear on what pattern pieces to cut from what fabric. This stalled me for a couple of hours, actually – there’s some general info in the pattern, but I’m the kind of person who needs clear-cut specifics. After googling as many Marlborough bras as I could find, pouring over Norma’s book, and referencing Maddie’s bra-making guide from her Sewing Party class, here’s what I came up with:
– The cups, bridge and frame are cut from the main fabric from my kit. I cut them according to the grainline, since there is a slight stretch in the fabric.
– The straps were cut out of powermesh, with the direction of greatest stretch (DOGS) running around my body.
– Since my lace is stretchy, I lined it with more of my black fabric so it would be rigid (as the pattern calls for)
– I lined the bridge with a second layer of the same black main fabric

The kits also don’t tell you which elastic is for what. I wish I’d bothered to figure that out BEFORE I started sewing – as there is actually a cute little 1/4″ scalloped/lace trim for the upper cup. Instead, I used clear elastic on the inside of my cups. Womp womp. At any rate, I figured out the rest of the elastics pretty easily – just measure them and check the widths against the pattern notions list. One thing to keep in mind, again, is that the small kit has narrower trims. Since my size is a D, I should have had the large kit (and wider elastics, including straps). I did not, but the bra turned out fine. I feel supported.

Oh, and I did not finish my seams. I felt that focusing on construction and fit was more important for this go. I do want to explore seam finishing for future bras, though!

Marlborough Bra

All this aside, I had a LOT of fun putting this thing together! Omg! Once the cups were assembled, it really started to look like a bra and that’s when things got exciting. I got to usse all kinds of cool zigzag stitches (these are all covered in the pattern instructions) and play around with lace and trims. So fun! One tip I will give is to be careful with those 1/4″ seam allowances – if you’re not used to sewing them (I’m not), you might have issues with the machine trying to eat the edge of your fabric, especially if you’re sewing something delicate. I have found that by *very* gently pulling the thread tails away from you when you start each seam, it will guide the fabric along until your feed dogs have a good grip and you’re past the danger of your machine chomping a hole in your fabric. Just be sure to hold both thread tails and don’t force it.

Also, that favorite RTW bra that looks a lot like this one? I kept it on hand while I was sewing my Marlborough, so I could refer to it when needed. That was pretty helpful, especially when I needed to visualize how the elastic was supposed to look.

Marlborough Bra

Marlborough Bra

The only downside to bramaking is, unfortunately, it’s very hard to tell if the bra will fit until it’s mostly finished. Of course, you can mock-up with crappy elastics and temporary underwires, but because the fabric is so essential to determining fit, the mock-up needs to be of the same stuff (aka, not cheap muslin, or whatever). So it’s a bit of a gamble. I’m pretty thrilled that mine fits so well – although it can definitely use a little bit of tweaking before it’s perfect. I’ll let y’all know how that goes! In the meantime, here’s a somewhat awkward photo of how this one fits on me:

Marlborough Bra

Sorry that I had to totally erase my body (I’m not terribly shy, but, this is a public blog, after all), but this should give you an ok idea of how it looks. I’m actually pretty impressed! It’s supportive, it’s comfortable, and it’s SO pretty! Looks like a bra you’d buy in a store. Except better, because I made it 😛 As far as wearing it under clothes – it’s about the same as any seamed/lace bra. Not completely smooth (personally, that doesn’t bother me), but not super lumpy. Since this fabric is kind of thick, I’ve noticed that nipping isn’t too much of a problem, either.

I’m looking forward to making more of these! Once I tweak the fit, I want to try some different kits – I see that Grey’s Fabric has some beautiful kits, and I’ve also been eyeballing the ones from Hooks & Wires. Not to mention the famous Merckwaerdigh kits, the holy grail of all that is beautiful about handmade lingerie. I want to buy all white everything and try my hand at dying the whole set to match (there’s a short chapter on dying in Demystifying Bra Fitting and Construction, yes!). I want to explore trying new fabrics (I’m thinking this might be the PERFECT excuse to splurge on a tiny piece of Liberty fabric while I’m in London!), laces and trims, and mixing and matching for some cray combinations. I want to make matching underwear (yep). I also want to make a push-up bra, but that may require a different pattern 🙂 Making this one bra just has me itching to sew more! It’s SO satisfying! Have I convinced you to make a bra yet? Have I? Huh? 🙂

Bloggy Disclaimer: Norma sent me a copy of Demystifying Bra Fitting and Construction as a gift. I did buy the pattern and kits with my own money, just in case that wasn’t clear!

Ooh, speaking of London – a couple more things –
For those who have asked – there will be a meet-up on Saturday the 22nd! If you emailed me previously, you should have received the details of the meet-up a couple of days ago. Anyone else who wants to join (whether you didn’t contact me, or are just hearing about it now 🙂 ) – we will be meeting at Goldhawk Road at 10:00 AM. We will congregate outside the tube stop until 10 minutes after the hour, then we will be moving on to shop! If you would like to join the meet-up – please, come! You don’t have to email me to get an ~invite~ (nor do you need to have a blog to hang with us). If you can’t make it at 10:00 AM but would still like to try to find us later, you can either email me and I will give you my number (I plan on getting a SIM while I’m there, so it’ll be local!) so you can text me, or just tweet me. Come to buy fabric, come to eat and drink later – whatever works! This is an open invite 🙂

Also, the blog will probably be pretty quiet while I’m gone. I want to really enjoy my vacation and not be sitting at a computer all day! I will have access to the web and will respond to emails and comments as I can (and maybe squeeze a post in if I have downtime waiting at the airport or something), but I don’t have anything autoscheduled and I’m not bringing in guest posters or anything like that 🙂 I’m taking a break and I’ll be back in December! 🙂 In the meantime, if you want to lurk my trip – you can follow my Instagram and/or Twitter.

See y’all laterz!! ♥