Tag Archives: named

Completed: Pulmu Skirt Kit from Needle Sharp

15 Dec

Y’all, I love a good kit. I think I’ve mentioned this before, but I just want to reiterate in case you didn’t hear me the first time – I LOVE KITS. Something about having everything already picked + sorted, then corralled in its own little box just pleases me to no end.

So, today, I have another kit to show you. Or, rather, the results of a project from a kit.

Pulmu Skirt with Needle Sharp

A few months ago, I was contacted by Mary of Needle Sharp, who wanted to send me one of her kits to try out in exchange for some honest feedback. Now, if there is one thing I love more than kits, it’s sharing my opinion! Needle Sharp is a new company that provides sewing subscription boxes. There are 3 different levels to choose from – the Lightweight, the Mediumweight, and the Heavyweight (plus a Starter Box if you literally don’t have the tools), with 3 fabric options to choose from each category. Each month focuses on a theme – this month it’s pencil skirts, last month was wiggle dresses – and the boxes include everything you need to make the project, including pattern, fabric, interfacings and stabilizers, thread, notions, even machine needles. All you need to supply is the sewing machine and any tools (such as scissors, pins, chalk, etc).

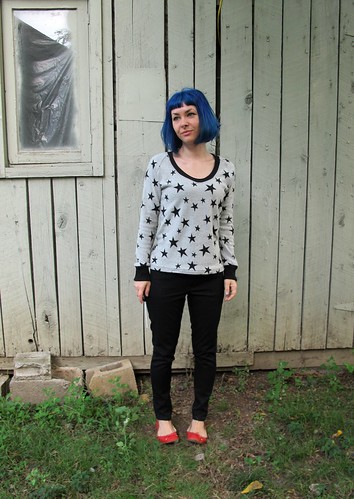
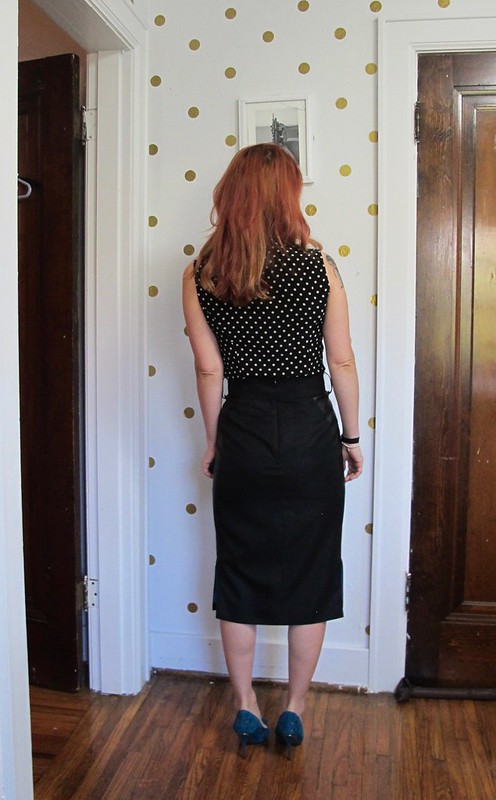
I was given several box options to choose from (including upcoming months that haven’t been announced yet!), and I went with the mediumweight pencil skirt box. I chose the rock’n’roll option – black polyester suiting, black pleather triangle inserts. Let me say this is a DEFINITE departure from my style (minus the black part) – I haven’t worn a pencil skirt in ages, and this one is long enough that it requires wearing heels or else it looks stupid – but I’m pretty into it!

I took some photos of the box before I tore into it, so here’s that:

Needle Sharp box

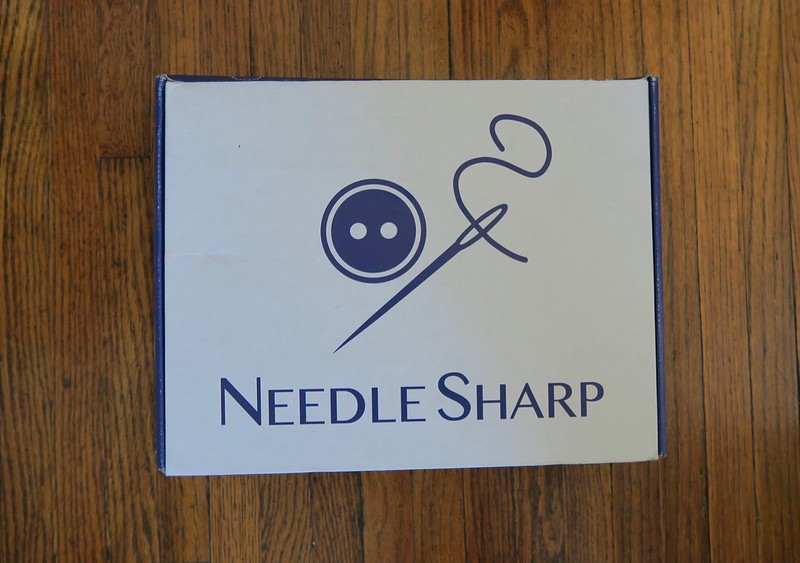
The box arrived on my doorstep with the logo clearly visible, so I knew exactly what was waiting for me (rather than it being a nondescript box that I ripped open with glee to realize it was just a bunch of Amazon books that my upstairs neighbor had ordered, ugh I’m still mad about that lol).

Needle Sharp tissue

Needle Sharp contents

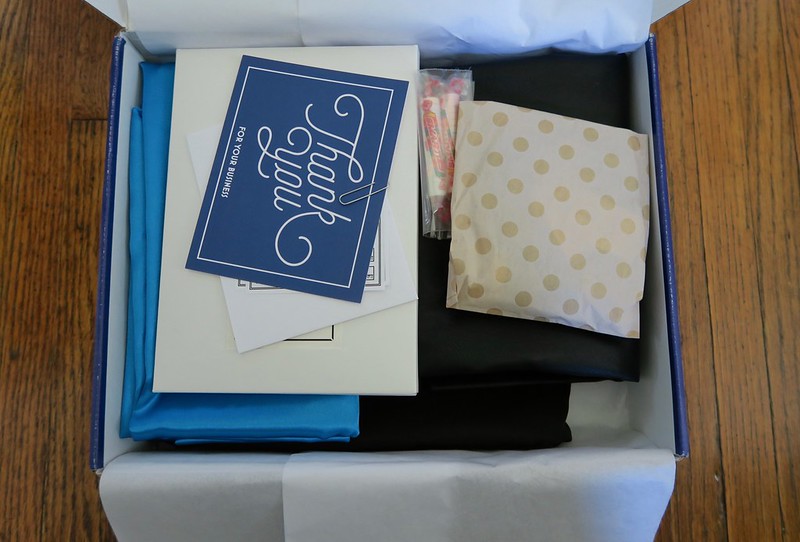
Everything was beautifully packaged, it looked like a present when I opened it. I didn’t take a picture of all the included stuff (well, I did, but it was a dumb and useless-looking picture so I deleted it), but my box contained the sewing pattern, suiting fabric, lining fabric, pleather, interfacing, 2 D rings, an invisible zipper, a spool of black thread, 2 sewing machine needles (80/12 and a leather needle – both clearly marked on a small card), and CANDY. TBH, the candy might have been the best part. I am always so tickled when I get surprise candy.

Needle Sharp fabric care

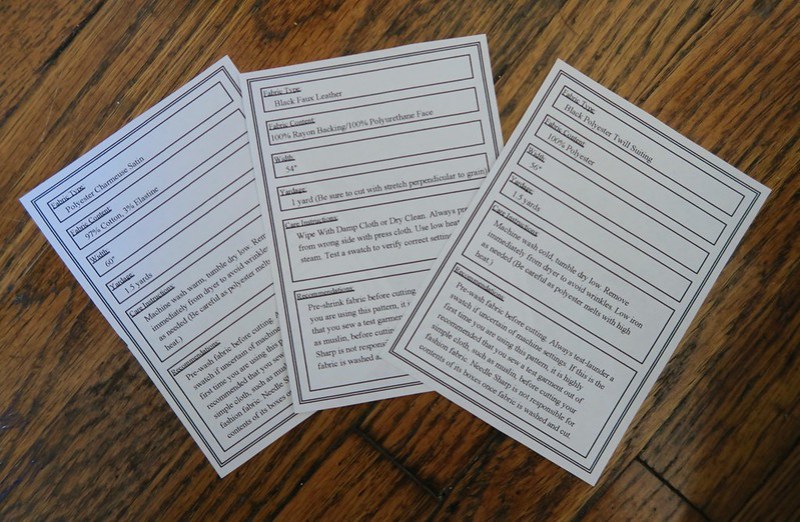
Another thing included in the box were cards for each piece of fabric, with yardage, content, and care instructions. I really appreciated this, since this information is rarely included with online fabric orders.

While I’m generally not a fan of polyester, the contents of this box were definitely a very high quality. It didn’t feel plastic-y like some polys, and in general the fabrics were easy to work with and handle. That lining shed all over the place like a bitch (a month later, I am still finding surprise tufts around my studio), but charmeuse has a tendency to do that regardless of whether it’s silk or poly. I especially loved the faux leather! It is a SUPER nice quality and actually looks like leather (as opposed to plastic, like a lot of the faux leathers I’ve seen). It is backed with a knit rayon, so it’s super easy to sew and doesn’t require a special foot (I did use the included leather needle). I received more fabric than I needed (each kit comes with enough fabric to make any of the sizes in the pattern), so I have tons to play with and put toward future projects. Pretty stoked about that!

Pulmu Skirt with Needle Sharp

So, now, let’s talk about the pattern – the Pulmu skir from Named Clothing. This was the pattern that was included in my box. As I’ve mentioned, a high-waisted pencil skirt really isn’t the kind of thing I wear these days, but I’m willing to branch out. I loved the way this one looks and I loved the idea of putting a cool fabric in those triangle inserts. This pattern is definitely a neat twist on an otherwise plain pencil skirt, and I’m totally into that.

With that being said, I feel like Named Patterns can be a little hit or miss. Some of the designs are cool (some of the designs leave me scratching my head. Sorry. I’m not a cool person.), the drafting is great and the pieces fit together well. The instructions make me want to SCREAM. Key steps are left out, additional wtf steps are included (like serging all the seam allowances – on a *closed* lined skirt. Really, dude?), but tbh I’m mostly mad because this pattern didn’t include any lengthen/shorten lines. Who does that?? And why??? So, that agitated me. Minor complaint, but frustrating nonetheless.

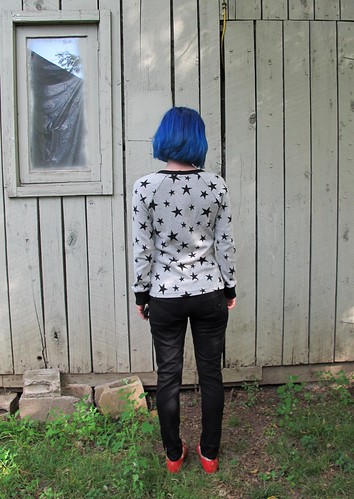
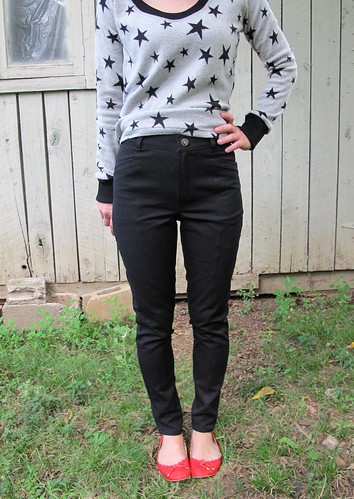
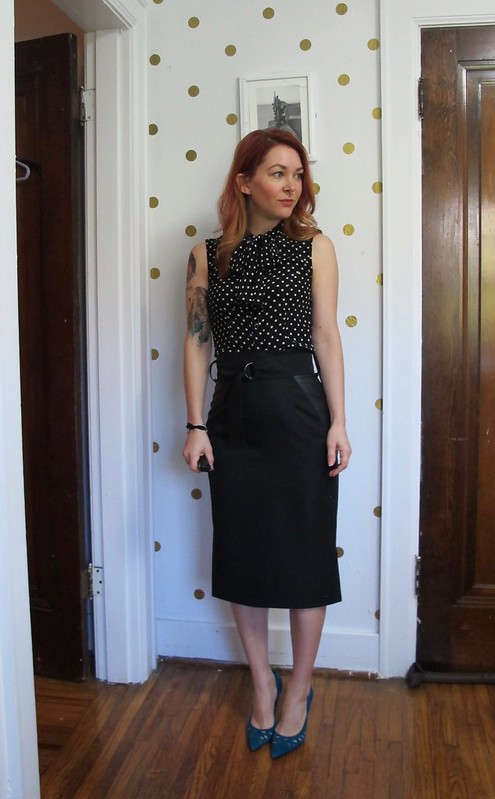
I knew this skirt was going to be long – the instructions state that the pattern is drafted for someone who is 5’8″ and to shorten if needed (again, then why the HELL would you not include lengthen/shorten lines, like, seriously dude), and I am more like 5’2″! The skirt is intended to hit calf length, and I was tempted to make it way shorter than that but decided to embrace that whole “wearing clothes out of my style comfort zone” and stick with the longer demure length. It does look cool, but the downside is that I have to wear heels or else I look frumpy. The upside is, I finally have something to wear these turquoise Jimmy Choos with, ha!

Pulmu Skirt with Needle Sharp

Pulmu Skirt with Needle Sharp

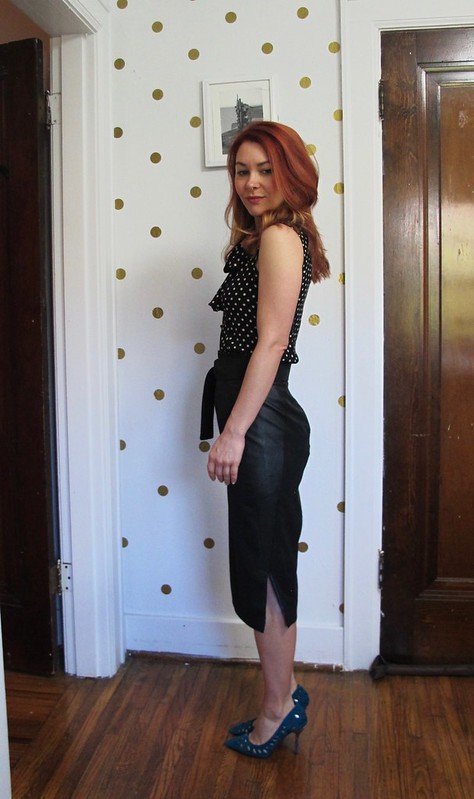
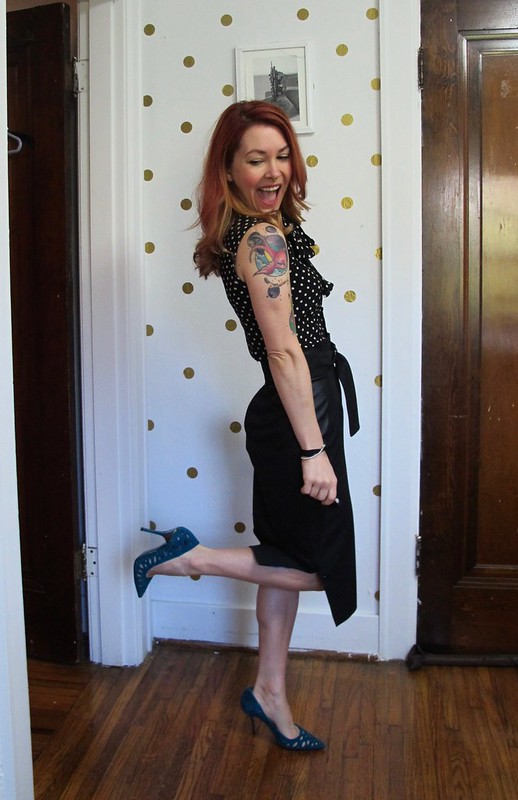
I mean, seriously, look at how fucking cool those shoes are.

In case you were curious, they are as uncomfortable as they look. I actually bought some new insoles to try out on these shoes and they have kind of changed my life – the Vivian Lou Insolia insoles, seriously amazing. My problem with heels is that all my weight gets pushed to my toes, and it gets incredibly painful really really fast (I took these photos before I tried the insoles and just the time it took to get pictures, my feet were screaming). These insoles redistribute the weight so your heel takes a lot of it, which makes the shoes easier to wear. I’m not delusional and I’m not going to tell you that these feel like sneakers now – but I can wear them and walk around and it’s way more tolerable. They are expensive for insoles – like $30! – but they have a money-back guarantee, so you’re not stuck with them if they suck. I’m pretty happy with this discovery!

And, in case you were wondering why I own a pair of designer shoes that I couldn’t even wear – my boss gave them to me (she never wore them either). I do not normally buy $1,000 shoes just for the hell of it 😛

Ok, moving on!

Pulmu Skirt with Needle Sharp

Pulmu Skirt with Needle Sharp_4662

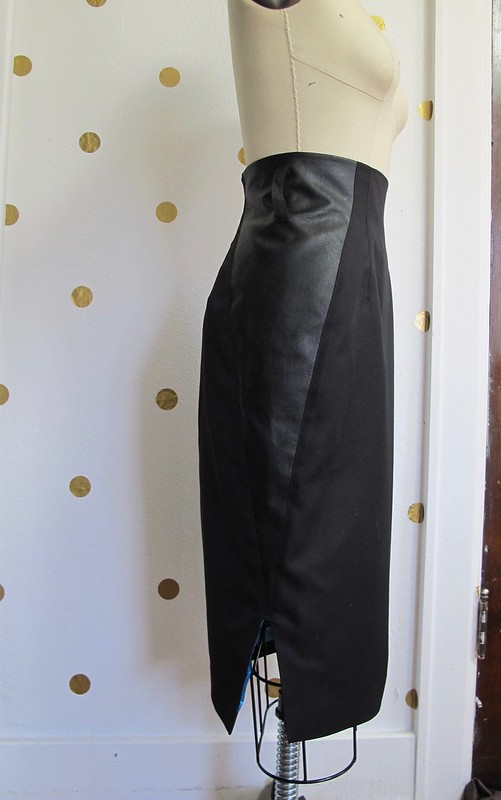
Based on my measurements, I’m a size 34 at the hip and between a 34/36 at the waist. I cut my skirt pattern between the 34/36 lines at the waist, grading down to a 34 at the hip to the hem. I also shortened the skirt by 2″ – which took a little problem solving on my end, as the skirt is pegged at the hem and has that triangular insert to contend with. What I ended up doing was shortening the skirt 1″ in two different places, which I think worked quite well. In addition to the pegged hem, the skirt has 2 side slits and an encased lining (it doesn’t hang free; it’s attached at the hem), so I wouldn’t be able to shorten the skirt after assembling it. Figuring out which 2 places to shorten was part of the challenge, but I ultimately went with around the hip area (which, strangely, is marked on the pattern), as well as a couple inches above the slits.

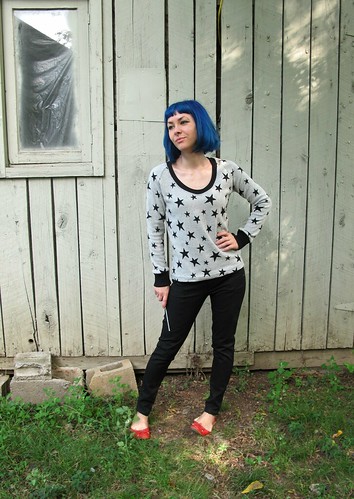
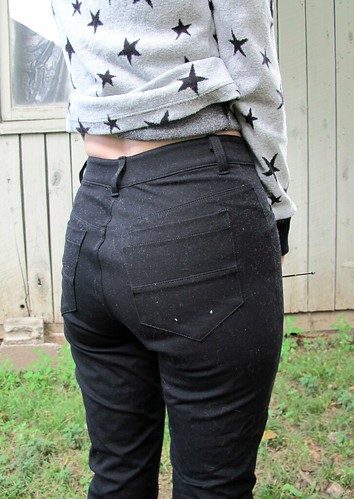
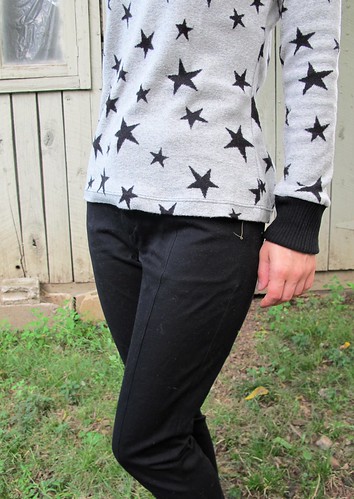
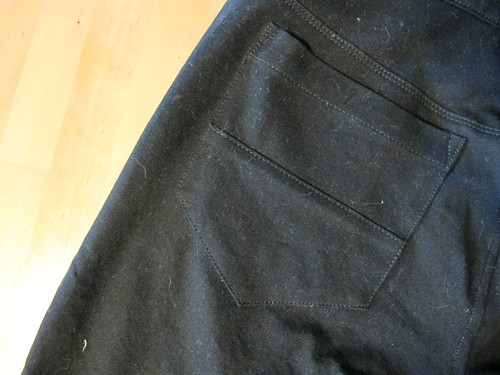
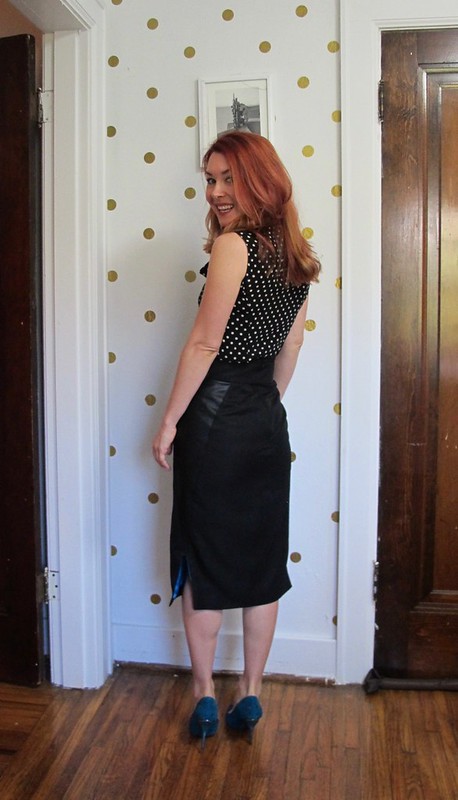
The waist fits great, but the hips could have stood to go up a size- as you can see, there are drag lines all over my butt. I’m not terribly concerned about it – the 3/8″ seam allowance means there’s not much room for fit adjustments, so I’m just gonna deal with what I was given here – but I’m certainly aware of it. Like I said, I cut my size based on my measurements, so I’m not sure if the finished hip is tighter due to my fabrics or an error in the sizing. The fabric recommendations on the pattern aren’t exactly helpful – they just say get fabric with “up to 5% stretch.” Oh, ok. To be fair, my leather inserts are stretch – but the lining isn’t, so it negates that. At any rate, I’m not concerned about it so whatever!

Pulmu Skirt with Needle Sharp

Pulmu Skirt with Needle Sharp

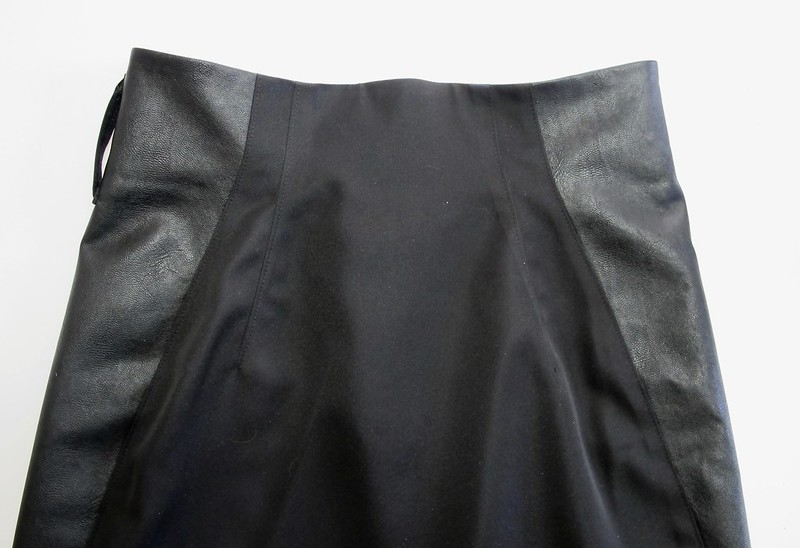
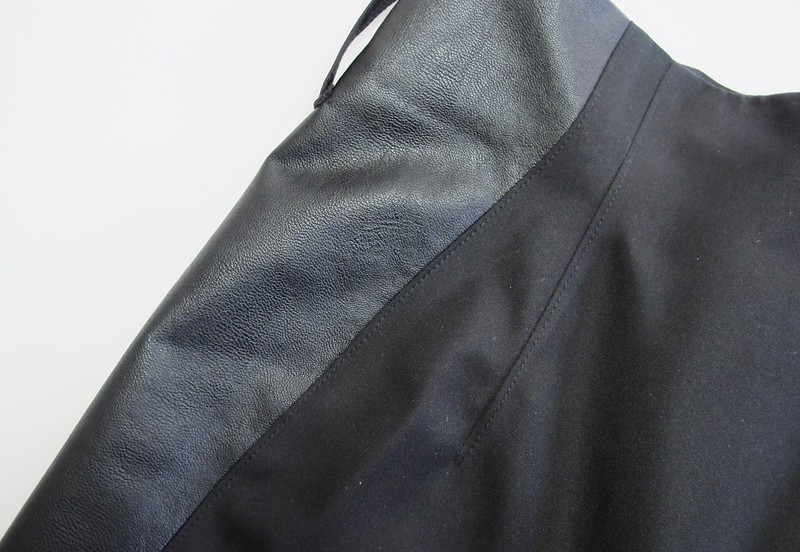
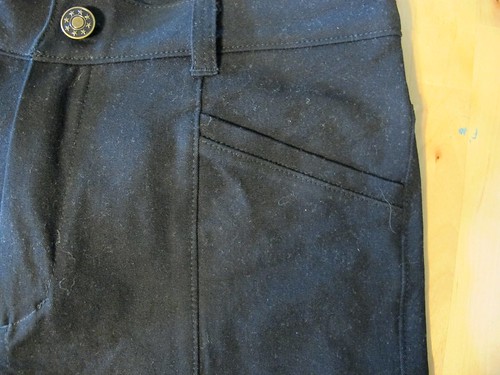
The poly + leather in this skirt pressed surprisingly well (I used medium heat, a presscloth, and a clapper to hold the heat in until it cooled), but I added a bunch of topstitching to get a really sharp edge. I topstitched all the darts, as well as the inserts, and I love the way it looks.

Pulmu Skirt with Needle Sharp

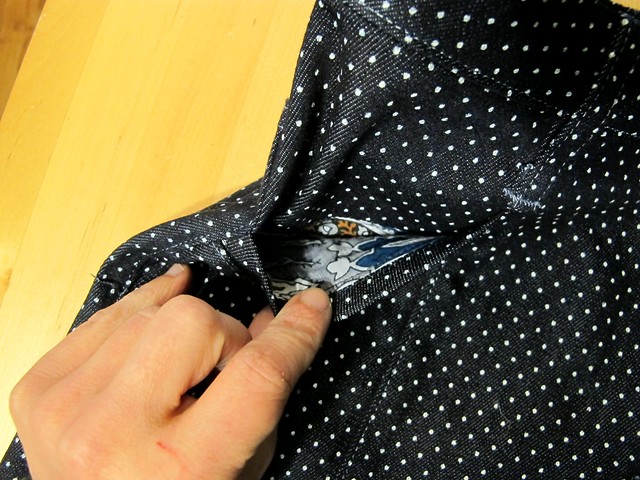
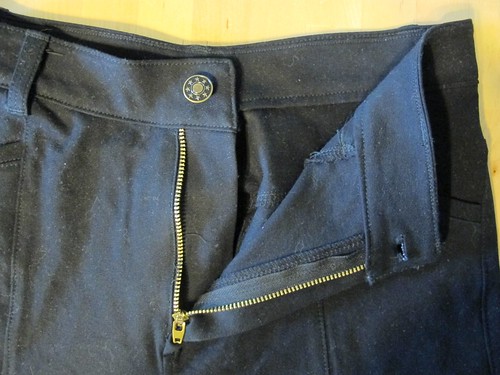
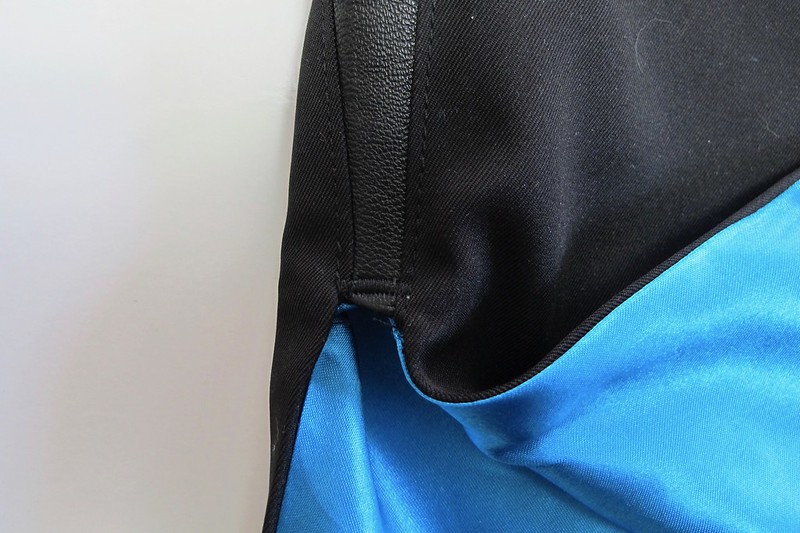
The skirt features a self-fabric facing to keep the top lining from peeking out, and the back closes with an invisible zipper.

Pulmu Skirt with Needle Sharp

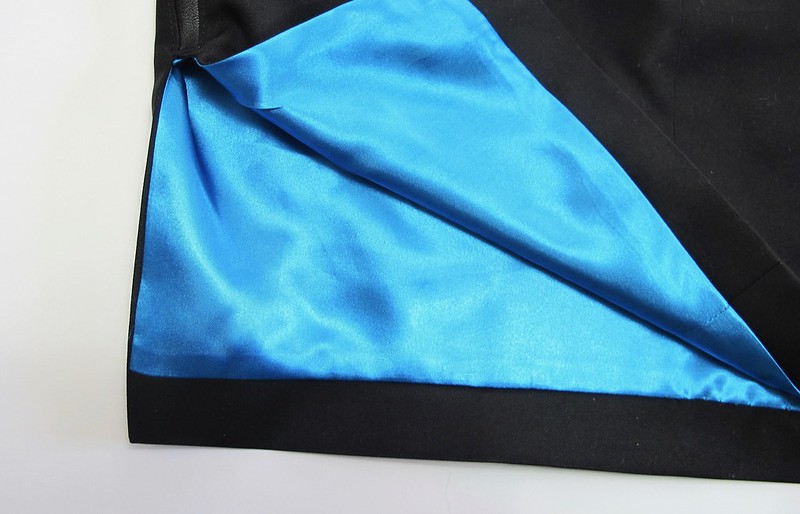
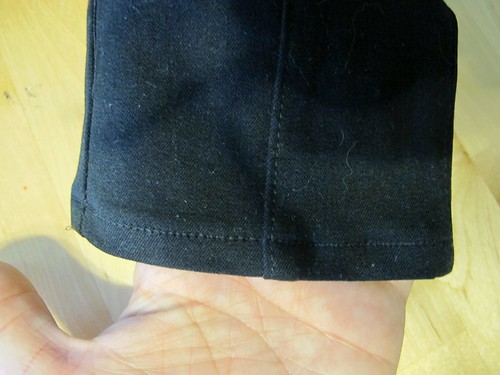
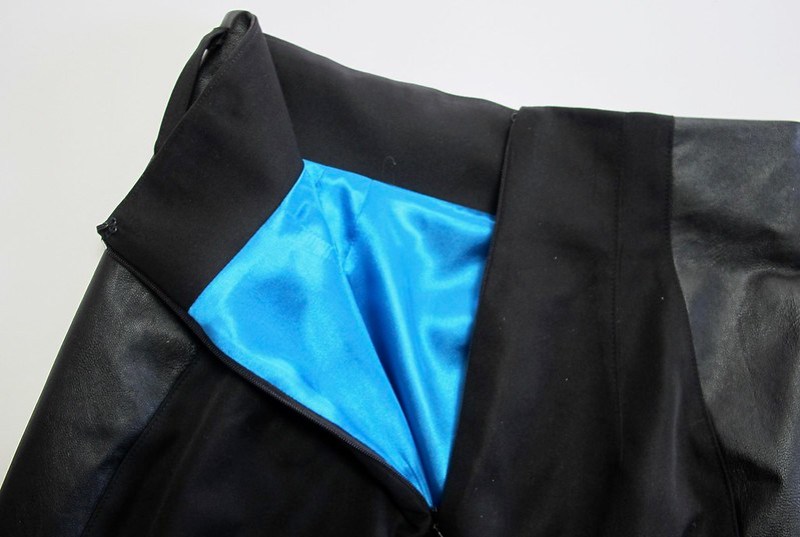
The “vents” are actually just slits. I love the look of them but be aware they are not faced like a true vent – so your lining fabric will show. This was my one complaint about the kit is the color of that lining fabric. I know that people love a contrasty lining, but I generally stick with neutrals, especially in a black skirt that is going to show the lining. Based on my feedback, the kits now have the option to choose your lining color (you can get plain black and be boring like me, or a fun contrast if that’s what you like!).

Pulmu Skirt with Needle Sharp

One thing I added was a small bartack at the bottom of the slit, to reinforce it from tearing. BTW, the slit instructions are… interesting. It’s not my cleanest work, but it’ll do.

Pulmu Skirt with Needle Sharp

Pulmu Skirt with Needle Sharp

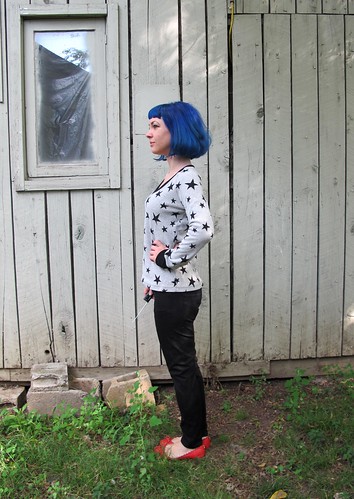
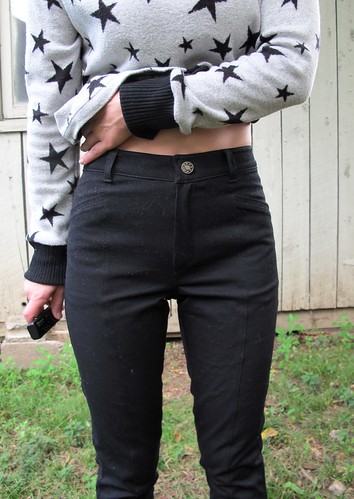
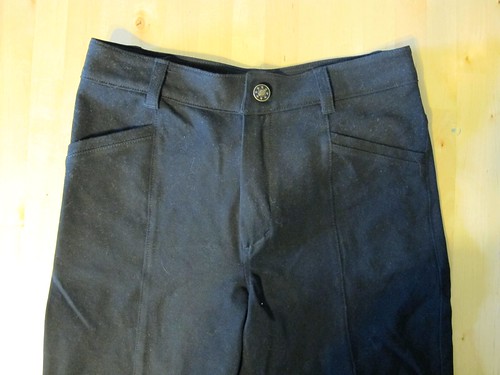
The skirt includes belt loops and a self-fabric belt that closes with D rings. I don’t know why I love that part so much, but I do. I’ve actually found other ways to wear the belt with different garments, so that’s a bonus!

Pulmu Skirt with Needle Sharp

I think that’s all the word vomit I have to say about this project! In short: the kit was great, and especially awesome for getting me to branch out a little, style-wise. If you are making this skirt (whether with a Needle Sharp kit or just because you own the pattern), I recommend sizing up at the hips, or using a fabric with some stretch (and making sure your lining stretches as well). And also check that length, because once you’ve sewn up the skirt you can’t exactly shorten it!

Oh, one last thing! If you want to try a box with Needle Sharp – use the code HOLIDAY10 to receive 10% off any box! This promo is good through 12/24/17.

** Note: All the supplies used to make this skirt were provided to me as a free kit from Needle Sharp, in exchange for my honest feedback. I was not required to post about this project, I just wanted to!

Completed: Dotty Jamie Jeans

12 Jan

In case you couldn’t tell, I spent the first weekend of 2015 making pants. You already saw my Ginger Jeans – now let’s revisit an old favorite! My beloved Jamie Jeans, I knew we’d meet again! ♥

Dotty Jamie Jeans

Ever since I made my first pair of Jamies in black stretch twill, I knew I wanted to make this pattern up again. I had a couple fitting changes that needed to be addressed – mostly reshaping the crotch (which I did on my original pair after they were sewn up, so it wasn’t reflected on the flat pattern) and pinching out some excess from the inseam. Knowing that the fabric I was using had considerably less stretch than the twill I used for the first pair, I decided not to remove any additional sizing/width, as that can be fairly easy to tweak during final fitting.

Dotty Jamie Jeans

I love this dotty fabric! You can’t see it too well (wait for the close-ups), but it’s a dark navy denim with tiny white pindots all over. LOVE IT. Been looking for something similar to this for yeeears. I actually found this magical piece of beauty all the way in Paris – it’s one of the fabrics from my coupon haul. I can’t remember exactly how much I paid for it, but I think it was around 10€ for 3 meters, give or take. A few other fellow meet-up-ers were also lurking on this shit, but thankfully there were quite a few pieces to go around, so everyone who wanted some went home with one 🙂 Yay!

Dotty Jamie Jeans

Dotty Jamie Jeans

Dotty Jamie Jeans

It’s kind of a peculiar fabric – a medium weight denim twill, and the dots are painted on (not printed). I can’t be 100% certain, but this may be the piece of fabric I accidentally dyed all of Landon’s undershirts with (sorry, Landon!). The back side does look like it bled a lot, but I also threw some black silk into that load – so who knows? Anyway. The fabric does have stretch, but not nearly as much as the twill – so I’m really glad I left off my additional sizing changes from the original pair (I believe I took out 1/2″ at the side seams, and even more at the center back and down the legs), because these are pretty snug as is! The denim is very stiff, but I’m hoping it relaxes a little more as I wear them. As of this posting, the only time I’ve worn them was during a really cold day, and I had on tights underneath to stay warm. Tights don’t make these pants super comfortable, but, then again – no pants are comfortable with tights underneath. So there’s that.

(Don’t look too closely, but I accidentally gave myself a weenie in one of those pictures lololol. Y’all are just lucky that I have no idea how to photoshpo that shit out haha)

Dotty Jamie Jeans

Dotty Jamie Jeans

I think they fit quite a bit better than the black pair I made, but there’s still definitely room for some improvement. Need to shorten the crotch length just a little more, and also remove some more width from the upper inseam. I also need to add some width to the calves – they are REALLY tight, like painted-on tight. It’s not uncomfortable, and I don’t think it looks bad – but I also can’t wear tall socks with these pants haha. Which I guess doesn’t matter for this particular pair, bc I think they look best with ballet flats, but, you know. Future Jamies. Fuck. I’ll get it eventually!

Dotty Jamie Jeans

Dotty Jamie Jeans

Having made these before and writing such a long post about the construction and fitting process, I don’t think there’s much else to add. I guess it bears noting that I didn’t bother with flat-felling the seams like I did on my jeans – I just serged and topstitched and called it a day.

Oh! I can talk a little about the waistband. Since the denim wasn’t as beefy as the denim for my Ginger Jeans, I did interface the waistband. I used lightweight knit fusible for the facing side. I love this interfacing because it gives a minor amount of support (enough to keep the waistband from collapsing on itself), but it doesn’t affect the stretch factor. Which means they’re still comfy, woohoo! Also, one fitting change I made for this pant – and possibly future pants, maybe – was to cut the one piece waistband into two pieces, so they can angle right at the center of my lower back (pretty much the same waistband as is on the Thurlows). This produces a much better fit than the single piece waistband does for me. There is a seam there now, but it’s covered by the back belt loop.

Dotty Jamie Jeans

NOW you can see the dots! And isn’t the topstitching pretty? I used light blue denim topstitching thread (it ain’t anything fancy – just a spool of Gutterman that I picked up from Joann’s), which gives an interesting contrast to the dark blue fabric. The silver jeans button is also from some class of big box fabric/craft store (either Joann’s or Hobby Lobby, I don’t recall) – I bought a pack after the button on Landon’s Gap jeans wore a hole through the waistband and fell out. You know what, after typing that, I don’t feel bad about dyeing his tshirts now. Who do you think sewed a patch on those jeans and hammered in a new button? ME, that’s who. Just don’t tell him how much I secretly enjoyed it hahahahaha

More gut pictures for your perusal~

Dotty Jamie Jeans

Dotty Jamie Jeans

Dotty Jamie Jeans

Dotty Jamie Jeans

Dotty Jamie Jeans

Dotty Jamie Jeans

This is me trying to show you the cool pocket fabric haha. Leftover from one of these dress, by the way!

Dotty Jamie Jeans

I think I’m about pants’d-out for the next couple of weeks (until I get my hands on some red twill, anyway, heh heh heh), but I feel pretty good about the two I’ve accomplished! Big ol’ snaps for ringing in 2015 with two successful projects! Hopefully that’ll be a recurring theme for the rest of this year 🙂

As a side note – WOOF, my hair color is faded. Can you believe the photos were taken maybe 2 days after I shot the Ginger photos? I didn’t do anything to my hair during that time (I only wash it once a week), other than style it – the only thing different is the lighting. Kind of crazy how much of a difference it makes!

Sweaters & Skinnies for Fall!

24 Sep

Ok, I’ll admit – when I first started working on this outfit, the air was a LOT more fall-like than it currently is at the moment. Stupid fickle season, ha!

Jamie Jeans + SJ Sweater Made with Mood Fabrics

Anyway, I’m totally a trooper so I’m modeling this outfit for y’all nonetheless (photos taken early morning before the temperatures got too high, because, woof.). My first real cold-weather makes – like I said, it’s a little early in the season here, but I like to get a head start so I can actually start wearing this stuff when the weather cools down 🙂 This outfit – or at least the skinnies – is also part of my London wardrobe. I’m officially less than 2 months out, EEEEEP! – so it’s time to really start cranking down and getting my wardrobe act together. Since I’m very limited in suitcase space, I’m trying to capsulate everything to mix and match. So I can bring less clothes, so I can bring home more fabric 🙂 You know – priorities!

ANYWAY, I have a lot of ground to cover with these two pieces, so let’s get started! Sorry in advance for the big photo overload!

Jamie Jeans + SJ Sweater Made with Mood Fabrics

Let’s start with the sweater. I bought this fabric last month while I was in NYC. This was my first non-spring trip to the city, which meant my fabric shopping was focused on woolens and winter weights (instead of summer fabrics, which I am usually bee-lining for in March). I immediately found this star printed WOOL sweater knit, and promptly flipped my shit over it. It’s SO fabulous – and soft! Even softer than you can imagine, forreal. At $25 a yard, it wasn’t the cheapest sweater knit – but stars and wool? Totally worth it. Plus, it’s not like a sweater takes a lot of yardage – at least not for me. I bought a yard and a half (and I have some leftover.. hmm, what to make with?).

Jamie Jeans + SJ Sweater Made with Mood Fabrics

The pattern I used to make this bad boy was actually suggested by Devra (who also bought some of the prized star wool knit, after I peer pressured her into it 😉 ) – the SJ Tee from Papercut Patterns. I made a wearable mock-up before the real deal – which I will show y’all later this week – so I was able to figure my fitting before cutting into my precious wool knit. I cut a size XXS and took 1″ out of the center back. The length is the long version (aka, not cropped) and the sleeves are long as well.

Jamie Jeans + SJ Sweater Made with Mood Fabrics

I used rib knit to finish the neckline and cuffs – it was in my stash, I have no idea where it came from. This knit was way stretchier than the sweater knit, so I had to keep retrying the neckline to get it to lie flat. I ended up cutting the rib to half the length of the neckline and stretched the everloving shit out of it – it could still stand to be a little tighter, but this will do. The neckline also can’t stand to be a little lower, it’s already a little risque (which I LIKE!). The cuffs are a bit looser than I’d prefer, but I wanted to be able to push the sleeves up, like so.

Jamie Jeans + SJ Sweater Made with Mood Fabrics

I sewed the entire sweater on my serger – you could use a sewing machine (this particular knit does not unravel or shed), but serger is faster 🙂 I did use a twin needle to topstitch the raglan lines, as well as the neckline & hem. Really loved topstitching this sweater; the stitches just sink right in and look soooo good!

Jamie Jeans + SJ Sweater Made with Mood Fabrics

For the black skinnies, I used a really great stretch twill. I’ve had some hits and misses when it comes to stretch bottom weights – they tend to be a weird weight (either too heavy, or not heavy enough), and the stretch can bag out over time. One thing I’ve learned is that you need a pretty high spandex/poly content to get them to snap back into shape – 5-10% – and you need to make sure they are bottom weight. I actually made Heather Lou source this fabric for me, also in the Mood store. We were initially looking for black denim, couldn’t find a good one (I still don’t really know what constitutes as a good one- you’ll have to ask her! I just blindly followed, ha), and decided on the twill. We did end up finding a black denim, fyi, but not at Mood. Once I sew that one up, I’ll share more about it 🙂

Jamie Jeans + SJ Sweater Made with Mood Fabrics

Anyway, this twill is great! It’s pretty similar to what you get with stretch RTW pants – thick enough for a bottom weight, but not tooooo thick (I still only used an 80/12 needle, so no heavy denim shit or whatev). The stretch is crazy good, and it actually snaps back into shape. I can’t give y’all a true verdict on a full day’s worth of wear – the weather jumped back up to hot, so I haven’t had a chance to wear these yet. However, I tried the jeans on a LOT during construction, and they haven’t bagged out yet. So that’s a good sign!

The only drawback to this stuff is that it attracts cat hair like a magnet. It’s not as bad in real life as it is in photos (else I would have lint-rolled that shit, I mean, come on), but it also doesn’t bother me that much. When you have a cat and you wear black pants, cat hair is sorta just a way of life, you know?

Jamie Jeans + SJ Sweater Made with Mood Fabrics

The pattern I used to make the skinnies is the Jamie Jeans, from Named. I’ve actually had this pattern in my stash for a few months – my friend Carla bought me these (plus a few other Named patterns) as an early birthday gift earlier this year. Then I was a total ass and didn’t do anything with them until just now 😛 Hey, it’s been too hot! Anyway, I’m glad I put these off because there is no way I would have had such stretch twill success if it hadn’t been for Heather doing that side of the shopping for me. So there’s that.

Jamie Jeans + SJ Sweater Made with Mood Fabrics

Anyway, this was my first experience with Named. My understanding is that a few things have changed since they initially released this pattern – for one, the instructions include some diagrams now (they used to be text-only), and the prices are a little more competitive. The pieces also aren’t quite as overlapped as they were the first go-round – because, ugh, tracing patterns, ugh. I only had to trace the waistband for these. Everything else was, thankfully, not super overlapped.

I started with the size 2, and made these initial modifications, based on my muslin:
– Added 1″ to the back crotch, for butt room
– Removed 2″ of length at the legs
– Removed 5/8″ at the center back yoke, blending to 1/4″ at the bottom (where the pants meet the yoke)
– Removed 1/4″ from the center back, blending to nothing

Once I started sewing, I ended up doing a few more fit adjustments. I don’t know why these weren’t prevalent in my muslin – perhaps my fabric wasn’t quite stretchy enough? At any rate, these are my additional modifications (and now you know why I pulled them on and off so many times!):
– Sewed the side seams at 1/2″
– Took a 1″ wedge out of the center back of the waistband, tapering to nothing at the bottom
– Removed an additional 3/4″ from the length
– Did some crazy witchcraft to reshape the crotch to be a J (again, NO IDEA why this wasn’t an issue with the muslin, but argh – at least I fixed it? Mostly.).

Things I will change for my next rendition:
– Need to remove some length from the front crotch – you can see that it’s slightly too long (it’s not toooo bad – I doubt anyone will point and be all “HA HA YOUR CROTCH IS TOO LONG HA HA!” But I know it’s there and hey, it bothers me, ok?). Maybe 3/8″ish.
– Rescoop that J a little more out of the crotch. It’s still not perfect, but it’s damn good considering that I did this while the pants were already mostly assembled (for those of you who are all, “Wtf is this J crotch you keep talking about?” Here’s the post where I talk about my pants adjustments, including J crotches. Also, in case you were wondering- those crotch rulers *do* work. I found one in Elizabeth’s studio last week, immediately stuck it on my crotch – and hey, there’s a J! Cool!)
– Need to take a little pinch of fabric out of the inner leg seam – maybe 1/2″

Despite my nitpicky fit adjustments, these aren’t so bad! I’ll still totally wear the shit out of them, at any rate.

Jamie Jeans + SJ Sweater Made with Mood Fabrics

Constructing these was REALLY fun! The instructions – honestly, they’re kind of useless about 70% of the time, but I’ve made enough pants to where I don’t really need them. The seams are all finished with my serger – except the crotch seam, which is flat-felled – and I made use of my edgestitching foot to get all that beautiful topstitching. For the waistband, I used fusible tricot knit interfacing – I fused both the outside and the facing, to give it some stability but retain that lovely stretch. The button & jean zip are both from Pacific Trimming in NYC.

Jamie Jeans + SJ Sweater Made with Mood Fabrics

I really love the back pockets! And hey, that double line of stitching at the yoke? That was done with a single needle, twice. No twin needle!

Jamie Jeans + SJ Sweater Made with Mood Fabrics

For the hem, I used the lightning bolt stitch, so it would retain some stretchiness. It looks pretty similar to a straight stitch, but it, you know, stretches.

What else? Here are some sweater close-ups:

Jamie Jeans + SJ Sweater Made with Mood Fabrics

YUM!

Jamie Jeans + SJ Sweater Made with Mood Fabrics

One last thing – here’s the little watercolor fashion illustration I made for this outfit. GOD, I love painting watercolors! So much fun!

Jamie Jeans + SJ Sweater Made with Mood Fabrics

Ok, I guess that’s it! Now if the cooler weather could please come back – I hate working up a sweat while I drink my morning coffee 🙂 Oh, and in case you were wondering – that’s a fresh dye job you’re looking at, in regards to my hair! I love how neon electric is is 🙂 Yay for fun-colored hair!

PS: Ralph Rucci V1419 Sewalongers – in case you missed it, there’s a new post up on the McCall blog regarding the sewalong. Just some general housekeeping, including blog buttons (yes!) and social media chat. The burning question this week – for general sewalong chat outside of our blogs, do y’all prefer to use a Facebook page or a Flickr Group? Trying to decide which platform to us. Let us know which side you swing!