Tag Archives: soft bra

Completed: The Watson Bra & Bikini Set

19 Jan

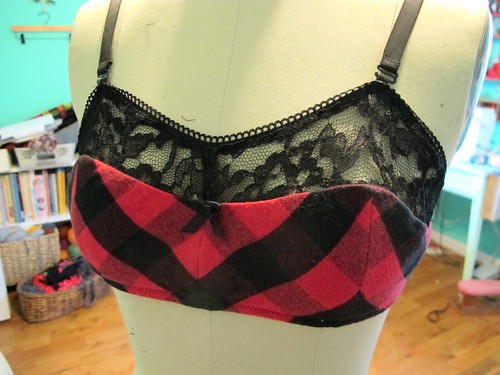
Hey look! I made another bra! And matching undies!!

Watson Bra

I’m loving my Marlborough bras so so much (yes, plural. I actually have two now, but I’ll save #2 for another post – this post is all about Watson), but I was really intrigued by the new Watson Bra pattern from Cloth Habit. Instead of a low movement fabric, this baby is sewn up in a fabric with lots of stretch. The cups are higher and more modest and there is no underwire. What really got my attention was the longline option, as well as the included bikini bottom pattern. SHUT UP AND TAKE MY MONEY!

Watson Bra

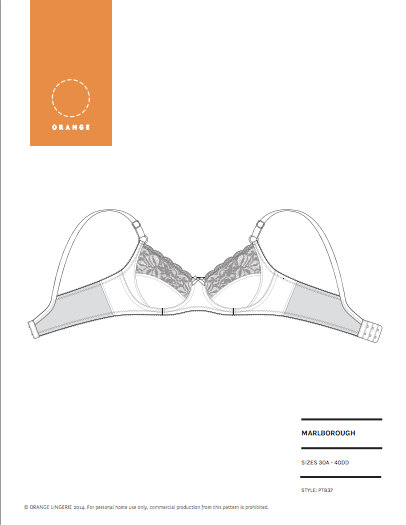
Since I’m still pretty new to this whole new world of lingerie, I let the pattern hold my hand when choosing a size and following the instructions. I measured to a 30D (to recap, in case there is anyone new here, I usually wear a 28DD), which fits pretty spot-on. Which is good, because other than hold the little cups up to my boobs while I was sewing them – I wasn’t able to actually try the thing on until I was completely finished with it. Talk about a bummer if that hadn’t worked out! Thankfully, the fit is pretty good. One cup has a tiny bit of sideboob action going on – but that breast is also slightly bigger, so I’m at the point now where I’m trying to decide if it’s worth tweaking the fit for a really custom bra. I’m pretty happy with the fit of the band – it’s nice and tight, like I like it, but it’s also very comfortable.

Watson Bra

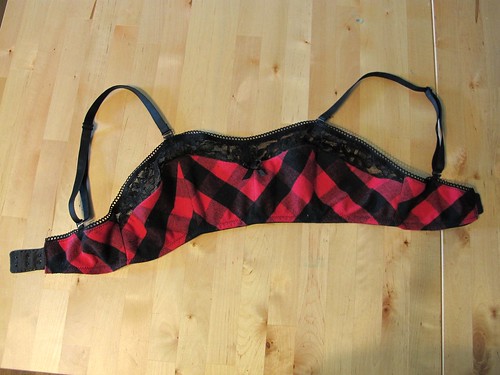
The pattern has you cut the cups and cradle in a stretch fabric, the band in power mesh, and then the cradle is lined with a non-stretch to stabilize. Lining that section was obviously a little difficult for me – and I ended up getting quite a few folds as a result. Wah. For my next make, I am going to try fusing my stabilizer to see if that helps. It’s not the end of the world with these folds – but of course I’m always looking to improve.

Watson Bra

The bra includes standard bra hardware – hooks and eyes, adjustable straps, and decorative elastic. I do like that about the pattern, because it makes it look a lot less like some kind of soft training bra that a pre-teen would wear, and more like… a cute bra without underwires, I guess.

Watson Bra

Because of the needed stretch fabric, this bra doesn’t require the same sort of fitting that a structured bra would command (such as the Marlborough). It’s very soft and forgiving. The pattern is rated as being pretty easy and a great way to introduce beginners to bra-making. That being said – while I didn’t find the bra necessarily difficult to make, I do think that the Marlborough was easier to sew! Mostly because that lycra was stretching and sliding all over the place, and getting the cups in just so required quite a bit of precision. Still, it only took me a couple of hours to make, so that should count for something.

The instructions are pretty good! I might be biased – because I’ve already made two bras, I have my copy of Demystifying Bra Fitting and Construction on stand-by, and I’ve had enough bra-making conversations to know at least a little of what I’m talking about – but I found them very easy to follow along with. One part that was missing was determining strap length, but it’s my understanding that the pattern was updated with directions on how to do this (I personally just cut two 18″ straps. Worked perfectly! They are adjustable, after all). There were a few minor parts of the pattern that I changed based on preference – such as trimming the excess fabric before topstitching the elastic to the wrong side – but what’s included with the pattern is great as-is. There’s a lot of helpful info for choosing fabrics and trims, and tips for stitch settings when choosing your zigzag stitch. Also, there is currently an entire Watson Bra sewalong happening at Cloth Habit right now, so there’s that if you need even MORE hand-holding!

Watson Bra

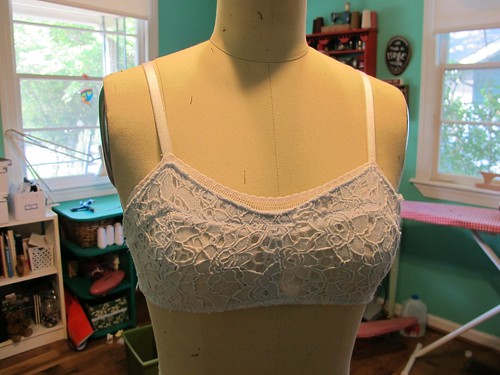
Here’s an inside shot. As you can see, I did not finish my seams – just left ’em raw. It seems to work fine for my other bras, anyway. In the future, I’d love to learn how to properly finish my seams – or even line the whole thing – but I really want to nail down fit and technique before I start going too far down the deep end.

Watson Bra

Watson Bra

Rather than try to source all the materials and notions myself, I decided to splurge on a Watson kit from Blackbird Fabrics. The kit includes everything you need – 4 way stretch lycra, matching powermesh, elastics and trims, metal strap rings and sliders (stupidly, that was my favorite part haha. THEY LOOK SO GOOD), even the aforementioned cradle stabilizer and cotton knit for the crotch lining (for the undies, obviously). There’s enough in the kit to make both the bra and the matching bikini, and you can choose if you want a kit for the standard band or the longline. Since my boobs run on the small side, I’d reckon I could probably make 2 or even 3 bras with how much fabric I have left over (and maybe even a little bit of trim!). This color set is sapphire blue with black trims – and it’s soo beautiful! I can’t wait to see what other color combos Caroline comes up with.

Watson Bra

Watson Bra

Here’s the matching underwear – sorry it looks so unimpressive haha. I cut the XS based on my hip measurement (I was very apprehensive about this, as I normally wear a small), and the fit is pretty good. I think the butt area needs… something. Maybe I didn’t stretch the elastic enough. I feel like it makes my butt look flat, but Landon tells me I’m being ridiculous. Either way, they’re pretty comfy. I wore them all day yesterday and didn’t get a wedgie, which is awesome haha.

Since these posts are somewhat useless to me without a live model wearing the goods (if you want THAT, go holler at Heather Lou), here’s another floating bra photo for your consideration:

Watson Bra

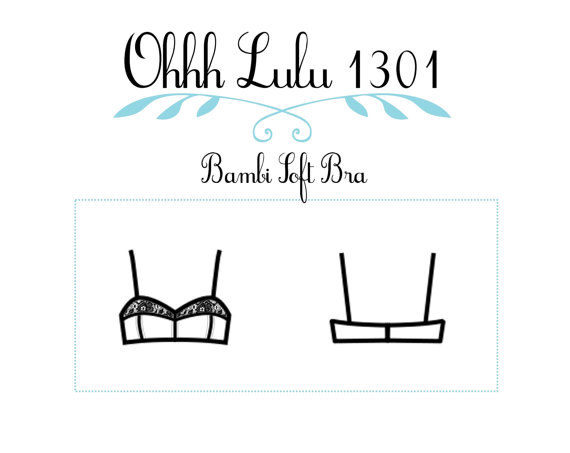
For a non-underwired bra, it’s surprisingly supportive! I also wore this all day yesterday (with the matching bikini, bc, duh), and it’s really really comfortable. Way more comfortable than those Bambi bras I made. And it’s REALLY cute on – I am thinking that with a couple minor tweaks to the strapping and back hook, this would make a fabulous bathing suit pattern. I just need to figure out how to stabilize that cradle – it has to stay rigid, and I think the stuff I’m using isn’t really water-friendly (and definitely wouldn’t hold up in chlorine or salt water). Any suggestions or ideas?

Also, it’s not lost on me that I would consider making a bathing suit from this pattern, but can’t bear to show my skin with the bra in this blog post. Oh well.

Watson Bra

Watson Bra

Bra making is SO MUCH FUN, you guys! Good thing that happens to be a hole in my wardrobe, because I really love making them and I definitely want to do more! I’m really looking forward to the Bra Making Workshop in Philly next weekend – I have sooo much to learn, and I know Maddie is going to be an amazing teacher!

Starting My Bra-Making Adventure!

2 Oct

I’ve reached what I feel like might be the most hardcore-DIY’er point to date in my me-made journey. I’ve slowed down the impractical makes and gone fullstop into the daily practical wear – tshirts, jeans, coats, pajamas, even workout clothes. The next logical stop on this me-made-merry-go-round?

Undergarments.

Yikes.

I never thought I would be that person who makes their own undergarments. On the surface, it seems unnecessarily fussy – like, why buy undies (or whatever your country calls them) if you can pick up a pair for less than $5? Sure, bras are expensive – but falling down the bra rabbit hole can be even more expensive when you look at the up front cost of sourcing all the materials and patterns, and then dealing with mock-ups (which, unlike other handmades – must be made from the same fabric as whatever you intend on using for the finished product. No cheapo bedsheet muslins here!). For those of us who treat sewing as more of a relaxing hobby and less of a “EVERYTHING I WEAR HAS TO BE MADE BY MY OWN HANDS, ARGH!”, it seems wasteful to spend time sewing something that no one sees.

However, I don’t fall in that category. I’m that weirdo who loves to wear all handmade (and y’all, I am NOT judging you if you don’t fall in this camp! I just tend to go balls to the wall with everything I do), and now I want it to include my undies. Yes! It’s also been driving me crazy as of late that I spend $70-$90 on a single bra that still doesn’t quite fit correctly (the underwires and bands fit, but the cup is not the right cut for the shape of my breasts, to get a little TMI on y’all)(and please don’t tell me to shop online, I fucking hate buying underwear online and dealing with returns. I won’t do it). Might as well make my own, right?

So this will be my bra-making adventure. Hope you like to read about undies! Also, if you were hoping to see some modeled bra shots… don’t hold your breath. That shit’s not happening, at least not in this post. Sorry!

bambi pattern

Making bras is pretty weird! As I mentioned before, it’s quite different from making, say, a dress. You have to mock-up the bra pattern, and it has to be done with the same fabric you’ll be making the real deal from. You can get a general idea of fit just by sewing the pieces together without the trims, but you won’t *really* know how that thing fits until you’ve actually completed it – straps and all. If the bra needs a lot of tweaking – too bad. You gotta make another one (hope you bought enough fabric!). This alone has been the biggest drawback to bra making, at least for me. The other big drawback is sourcing all those dang bits and pieces you need to make *one* bra – the fabrics, the lining, all the elastics and channeling and boning and trims, and ugh! Too much! Can’t deal!

Like I said, the thought of putting all that work into something that I may not even be able to wear was very off-putting. However, I have made a couple bikini tops at this point (see one and two), and I didn’t find either of those processes traumatizing at all. So I decided to start with a soft bra – the kind that don’t require a lot of special notions (including underwires) or fabrics, with similar assembly to that of a bikini top. The Bambi Bra pattern from Ohhh Lulu seemed to fit the bill quite nicely, so that’s the one I went with. Fortunately, my boobs have shrunk enough now that I can actually wear one of these (because I don’t really need much support these days), but they’re also good for lounging around the house/sleeping. You know, comfy bra!

I bought the pattern and printed it out. I exchanged quite a few emails with Madalynne, who gave me lots of great tips and encouragement and even offered to phone or Skype if I was having fitting issues. Ultimately, though, I realized that no one was going to come out here and make this bra for me, so I set about making my first one a couple of weekends ago. And here she is! My first bra!

Bambi Bra

I made this first Bambi using fabrics that were sent to me from Madalynne – a beautiful blue stretch lace with matching white power mesh. The white lace trimming at the top is actually from my own lingerie elastic stash (oh yeah, I totally have a stash of that shit). It turned out REALLY pretty! It also turned out to be a bit too small in some places, and too large in other places, but that’s ok. It’s still wearable and it’s quite a learning experience and both of these things are satisfactory to me.

Bambi Bra

For this bra, I followed the sizing of the pattern but kind of went my own way with the directions. All of the lace is lined with the power mesh – in retrospect, probably/definitely should have left that upper cup lace and back band lace unlined, as it’s a little too stable right there (see what I mean? Learning experience!). When I put on the bra without the elastics, the upper cup was gaping a bit (this is a problem I have with my RTW bras), so I tried to compensate by pulling the top elastic for a snugger fit. BAD idea! You shouldn’t pull that elastic more than a 1:1 ratio, except in certain areas. I knew that. I did it anyway. Oh well!

By the time I got to the back, I realized that I didn’t have a hook and eye to sew in there. Oops. I just stole one off an nude old bra that doesn’t fit. It doesn’t match at all and looks pretty bad, why is why I didn’t take a photo 😛

Bambi Bra

Here it is flat – see how much the elastic is pulling? It definitely shouldn’t pull that much. You may also notice that I just literally sewed the strapping elastic to the bra – there’s no adjustable sliders on this guy! By the time I realized this bra wasn’t quite right, I decided not to waste my cute little gold strap slider things (that Madalynne also included) and save those for a bra I’ll actually wear. In case you were wondering – I have more of this lace fabric, and the powermesh, so I can totally make another one once I get my fit down. Again, learning experience!

First bra down means that the second one can only get better though, right?

Bambi Bra

This one was SO much better! For one, I used a non-stretch woven fabric cut on the bias (leftover from this top, in case you were wondering!), which gave me the stability I wasn’t getting with the stretch lace. I also tweaked the sizing a bit, so it’s better (but it could still use some improvement).

Bambi Bra

Here’s a close-up. I’m like a sexy lumberjack up in hurr.

So, let’s talk about the sizing. My underbust is 28″, my full bust is 32″, and I typically wear a 28DD in RTW (I know, according to ~bra measurement guides~ that shouldn’t be my size, but any band size higher is way too big and any cup size smaller means I’m busting out of the place. This is the size that *generally* fits my body best, at least with brands like Freya and Panache). The Bambi bra says that the XS will fit a bust of 34″-35″, so I was apprehensive right off the bat.

I started with the XS, and used the straight size for the Blue Lace, just to get an idea of the sizing and what needed to be adjusted. Not surprisingly – the band was too big and the cups were too small. The band can be adjusted by taking out of the center back or side seams – you can even adjust the back right before sewing in the hook and eye at the very end. The cups, unfortunately, just kind of are what they are. They’re definitely not big enough, which is actually kind of awesome because it almost makes me feel like I have huge rack! Woohoo!

For the Lumberjack Lady, I made a few adjustments:
– I sewed the bust curve (that seam that runs vertical right over the nipple) at 1/4″. The seam allowances in this pattern are 1/2″, so I figured that would give me a little more room where I needed it.
– I kept the seam allowance at the center front at 1/2″, although next time I may shave off 1/4″ because it’s still a little wide.
– I also added 1/2″ to the bottom of all the pieces except the little lace piece at the top, so the bra would actually cover my entire breast (Blue Lace has a little bit of underboob action going on). Next time, I will also add 1/2″ to the top of the pieces as well. They just need a liiiiittle more coverage up there.
– I took some length out of the band to make it fit my ribcage, but I honestly couldn’t tell you how much. Sorry!

Bambi Bra

The end result is a better fitting bra. It’s still not perfect, but we are getting there!

Bambi Bra

Here’s the back – don’t laugh too much at how bad it looks. I was feeling so clever about this salvaged hook & eye that actually matched, until I realized that it’s not the right width – after I’d already sewn on the elastics! Argh! Lesson learned!

Bambi Bra
Bambi Bra

By the time I was sewing on the trims for bra #2, I found that I was much more comfortable and confident in the process – and I think the end result really shows (other than that embarrassing hook and eye! STOP LOOKING AT IT!). The elastic was sewn on at a less tight ratio, which really shows when the bra is laying flat (and makes it fit much more comfortably). Also, dudes – sourcing all the little trimmings and fabric combinations for this thing is fun, at least when it come from a stash raid 🙂 The black lace is from my Georgia Dress, The lace trim is from Pacific Trimming, and the straps were sent to me from Trice. WHAT UP, FREE BRA.

Bambi Bra

The inside is lined with a soft cotton jersey.

So that’s it! Some things I learned with this new experience:
– Bra Making is really fun and kind of addictive. It uses the tiniest little pieces of fabric (forreal, the amount of blue lace I used was smaller than a sheet of copy paper, ha!), which means you can never throw scraps away. Sorry!
– Adjusting the sizing is not as scary as I thought it would be. Basically finishing a bra before knowing whether or not it’ll work – yeah, that still kind of sucks, but there are worse problems to have, you know?
– You can sew this – start to finish – on a sewing machine! No serger needed. I used a lightning bolt stitch to assemble pretty much everything, and a standard zigzag for sewing the trims.

One big thing I learned is – ok, soft bras are fun, but I’m ready to pull out the big guns! Bring on the real bras with underwires and lots of tiny pieces! I’ve been reading Orange Lingerie‘s Demystifying Bra Fitting and Construction and I just bought my own PDF copy of the Marlborough Bra – partially because it was designed and drafted by Norma herself (and I totally trust her bra-making expertise), and partially because it looks exactly like my favorite RTW bra (aka, the only one that really fits right, haha). I also bought a couple of bra kits from Bra Maker’s Supply, which means I didn’t have to personally source all the bits and pieces. So that’s a plus!

marlborough patternWhat about y’all? Would you ever consider making your own lingerie (or… have you?)? Are you a handmade-all-the-time kinda sewer, or would you rather focus your free time on making extravagant and fun things? I think you guys all know my stance, but I want to hear yours!

Hey, and one last thing – last week, I had the pleasure of “meeting” Corinne of The Sewing Affair via phone and chatting her up – and now it’s a podcast that you can listen to! Go have a listen – even if it’s just to decide whether or not I have a southern accent (southerners think I don’t; everyone else thinks I do. Someone sway the vote, my voice is feeling like it doesn’t have an identity haha). ALSO, Corinne has been killing it with these podcasts and they are ALL so good – you should listen to them all! It’s so cool to put a real voice to the blog voices I’ve been reading for the past few years 🙂