Tag Archives: tee

Completed: 2 More Scout Tees

8 Aug

Apologies in advance for the big Grainline kick I’ve been on lately. Nothing intentional, no ulterior motives – I am just really loving the patterns these days! Brace yourselves for more where this came from (oh ho ho ho wait till you see my backlog of finished projects), but first – some Scout Tees!

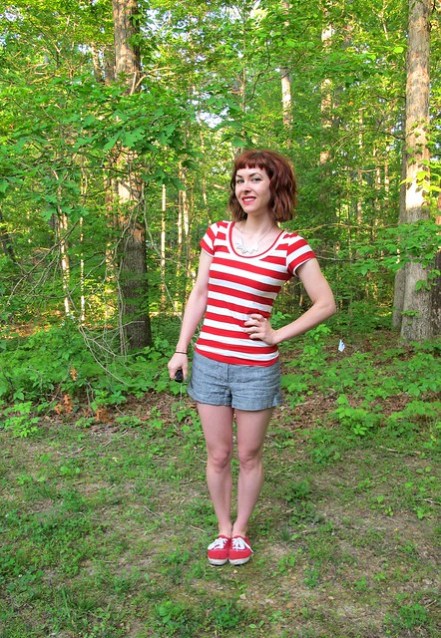
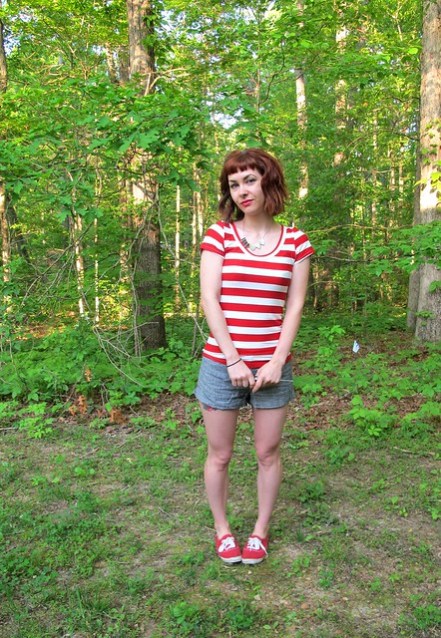
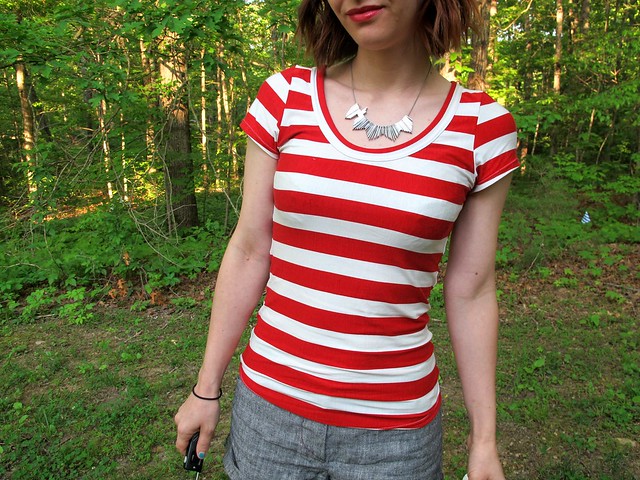
I made 2 Scout Tees, both of which I will be sharing in this post because I think splitting it into separate posts is a bit of an overload – especially since I’ve already made and posted about this pattern twice (see: handwoven cotton and birds). What can I say – I love this pattern and it’s been a hardworking staple in my summer wardrobe this year.

Gauze Scout Tee

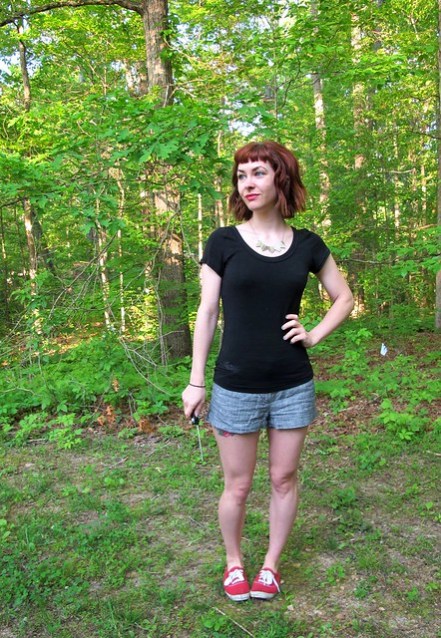
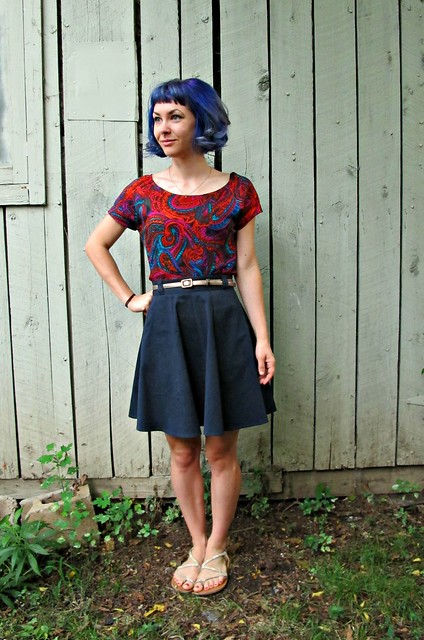
First Scout is this one that I made out of a cool (both literally and figuratively) cotton gauze. The best part about this particular project is that the fabric didn’t start out as a yardage – it was actually a scarf! See?:

Gauze Scout Tee

I don’t know the true origins of the scarf; it was given to me by the one guy in my knitting group (btw, every knitting group should have a Token Dude. It really makes you feel like you made it as a knitting group coordinator haha). He was in the process of helping his mother downsize and move, and thus ended up with a big stack of fabrics that needed to be rehomed – most of which ended up in the trunk of my car. This scarf was part of that loot bag. I originally wanted to keep it as a scarf and just wear it like that, cos I looove those gorgeous gauzy scarves and yes I wear them in the summer don’t you dare judge me, but the fact is I never ever come across fabric in this weight/print and I felt like I needed to take advantage of that surprise yardage. Once I realized that I could squeeze a little woven top out of it, my game plan immediately changed.

Since Scout is intended for wovens, it was a good pattern for this project. It’s also fairly small (at least in the size that I cut, which was a 0), doesn’t have a bunch of pieces, and is narrow enough to fit on this scarf. The scarf was also fairly wide – not quite as wide as true fabric yardage, but wide enough to accommodate the pattern pieces on the fold. I had enough length so that I was able to place the print where I wanted it, as well as match it across the seams. I decided the pattern would look best with the paisley design across the hem (which I made sure to account for the hem allowance while cutting), and the white/blue scattered paisleys at the top and on the sleeves. Having a large cutting surface is ideal for this, as I was able to lay everything out and make sure I had enough fabric to match everything before I started cutting.

Gauze Scout Tee

Gauze Scout Tee

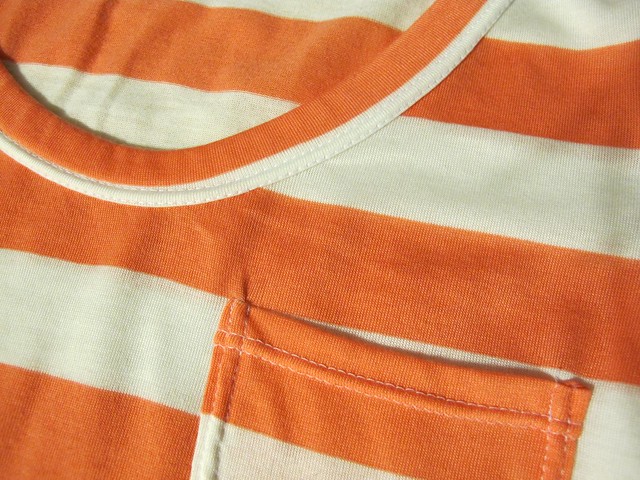
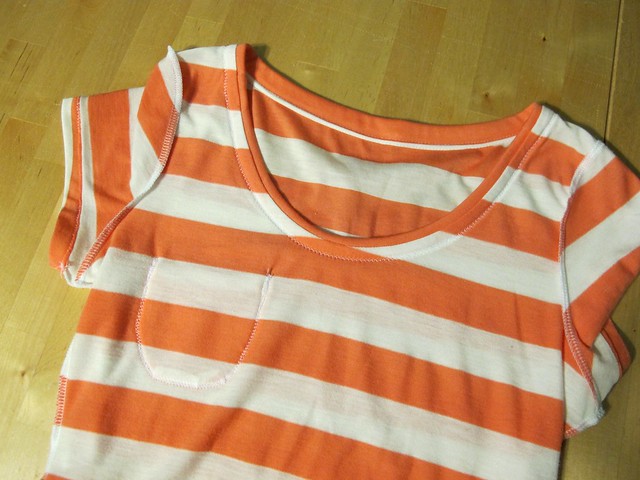
Cotton gauze is super lightweight, as well as borderline sheer, so I used French seams throughout for a neat and delicate finish. The hem is 2″ deep, to slightly crop the tee as well as give the bottom some extra weight. The sleeve hems are a simple rolled 1/4″ hem. And I used silk crepe as the neckline bias facing, instead of self-fabric (I don’t even want to think about trying to do a bias facing with this gauze – that shit would have been a nightmare!).

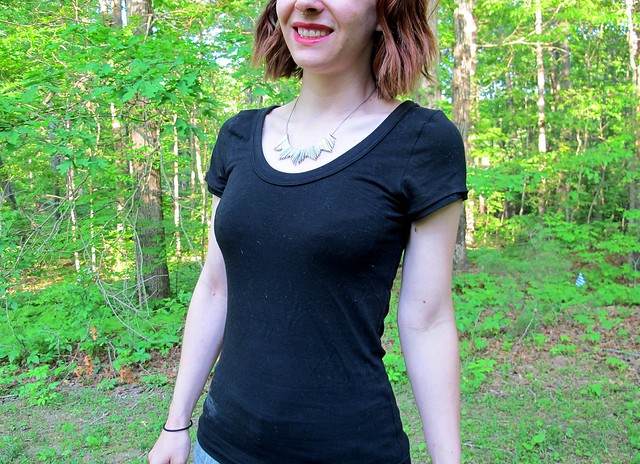
The finished top is definitely a bit see-through if you look very closely, but the busy print helps camouflage things. I also make sure to wear a light or flesh-colored bra underneath (I’m wearing my yellow lace Marlborough in these photos) so there’s not too much of a contrast. The only downside is that the fabric – despite being pre-washed by me, as well as whatever washing it may or may not have gotten in it’s previous life – tends to transfer blue dye on anything it constantly rubs against. Learned this one the hard way after getting home from the flea market last month and discovering that my bra straps were blue, as well as the back side (the part that goes against my body) of my mostly white purse. LAME. Thankfully, most of it washed off with some dish soap and a bit of patient scrubbing. As a side note, if anyone has a good recommendation on how to get a white canvas purse cleaned – yeah, I think I’m gonna need that. I have put that poor Kate Spade through hell and back at this point haha.

All right, second Scout Tee!

Birdy Scout Tee

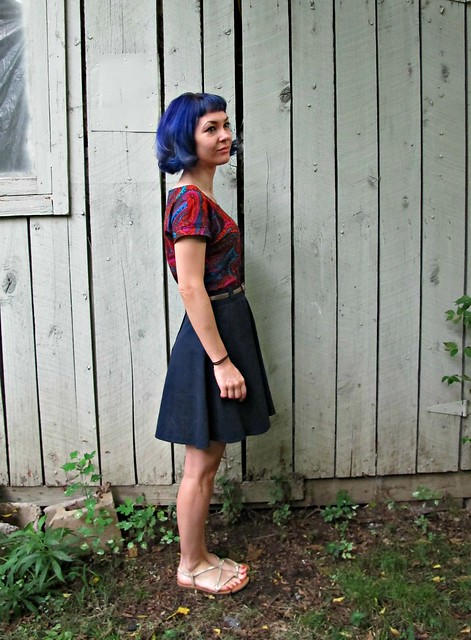
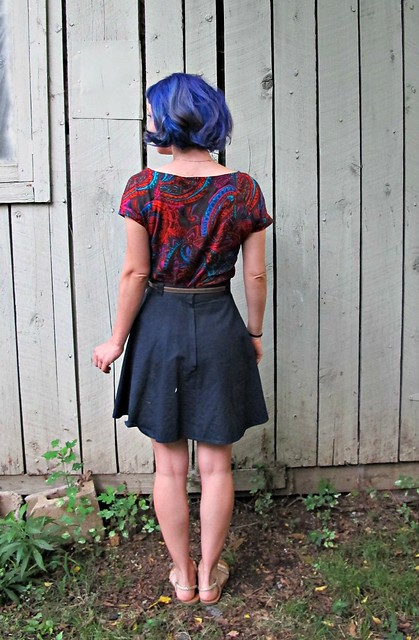
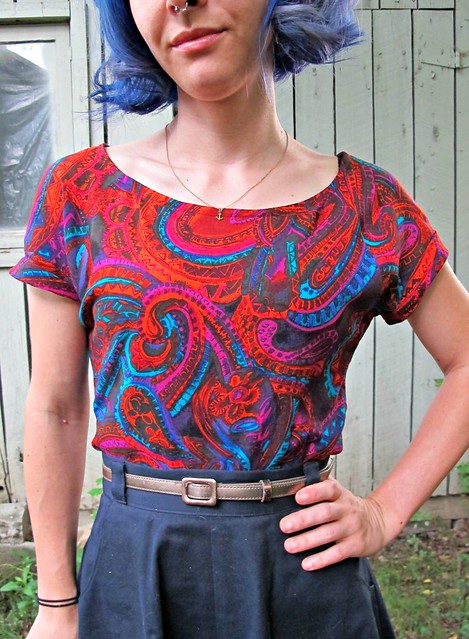
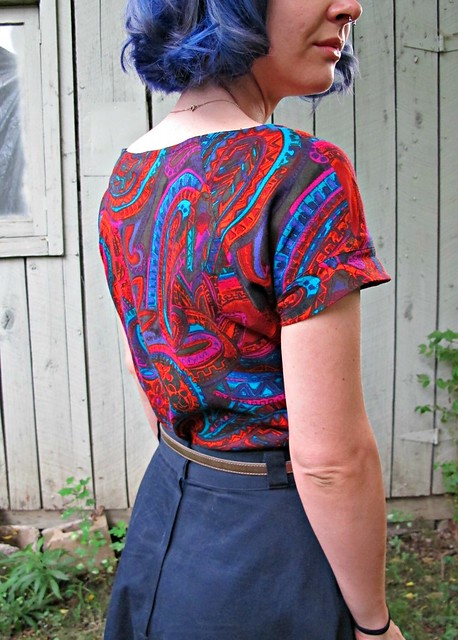
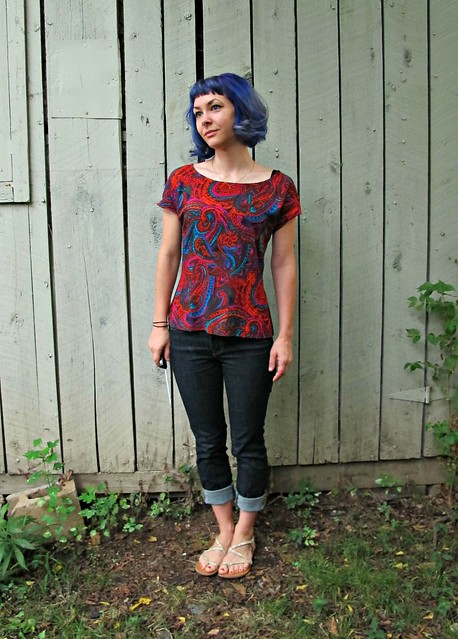
Recognize this fabric?! I made a fantastic bird dress out of most of it (which is still one of my favorite things I’ve ever made to date, and I still wear it whenever I need to impress someone), but I had about 1 yard left over that I’ve been hoarding ever since, just waiting for the right project. Silk Scout Tee it is, then! And you can go ahead and laugh that I now have 2 bird print Scout Tees. It’s ok, I just really like birds 😛

Birdy Scout Tee

Birdy Scout Tee

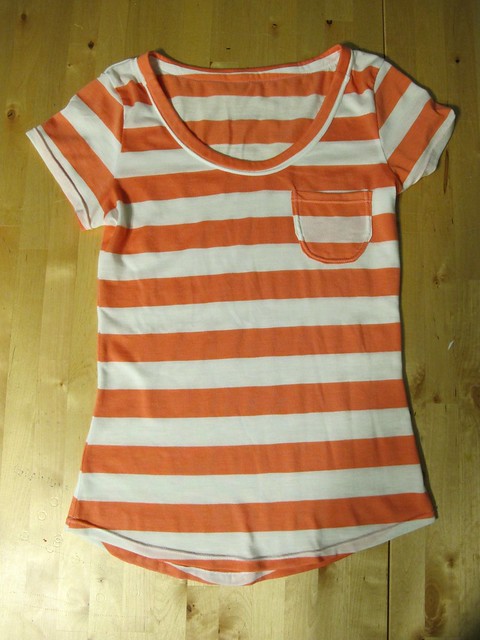
As with the gauze Scout, this pattern is really great for letting the fabric take center stage. And same as with the gauze version, it doesn’t require a lot of fabric, so I was able to eek it out of my tiny yardage remains. Notice how completely different the shape is, though, since this georgette has a lot more drape an less body than the gauze. I think both look awesome, but this one is definitely a bit more flattering since it’s not so boxy.

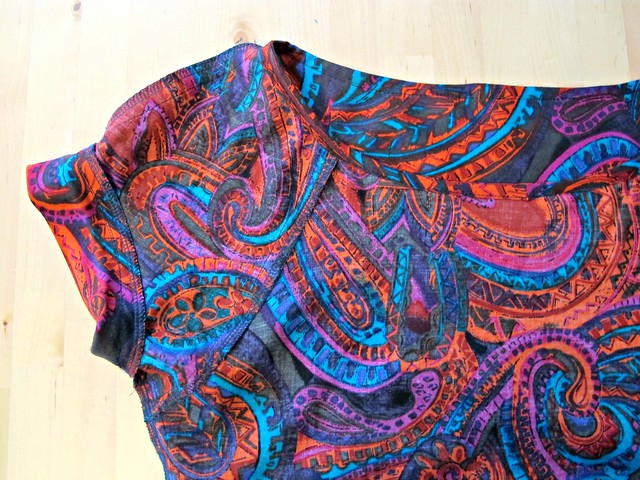
Not much to say about this one that wasn’t already said about the gauze one (and hence why I’m slapping both into one post). It was sewn pretty much the exact same way – French seams, 2″ hem, etc etc. I did use self-fabric as the bias facing for this one, which I’m not entirely happy with how it lays and probably should have used silk or cotton voile instead, but whatever. I just don’t think the georgette behaves as well as a silk crepe would have. Too late now, though, cos I ain’t about to rip it out! It’s fine. IT’S FINE.

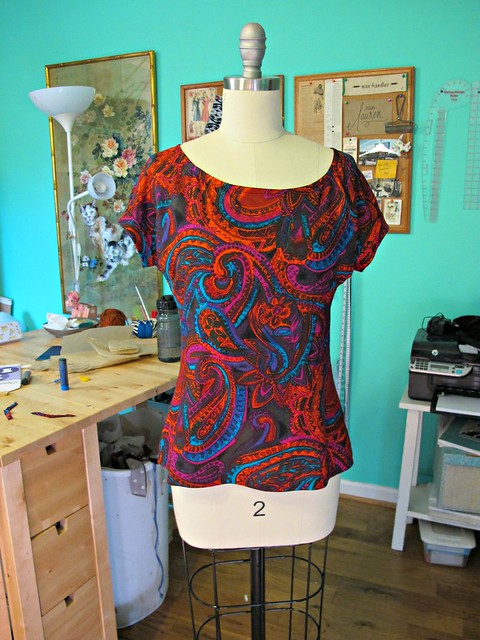
I don’t know why I got dressform and flat shots of this one and not the other, but here you go:

Birdy Scout Tee

Birdy Scout Tee

Birdy Scout Tee

Birdy Scout Tee

I’m trying really hard not to get all weird and hoardy with my favorite fabrics, because they don’t do me a lot of good just sitting on the shelf. I want to make them into things that I love so I can wear them and love them every day! It can be a little stressful when it’s fabric you know you can’t get more of in case you done goof it up (this bird stuff sold out REALLY fast!), but I’m working on trusting myself and my best judgement. Again – it’s not doing me any good sitting on the shelf! Gotta take that shit out and actually give it the use and love that it deserves!

Gauze Scout Tee

I think I’m done with Scouts for now, but that doesn’t mean I’m over the woven tshirt! Right after I finished cutting these two, Megan Nielsen released her Sudley pattern, and the blouse is giving me all kinds of heart eyes. I’d love to make a version with the back keyhole!

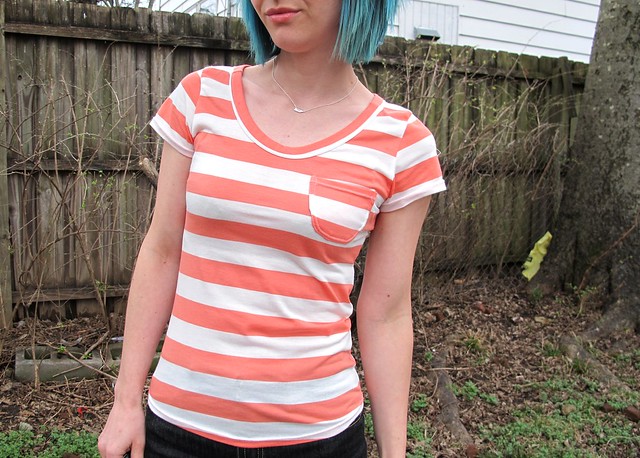
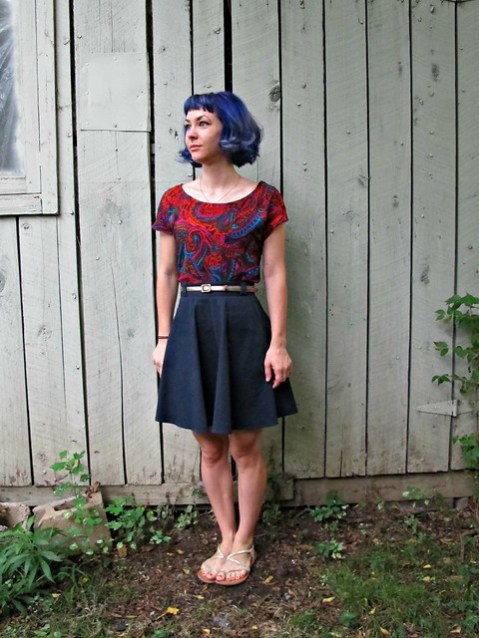
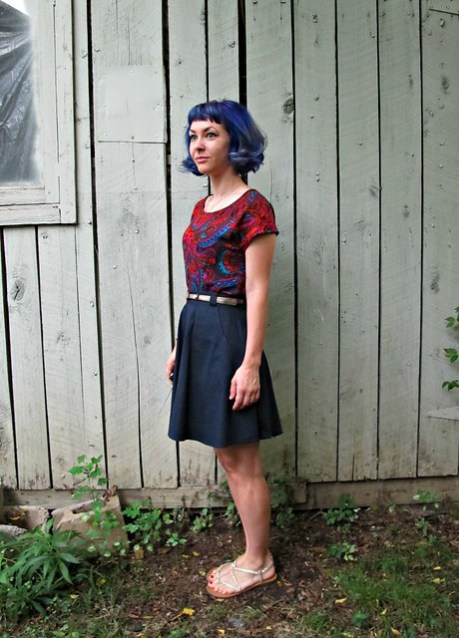
As a side note – hi, welcome to my living room. I think I like these pictures better than the ones in my sewing room (the only good lighting in my sewing room has some wretched boring background action), although the changing light is a bit of a challenge. I dunno. Taking photos indoors in general is a bit of a challenge, to be honest, but it sure beats standing outside with a tripod while all my neighbors snoop on me through their windows haha (which is what I imagine is happening, and more than likely actually not the case at all).

Completed: Some Tshirts, + thoughts on Me-Made-May

5 May

Good morning & happy May, everyone! Today we are gonna talk about my tshirts! I briefly touched over this pattern in my last post (and also when I made this ~heart-on~ sweater), but I’ve done some more tweaking to my pattern so I thought I would share some updates.

My first renditions were pretty awesome as far as the fit of the body was concerned, but were quite lacking in the neckline department. I love a deep scoop neck, but something about that neckline was practically square and it just drove me way crazier than it should have. I ended up retracing my pattern and substituting the Briar neckline and binding, which I think makes for a much more flattering scoop neck. I also lengthened the body just a bit more and copied the hem off the Ensis Tee because I really loved that subtle curve.

Just to be clear – I did not do ANY drafting with this pattern. I’m not a pattern drafter; I’m a copier and a tracer and I loves me a good Frankenpattern. I copied the body and cap sleeves from the Lady Skater. Obviously this pattern is just for my personal use, but it’s pretty easy to hack out your own if you’ve got patterns on hand with elements that you like and want to mash up into one pattern 🙂

Soooo anyway, here are my finished tees as of these latest adjustments. I used a few different types of fabrics, so they’re all slightly different looking and feeling (probably not so much in the pictures, but definitely so much in real life).

IMG_1499

THE PINK LADY: This is the first one I made – I used some fabric in my stash that I only sort of cared about (cared enough to wear if it worked out, cared little enough to not cry if it didn’t) to make sure my adjustments all translated into something cohesive at the end. I bought this fabric at Textile Discount Outlet when I was in Chicago like… 2 years ago. Eep. It’s a soft poly knit that was pretty inexpensive but has held up surprisingly well and resisted pilling. I actually bought enough to make a maxi dress – I 100% blame this on the girl who was cutting it, because she told me she would make a maxi with it and then that’s all I could see for the rest of the day – and then I cut said maxi dress and SOMEHOW LOST THE BACK PIECE. I honestly have noooo idea where that piece went. I literally crawled around on the floor of my sewing room like a dog in search of it. It disappeared into the Bermuda Triangle or something, idk. I’ve even purged my sewing room and moved since them, and still can’t find that damn back piece. No idea, y’all. No idea.

Also – green hair & different background! How old is this picture?! Ha! Before you get all up in arms about how bad my hair looks – I know it looks bad. This was during the very end of my green, when I was intentionally fading it so it would be easier to color correct at the salon.

Some flat shots:

IMG_1475

IMG_1478

IMG_1474

To make these, I just whip them through my serger and use this method to apply the neck binding. The hem and sleeves are finished with a twin needle. Super easy!

IMG_0008

IMG_0009

IMG_0013

IMG_0012

THE WALDO: To be honest, this particular tshirt is 100% the reason why I was hacking around with this pattern so much. The fabric is an amazing rayon/spandex that I bought/splurged on at Cloth House during my big shopping day with Tilly (don’t ask me which Cloth House; we went to both but I can’t remember which one ended up taking my money haha). It was pretty pricy – I think around £18 per meter – but I only needed a small amount to make a tshirt, so I justified it. Also, it came in an adorable little bag that made me feel like I was carrying around a present, so that was nice haha. It’s a thin knit, but it’s not sheer. The added spandex gives the fabric a bit of heft, so it kind of sucks in and holds up and doesn’t really drape. It also holds it’s shape REALLY well. I wish I had more of this fabric in every color of the rainbow, it’s incredible.

ANYWAY, I have a similarly-striped vintage Henley that has 3/4 sleeves (well, long sleeves… but it’s child-sized, so 3/4 sleeves on me, ha) that I love wearing, but it’s falling apart so I’ve been looking for a replacement ever since. This is not an exact replacement – lack of Henley buttons and short sleeves and all that – but it’s a bit more appropriate for the climate I live in, as I can wear short sleeves almost year round. Awesome.

IMG_0016

IMG_0019

THE BLAQUE: I’ve been lacking a simple black tshirt (and white, for that matter) for a looong time, so obviously that was the next wardrobe filler to make. This fabric is from Metro Textile, and I bought it back in March. It’s another rayon/spandex, similar to the Cloth House fabric, but a little lesser quality (that’s not to say it’s bad quality – but nothing can compare to that striped dream above. Nothing.). It has the same sucking-in and holding-it’s-shape qualities as the striped rayon, but it has a little bit of a drape. The fact that it doesn’t bag out over the course of the day means that this one will get a lot of wear. Hate having clothing that grows 3 sizes by the end of the day.

Also, um, sorry bout the deo stain by the hem. Whoops. At least you know my pits smell fresh.

IMG_0031

IMG_0020

THE WHITE W(H)INE: My least favorite of the bunch, if only because of fabric choice. It’s funny how you can make the same freaking pattern and still have each finished garment look different depending on the fabric you used. This fabric was also from Metro Textiles, and it’s also a rayon, but it’s lacking that sweet, sweet spandex. As a result, the fabric is very lightweight, borderline sheer, and drapes like a dream. It also meant that the shirt was a bit too big, especially around the bicep. I tried it on before hemming and sucked in the side seams about 1/2″ on each side and took about 1″ off the sleeve circumference. It’s still a little loose – and the lack of elasticness in the fabric means this will grow over the course of the day – but I think it looks all right. Next time, though, I’m sticking with knits that have some spandex.

Couple of other things – my shorts are linen Thurlows from a couple of years ago. They’re a little big in the legs, but the looseness is ok for now because that is a pretty fresh tattoo you’re seeing on my thigh. No close-ups because it’s in the gross peeling stage right now, but here’s a shot taken immediately after it was finished.

So anyway, going back to the title of this post – Me-Made-May has just started, and my Instagram feed is delightfully full of endless selfies featuring handmades. To those of y’all who are unfamiliar with MMM, it’s a month-long challenge to get you wearing your handmades and figuring out wardrobe gaps (check out the link; Zo does a much better job of explaining it than I do). I have participated for a few years now – 2012, 2013 and 2014 – and I always enjoy it, except for the whole daily photo part 😛 This year, though, I have decided to opt-out.

For one, I make everything I wear now. I own very little RTW, and none of it is new – it’s just stuff that managed to survive several closet purges. Wearing handmade is something that I do daily, from my pajamas to my jeans to my tshirts to even my freaking underwear. It seems a bit silly and redundant to spend a month documenting it at this point. There’s nothing novel about it for me, it’s just my daily life. Also, I HATE taking daily photos. Gets old after about 3 days.

The bigger reason why I’m choosing to opt out is because my participation has given me this weird complex about repeating outfits. I don’t know why! Outfit repeats used to be a big part of my style (I like it and I latch onto it, ain’t no shame in that) – but something about spending a month documenting your wardrobe and trying to intentionally wear different outfits every day really started to make me feel like I *needed* to always have something fresh and new. That’s not really a sustainable way of dressing – and having a giant closet of things I only sorta like is surprisingly stressful. I went down a weird rabbit hole of not ever wearing my favorite pieces, because I wanted to “save” them for… something. Which is REALLY stupid! I wear (and make!) clothes because I like them and I feel good in them. If I want to wear the same dress three times in one week, I should just do it. If anyone notices that I’m wearing the same dress 3x in one week, then that’s their problem, not mine. Unless I smell, which in that case someone should definitely say something.

While I love and appreciate what Me-Made-May stands for and how it helps people get out of clothing ruts and determine wardrobe holes, it’s just not working for me. So I won’t be participating this year, and y’all can all breathe a collective sigh of relief that you don’t get blasted with 31 extra photos of my mug this month 🙂

IMG_0022

On that note – how’s your Me-Made-May going? Are you participating? Have you opted out? Are you enjoying the daily updates of outfits as much as I am?

Completed: Ooh La Leather Leggings

26 Jan

Ok, so, the title of this post is a tiny bit misleading – these aren’t leather leggings so much as they just have a panel of faux stretch pleather. BUT, it sounded catchy (as long as I ignore all the weird Google search terms that will likely lead people straight to this post, aiee), so it stays.

Leggings & Ensis Tee

Anyway, like, ~Ooh La La Leather~ or some shit, amirite?

Leggings & Ensis Tee

In all seriousness, I’ve mentioned before that this is my favorite leggings pattern. I have a couple more patterns in my stash that I haven’t even bothered to try because I JUST CANNOT QUIT me some Ooh La Leggings. I love the way they fit and I love the seaming detail. Made up in a thicker ponte, they almost pass for actual pants. Made up in a thinner material, they are great for lounging and sleepwear. Made up in some crazy lycra, they make amazing workout/yoga pants. Basically, they are my dream leggings and you will have to pry this pattern out of my cold, dead hands.

Because I love this pattern so so much, it goes without saying that I’ve made a metric Shit Ton of these leggings over the past two years. Obviously most of them haven’t made it to the blog – after sharing a couple pairs, they kind of get redundant. And y’all know how much I hate redundancy, at least when it comes to my own blog. So while you might occasionally see a pair pop up in a post (without needing to be the center of attention), they spend much more time in the real world than they do the blog world. And I do wear the shit out of all my pairs, so there’s that.

Leggings & Ensis Tee

With that being said, I think it’s ok/non-redundant to post about this pattern if I’ve done something ~unique with it. Which is exactly what I did. Check out my (faux)(p)leather (paneled) leggings, y’all!

Leggings & Ensis Tee

I found this stretch pleather on Goldhawk Rd while fabric shopping in London. It was one of the very few things I had on my list to buy, as I knew I’d need to be able to actually touch the fabric to make sure it stretched enough and wasn’t toooo shiny. Not that I’m against shiny pleather pants – I had a pair when I was in high school, back when I worked at Hot Topic and thought I was sOoOoOo punk rock (and no, I have no idea why my mom didn’t veto those things! HAHA! I must have looked like such a little baby hooker!) – but, being nearly 30 now, I’m an adult and I have to tone things down just the tiniest bit, at least when it comes to my pants. ANYWAY, this pleather is pretty good, I think – as far as pleather goes. It’s very stretchy, it’s not too shiny, and the wrong side has a nice fabric backing so it’s actually quite comfortable against the skin. Or, rather, as comfortable as pleather leggings can get.

Leggings & Ensis Tee

Since my pattern was nice enough to already have all the piecing done for me, I just cut the side panels in the stretch pleather, and the remaining pieces (front and back legs, as well as the yokes) in this black polyester Ponte de Roma. The Ponte de Roma was pretty shiny on one side – like, way more shiny than I was expecting – so I sewed it with the wrong side facing out, which looks a bit more polished. I sewed everything on my serger, as I do, and omitted the topstitching as I was afraid that piercing the pleather would cause it to wear holes that would eventually tear.

As far as actually sewing the pleather, that part was surprisingly easy! Keep in mind that stretch pleather (as well as non-stretch, as well as leather, etc) does show pin holes, so you need to be reeeeeally mindful of your pin usage (aka, don’t use ’em if you can’t pin inside the seam allowance!). I traced my side panel piece with a Chaco liner before cutting on a single layer. I did not pin my pieces together, except for one part at the hem just to hold it in place while I topstitched (I usually don’t pin my hems for knits, just press them – but you can’t press pleather! One little pin hole at the hem is ok with me, anyway). The sewing part did not require any special forethought or tools – due to the fabric backing of this material, it went through my machine just fine without the need for a Teflon foot. I used a regular stretch needle. Et voila!

Leggings & Ensis Tee

While I’ve got your attention, I guess I’ll also talk about my shirt – because y’all know I made that shit too!

Leggings & Ensis Tee

The pattern is the Ensis Tee, also from Papercut Patterns (ooh, I just heart me some Papercut!). I’ve made this before, albeit in a thicker/less drapey knit, so I think this version deserves a little bit of spotlight 🙂 It’s amazing how different it looks with a drapier fabric, yeah? Honestly, I like this version a lot better – I think it’s a lot more flattering (plus, it’s wool, so it’s pretty snuggly!). The top yoke is a piece of wool knit I bought in Paris, and the bottom is this cool steel grey sweater knit. I bought that knit on a whim, and it’s pretty cool – it has a lot of dimension to the color, and you can really see the knit stitches due to the somewhat loose gauge. It’s also wide and VERY stretchy in both directions – I might use the rest to make a pair of tights. Also, I need some kind of grey knit intervention. I keep buying pieces and this shit is getting out of handddd. Like, I really want that pewter grey but I’m gonna resist. I must resist.

Leggings & Ensis Tee

This is basically the same picture as above, just without my head.

Leggings & Ensis Tee

This tee whipped up fast! I had it cut and sewn within a couple of hours – and honestly, it took that long because of all the topstitching I added. I topstitched the colorblocking at the yokes and sleeves, as well as the neckline, using my stretch twin need and wooly nylon in the bobbin. I think it adds a little extra to an otherwise plain tshirt. Oh, and that yellow tab at the neckline is my laundry reminder not to wash this in the machine – because it’s wool 🙂

Leggings & Ensis Tee

I kept the curved hem, left off the hem band, but added cuffs to the sleeves. Happy sweater-hybrid-tshirt-thing!

Leggings & Ensis Tee

And here are my leggings again, because I know you’re just dying to see them one more time. As a side note – I used a different method to attach the elastic waistband (rather than feed it through a hole like the pattern instructs). I took some pictures while I was doing this, which I’m hoping to make into a tutorial at some point later this week.

Leggings & Ensis Tee

Anyway, that’s mah new threads! Basics with a lil’ twist! What do you think? Am I going to burn someone’s eyes out with my leather leggings? Should my mom have not let me leave the house in those pleather pants? Man, I wish I had pictures of that ensemble. Sooo glad the only social media platform we had back then was makeoutclub.com HAHAHA.

As a side note – if you think my hair looks green, it’s because it is! It was due for a redye, and I decided to go green 🙂 I’m using a new dye that I bought in London, at the suggestion of Nicole – we’ll see how it holds up! I gotta say, I’m not looking forward to the fading… green always fades so ugly. Also, these pictures are REALLY deceiving. It’s much brighter and more emerald in real life. I took these pictures on a grey and overcast day, so the color is kind of sludgy here. I don’t know how to color correct my photos, so this is what you get. Sorry, not sorry 🙂

Completed: The Belcarra Blouse

1 Sep

I am only slightly embarrassed to admit that this make is over 3 weeks old at this point*. What? I’ve been busy, ok??

Sewaholic Belcarra blouse

This is the Belcarra Blouse from Sewaholic Patterns. Described as a super simple/wardrobe staple top, this bad boy has no darts or tucks (ladies, can I get a hell yeah?), raglan sleeves (requiring no setting like a traditional sleeve, which means – let’s have another hell yeah!), and a simple bias bound neckline. I knew it would be quick and easy, but I wondered – would it be flattering?

Sewaholic Belcarra blouse

Obviously, that crazy paisley fabric would hide a lot of sins (if there were any to hide mwahahahaha), but I think it’s safe to step out of my cave and say, yes! Yes, this shit is flattering! Yes, it’s comfy! Yes, it’s breezy and cool to wear when the temperatures are still hanging out in hell territory. Yes yes yes!

Sewaholic Belcarra blouse

I shit you not, I made this in an afternoon. From cutting, to sewing, to finishing – it only took a few hours. I followed the instructions as written – except in the case of the neck binding, I found that I needed to shorten it to get it to lay right (which I was anticipating, because my rayon challis has a slight stretch to it). I cut a size 0, which is my usual Sewaholic size, and took in the side seams an extra 1/2″ because it seemed a little overwhelmingly big when I first tried it on. Otherwise, pretty good straight out of the envelope! Good and fast.

Sewaholic Belcarra blouse

My initial concern was whether or not this would actually be flattering, as I’m not one to really embrace loose shapes (I’m trying, though! It makes for a more comfortable summer when a breeze can blow between you and whatever unfortunate piece of clothing you happen to be wearing!). To be honest – when I first saw the pattern, I brushed it off as ~not me~. It wasn’t until I found myself staring at this silk Georgia tee from Elizabeth Suzann** that I realized the key to making this pattern look good on me was using a fabric with a gorgeous, fluid drape (and it doesn’t hurt that the Georgia tee is a VERY similar style and shape – albeit with kimono sleeves instead of raglan, and no waist shaping – so I could see this put into action).

I know I joked about making this pattern with this fabric so that it would match my Crazy Paisley Hollyburn, but forreal, these two are a match made in heaven. The rayon challis has pretty much no body to it whatsoever – just a nice drape that flows like water. This keeps the top from being too structured, and thus the excess ease hangs in soft folds, instead of sticking out all crazy and giving me a weird shape. I like it! And next, I want to make this shit up in some SILK!

Sewaholic Belcarra blouse

To further prove my point, here is the top when worn loose over jeans. Doesn’t that look lovely?

Sewaholic Belcarra blouse

I kept this particular style very simple (well, as simple as you can be when you’re dealing with a fabric design that wack-o, amirite), but I’d love to experiment with different fabrics and textures to really play up on the raglan sleeves. I’d love to try it with a two-sided silk satin – keeping the body matte, with the cuffs and bias binding shiny. Or even make it out of two different colors of silk, as a sort of fancy baseball tshirt!

Sewaholic Belcarra blouse

Not a lot of shots of the inside, but here you can see the guts. Serged seams, self-cuffs cut on the bias, and self bias neckline that is topstitched down.

The only thing I will change about future Belcarras is that I’d like to take the neckline in to be a bit less wide. The wide neckline is lovely, but it also means that bra straps are constantly getting flashed. I also feel like it almost looks *too* wide on me – and that it’s not balanced. Thoughts? I’m also waffling with shortening it, because it seems too long when it’s tucked in, but I think it looks just right when it’s untucked. Decisions, decisions!

Oh, one last thing-

Sewaholic Belcarra blouse

You know I totally tried that shit on with my matching Hollyburn – and it surprisingly works! Really! Even Landon agreed (after laughing at me when he saw me pulling both pieces out of the closet). It might be that the fabric is so busy, you can’t really see what’s going on – but, fuck, it sure looks like a dress to me. Y’all have no idea how tickled I am about this discovery.

Sewaholic Belcarra blouse

Anyway, what are your thoughts on the Belcarra? Love it? Hate it? What’s your go-to woven tshirt pattern?

Ooh, one more thing! As you’ve undoubtedly already heard all about, I’m going to be teaching a small class while I’m in London this November, over at Tilly HQ, in her gorgeous new studio!! My Zips+Buttonholes Worshop will teach you how to insert both invisible and lapped zippers, and also guide you through sewing flawless button holes (for both one-step/automatic and four-step/manual). Afterwards, we will celebrate with a delicious cocktail and we can talk about how typing ‘buttonholes’ usually ends up being ‘buttholes’ (just me?).

If any of y’all Londoners are sad that you have to miss my class at The Sewing Party due to international restrictions – here’s your make-up chance (except this one is better, because it’s in PERSON! Actually, that might be worse, depending on how annoying you find me HA HA HA). Sign up for the Zips+Buttonholes Worshop here, or peruse all the neat workshops here (wish I could take that copy your clothes one taught by Zoe! Argh!).

* As of publishing, I still have 3 unblogged garments to post – I seem to have no problem finding the time to sew; my issue is finding the time to write about it!
** You’ve probably already picked up on this at some point, but yes, I work for Elizabeth part-time as a production seamstress (my ~main money~ income is being a personal assistant for another entrepreneur. Yeah. It rules.). I sew on some of the coolest industrial machines, handle gorgeous silks and linens all day, and watch a loooot of Netflix. It’s just as awesome as it sounds.