Tag Archives: a fashionable stitch

Completed: Simplicity 6266

14 Aug

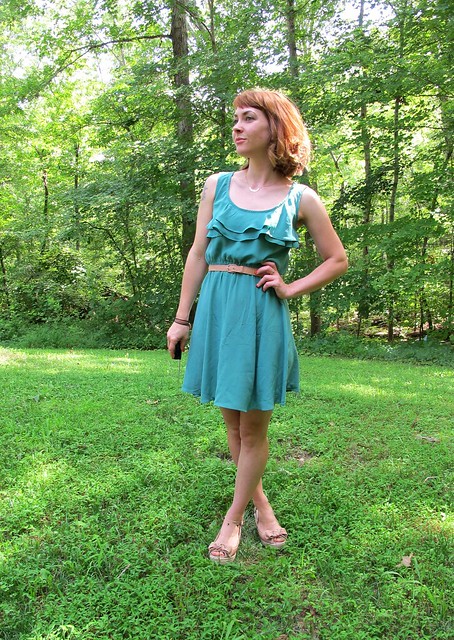
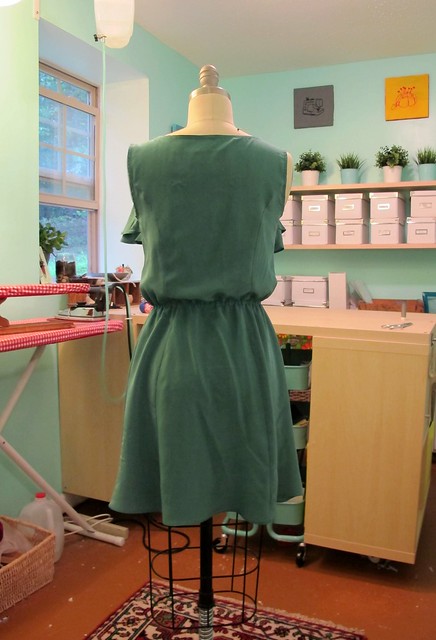
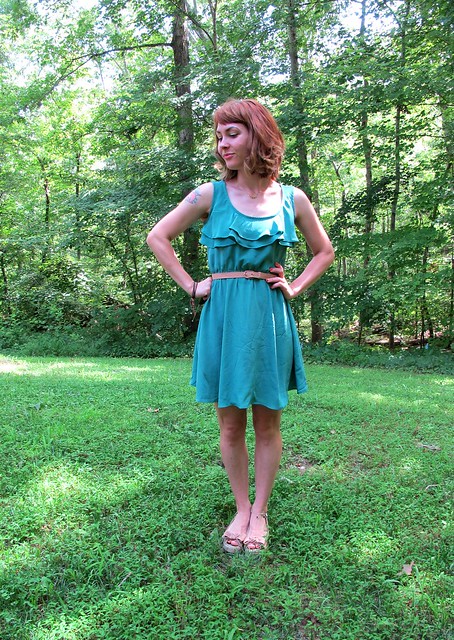
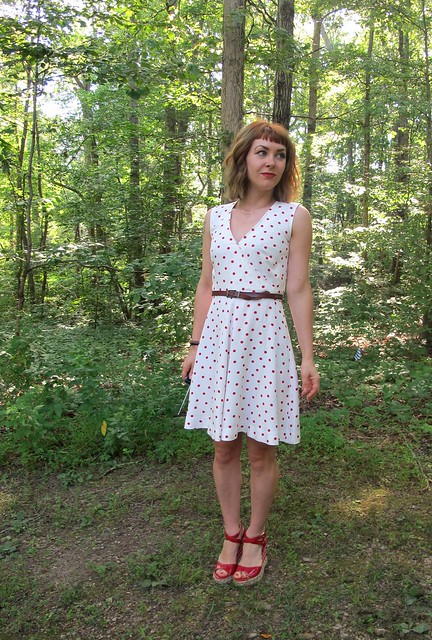
How often do we fall in love with a pattern and swear that we’re going to make a million versions, and then end up with just the original one? Yeah. I definitely made this pattern like 3 years ago, and I definitely have been saying ever since then that I need to make it again. Whoops. Better late than never, anyway!

Simplicity 6280

The pattern in question is Simplicity 6266, which, 3+ years later, I STILL can’t find anywhere on the internet. EDIT: Definitely had the pattern number wrong. Dunno what that was all about hahah! This post has been corrected 🙂 I made this forever and ever ago in a slinky poly cheetah print, with adorable little tulip sleeves. It’s the best dress. I still wear it all the time – it is kind of awful in the summer (polyester not being breathable and all), but I do it for the ~fashion~. Truth me told, the OG cheetah version is one of the few dresses that I actually altered to fit my new size after I lost weight, rather than get rid of it (which happened to most of my closet, if you were around for the Great Closet Etsy Purge a couple years ago). Now you know that’s true love!

Simplicity 6280

I knew I eventually wanted to make it again – it stayed in my pattern queue piles for years, and I waffled back and forth on fabric choices. I finally decided to bite the bullet and just fucking make it – and I used a special/hoardy fabric to do it. Might as well kill two birds with one stone! Get’er done and all that!

Simplicity 6280

Simplicity 6280

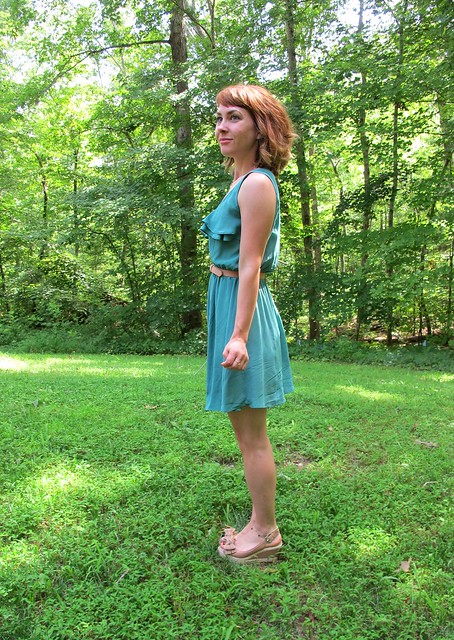
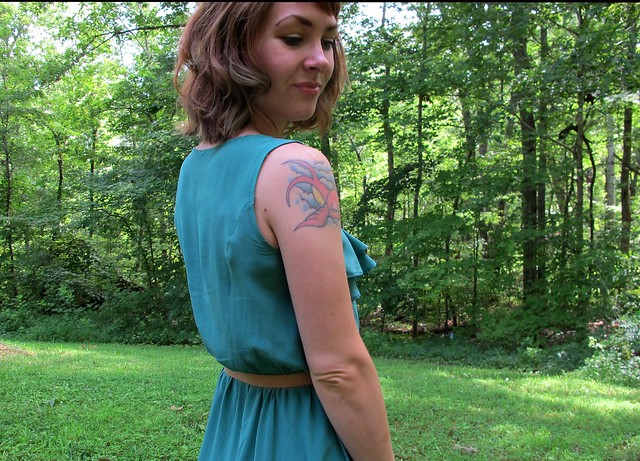
Remember when I said that I had to alter the original dress after I lost weight? Well. I knew the pattern was going to need some adjustments, since it was completely unaltered and thus the original size (which was for a 33.5″ bust, sadly larger than what I’m rocking these days), but I threw all fucks to the wind and just charged ahead with making this before I changed my mind. So, there were a lot of last-minute fitting alterations to get this thing even remotely sized like I am. I took quite a bit out of the side seams, as well as raising the shoulders a bit (not much, less than 1/2″. Maybe more like 1/4″. I don’t remember! Sorry!). The resulting fit is pretty good, I think, but it definitely added quite a bit of unnecessary unpicking and re-adjusting that I could have avoided had I bothered to make a muslin and do some flat pattern adjustments. With that being said… did I make those adjustments to the pattern after these alterations? Hell no! Do I look like I operate on common sense?? 😛

Simplicity 6280

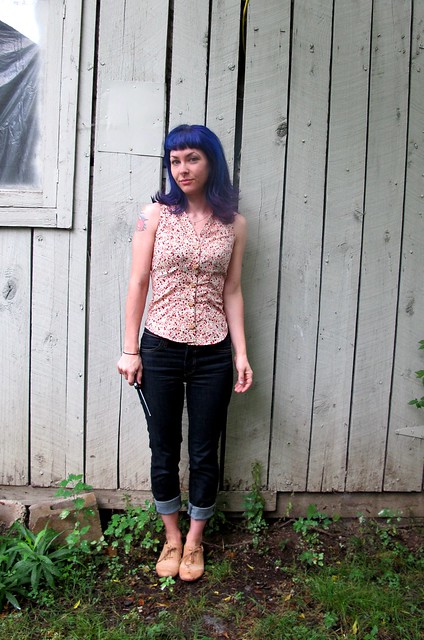
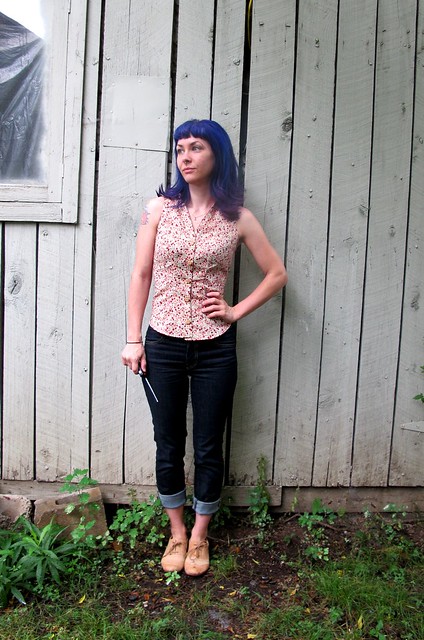
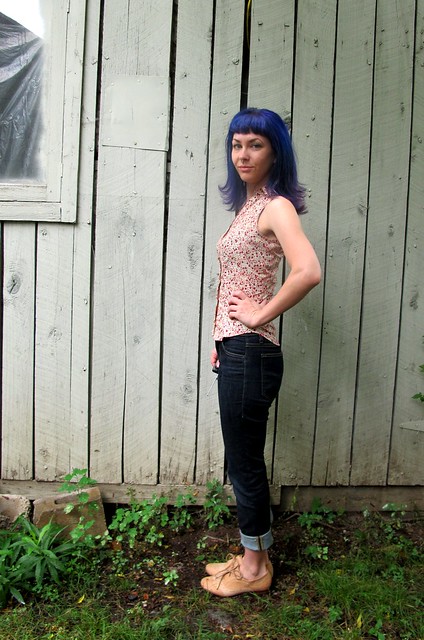
All that aside, once I got the fitting sorted out – the rest of the dress came together beautifully. This is the kind of project that I just love doing – working with a pattern that I know I love to wear, made up in a beautiful and special fabric, and spending the extra time on parts of the construction, such as blind-stitching the hem by hand (I can’t even remember the last time I did that! What is wrong with me?)

Simplicity 6280

Simplicity 6280

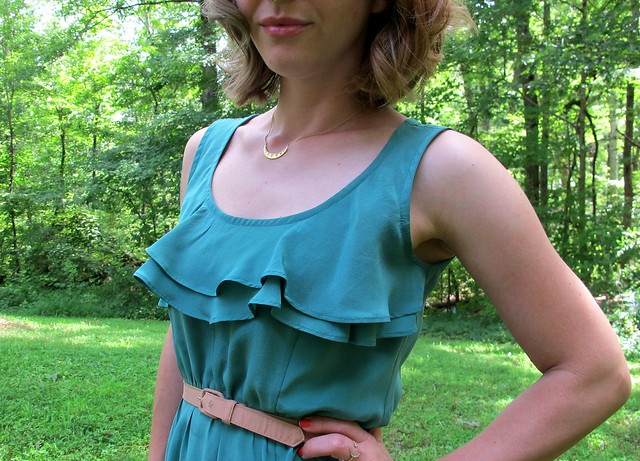
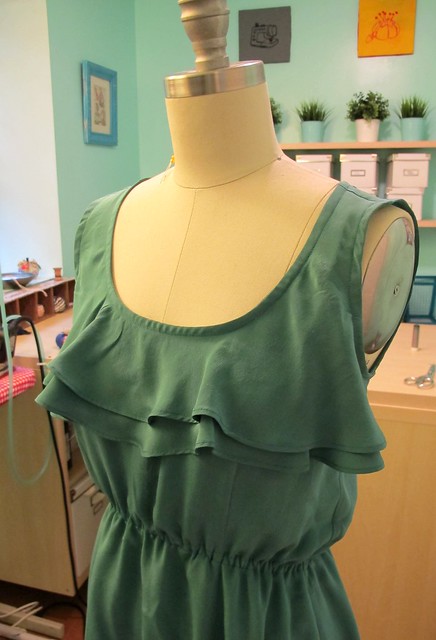
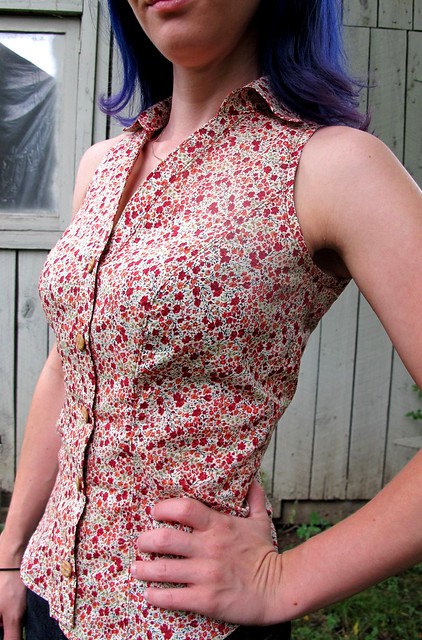
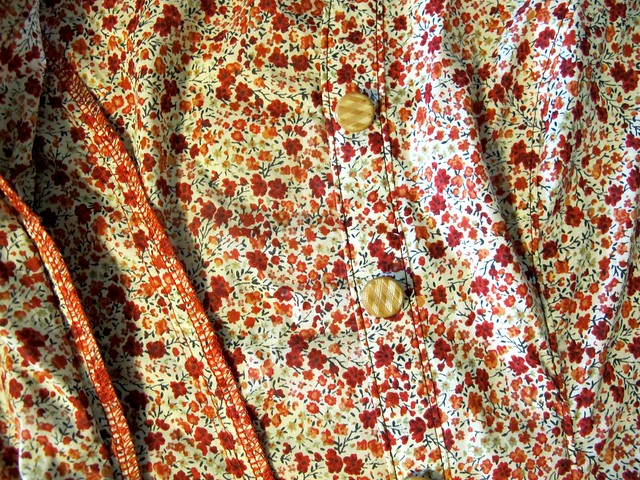
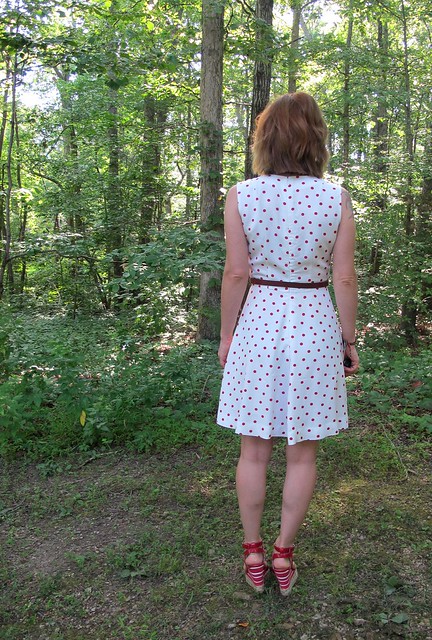
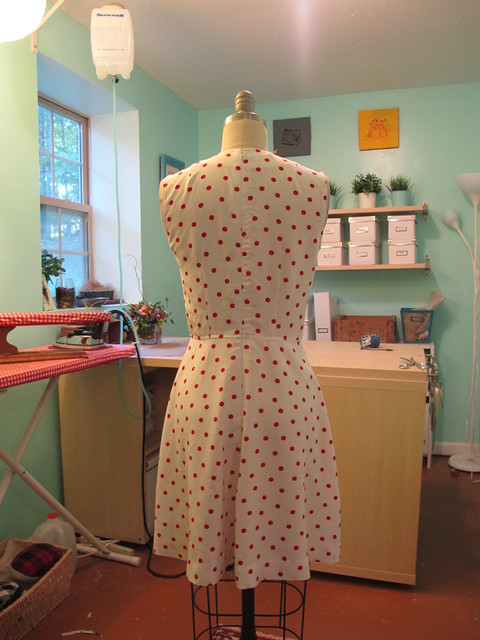
I kept most of the construction true to the pattern, but I did change out a few things. For one, I left off the arm hole facing and used bias facing instead. Since there’s a lot of topstitching going on with this dress, the topstitching for the bias facing doesn’t stand out like a sore thumb. I also traded out the lapped zipper for an invisible zipper, because it looks a bit more polished. I did not make the waist tie for this dress (on my cheetah dress, I made it, just didn’t attach it to the dress), instead I added some thread loops to hold my belt in place.

Simplicity 6280

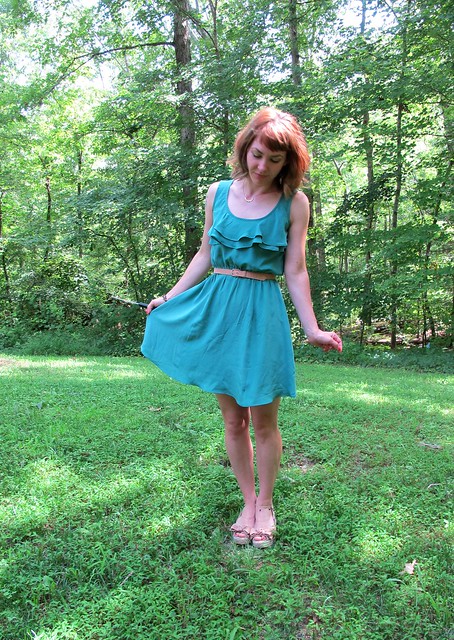
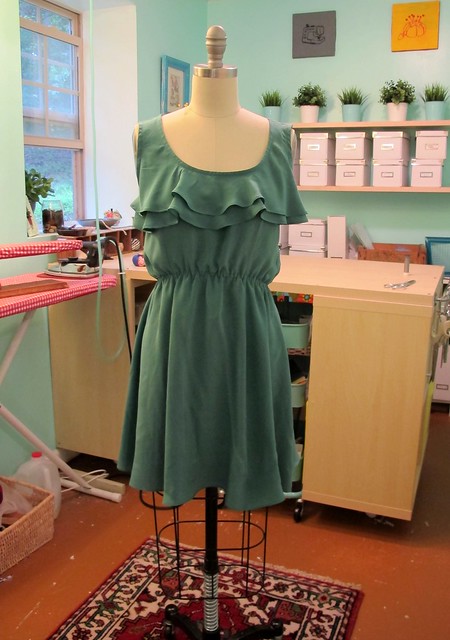
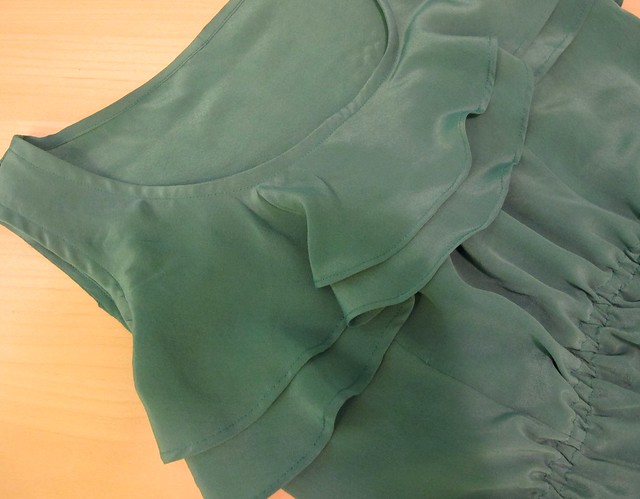
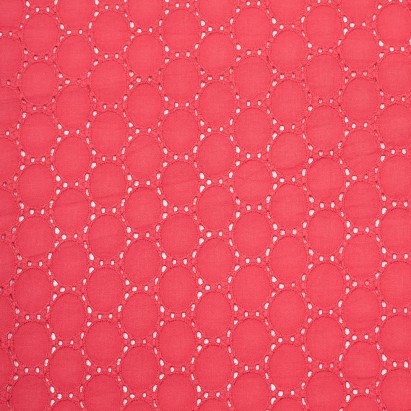
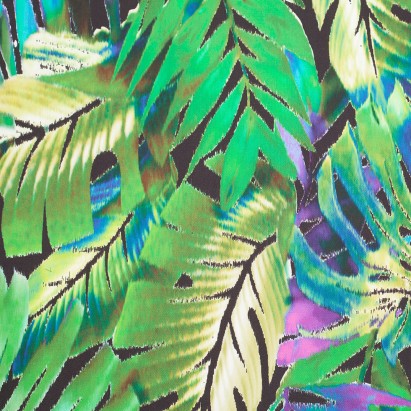
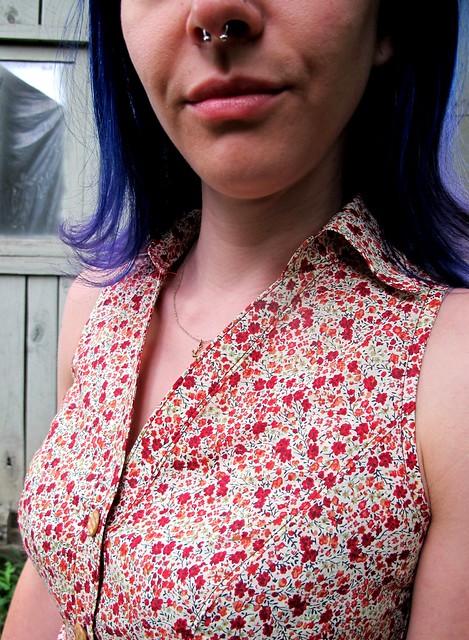
The fabric was another gift from the fabric goddess herself, Sunni. This, too, was part of the awesome care package she sent me last year. I’ve been waiting so long to figure out what to use with it, but I’m happy that I decided to match it up with this pattern! This fabric is rayon challis that has the most gorgeous, fluid drape. Really really lovely stuff. It shed like a hairy little monster, but otherwise sewed and pressed well. It is slightly translucent, so you can see the facings shining through the front in some lights, but that doesn’t bother me. I just wear skin-colored undergarments and get on with my life.

Simplicity 6280
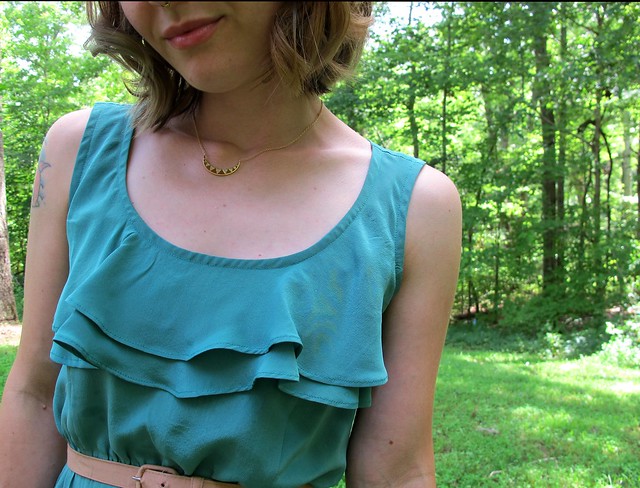
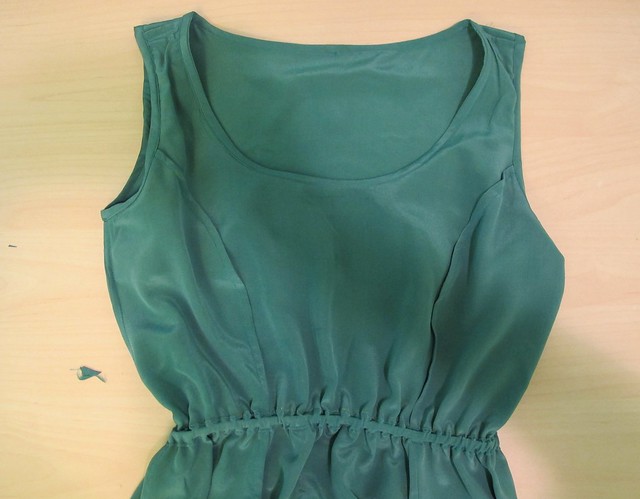
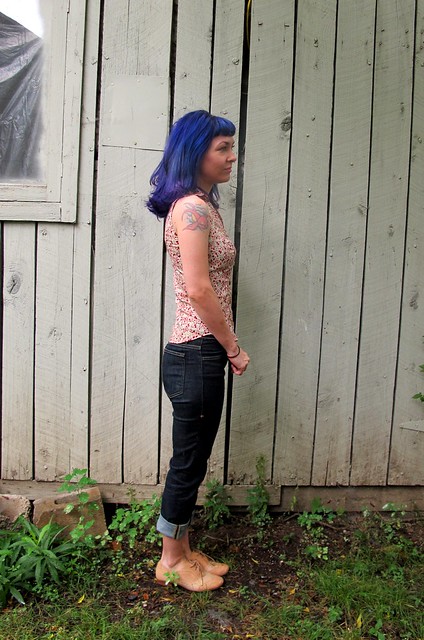
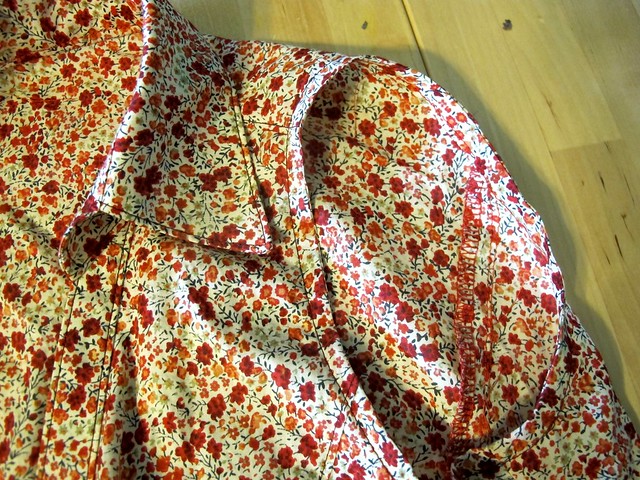
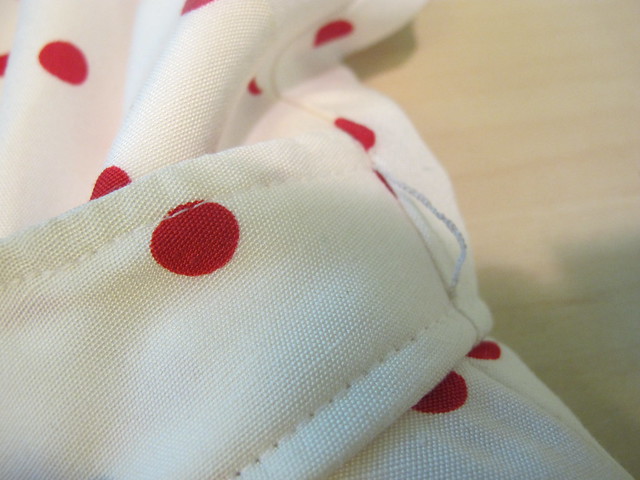
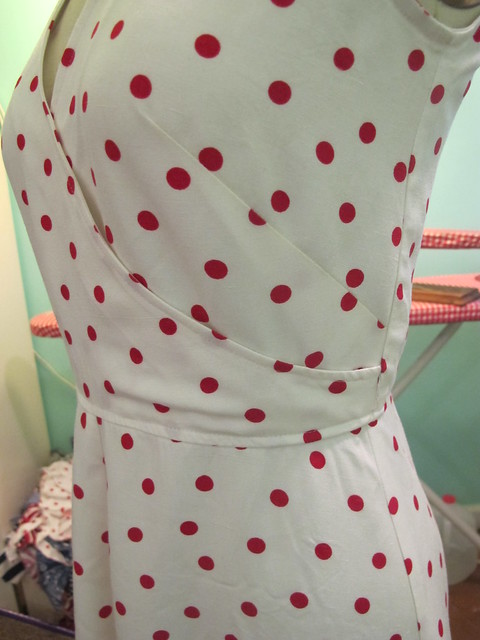
Similar to the cheetah version of this dress, I tacked the front surplice together to prevent it from gaping when I bend over. Unlike the cheetah version, I literally just sewed the two pieces together (see the stitching line? It’s aligned with the topstitching so it doesn’t show from the outside), instead of using a snap. A snap seems kind of silly with a mock-wrap dress – I mean, when am I going to unsnap it? Never, that’s when!

Simplicity 6280

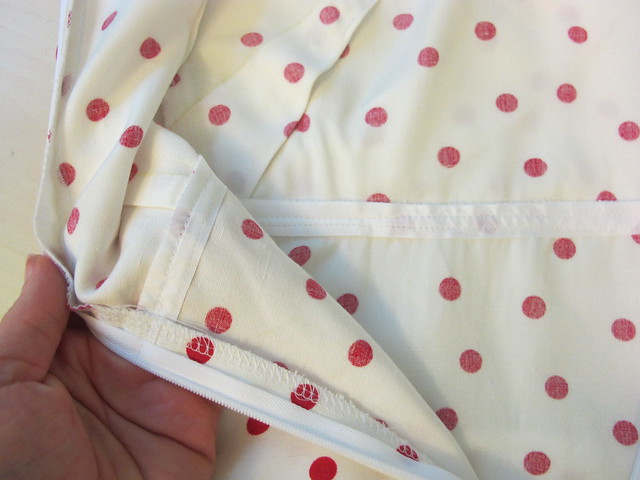
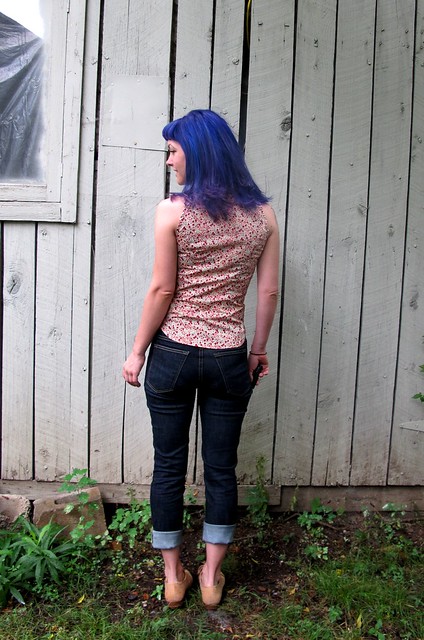
Because the fabric is so drapey and shifty, I added a strip of stay tape to the waist seam to prevent it from stretching over time. Just sewed it to the seam allowance at the waist, and then topstitched it down on the outside. Not shown but also there – I interfaced the zipper seam allowance with a strip of fusible interfacing, before I added the zipper. This not only adds strength, but also keeps the fabric from wrinkling by the zipper. I know there are still a few puckers – alas, the nature of the beast – but it’s not nearly the horrifyingly wavy thing that it was threatening to be pre-interfacing.

Simplicity 6280

I love making belt thread loops! Ha!

Simplicity 6280

Simplicity 6280

Simplicity 6280

Simplicity 6280

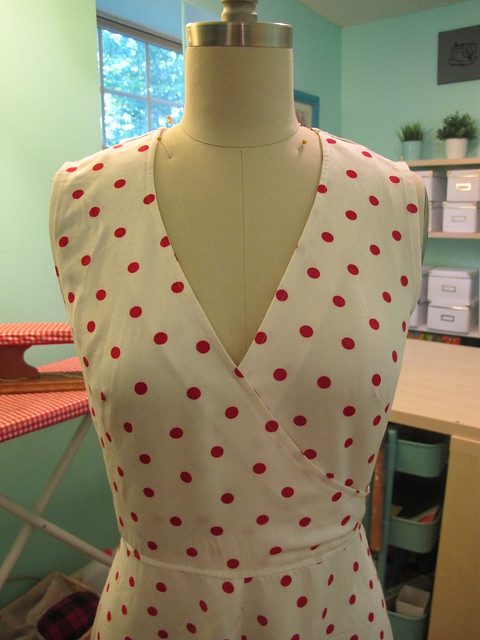
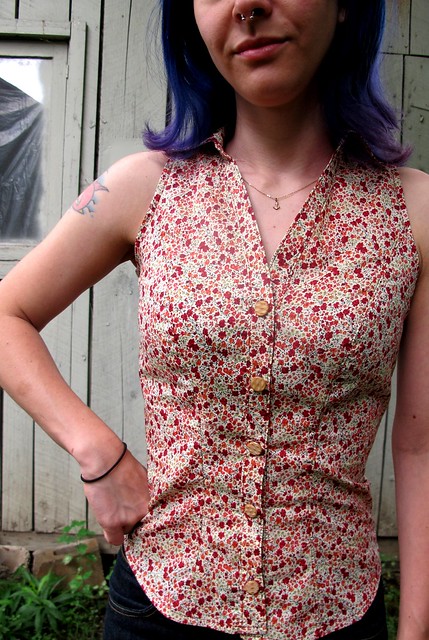
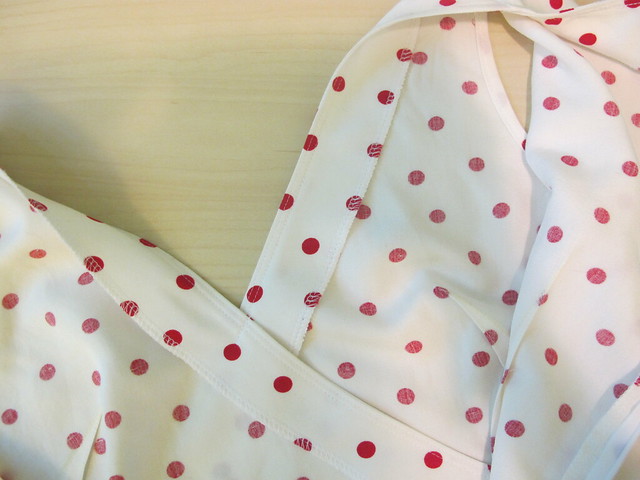
One of my favorite parts of this dress is this section right here – the dart + the lines of the surplice neckline. I just think it’s so pretty!

Simplicity 6280

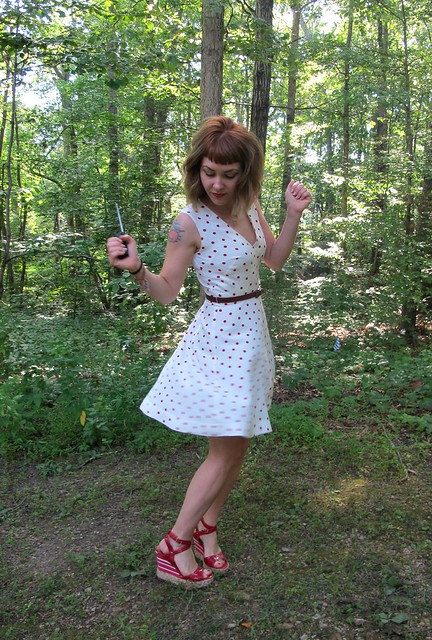
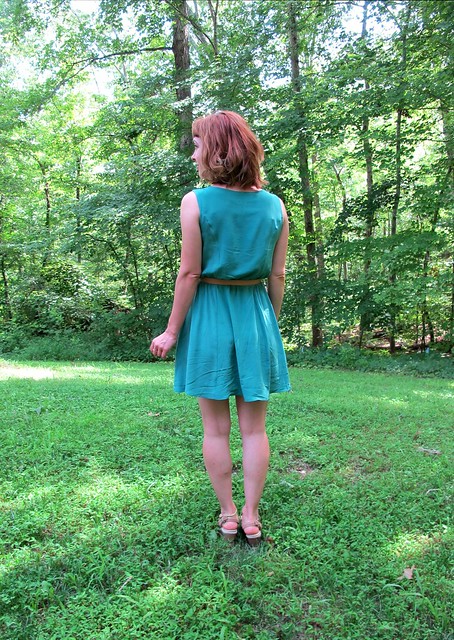
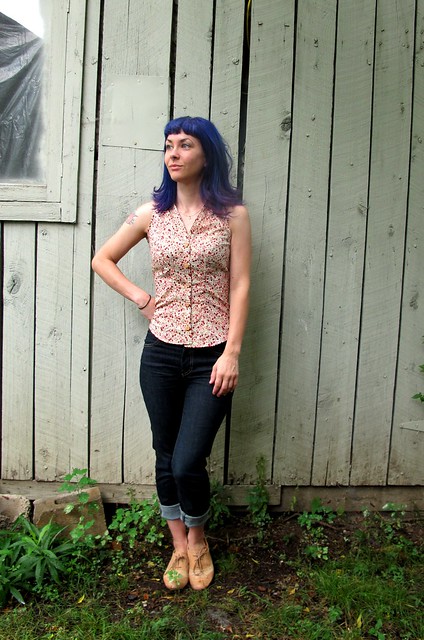
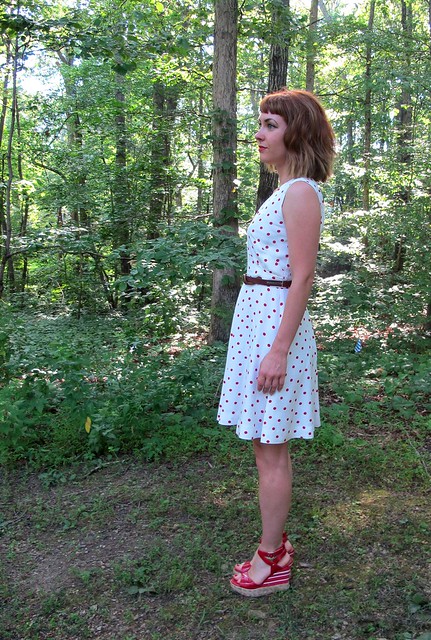
Really glad to finally get a good idea for that fabric so I could give it the love it deserved! I actually almost made a Hawthorn with it – but decided at the last minute that it might look a little too cutesy with the polka dots. This sleek 70s mock-wrap is a good alternative because it’s a classic style in it’s own right, and I know I love wearing it. Ideally, I’d like to make this again for winter with the long sleeves – but I also know I’d have to do a lot of pattern adjustments to the tissue before that happens. We’ll see!

In the meantime – I used some of the remaining fabric to make a really adorable bra, so stay tuned for that!

made-up-logo-ii

As a side note – have y’all heard about the Made Up Initiative that was just launched yesterday? Karen and Love Sewing Magazine have dreamed up a great fundraiser, where you pledge a donation and set your own challenge to make something before September 10 (it doesn’t have to be sewing related! It can be anything!). There will be prizes for those who complete their personal challenge on or before the deadline. All the money raised goes to the National Literacy Trust.

I love the idea of pulling the sewing community together to accomplish something like this, and bonus if it’s for literacy! Reading was a huge part of my childhood and I fell in love with it at a very early age. I come from a family of voracious readers and it saddens me that not every child (or adult, for that matter) has those same opportunities that I did. So I’m definitely on board with this, and have contributed and made my pledge – I will be making a swimsuit before we go on vacation next month. It’s a pretty simple pledge – I really wanted to make something show-stopping, like a coat or some shit – but I realized that time is pretty short right now and I need something low-key if I actually want it to be finished by the deadline. Plus, I want an excuse to use this 70s-fabulous string bikini pattern that I bought at the flea market a couple of months ago. We are going to Cancun, Mexico, the first weekend of September, so time is short!

I encourage all of you to consider joining the Made Up Initiative and set your own challenge! Again, it doesn’t have to be a big fancy project – it can be as small as making a couple of napkins – or even sewing related. You just need to make something by the deadline. And even if you don’t think you can manage anything by the deadline, maybe consider donating anyway. Even $5 makes a difference!

For all the info on the Made Up Initiative, check out Karen’s blog post. You can also donated directly to the Just Giving page – as of this publish, it’s at 91%, which is awesome. Think we can double that? C’mon, y’all! Do it for the books! ♥

Completed: McCall’s 6952

27 Jul

I think this summer will forever be known as the Summer of the Silk Sundress, well, for me, anyway. That seems to be all I want to sew/wear – not that I’m complaining!

McCall's 6952So, here’s my newest addition to the closet – McCall’s 6952. I think this pattern is actually from last year, but I only just discovered it this year. As far as dress patterns go, it’s pretty basic – wide shoulder straps (aka BRA FRIENDLY STRAPS), princess seams, and an elastic waist. The dress doesn’t even require a zipper; you can just slip it over your head. And I don’t know what is with me and elastic waists lately, but it’s basically all I want to wear these days. I’m not pregnant or anything. I’m just constantly in search of comfort haha. McCall's 6952

Simple is good, though, if you want a nice plain backdrop for showing off amazing fabrics. Or not even cool printed amazing fabrics – sometimes a luxe silk in an incredible color is amazing enough, you know?

McCall's 6952McCall's 6952

The silk I used here is another fabric gift that I’ve been too terrified to actually use. Sunni sent it to me last year in a big grab box of fabrics – any of y’all who lurk her blog or perused her store (which I’m really bummed to hear about it’s closing!) know that woman has got some taste when it comes to fabric. I believe this silk crepe was actually dyed by her, even. Of course. And she sent me like 4 yards (or something generous like that) and here I’ve been too skeered to actually use it.

McCall's 6952This pattern seemed like a good place to start. The dress isn’t super close-fitting, so I didn’t have to worry about fitting issues (other than the length of the straps, which were surprisingly almost perfect for me). I originally noticed the pattern because I really like view A – with the plain front and cut-out back – but I decided to make view B for this dress – with the cool little ruffled boobie flounce. My boobs need all the help they can get, y’all. McCall's 6952

McCall's 6952Construction-wise, I didn’t follow the instructions at all. The instructions have you line the dress, but I like wearing as few layers as possible when it comes to summer heat. So I just finished the neckline and arm holes with self bias binding (jeez, I sound like a broken record. I should rename this The Summer of Self Bias Binding haha). All hems are rolled by machine, and the inside is entirely finished with French seams. The elastic casing is a strip of bias binding, with the elastic threaded through. McCall's 6952

And I totally prewashed/dried this silk in the machine so this is some shit that will never see the dry-cleaners. Machine washed silk FTW!

McCall's 6952McCall's 6952

McCall's 6952Fit-wise, I only needed a couple very minor adjustments (minor enough where I was able to fit them as I sewed). The shoulders were almost perfect, but I did raise them by about 1/4″. I also ended up taking about 2″ off the hem, as I think the shorter length is a bit more flattering on me. McCall's 6952

McCall's 6952I am thinking this will be a good pattern match for the cool fabric that I bought in Peru. The plain version with the cut-out back, I mean. Right?? I better do it before I change my damn mind again haha. McCall's 6952

OAL2015: Fabric, Size & Cutting

1 Jun

OAL_Banner

Happy Monday, everyone! We are officially kicking off the OAL (Outfit Along) this morning, so I hope you’re ready for it! As I mentioned in the announcement post, we won’t actually start the sewing until later this month, on 6/22, since I’ll be traveling outside of the country and won’t have much internet access (and I hate the thought of putting up a tutorial and then not being around to answer questions! Lame!). However, I figured I’d help get you guys rolling in the meantime with choosing your fabric, size, and cutting. Then when I’m back, we can get straight into sewing so you can finish these dresses before the deadline at the end of July! Sound good?

Of course, if you don’t need the sewing tutorials, then you are absolutely free to start the sewing whenever you’d like! This just goes for those of y’all who are waiting for tutorials 🙂 For this year, I won’t be doing a full photo step-by-step of the entire pattern – but if you need those, most of the steps are similar to the ones from The 2014 OAL, so you can always browse through the tag for the tutorials. Things like sewing princess seams, sleeves or bias binding, and inserting a lapped zipper. All good stuff! Since it’s already up on the blog, I don’t see any point in reinventing the wheel (or subjecting those of y’all who aren’t following the OAL to a bunch of repeat tutorial posts, because, boo on that).

The tutorials I’ll be covering on this here blog are changing out the lining for bias facing (which can get a little weird around that back cutout, but don’t worry, I got your back!) and adding pockets. I will only be sewing View A, with the back cutout and no sleeves (that’s a lie, I’m still debating if I want to add the little cap sleeves. Decisions, decisions!). Again, the ~official~ dress pattern for the OAL is McCall’s 6887, but you are totally welcome to sew whatevererrrrr pattern you like!

First of all, here’s the fabric I’ve chosen for my dress!

OAL2015 - Fabric

This is some uhhhh-mazing Ikat cotton that I picked up from Mood Fabrics in NYC when I was there… um… March 2014. Ha! I’ve been apprehensive to sew it up because the print-matching looked to be a nightmare, and also, the fabric is pretty thick and I wasn’t entirely sure what kind of garment it would work with. I think it’ll be really nice for this dress; it has a good structure for the skirt, and the print is so fun! I haven’t decided what color bias binding to use for the insides – common sense would tell me black or white, but I’m thinking I might look for some turquoise or hot pink 🙂 Something to add a little splash of color to the inside 🙂

OAL2015 - Fabric & yarn

Here it is with my yarn for the sweater portion – this is good ol’ Cascade 220 (my one true yarnlove), in a gorgeous mint color.

Don’t know what kind of fabric to choose for your dress? First of all, think about how you want the finished dress to look – do you want a bit of structure in the skirt and bodice, or do you want everything to hang in soft folds? You will want to choose a fabric with a weight and drape that work with what you have in mind. For this particular pattern, I really like how it looks with more structured fabrics – such as linen, cotton eyelet, cotton sateen, or even quilting cotton! This blog post I wrote for last year’s OAL goes over all the details for choosing and weight and drape, and shows you the differences between several fabrics. I’d recommend checking that out first, if you’re confused!

Here are some fabrics I’ve pulled off the ‘nets that would be lovely for this pattern –

coral eyelet
Italian Red Coral Eyelet – from Mood Fabrics
This would be a great choice for adding a lining – or if you want to skip the lining and still go with bias binding finishes, make sure you get an appropriate underlining. You could also sew a matching slip 🙂

tropical sateen
Tropical Cotton Sateen – from Mood Fabrics
Busy prints are great for hiding wonky seams, if you’re concerned about neatness 🙂 If you plan on sewing this pattern with a stretch fabric, you may want to consider sizing down (make a muslin out of similar weight/stretch fabric first, to check!).

abstract sateen
Abstract Cotton Sateen – from Mood Fabrics
I couldn’t resist. This fabric is AMAZING.

seersucker
Red and White Striped Cotton Seersucker – from Mood Fabrics
Easy to sew and lovely to wear, cotton seersucker is a great option if you live in a hot climate. I love the classic red and white stripes!

linen
Pinstriped Linen from Blackbird Fabrics
Another good option for hot climates. This linen is similar to the stuff I used to make my linen pajamas 🙂

shirting
Denim Chambray Cotton Shirting – from A Fashionable Stitch
Ain’t nothing that says you have to use shirting to make shirts. Make yourself a comfy little dress instead 🙂

agf
Art Gallery Fabrics: Arizona from Grey’s Fabric
Quilting cotton is a surprisingly good choice for this pattern, since it has the weight and drape that looks best with the bodice and skirt – and you have aaaalll kinds of fun prints to choose from 😀 I’ve never personally sewn with Art Gallery Fabrics, but everyone on the internet seems to go apeshit over them. At any rate, this is one helluva fun print!

A few notes about fabric:
– As I mentioned, if you’re sewing stuff that’s on the sheer side and you don’t want to mess with a lining, make sure you get an appropriate underlining fabric. I prefer to use white cotton voile or batiste (or black, or, whatever color looks best with my fabric), as it doesn’t add too much weight. If you aren’t sure about the weight, hold it with a piece of your main fabric and see how you like the way it feels. I won’t be covering underlining in this OAL, but I have a tutorial on my blog if you need help!
– Those of y’all sewing stripes or directional prints (meaning if you turn it the other way, it’s quite obviously upside-down) – make sure you buy extra fabric! Depending on the width of your fabric and the size you’re cutting, 1/2 yard – 1 yard will do.
– Prewash your fabric, however you plan on sewing your final garment. For me, that’s a cold wash and a low tumble dry (I hang my dresses to dry once they’re done – only because I hate ironing! Ha. But I always pre-shrink in the dryer just in case it accidentally gets tossed in there later down the line!).
– For your bias facings (and pockets, for that matter!), you may want to use a lighter fabric if your main fabric is a bit bulky. This is the case with my Ikat – I don’t want bulky facings, so I’m getting something lighter. Again, cotton batiste or voile is a really good choice for this, as is quilting cotton or cotton shirting. You can use almost anything, but remember that you’re dealing with skinny strips cut on the bias, so maybe don’t try the silk right now (unless you’re feeling really brazen!). Also, get something that presses well – like cotton or rayon. You will be pressing the hell out of your facings, and you want something that will respond to that. Polyester is not a good choice for this. I always stash-raid for this kind of thing, but if you’re buying, you’ll need about 1/2 a yard (and you’ll have tonssss left over to make even more bias binding, so get something you really love 🙂 ). Of course, you also buy those pre-made bias tapes – I don’t care for them, because I think the fabric is too stiff to look nice (and the color selection is very limited), but it’s definitely a lazy option if you don’t want to make your own. You’ll need the kind that is 1″ wide.
– To make your dress, you will also need interfacing, an invisible zipper (I prefer this dress finished with an invisible zipper, but you can try a lapped zipper if you’d like) and at least 3 buttons for the back, if you’re making the scoop back version.

For choosing your size, again, I will refer to you to Last year’s post in the OAL. Scroll past all the fabric, and there’s a section on choosing your size based on the finished measurements. McCall’s patterns can have quite a bit of ease in them, so this is a more accurate way of choosing the correct size. This is how I size *all* of the patterns I make, and it has yet to let me down 🙂 As an example – my body measurements put me into a size 10, but I sew the 6 (graded to 8 at the waist) for my finished garment, and it fits perfectly. Check those finished measurements!

If this is your first time making the pattern, I would strongly advise you to make a muslin mock-up of at least the bodice so you have a good idea of how the finished garment will fit. This gives you a good opportunity to make any necessary adjustments before cutting into your fabric. It’s also important if you’re sewing the version with the scoop back – I found the scoop came up higher than my bra band, and this may be the case for you as well. Can’t fix it once you’ve already sewn it up! For the muslin, you can make the whole dress if you’d like – but I just sew up the bodice and leave off any finishing. Pin the back shut as best you can to get a good assessment of the fit.

Once you’ve got your size and muslin done, THEN it’s time to cut your fabric! Refer to this post about cutting and marking fabric (also from last year’s OAL hahahaha sorry) if you need any help 🙂 You will be following the cutting guidelines that are included in your pattern; make sure you follow them carefully so you cut the correct number of pieces. The side skirt piece should be cut TWICE on the double layer, for a total of 4 pieces.

OAL2015 - Cutting the back bodice

You may also want to consider adding a little extra fabric allowance below the scoop back, just to give yourself more bra coverage (I added about 1/2″). There is also a 5/8″ seam allowance there, and we’ll be sewing at 1/4″ to apply the bias, so keep that in mind as well. Your muslin will tell you exactly how much you need to add (if any at all!) to cover your bra band. Or maybe I just wear my bra band low, ha.

FINALLY, if you’re cutting stripes or plaids and need help matching – here’s another tutorial link for that. Man! I’m so glad I already wrote all these tutorials haha!

Ok, whew, I think that about covers it! Do you have any questions about the prep work that I haven’t covered in this post? Let me know before I ditch town on Thursday 6/4 and I’ll be happy to answer them as best I can 🙂 Have you chosen your fabric and yarn yet? Let’s have a look, please! 🙂

Completed: McCall’s 5803

21 Jul

For the past couple of weeks, I’ve been slowing reorganizing my pattern stash. You guys, I had no idea how much shit I had stuffed in those boxes until I really started culling through them. Let’s just say I’ve made 3 trips to my local comic book store to buy more packs of 100 backing boards and clear sleeves. It’s kind of disgusting when I think about how many patterns I have (although, to be fair, most of them are old vintage ones I picked up at our flea market for next to nothing because they would have gotten thrown away otherwise oh god), and even more so when I realize I have so many that I haven’t even thought about since I took them home. On the flip side, I’ve been rediscovering a lot of cool ones!

McCall 5803 - Liberty

This is McCall’s 5803 – it’s an old OOP Lizzy McGuire (lol yep) pattern that I’ve had for god knows how long. I’ve actually made this one before – in the form of a Plaid Clusterfuck – and I’ve always (well, when I remembered about it hahahahaha) wanted to made a more demure version, since I love the shape of the arm holes and button placket (and I’d love one with a proper collar and not just the stand). I swear, every time I wore that Plaid shit, I would think, “Man, I wish this didn’t have the ruffles.” So as soon as I rediscovered it, I knew I could make it happen.

McCall 5803 - Liberty

My original version of this top included a big ol’ 1.5″ FBA, which was no longer needed to get a good fit (I don’t even have the original one; I sold it last year when I realized it didn’t fit me at all anymore). Since I’m too much of a stubborn ass to trace my patterns and preserve the original, that meant I had to remove the FBA by carefully peeling up tape and carefully repiecing tissue together. It worked, for the most part I guess, but something tragic happened at the waist because this baby is apparently painted on. Despite a tissue fit (and my stubborn ass thinking, “noooooo I don’t need a muslin, I’ve made this before lololol) and everything. Argh.

I also didn’t bother to staystitch the neckline (whyyy), so it stretched out a little on one side. To remedy this, I pulled that side lower while marking the button spacing, which is why it’s not even at the bottom (you probably didn’t even notice that until I said something, oh well). These types of shirts are generally hemmed during the beginning of construction, so I couldn’t fix the unevenness when I was doing the buttons, if that makes sense. I should probably unpick the hem and fix it now, but eh. It doesn’t bother me as much as it should.

McCall 5803 - Liberty

McCall 5803 - Liberty

I know these pictures make it hard to see what’s going on. I’m sorry 😦 You can click on them to make them bigger through Flickr, if that helps.

McCall 5803 - Liberty

I let out some of the side seams to try to add a little more tummy room, and that helped a little. I’ve also just recovered from a couple weekends of eating some of the worst shit for me ever – I don’t necessarily diet, but I try to maintain regular exercise and eat things that are beneficial to my health/body and that seems to work well enough for me. After a couple of weekends of eating cupcakes and cookies and fried deliciousness in a to-go box, though, I was feeling tired and bloated and definitely like a stuffed sausage when I put this damn shirt on. I put the shirt aside for a week (wadded up in the corner, because that’s how I roll), I think it looks a bit better now that my body is back to normal. It’s definitely still pretty tight, but at least the busy print hides most of the wrinkles! Ha!

McCall 5803 - Liberty

Speaking of this busy print – isn’t it beeeeeautiful!? Ahh!! It was a gift from Sunni, who sent me a box of some of the most lovely fabrics earlier this year. I guess I never blogged about that, but we decided during Project Sewn that we both deserved a little treat and decided to have a fabric trade! She sent me all kinds of amazing shit – stuff that I’m now just sitting on because it’s almost too good to cut (and I’m waiting for divine inspiration)! That woman has some fabulous taste – and this is the first piece I actually made something with.

McCall 5803 - Liberty
The goodness you are looking at right now is actually Liberty of London shirting cotton (I told you, that woman has some fabulous taste!) from Sunni’s personal stash. Ahh!!! I’ll admit – and y’all can chase me with pitchforks if you’d like – but I’ve never really cared much for Liberty fabrics. Sorry! I think the prints are lovely, but they also remind me way too much of my Laura Ashley bedroom from my childhood. Too girly and floraly and, well, y’all look pretty in them but I’d rather not. I’d rather be clothed in NEON! But anyway, I’ve always been curious to try it because sewists don’t only rave about the prints – they rave about the quality of the cotton as well. You know I love trying new things for science, so I was pretty excited to have my own piece to play with when I got Sunni’s package. And I do think this print is super beautiful – it’s floral, sure, but it’s not all ditzy and super pastel girly like the Liberty I always see. It’s much more along the lines of my style, and I knew it would make a fabulous top.

McCall 5803 - Liberty

I’m so glad I made this work, because I would have been really really angry at myself if it had ended up being a wadder! I could probably stand to let out a couple more seams, but everything is topstitched, so it’s really a matter of me getting the energy to go through all that unpicking and retopstitching. Argh! Anyway, at least I left off the ruffles this time 😉

McCall 5803 - Liberty

Anyway, here she is in all her glory! Beautiful print, topstitching (that will be the end of me), and those gorgeous buttons. If those look familiar, it’s because I used them on my Audrey in Unst cardigan. Not the same ones – my cardigan still has buttons – but from the same batch. My sister-in-law helped me pick them out for the cardigan, and I bought them from a vendor at our flea market. He had all kinds of cool vintage buttons – I think he said these are vegetable protein from the 20s? – and she actually went back afterwards and bought up the rest for me for Christmas. So awesome 🙂 So obviously, they were perfect for this shirt – both in specialness and general matchy-ness 🙂

McCall 5803 - Liberty

Construction-wise, nothing new to report here. I finished the arm holes with self bias facing and topstitched with a slightly longer stitch length so the stitches would be more defined.

McCall 5803 - Liberty

So, what’s the verdict on Liberty of London? Well – y’all sewists are right, this shit is a JOY to sew up! It presses well, it doesn’t show pin holes, it’s easy to cut, and the fraying is minimum. It also just feels absolutely luscious. I totally understand the rabid fangirling over this shit. I don’t know if there is much Liberty in my future – after all, it’s still hideously expensive – but considering this shirt barely took any yardage, I could probably squeeze out a special piece for another special top 🙂

So, THANK YOU, Sunni, for the amazing gift of this gorgeous fabric (not to mention the chance to get to sew on it!)! Have any of y’all ever sewn with Liberty? Are there any cool non-floral prints that I’m blindly overlooking?