Tag Archives: cotton voile

Completed: The Brumby Skirt

29 May

Raise your hand if you love Megan Nielsen and are excited about her return to printed patterns and the release of her new sewing app. All I can say is – YAAAAY!!!

Brumby Skirt

To celebrate these big launches, Megan also dropped a new pattern into the mix – the Brumby skirt. She asked me a few weeks ago if I’d like to try out/review the new pattern – as well as the app – and considering I’d been stalking this pattern for well over a year (it’s not too hard, since she kept posting teasers of it on Instagram!), I was all YAAASSS. I wasn’t sure if I’d be able to finish the skirt – let alone post about it – before I leave for my trip next week, but curiosity got the better of me and I found myself dedicating an afternoon to Brumby Heaven.

Brumby Skirt

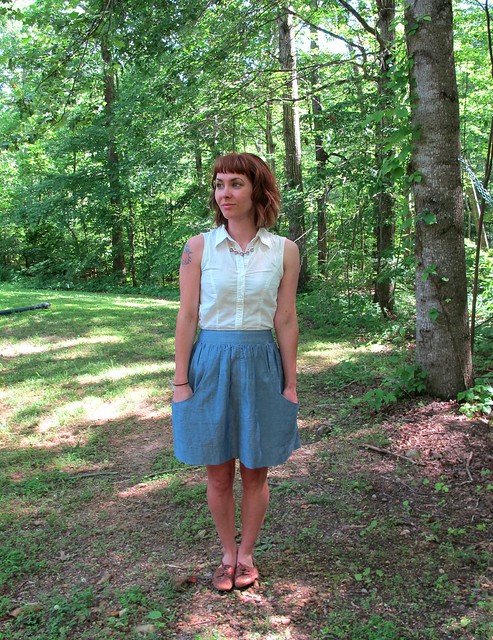
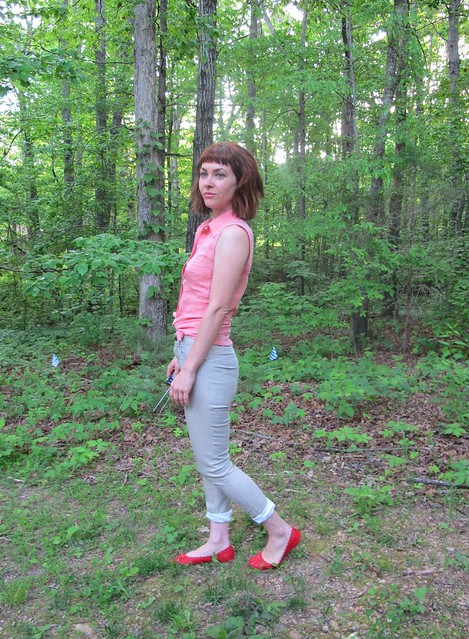
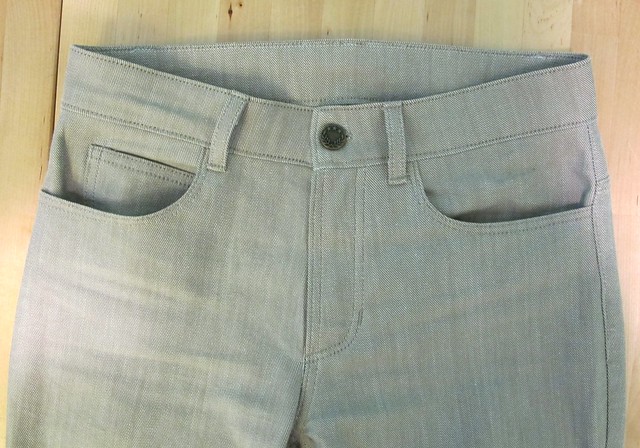
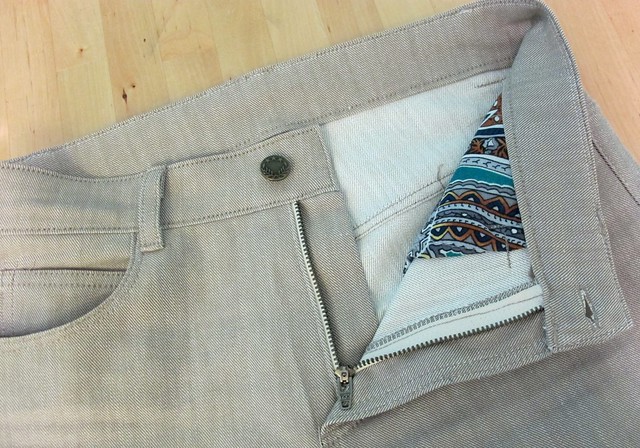
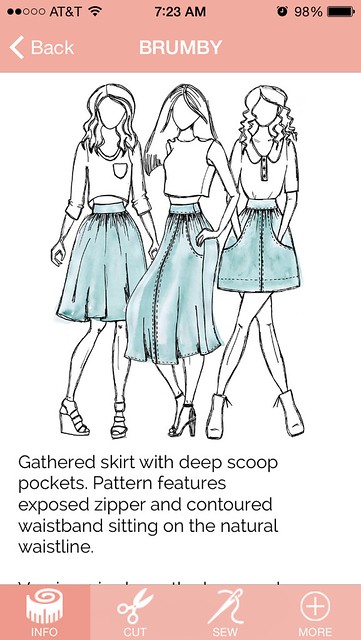
Brumby is a simple little gathered skirt pattern, with a couple special details to make it stand a step above your basic DIY-drafted-dirndl. For one, there’s those pockets. How good are those pockets?! They are nice and deep, and what really pleases me about them is how they kind of stick out away from the skirt and give it this interesting shape. The instructions also include how to insert an exposed zipper – which, honestly, I didn’t realize there was actually a specific method on how to do this. These instructions give you a nice clean finish and a strong zipper.

The skirt has a curved waistband with side seams, as well as options for varying amounts of fullness in the gathers and different hem lengths.

Brumby Skirt

Brumby Skirt

What I’ve always loved about Megan’s patterns is that there isn’t necessarily anything ground-breaking about the designs – it’s clean and simple design, the building blocks of your wardrobe, to be made in a myriad of different fabrics. There are special details to make the pattern stand out above all the other similar ones available on the market – such as the curved hi-lo hem of the Briar tshirt, or the floaty circle skirt of the Tania culottes, or even the awesome pockets in this skirt. The directions are clearly laid out so that even the earliest beginner can manage them, but they also lend themselves well to customization so even an advanced sewer can find joy in making them up.

Brumby Skirt

Brumby Skirt

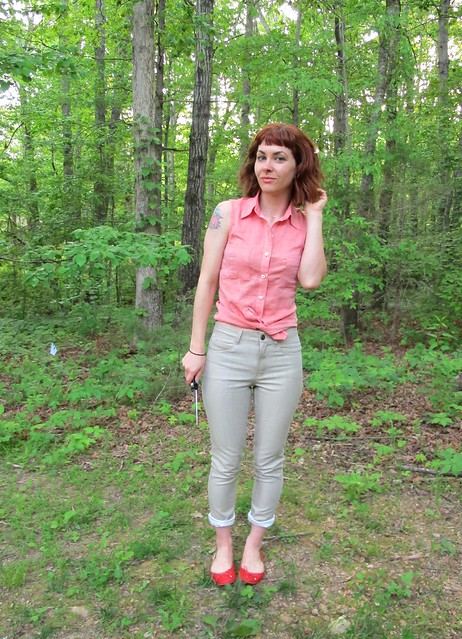
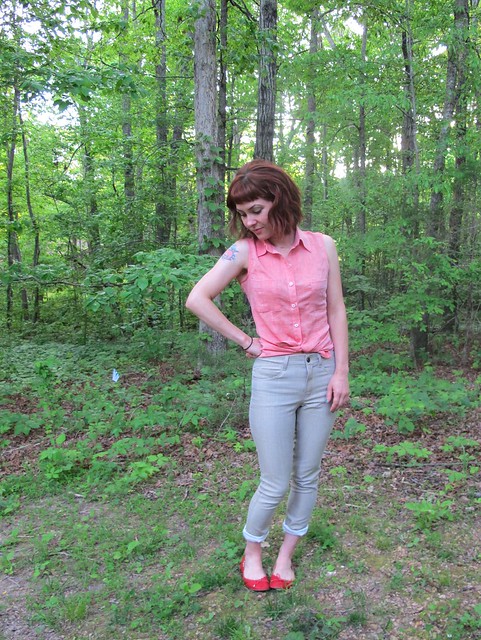
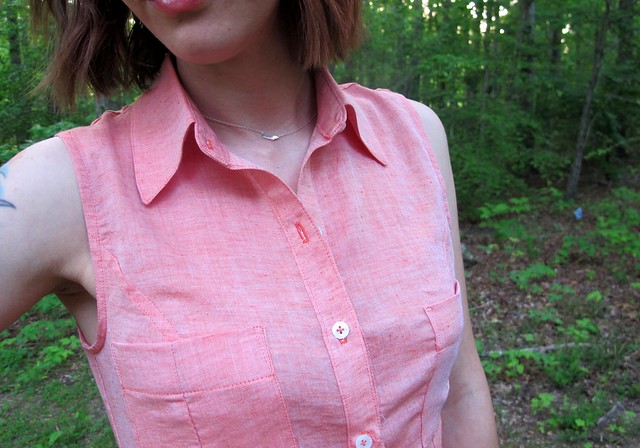
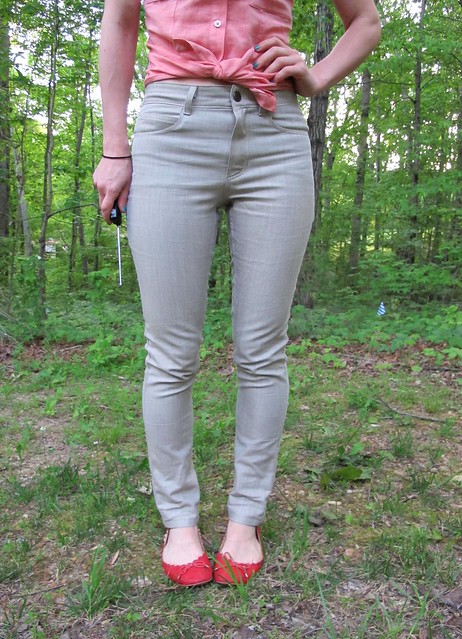
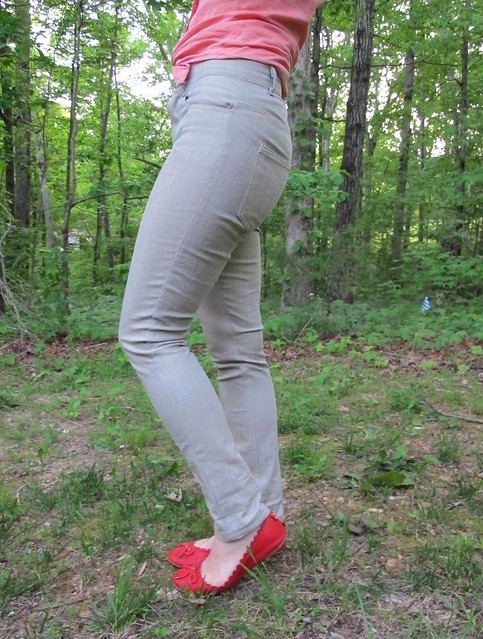
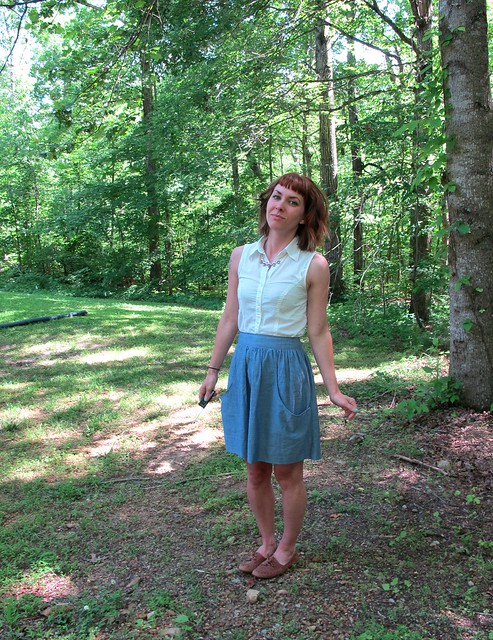
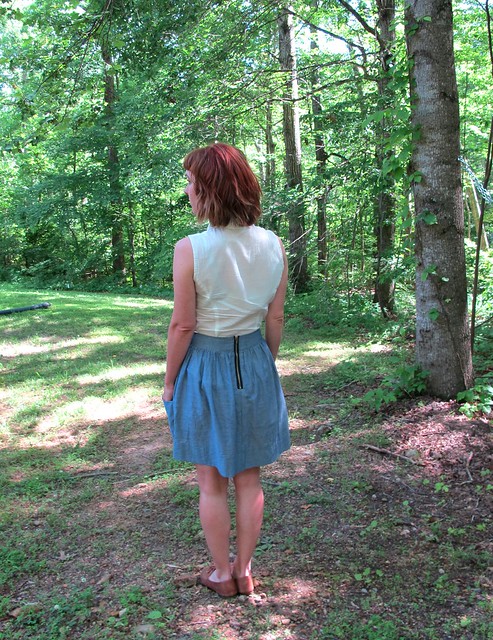
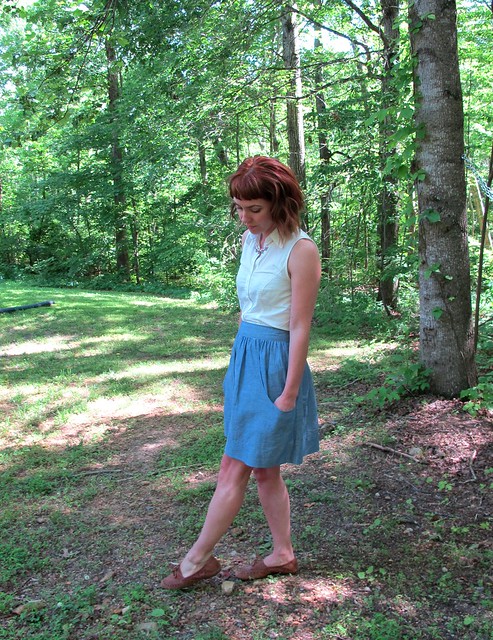
To make my Brumby, I cut the size XS and sewed up Version 1. This version has less gathers and is intended for heavier fabrics, however, I used a pretty lightweight fabric in it’s place. I’m not a huge fan of gathers at my waist – I think they add bulk in weird spots and just don’t look very good on me – but I thought the wide waistband combined with less gathers in a lighter fabric would probably work. And I think it does! My fabric is a total stash-bust, leftover chambray that I used to make this shirt last year. I bought it locally here in Nashville at The Fabric Studio, and I’ve been hanging onto the remaining yardage because I wanted to make a floaty little summer skirt with it. It’s *very* lightweight chambray – like, voile lightweight. It’s borderline sheer – with my button up, I have to wear a nude bra or you can see everything underneath haha. Anyway, it has a lovely sheen and a nice drape and it’s soooo good to sew. Making it up into this skirt was a good idea. Sorry if it’s a little wrinkled – these photos were taken after a day of wearing it.

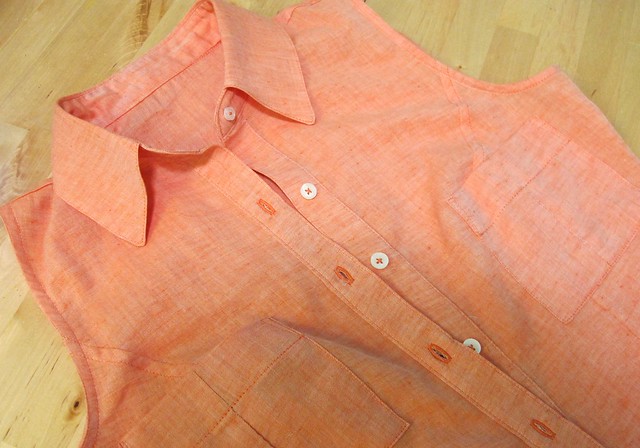
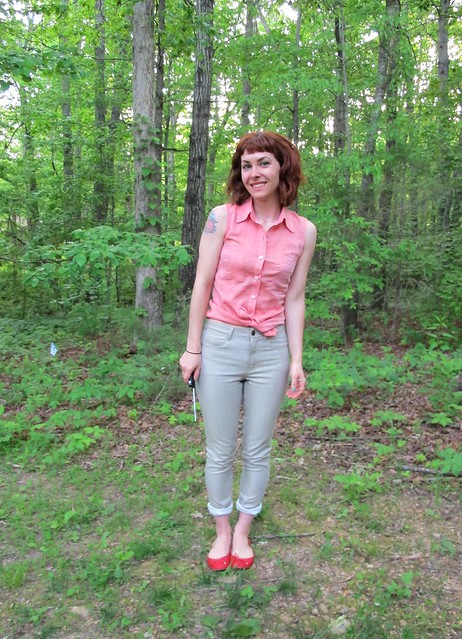
Oh! And I also made that top – it’s my very first Butterick 5526. I hated the length of the sleeves and never wore it, so I finally just cut them off and finished the raw edges with bias facing. Much more wearable now!

Brumby Skirt

Brumby Skirt

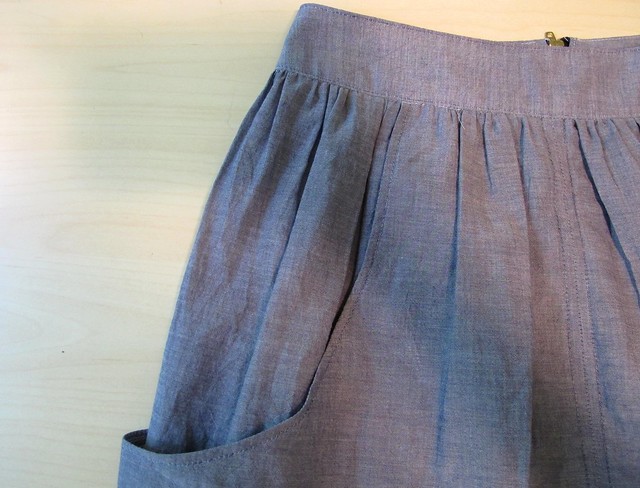
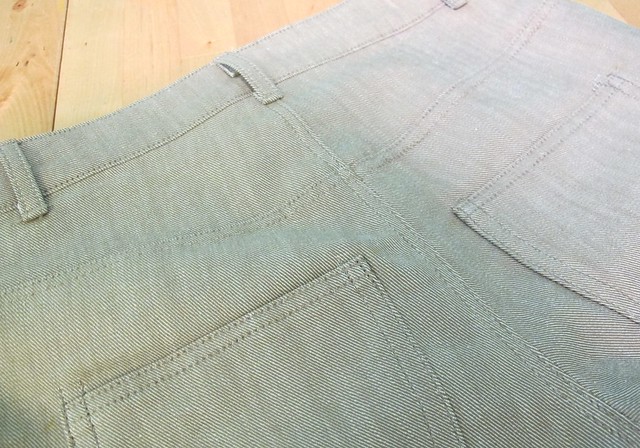
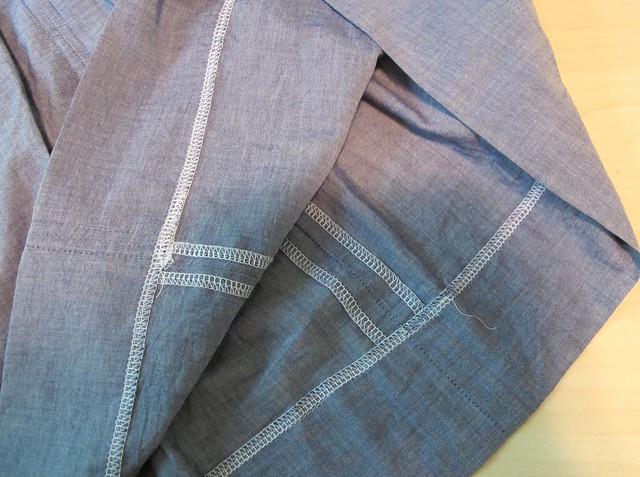
Back to Brumby! I knew I wanted topstitching, but chambray is notoriously hard to thread-match, and I didn’t want my topstitching to be the first thing you noticed when you saw the skirt. I actually ended up using denim thread to topstitch this – a lightweight denim thread, but denim thread nonetheless. It’s that weird blue/navy Gutterman thread that they sell with the denim thread. The variances in color were good enough that they went well with the blues in the fabric, and they contrast nicely but they don’t really stand out. The thread is light enough so it doesn’t make the topstitched areas hang weird, so that is nice. I used white all-purposed thread in the bobbin which also probably helped.

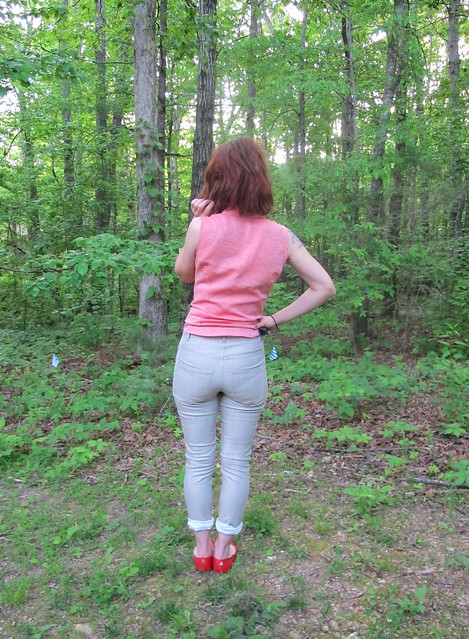
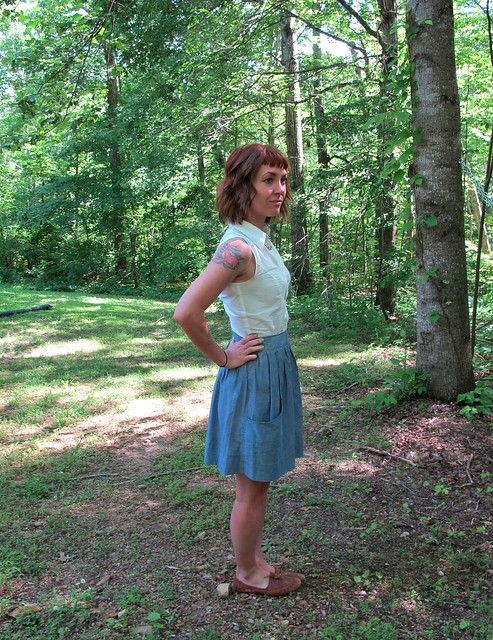
The topstitching goes all over the skirt – down the center front, down the side seams, around the pockets, across the hem, all around the waistband, and of course, holding the zipper into place. I wanted to offset the delicate, floaty fabric with a some casual construction, and this is it! All seams are topstitched at 1/4″. I just eyeballed it on my machine, but I think I’m pretty certain I want a 1/4″ foot next time I go to the Bernina store. Feeeeeeet♥

Brumby Skirt

Brumby Skirt

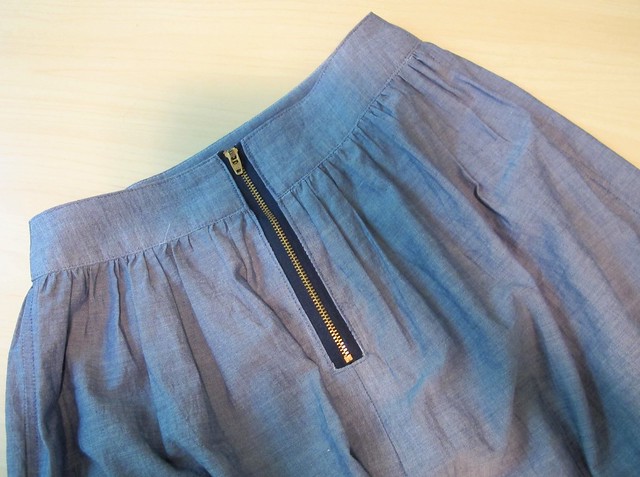
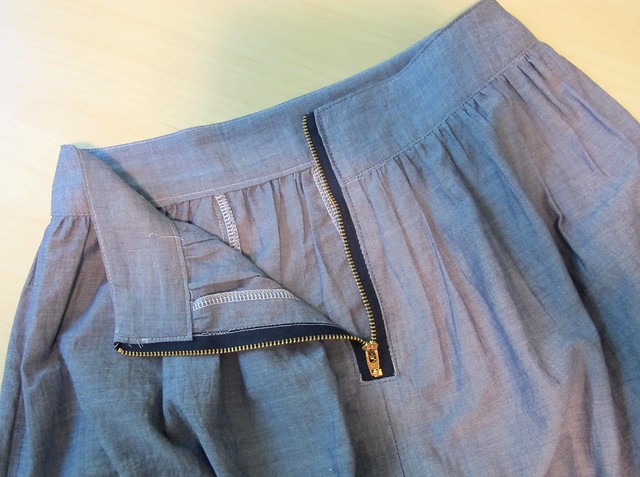
I am really happy with how nicely the zipper went in! Like I said, there are directions in the pattern for getting a good exposed zip – and I totally didn’t realize there’s a method to doing this. I put an exposed zip in one of my tops last year (and I totally thought about wearing that top with this skirt, peplum tucked in, but ughh it won’t work because there are 2 exposed zippers and they’re different metals and wah), but that was really a matter of pressing seam allowances back and topstitching the zipper in. Poor peplum top, didn’t even have a damn chance.

Brumby Skirt

I will be totally honest here and tell you that I tried the skirt on about 3/4 of the way through construction (after attaching the waistband, but before I put in the zipper) and I was COMPLETELY underwhelmed with how it looked on me. In fact, underwhelmed is too nice of a word – I hated it! It was extremely unflattering and the length made me look dumpy. Part of that was because the waistband was a little bit too big – big enough to slide around and not sit into place, and make me look wider than I am. I did some quick waistband surgery to remove about 1/4″ total from the side seams, and then I took another 1/4″ out of the zipper seams when I was inserting it. That was enough to make the waistband fitted, but not so fitted that it’s uncomfortable.

The length was another issue – I just don’t do midis, and while I did cut the pattern for the mini, there’s a huge-ass hem included so it was really long before that got turned up. I know midis are ~in~ right now, and you can tell me all you want that they might even be flattering on me – but I’m all legs when it comes to skirt length and I just.can’t.do.it. Honestly, I didn’t really love this skirt on me until the hem was turned up and topstitched into place – and then I was twirling around my sewing room in excitement like a big dork. It’s funny how much the hem can affect how something looks. Anyway, that’s a big part of the reason why my hem is serged and topstitched – I wasn’t if I’d love the finished skirt, so didn’t want to spend tooo much time on the last steps. At any rate, the serging matches the rest of the guts so whatev.

Birthday Brumby!

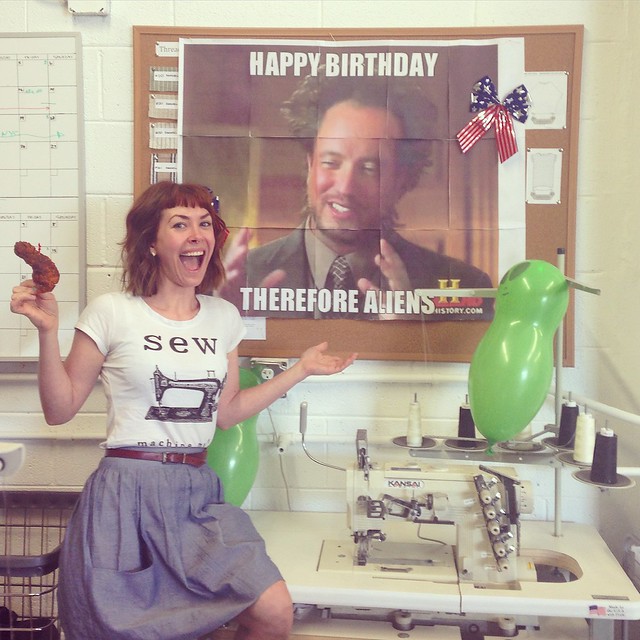
Sooo in the end, I loved the finished skirt so much that I wore it for my last hurrah of my 20s. Notes about this picture:
– That’s not what you think it is in my hand. It’s hot chicken.
– I love Giorgia Tsoukalos.
– And America.
– And also aliens.
– My coworkers at Elizabth Suzann are awesome and know how to throw (me)the best parties.

Megan Nielsen app

Before I jump off here, let’s talk about the Megan Nielsen Patterns app!

I will admit – other than my love for sewing blogs, I’m a bit of a paper girl when it comes to sewing media. I like paper patterns and I like having hard copies of the instructions that I can scribble notes (and mustaches) all over. While I think this app is a completely brilliant idea and may very well be the future of sewing patterns – I wasn’t sure if it would actually be useful to me (I’m old-fashioned in that sense, and I’m ok with it). However, I was willing to try it. For science. Also, it’s a free app soooo it’s not like I had anything to lose if I ended up hating it.

Megan Nielsen app

Megan Nielsen app

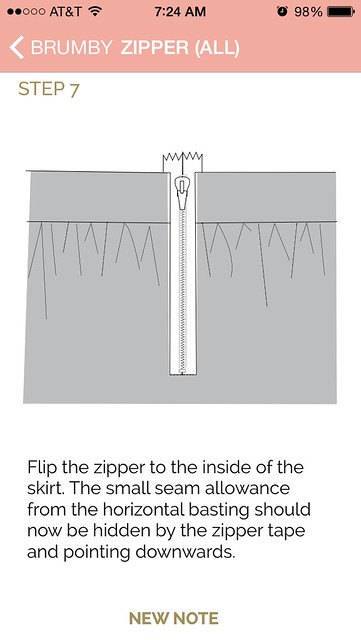
The main drive behind the app is basically digitizing the instructions you get with your pattern (paper or PDF). Everything from the required materials, to the cutting layouts, to each step of the instructions (cataloged in a way that’s easy to get straight to the section you need, instead of relying on the Endless Scroll) is included in the app. There are also options within the app (and each individual pattern) to view other people’s makes of this pattern, customization suggestions, and links to the tutorials that may be useful while constructing the garment.

Megan Nielsen app

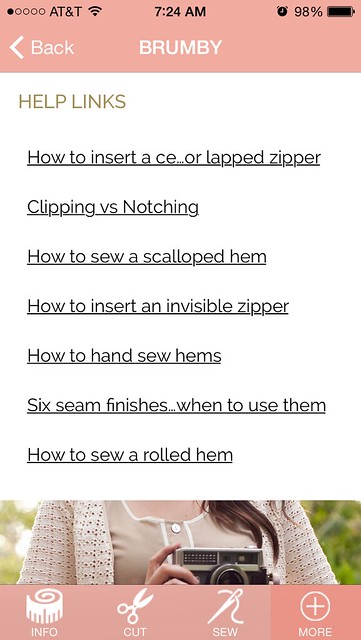
While I probably won’t switch out my paper instructions for digital (again, mustaches), I actually do find bits of this app useful! It’s SUPER handy to have when you’re shopping and need to reference a material’s list – in the past, I’d scribble everything down on paper (all right, I still do that. No shame!), but then you lose your paper, or you find that perfect fabric that doesn’t go with anything on your “make” list, or you forget that you also needed a zipper. I love the tutorial links, as I do use a computer to look up things while I’m sewing – but more often than not, I end up spiraling down this long internet rabbit hole, where I click on links on links on links and then I forget that I was sewing! Lame! So it’s nice to have a direct link in the app, where I can go straight to the tutorial, get the info I need, and get back to the task at hand. Another thing I love about the app is that you can access any tutorial/instructions for any pattern that you own – which is awesome for when I’m using a Megan Nielsen step in a different pattern, such as stealing her Briar neckline binding for my traced tshirts. In the past, I’d just pull the paper instructions out – but I’m always afraid I’m going to lazy out and forget to put them away and eventually lose them (I mean, it must happen – I think about all those vintage patterns we buy that have the wrong instructions or extra pattern pieces in them. Yep!). With the app, everything is in one place and I can quickly find it. So I like that!

And there are notes sections in the app, for scribbling, but no places that I see where you can doodle on the croquis faces.

Anyway, you can read more about the app in this post and download it in the iTunes store FOR FREE. Those of y’all on Andriods – it’s coming! Don’t worry!

Brumby Skirt

In other news, thanks for all your tips on dealing with my caffeine withdrawals! I am happy to report that I was feeling MUCH better yesterday – no more weird body aches, no more tiredness. I found some great uncaffeinated teas and I only miss coffee the tiniest bit now 🙂 To those of y’all who suggested that I drink decaf – I’m not opposed to decaf (and I drank about a cup a day while weaning off the hardcore stuff), but it does have trace amounts of caffeine in it, and my whole goal was to eliminate the stuff 100%. Mostly to see if I could 😛

*Note: Megan Nielsen provided this pattern to me free of charge, in exchange for a review. All opinions in this post are my own!

Completed: Another B5526 + Ginger Jeans Get-up

18 May

So sorry to dump this on y’all yet again – another collared shirt + jeans outfit combination. Yawn.

Gingers & B5526

Well, to backtrack – yawn for you, but 😀 😀 😀 😀 😀 for me hahahaha. I will never get tired of this outfit combination. Or, at least, not anytime soon. Maybe never is too strong of a word to use here.

Gingers & B5526

What’s mildly frustrating about writing a long-term blog (at the time of this posting, I’ve accumulated nearly 500 entries since I started waaaay back in 2009, WTF) is that you eventually reach a point when you’re just making the same thing over and over again (well… those of us who don’t make our blog our full-time income fall in this category. I’m sure if I was sponsored out the wazzoo and had all the time I spend at work to spend making content for my blog, it would be a different story, ha.). After re-assessing my wardrobe at the end of 2014 and realizing that I *still* had shitloads of clothing that I made simply for the new and shiny, I have made it a big point to really be honest with myself about whether or not I’ll actually wear something that I make. Like most people, I have a pretty predictable style. And like many sewers, I don’t want to spend a lot of time reinventing the wheel with new patterns if I can get the look I’m going for with an old TNT. So this translates to repeats upon repeats upon repeats.

So, while you might be yawning about the majority of the stuff that’s been posted in 2015… I gotta say, I am elated with the way my closet is looking these days!

Gingers & B5526

Gingers & B5526

With all that being said, there’s not much to report on either of these pieces since I’ve made them soooo many damn times. Jeans + collared shirt is totally my go-to when I want to feel comfortable but still look like I made an effort in the AM. I’ve found my TNT patterns and I feel good about the way they fit and the construction methods that I use.

Gingers & B5526

Gingers & B5526

The top was made using my beloved Butterick 5526. Y’all, I don’t know if I’ll ever sew another button up pattern again! (we all know that’s a lie) I’ve gotten to the point with this one where I can bang one out in a couple of days, which is really nice when you’re coming up on a looming Mood Sewing Network deadline, ha. The fabric is this amazing tigerlily orange cotton voile from Theory, which is a bit more of a coral-y pink than it is orange in real life (I don’t know how the color translates on your screen, but on the Mood Fabrics website it’s definitely pretty muted. The real color is much closer to what you see in my photos. It’s BEAUTIFUL). It has a beautiful chambray weave, which gives the color lots of dimension. This fabric was so so nice to work with – ok, it was a shifty bitch to cut, but once I got past this point, it handled and pressed like a boss. It’s also super comfortable to wear on even the hottest day.

Since the fabric does have a tendency to fray, I used flat-felled seams every where in my shirt. I also left off the sleeves and finished the armhole with self bias binding – it makes the shirt really casual and, again, awesome for hot weather. The pockets are the same pockets that come with the pattern, but I made them slightly smaller because the original size was a little overwhelming on me. Buttons are from my stash; they’re just your standard white shirt buttons. Oh! And the matching thread also came from Mood Fabrics – I noticed that when I was ordering my fabric, there were thread suggestions at the bottom of the page. I figured I’d try out the service – you know, for science – and I’m super pleased with the color match. Even more pleased that I was saved a trip to the fabric store. Mostly because those tend to be very dangerous places for my wallet, ha.

Gingers & B5526

Gingers & B5526

The good thing about running a long-term blog and making a bunch of pattern repeats is that you will eventually bore of just making things that are passable to wear in public, and start focusing on really honing your skills to the next level. Or, at least, that’s how it worked out for me. Look at those clean finished insides! I should wear this shit wrong-side out.

Gingers & B5526

I did shorten the length of the shirt by about 2″ – I think the original length was just sliiiightly too long for my height. This way I can wear it untucked or tied at the waist. If I do a half tuck, it doesn’t pooch out all weird like some of my longer shirts tend to do. As always, I finish my shirt hems with self bias facing. I think it makes for a much cleaner finish, and it’s must easier to press and sew those curves with the bias tape instead of trying to wrangle the hem itself.

Gingers & B5526

Gingers & B5526

For my jeans, I used my now-favorite-ever-pants-pattern, the Ginger Jeans. I’ve made this a few times before (and I definitely don’t plan on stopping – I finally was able to invest in one of the denim kits because YAY) and I’m just really happy with the way this pattern fits my body. The fabric is a cool metallic gold stretch denim. I was actually looking for white denim to make this up, despite me being a stain magnet when it comes to white. At any rate, this denim’s wrong side actually is white flecked with very subtle bits of gold, and these very well almost became white jeans. I talked myself out of it because I was afraid the not-quite-pure-white would make the jeans look like they were dirty, plus again, stain magnet. So I stuck with the gold side. Also, this denim doesn’t have as much stretch as my other denims, so the jeans are a bit tight. I had to let the side seams out to 3/8″ or else I would have never gotten these things over my ass. They’re still a bit tight – mostly around the calves – but I’m hoping that they will loosen up a little with wear.

Gingers & B5526

Gingers & B5526

Gingers & B5526

Not much to report on construction. I used a combination of flat-felled and serged seams (as how most RTW jeans are made) and a triple stitch to really make the topstitching stand out. I would have loved to use topstitching thread, but I couldn’t find a good match with what is admittedly kind of a weird denim color. It’s gold, but it’s also kind of beige. Fortunately, Mood Fabrics REALLY came through with that thread match, as you can see in these close-ups.

What else? I did not interface the waistband (I like my jeans with an uninterfaced waistband; it’s much more comfortable. Not sure how that would work with a lower rise, but for the high rise version, it’s perfect). The jeans button is from Pacific Trimming, and the cotton pocket lining is left over from this crazy blue dress.

I will admit right now that this outfit inspiration came way of my boss’ closet. Since I do all her laundry for her (if you are new to this blog and that sounds REALLY WEIRD, I should probably point out that I’m a personal assistant 🙂 ha!), I’m always lurking on her clothes and I’m always finding inspiration in some of the strangest ways. She has a similar coral chambray shirt – hers has sleeves and a lace inset at the yoke, though – and white jeans. And I wanted that outfit for me. So I made it 😛

Gingers & B5526

So, hey, in other news that doesn’t involve me making my fifty billionth b5526 – I’ve got an article out in the current issue of Seamwork Magazine! If you haven’t heard of Seamwork, it’s a sewing magazine that is published online by the masterminds behind Colette Patterns. The magazine is free to read and there are optional pattern downloads with each issue (the patterns you pay for, however). ANYWAY, my article is all about visiting Nashville! I had so much fun writing a city guide about my favorite city in the entire world, and I hope you have fun reading it (and are inspired to come visit because, hey, Nashville is awesome! Really really awesome!). You can read The Seamworker’s Guide to Visiting Nashville at Seamwork. My first published article! Yay!

Completed: The Sureau Dress

8 Sep

You know what rules? When you have a brilliant strike of inspiration that comes together perfectly – from fabric, to pattern, to completed project.

Deer & Doe Sureau dress

AKA this dress.

Deer & Doe Sureau dress

I’ve been holding onto this silk cotton voile from Mood Fabrics since the beginning of this year (it’s sadly long gone from the site now, but they have lots of other options – including this gorgeousness. Ok, that doesn’t have silk, but it belongs in my fabric stash nonetheless). I had originally planned to make an Aubepine dress with it – but changed my mind at the last minute and ordered the Sureau instead, also from Deer & Doe (I still have the Aubepine & still plan to make it, but I’m thinking I would like it better in a dark/solid color, possibly even a lightweight knit. We’ll see!)

Deer & Doe Sureau dress

I LOVED sewing this dress! Too bad the pictures are kind of shitty. I promise it’s much prettier in real life – the voile is floaty, slightly sheer, and fucking ethereal. The colors are amazing and very fall-like, but the lightweight fabric keeps things from getting too sweaty.

Deer & Doe Sureau dress

You’ll notice that my version differs quite a bit from Deer & Doe’s – I had to make a few changes – both fitting and design – to get the look I wanted.

For fitting changes, I made a muslin and made the following adjustments:
– The front neckline was slightly gaping, so I removed a 3/8″ wedge (similar to this method)
– The upper back was a little loose, so I removed about 3/8″ from the center back, starting at the top and tapering to nothing at the bottom.
– Shortened the shoulders 1/2″
– Added 1/4″ to the side seams

Deer & Doe Sureau dress

I also made a couple of major design changes! The main one was that I lengthened the sleeves to be full length, and added a cuff and placket (stolen from Archer pattern). Unfortunately, I didn’t correctly measure the sleeve length – which seems to be a common mistake that I ALWAYS ALWAYS make, argh! – so they’re a tiny bit on the short side 😦 Bummer! Fortunately, the sleeve placket means I can roll them up, so there’s that.

The other ridiculously hilarious issue with the sleeves is that they are sewn on backwards – and I did that shit on purpose! Let me back up a little. When I altered the sleeve pattern to include the placket, I used my Grainline pattern as a guide. I didn’t think to make sure that I was tracing the placket to the correct side of the sleeve, so – you guessed it – the placket ended up on the front of the sleeve. Didn’t realize this until I’d already attached the cuffs and everything, derp (and didn’t have enough fabric to recut because, come on, that would make too much sense). I weighed out the options, and decided that a backwards sleeve cap was easier to forgive than a placket in the wrong place, so the back of the sleeve is now at the front, and vice versa. Fortunately, the sleeves are fairly loose & the cap is slightly gathered, so it’s not obvious that I inserted them incorrectly, and I still have plenty of room for movement. That being said, y’all all know my secret now. Don’t tell anyone.

Deer & Doe Sureau dress

The other design change was adding that cute little half collar! I used this tutorial to draft my little collar, and interfaced one layer of the fabric before sewing them together. I hemmed and hawwed over whether or not to include it – but ultimately, Landon & I both agreed that the dress looked weirdly unfinished without the collar at the neckline, at least with this particular fabric.

Deer & Doe Sureau dress

Because the fabric is so lightweight, I took extra care with the construction. All seams – including the waistline and sleeves – are sewn with a French seam, for a durable and elegant finish. The facings are finished with pinking – any other finishing would result in showing through the fabric. The instructions don’t have you interface any part of the dress, but I added interfacing to the facings, sleeve cuff, collar, and both front placket pieces (both the front and the placket facing). Again, the fabric is super lightweight, so it needed a little more support from the interfacing. Specifically, I used the Pro Sheer Elegance Couture fusible interfacing from Fashion Sewing Supply. I like that is gives a little needed support, but it doesn’t actually change the drape of the fabric. I had black on hand, which was perfect for my emerald fabric as white would have slightly shown through.

Also, ugh, guys, I know it’s REALLY short. Wasn’t planning on that! My fabric shortages meant that I couldn’t lengthen anything, and once I got the dress sewn up – I realized it would look way better with a deep 2″ hem. Which means the dress is now rill short (again, didn’t have enough fabric left to face the hem, which is how I would have normally solved that issue), but I plan on mostly wearing it with tights and/or boots sooo it’s not too bad.

Deer & Doe Sureau dress

Deer & Doe Sureau dress

Pretty much everything to do with this dress – other than my frantic last-minute pattern ordering – came out of my stash! Fabric, buttons, interfacing, even the thread – I love it when that happens!

Deer & Doe Sureau dress

Deer & Doe Sureau dress

There’s a cute little lapped zipper in the side of the dress 🙂

Deer & Doe Sureau dress

And that damn deep hem! Ha! I topstitched it because, I figured the rest of the dress has lots of topstitching, so it woudn’t look out of place 🙂

Deer & Doe Sureau dress

And that’s it! I like to wear the dress with a belt – I’m still not sold on how I look with gathered skirts (even slightly gathered, like this one), but I think the belt breaks things up nicely 🙂 I also wear it with the sleeves rolled up, because, again – they are too short (even if they look ok in the photos, trust me, once I start moving around, it’s evident that they are too short)(maybe someday I’ll have sleeves the right length. Sigh.). It’s pretty short, but not so short that I flash cheek when I bend over (as several people have been kind enough to observe and report on).

I’ll count this one as a success! 🙂 Next question – whyyy have I not been sewing Deer & Doe patterns? They are SO GOOD. I actually just ordered the Bruyere and am anxiously awaiting it’s arrival (as is apparently most of the sewing world :P). I have plaid flannel dreams for that bad boy. Man, I love sewing ♥