Tag Archives: megan nielsen

Completed: Tongue-Tied Sweater

26 Feb

It’s been a minute since I shared a knitting project! I actually *have* been knitting – I always have at least 1 project on my needles at any given time (usually two – one for the couch, and a smaller/simpler one for the road!), and I always keep my Ravelry account updated! But for whatever reason, I never feel super compelled to share them on my blog. Anyway, here’s one today!Tongue-Tied Sweater + Dawn Cords

This is the Tongue Tied sweater by Poison Grrls. I actually chose the yarn before the sweater pattern – a very uncharacteristic knitting move for me (usually I have my pattern selected before I start shopping for yarn). To be completely honest – I wasn’t in the mindset for planning a new sweater when all this happened, as I was still steadily working my way through my last sweater (see! There’s one I knit and never shared here lmao). But this yarn caught my eye at Pintuck & Purl and once I got my hands on it, it was all I could think about.

Tongue-Tied Sweater + Dawn Cords

The yarn is CashLuxe Spark by Sweet Georgia Yarns, a gloriously soft and cushiony fingering-weight yarn with this incredibly rich color and the cutest subtle sparkle! I’m not a super duper yarn snob (I love natural fibers, blah blah, but I don’t typically buy *really* expensive yarn. Although. That may now change haha) but I really, really, really wanted this yarn on my body. I initially considered socks – I mean, who doesn’t want to wrap their toes in cashmere? – but at $38/skein, that was a little rich even for my blood. So obviously it made sense to buy two skeins and turn it into a sweater, because that’s totally fiscally responsible.

Tongue-Tied Sweater + Dawn Cords

Tongue-Tied Sweater + Dawn Cords

I started this sweater right after I finished my last one, toward the end of December last year. It knitted up really fast – partially because, well, it’s a tiny fucking sweater, but also I just really enjoyed every part of the process. I LOVED touching that yarn, so so much. I actually would have finished this quite a bit sooner, except once I got to the point of picking up the sleeves I let it sit dormant for a couple of weeks while I worked on other stuff.

Not a lot to say about this pattern, but here are some notes:
– I knit the size Small, based on my bust measurement. My gauge called for size 2 needles (body) and 1 needles (ribbing).
– This is a really fitted sweater! I mean, I knew that going in – but trying it on, yeah, it’s basically painted on. Aggressively blocking the entire thing really well helped a lot, and now it skims my body perfectly.
– Because it was so tight, I did have some issues with getting a stretchy enough bind off (I actually had to re-do my bind off at the bottom AND the neckline twice!). I ended up using size 3 needles and a super stretchy bind off. With the neckline, that was mainly my fault for being an idiot. I thought I’d be super clever and do a fold-over neckband, but quickly discovered (while unsuccessfully trying to pull it over my head) that those don’t stretch at all. LMAO.
– Mod-wise, I added 1″ of length to the body, since I wanted to be able to wear this with high-waisted jeans (it’s pretty short!).
– If you think you see a yarn tail in the back, you’re right. I haven’t woven it in yet. I don’t know why.

Tongue-Tied Sweater + Dawn Cords

I loved knitting this pattern! It was easy to follow, simple to knit (but not boring), and the proportions are just lovely. I’ve already got a few more Poison Grrls patterns in my radar for my next sweater. I love Amy’s aesthetic and I love that she uses fingering weight yarn – perfect for our mild winters!

Tongue-Tied Sweater + Dawn Cords

Tongue-Tied Sweater + Dawn Cords

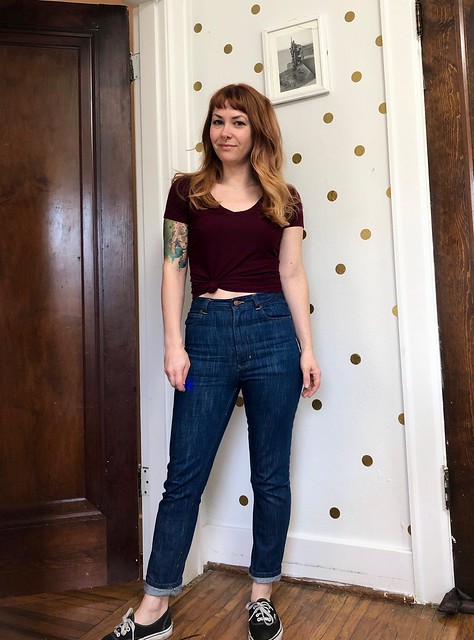
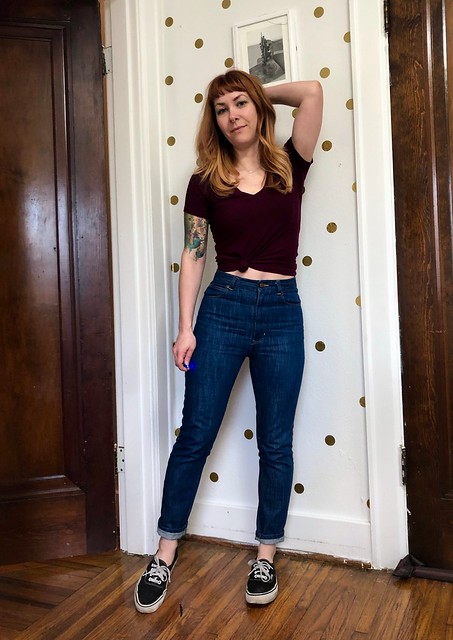
Oh, I also made my pants, too! These are more Dawn Jeans, made in Robert Kaufman non-stretch corduroy from Pintuck & Purl! (I picked it out the same time I was fantasizing about that yarn haha). Not much to say about these that I haven’t already said – I made my normal size, this time with the wide legs and the cropped length. The cropped length isn’t actually that cropped – I ended up having to take off another 3″ or so (but I also have a 28″ inseam sooo take that as you will). I’m also not super thrilled about how the back fits, but I believe that’s just what you get with wide leg pants. The wrinkles are there because there is too much fabric at the inner thigh (the issue I had with my Calvin Klein jeans), but for true wide-leg pants you really don’t want to remove width there. Whatever, I’m not the one looking at my own butt so I don’t care.

Tongue-Tied Sweater + Dawn Cords

So anyway, that’s my new sweater! Fun to knit, fun to wear, and the sparkles make me happy 🙂 Oh! And I still have some of this yarn leftover – so you better believe I’ll be making a tiny pair of socks 🙂 If anyone has suggestions for short-cuff sock patterns – preferably one with bobbles (I don’t know why but I’m feeling like I want bobbles on these), let me know!

Completed: Black Dawn Jeans

11 Dec

Hello everyone and welcome to my third installment of Operation-Jeans-Drawer!

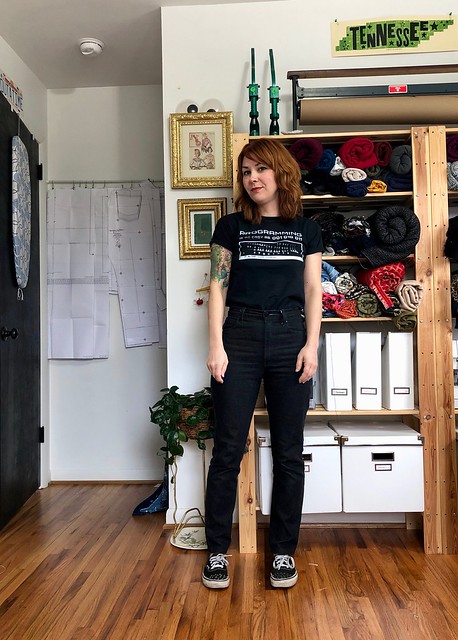
Black Dawn jeans

This time, I’m sharing the Dawn jeans by Megan Nielsen. This is another great jeans pattern that, again, has some major differences from the other 2 that I previously shared. I don’t like to say that I have a “favorite” jeans pattern – since they are all so good and serve different purposes! – but right now, I gotta say, this is the one that is getting sewn the most in my studio these days. I shared the first pair I made at last year, and they still get lots of wear (they’ve truly broken in beautifully). I’ve actually made the shorts several times this summer, but this is only the second time I’m sharing the pattern here on this blog.

Black Dawn jeans

So, again, I can’t really compare these jeans to the Ginger or the Claryville since they are very different – but I’ll tell you what their key features are:
BODY TYPE: I don’t think these are necessarily designed for a specific body shape? I will say that they fit me pretty well straight out of the envelope. I did not make a muslin, just cut according to my measurements on the envelope.
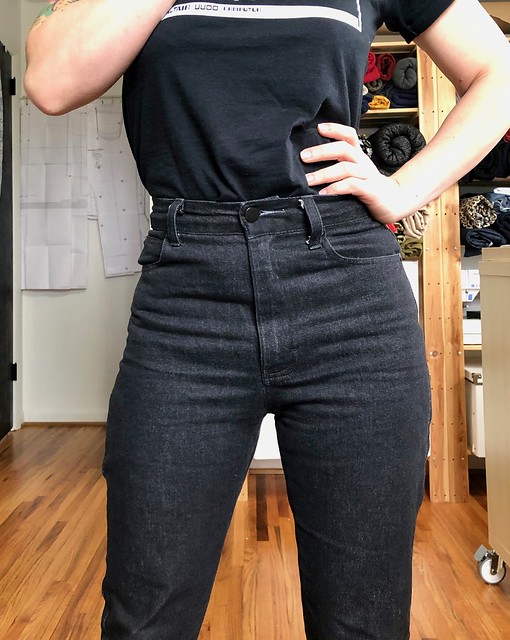
FIT: These are slim-fitting, rigid jeans with a high, high waist! Like, the rise will completely cover your belly button (I love it!). If this is not your jam then this definitely is not the pattern for you lol. They aren’t a true “mom” jean – the legs and hips are a little more slim fitting than that – but they do have that suuuuper high rise. I should also add – the standard size pattern comes in sizes 0-20, and there is also a Curve range that includes sizes 14-30! Yay!
FABRIC: You want rigid denim for these! No stretch whatsoever! The good news is it means you don’t have to interface anything except maybe the fly facing (yup, I don’t interface my waistband! Not even at the button hole! Fight me!). The not as good news means that these are not gonna be the most comfy jeans you ever wear. I don’t mean to say that they are uncomfortable… I just mean, you can’t do, like, yoga in them (I can, and have, done yoga in my Ginger jeans lmao). I would not say the jeans are tight so much as they are restrictive. I hope that makes sense. Think pencil skirt vs circle skirt. I love them and I wear them all the time but I will be damned if I wear these on a 5 hour cross country flight, you know what I mean? Also, there is no law saying you can’t make these with stretch denim (def size down tho) but why? Just use a stretch pattern, save this one for those cool rigid denims, twills, and corduroys that you don’t know what to do with!

Black Dawn jeans

So, with that out of the way – here’s my newest pair! I wanted some black jeans because I made black shorts for the summer (also with the Dawn pattern) and I got a surprising amount of wear out of them. This fabric is a rigid denim from Darrell Thomas Textiles, which I bought when I was there this summer for a Jeans Workshop. When I say “rigid,” I mainly mean denim with no added stretch. A little bit of mechanical stretch is good. I have learned that I don’t like the suuuuper rigid denim that does not stretch at all; I find them hard to move in (granted, most of my moving involves a lot of squatting and crawling around the floor so maybe that doesn’t apply to you lol). Anyway, this is a nice denim and no I don’t know the weight! I felt it, it felt good, I bought 2 yards.

Black Dawn jeans

Black Dawn jeans

My only grief with this style of jean is the time that it takes to properly break in. Ugh! Like I said in my previous post, washing them a lot up front does help quite a bit. But you do still have to wear them around and get the wrinkles to soften up and have the denim mold to you body. One of these days I’ll woman up and sit in a bathtub full of warm water with the jeans on and let them dry that way. I’m not brave enough quite yet to try that tho lol. Please don’t be scared of my talk about the breaking in… it’s really not that bad, and it is ABSOLUTELY worth it. But if you make these jeans and they are super uncomfortable… that’s why! Give them some time (and WEAR THEM!) and they will soften up quite a bit.

Black Dawn jeans

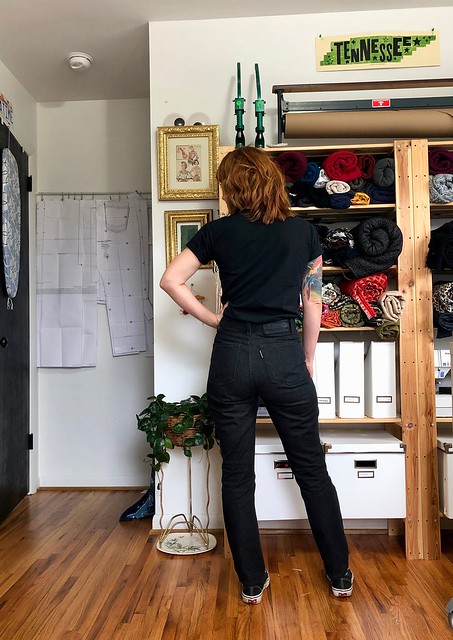
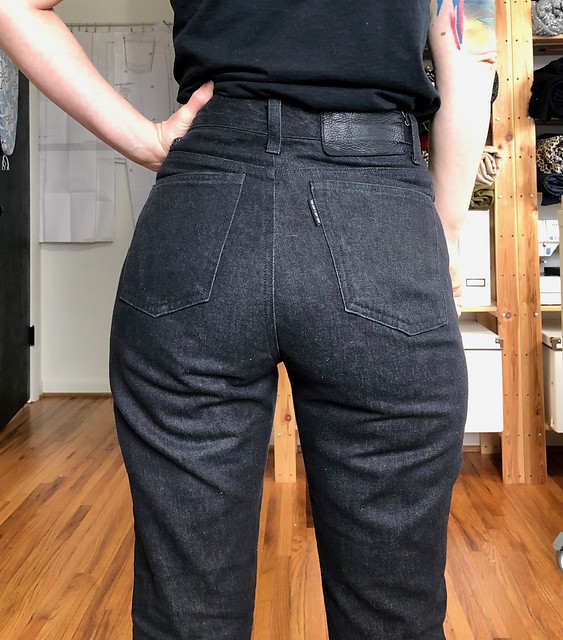
Anyway, this denim wasn’t too bad as it was already pretty soft. I washed it three times before I cut it (I always do this with new denim) and that helped a lot. As you can see in these photos – it does relax out (compare these to the Dawn Jeans in my first post and you’ll see what I mean. They are the same size, those were just more fresh!). What you’re seeing is a pair of non-stretch jeans that I wore for probably a week without washing. They don’t bag out so much as they just relax. Yes, there are wrinkles under my butt but they are there to help me move. Otherwise I don’t think I’d be able to sit in these things haha.

Size-wise, I made a straight 4 but ended up letting the hips out a little. I think my hips are more in the size 6 range now, which makes sense (when I originally made these, the size 4 was fine but since then I have gained weight and also had to let my original ones out lol). I also reduced the height of the yoke by 1″ because it was too tall for me – I just ended up with a 1″ fold right in the middle when I put them on, so I cut it off the top. Finally, I also adjusted the pocket bags on this pattern. They are CRAZY deep. Like… I understand wanting deep pockets (I guess, I dunno, I don’t really use my front pockets) but with pants this tight they are absolutely fucking useless. I just cut the bottom curve off so now they are straight. Mainly it was really annoying trying to push them back into place after using the bathroom, and not being able to reach the bottom. They were THAT deep. Absolutely useless.

Black Dawn jeans

Black Dawn jeans

Black Dawn jeans

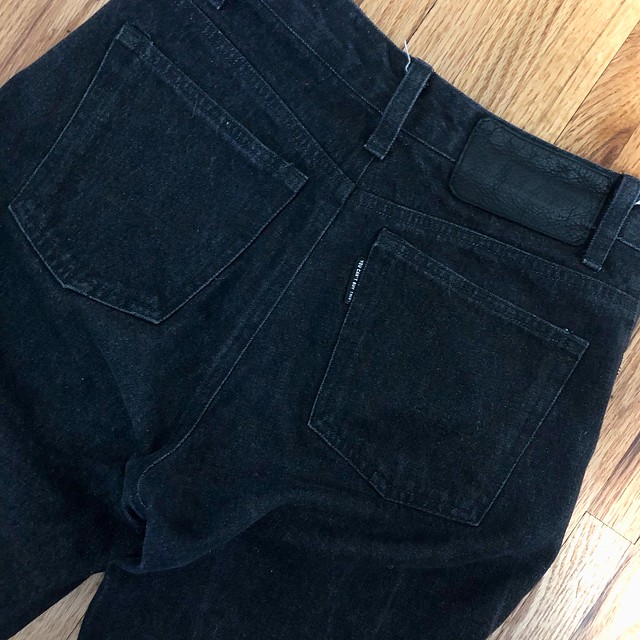
I kept these pretty simple, with black topstitching thread, black rivets and buttons (matte black from Blackbird Fabrics and I love them!), and a black leather back patch. One of the back pockets actually has a design topstitched in it (yes it’s the TCB lightning bolt, thanks for noticing) but it’s quite subtle. I am hoping that over time, as the jeans are washed and started to fade and crinkle, the design will be more noticable. We shall see! Oh, and you can’t really read the tag in the back pocket, but it says “You Can’t Buy This” Ha!

Black Dawn jeans

Black Dawn jeans

Black Dawn jeans

Forgot to say – this is the slim leg version, with the short inseam (and yes they are actually hemmed in these photos haha). This pants pattern comes with 4 different leg versions – skinny, straight, wide, and shorts – but I’ve only tried this one and the shorts. I have plans to make a pair of cropped wide-legs out of some corduroy, but we’ll see when I actually get around to it (not anytime soon now that I can’t leave the house without socks on haha).

Black Dawn jeans

Anyway, that’s it for this post, as well as for this series of “Lauren Talks About Her Favorite Jeans Patterns While She Also Revamps Her Pants Selection”! I have one more pair of jeans/pattern to share, but I need to sew them first (it’s been a busy month!). Hoping to get that accomplished before the end of the year, we’ll see!

Have you sewn jeans yet? What’s your favorite pattern?

Completed: The Brumby Skirt

29 May

Raise your hand if you love Megan Nielsen and are excited about her return to printed patterns and the release of her new sewing app. All I can say is – YAAAAY!!!

Brumby Skirt

To celebrate these big launches, Megan also dropped a new pattern into the mix – the Brumby skirt. She asked me a few weeks ago if I’d like to try out/review the new pattern – as well as the app – and considering I’d been stalking this pattern for well over a year (it’s not too hard, since she kept posting teasers of it on Instagram!), I was all YAAASSS. I wasn’t sure if I’d be able to finish the skirt – let alone post about it – before I leave for my trip next week, but curiosity got the better of me and I found myself dedicating an afternoon to Brumby Heaven.

Brumby Skirt

Brumby is a simple little gathered skirt pattern, with a couple special details to make it stand a step above your basic DIY-drafted-dirndl. For one, there’s those pockets. How good are those pockets?! They are nice and deep, and what really pleases me about them is how they kind of stick out away from the skirt and give it this interesting shape. The instructions also include how to insert an exposed zipper – which, honestly, I didn’t realize there was actually a specific method on how to do this. These instructions give you a nice clean finish and a strong zipper.

The skirt has a curved waistband with side seams, as well as options for varying amounts of fullness in the gathers and different hem lengths.

Brumby Skirt

Brumby Skirt

What I’ve always loved about Megan’s patterns is that there isn’t necessarily anything ground-breaking about the designs – it’s clean and simple design, the building blocks of your wardrobe, to be made in a myriad of different fabrics. There are special details to make the pattern stand out above all the other similar ones available on the market – such as the curved hi-lo hem of the Briar tshirt, or the floaty circle skirt of the Tania culottes, or even the awesome pockets in this skirt. The directions are clearly laid out so that even the earliest beginner can manage them, but they also lend themselves well to customization so even an advanced sewer can find joy in making them up.

Brumby Skirt

Brumby Skirt

To make my Brumby, I cut the size XS and sewed up Version 1. This version has less gathers and is intended for heavier fabrics, however, I used a pretty lightweight fabric in it’s place. I’m not a huge fan of gathers at my waist – I think they add bulk in weird spots and just don’t look very good on me – but I thought the wide waistband combined with less gathers in a lighter fabric would probably work. And I think it does! My fabric is a total stash-bust, leftover chambray that I used to make this shirt last year. I bought it locally here in Nashville at The Fabric Studio, and I’ve been hanging onto the remaining yardage because I wanted to make a floaty little summer skirt with it. It’s *very* lightweight chambray – like, voile lightweight. It’s borderline sheer – with my button up, I have to wear a nude bra or you can see everything underneath haha. Anyway, it has a lovely sheen and a nice drape and it’s soooo good to sew. Making it up into this skirt was a good idea. Sorry if it’s a little wrinkled – these photos were taken after a day of wearing it.

Oh! And I also made that top – it’s my very first Butterick 5526. I hated the length of the sleeves and never wore it, so I finally just cut them off and finished the raw edges with bias facing. Much more wearable now!

Brumby Skirt

Brumby Skirt

Back to Brumby! I knew I wanted topstitching, but chambray is notoriously hard to thread-match, and I didn’t want my topstitching to be the first thing you noticed when you saw the skirt. I actually ended up using denim thread to topstitch this – a lightweight denim thread, but denim thread nonetheless. It’s that weird blue/navy Gutterman thread that they sell with the denim thread. The variances in color were good enough that they went well with the blues in the fabric, and they contrast nicely but they don’t really stand out. The thread is light enough so it doesn’t make the topstitched areas hang weird, so that is nice. I used white all-purposed thread in the bobbin which also probably helped.

The topstitching goes all over the skirt – down the center front, down the side seams, around the pockets, across the hem, all around the waistband, and of course, holding the zipper into place. I wanted to offset the delicate, floaty fabric with a some casual construction, and this is it! All seams are topstitched at 1/4″. I just eyeballed it on my machine, but I think I’m pretty certain I want a 1/4″ foot next time I go to the Bernina store. Feeeeeeet♥

Brumby Skirt

Brumby Skirt

I am really happy with how nicely the zipper went in! Like I said, there are directions in the pattern for getting a good exposed zip – and I totally didn’t realize there’s a method to doing this. I put an exposed zip in one of my tops last year (and I totally thought about wearing that top with this skirt, peplum tucked in, but ughh it won’t work because there are 2 exposed zippers and they’re different metals and wah), but that was really a matter of pressing seam allowances back and topstitching the zipper in. Poor peplum top, didn’t even have a damn chance.

Brumby Skirt

I will be totally honest here and tell you that I tried the skirt on about 3/4 of the way through construction (after attaching the waistband, but before I put in the zipper) and I was COMPLETELY underwhelmed with how it looked on me. In fact, underwhelmed is too nice of a word – I hated it! It was extremely unflattering and the length made me look dumpy. Part of that was because the waistband was a little bit too big – big enough to slide around and not sit into place, and make me look wider than I am. I did some quick waistband surgery to remove about 1/4″ total from the side seams, and then I took another 1/4″ out of the zipper seams when I was inserting it. That was enough to make the waistband fitted, but not so fitted that it’s uncomfortable.

The length was another issue – I just don’t do midis, and while I did cut the pattern for the mini, there’s a huge-ass hem included so it was really long before that got turned up. I know midis are ~in~ right now, and you can tell me all you want that they might even be flattering on me – but I’m all legs when it comes to skirt length and I just.can’t.do.it. Honestly, I didn’t really love this skirt on me until the hem was turned up and topstitched into place – and then I was twirling around my sewing room in excitement like a big dork. It’s funny how much the hem can affect how something looks. Anyway, that’s a big part of the reason why my hem is serged and topstitched – I wasn’t if I’d love the finished skirt, so didn’t want to spend tooo much time on the last steps. At any rate, the serging matches the rest of the guts so whatev.

Birthday Brumby!

Sooo in the end, I loved the finished skirt so much that I wore it for my last hurrah of my 20s. Notes about this picture:
– That’s not what you think it is in my hand. It’s hot chicken.
– I love Giorgia Tsoukalos.
– And America.
– And also aliens.
– My coworkers at Elizabth Suzann are awesome and know how to throw (me)the best parties.
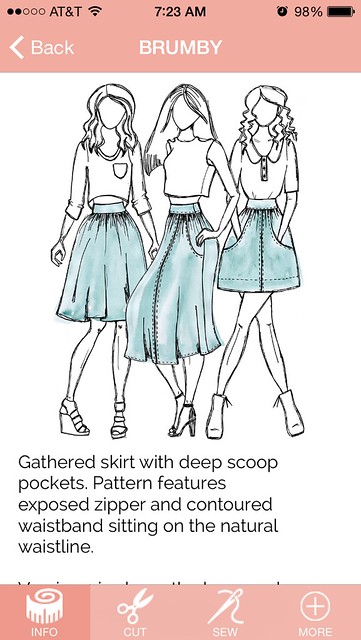
Megan Nielsen app

Before I jump off here, let’s talk about the Megan Nielsen Patterns app!

I will admit – other than my love for sewing blogs, I’m a bit of a paper girl when it comes to sewing media. I like paper patterns and I like having hard copies of the instructions that I can scribble notes (and mustaches) all over. While I think this app is a completely brilliant idea and may very well be the future of sewing patterns – I wasn’t sure if it would actually be useful to me (I’m old-fashioned in that sense, and I’m ok with it). However, I was willing to try it. For science. Also, it’s a free app soooo it’s not like I had anything to lose if I ended up hating it.

Megan Nielsen app

Megan Nielsen app

The main drive behind the app is basically digitizing the instructions you get with your pattern (paper or PDF). Everything from the required materials, to the cutting layouts, to each step of the instructions (cataloged in a way that’s easy to get straight to the section you need, instead of relying on the Endless Scroll) is included in the app. There are also options within the app (and each individual pattern) to view other people’s makes of this pattern, customization suggestions, and links to the tutorials that may be useful while constructing the garment.

Megan Nielsen app

While I probably won’t switch out my paper instructions for digital (again, mustaches), I actually do find bits of this app useful! It’s SUPER handy to have when you’re shopping and need to reference a material’s list – in the past, I’d scribble everything down on paper (all right, I still do that. No shame!), but then you lose your paper, or you find that perfect fabric that doesn’t go with anything on your “make” list, or you forget that you also needed a zipper. I love the tutorial links, as I do use a computer to look up things while I’m sewing – but more often than not, I end up spiraling down this long internet rabbit hole, where I click on links on links on links and then I forget that I was sewing! Lame! So it’s nice to have a direct link in the app, where I can go straight to the tutorial, get the info I need, and get back to the task at hand. Another thing I love about the app is that you can access any tutorial/instructions for any pattern that you own – which is awesome for when I’m using a Megan Nielsen step in a different pattern, such as stealing her Briar neckline binding for my traced tshirts. In the past, I’d just pull the paper instructions out – but I’m always afraid I’m going to lazy out and forget to put them away and eventually lose them (I mean, it must happen – I think about all those vintage patterns we buy that have the wrong instructions or extra pattern pieces in them. Yep!). With the app, everything is in one place and I can quickly find it. So I like that!

And there are notes sections in the app, for scribbling, but no places that I see where you can doodle on the croquis faces.

Anyway, you can read more about the app in this post and download it in the iTunes store FOR FREE. Those of y’all on Andriods – it’s coming! Don’t worry!

Brumby Skirt

In other news, thanks for all your tips on dealing with my caffeine withdrawals! I am happy to report that I was feeling MUCH better yesterday – no more weird body aches, no more tiredness. I found some great uncaffeinated teas and I only miss coffee the tiniest bit now 🙂 To those of y’all who suggested that I drink decaf – I’m not opposed to decaf (and I drank about a cup a day while weaning off the hardcore stuff), but it does have trace amounts of caffeine in it, and my whole goal was to eliminate the stuff 100%. Mostly to see if I could 😛

*Note: Megan Nielsen provided this pattern to me free of charge, in exchange for a review. All opinions in this post are my own!

Completed: Butterick 4066

5 Sep

Ummmm so this may or may not be the third garment I’ve posted this week that is made of rayon challis.

Butterick 4066

No shame.

Butterick 4066

These pictures are also horrifyingly bad and blown out, but… meh. We all know y’all don’t come here for the ~dazzling photography. Again: No shame.

Butterick 4066

I picked up this copy of Butterick 4066 while I was last at the flea market in July. The cover art is a little outdated (and not in a cool vintage way, but rather, I feel like I can probably smell my Mamaw’s house if I lean in too close. Wait, just kidding, my Mamaw’s house smells great. That shit probably smells like someone else’s Mamaw’s house, maybe), but the line drawings looked promising enough – almost like the Kelly skirt and Hollyburn skirt had a secret affair that ended up with a little love child.

Butterick 4066

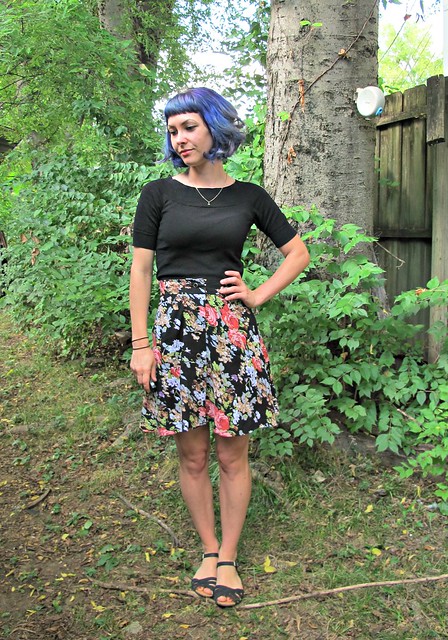
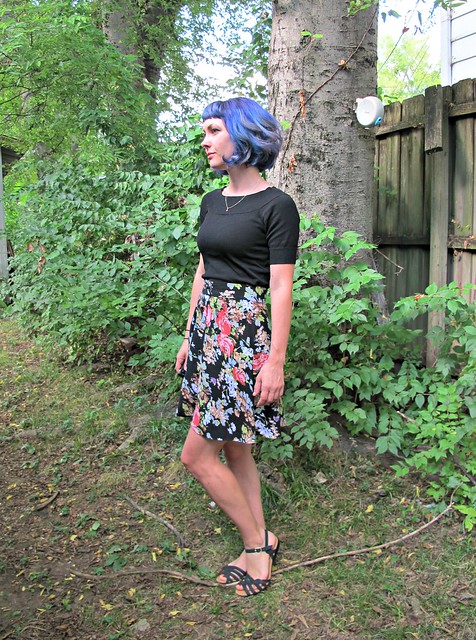
It’s hard to see, thanks to my terrible photos, but the skirt has pockets, a smooth A-line shape with no darts or tucks, and buttons down the front. I used this shameless 90s black floral rayon challis from Fashion Fabrics Club, as I knew the shape would look great with a drapey fabric (just like my Crazy Paisley Hollburn).

Butterick 4066

My skirt pattern was just a smidge too big (not the fault of the pattern itself – my copy is a size too big, since we don’t normally get to be choosy when it comes to buying vintage patterns!), but that was easily fixed by taking in the side seams before attaching the waistband. The big challenge was cutting off length – a LOT of length. Even after I’d shortened the shortest version of the pattern tissue by a good 6″, I had to go back after making the skirt and hack off another 4″! Shortening the length did wonders for the overall look of the finished skirt – before, it was pretty dowdy and outdated looking (mostly due to fabric choice, I mean – we are talking about the 90s here), but I think it looks pretty cute now! Shorter skirts FTW!

Butterick 4066
Butterick 4066

I finished the seams with my serger and used these pretty black and gold buttons that I had lurking in my stash.

Butterick 4066

I love how the finished skirt turned out – and I think it’ll transition really nicely for our “fall”**, since it’s so cool and lightweight, but still has those nice dark fall/winter colors. That being said, it’ll look great with tights and a sweater, too 🙂 (maybe with a silk slip, though! It’s not very warm!) I’m interested to try pairing this print with black and white stripes – I can imagine it in my head, but until I start sewing up the striped knits I got while I was in Mood last month, your guess is as good as mine.

** Tennessee Fall: Beyond gorgeously colorful (visiting Tennessee in the fall should be on every single one of y’alls bucket lists), but still blazing hot and, yes, we absolutely make fun of those dumbasses who insist on wearing wool caps and jeans tucked into tall boots while marinating in giant pools of sweat. I mean, COME ON LADY, it’s 90* outside FFS! You aren’t fooling anyone!

One last thing – Giveaway Winner! Lucky number is…

winner1

winner2

Congratulations, Sue Martin! I love your method of sneaky inspiration by way of shop dressing rooms – something I’m too chicken to do myself (I got major stink-eye once while manhandling a rack of dresses in Buckle and I’m kind of traumatized now haha). As far as adding hours in the day – well, let me know when you figure it out! 🙂 haha!

Thanks to everyone to entered the giveaway – and thanks to Laurence King for providing us with a copy to giveaway! Friends, if you’d like to buy your own copy of Casual Sweet Clothes, use the code LLADYBIRD35 to get 35% off! The code is good through 10/1/14 🙂

Completed: A Jumpsuit, of sorts

3 Sep

A couple of months ago, I was asked by the ladies at By Hand London if I’d like to test their new Holly Jumpsuit. I’m always a sucker for these gorgeous patterns, but then they went and threw in an offer of testing-fabric from Grey’s Fabric to really seal the deal. Consider me sold, name signed in blood and all (forreal, though, I’ll do anything for love free fabric).

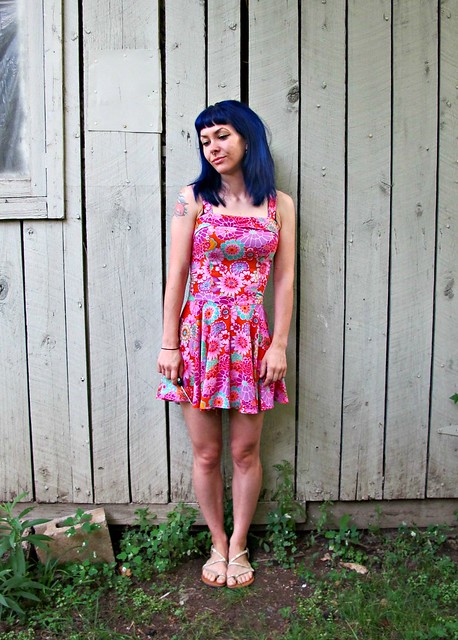
Holly/Tania Mash-up

I finished with good time, sent my testing notes in, and took some photos (I could pretend my hair grew like that overnight, but in reality, these photos are just that old. Haha!). And then I waited. And waited. Right before the pattern was to be released, there was a design snafu that meant the pattern had to be reworked, which set things back by… well, a lot. Fortunately, the kinks have been worked out and the pattern is now officially for sale! Which means I can finally show you mine! Yay!

Holly/Tania Mash-up
Holly/Tania Mash-up

You may have noticed by now that my jumpsuit* looks nothing like the pattern – and you would be right. That’s because at this point, no part of my jumpsuit is actually part of the pattern! Whoops!

Holly/Tania Mash-up

However, it is still technically a jumpsuit (right? The two-separate-holes-for-each-leg dictate that… right?), so there’s that.

Holly/Tania Mash-up

There’s a method to this madness, I promise. As a pattern tester, I always make my first version (usually a muslin), exactly as drafted and written by the pattern. After I have taken my (usually very unflattering)photos and made my fitting adjustments, I will transfer those adjustments to the pattern and make it up in my fashion fabric (if not a second muslin entirely). I started out with the shorts and Variation 2 bodice, which was surprisingly a pretty good fit straight out of the envelope. The butt of the shorts was a little tight (it is my understanding that this ended up being a grading error that has since been amended), and I needed to shorten the straps – but overall, things were looking good. It wasn’t until I had made this up in my beautiful rayon challis – i.e., the good stuff – that I realized the entire ensemble just made me look like a giant toddler. Especially when combined with this fabric – while beautiful, it’s pretty juvenile looking. Eep!

After some chatting with the BHL ladies, we ultimately decided that it would be a shame to sew something I’d never wear (and I know I occasionally wear some out-there ensembles, but again, looking like a giant toddler is NOT one of them) , so I was given the green light to swap out the bottoms for another pattern. Specifically, I chose the Tania Culottes because FUCK YES I DID.

After that, things went haywire in the design department and my tested version of the bodice ended up getting scrapped and redesigned. Which means my tested Holly jumpsuit is now basically anything BUT Holly! Oh well! I tried!

Holly/Tania Mash-up
Holly/Tania Mash-up

Anyway, let’s talk about the construction of this jumpsuit. To combine the bodice with the Tania culottes, I added a 2″ wide straight waistband (interfaced on one layer, and faced with self-fabric on the inside) that connects the bodice to the skirt. Ideally, I would have shortened the bodice and raised the rise of the culottes, as I think the waistband sits a little low, but that’s life. The Tanias are sewn as normal, just without a waistband.

Holly/Tania Mash-up

All edges were finished with my serger and I used my rolled hem foot to make the prettiest little baby hem.

Holly/Tania Mash-up

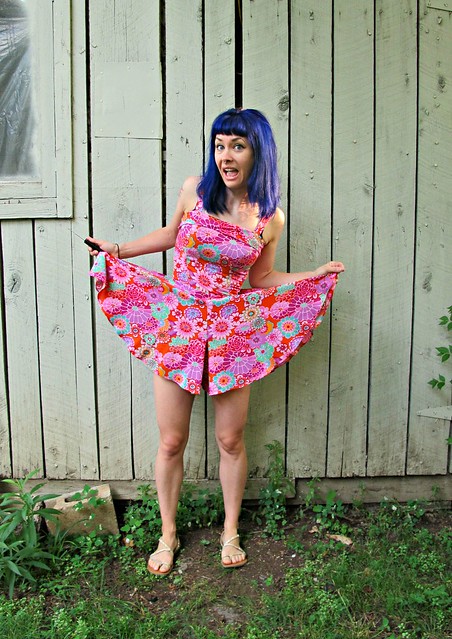
The end result is a sweet little flouncy tank dress that has an amazing twirl factor – and thanks to the culottes, is less likely to fly up and flash any innocent bystanders.

Holly/Tania Mash-up

As I previously mentioned, my beautiful rayon challis came courtesy of Grey’s Fabric, specifically to be used to test this pattern. I just love the smooth silhouette and fluid drape that comes with rayon challis – not to mention, it’s ridiculously comfortable to wear in the heat. Rayon loves to wrinkle like crazy and this fabric is no exception, but at least the busy print and voluminous skirt hide most of that.

Holly/Tania Mash-up

Anyway, despite my design changes+unexpected pattern snafu changing things to the point that my tested pattern ended up being something completely different, I am happy with said end result – not to mention, it’s absolutely something I would wear (and have worn! Lots!). Again – if you plan on buying this pattern, please keep in mind that absolutely nothing about my version matches what is included in the final pattern – although it would be pretty easy to Frankenpattern this one with a couple indies.

What do you think of the Holly Jumpsuit? Are you Team Jumpsuit – craving dangly earrings, sparkly eyeshadow, and a Studio 54 vibe (I mean, ugh, that new Variation 2 bodice is KILLER, ain’t it?)? Or do you feel like an overgrown toddler who would prefer to stick with dresses and two pieces, thank you very much?

* I think the leg-shorts mean this thing is actually a romper or a playsuit, not a jumpsuit. However, the thought of saying that I’m wearing a playsuit makes me feel, again, like an overgrown toddler, so fuck that. I’m calling it a jumpsuit, as that sounds a lot more grown-up. My blog, my sewing, my rules 😛

In other news-
1. The new class schedule is up at The Fabric Studio! Lots of fun classes coming up – including an Open Sewing Lab hosted by yours truly! Those of y’all in Nashville can come hang out in the studio to sew and drink tea with other crafty peeps 🙂 I’ll be on hand to answer questions and assist as needed. This is a great alternative to a structured class since you can work on whatever you want, come whenever is convenient for you, and it’s a heck of a lot cheaper than a private lesson 🙂 Check out the classes page to sign up (my class is at the bottom). I am REALLY excited for this; I love sewing with company! Yay!

2. Don’t forget that the Casual Sweet Clothes giveaway ends on Friday! If you haven’t already entered, here’s your hint 🙂