Completed: The Archer Popover

29 Dec

Oooh, one last make for this year!!!

Gingham Archer Popover

I made this about 4 months ago, but it was a sample for Craft South so I’m just now getting possession of it to actually wear! I love making samples for the shop – you get access to the pattern + materials for free, and are allowed to sew during downtime at the store – but the trade-off is that you have to leave it at the shop for at least a couple of months. Which makes sense – it is a sample, after all, haha. But it can be frustrating when you have to wait to be able to wear it!

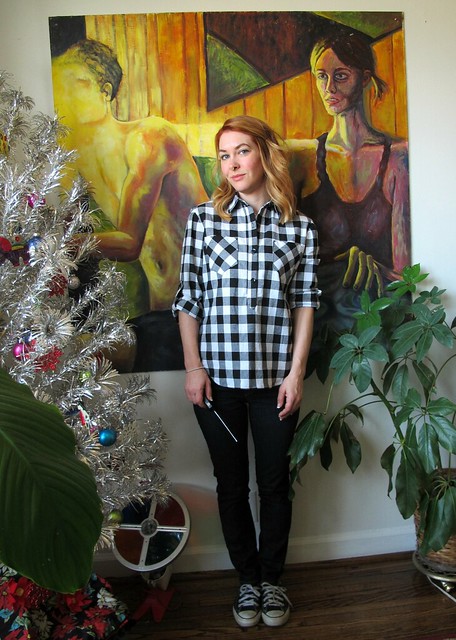
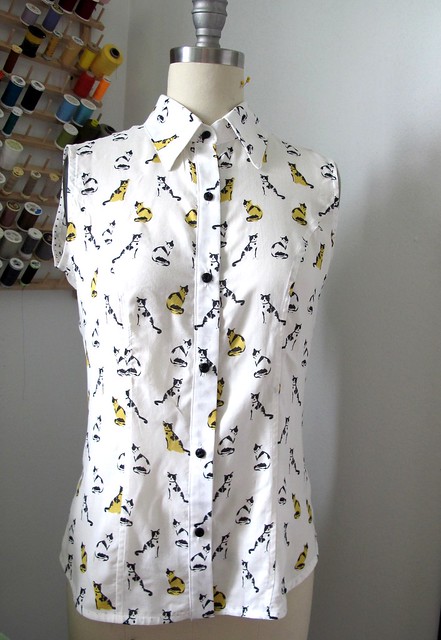
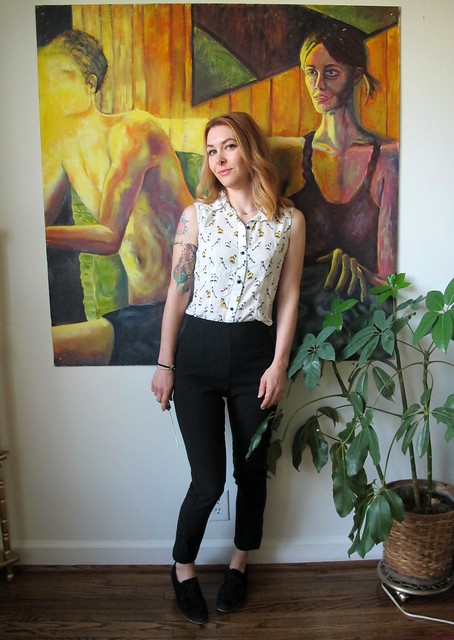
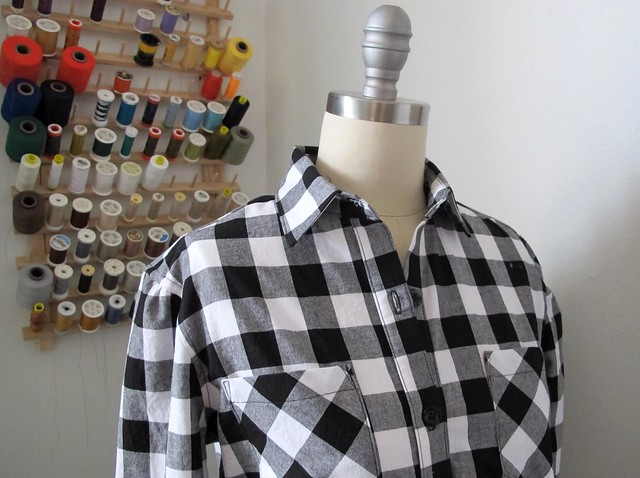
For this top, I used my personal Archer pattern (which we do sell in the shop, but I didn’t want to rip one open when I had a perfectly usable pattern at home), and I downloaded the popover variation. The fabric is Cotton + Steel Checkers, in the 1″ black and white. It’s a nice woven cotton that feels similar to a yarn-dyed cotton – it hangs (and feels!) nicer than a quilting cotton, but it does have a dense weave that still makes it have quite a bit of body. The checkers are woven, not printed, so the design is the same on both sides of the fabric. I did take this fabric home and prewash it before actually sewing the sample – I wanted to be sure it got its shrinking out of the way before I cut it up. Actually, I also cut it while I was at home, and fused my interfacing as well. Matching plaids takes some focus and concentration, and there are a lot of pieces to contend with on this pattern. I didn’t want to have to try to juggle cutting/matching while also dealing with customers as they come in and out of the shop, so it made more sense to tackle that part of the project at home away from distractions. But all the actual sewing did happen while I was at the shop!

Gingham Archer Popover

Gingham Archer Popover

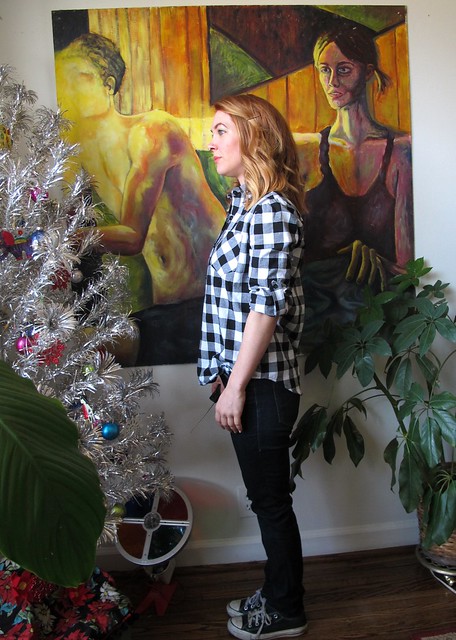
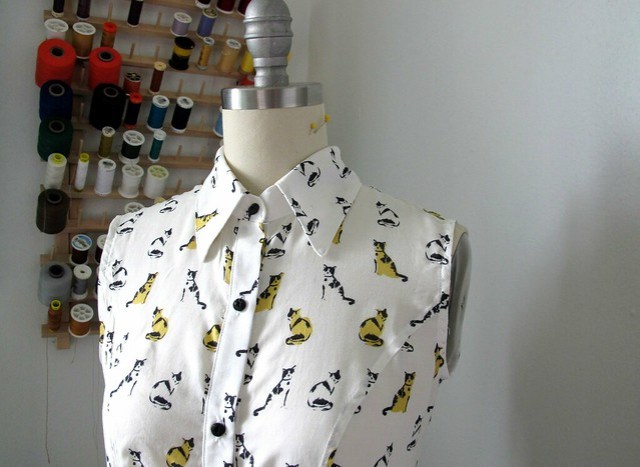
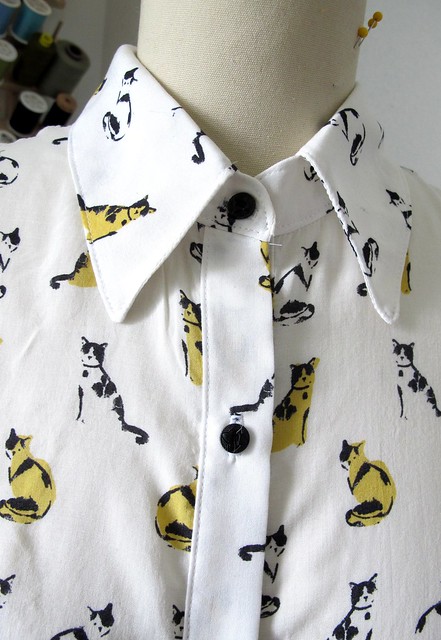
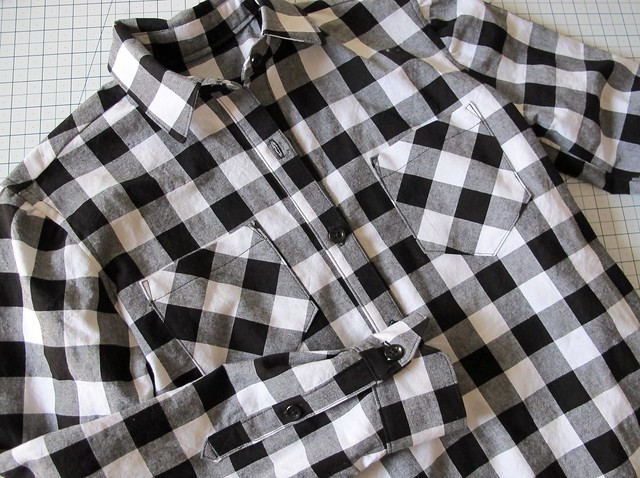
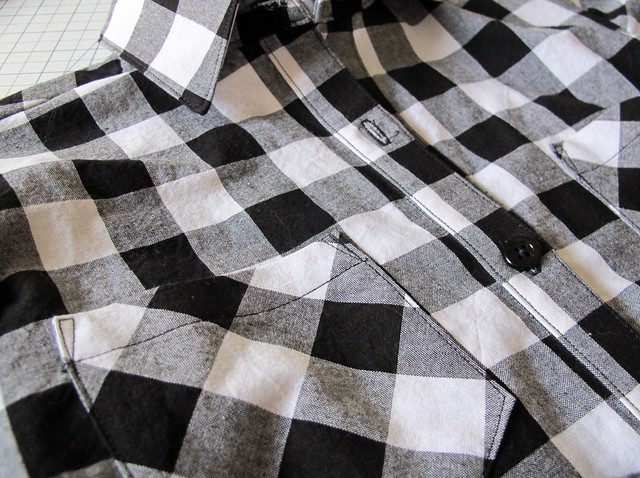
I’ve made lots of Archers in my time, so there’s not much to say that I haven’t already said. I made a size 0, and followed the instructions as they are written. This particular version is a bit different in that the button placket doesn’t extend all the way to the bottom of the shirt – hence, that it’s a popover, not a button up. The variation pack includes a new shirt front, a new front placket, and a different sleeve placket, as well as the instructions you need to actually sew them in. It’s been a few months since I made this top, so my memory is a little fuzzy, but I recall the instructions being easy enough to follow. I do remember that I did not like the instructions or pattern pieces for the tower placket on the sleeve – I found that whole process unnecessarily fiddly, although it did turn out nice in the end. Personally, my favorite way to sew a tower placket is by way of the Colette Negroni, it is very straightforward and simple, with a really nice finished result.

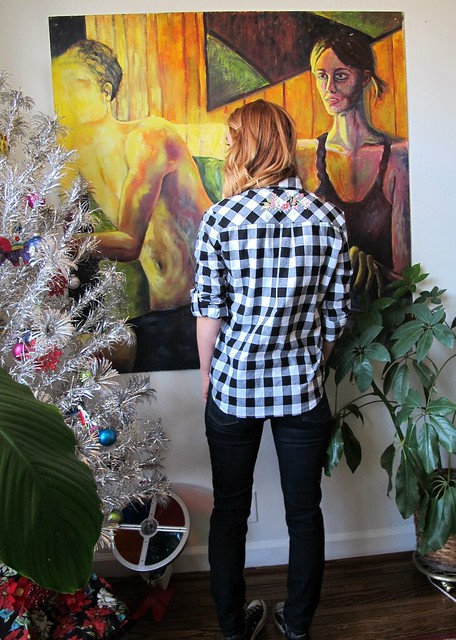
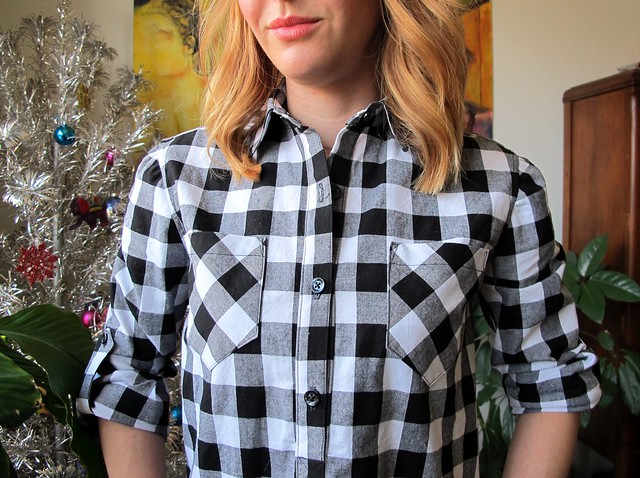
Other changes I made to the pattern was to include tabs for rolling up the sleeves (I swiped the pattern piece from my copy of B5526) and different shaped pockets (pattern piece swiped from the Negroni). I cut the gingham on the straight grain as directed, except for the outer yoke and pockets, which were cut on the bias. The inner yoke is also cut on the straight grain, to give the bias side some support. I didn’t get any photos of me with the sleeves rolled down, but they are full-length.

Gingham Archer Popover

Gingham Archer Popover

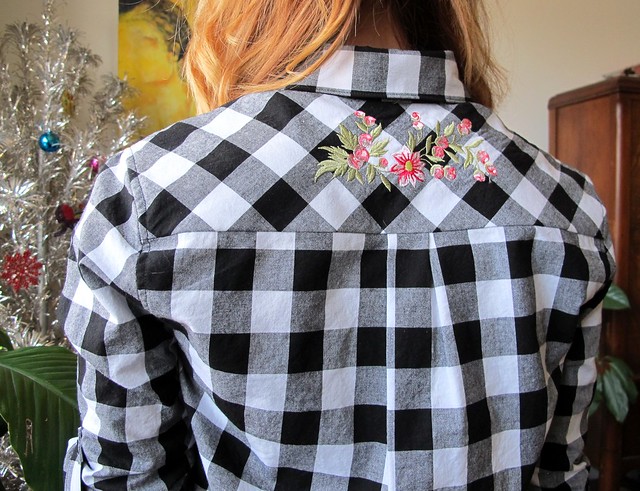
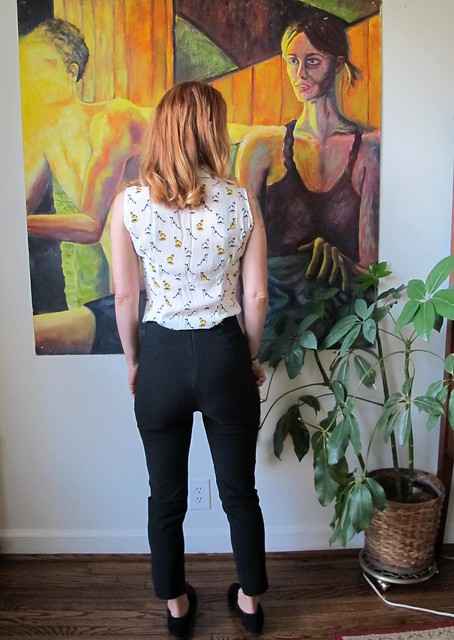
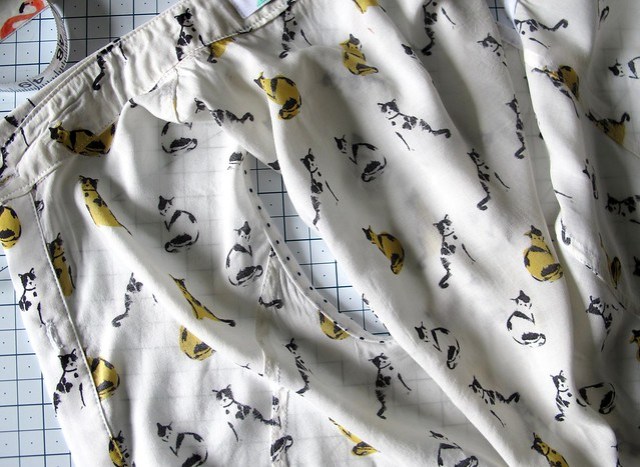
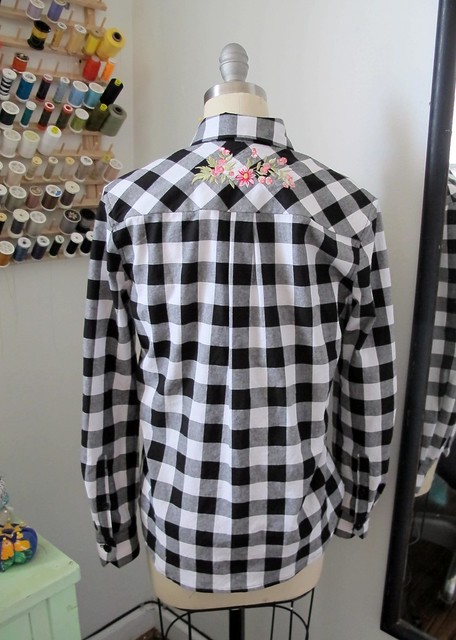
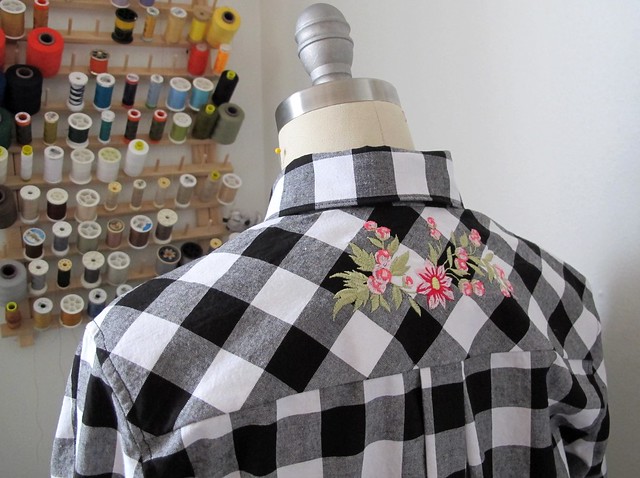
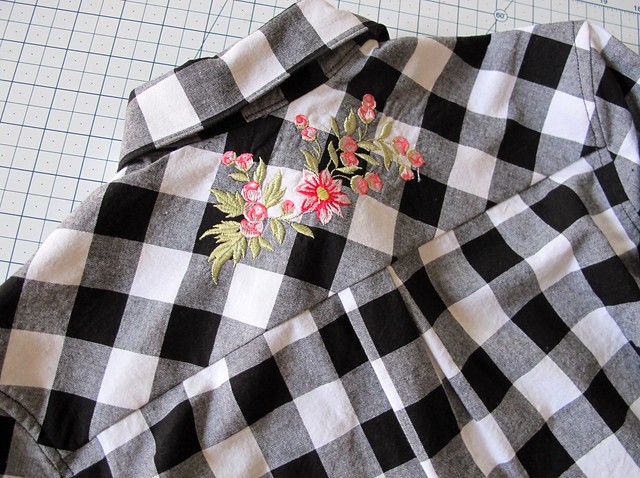
There were 2 reasons why I wanted to make this particular shirt – one, I really liked that Cotton + Steel fabric and I wanted to sew something out of it; and two, I wanted an excuse to bust out some fancy machine embroidery. I love embroidered western shirts, hence the inspiration for this one. Because I work in a sewing machine shop and we have several models out on the floor to play around with, I went straight for the Rolls-Royce of the bunch and did all my embroidery (and sewing, for that matter!) on the Horizon Memory Craft 15000. Y’all, we sell this sewing machine for a little over $10,000 (yes, all those zeros are supposed to be there). It comes with a fucking IPAD. It’s a super badass machine that I’m going to confidently say will never ever be in my personal budget to own, but you bet your ass that I’m gonna take advantage of the fact that I can sew something on it right now. Ha! Honestly, it was actually a good thing for me to sew this project on that machine, because it gave me lots of time to play around with it, learn how to use the embroidery features, and get comfortable sewing on it. I can’t imagine anyone would ever want to buy a sewing machine from someone who doesn’t even know how to use the thing themselves, so it was beneficial for me to learn all that in shop downtime. Also, I have a new shirt from it. Yay!

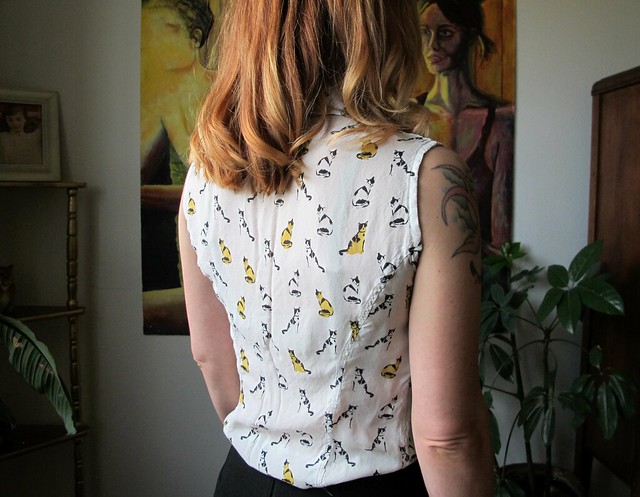
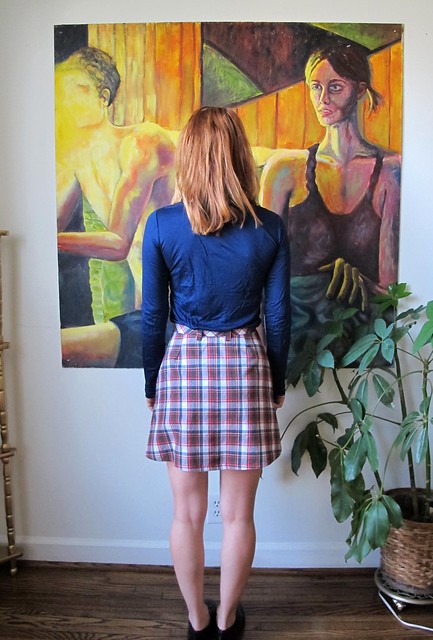
Anyway, that particular sewing machine comes with a bunch of pre-loaded embroidery designs, plus you can download (or create) more designs and upload them straight to the machine (either via USB, or with that aforementioned iPad haha). I get too overwhelmed when presented with way too many options, so I kept it simple and stuck with what was available on the machine. This little floral design fit right in the back yoke, although the suggested colors were a little weird (those were easy enough to change, obviously). I made a few practice pieces to get a feel for the finished size and also how the embroidery goes on, then I embroidered the actual garment piece. To do this, I first cut my piece and fused a piece of interfacing to the back to stabilize it (this isn’t 100% necessary in all cases, but since that piece is on the bias, it was needed). I used my sample piece to determine where the machine would start the embroidery, and centered my pattern piece in the hoop with tear-away stabilizer. Then you just turn the machine one and let it go to town! I can’t remember how long the embroidery took – we turned the speed down and let it roll on in the background while we worked – but it wasn’t super long. The machine will stop when its time to change the colors, and thankfully its also smart enough to pick up where it left off if you run out of thread or have to stop the embroidery for any reason.

Gingham Archer Popover

Gingham Archer Popover

Other than that, sewing was pretty uneventful. I finished the rest of the shirt on the same machine, which let me play around with all the available feet and additional sewing settings. It was pretty fun! All the seams are flat-felled, so it looks just as good on the inside as it does on the outside.

Gingham Archer Popover

Gingham Archer Popover

Gingham Archer Popover

Gingham Archer Popover

Gingham Archer Popover

Gingham Archer Popover

Gingham Archer Popover

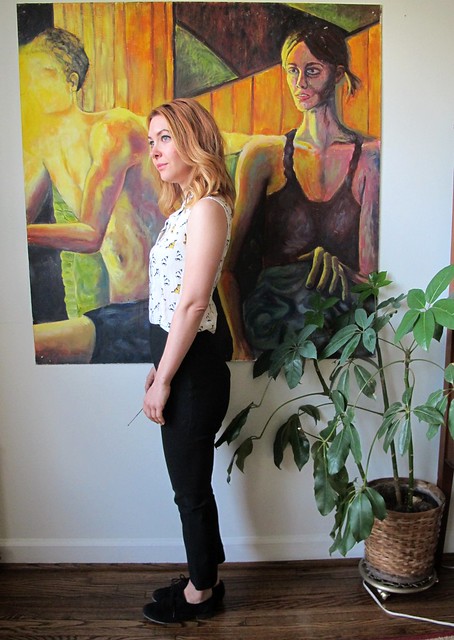
I think the shirt turned out really nice, however, I’m not super crazy about how much it stands away from my body. I normally like my Archers in a stiffer fabric, but all the others I’ve made button all the way to the bottom, so I can leave them open and wear them sort of like a little jacket.This particular style might do better in a drapier fabric. With that being said, I am hoping the fabric will soften with more washing, as cotton tends to do. We will see! In the meantime, it gave me an excuse to sew something on a machine that costs more than the first 3 cars I owned combined, so that’s saying something haha.

Gingham Archer Popover

Completed: The Fraser Sweatshirt

26 Dec

Gonna keep this one short and sweet today!

Fraser Sweatshirt

Also, in case you were wondering – yes, I took these immediately after the photos from my last post. Just pulled the sweatshirt on over what I was already wearing! Haha!

This is the Fraser Sweatshirt from Sewaholic Patterns. I have actually made this top before – I used a beautiful marled French Terry from Metro Textiles and it’s soooo soft and cozy – but this is my first post about it. I don’t normally dedicate a post strictly to something as plain at a knit top, as I personally find it a little boring – but I do think this one deserves its own very short post. So there you go. I finished this way back in August and have worn it loads since.

Anyway, Fraser! I think this pattern got a bit overlooked – I certainly overlooked it at first. It’s pretty similar to the Renfrew Top – albeit with a higher neckline, a little more ease (to allow for sewing out of a bulkier fabric) and some style variations. I didn’t care much for the style variations, personally – not a fan of that western contrast yoke, and really falling out of love with twee collars on everything. I liked the plain version, and like I said – I made it up and really enjoy wearing it – but I don’t know if the plain version alone really justifies buying the pattern if you already have the Renfrew (FWIW, Tasia gifted me these patterns, although she did made it very clear she was not expecting a review post in exchange). With that being said, I loved Amanda’s collared version the second I saw it, and filed it away for future consideration.

For fabric, I used a grey sweatshirt knit that has been in my stash for a few years. I’m not 100% on where it’s from, but my best guess is that I bought it at Paron’s in NYC. It’s a little lighter and stretchier than a true sweatshirt fleece – it almost feels like scuba with fleece on one side.

Fraser Sweatshirt

Fraser Sweatshirt

I wanted my collar to be more subtle than straight-up color-blocking, so I simply used the wrong side of my main fabric. In theory, it seemed like a really cool idea – the wrong side is fuzzy, so there’d be some unexpected texture there. In practice, it looks very much the same as the right side, unless you’re actually touching it. So my inset collar is even less of a contrast than I was anticipating, although I don’t think this is a bad thing. I actually do like the way it turned out!

Anyway, I topstitched around the collar with a straight stitch to really bring out the seam lines and help everything lay flat. I love the effect, especially how it looks with another collared shirt peeking out from underneath, inception-style 😛

Fraser Sweatshirt

Fraser Sweatshirt

Pattern-wise, not much to report. I made a size 0, which is my usual Sewaholic size. I assembled the shirt with a serger, although I used my sewing machine to sew the collar in first so I could easily unpick if I messed something up (I just went over the seams again with my serger once I knew everything was good). Actually, the serged seams on the collar look REALLY cool and I almost let that be the right side… maybe for the next top. Who knows!

I did have to do a little tracing to get those long sleeves. The pattern comes with 3 sleeve options, but the long sleeves have that yoke on top of them. The yoke-less sleeves are 3/4 and short, both of which I feel are useless for a sweatshirt. I simply combined the top of the 3/4 sleeve with the bottom of the yoked sleeve, to make a plain long sleeve. Not difficult to do at all.

Interestingly, I found the hips to be too wide in the first version I made of this pattern – there were super A-line on me (not surprising, considering I’m not a pear shape and this pattern is drafted for someone who is) and I had to take in the sides quite a bit to make them more straight – but on this current version, they are fine. I am guessing my fabric choice had something to do with this, because I didn’t alter the actual pattern pieces. This knit is way softer and stretchier than the French terry I used for my first version, which makes the sides hang better.

Fraser Sweatshirt

Anyway, I don’t have anything else to say about this top sooooo I guess that’s it!

Review: The Janome AMH M100 Sewing Machine

19 Dec

Good morning, everyone! I have a review post today (if you’re not into reviews, no worries – I will have a ~normal~ post later this week, too! So much catching up on projects before the year ends!) – for a sewing machine! NGL, I am pretty excited about this little machine.

As you may or may not know, I started working for Craft South earlier this year. Craft South is an adorable little fabric/yarn/crafty store, located in the seriously hip 12 South neighborhood in Nashville, TN, and owned by our fearless leader, Anna Maria Horner. In addition to our sewing, fiber and other craft supplies, we also sell Janome sewing machines. Now, I am not particularly attached to any one brand of sewing machine – I have several different brands that I use at home myself – and I strongly believe that all brands are good brands, it’s just a matter of what fits best with your budget and needs. Whenever I have the opportunity to try out a new machine – especially one that’s perhaps a little more budget-minded than whatever I have on my sewing table at home (sorry, guys, but I LURVE me some expensive-ass sewing machine hahahaha) – I am ALL about that! This particular machine is especially delightful to me, cos it’s a branded Anna Maria Horner machine *and* it’s our future classroom machine for Craft South.

I will lead with a stock photo from the Janome website, because it’s much prettier than the pile of trash photos you’ll see in the rest of this post, lolz

AMH M100

This is the AMH M100 – designed by Anna Maria Horner, and manufactured by Janome sewing machines. It’s a reasonably basic machine – no crazy embroidery functions, a few decorative stitches – that is easy to use, has some fun features, and is just plan adorable! It’s a fairly small machine, and I think the floral design is so beautiful! There’s also a big honkin’ space that is perfect for having signed by Anna herself, and yes, speaking from experience here.

There are a lot of features about this machine – too many to put in a blog post (well, without making this post insanely boring), so I am just going to touch on the ones that I think are really cool, as a sewist and also a sewing teacher. You can always go to the website and get the full run-down, or, if you’re local – come in our shop and play with the machine.

AMH M100 Sewing Machine

The machine has 99 stitch designs – ranging from your basic utility stitches (straight, zigzag, button hole, etc) to some crazy looking embroidery stitches that are perfect for quilting and applique projects. They’re all based on Anna Maria Horner designs – so lots of hearts, swirls, girly things like that. I admit, I don’t ever use stitches like this in my projects, but they are REALLY fun to just sew samples on and ooh and ahh over.

As a sewer of garments, the stitches I use most are 00, 01, 04, 06, 07 & 18. That’s your basic straight stitch, the Lock-O-Matic stitch (it will automatically backstitch at the beginning and end of your seam, which I find especially useful for bra making), the triple stitch (which is what I use now for topstitching, instead of topstitching thread + straight stitch), zigzag stitches, and the button hole stitch. There is also a locking stitch (02, it’s the same idea as the lock-o-matic, except it locks the stitches by stitching in one place instead of backstitching), stretch stitches, overcasting stitches, darning stitches, blind hem stitches, the triple zigzag, and all those applique stitches. One thing I do appreciate is that there isn’t a mass overload of decorative stitches – just a handful. It’s not overwhelming, but there are a few cute options to play around with.

AMH M100 Sewing Machine

AMH M100 Sewing Machine

The little stitch card fits in a piece that clips to the machine, so you can keep it attached to your machine if you want to reference it. The clip also folds down, so you don’t have to stare at it if you don’t want to. Or you can take it off completely and lose it somewhere in your sewing space, which is generally what I do.

AMH M100 Sewing Machine

There are several feet and accessories included with the machine – a straight stitch foot (not shown in this photo, but it’s attached to the machine), a clear satin stitch foot, a 1/4″ foot (PRAISE), an overcasting foot, a blind hem foot (which I use as an edgestitching foot), a zipper foot, a button hole foot, *and* an Even-Feed Foot. The Even-Feed foot is similar to a walking foot, except instead of “walking”, it clamps down on the fabric and moves it. I am told this is more precise than a walking foot, since the pieces are held together when they are moved. At any rate, that alone is a pretty sweet add-on! Those feet tend to be pretty expensive on their own.

The machine also comes with boring but useful things, like extra bobbins, spool caps, a seam ripper, etc. The Organ needles included are a new thing for me – I’d never heard of this brand before I started working at Craft South, but they are just as nice as Schmetz and soooooo much cheaper. I can get a pack of 10 Organ needles for like $2.30, WTF. Janome machines are made to work specifically with Organ needles – they will work with other brands, including Schmetz, but the needle-threader is calibrated to work with the eye placement of an Organ needle. So you can sew on the machine with any brand of needle, but you may or may not be able to use the needle threader if it’s not an Organ brand. I haven’t tested this theory bc Organ is all I keep in my sewing room now (and it’s all we have at Craft South, too).

AMH M100 Sewing Machine

AMH M100 Sewing Machine

The front box opens up so you can store all your feet and accessories in one handy spot. This piece can also be removed so that the machine has a free arm – useful for sewing stuff with a small circumference, such as sleeves and pants hems.

AMH M100 Sewing Machine

AMH M100 Sewing Machine

Threading is super easy. For the needle, there are numbers and arrows to direct you the thread path (if you’ve ever threaded ANY sewing machine before, just know that they are all mostly the same in this regard), and then there is an automatic needle threader to pull the thread through the eye if you have trouble seeing / are lazy.

AMH M100 Sewing Machine

The bobbin winder also has a clear diagram. One thing I really love that about this machine is that the bobbin can be wound without the foot pedal – just unplug it and press the Start/Stop button on the machine. This is incredibly handy when I am setting up for class – sometimes I’ll have all 10 machines winding bobbins simultaneously and I feel like a little Sewing Machine Goddess hahahaha

AMH M100 Sewing Machine

The AMH M100 has a drop-in bobbin, which makes it incredibly easy to thread. There is a little diagram on the case cover to show you how it is threaded – just a head’s up, 9 out of 10 of my students always thread it backwards the first time (actually, on my old Janome – I had it threaded backwards for like the first 6 months of use haha). The threading feels counterintuitive to what you’d think, but it’s necessary for proper tension. At any rate, you’ll know if you thread it backwards because your stitches will pull out very easily.

AMH M100 Sewing Machine
To thread the bobbin, you drop in your spool and pull the thread down, with the tail pointing toward the left…

AMH M100 Sewing Machine

Then you pull it under the metal piece and up the channel, toward the 1…

AMH M100 Sewing Machine

And pull the thread down toward the 2…

AMH M100 Sewing Machine

Where there’s a built-in thread cutter that will clip the tail to the correct length. Then you just put the cover on. That’s it! No need to pull up the bobbin threads, it’s ready to sew.

A word about drop-in bobbins: I’ve used both drop-in and front-loading, and both have their merits. The front-loading bobbins will give you a more even, precise stitch. However, they are also prone to tangling and creating thread needs on the underside of your work. The drop-in bobbins don’t give you quite as beautiful of a stitch (I think this is negotiable, though, since very few people are going to be able to tell the difference just by glancing), but they are a lot more user-error-proof. These bobbins in particular are known for being really really hard to mess up. We rarely have problems with the bobbin in our classes, unless something else is wrong (such as a dull needle, or incorrect threading). Our Janome rep loves to do this trick where she throws a big thread nest in the bobbin and sews a seam – the nest just shoots out of the back and doesn’t affect the stitching. It’s kind of weird and also really amazing haha. I think this sort of bobbin is really ideal for the beginner sewer, or someone who buys a machine for their kid and doesn’t want to mess with fixing it when they inevitably screw something up. Like I said, it’s really hard to jam it up, even if you intentionally shove a thread nest in it.

AMH M100 Sewing Machine

Here are the buttons on this machine. The Start/Stop can control the machine without the foot pedal – you just have to unplug it first. I will admit I’ve never personally used this button except to wind the bobbin, but kids whose feet don’t quite reach the floor love it. ha. There is also a backstitch, locking stitch (again, same as the backstitch except it stitches in one place to lock. This is really useful for those embroidery stitches), needle up/down, aaaaand my favorite button – the scissors! Press that little dude after you finish sewing, and it will raise the needle and clip your threads! Argh I love that feature so much! There is also a slider to control the machine speed.

AMH M100 Sewing Machine

The stitch buttons are in the green section. From here you can select your stitch, move the needle position, adjust length/width, make a button hole, and there’s also a “memory” feature for the scissors button.

AMH M100 Sewing Machine

The throat plate has a ton of markings for measurements, which are especially useful for quilting and applique. This is my only beef with the machine, actually – I absolutely hate the guide markings. I find them really confusing to see which one you’re using, and I don’t like that they are only on one side of the needle. This is easily solved by slapping a piece of tape on the machine along the markings, which is what I do for my classes.

AMH M100 Sewing Machine

AMH M100 Sewing Machine

The machine also comes with this giant (removeable) tabletop, which is ideal for quilting.

Finally, here are some stitch samples:

AMH M100 Sewing Machine

AMH M100 Sewing Machine

Just your basic straight stitch. The top fold is the bobbin stitching.

AMH M100 Sewing Machine

Here is the straight stitch with a triple stitch underneath. These stitches used the exact same thread – just basic polyester Gutterman, the stuff you use to sew a garment. This is why I love that triple stitch – it’s sooo much thicker than the straight stitch, but doesn’t require a special thread or needle.

AMH M100 Sewing Machine

I also played around with some of the embroidery stitches.

AMH M100 Sewing Machine

And a few of the utility stitches (zigzag, triple zigzag, and stretch/lightning bolt stitch). Sorry the angles are so weird and artsy, it was really hard to take a photo without a huge shadow over it.

Here are some more photos of the machine working her glorious angles:

AMH M100 Sewing Machine

AMH M100 Sewing Machine

AMH M100 Sewing Machine

AMH M100 Sewing Machine

In conclusion, this is a fantastic little machine and I’m excited to bring these into the Craft South classroom! It’s very easy to use (as in, intuitive and user-friendly) and a solid little machine that doesn’t bounce around the table when you’ve got it on a high speed. It’s very similar to our current classroom machines, the Janome 4120 – the main differences that I have noticed thus far is that the AMH M-100 has less decorative stitches (and doesn’t have the stitch alphabet – which, let’s be honest, rarely gets used). However, the AMH M-100 does come with that Even-Feed foot. I love those 4120s and think they are wonderful machines, but I can’t wait to make our classroom just a little bit prettier 🙂

AMH M100 Sewing Machine

Note: I was not compensated in any way for this post (no, I did not get a free machine either). However, if you come to Craft South and buy a machine from me, I *do* get a commission. If you’re not local and are interested in this machine, visit your local Janome dealer!

Completed: The Freedom Backpack

12 Dec

I know.

I already made a travel backpack. And in all honesty – a pretty nice one at that. It has been my little tag-along for every adventure I’ve gone on since finishing it, and I get a lot of compliments on it from strangers (and a lot of boggled minds when I reply with, “Thanks, I made it!” GREAT feeling, btw! ;)).

I do love that backpack, but it’s definitely more suited to be a day backpack – it’s very small, so great for walking around and exploring a new city, not as great for a long plane ride. It’s also very light, so I’m a bit nervous to stuff it too full. Which honestly isn’t too much of a problem, since it’s too small to stuff really full in the first place 😛

So, I made another one. Two backpacks in one year! I am on a roll here, you guys.

Niizo Freedom Backpack

I actually had no intention of making another backpack. Like I said – I like the little rainbow travel one, and I’ll continue to use it. I have been planning for my trip to Egypt in January (OMG IT’S SO SOON OMG), and thinking about what I might use as my carry-on for the flight. I had been lurking around at the backpacks in the stores, but not actually planning on buying anything. About this time, I got an email from niizo, asking if I wanted to try and review something from the shop. My immediately first thought was, “Naw.” Until I actually looked at the stuff that was available. The patterns available are really nice – they looked a lot like the stuff I was seeing in stores. And the fact that they also had kits that included everything needed to make the pattern – pretty tempting (sourcing all those materials can be a PITA, especially if you have to order half the shit online). Further, Amy mentioned in her original email that her instructions were super user-friendly and the patterns were professionally designed. I thought about it for a couple of days and decided to go for it.

It was hard to decide which kit to receive (like I said, I had backpacks on the mind but duuuude I love that Sunny Day bag, too!), but eventually, practicality won out and I chose the Freedom Backpack Kit in the Iron Gray colorway. My finished backpack totally looks like the products photos, but, whatever, I like the grey haha.

Once I chose my kit, I received the package within about a week. I don’t know the specific day as I was in NYC while it was delivered, but it was definitely less than 10 days. I wish I’d thought to take a picture of the packaging, because it was all packaged together quite beautifully – but I eagerly ripped that shit open the second I laid eyes on it AS I AM WONT TO DO, so, sorry. The fabrics were all neatly folded and labeled, and all the accessories were split between a couple plastic bags. If you look at the listing, you can see what the kit includes – but it’s literally everything you need, except the thread & needles (and sewing machine, obviously). They even include waxed thread & large needles for sewing on the leather pieces. The zippers already have the big leather pulls attached (with the stoppers cut off – since you’re inserting the zippers into something, you don’t need the stoppers. They are tagged in place to the zipper tape, so you accidentally yank the pull off and ruin the zipper. A very thoughtful touch!) and all the little leather pieces have the edges finished and the stitch holes pre-cut. It’s a really nice kit – and pretty close in cost to what I paid for my other backpack, except that I didn’t have to source all these materials individually!

The pattern is a PDF that you print off and tape about half the pieces together (they are individual, so you don’t end up with a giant sheet of paper that you then have to cut down). There isn’t a test print measurement square, however, the dimensions of the piece are printed on every pattern piece, so you can double check to make sure you printed the correct size. I scaled at 100% and everything was perfect. I spent the first evening taping and cutting – put on some good music, spread my fabric out on a single layer, and traced around the pieces with a big piece of wax so I could make sure they all fit on the yardage provided. I followed the cutting layout in the pattern and ended up with very little waste, and a very satisfying pile of cut pieces.

Niizo Freedom Backpack

Niizo Freedom Backpack

Sewing this backpack was INCREDIBLY fun. I do not consider myself a bag maker – like, I’m not super skilled at it, and also I kind of hate sewing bags (which is why I carry a purse that I actually paid money for, instead of making one. Also my wallet. Also all my tote bags. Sewing bags is borrrrrring). But I honestly, truly enjoyed nearly every moment of putting this thing together (I am sorry in advance because this review is about to get super gushy hahaha). The instructions are really good – they include photographs (not drawings) and are very simple and direct. The pieces all fit together perfectly. I had no problem deciphering or following any of the steps, and I was quite impressed with how nice the bag turned out. I had so much fun sewing this thing, it ended up being the sort of project that kept me up way past my bedtime (and also skipping dinner) because I was enjoying myself too much to stop. Having sewn another backpack just a few months prior, the finishing of this pack is much much much more professional than the other pattern. Not that the other pattern is bad – this one just definitely has better instructions and a nicer finish.

Niizo Freedom Backpack

It’s a little difficult to see in the product photos, but there are a lot of nice touches that really elevate this project. The plaid lining (which is waterproof cotton – all the fabric in this bag, including the lining, is waterproof) is under the hood flap and also at the underside of the straps. There are two zippered compartments under the hood flap – the back compartment is the size of the bag, with one large pocket (sized for a laptop) and two smaller pockets. The front compartment is as wide as the backpack, but only about half as deep, with some smaller pockets inside.

Niizo Freedom Backpack

The bottom half of the front compartment is also a pocket, with a little sneaky side zipper. I imagine this would be a great place to hold stuff like a change of clothes (for international flights) so you they are handy but also out of the way when you’re digging through the rest of your shit.

Niizo Freedom Backpack

The straps are padded with some plastic-y foam stuff (I dunno what it is, but it’s way more comfy than quilt batting haha), and then the nylon webbing is sewn directly on top.

Niizo Freedom Backpack

The straps are then attached to the bottom of the backpack with this little triangle tab thing, which is a nice feature.

Niizo Freedom Backpack

The back is padded with the same foam stuff, and topstitched in place. You can also see the piece that covers where the straps attach at the top.

Niizo Freedom Backpack

Niizo Freedom Backpack

I love the little leather details. I sewed them on with the included thread & needles, using a double needle stitch – which the pattern includes a link to video instructions that you can follow along.

Niizo Freedom Backpack

Finally, there are two side pockets that can hold your water bottle.

Niizo Freedom Backpack

This is the inside of the back compartment – one side of pockets.

Niizo Freedom Backpack

Here is the other side of the same compartment. Not sure if my backpack is drunk or just leering in this photo.

Niizo Freedom Backpack

What’s awesome about this backpack is there is NO INTERFACING involved! It gets its shape from the heft of the outer fabric (which is a waterproof cotton canvas) and that back padding. I didn’t put anything in this backpack for these photos – it’s empty and standing up on it’s own just fine. The downside to this is that it was quite difficult to manipulate under the sewing machine once I got to those very final steps of putting it all together – it’s just really bulky, and hard to push down flat. I managed, just by going slow and being careful. Don’t try to rush that part! It was also a big beast to turn the thing right side out once I was finished (the bottom lining is left open and slip-stitched shut), but obviously I was able to get that eventually… it just took a bit of patience.

If you’re interested in trying this backpack – or anything similar to this – here are my tips:
– An 80/12 needle works fine, although a heavier one might be more ideal (I only had 80/12’s on hand). I only broke one needle during the making of this, and it was at the very end.
– Some of the layers get too bulky to pin together, so I bought a pack of Wonder Clips and that was immensely helpful. They’re not as flat as pins, so you’ll have to pull them off earlier than usual to get it under the machine, but it’s worth it to be able to at least hold the layers together temporarily.
– The cotton fabrics press, but that waterproof nylon lining does not. For the tops of the pockets, I marked a 3/8″ line with chalk as a guide for my first fold, and then just doubled it for the second fold.
– The pattern includes measurements in both centimeters and inches – I found it waaaay easier to just follow the cm measurements.
– The seam allowances are included in the pattern, and they are quite small. Depending on what part you’re sewing, they range from 3/8″ to a little under 1/4″. For those teensy seam allowances – especially when I got to putting the entire thing together, in all of it’s bulky glory – the 1/4″ foot on my sewing machine was a LIFESAVER. I just moved the needle closer to the edge blade, to make the seam allowance less than 1/4″.
– Some of the backpack instructions might seem kind of weird… just blindly follow them, it’ll all make sense eventually.

Niizo Freedom Backpack

Overall, I have nothing but positive things to say about the backpack – both the experience putting it together, and the finished product. I was going through a little bit of a sewing slump, and this definitely revived my mojo! It was really entertaining to sew something that wasn’t garment related. I can’t wait to take this thing out and use it for my upcoming trip! It certainly feels much sturdier than my mini travel backpack, and I think it looks really professional.

As I mentioned, I did receive this backpack kit from niizo in exchange for a review post. I know this review is pretttty gushy, but I am honestly that excited about it (don’t worry, I’ve gushed about it to everyone I know irl as well haha). 10/10, would absolutely make another pattern from this shop again.
One last thing – niizo is running a winter sale through next Monday, here are the details on that:

Grateful Winter Sale on niizo Etsy shop
12/12 – 12/18 Each day we’ll release a surprise coupon code at 0:00(GMT-5)
++++ How to Get the Coupon ++++
Follow @niizocraft on instagram.
Watch the short clip to find the out the coupon code in the video!!
Each coupon code lasts for only 24hrs.
If you miss it, it’s okay, tomorrow is a new day.

Now, who’s got a hankering to make a backpack? 😉

Completed: The Mélilot shirt

5 Dec

Hey guys, New Favorite Outfit alert!

Mélilot shirt - front

This is the Mélilot shirt from Deer & Doe Patterns. I vaguely remember when this pattern came out – although I didn’t give it more than a second glance (the main version you see on their website is long sleeved, with dropped shoulders and a peter pant collar. It’s very nice, but it’s not really my style). Once I started googling around for the short sleeved version, though – I decided it was super cute and that I wanted to make it in a lovely drapey silk.

(It feels so redundant to talk about silk… I should just dub my 30s “The Silk Decade” because I feel like it’s ALL I sew now haha)

Mélilot shirt - front

Mélilot shirt - side

Mélilot shirt- back

Mélilot shirt- back

I sewed Version B, with the short sleeves, and used the hidden placket from Version A. My shirt is a size 34 (which is what I usually sew from this company) with no alterations to size or length. The instructions were reasonably easy to follow, although the hidden placket info was a bit sparse and took some head scratching before I really figured it out (and don’t ask me for a tutorial, bc I don’t remember exactly what I did haha)

My fabric is an olive green / brown (depending on the light you are in, ha) silk charmeuse with the slightest amount of stretch, from Mood Fabrics. I bought this at the store while I was in NYC in November, with the intention on making this pattern with it. I used the matte side for the body, and the shiny side for the collar stand, pockets, and sleeve bands. It’s a very subtle contrast, but I love the way it looks. I use a Spray Stabilizer on my fabric, which made it easier to cut and eventually sew. One thing I have learned with fabrics like this is to leave the pockets off until the garment is completed. I don’t know what it is – but every time I put the pockets on, the end up super crooked and I have to unpick them and re-sew. Maybe it’s how the garment hangs off my body, maybe I’m just an idiot WHO KNOWS. But I had the same crooked pocket problem with this top (I took a photo, but you couldn’t really tell… but trust me, it was bad in person. Even my mother, who thinks I’m the great sewer ever, laughed when she saw it), so next time I’m just going to wait till the end. No sense in doing things twice!

I will admit that the color of this shirt is kind of ugly… but it definitely works really well with my coloring. How awesome that the doo-doo colors suit me best. Ha.

Mélilot shirt - front

Mélilot shirt- back

Mélilot shirt - front

I just love the fluid drape of this fabric, and the way the little sleeve bands stick up. I am not normally a fan of these deep curved hems, but I think it works well with the style of the shirt. Same with the pockets – this shirt definitely needs the pockets, or else it looks really unbalanced in a bad way. I am thinking this will be a good shirt to take with me to Egypt – it covers my shoulders and butt, and I can button it up pretty high for modesty.

Mélilot shirt - on dressform

Mélilot shirt - on dressform

Mélilot shirt - sleeve detail

Mélilot shirt - hidden placket detail

Mélilot shirt- hidden placket detail

The pattern calls for lined pockets, which makes it easier to get identical, crisp curves on both pockets. For buttons, I actually used the wrong side of a bunch of those shell/mother of pearl buttons that I found in my stash. The back side is a little matted and kind of a taupe color, which went really well with the fabric. Due to the covered placket, you only see a couple of buttons anyway. Oh, and as always – the inside seams (you know, all 2 of them haha) are French seams. FYI, watch those seam allowances if you make this pattern and omit the French seams – because I’m pretty sure the side seams are only 1/2″. The pattern instructs you to sew French seams for these seams, with two passes at 1/4″, which doesn’t add up the standard 5/8″ seam allowance on the rest of the pieces. Just a thought! Also, I always trim down my first pass to like 1/8″ before sewing the second pass, as it ensures that the seam allowance it caught in that stitching. Ain’t nobody got time for hairy seams amirite.

Mélilot shirt - front

That’s all! A pretty simple shirt, but the silk makes it feel super fancy. I am wearing it with my Cecila Pants from Elizabeth Suzann. Y’all, these are magic pants. The denim is suuuuuper stretchy and comfy, and has a fantastic recovery – I can wear these several times before they need a wash to shrink back up. And while I didn’t personally make these pants – I can tell you exactly who did. Her name is Colette 😉

Completed: Plaid Rosarí Skirt

29 Nov

Y’all. I love this skirt pattern.

Plaid Rosari Skirt - front

I’ve made it in corduroy, stretch twill, and Cone Mills denim, and I’ve had my sights on making a plaid version as well. Nothing like channeling your inner Cher Horwitz with a plaid mini amirite? This pattern is especially great for plaids as it doesn’t involve a lot of matching – just center front, center back, and the side seams – and you can add some ~visual interest~ by cutting the pockets and waistband on the bias.

If you didn’t already figure it out, this is the Rosarí Skirt from Pauline Alice Patterns. I made the mini version in a size 34, and added curved front pockets and a lining (this is not covered in the pattern, but it was pretty easy to figure out).

The plaid fabric is from Mood Fabrics. It is listed as a cotton flannel, but I think “flannel” is a bit of a stretch. It is VERY slightly flanneled if you look at it really really closely, I guess. Honestly, it just looks like a plaid shirting to me. It’s definitely cotton, just the flannel part isn’t exactly accurate. While I had visions of a cozy flannel skirt when I ordered the fabric, I think the smooth cotton works just fine. Probably makes it look a bit less like pajamas, ha. With that being said – if you are wanting to order any of this fabric, definitely get a swatch first!

The lining is Bemberg Rayon that I had in my stash (I’d say it was a miracle that I had a perfect color match, but ha ha have y’all seen my stash?), and the buttons are also old stash (I think they are originally from the flea market, though, probably).

Plaid Rosari Skirt - front

Plaid Rosari Skirt - side

Plaid Rosari Skirt - side

Plaid Rosari Skirt - back

Sewing this up was really easy and mostly uneventful, considering I’ve already made this pattern so many times. Like I said, I added a lining so that I could wear this with tights – the one thing that bums me out about my other Rosarí skirts is that they stick to tights and ride up (generally right in between my legs, which is sooo attractive I know) (I ended up making a teeny half-slip out of stretch silk charmeuse to wear with those – so problem solved! This is the tutorial I followed, FYI!). To add a lining, I cut the lining from the front and back pattern pieces, and sewed them together like a lining skirt. Then I attached them to inside along the top edge of the plaid pieces (also assembled together), and then treated everything as one piece. The lining is basically flat-lined to the outer fabric, except the side and back seams are enclosed. The front button band and hem are turned to the inside as per the pattern and topstitched down.

The only part that was eventful about this sewing – the fit! I was nearly finished – like, button holes sewn in and marking button placement nearly finished – and I tried the skirt on to mark those damn buttons. That’s when I realized that it was too tight – way too tight. I could get it to close, but it was less “cute plaid skirt” and more “sausage stuffed in a casing,” if you know what I mean. I couldn’t figure out why it was too small – did I gain weight? did I fuck up the seam allowances somewhere? – because, again, I’d made this skirt several times, all in the same size, and THOSE still fit just fine (I went in my closet and tried them all on to be sure haha). Then I threw it on the cutting table and plotted how I was going to fix this mess.

Well, first of all – I figured out why it was too small. See, all 3 previous versions were made using stretch fabric. Due to the addition of the lining, this skirt didn’t have any give to allow for a little more room (actually, the fabric itself wasn’t very stretchy either, so – that factors in as well). I probably also fucked up a seam allowance somewhere, idk.

To fix the skirt and actually make it wearable, I removed the waistband entirely. I let out the side seams until the skirt fit comfortably (I think I ended up with 3/8″ seam allowances – I don’t remember), in both the outer and the lining. Then I cut a new waistband and reattached everything. As you can see, it now fits. Success!

Here are a lot more photos. Sorry about that giant-ass wrinkle on the right, by the way.

Plaid Rosari Skirt - on dressform

Plaid Rosari Skirt - on dressform

Plaid Rosari Skirt - on dressform

Plaid Rosari Skirt - flat

Plaid Rosari Skirt - flat

Plaid Rosari Skirt - flat

Plaid Rosari Skirt - flat

I guess that’s it for this post! Moral of the story – even if you’ve made a pattern numerous times, always ALWAYS check that fit as you go! Your fabric can really change the fit of the garment. I generally do this when I sew, but the ONE time I did not, I ended up regretting it!

Plaid Rosari Skirt - front

Completed: Denim Rosa Dress

16 Nov

Good morning, everyone! As I write this, I am preparing to experience what will probably be the shittiest day of my life (literally – I have a colonoscopy tomorrow and today is prep day) (lol) (bet you never expected to read THAT on a sewing blog). I haven’t had solid food since last night and I’m stuck in this house for the rest of the day. Lucky for you, I am writing this blog post to pass the time!

I’ve had quite a few people ask me when this project was going to be posted (Rosa made her debut on my Instagram nearly 2 months ago, and I’ve worn her several times since – including to all the workshops I’ve been traveling to in between!), and honestly, the only reason it’s taken so long is because I really hate taking photos! So, with that being said, sorry in advance for the quality of these – namely, how freakin’ wrinkled the dress is! It looks much worse in photos than it did in real life – otherwise I would have at least steamed it a little – however, I have been wearing it pretty rumply in real life so I guess this is as close to authentic as one can get.

Also, I’m sorry if I don’t make any sense in this post. I’m blaming it on the lack of food.

Denim Rosa Dress - front

Denim Rosa Dress - front

Rosa is one of Tilly & the Buttons‘ newer patterns, and it includes options for both a shirt and shirtdress. The pattern features front and back princess seams, a pointed back yoke (which I LOVE!), plus all the features that make for a proper button-up shirt – collar, collar stand, button placket. There’s also an online video workshop if you need help with the steps, although I didn’t use this (I’ve made plenty of these sorts of garments before, and plus, the instructions are pretty great as they are).

I made a size 1, as I wanted a very fitted dress. I made a muslin before cutting into my real fabric, which I’m glad I did because the arm holes ended up needing a little adjusting for me. Apparently I have very small armscyes – arm holes almost always tend to be too low and/or too large for my body, which restricts movement when you add sleeves to the equation. The sleeves in this dress weren’t necessarily bad as-drafted, but I knew they could be better. I ended up raising the armscye 3/4″ higher at the bottom, and also adding 3/8″ to the back arm curve, which made the entire arm hole that much smaller. I reduced the sleeve cap ease, so that the sleeve would properly fit without a bunch of gathers. This worked perfectly and I have a full range of movement with my dress, woohoo!

Denim Rosa Dress - side

Denim Rosa Dress - side

Denim Rosa Dress - back

Denim Rosa Dress - back

Style-wise, I shortened the hem 1″ for a real mini length, and also added a curved cuff so that sleeves would be full-length (the bracelet-length sleeves are sweet, but as I mentioned before – it’s either full sleeves for me, or none at all!), as well as a tower placket so I can roll the sleeves up if I need to. I left off the sleeve tab, because it just ended up feeling too bulky with all the denim. To make the curved cuff, I used the straight cuff from my B5526 pattern and just curved the edges using curved ruler. The tower placket pattern piece is from my Negroni pattern.

The denim that I used to make this dress – honestly, I have no idea where it originally came from, ha! It was in my stash and it’s a much lighter weight than what I would use to make jeans. I imagine I probably bought it intending on a skirt, but I don’t think it would really even be suitable for that (considering how easily it wrinkles). It’s a woven cotton denim with no stretch, and clearly I should have pre-washed it at least one more time because it has shrank a little since I finish this dress. On the flip side, I intentionally made the sleeves a little long in anticipation of that – and now they are the correct length. On the downside, the dress is even shorter than I was planning and it pulls a bit across the bust now. Oh well! Lesson learned haha.

Denim Rosa Dress - detail

Denim Rosa Dress - detail

Denim Rosa Dress - detail

My inspiration for this dress came from the Rosa inspiration post, in fact. The top left denim dress immediately caught my attention and I knew that was exactly what I wanted mine to look like. A few clicks later brought me to the Net-A-Porter page, which at the time showed close-ups of the dress from several angles (unfortunately not the case now, I guess, since it’s sold out – sorry!). This was extremely helpful in assisting me with my blatant rip-off.

I used a brown/taupe thread for all my topstitching – it’s just some weird cotton crap I had in my thread rack, and I used the triple stitch on my machine so that the stitches were nice and thick like topstitching. Most of the topstitching is two rows – the first row 1/8″ from the edge, and the second row is 1/4″ from that first line. Instead of doing a true flat-fell seam, I just mock flat-felled them as per the instructions (stitch as normal, serge, and then topstitch from the right side). The tops of the pockets are secured with bar tacks. The snaps are gunmetal snaps done up with an industrial snap setter (I use the one at Elizabeth Suzann’s production facility bc they haven’t shooed me away yet haha). I LOVE hulking out of this thing at the end of the day, y’all!

What else? I think that’s about it. Have a picture dump (pun intended looool):

Denim Rosa Dress - on dressform

Denim Rosa Dress - on dressform

Denim Rosa Dress - on dressform

Denim Rosa Dress - on dressform

Denim Rosa Dress - on dressform

Denim Rosa Dress - on dressform

Denim Rosa Dress - detail

Denim Rosa Dress - detail

Denim Rosa Dress - detail

As I said, I am pretty happy with this finished dress and I have worn it tons! It’s a nice autumnal version of my beloved chambray Hawthorn (which, 2 years later, is still one of my most worn me-mades to date) – a good neutral base that can be worn as-is with flats when it’s warm, or layered with tights and a slip when it gets cold. I’d love to make another version in corduroy – currently on the lookout for a good one if you have any suggestions! 🙂

Completed: Navy Ponte Morris Blazer

10 Nov

Continuing on the Navy Train (although not really, bc I actually made this shit ages before I made my Navy Twill Gingers), here is what I guess we can consider the other half to my ~casual navy suit~ – the blazer!

Navy Ponte Morris Blazer

Navy Ponte Morris Blazer

Although, unlike most blazers – this one is made of a ponte knit, which makes it about as comfortable to wear as a knit hoodie. I dunno about y’all, but this is basically a huge score as far as I’m concerned.

Navy Ponte Morris Blazer

Navy Ponte Morris Blazer

Navy Ponte Morris Blazer

The Morris Blazer from Grainline Studio has been out for a while (and yes, I completely acknowledge that my finished blazer looks exactly like the shop sample no regrets), but I initially disregarded it as an option for my wardrobe as I haven’t bothered to wear a blazer since pretty much my very first office job. Even when I was working in office environments up until I switched to a more casual work life a few years ago, I eschewed the (often uncomfortable, often ill-fitting) blazer in favor of simple and much more comfortable cardigans. Actually, I had a really beautiful black wool blazer that I bought on sale at Bebe when I was in high school (lol anyway, but you’d lol even harder if you knew me in high school because my preferred places to shop were generally Hot Topic and the kid’s section of Goodwill hahahahah oh teenagers) that I wore the hell out of, and it was sadly stolen right my desk when I was 19, at the T-Mobile call center I was working at. To whoever stole that thing: fuck you. Also, I hope you couldn’t fit into it. I was really really small back then, like 90 lbs small. My clothes from back then were fucking comical… and also the reason why I learned how to sew in the first place. Alterations! Yay!

ANYWAY MOVING ON.

What eventually caught my attention about the Morris Blazer is that it is a much more casual take on the traditional blazer – obviously you can’t wear this in a corporate environment, but it’s still a step up from that aforementioned hoodie. It is intended to be made using a stretch woven fabric, and the blazer is unlined. I’d seen some people make it out of a ponte knit, which really piqued my interest because I am all about some ponte knit and its secret pajama properties.

I used a navy nylon Ponte de Roma from Mood Fabrics – it’s currently sold out in this colorway, but they have other colorways and it tends to go back in stock pretty frequently, FYI. I have also bought this ponte in the black & wine colors – it is great! Nice and thick, a good heavy stretch in 4 directions, and it remains opaque and holds its shape quite nicely. It washes really well and I haven’t noticed any pilling on any of my pieces. The rayon content makes it feel a bit nicer than the pure poly stuff, but the spandex/nylon additions give it that good recovery so it doesn’t bag out of shape over the course of the day.

I initially was a tiny bit concerned about using this fabric, as the Grainline website really suggests against using knits with a 4 way stretch – this pattern is intended for 2 way stretch wovens, so that the blazer doesn’t stretch and sag downward against the facing. I couldn’t find a good knit fabric that was heavy enough, had the intended stretch amount, *and* came in the color I wanted, however. So I threw caution to the wind and just used this stuff. I’ve been wearing the finished product for about 2 months and I reckon it turned out fine. So, in case you were wondering about 2 way vs 4 way stretch with this pattern!

Navy Ponte Morris Blazer

Navy Ponte Morris Blazer

I made the size 0, which is my usual size for Grainline patterns. I lengthened the sleeves to full-length – bracelet length is pretty, but I’ve decided there is no place in my life for that nonsense (either I’m cold enough to need full sleeves, or don’t want sleeves at all. My sleeve opinions are very black and white haha). I had also originally raised the armholes by about 1″, since I found the armholes in my Lark tee to be about that much too low (if you’re wondering why you don’t remember that post, it’s cos I haven’t written it yet haha), but lowered them back down to the original size when I tried on the blazer without sleeves. I used fusible tricot knit to interface the facings (I did not interface the entire front section, which is suggested in the sew along if you use a 4 way stretch as I did), and sewed most of the construction on my serger, with all topstitching done on my regular machine with a straight stitch.

Overall, I found this pattern really easy to follow. There is some interesting seam wizardry going on to create that shawl collar out of the shoulder seams, but none of it is particularly difficult. I like how the hems are all faced, and I like the topstitching detailing – especially at the bottom hem, which I know some people weren’t a fan of. I like that the knit fabric makes as comfortable as wearing a ratty hoodie, without actually looking like a ratty hoodie. I wasn’t sure if I would like that it didn’t have closures – I am the sort of person who never wears things open; if there are zippers or buttons, they are done up – but it hangs really nicely and I rather like how smooth and streamlined it is. One thing to note is that the facing is not tacked down at the front of the blazer, except at the shoulders and where it is caught in the hem. I read some reviews that people did not like how it flipped out, however, I haven’t found this to be an issue with my blazer.

Navy Ponte Morris Blazer

Navy Ponte Morris Blazer

Navy Ponte Morris Blazer

Navy Ponte Morris Blazer

Navy Ponte Morris Blazer

I have worn this quite a bit over the past couple of months – it’s a nice protection against the freezing a/c blasts Tennesseans love to subject people to, and a pleasant style change from the basic cardigans I usually carry around. I think this pattern combined with the Pinot pants would make an awesome ponte fake suit – you know, kind of dressed up from a distance but TOTAL LEISURE COMFORT in reality haha.

Also, in case you were curious -I also made the rest of my outfit! The jeans are Cone Mills Ginger jeans, and my tshirt is a Renfew made with bamboo knit ♥ that knit is another fabric I buy over and and over again – because it’s awesome! It’s super soft, incredibly stretchy without being sheer, and has an amazing recovery. It’s also super wide, so I can cut a long sleeve shirt out of a single yard of fabric. It tends to go in and out of stock quickly, but it looks like they just restocked the website. FYI!!