Oooh, one last make for this year!!!
I made this about 4 months ago, but it was a sample for Craft South so I’m just now getting possession of it to actually wear! I love making samples for the shop – you get access to the pattern + materials for free, and are allowed to sew during downtime at the store – but the trade-off is that you have to leave it at the shop for at least a couple of months. Which makes sense – it is a sample, after all, haha. But it can be frustrating when you have to wait to be able to wear it!
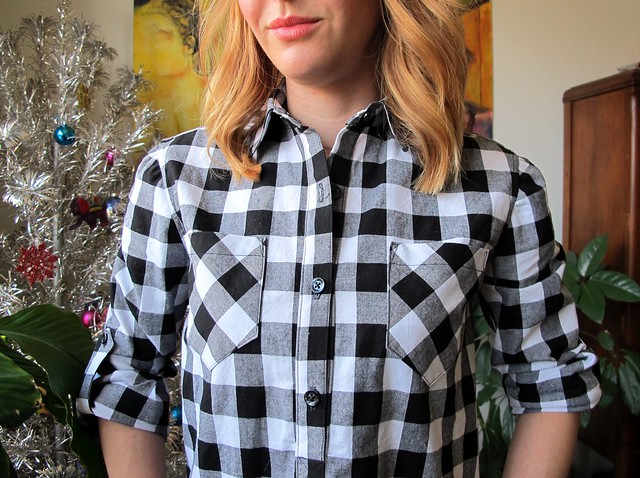
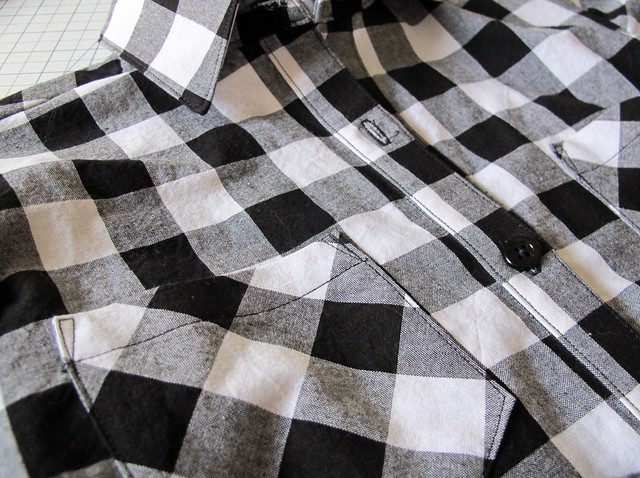
For this top, I used my personal Archer pattern (which we do sell in the shop, but I didn’t want to rip one open when I had a perfectly usable pattern at home), and I downloaded the popover variation. The fabric is Cotton + Steel Checkers, in the 1″ black and white. It’s a nice woven cotton that feels similar to a yarn-dyed cotton – it hangs (and feels!) nicer than a quilting cotton, but it does have a dense weave that still makes it have quite a bit of body. The checkers are woven, not printed, so the design is the same on both sides of the fabric. I did take this fabric home and prewash it before actually sewing the sample – I wanted to be sure it got its shrinking out of the way before I cut it up. Actually, I also cut it while I was at home, and fused my interfacing as well. Matching plaids takes some focus and concentration, and there are a lot of pieces to contend with on this pattern. I didn’t want to have to try to juggle cutting/matching while also dealing with customers as they come in and out of the shop, so it made more sense to tackle that part of the project at home away from distractions. But all the actual sewing did happen while I was at the shop!
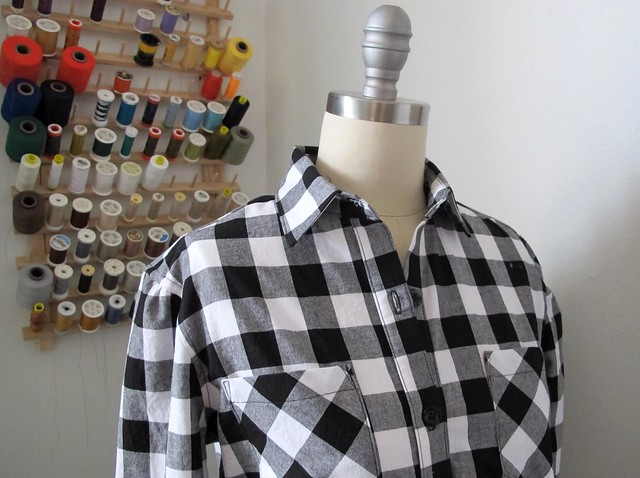
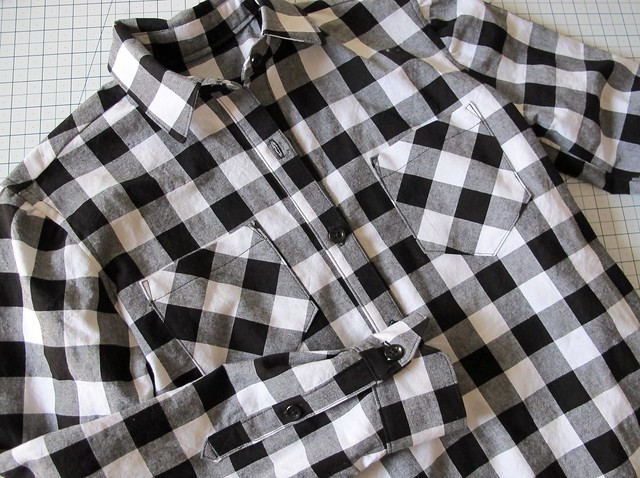
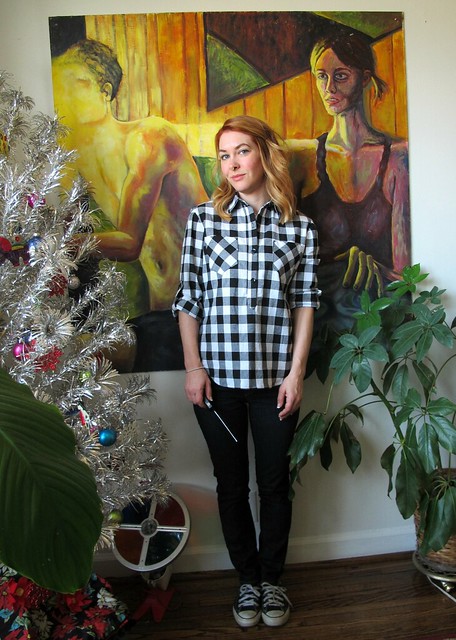
I’ve made lots of Archers in my time, so there’s not much to say that I haven’t already said. I made a size 0, and followed the instructions as they are written. This particular version is a bit different in that the button placket doesn’t extend all the way to the bottom of the shirt – hence, that it’s a popover, not a button up. The variation pack includes a new shirt front, a new front placket, and a different sleeve placket, as well as the instructions you need to actually sew them in. It’s been a few months since I made this top, so my memory is a little fuzzy, but I recall the instructions being easy enough to follow. I do remember that I did not like the instructions or pattern pieces for the tower placket on the sleeve – I found that whole process unnecessarily fiddly, although it did turn out nice in the end. Personally, my favorite way to sew a tower placket is by way of the Colette Negroni, it is very straightforward and simple, with a really nice finished result.
Other changes I made to the pattern was to include tabs for rolling up the sleeves (I swiped the pattern piece from my copy of B5526) and different shaped pockets (pattern piece swiped from the Negroni). I cut the gingham on the straight grain as directed, except for the outer yoke and pockets, which were cut on the bias. The inner yoke is also cut on the straight grain, to give the bias side some support. I didn’t get any photos of me with the sleeves rolled down, but they are full-length.
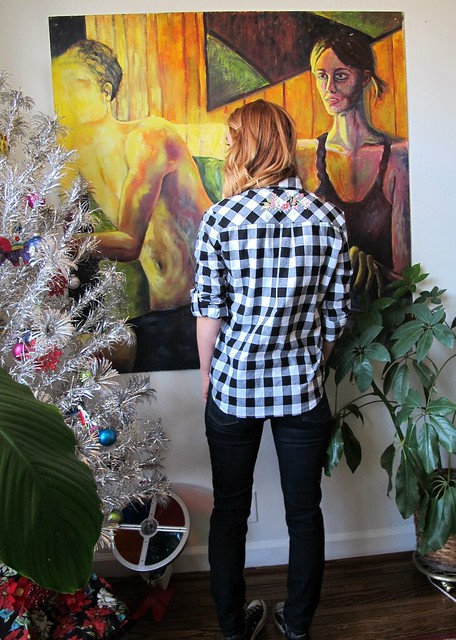
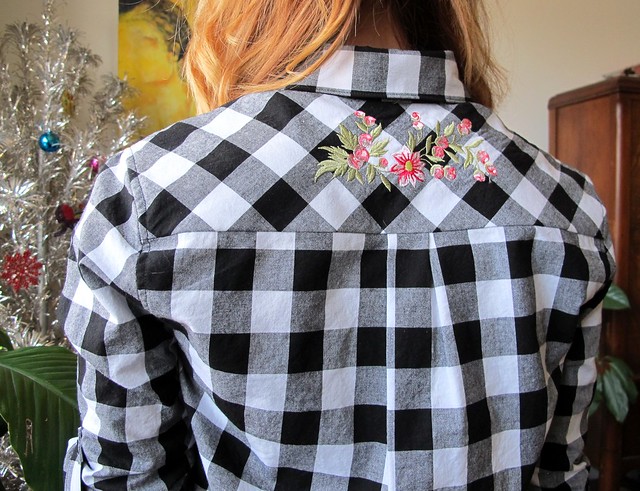
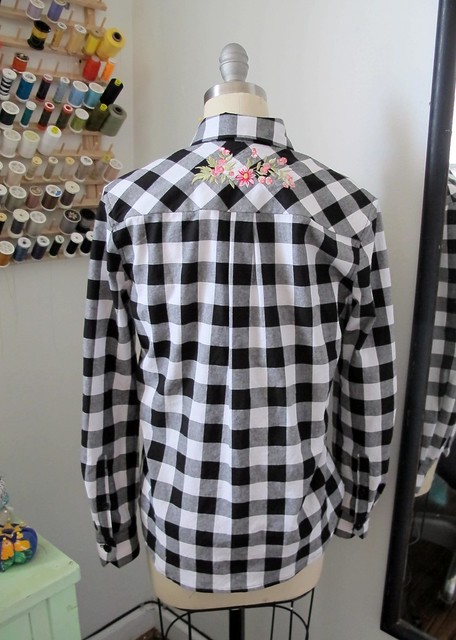
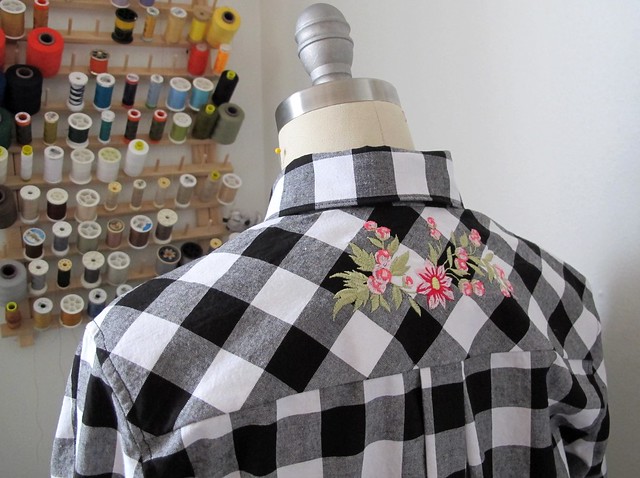
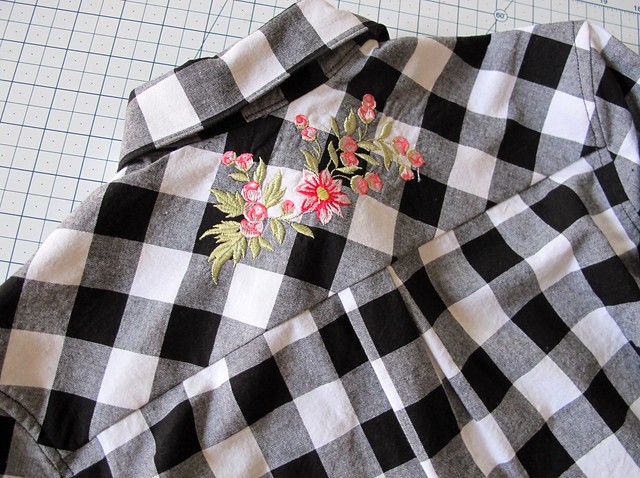
There were 2 reasons why I wanted to make this particular shirt – one, I really liked that Cotton + Steel fabric and I wanted to sew something out of it; and two, I wanted an excuse to bust out some fancy machine embroidery. I love embroidered western shirts, hence the inspiration for this one. Because I work in a sewing machine shop and we have several models out on the floor to play around with, I went straight for the Rolls-Royce of the bunch and did all my embroidery (and sewing, for that matter!) on the Horizon Memory Craft 15000. Y’all, we sell this sewing machine for a little over $10,000 (yes, all those zeros are supposed to be there). It comes with a fucking IPAD. It’s a super badass machine that I’m going to confidently say will never ever be in my personal budget to own, but you bet your ass that I’m gonna take advantage of the fact that I can sew something on it right now. Ha! Honestly, it was actually a good thing for me to sew this project on that machine, because it gave me lots of time to play around with it, learn how to use the embroidery features, and get comfortable sewing on it. I can’t imagine anyone would ever want to buy a sewing machine from someone who doesn’t even know how to use the thing themselves, so it was beneficial for me to learn all that in shop downtime. Also, I have a new shirt from it. Yay!
Anyway, that particular sewing machine comes with a bunch of pre-loaded embroidery designs, plus you can download (or create) more designs and upload them straight to the machine (either via USB, or with that aforementioned iPad haha). I get too overwhelmed when presented with way too many options, so I kept it simple and stuck with what was available on the machine. This little floral design fit right in the back yoke, although the suggested colors were a little weird (those were easy enough to change, obviously). I made a few practice pieces to get a feel for the finished size and also how the embroidery goes on, then I embroidered the actual garment piece. To do this, I first cut my piece and fused a piece of interfacing to the back to stabilize it (this isn’t 100% necessary in all cases, but since that piece is on the bias, it was needed). I used my sample piece to determine where the machine would start the embroidery, and centered my pattern piece in the hoop with tear-away stabilizer. Then you just turn the machine one and let it go to town! I can’t remember how long the embroidery took – we turned the speed down and let it roll on in the background while we worked – but it wasn’t super long. The machine will stop when its time to change the colors, and thankfully its also smart enough to pick up where it left off if you run out of thread or have to stop the embroidery for any reason.
Other than that, sewing was pretty uneventful. I finished the rest of the shirt on the same machine, which let me play around with all the available feet and additional sewing settings. It was pretty fun! All the seams are flat-felled, so it looks just as good on the inside as it does on the outside.
I think the shirt turned out really nice, however, I’m not super crazy about how much it stands away from my body. I normally like my Archers in a stiffer fabric, but all the others I’ve made button all the way to the bottom, so I can leave them open and wear them sort of like a little jacket.This particular style might do better in a drapier fabric. With that being said, I am hoping the fabric will soften with more washing, as cotton tends to do. We will see! In the meantime, it gave me an excuse to sew something on a machine that costs more than the first 3 cars I owned combined, so that’s saying something haha.


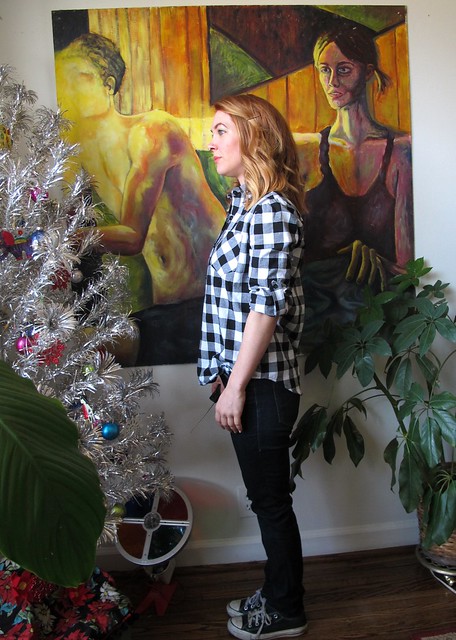





I know it’s your camera remote, but it totally looks like you’re carrying a wand. 😊 Love the popover! Is there a terminology difference between tunic and popover? I feel like it’s been all popovers for the last year or so, but before I probably would have called this a tunic.
I thought it was a screwdriver?
Haha nope! It’s my camera remote. My camera is too old for those really tiny ones, only works with the giant remote that has an antennae haha.
I like the idea of it looking like a wand! Most people think the remote looks like a screwdriver haha! 🙂
And I *think* the difference between tunic and popover is the button band – a popover has the partial button band, and a tunic does not necessarily have one. Tunic also refers to length – a popover can be any length. I could totally be way off the mark here, though!
What a beautiful Shirt! Can’t believe the price of that machine, but it is all singing and dancing! Well done you, for taking advantage while you can in the shop.
Thank you! And yeah, I can’t believe the price of the machine either but there is certainly a (small) market for it!
Beautiful work, as always. Matching plaids is time consuming, for sure. I just had a “duh” moment seeing your shirt. I received a Brother PE770 embroidery machine for Christmas. I would never have thought to use it on the back yoke, even though I spent years country line dancing. Totally forgot about having embroidery there. I am a sewer, not really an embroidery person. I wanted it to put on the items I make for my grandkids. I can’t ever imagine paying 10k for a sewing machine. I have an arsenal of Brothers, and I’m pretty satisfied with all of them. Enjoy seeing your makes. You are always inspiring.
I know what you mean, I always thought machine embroidery was not for me – until I realized I could use it to make western shirts and cool back pockets for my pants (haven’t gotten around to doing the latter yet, but soon!). Now I kind of want one of those machines for myself haha. They are so fun!
This is bloody awesome!! I love the black and white gingham and the embroidery is amazing. Caroline (who gifted you the organic bicycle fabric at the Tilly & the Buttons zip workshop in London).
Thank you!! And YES, I still have that amazing bicycle fabric! I’m almost afraid to cut it bc it’s so precious, but I should do something with it next year for sure 🙂
Fabulous shirt and I love the embroidery! How fun to be able to mess around on a machine that’s soooooo expensive. Cotton and Steel fabric is so great, and you’ve used it to its best advantage contrasting bias cut with straight on the grain.
Thank you! I am really happy with how it turned out :F
Whoa Lauren!! Stop the presses!!! We have the same Christmas Tree!!! Except mine is the 4 foot one. It was the first Christmas Miracle for me this year…. I love my tree…. I love it so much that I’m thinking I’m not gonna take it down this year.. HA! I”ll give you the full run down on it when I see you. Happy New Year! Love the shirt… Love the embroidery. I found out Christmas Day that my dad used to embroider kitchen towels for his mom when he was like 4 or 5. I knew I got my love of sewing from that side of the family!!!! 🙂
Haha mine is a 4 foot one too- it’s just on a small platform, and remember, I’m only like 5’2″ haha 🙂 I love my tree too, it was my great grandmothers and it makes me so happy! And you say when – not if – does that mean I’ll see you in 2017?? 😀 😀 😀
There’s a possibility!!!! I’ll email next week. My daughter has a business trip to Nashville and she says I can share her hotel room 🙂 That means possible dinner or something fun with you!! Happy New Year!!!!
Yesss!!! Hopefully we can get our schedules to match up so it’s not a week while I’m out of town 😀 I’d love to get dinner with you for sure!
Your tree was the tree of my childhood in the early 1960s! We had neighbors who also had this tree with the color wheel. I loved to watch the colors at night. My bedroom window overlooked their living room floor to ceiling front room windows. Thanks for the fun memory!
You are welcome! I love that tree so much, it makes so happy 😀
I have been plotting, dreaming and scheming on how to get a Janome 15000 so I’m a little jelly that you can use it whenever you want. I love my 8900QCP and have been sewing on Janomes for almost 2 decades so after trading in my 8900 for the Memory Craft 9400, that one or the next version of it is on my list.
BTW, the shirt is pretty, really love the embroidered yoke!
Carolyn, if you want to come to Nashville you are more than welcome to sew your little heart out on this machine! It’s SO fun to play around with! 🙂
And thank you!!
Great shirt! Love the fabric, oh wait, I brought some from you at Craft South in pink and white didn’t I. (hahaa) Happy sewing, Lauren.
Haha yes you did!!! We are fabric twinsies now 😀
Beautiful shirt! I love the embroidery on the back. The added tabs on the sleeves look really great with the popover style. I may actually purchase this variation as I do have the Archer.
Thank you! It’s a fun variation, I definitely recommend it 😀
Hello Lauren! I love a good gigham and it is scarce nowadays, i’ll check that site… I did not know you were working in a shop neither… I missed that info along the way somewhere, but I can imagine the JOY of sewing with a badass machine like that. I dream with an industrial machine to sew leather… but well, one cannot have it all!
I’ve mentioned it a few times 🙂 I started the job back in April this year haha. It is pretty awesome!! And I hope to have an industrial someday, but not until I am in a permanent living situation (i.e., not renting – def don’t wanna move that thing any more than I need to!)
So perfect match up plaids:-)
Gorgeous shirt!!
NICE JOB–LOOKS GREAT! ALIGNING THOSE CHECKER BOARD PATTERNS ISN’T ALWAYS EASY! 😀