Tag Archives: sweater

Fall/Winter Sewing Plans for 2014

10 Oct

It just occurred to me that I haven’t share any seasonal sewing plans in… well, a while. Which is lame, because these are some of my favorite types of posts (both to write *and* to read) – I mean, who doesn’t like lurking inside someone’s brain, even if it’s just to see what they plan on doing over the next couple of months? Too creepy? Naw.

Anyway, now that London/Paris is looming on the horizon (less than 2 months! Omg less than a month and a half! Eee!), it’s really time that I start figuring out what I’ll be bringing with me (and making, for that matter! Don’t want to end up with another frantic last-minute sewing disaster, ugh). Especially since my luggage space will be very limited – I’m only allowed to bring one suitcase with me overseas (well… I use the word “allowed” loosely here. I can bring two suitcases if I want to – but I get to pay $130 for the second one! LOL GURL NO.), and I want to fabric shop while I’m there! So, I will be packing a capsule wardrobe, one that mixes and matches with itself, for maximum outfit options, as well as warmth. This is much different than how I usually travel (as I fly Southwest, where you can bring 2 bags free – so why the hell not, you know?), but I’m up for the challenge! 🙂 Adulting and all that 🙂

I’ve already made/chosen a couple of pieces to base my capsule around, as well as chosen my theme (like Devon, I think all vacation wardrobes should have themes, because, duh) – Minimalist Parisian Chic. Mostly because my capsule will be very minimal – or, as minimal as I can get it down to, because I am still one of those people who delights in overpacking – with lots of black. Not much on the Parisian Chic side (I’m sure Parisian women will be horrified when they see what I wear to stomp around their city, ha!), but it has a nice ring to it 🙂

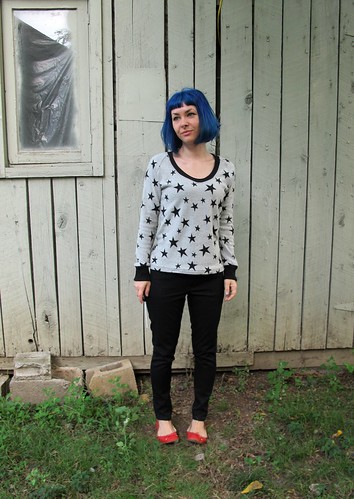
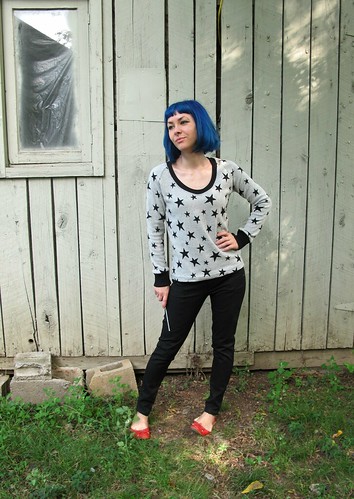
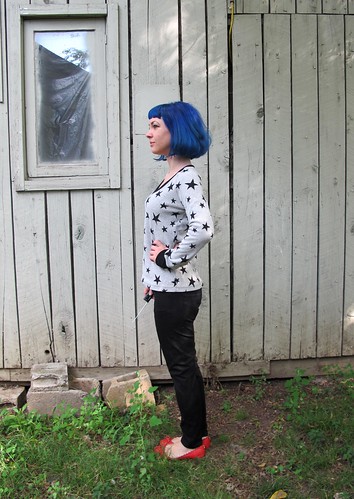
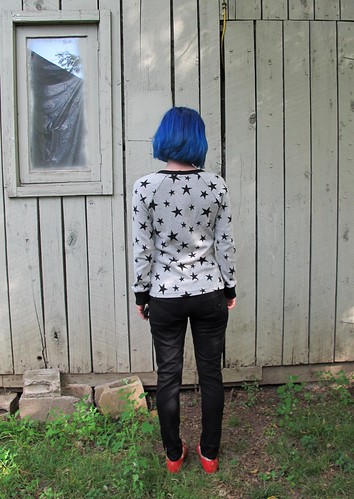
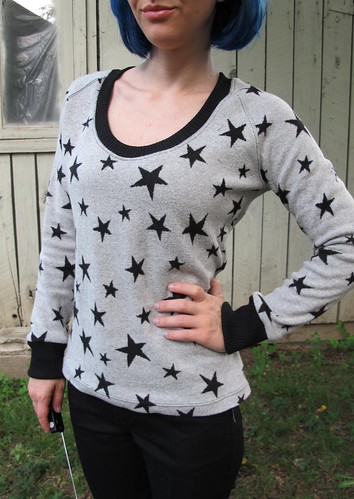
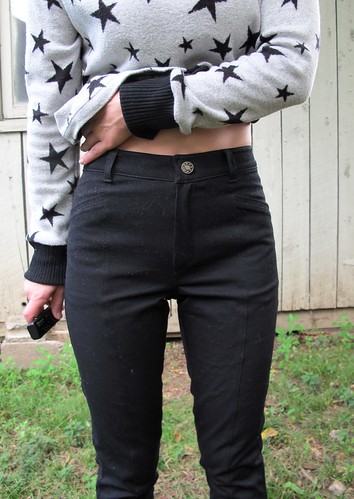
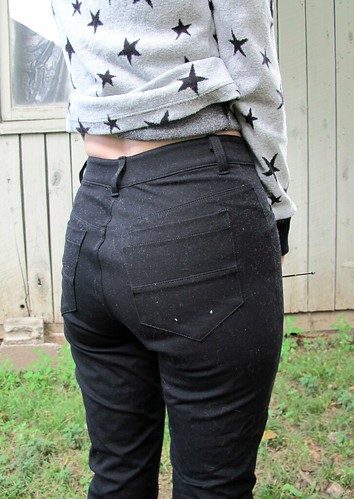
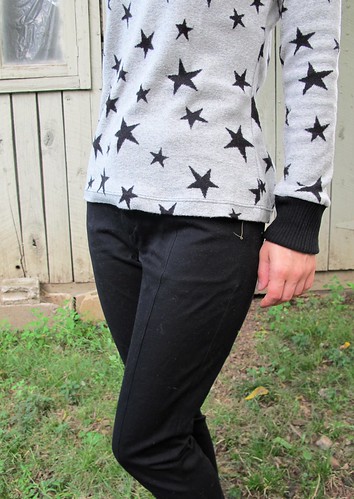
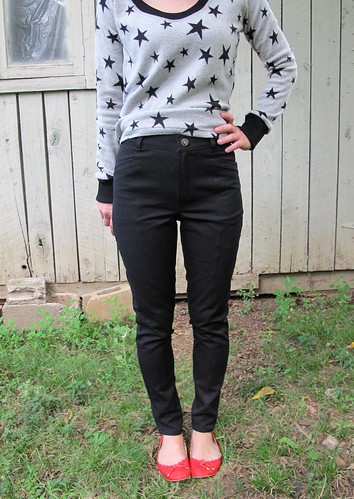
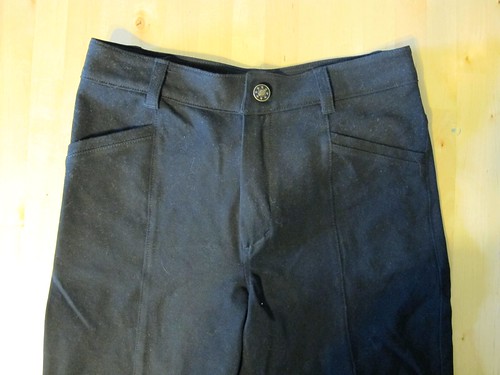
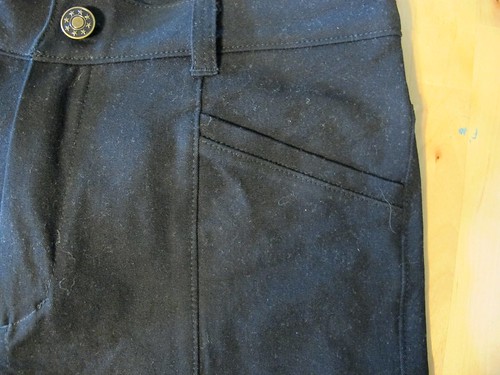
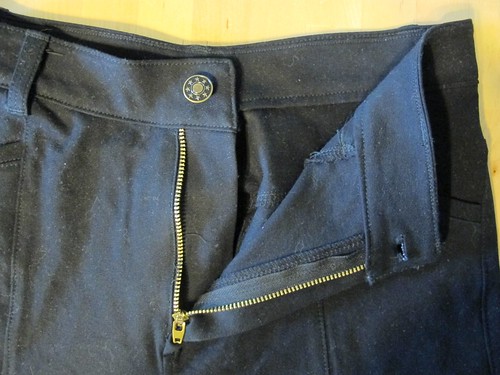
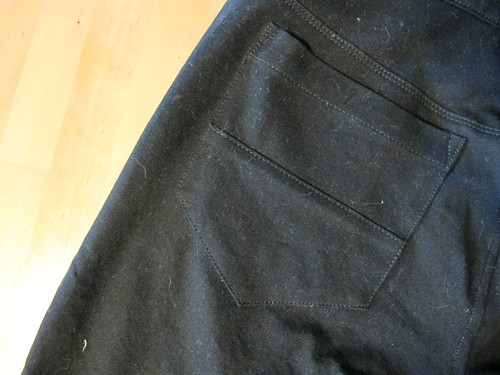
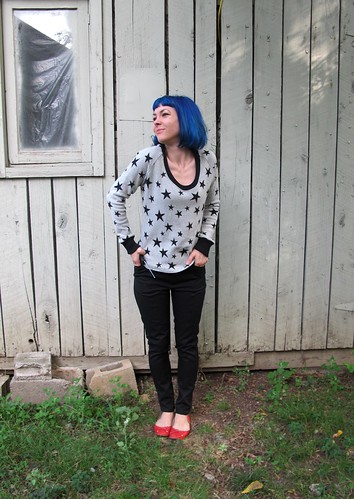
Anyway – to start – I have these black Jamie jeans that I made a couple of weeks ago:
Jamie Jeans + SJ Sweater Made with Mood Fabrics
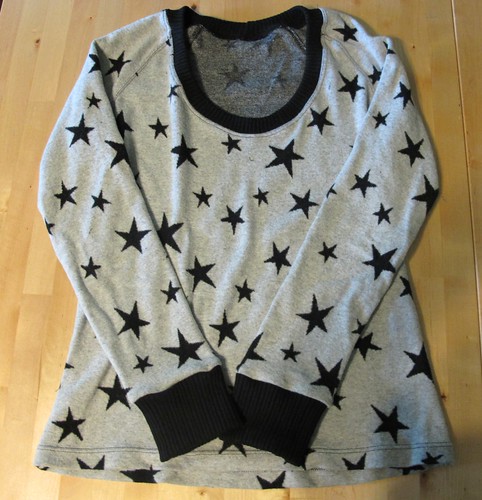
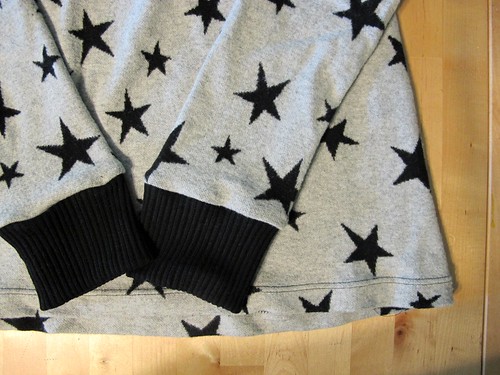
I haven’t decided yet if I’ll be bringing the star sweater. It’s a little bulky! On the flip side, regarding the jeans – I just finished wearing them for the 5th time in a row (sans wash), and they’ve stayed very close to their original shape. No bagging out, woohoo! So that makes me feel good, because I’ll be wearing these a LOT come London.

Stripey Renfrew
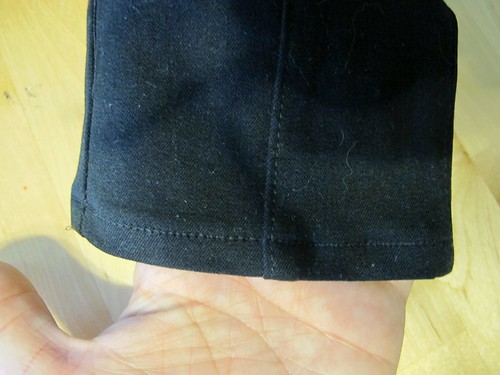
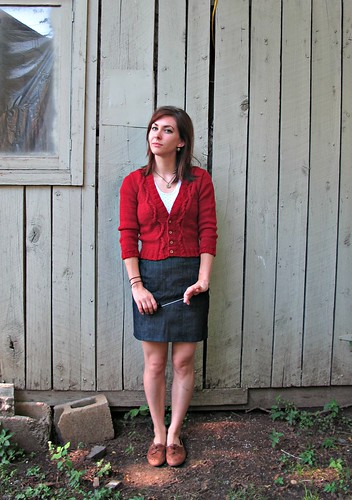
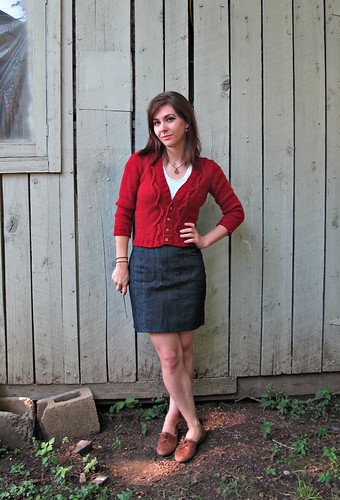
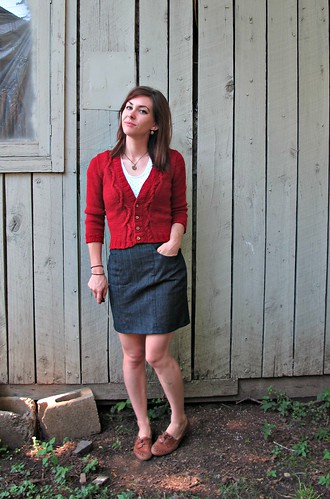
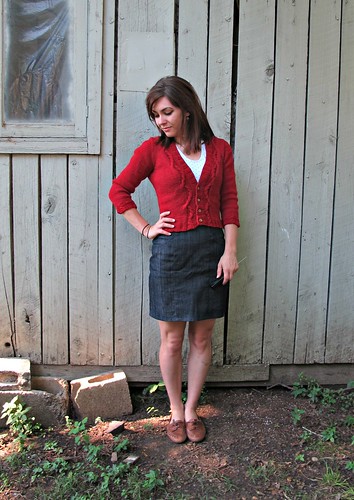
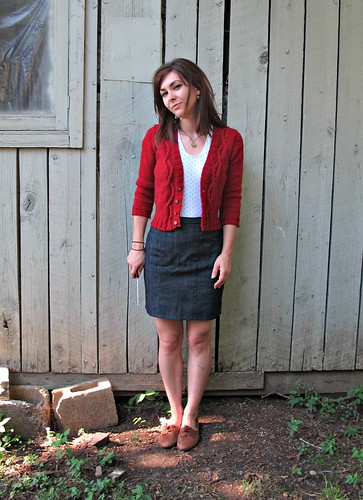
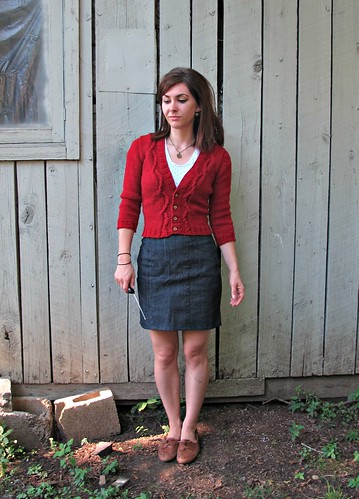
I will also be bringing my Imogene + Willie slim jeans (pictured here), because they are basically the best jeans ever. Oh, and probably that stripey Renfrew top. Can’t have enough tshirts!

Now for the sewing plans! Sidenote: By the time of publishing this post, I’ve already finished more than half these makes. Whoops! Guess y’all see where my priorities lie when it comes to posting vs sewing hahaha. Oh well!

Ikat Lady Skater
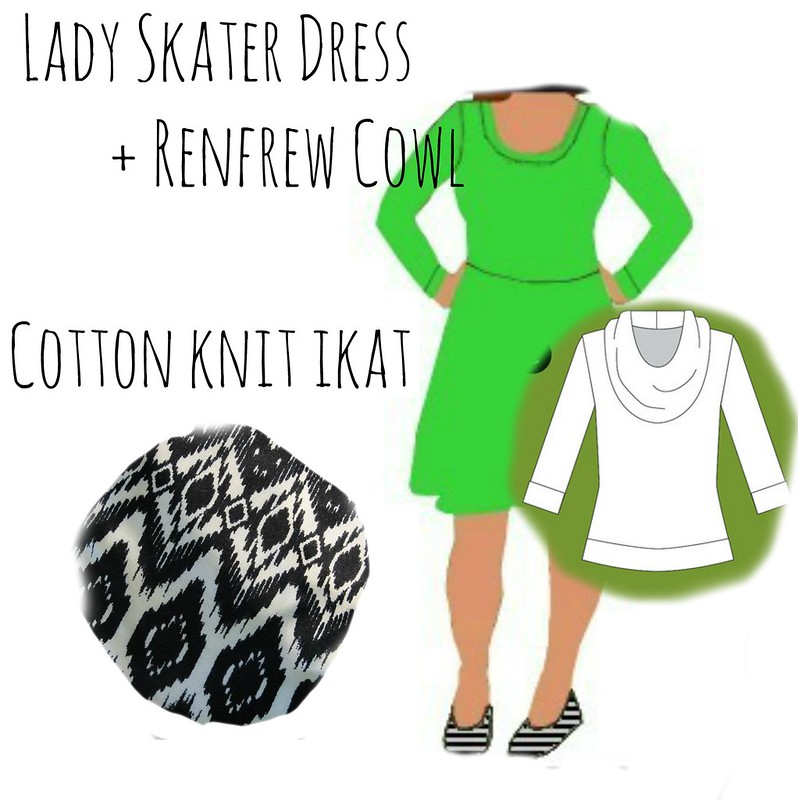
The Cowl-Necked Skater Dress
I’ve had this idea in my head for a while now – a Lady Skater dress // Renfrew top mash-up! This cotton Ikat knit fabric (purchased at The Fabric Studio here in Nashville) will be the perfect match for this dress – like a giant, snuggly Christmas sweater! I actually don’t know if I’ll be bringing this one to London, due to bulk factor (my capsule really only allows for one dress, which I’m thinking will be the one below – but we’ll see!), but the plans were too good to keep to myself 🙂
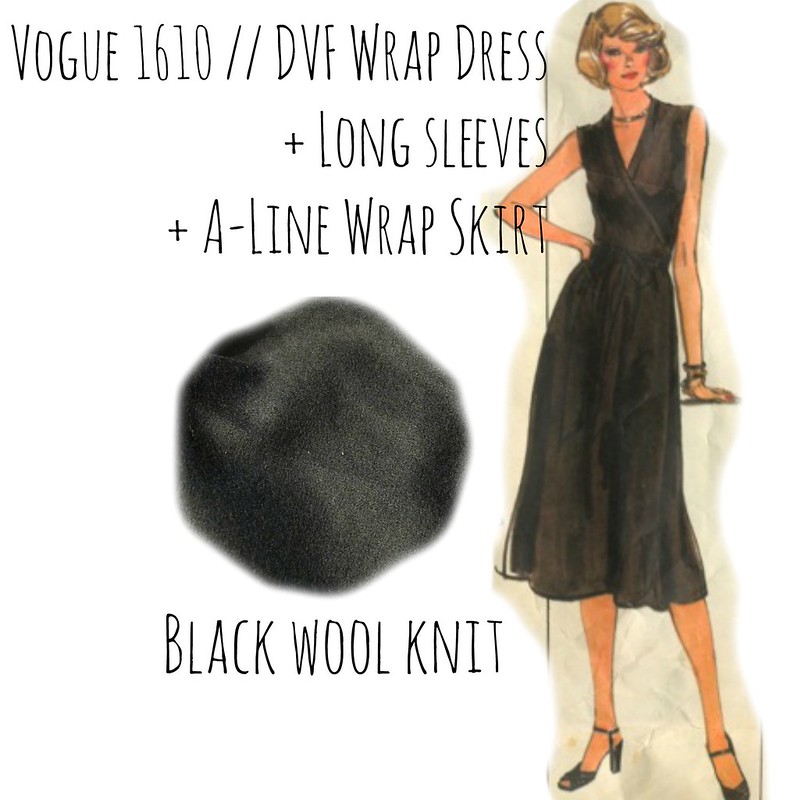
DVF Wool wrap
The Wool Wrap dress
Another big mash-up – I’m starting with the DVF Wrap dress pattern, but adding long sleeves (stolen from the Lady Skater, naturally) and swapping out the gathered skirt for a wrap A-line (Miette Wrap skirt – I’m looking at you). The black wool knit fabric was picked up at Mood in NY a couple of months ago – it’s SO soft! Like, cashmere soft. I’m so in love ♥

Silk v neck
The Silk Button-down
I already have a nice white button-down – made from the same pattern, Butterick 5526 (my favorite!) – but it’s not really cold weather appropriate, due to the length of the sleeves. Since they are 3/4, they don’t really layer nicely with my long sleeve sweaters! I’d love to make another one, but up the ante with some beautiful silk double georgette, and modify the neckline to be more of a v shape (likely using this V-Neck variation tutorial by Jen!)

Chambray Button down
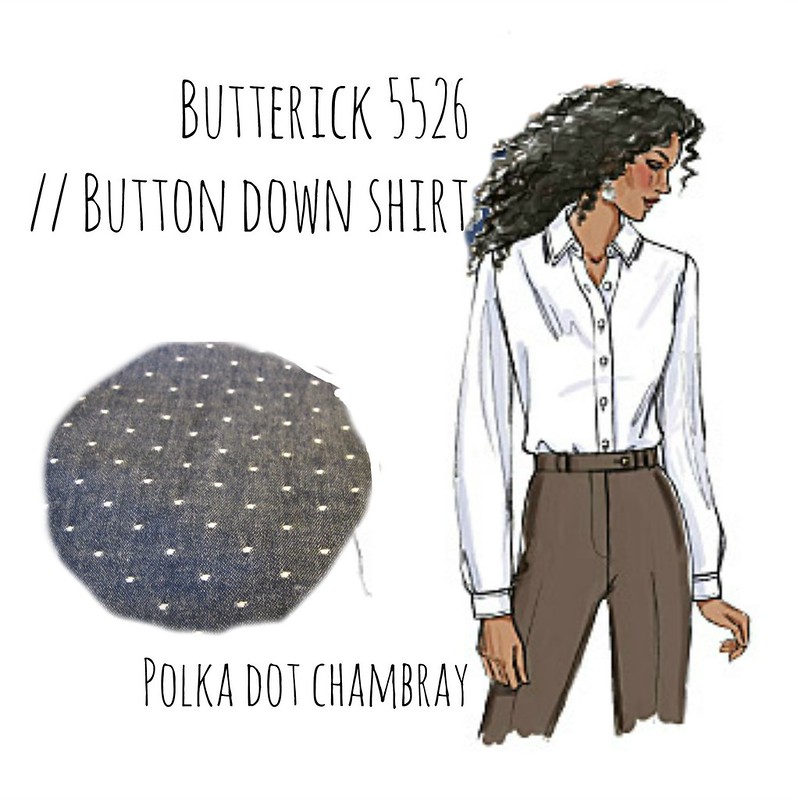
The Polka Dot Chambray Button-down
Another thing I already have one of, but need a winter version. This one will be made using a gorgeous cotton polka dot chambray, picked up here locally at Textile Fabrics.
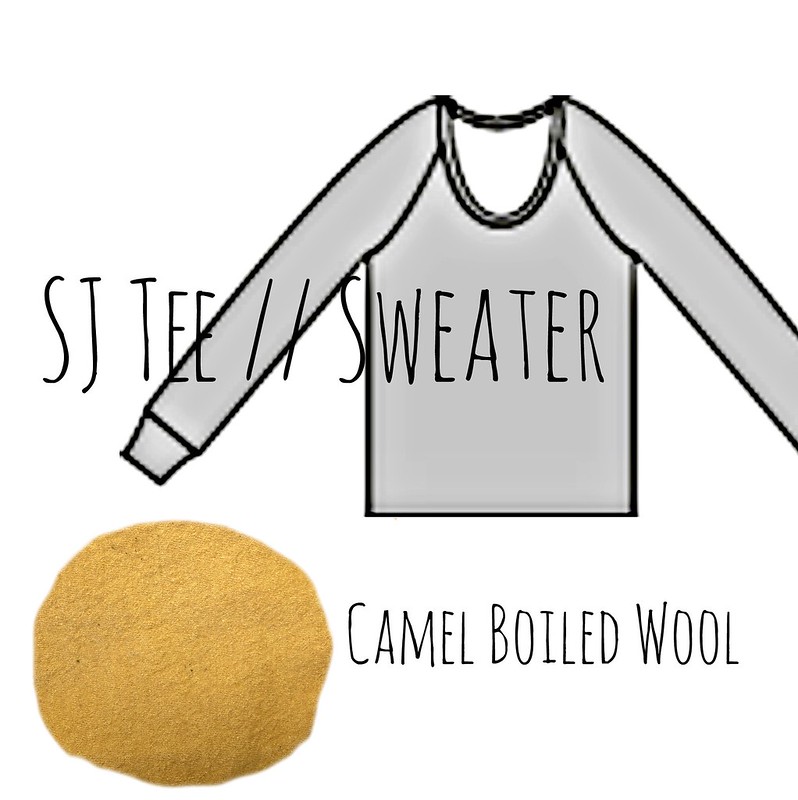
SJ Sweater
The Wool Sweater
Button downs need a nice sweater, yeah? I want to try sewing a sweater, using the SJ Tee as a basis (with a higher neckline, and omitting all bindings). The fabric I have is a lovely camel-colored boiled wool, that I bought from Elizabeth Suzann (aka I totally jacked her wholesale order hahaha). I think it’ll look equally good over both those button down shirts I have planned!

rigel bomber
The Bomber Jacket
I know – I’m already planning a pretty sweet coat. However, the weather in London (and Tennessee, for that matter!) can be fickle, so I’d like to bring a lighter-weight jacket for days when the temperature isn’t as low. I’ve been meaning to make the Rigel Bomber for, well, months now. Just been waiting on the perfect fabric – and I think I found it! Check out this black wool coating – to be paired with gold china silk for the lining.

Other plans I have (no photos, sorry! Use that imagination of yours, ha!)
– Need some thin long sleeve shirts for layering – maybe just a couple out of wool knit, such as this textured black wool jersey (that’s apparently already sold out?! Wah!). I wear these pretty much daily in the winter – and sometimes I like to sleep in them if it’s really cold – so it’ll be nice to have a few to choose from.
– Speaking of sleeping – I need some new pajama pants! Currently lurking Margot pj pants in Tilly’s book, Love at First Stitch, since they seem to be a pretty quick/easy make (I really want to make the Tofino pants, but right now I need quick and easy!). I picked up some really fun orange plaid flannel to make them with – I know, that fabric is ridiculous, which is exactly why I chose it. It’s nothing like I already own! When it comes to pjs, why not, you know?
– I would like to make a flared A-line wool skirt to make as well – thinking about using the Delphine pattern (also from Love at First Stitch), because I love the shape. A little stuck on fabric selection, though! My go-to is usually wool crepe, but that will be too drapey for this shape. Thoughts? I need it to be 100% wool (pretty nitpicky about this, sorry!) and I’m looking for lipstick red. Budget is no more than $25 a yard (and obviously I’d be delighted if it was less than that!)
– Bras! I want to finish at least one bra before I leave – using the Marlborough pattern and one of my kits from Bra Maker’s Supply. Obviously I want new bras, but even more – Norma will be in Paris while I’m there, and you better believe I’m going to drag her into a bathroom and make her assess and critique my fit. Haha! Man, sewing people are weird 😛

I think that’s it for now! It feels good to get everything listed out in one place. I’m hoping I can get all this done before I leave – but if not, no worries. It’s not like I’m lacking clothing or anything as it is!

As a side note, I was just notified that one of my lovely sponsors, Indie Sew, is holding a pretty sweet contest where you can win a YEAR of free patterns! Fuck yes! You can read all about the contest and the reasoning behind it on this blog post, but the general gist is that Indie Sew wants to help you transform your entire wardrobe into handmade and end the cycle of cheap/fast fashion. And what better way to jump start a new handmade wardrobe than with some FREE FREAKING PATTERNS AMIRITE? Such a cool idea, and I really really hope the winner shares their journey via blog or social media so we can follow along! Anyway, soapbox rant over – go throw your name in the hat!

What’s on the table for your fall/winter sewing plans? Do you have any capsule wardrobe suggestions for me? Tips for packing light? Are you going to judge me if you see me wearing the same thing for 3 days in a row while I’m on my trip? 🙂

Sweaters & Skinnies for Fall!

24 Sep

Ok, I’ll admit – when I first started working on this outfit, the air was a LOT more fall-like than it currently is at the moment. Stupid fickle season, ha!

Jamie Jeans + SJ Sweater Made with Mood Fabrics

Anyway, I’m totally a trooper so I’m modeling this outfit for y’all nonetheless (photos taken early morning before the temperatures got too high, because, woof.). My first real cold-weather makes – like I said, it’s a little early in the season here, but I like to get a head start so I can actually start wearing this stuff when the weather cools down 🙂 This outfit – or at least the skinnies – is also part of my London wardrobe. I’m officially less than 2 months out, EEEEEP! – so it’s time to really start cranking down and getting my wardrobe act together. Since I’m very limited in suitcase space, I’m trying to capsulate everything to mix and match. So I can bring less clothes, so I can bring home more fabric 🙂 You know – priorities!

ANYWAY, I have a lot of ground to cover with these two pieces, so let’s get started! Sorry in advance for the big photo overload!

Jamie Jeans + SJ Sweater Made with Mood Fabrics

Let’s start with the sweater. I bought this fabric last month while I was in NYC. This was my first non-spring trip to the city, which meant my fabric shopping was focused on woolens and winter weights (instead of summer fabrics, which I am usually bee-lining for in March). I immediately found this star printed WOOL sweater knit, and promptly flipped my shit over it. It’s SO fabulous – and soft! Even softer than you can imagine, forreal. At $25 a yard, it wasn’t the cheapest sweater knit – but stars and wool? Totally worth it. Plus, it’s not like a sweater takes a lot of yardage – at least not for me. I bought a yard and a half (and I have some leftover.. hmm, what to make with?).

Jamie Jeans + SJ Sweater Made with Mood Fabrics

The pattern I used to make this bad boy was actually suggested by Devra (who also bought some of the prized star wool knit, after I peer pressured her into it 😉 ) – the SJ Tee from Papercut Patterns. I made a wearable mock-up before the real deal – which I will show y’all later this week – so I was able to figure my fitting before cutting into my precious wool knit. I cut a size XXS and took 1″ out of the center back. The length is the long version (aka, not cropped) and the sleeves are long as well.

Jamie Jeans + SJ Sweater Made with Mood Fabrics

I used rib knit to finish the neckline and cuffs – it was in my stash, I have no idea where it came from. This knit was way stretchier than the sweater knit, so I had to keep retrying the neckline to get it to lie flat. I ended up cutting the rib to half the length of the neckline and stretched the everloving shit out of it – it could still stand to be a little tighter, but this will do. The neckline also can’t stand to be a little lower, it’s already a little risque (which I LIKE!). The cuffs are a bit looser than I’d prefer, but I wanted to be able to push the sleeves up, like so.

Jamie Jeans + SJ Sweater Made with Mood Fabrics

I sewed the entire sweater on my serger – you could use a sewing machine (this particular knit does not unravel or shed), but serger is faster 🙂 I did use a twin needle to topstitch the raglan lines, as well as the neckline & hem. Really loved topstitching this sweater; the stitches just sink right in and look soooo good!

Jamie Jeans + SJ Sweater Made with Mood Fabrics

For the black skinnies, I used a really great stretch twill. I’ve had some hits and misses when it comes to stretch bottom weights – they tend to be a weird weight (either too heavy, or not heavy enough), and the stretch can bag out over time. One thing I’ve learned is that you need a pretty high spandex/poly content to get them to snap back into shape – 5-10% – and you need to make sure they are bottom weight. I actually made Heather Lou source this fabric for me, also in the Mood store. We were initially looking for black denim, couldn’t find a good one (I still don’t really know what constitutes as a good one- you’ll have to ask her! I just blindly followed, ha), and decided on the twill. We did end up finding a black denim, fyi, but not at Mood. Once I sew that one up, I’ll share more about it 🙂

Jamie Jeans + SJ Sweater Made with Mood Fabrics

Anyway, this twill is great! It’s pretty similar to what you get with stretch RTW pants – thick enough for a bottom weight, but not tooooo thick (I still only used an 80/12 needle, so no heavy denim shit or whatev). The stretch is crazy good, and it actually snaps back into shape. I can’t give y’all a true verdict on a full day’s worth of wear – the weather jumped back up to hot, so I haven’t had a chance to wear these yet. However, I tried the jeans on a LOT during construction, and they haven’t bagged out yet. So that’s a good sign!

The only drawback to this stuff is that it attracts cat hair like a magnet. It’s not as bad in real life as it is in photos (else I would have lint-rolled that shit, I mean, come on), but it also doesn’t bother me that much. When you have a cat and you wear black pants, cat hair is sorta just a way of life, you know?

Jamie Jeans + SJ Sweater Made with Mood Fabrics

The pattern I used to make the skinnies is the Jamie Jeans, from Named. I’ve actually had this pattern in my stash for a few months – my friend Carla bought me these (plus a few other Named patterns) as an early birthday gift earlier this year. Then I was a total ass and didn’t do anything with them until just now 😛 Hey, it’s been too hot! Anyway, I’m glad I put these off because there is no way I would have had such stretch twill success if it hadn’t been for Heather doing that side of the shopping for me. So there’s that.

Jamie Jeans + SJ Sweater Made with Mood Fabrics

Anyway, this was my first experience with Named. My understanding is that a few things have changed since they initially released this pattern – for one, the instructions include some diagrams now (they used to be text-only), and the prices are a little more competitive. The pieces also aren’t quite as overlapped as they were the first go-round – because, ugh, tracing patterns, ugh. I only had to trace the waistband for these. Everything else was, thankfully, not super overlapped.

I started with the size 2, and made these initial modifications, based on my muslin:
– Added 1″ to the back crotch, for butt room
– Removed 2″ of length at the legs
– Removed 5/8″ at the center back yoke, blending to 1/4″ at the bottom (where the pants meet the yoke)
– Removed 1/4″ from the center back, blending to nothing

Once I started sewing, I ended up doing a few more fit adjustments. I don’t know why these weren’t prevalent in my muslin – perhaps my fabric wasn’t quite stretchy enough? At any rate, these are my additional modifications (and now you know why I pulled them on and off so many times!):
– Sewed the side seams at 1/2″
– Took a 1″ wedge out of the center back of the waistband, tapering to nothing at the bottom
– Removed an additional 3/4″ from the length
– Did some crazy witchcraft to reshape the crotch to be a J (again, NO IDEA why this wasn’t an issue with the muslin, but argh – at least I fixed it? Mostly.).

Things I will change for my next rendition:
– Need to remove some length from the front crotch – you can see that it’s slightly too long (it’s not toooo bad – I doubt anyone will point and be all “HA HA YOUR CROTCH IS TOO LONG HA HA!” But I know it’s there and hey, it bothers me, ok?). Maybe 3/8″ish.
– Rescoop that J a little more out of the crotch. It’s still not perfect, but it’s damn good considering that I did this while the pants were already mostly assembled (for those of you who are all, “Wtf is this J crotch you keep talking about?” Here’s the post where I talk about my pants adjustments, including J crotches. Also, in case you were wondering- those crotch rulers *do* work. I found one in Elizabeth’s studio last week, immediately stuck it on my crotch – and hey, there’s a J! Cool!)
– Need to take a little pinch of fabric out of the inner leg seam – maybe 1/2″

Despite my nitpicky fit adjustments, these aren’t so bad! I’ll still totally wear the shit out of them, at any rate.

Jamie Jeans + SJ Sweater Made with Mood Fabrics

Constructing these was REALLY fun! The instructions – honestly, they’re kind of useless about 70% of the time, but I’ve made enough pants to where I don’t really need them. The seams are all finished with my serger – except the crotch seam, which is flat-felled – and I made use of my edgestitching foot to get all that beautiful topstitching. For the waistband, I used fusible tricot knit interfacing – I fused both the outside and the facing, to give it some stability but retain that lovely stretch. The button & jean zip are both from Pacific Trimming in NYC.

Jamie Jeans + SJ Sweater Made with Mood Fabrics

I really love the back pockets! And hey, that double line of stitching at the yoke? That was done with a single needle, twice. No twin needle!

Jamie Jeans + SJ Sweater Made with Mood Fabrics

For the hem, I used the lightning bolt stitch, so it would retain some stretchiness. It looks pretty similar to a straight stitch, but it, you know, stretches.

What else? Here are some sweater close-ups:

Jamie Jeans + SJ Sweater Made with Mood Fabrics

YUM!

Jamie Jeans + SJ Sweater Made with Mood Fabrics

One last thing – here’s the little watercolor fashion illustration I made for this outfit. GOD, I love painting watercolors! So much fun!

Jamie Jeans + SJ Sweater Made with Mood Fabrics

Ok, I guess that’s it! Now if the cooler weather could please come back – I hate working up a sweat while I drink my morning coffee 🙂 Oh, and in case you were wondering – that’s a fresh dye job you’re looking at, in regards to my hair! I love how neon electric is is 🙂 Yay for fun-colored hair!

PS: Ralph Rucci V1419 Sewalongers – in case you missed it, there’s a new post up on the McCall blog regarding the sewalong. Just some general housekeeping, including blog buttons (yes!) and social media chat. The burning question this week – for general sewalong chat outside of our blogs, do y’all prefer to use a Facebook page or a Flickr Group? Trying to decide which platform to us. Let us know which side you swing!

Completed: The Aiken Sweater

19 Sep

Yay for finished knitting projects!

Aiken Sweater

This is the Aiken pullover from Andi Satterlund (aka my faaaavorite knit designer, to whom I should probably just establish a direct deposit of a portion of my paychecks, because, YES). Aiken is everything I love in a knit project – seamless, top down construction, knit in the round on worsted weight yarn, with just a little bit of lace to keep things interesting.

Aiken Sweater

Aiken Sweater

I knit the XS (size range goes up to 3X, whoop whoop), using my normal size 6 needles and this delightfully soft and squishy Debbie Bliss Rialto yarn (oh shit, I just realized this is 100% Merino and here I’ve been telling everyone who will listen that it’s Cashmerino… I’m a lying piece of shit, you guys. But really, it is SOFT). By the way, I LOVE these Debbie Bliss yarns. This is the second sweater I’ve knit up with ’em (the first one being my Cashmerino cowl neck sweater, well, I reckon there’s where I was assuming this one also involved cashmere, ha), and they’re just so lovely and soft with the most beautiful saturated colors.

The Debbie Bliss yarns are kind of expensive, though – around $10+ for a 100 yd skein (compared to Cascade 220, which I think I pay around $11 for a 220 yd skein at my local yarn store) (yes, I know it’s a little cheaper online, but I want to keep my LYS in business, thanks, bye). With that being said – my favorite yarn shop – Haus of Yarn – has an awesome sale at the end of every year where they mark a big chunk of the yarns at half off – and there’s always some Debbie Bliss lurking in the piles. So these skeins were $5 a pop, which made this sweater cost me a very affordable $30. Can’t beat that with a stick!

Aiken Sweater

This pattern is relatively plain – the body and arms are plain stockinette, with 1×1 ribbing at the edges. The neckline is a very simple slash – it’s not finished with ribbing, so it has a soft roll, which I think is very pretty! And then there’s the lace inset, which is mirrored for both the front and back. As far as lace goes, this one is preeetty simple. It’s not super mindless lace like the Myrna – there’s a little more stitchcraft involved. I did have to unpick a couple of rows when I missed a yarn over and thus messed up my count, but it’s not so bad. The good news is that you start at the top, so you get the longest part done first and then progress to less lace knitting as you go down to the tip of the V. Then you combine the whole thing into a tube and knit in endless circles for the rest of the way.

THEN, because there’s no neckline finishing or button bands to contend with – you just block it and wear it! SO gratifying! OMG I love knitting pullovers!

Aiken Sweater

My sweater is worn with about 1″-2″ of negative ease, which is why it’s a little more fitted than the version in Andi’s shop. The lacework surprisingly doesn’t dip as far as I thought it would – I’m not wearing anything under the sweater (well, I mean other than a bra haha), and there’s absolutely no danger of cleavage flashing. That being said, I don’t have much cleavage to begin with sooo that might also have a lot to do with it 🙂 I really like to way it looks with my polka dot trousers, though! I imagine it’ll also look pretty ace with a collared shirt underneath it. And it’s the perfect length for wearing with high-waisted skirts.

Aiken Sweater

(not sure why I basically took the same picture twice. Deal with it?)

Aiken Sweater

Love the back! ♥

Aiken Sweater

Aiken Sweater

It took me a little over 2 months to knit this – which is slow for me, but has also become my new normal, if that makes sense (gone are the days of my luxurious one hour knitting break at the office – I still have an hour to knit, yes, but I’m usually home and DAMMIT I’d rather sew! :)). It was a relatively easy knit, and I think would make a great first sweater pattern if you’re somewhat comfortable with knitting lace.

Full Ravelry notes are here.

Aiken Sweater

That’s all, folks! Right now I’m working on my first pair of socks (I haven’t gotten to turning the heel yet, so I’m going to refrain from commenting on whether or not they’re easy until I get to that point! But so far, the cuff has been easy 🙂 HAHA) – but I’m still dreaming of sweaters! What should I knit next? Would love to do another pullover; I’m a little cardigan’d out at this point 🙂 Looking at Berwick, Ease, Cloudy Sunday (maybe lengthen those sleeves, tho), or Praline – what would you choose? Alternately – what’s on your needles right now?

(Psst! Not a knitter but want some handmade cardigans nonetheless? Don’t forget to enter the Jenna Cardi Giveaway for a chance to win an awesome cardigan sewing pattern PDF! Giveaway ends on Monday morning 😉 )

Completed: My Finished OAL Dresses!

28 Jul

Good morning, everyone! I hope your AM is filled with lots of sunshine, like mine, and coffee, unlike mine (because, *ahem* someone forgot to mention we were out after he made a pot yesterday). Anyway, that’s neither here nor there – you came here to see finished dresses and sweaters, right? Let’s get to it!

OAL 2014: Completed Simplicity 1803 + Myrna Cardigan

Fair warning – this is a pretty picture-intensive post. I have two dresses to show plus a cardigan! (You’re so lucky that I don’t have two sweaters. I tried, but the second one is technically a vest right now soooo…). While I could theoretically stretch this out into 3 posts, I actually really hate it when people do that so I’m just dumping it all in one glorious picture-filled OAL extravaganza! Hope you don’t mind looking at my mug 😉

Speaking of which… you probably noticed the change in scenery, not to mention actual decent looking photos. That’s because I didn’t take them! Ha! All photo credit for this post goes to my lovely friend, Jenna, of Kitty Cat Stevens (you may recognize her photos from last year; she took those ace ones of my Lace trench). She really did an amazing job with these and I just love how they turned out!

OAL 2014: Completed Simplicity 1803 + Myrna Cardigan

Dress #1 was made with a lightweight cotton from Mood Fabrics (purchased at the NY location while I was there in March). The bodice is view C with cap sleeves, a softly pleated skirt and a lapped zipper.

OAL 2014: Completed Simplicity 1803 + Myrna Cardigan

OAL 2014: Completed Simplicity 1803 + Myrna Cardigan

OAL 2014: Completed Simplicity 1803 + Myrna Cardigan

LOOKS SO GOOD WITH MY HAIR.

OAL 2014: Completed Simplicity 1803 + Myrna Cardigan

OAL 2014: Completed Simplicity 1803 + Myrna Cardigan

Dress #2 was made with a gorgeous rayon challis from Grey’s Fabric. I used the same pattern, swapped out the bodice for view B with bias-faced arm holes, a softly gathered skirt and an invisible zipper.

OAL 2014: Completed Simplicity 1803 + Myrna Cardigan

OAL 2014: Completed Simplicity 1803 + Myrna Cardigan

OAL 2014: Completed Simplicity 1803 + Myrna Cardigan

OAL 2014: Completed Simplicity 1803 + Myrna Cardigan

OAL 2014: Completed Simplicity 1803 + Myrna Cardigan

OAL 2014: Completed Simplicity 1803 + Myrna Cardigan

The hem on this one is finished with rayon seam binding. So pretty!
OAL 2014: Completed Simplicity 1803 + Myrna Cardigan

OAL 2014: Completed Simplicity 1803 + Myrna Cardigan

Finally – here’s Myrna herself! I guess I can talk a little more about this part of the project since I haven’t really mentioned it much on my blog (unlike that entire OAL full of posts, ha).

OAL 2014: Completed Simplicity 1803 + Myrna Cardigan

Can I just say – I LOVE THIS CARDIGAN. It was super fun and super easy to knit, not to mention super fast (how many more times can I say super in this post?). According to my Ravelry, I finished it in just under a month.

I went with the size XS, getting gauge with size 6 needles (which is typical for me + worsted weight yarn + Andi’s patterns).

OAL 2014: Completed Simplicity 1803 + Myrna Cardigan

The yarn is (super?)AMAZING, isn’t it? Something I picked up from my local yarn store, Haus of Yarn– I knew I wanted neon yellow to go with the fabric for dress #1, so I took a swatch with me and went lurkin’. Maybe it’s just my yarn store (granted, we have more in this city – actually, a surprising number of really good yarn stores – but this particular store is less than two miles from my house, so obviously I like shopping here best haha), but they never seem to have the color I want in the weight/fiber I prefer! In this case, they only had a couple options for neon yellow worsted weight wool. Because I am an adult, I picked the most expensive option – this is Jill Draper Makes Stuff, and the color is Daffodil. At $26.50 per skein, it was definitely a splurge, but I only needed 2 skeins for this sweater so I figured it was worth it 🙂 Spoiler: It totally was! This yarn was a dream to work with – so soft and squishy, with a beautiful saturated color gradient. I don’t know if this particular yellow looks any good on me, but I also don’t give a fuck because it makes me happy.

OAL 2014: Completed Simplicity 1803 + Myrna Cardigan

I knit the pattern 100% as written, and had no issues. Blocked it with a bit of gentle shampoo (I keep meaning to get that special wool washing/no rinse shit they sell at my LYS, but since I went over budget with the yarn I had to put it back. Maybe next time. Maybe never lolz). True story: I forgot to finish the keyhole until after I’d blocked the whole thing, so I had to go back and keep knitting. I’m glad I did, though – I was on the fence about the keyhole because it looks kind of wonky at first, but once it’s finished it really does make a world of difference!

OAL 2014: Completed Simplicity 1803 + Myrna Cardigan

The button bands are stabilized with Petersham ribbon. Because this cardigan has a v-neck, I steamed the Petersham with a gentle curve to mimic the shape of the neckline, and stopped it a little above the top button hole (so, before you ask: no, it doesn’t go all the way around the neck). I used this tutorial from Sunni’s blog for guidance – she’s using it to hem a skirt, but it’s the same concept with the neckline, with a less aggressive curve. The vintage glass buttons are from my stash, previously purchased at the flea market.

OAL 2014: Completed Simplicity 1803 + Myrna Cardigan

I love how well the sweater goes with dress #2, because that was not planned at all! I didn’t decide to make a second dress until I’d already started the sewalong, and knit about half of the sweater. They do look good together, though. Yay for unintentional matching!

How are y’all doing with your OAL garments? Almost finished? Remember – the deadline to enter is this Thursday, July 31. Don’t forget to post your finished outfits in the Ravelry thread, which will give us all full lurking capabilities and also enter your ass to win some prizes. We also have the Offical Unoffical Flickr Group if you don’t use Ravelry/only finished a dress – but please be aware that your two pieces need to be uploaded to the Ravelry thread to be eligible for the contest 🙂 I’m loving all the dresses and sweaters I’ve seen so far, and I need to see MORE PLS.

Feeling inspired? Here’s a link to all the tutorials covered during the OAL:
1: Choosing Your Fabric and Size
2: Cutting and Marking Your Fabric
3: Sewing the Bodice
4: Sewing Sleeves or Bias Facing
5: Attaching the Skirt
6: Inserting a Lapped Zipper (see also: My Method for Invisible Zippers)
7: Hemming & Finishing
How to Stabilize a Buttonband with Petersham Ribbon (not part of the official OAL, but useful nonetheless!)
FINALLY, you can see my Myrna Ravelry notes here.

OAL 2014: Completed Simplicity 1803 + Myrna Cardigan

Whew! That’s a lotta post for a coffee-deprived Monday morning! 😉

Completed: The Owls Sweater

2 Jan

Happy New Year, everyone!! Gah, I feel like I really dumped a load on y’all with my last post… sorry about that! I promise to keep things much more concise, at least with the current offerings 🙂 And before we get too far into the new year, I do have one small confession – I actually finished this sweater at the very end of 2013! Whoops! So it’s not my first completed garment of 2014 (and it’s sweater #9 of 2013, wow!), but we’re going to count is as such since that’s when the pictures surfaced 🙂

Let me introduce you to: Owls!

Owls!

I’m sure a lot of you knitters already recognize this pattern, since it’s insanely popular on Ravelry. Truth, this was one of the sweaters that really made me want to improve my knitting skills enough to be able to have one of my own! This is the famous owls pattern by Kate Davies and there’s a good reason why it’s so overplayed (in the best way, I mean) – it’s a simple, quick knit and looks flattering on pretty much everyone who makes it up!

Owls!

Like I said, this has been in my queue for aaaages. So long! Part of what made me waffle on starting it up was finding a suitable bulky weight yarn that didn’t cost a fortune – some of the stuff I was looking was pretty pricey! Eep! I was actually gifted the pattern by Jo for my birthday last year (did you know you can gift patterns on Ravelry? So dangerous…), which really pushed me to try to find a good yarn.

Owls!

What ended up working for me was the Valley Yarns Northampton Bulky from good ol’ yarn.com. What I loved about this yarn was that it was cheap (I think I paid $3.99 a skein, but it’s normally $5.99!), 100% wool, and it came in colors that didn’t suck. I know a lot of people love that Cascade 128 that comes in a giant yardage, but I never cared for the colors offered and plus, with the amount I needed I would end up with a lot of unneeded yardage. So this worked out perfectly.

Owls!

Thanks to the bulky yarn, this pattern knit up SUPER fast – I finished it in a little over 3 weeks. That’s a record for me! Definitely needed after how long I toiled on my A to Z cardigan 🙂 The construction for this was pretty interesting – it’s knit bottom-up to the armpits, then you knit each sleeve from the bottom up, then you connect everything and finish the owls and the neck binding. It gets a bit heavy at the end, but fortunately there’s not too long of that.

Owls!

I love how the owls wrap around the shoulders. So cute!

Owls!

I knit the pattern as-is, and there were a few things I didn’t care much for during the process. For one, the back decreases were kind of… weird? I think it also gives me a slightly poofy upper back, although it’s more noticeable in pictures. I would have changed to side decreases – it was even suggested to me by a few people – but the construction was so weird that I didn’t quite understand where the sides started, so I just followed the instructions blindly. Oh well! It doesn’t look bad, I just think the bad is a weird place to put decreases! Another thing I did not like was how the sleeves were attached, because you end up grafting stitching at the underarms. There are 4 stitches to graft, but my holes were WAY bigger than 4 stitches! It was like an armpit window or some shit! I managed to close it up and you can’t even tell, but man, that’s more sewing than I want to do on a knit. Sorry.

Owls!

One last beef, and you’ll probably notice this the second I point it out (if you didn’t notice already ;)) – I ran out of yarn at the very end! I bought the recommended yardage (oh ho ho, I actually bought a whopping 5 yards more than required, like, I’m such an adult), but I obviously goofed something because I ran out of skeins while finishing the owl cables. Shit! And since I ordered this online, I didn’t want to pay for shipping to ship one whole skein to me for like… 5 rows of knitting. I unraveled my two gauge swatches (bummer, because I was saving them to make a blanket o’ gauge swatches, like, someday haha) and still came up short. I hemmed and hawed for a few days, dug around my stash, lurked the yarn store by my house… and eventually realized that the black yarn I used to knit my Blagatha was an *almost* perfect match. Not quite, but close enough. Since the donor yarn is a lighter weight, I held it double and it worked out fine to finish the ribbing. It doesn’t quite match, but it blends into kind of an ombre effect. Fancy!

Owls!

The most agonizing part about the whole yarn ordeal was that once I blocked the sweater, I realized the sleeves were too long! DERP. So, yeah, I totally had enough yarn! Whatever, fuck that shit. They’ll just stay cuffed and maybe my arms will magically lengthen someday :B

Owls!

You probably also notice that I left off the eyes on all my owls. I started to sew on buttons, but decided I like them more subtle. So there!

Owls!

Owls!

This puppy is WARM! I’ll probably live in this for the remainder of winter. I love how it looks with this silk skirt (which, btw, is vintage, not me-made – but now I’m thinking, ooh, silk Zinnia??). Anyway, full Ravelry notes here!

Owls!

One last thing… we have a giveaway winner from last year! Ooh, so who’s the lucky recipient of the $25 credit at She’ll Make You Flip?

win79

winmeow

Congratulations, SewMeow! Go check your inbox! 🙂

Thanks to everyone who entered, and thanks to She’ll Make You Flip for offering such a lovely prize! Guys, if you’re still eyeballing a sweet vintage pattern, let’s up the ante a little! Use the code LLADYBIRDNY25 for 25% your total purchase through January 15, 2014! Yeah! Now don’t say I never did nothin’ for ya 😉

Completed: From A to Z Cardigan

2 Dec

I feel like the knitting of this cardigan took forever, but it was really only about 2.5 months. Crazy!

IMG_5547

This particular project is a little special to me because I started it right when I put in my final notice at my old job, then I got a huuuge chunk of it done while I was in Chicago, and now it’s been my saving sanity since.

IMG_5580

The main reason why I haven’t knitted it up as quickly as the others is just TIME. I never feel like I have enough anymore! I guess every adult feels that way, though, huh? 🙂 Once I realized I was not getting back those 1 hour lunch breaks (and let’s be real – working from home means NO LUNCH BREAKS EVER, EAT WHILE YOU WORK !!!! haha), I just let myself manage what I could manage. Which usually meant a full 15 minutes of knitting, at the tail end of my lunch. This equates to about 10 sleeve rounds (oh, don’t look at me like that, there were 30-50 stitches per round. very small!).

IMG_5545

Once I hit that, I finished fairly quickly! Yay for me taking my own advice 🙂

IMG_5540

Anyway, pattern talk time! This is From A to Z by Andi Satterlund. A little different from what I usually knit – the construction is bottom up, with knitted-in pockets and a few bits of intarsia for contrast, plus that monogram at the front (it’s duplicate stitch, not intarsia. FYI!). I used Valley Yarns Northamton worsted weight yarn for the main color, and the contrast is leftover bits from my Central Park Hoodie.

IMG_5542

The pockets on this cardigan are SO COOL. They are knit with the body – meaning they aren’t seamed on separately. It was hard for me to wrap my head around first (honestly, I had to email Andi and ask her for help, and she was very prompt in her response!), but once I got going it was pretty easy. The top stripes are intarsia – my first intarsia, ever, and while it’s not terrible, it could use some improvement. I still have problems with holes where the colors join (which you can’t see because, duh, I sewed those shits right up), but it’s a start!

IMG_5549

Part of the reason why this took so long was because it was sooooo repetitive. Stockinette can really take forever, especially at the bottom where it’s the widest! Once I got to separating the tops and then adding the sleeves, I finished this up fairly quickly. In comparison, anyway.

IMG_5553

(I was really horrified when I saw this pantyline picture, until I later realized that those lines are caused by the ruffles in my undies. JUST SO WE ARE ALL CLEAR)

IMG_5572
IMG_5573

I plan to wear it closed, but it looks good open, too!

IMG_5565

I made the XS and had no pattern alterations. This is what I love about Andi’s patterns – they fit me perfectly as-written! Can’t argue with that 😀

IMG_5566

I LOVE the monogram. As with my intarsia, my duplicate stitch could reeeeally use some work as it’s definitely a Monet. It doesn’t look so great up close! But from far away it’s not so bad.

IMG_5583

Ugh, sorry for all the pictures. I’m just really proud of how this cardigan turned out!

IMG_5568

Like the varsity sweater of my ~dreamz

IMG_5527

IMG_5530

IMG_5531

Told ya that dupe stitch was lacking. OOPS haha!

IMG_5528

IMG_5529

IMG_5532

Here’s the back of the pocket, in case you were curious about the construction. I created the pocket by making kfbl stitches and pulling the new stitches to a holder, then knitting the pocket lining separately, then picking up each stitch along the side as I knit the bottom of the cardigan. I hope that makes sense! It’s pretty genius, in my opinion, glad I had a chance to try it out!

IMG_5554

I’ve plumb run out of things to say, so I reckon that’s it! Ravelry notes are here. Next knit project – Owls! I have some lovely grey yarn for that and I’ve already started swatching 🙂

Oh, and just in case you were curious – my shirt says “I Listen To Bands That Don’t Even Exist Yet” (because it’s hilarious, that’s why) and I made my hairbows myself:)

One last thing – the giveaway winner! Let’s see who the random number generator picked today….

winner
winnername

Congratulations PoldaPop! Keep an eye on your mail, you’ve got a Sugar Plum headed your way!

Thanks to everyone who participated!

Completed: The Peacock Eyes Cardigan

23 Sep

Who else out there has a sewing or knitting kindred spirit? You know, someone who is pretty much always on the same wavelength as you when it comes to projects, whose blog or Ravelry queue is prime for lurkin’ because it means you’re totally about to find your new favorite pattern without actually discovering it yourself? For me, that’s Jo. Seriously, her Ravelry favorites are one of my favorite things to look at on the internet because I love basically everything that she loves (also, when I opened that link to embed it in this post, I discovered ANOTHER cardigan pattern that I need. Dammit, Jo!). It seems like every time we chat about what we’re working on, it’s something creepy similar. I love having a knitting twin!!

Jo's Francis sweater
Red Cashmerino Cowl

See? I spied her Francis, Revisited sweater and SHAMELESSLY ripped it off as soon as I got my hands on the yarn. No hate.
Wish I could have ripped off her amazing hair, too, but I guess life doesn’t work that way 😛

So we decided for our next projects, we’d embrace that twinsy-ness and try to channel each other’s wavelength… the wavelength being bright green, obviously, since we had both been independently thinking about buying yarn in this color. We weren’t planning on finishing at the same time (one thing I’ve learned is that you can’t really rush knitting!), but somehow it worked itself out anyway. So here’s mine – in brilliant kelly green, my new favorite color of right this second.

Peack Eyes Cardigan

This is the Peacock Eyes pattern. Lots of my favorites rolled up in this one – top-down, once piece, fingering weight, pretty lacework. Hell yeah!

Peack Eyes Cardigan

I bought the yarn for this sweater back in August, when I knew I would be having surgery and lots of couch-time as a result. I decided to treat myself to something special, and, whooo boy, this stuff is special all right. The brand is Vice and it’s a blend of merino, silk, and cashmere. It feels just as amazing as is sounds, and the color is incredible (don’t let my shitty pictures fool you – it’s bright Kelly green, y’all).

Peack Eyes Cardigan

It was also really really expensive – like $70 for 2 skeins. Ok, I guess that’s not *that* expensive, but it’s the most I’ve paid for sweater yarn to date! Totally worth it, though. I enjoyed knitting every single stitch of this cardigan. It was like angels on my fingertips or some shit.

Peack Eyes Cardigan

If you clicked over to the pattern link, you’ll see that my cardigan is much more cropped than the original pattern, as well as having shorter sleeves. I had to change a couple things up to get my yarn to work with the pattern as I didn’t buy enough – two skeins meant I was about 100-150 yards short of the suggested amount, and I didn’t want to buy a third skein soooo I improvised! I’m not a huge fan of long cardigans, anyway, so this worked out – although in retrospect, I may have cropped it too much. Oops. I’ll still wear it, though 🙂

Peack Eyes Cardigan

I really love this style of cardigan. I think the lace peacock eyes are so pretty!

Peack Eyes Cardigan

It looks good unbuttoned, too – which I’ve already tested this theory, wearing it last week before I sewed the buttons on. Ha! It just looked toooo good with my outfit, is the thing.

Peack Eyes Cardigan

Since the cardi is pretty shrunken with a good amount of negative ease, the button bands really don’t like laying completely flat – see in the picture? I hand sewed seam binding to the undersides so at least the actual button holes aren’t trying to pull open (ugh, I just hate the way that looks, sorry), but there is still a little bit of pulling. I am happy with the way it fits, though.

Peack Eyes Cardigan

I feel like I should point out the new piece of jewelry in my septum – well, I guess it’s not really new, it’s been there for over a month. It’s just a retainer; I got it so it could be removed during surgery, but I kind of like it so I haven’t changed back to the silver horseshoe. My mom hates it. She says it looks like I have a staple in my nose, haha. What do you think?

Peack Eyes Cardigan

One other thing, I wore this dress because 1. It looks awesome with the green; and 2. I wanted to show y’all that I did fit my puckery bust darts. Of course, you can’t see them at all so obviously this is a moot point, but, you know. Just so you know.

Peack Eyes Cardigan

One more back shot, because I can!

Peack Eyes Cardigan

I do have one question for the knitter pros – see how my button band does not align with my bottom ribbing? No matter what I do (and I’m extra careful to pick up the stitch at the VERY edge of the ribbing when I start the band), I can’t get it to make a straight line. Any tips on how to fix that?

Peack Eyes Cardigan

I didn’t have any green petersham ribbon to sew to the button band like I normally do, so I used rayon seam binding. It does not exactly match – it’s teal, the sweater is green – but it complements. I sewed my button holes on as usual (and stuck a piece of silk organza underneath because my machine wanted to eat that rayon) and then stitched it on the sweater by hand. It’s not as solid or pretty as the petersham would be, but it works!

Peack Eyes Cardigan

Peack Eyes Cardigan

The buttons are vintage, a gift from my sister-in-law. They are a perfect match for the yarn color!

Peack Eyes Cardigan

This is a shitty picture, but it shows the true yarn color. Told ya – kelly green 😉

Peack Eyes Cardigan

I guess that’s it! Full Ravelry notes are here. Now hop over to Jo’s blog and check out her green goddness… she went with the same brilliant green, but with different pattern (omg amazing)(yes it’s already in my queue).

Who’s your crafty Kindred Spirit?

EDIT Almost forgot to mention this! I’m taking a quick, last-minute trip to Chicago this weekend and would love to meet up with some sewing friends for fabric shopping and eats! I sent out an inquiry on Twitter and we’re cooking up some plans right now, but if you did not see the tweet and would like to join – just send me an email! We are looking at either Saturday or Sunday (the 28th & 29th).

Completed: The Marion Cardigan

5 Aug

I should probably first confess that this cardigan has been a finished object for over a month now. Oops! In fact, I’m nearly done with my next knitted project. It’s just hard to bring myself to take photos of a wool, worsted weight cardigan when it’s 95* outside, ya know?

Marion Cardigan

But anyway, here she is – my newest cardi and and Andi Satterlund‘s newest pattern offering, the Marion!

Marion Cardigan

This was SO MUCH FUN to knit, guys!

Marion Cardigan

Marion is a lovely little cropped, 3/4 sleeve cardigan, knitted seamlessly from the top-down in almost entirely stockinette. There is some fun cabling around the v neck to add a bit of interest (both in looks and during the actual knitting, ha!), but it is an easy, fast knit. Well, for me, anyway. I finished it in just under a month!

Marion Cardigan

I think everyone knows about my love affair for Andi’s patterns, but let me just repeat – I LOVE her patterns! I love the construction, I love the fit, and I love the finished pieces! Every time she releases a new pattern, it immediately goes into my queue.

Marion Cardigan

Marion Cardigan

This is a straight size small, with no alterations. I did size down my needle to a 6 (I find that I knit pretty loosely!), but everything else in the pattern was knitted as written. Going forward, though (because I WILL knit this again… maybe in a lovely grey alpaca? Ooh!), I will probably adjust the length of the sleeves. They hit me in a weird spot when they’re not scrunched, I guess I have short arms? Whatever, not a big deal.

Marion Cardigan

The yarn is from Sonja, a little destashing prezzie she gave me while I was in NY. I actually have a LOT of this stuff left over… I think the sweater took maybe 6 skeins, and she gave me 10. I may have to dream up a matching hat and scarf, yeah?

Marion Cardigan

The yarn is Knit Picks Wool of the Andes. I found it very similar to my beloved Cascade 220, but with a little less pilling. I just love this color – it’s the perfect not-quite-cranberry-not-quite-harlot red. It’s also VERY warm. This will be nice in the winter, I guess!

Marion Cardigan

Oh, who am I kidding – it’s fucking freezing in my office these days. I’ve been wearing this a LOT!

Marion Cardigan

The only thing that was a bummer about this pattern is that the cabling looks really weird until it’s actually blocked. That’s why I didn’t show any progress shots – the cables were all lumpy and weird and it just wasn’t pretty enough to photograph! I did give this a proper block – soaking and all – and the cables bloomed out and now it’s basically perfect.

Marion Cardigan

I’m so happy with how they turned out 🙂

Marion Cardigan

There are teeny cables on the sleeve ribbing, too!

Marion Cardigan

Here is how it looks unbuttoned. I don’t think I’ll ever wear it like this – I like to keep my stuff closed – but I thought I’d show y’all anyway. You probably noticed that I didn’t stabilize my button bands with petersham this time. I was planning on it – I even bought some cranberry red petersham ribbon – but the way the buttonband is constructed was going to look really weird with ribbon sewn on half of it. Anyway, I tried the sweater on and the button holes don’t gape at all, so I just sewed my buttons directly on there and called it a day.

Marion Cardigan

Also, here is a picture of Amelia judging me.

Marion Cardigan

And that makes 10 sweaters for me! Fuck yeah, I love knitting 🙂

Completed: the Peggy Sue Sweater

1 Jul

I knitted another sweater!!! Ok ok… I actually finished this over a month ago, and since then I’ve knit a whole ‘nother sweater. But let’s take this one day sweater at a time, shall we? 🙂

Peggy Sue Sweater

This is the Peggy Sue (oh yah, I’m so creative with my project names, ha!). You probably notice that it does differ slightly from the pattern picture – I made a couple changes (some intentional, some “oh well I done fucked that one up”).

Peggy Sue Sweater

For starts, I knit this in a smaller size than what I should be wearing – the XS, which is for a bust 30. I decided to do this after measuring a similar cropped sweater with a fit that I liked. Since the pattern calls for no waist shaping – it just goes straight down in a tube – I also added a few decreases to pull the body in to 24″ at the waist (again, my waist is not 24″ – but the copied-sweater has those measurements!). These are the changes I made intentionally.

Peggy Sue Sweater

Unintentional changes: Well, for one, the ribbing. It doesn’t come up nearly as high as the pattern is written! That was actually an accident – the pattern has you knit in straight stitch until 8.3cm or 3.5in. Being an American, I saw the 8.3 and assumed it was inches, so I merrily knitted myself 8″ of fucking stockinette. Double-checked the pattern as I was coming to the end, and realized they mean centimeters. WAH. Rather than rip all that shit out, I just drastically shortened the height of the ribbing and called it a day. I kind of like it better this way, I think it’s more flattering!

Peggy Sue Sweater

My other unintentional change was swapping out the buttons for snaps. I planned on sewing buttons – I even put in button holes on the button band (which you can baaarely see), but I managed to skip one, somehow. How? Lord knows. Anyway, my chosen buttons didn’t fit in the holes and since there was one missing (right between the bottom button and the third from the bottom – again, HOW DID I MISS THAT??), I just opted for snaps. It’s fine.

Peggy Sue Sweater

Anyway, I am pleased wit the fit! It’s nice and shrunken, and looks good whether the snaps are fully closed, partially open, or totally open…

Peggy Sue Sweater

Peggy Sue Sweater

See? 🙂

Peggy Sue Sweater

Anyway, this was as fun pattern to knit! The body is stockinette, with raglan sleeves (which means no wrapping for the sleeve caps, fuck yeah). The button band is moss stitch, and the ribbing involves some funky cabling. I likey!

Peggy Sue Sweater

I’m a big fan of this yarn, which was a gift from reader Holly, who offered it after I posted up my big knitting fail. She actually sent me a bunch of really sweet emails filled with great knitting advice, and the package she sent me was full of amazing – in addition to the yarn, there was fancy chocolate. Actually, those chocolates are the sole reason why I even eat chocolate now. I’ve always thought it was hilariously underwhelming (give me a good vanilla-flavored anything, any day of the week), but now I realize it’s because I was just eating shitty chocolate. Imagine that! This led me to try Nashville’s own local chocolatier, Olive and Sinclair, and a longtime romance has begun.

Peggy Sue Sweater

Oh, right, I’m supposed to be talking about this yarn! I don’t actually know what the yarn is specifically, brand-wise, but it’s a gorgeously soft merino and bamboo superwash. It’s somewhere in the DK-weight realm (although I compared it to some of my sport weight and I think it might be closer to that?). One thing that I didn’t notice on the skeins, but is apparent in the sweater is that there are some subtle color gradients going on. I LOVE THAT! I don’t care much for heavily variegated yarn – it’s just not my jam, sorry! – but the subtleness of this is just gorgeous and gives the sweater so much dimension. Love love loveee.

Peggy Sue Sweater

You can really see it here! Ahh, so pretty!

Peggy Sue Sweater

Peggy Sue Sweater

Per usual, I finished the button bands with petersham ribbon to keep them from stretching all crazy. I actually started to make a tutorial on how to do this, but I found it difficult to get a good picture and anyway, it’s literally just hand-sewing petersham ribbon to the back of the knitted band. So.. there’s your tutorial, I guess HAHA.

Peggy Sue Sweater

To block this, I just laid it on a towel and saturated it real good using a spray bottle. After my last fiasco with superwash, I didn’t want to risk it growing all weird!

I don’t know how much I can really call a sweater “summer appropriate” when I live in a climate that has regular 100*+ days, but this is probably the closest I’ll get. The fibers and light yarn weight are much cooler than my usual wool worsted weight sweaters.

Oh, and since a couple people asked – here are some pictures of the dress I’m wearing!

Peggy Sue Sweater

Peggy Sue Sweater

Peggy Sue Sweater

It’s vintage, probably from the late 50s/early 60s, based on the construction and style. I picked it up from the flea market last weekend for a sweet $30. It just *barely* fits me – like, I cannot gain any weight at ALL hahaha. It’s also pretty see-through, but I wear a slip under it and that works! Actually, this is the first time I’ve worn a slip under my clothes, I think. Lord, the majority of y’all must be rolling your eyes so hard at me right now haha.

Anyway, I guess that’s it! Full Ravelry notes (spoiler: there ain’t a lot) here. Thank you again for the yarn, Holly!!

Now to muster up the strength to pull on my second sweater and take pictures for that. It’s one of them worsted-weight wool ones, ugh 😉

OH, I almost forgot – I owe y’all a giveaway winner. Random Number Generator saysssss (dum dum dummm)….

A-Z Winner

A-Z Winner1

Taryn is our winner! Yay, congratulations, Taryn!

Thanks to everyone who entered!