Tag Archives: fashion drawing

Sweaters & Skinnies for Fall!

24 Sep

Ok, I’ll admit – when I first started working on this outfit, the air was a LOT more fall-like than it currently is at the moment. Stupid fickle season, ha!

Jamie Jeans + SJ Sweater Made with Mood Fabrics

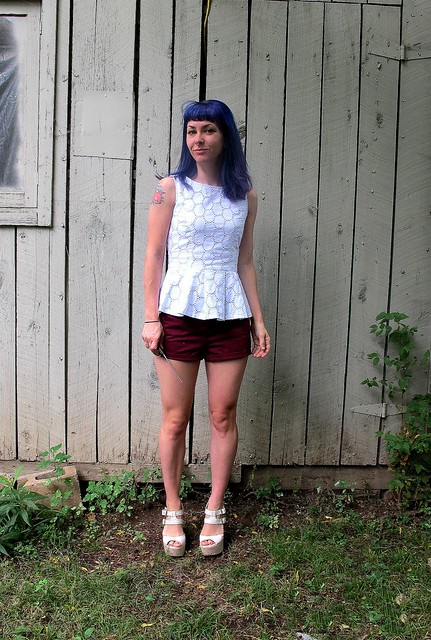
Anyway, I’m totally a trooper so I’m modeling this outfit for y’all nonetheless (photos taken early morning before the temperatures got too high, because, woof.). My first real cold-weather makes – like I said, it’s a little early in the season here, but I like to get a head start so I can actually start wearing this stuff when the weather cools down 🙂 This outfit – or at least the skinnies – is also part of my London wardrobe. I’m officially less than 2 months out, EEEEEP! – so it’s time to really start cranking down and getting my wardrobe act together. Since I’m very limited in suitcase space, I’m trying to capsulate everything to mix and match. So I can bring less clothes, so I can bring home more fabric 🙂 You know – priorities!

ANYWAY, I have a lot of ground to cover with these two pieces, so let’s get started! Sorry in advance for the big photo overload!

Jamie Jeans + SJ Sweater Made with Mood Fabrics

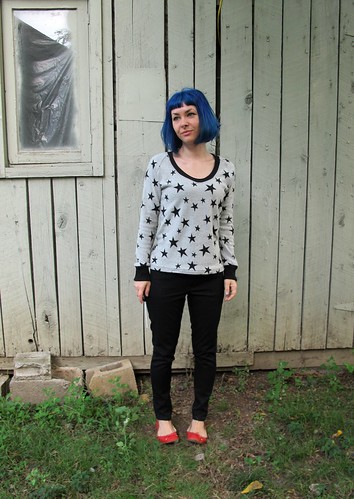
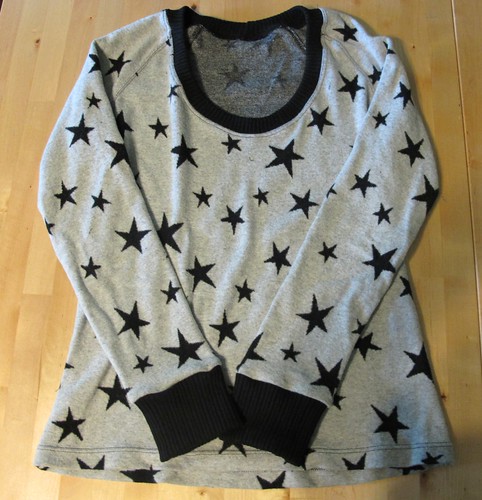
Let’s start with the sweater. I bought this fabric last month while I was in NYC. This was my first non-spring trip to the city, which meant my fabric shopping was focused on woolens and winter weights (instead of summer fabrics, which I am usually bee-lining for in March). I immediately found this star printed WOOL sweater knit, and promptly flipped my shit over it. It’s SO fabulous – and soft! Even softer than you can imagine, forreal. At $25 a yard, it wasn’t the cheapest sweater knit – but stars and wool? Totally worth it. Plus, it’s not like a sweater takes a lot of yardage – at least not for me. I bought a yard and a half (and I have some leftover.. hmm, what to make with?).

Jamie Jeans + SJ Sweater Made with Mood Fabrics

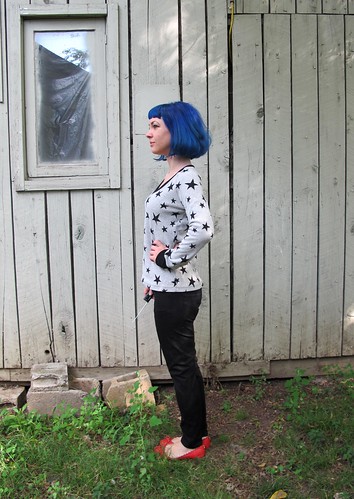
The pattern I used to make this bad boy was actually suggested by Devra (who also bought some of the prized star wool knit, after I peer pressured her into it 😉 ) – the SJ Tee from Papercut Patterns. I made a wearable mock-up before the real deal – which I will show y’all later this week – so I was able to figure my fitting before cutting into my precious wool knit. I cut a size XXS and took 1″ out of the center back. The length is the long version (aka, not cropped) and the sleeves are long as well.

Jamie Jeans + SJ Sweater Made with Mood Fabrics

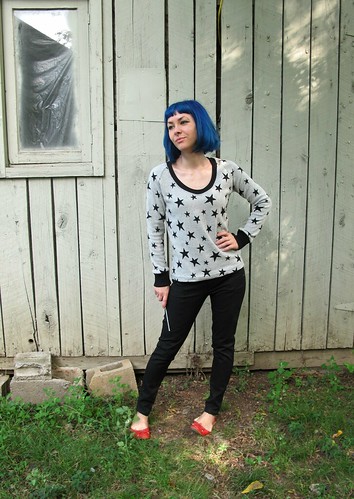
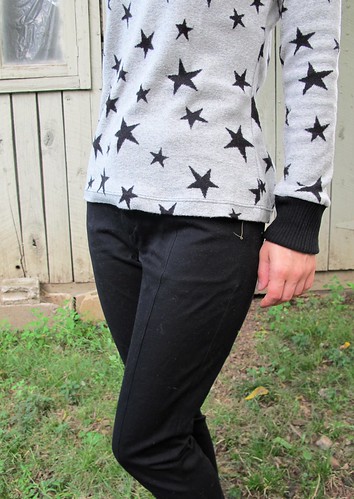
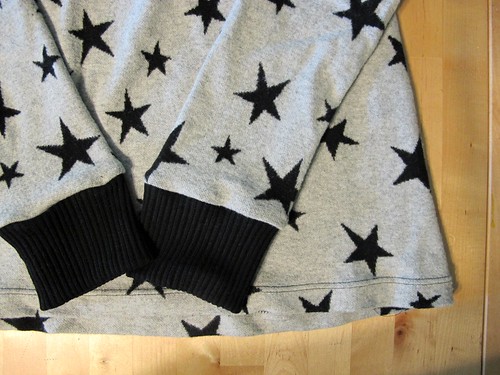
I used rib knit to finish the neckline and cuffs – it was in my stash, I have no idea where it came from. This knit was way stretchier than the sweater knit, so I had to keep retrying the neckline to get it to lie flat. I ended up cutting the rib to half the length of the neckline and stretched the everloving shit out of it – it could still stand to be a little tighter, but this will do. The neckline also can’t stand to be a little lower, it’s already a little risque (which I LIKE!). The cuffs are a bit looser than I’d prefer, but I wanted to be able to push the sleeves up, like so.

Jamie Jeans + SJ Sweater Made with Mood Fabrics

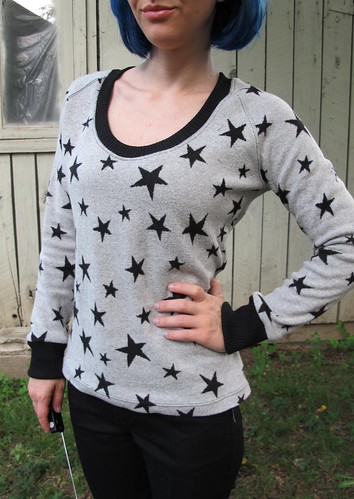
I sewed the entire sweater on my serger – you could use a sewing machine (this particular knit does not unravel or shed), but serger is faster 🙂 I did use a twin needle to topstitch the raglan lines, as well as the neckline & hem. Really loved topstitching this sweater; the stitches just sink right in and look soooo good!

Jamie Jeans + SJ Sweater Made with Mood Fabrics

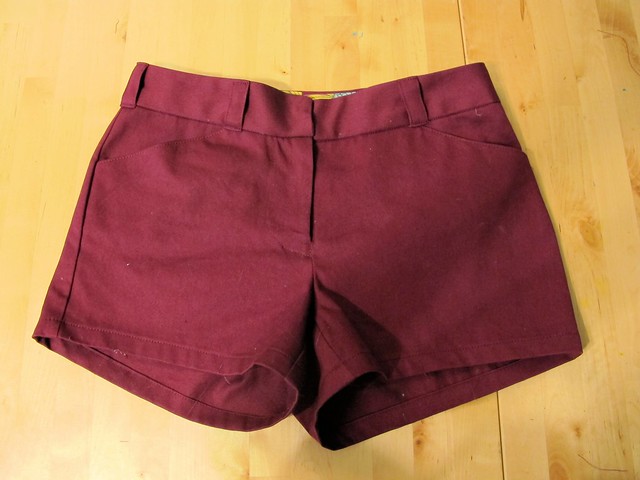
For the black skinnies, I used a really great stretch twill. I’ve had some hits and misses when it comes to stretch bottom weights – they tend to be a weird weight (either too heavy, or not heavy enough), and the stretch can bag out over time. One thing I’ve learned is that you need a pretty high spandex/poly content to get them to snap back into shape – 5-10% – and you need to make sure they are bottom weight. I actually made Heather Lou source this fabric for me, also in the Mood store. We were initially looking for black denim, couldn’t find a good one (I still don’t really know what constitutes as a good one- you’ll have to ask her! I just blindly followed, ha), and decided on the twill. We did end up finding a black denim, fyi, but not at Mood. Once I sew that one up, I’ll share more about it 🙂

Jamie Jeans + SJ Sweater Made with Mood Fabrics

Anyway, this twill is great! It’s pretty similar to what you get with stretch RTW pants – thick enough for a bottom weight, but not tooooo thick (I still only used an 80/12 needle, so no heavy denim shit or whatev). The stretch is crazy good, and it actually snaps back into shape. I can’t give y’all a true verdict on a full day’s worth of wear – the weather jumped back up to hot, so I haven’t had a chance to wear these yet. However, I tried the jeans on a LOT during construction, and they haven’t bagged out yet. So that’s a good sign!

The only drawback to this stuff is that it attracts cat hair like a magnet. It’s not as bad in real life as it is in photos (else I would have lint-rolled that shit, I mean, come on), but it also doesn’t bother me that much. When you have a cat and you wear black pants, cat hair is sorta just a way of life, you know?

Jamie Jeans + SJ Sweater Made with Mood Fabrics

The pattern I used to make the skinnies is the Jamie Jeans, from Named. I’ve actually had this pattern in my stash for a few months – my friend Carla bought me these (plus a few other Named patterns) as an early birthday gift earlier this year. Then I was a total ass and didn’t do anything with them until just now 😛 Hey, it’s been too hot! Anyway, I’m glad I put these off because there is no way I would have had such stretch twill success if it hadn’t been for Heather doing that side of the shopping for me. So there’s that.

Jamie Jeans + SJ Sweater Made with Mood Fabrics

Anyway, this was my first experience with Named. My understanding is that a few things have changed since they initially released this pattern – for one, the instructions include some diagrams now (they used to be text-only), and the prices are a little more competitive. The pieces also aren’t quite as overlapped as they were the first go-round – because, ugh, tracing patterns, ugh. I only had to trace the waistband for these. Everything else was, thankfully, not super overlapped.

I started with the size 2, and made these initial modifications, based on my muslin:
– Added 1″ to the back crotch, for butt room
– Removed 2″ of length at the legs
– Removed 5/8″ at the center back yoke, blending to 1/4″ at the bottom (where the pants meet the yoke)
– Removed 1/4″ from the center back, blending to nothing

Once I started sewing, I ended up doing a few more fit adjustments. I don’t know why these weren’t prevalent in my muslin – perhaps my fabric wasn’t quite stretchy enough? At any rate, these are my additional modifications (and now you know why I pulled them on and off so many times!):
– Sewed the side seams at 1/2″
– Took a 1″ wedge out of the center back of the waistband, tapering to nothing at the bottom
– Removed an additional 3/4″ from the length
– Did some crazy witchcraft to reshape the crotch to be a J (again, NO IDEA why this wasn’t an issue with the muslin, but argh – at least I fixed it? Mostly.).

Things I will change for my next rendition:
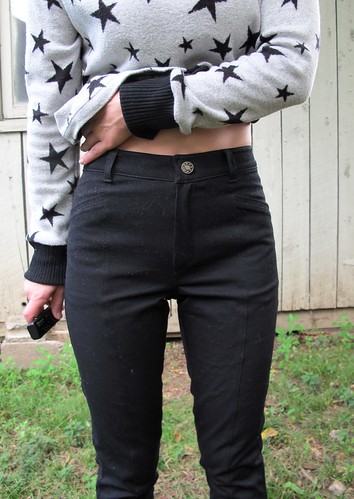
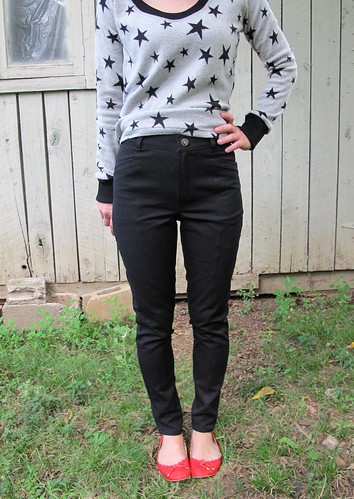
– Need to remove some length from the front crotch – you can see that it’s slightly too long (it’s not toooo bad – I doubt anyone will point and be all “HA HA YOUR CROTCH IS TOO LONG HA HA!” But I know it’s there and hey, it bothers me, ok?). Maybe 3/8″ish.
– Rescoop that J a little more out of the crotch. It’s still not perfect, but it’s damn good considering that I did this while the pants were already mostly assembled (for those of you who are all, “Wtf is this J crotch you keep talking about?” Here’s the post where I talk about my pants adjustments, including J crotches. Also, in case you were wondering- those crotch rulers *do* work. I found one in Elizabeth’s studio last week, immediately stuck it on my crotch – and hey, there’s a J! Cool!)
– Need to take a little pinch of fabric out of the inner leg seam – maybe 1/2″

Despite my nitpicky fit adjustments, these aren’t so bad! I’ll still totally wear the shit out of them, at any rate.

Jamie Jeans + SJ Sweater Made with Mood Fabrics

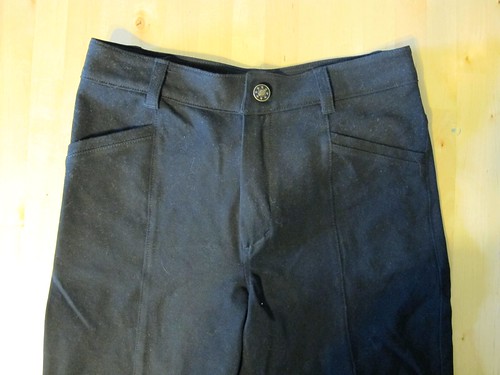
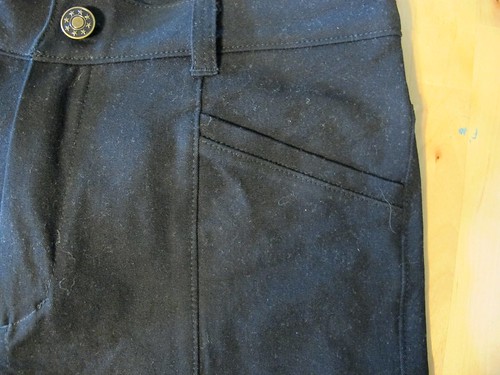
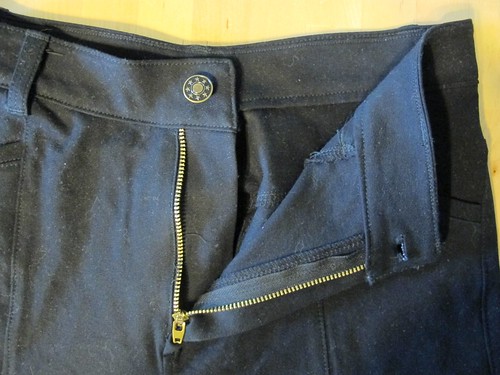
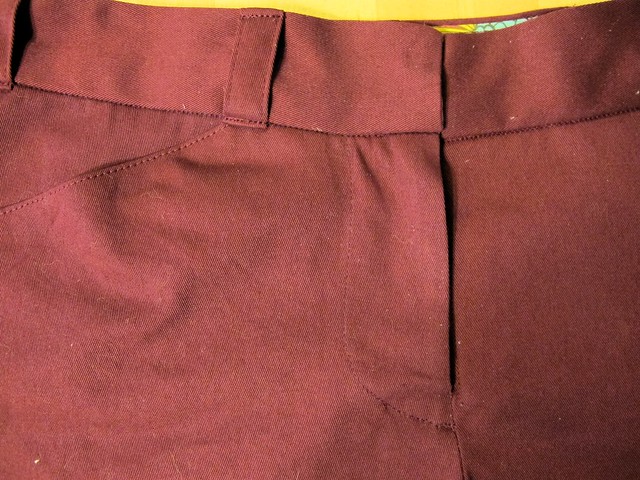
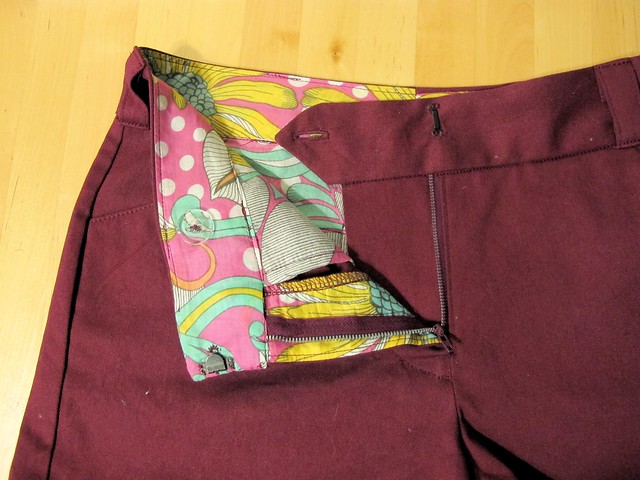
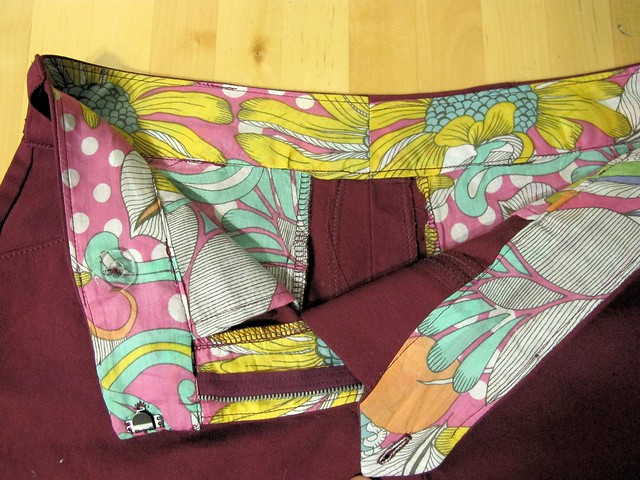
Constructing these was REALLY fun! The instructions – honestly, they’re kind of useless about 70% of the time, but I’ve made enough pants to where I don’t really need them. The seams are all finished with my serger – except the crotch seam, which is flat-felled – and I made use of my edgestitching foot to get all that beautiful topstitching. For the waistband, I used fusible tricot knit interfacing – I fused both the outside and the facing, to give it some stability but retain that lovely stretch. The button & jean zip are both from Pacific Trimming in NYC.

Jamie Jeans + SJ Sweater Made with Mood Fabrics

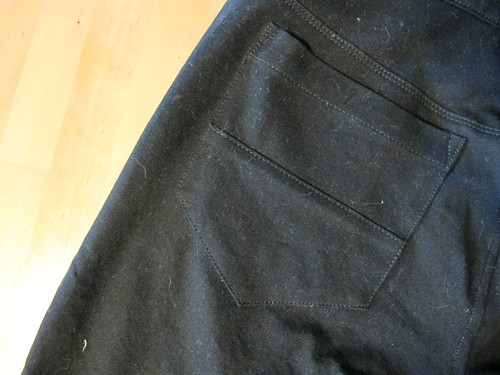
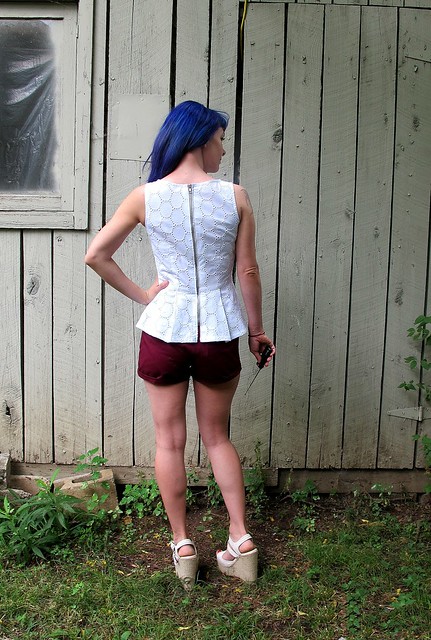
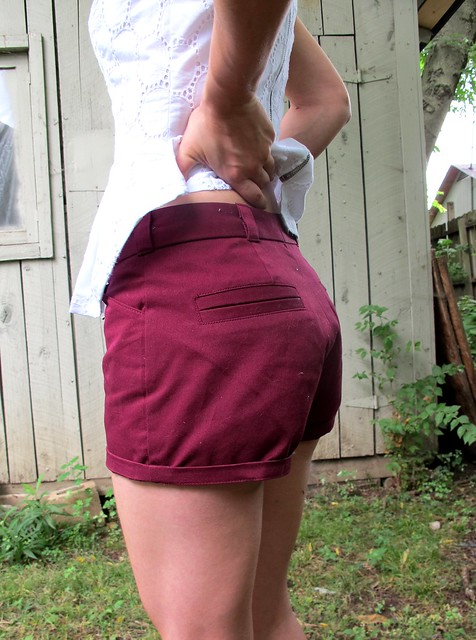
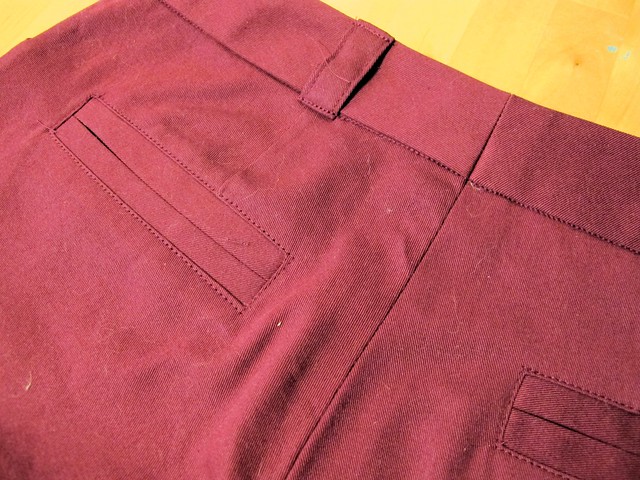
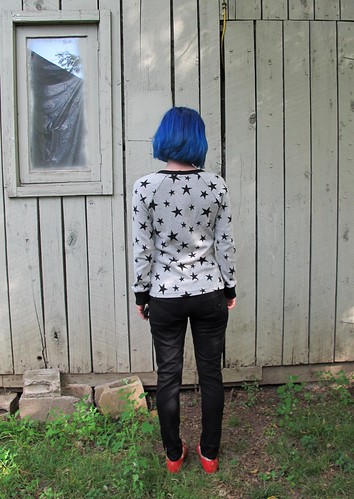
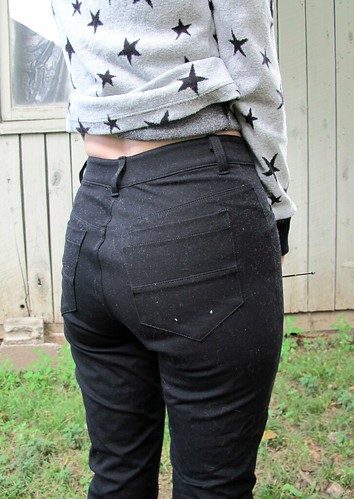
I really love the back pockets! And hey, that double line of stitching at the yoke? That was done with a single needle, twice. No twin needle!

Jamie Jeans + SJ Sweater Made with Mood Fabrics

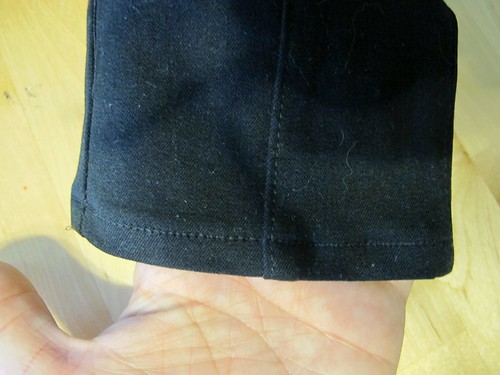
For the hem, I used the lightning bolt stitch, so it would retain some stretchiness. It looks pretty similar to a straight stitch, but it, you know, stretches.

What else? Here are some sweater close-ups:

Jamie Jeans + SJ Sweater Made with Mood Fabrics

YUM!

Jamie Jeans + SJ Sweater Made with Mood Fabrics

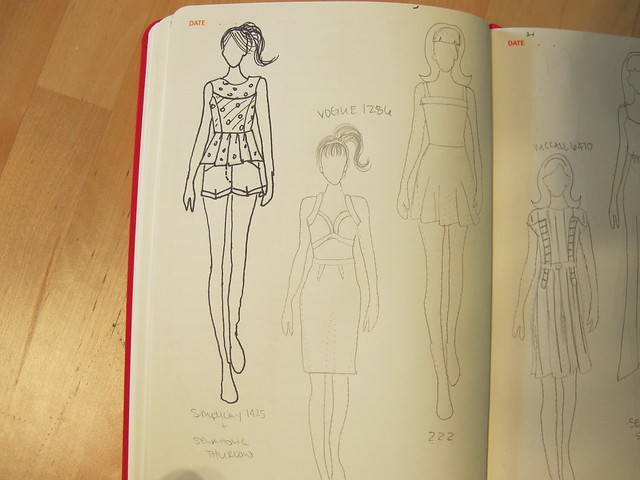
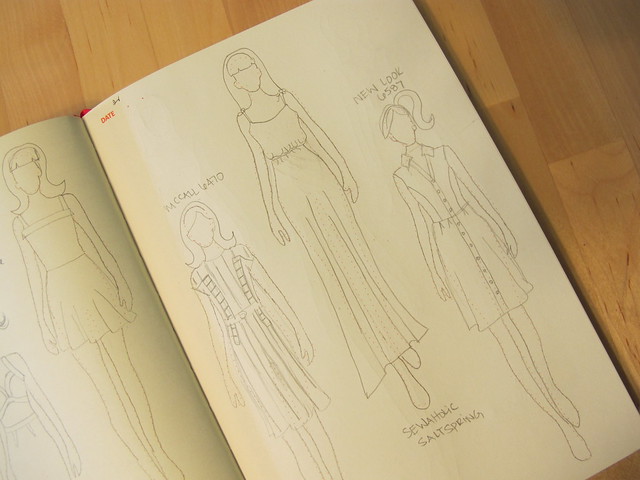
One last thing – here’s the little watercolor fashion illustration I made for this outfit. GOD, I love painting watercolors! So much fun!

Jamie Jeans + SJ Sweater Made with Mood Fabrics

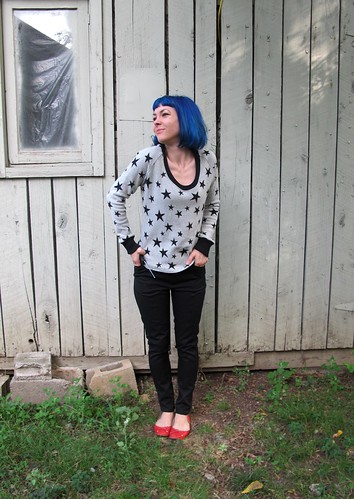
Ok, I guess that’s it! Now if the cooler weather could please come back – I hate working up a sweat while I drink my morning coffee 🙂 Oh, and in case you were wondering – that’s a fresh dye job you’re looking at, in regards to my hair! I love how neon electric is is 🙂 Yay for fun-colored hair!

PS: Ralph Rucci V1419 Sewalongers – in case you missed it, there’s a new post up on the McCall blog regarding the sewalong. Just some general housekeeping, including blog buttons (yes!) and social media chat. The burning question this week – for general sewalong chat outside of our blogs, do y’all prefer to use a Facebook page or a Flickr Group? Trying to decide which platform to us. Let us know which side you swing!

Completed: Simplicity 1425

22 Jul

Today’s outfit inspiration comes from a completely new realm for me – watercolor painting!

Eyelet Peplum Top & Thurlow Shorts made with Mood Fabrics

Remember that watercolor class that I signed up for earlier this summer? Well, here’s a shot of one of the paintings I did in my final class (no, it wasn’t a fashion illustration class, but the teacher was open to letting us paint whatever wanted – and she was tickled that I went with fashion illustration, ha!). I had some swatches from Mood Fabrics that I knew I wanted to turn into an outfit for my next MSN post, but the outfit inspiration didn’t come until my pen er, watercolor hit the paper 🙂

Eyelet Peplum Top & Thurlow Shorts made with Mood Fabrics

Let’s start at the top and work our way down! I used Simplicity 1425 for the pattern, and cut the most simple version (sleeveless, no yoke, no collar). I cut the size 4 and took a little in at the waist, as well as made my normal gaping-upper-back alteration that seems to be a running theme for me when it comes to sewing Simplicity patterns.

Eyelet Peplum Top & Thurlow Shorts made with Mood Fabrics

My fabric is this beautiful white cotton eyelet from Mood fabrics, which I underlined with this bright white cotton batiste (also from Mood Fabrics), for modesty and some opacity. It’s still a little on the sheer side – as in, I have to watch what color undergarments I’m wearing! – but the two fabrics together make such a fun light and airy top.

Also, I just noticed that there is a fly on my boob in this picture (at least, I’m pretty sure it’s that fly that was buzzing around). Gross.

Eyelet Peplum Top & Thurlow Shorts made with Mood Fabrics

Sewing was very simple and straightfoward – not to mention fast! Seriously did all this (minus the initial muslin) in the space of a Saturday afternoon. Not too bad! I underlined all the pieces by hand with silk thread (it’s not totally necessary to use silk thread, but it does make it easier to pull out the basting when you attach the seams – which, if you’re as anal-retentive as I am about sewing, you will totally appreciate that, ha!) and I used a 70/10 Microtex needle to prevent puckering, since the fabric is so lightweight. Most of the inside seams are serged, although I did finish the armholes and neckline with bias facing (cut from the same batiste). I can’t really speak for the instructions on this pattern as I didn’t use them at all, but the overall finished top is pretty nice!

Eyelet Peplum Top & Thurlow Shorts made with Mood Fabrics

For an extra lil’ punch, I stuck an exposed separating zip right up the center back. Kind of toughens up the overall sweetness of the eyelet, yeah? 🙂 This pattern was actually written for there to be buttons down the back – which is a cute idea in theory, but they only called for 3. THREE. How that doesn’t look like a fucking hot mess when you’re wearing the top and moving around is beyond me. I imagine that would gape a lot! So I swapped out my buttons for a fun zipper and I’m loving the way it turned out.

Eyelet Peplum Top & Thurlow Shorts made with Mood Fabrics

Getting the zipper in was kind of an adventure in itself. I tried googling around for directions on inserting an exposed zipper (I mean, I had a vague idea of how to do it, but I always like to check and see if my technique is right first), but everything I was pulling up was for close-ended zippers. Since my zip is separating (you know, so I can get the top off and on without destroying something in pure rage during the process), those particular tutorials were kind of a moot point. In the end, I kind of winged it, but I think it worked out!

Eyelet Peplum Top & Thurlow Shorts made with Mood Fabrics

As far as the style of the top – well, I like it. I know it’s super trendy- especially with the dang exposed zipper! – but I’m ok with being trendy. I think peplum tops are super cute and the white eyelet will go with lots in my summer wardrobe. Plus, I can tuck that peplum into high-waisted skirts, so it’s like two tops in one! Woohoo!

Eyelet Peplum Top & Thurlow Shorts made with Mood Fabrics

Eyelet Peplum Top & Thurlow Shorts made with Mood Fabrics

Now for the shorts! I used my beloved Sewaholic Thurlow pattern, matched up with my other beloved plum organic cotton twill from Mood Fabrics. My love affair with that organic cotton twill should be well known at this point, I hope. That stuff is amazing. Soft and cottony with a bright, saturated color… a dream to sew, and a dream to wear. I’ve made so much with this particular fabric in different colorways – including moreeee Thurlows! – and I’m sorry y’all have to see it again. Just kidding, I’m not sorry! These shorts rule! Get you some of that organic cotton twill, you won’t regret it!

Eyelet Peplum Top & Thurlow Shorts made with Mood Fabrics

I don’t really know how much more I can talk about these shorts until y’all tell me to shut up. I’ve seriously made them so many times, it’s kind of like autopilot at this point. I found that I did have to take quite a bit of excess out of the legs this go-round… I think I might be getting too un-curvy to wear this particular pattern 😦 I’m already at the smallest size, so it’s not like I can size down. I’m hoping my adjustments will work for future Thurlow shorts, but I’m kind of afraid to try the pants at this point since there is soo much that needs to be changed now, ugh. I reckon I could find another pants patterns to sub out, but wah! I want to keep making Thurlows forever!

Eyelet Peplum Top & Thurlow Shorts made with Mood Fabrics

Anyway, fitting issues aside, these shorts were a delight to put together. I played around with the topstitching on this pair and I really love how the it looks so gorgeous and crisp against this fabric. I tried topstitching around the welts this time – something I’ve seen in RTW and always wanted to try – and I think it looks pretty nice!

Eyelet Peplum Top & Thurlow Shorts made with Mood Fabrics

Oh, and check out that fun lining! Yeah girl! That comes courtesy of this crazy/awesome psychedelic cotton voile print, which is unfortuanately sold out now (but take a look at the other cotton voiles from Mood Fabrics. Sweet!). I love putting crazy prints in my pants because, dude, why not? Business in the front, party on the inside. Or something like that!

Since we’re on a roll with all these detail shots, here are some of the top:

Eyelet Peplum Top & Thurlow Shorts made with Mood Fabrics

I took waaay too many pictures, but there was so much detail to capture! Sorry bout that!

So I guess the next question is – does she have that outfit from the fashion illustration?

Eyelet Peplum Top & Thurlow Shorts made with Mood Fabrics

Fuck yeah I do! Ok, maybe not so much the shoes, but I’ve got the purse! Ha! This shit’s from Kate Spade – I bought it after I was having a really rough week (retail therapy totally works, y’all.). It was on sale, but it is still also the most expensive purse I’ve ever bought – and it’s totally worth it! I knew I couldn’t find that lemon fabric anywhere, so I justified it with the purse hahah 🙂

Eyelet Peplum Top & Thurlow Shorts made with Mood Fabrics

Just for fun, here I am trying to strike a pose like my fashion illustration. Hmm… probably should stick to painting, not posing! 🙂

Review: Fashionary Sketchbook (+ a giveaway!)

25 Jun

Fun LT Fact: Back in high school, before I fell hard in love with sewing, I was a wannabe artist. Painting, sketching, doodling – I loved it all. I was moderately good at it (not enough to, like, make a career out of it or anything, ha!), and I churned out dozens of sketches and paintings (mostly oil and acrylic). Once I switched over to sewing, my love affair with art started to die down. This is why I love fashion sketching so much – it really appeals to the other artistic side of me, the one that likes to use paintbrushes and fancy drawing pencils.

One caveat to my art: I’m a fantastic copier, but I cannot draw or paint from memory. Can’t do it! So all my paintings were direct copies of whatever I was looking at (be it a photo from a magazine, or a real painting in my art book, or whatever).

Fashionary Sketchbook

So, this Fashionary Sketchbook really appeals to me, as it allows me to draw and doodle clothing to my little heart’s desire, without actually having to come up with drawings on my own accord (aka, copy that shit, dude!).

Fashionary Sketchbook

This little unassuming red book was sent to me by the folks at Fashionary to review. I’ve been carrying it around for about a month, and I gotta say – it’s pretty freaking cool! The small size (I’m using the red sketcbook, fyi) is small enough to carry around in my purse, but it’s big enough so I’m not drawing little 2″ figures. I love that there’s elastic to keep the book closed when you’re not using it, and a bookmark is attached to the binding so you can quickly find your place.

Fashionary Sketchbook

Oh, and the first 20% of the book is full of line drawing for various clothing and accessories! Remember what I said about being a copier? YEP, this shit is RIGHT up my alley!

Fashionary Sketchbook
There are so many little details in this book, I don’t even know where to begin. Lots of line drawings to copy for your figure sketches – and even the outline of pattern pieces at the top of the clothing pages.

Fashionary Sketchbook
Tables of measurements for anything you might need while designing.

Fashionary Sketchbook
Fabric patterns!

Fashionary Sketchbook
Care labeling instructions decoded, because why the fuck not?
(Note: I should probably learn these. I just wash everything on cold, is that terrible?)

Fashionary Sketchbook
Different poses, if you dare!

Fashionary Sketchbook
The last 80% of the book is for sketching. A first glance, it appears to be blank pages-

Fashionary Sketchbook
But if you look closely, you can see a faint outline of the figure, 3 per page. This is my favorite part of the book; the outline is visible enough so you can use it if you have problems with drawing proportions (well, we are talking ~fashion~ proportions here), but it’s faint enough to where you could ignore the template and doodle whatever the hell you want right over it.

Guys, I have fallen in LOVE with this book. I’m so sorry if this is like the gushiest review ever – yes, I got a free book out of it, but I’d buy this shit regardless. It’s so handy and well thought out, and it appeals to me on so many levels.

Want to see what I’ve been doodling? Don’t judge my mediocre drawing skills, now!

Fashionary Sketchbook

My only complaint is that I wish the paper was a little thicker so I could outline my pencil with ink – I started to, with my first drawing, but it bled through the back. Ugh. I reckon if the paper was any thicker, the book might have to have less pages, so I’m sure that’s why it is what it is. Alternately, I could probably try using an ink pen that didn’t bleed through so much, like a ballpoint. I was using a Sharpie in this case, ha.

As a side note, this book has inspired me to start painting again, so I signed up for a Watercolor Painting class this past month! It’s been really fun – I love learning new things as an adult – and hopefully I’ll have some cool ~fashun~ watercolors to show y’all in the future 🙂 Lord knows I spent enough on the paints 😛 I better get my money’s worth out of them!

Fashionary Tape
In my package, I also received this bonus little Fashion Tape Measure! While this is not something I will personally use for it’s intended, er, use (I don’t draft patterns, and I probably won’t ever start. Sorrrrrryyyyy!), I can’t hate on a good tape measure. Those things always come in handy 🙂

Fashionary Tape
Fashionary Tape
What makes this tape measure unique is that it is marked at key measurements for two standard sizes (men and women’s). The women’s standard US size 6 is marked on the white side in centimeters.

Fashionary Tape
The men’s US 38 is marked on the black side, in inches.

I can absolutely see how someone who designs and drafts patterns could find this useful! It’s pretty cool. Personally, though, I’ll just be using it for plain tape measure purposes. I love sewing gadgets haha 🙂

GIVEAWAY IS NOW CLOSED
Hey, ok, so now let’s have a giveaway! The folks at Fashionary were generous enough to offer up a free Red Fashionary Sketchbook for one lucky reader to win (and you can match me, yay!). To enter, just leave a comment on this post and tell me if you have any artistic talents beyond sewing. I’m curious! 🙂 This giveaway is open WORLDWIDE and I will close the entries one week from today, WEDNESDAY, JULY 2, 2014 8AM CST.

GIVEAWAY IS NOW CLOSED
Good luck!