Tag Archives: underlining

Completed: The Marlborough Bra

19 Nov

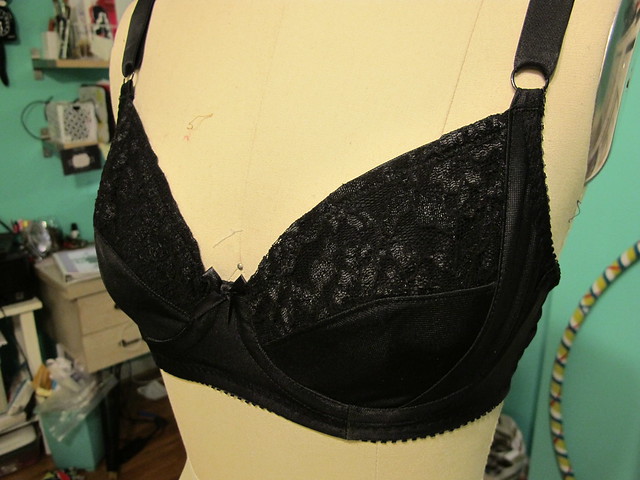
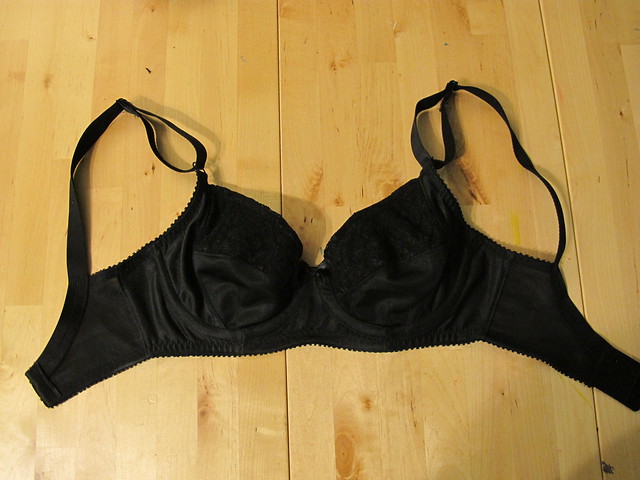
Omg, you guys! I made a bra!

Marlborough Bra

And not only that – it actually fits! It’s comfortable! And it’s PRETTY!

Marlborough Bra

Besides the little bralettes I played around with a couple months ago (which totally don’t count), this is actually the first bra I have ever made. The VERY first – it started as a wearable muslin, that is quite super duper wearable. In fact – wearing it as I type this! Can you tell how tickled I am with this turn of events? SUPER pleased with myself right now.

Ok, lemme back up a little bit and talk about the not-so-harrowing process of bra-making. The pattern I used to make this gorgeous gal is the Marlborough Bra from Orange Lingerie. I can’t even tell you how happy I am about the release of this pattern – after reading up on Norma’s (of Orange Lingerie) book Demystifying Bra Fitting and Construction after she sent me a copy a couple of months ago (as well as lurking hard on the beautiful custom lingerie she makes), I knew the pattern itself would be amazing, both in terms of fit and instruction, not to mention overall style. Spoiler: the pattern absolutely did not disappoint.

While I’ve had this pattern in my stash for a little while now, it took me a couple of months to muster up the energy to actually make it up. There is a LOT of info in the pattern – as well as on the Orange Lingerie blog – about choosing fabrics and notions. Orange Lingerie’s book, Demystifying Bra Fitting and Construction, is also a great resource, with whole chapters devoted to all the fine details. I ended up chatting Norma up via email for advice on what fabrics to buy, and she directed me to Bra Makers Supply (psst – the US version is Sweet Cups Bra Supply. It confused me at first, too, but the shipping is a bit more reasonable for those of us in America. You can click over to the US site from the main site, on the top right hand corner). They actually sell full bra kits that include everything you need to make a bra – the fabric & powernet, all the elastics and notions, even a tiny bow 🙂 The Marlborough bra was designed to be made of a fabric that has no stretch, and specifically, designed for the fabric that comes in these kits. So I bought two kits right away. There are ways to manipulate any fabric to get it to work for this pattern (which is outlined here), but for my first bra, I wanted to Keep It Simple, Stupid.

A few of things I want to point out about these kits:
– They don’t come with underwires. You have to buy those separately. I bought them from the same site to save on shipping. If you don’t know your underwire size (I did not), get your best guesstimate based on your RTW size/measurements and buy the next size up or down. I bought both the 34 & the 36. I ended up using the size 34 for this bra.
– The kits also do not come with lace. You’ll need to supply that on your own. I was all set to make this bra with my red kit, until I realized I didn’t have any red lace! So I’ll be looking for red lace in London. In the meantime, the black lace leftover from my Georgia dress worked nicely for this bra 🙂
– While the kits do come with elastic strapping, be warned that it is NOT enough for this pattern (Maddie warned me to this, and I didn’t listen to her at all because I’m an asshole. Then I had to go back and buy more strapping. Except I bought it from a different supplier, and it was a MILLIMETER more wide than what I needed, so it’s kind of hard to slide the sliders and rings. Argh!). I think the kits are cut for bras with fabric straps. Anyway, you’ll want to buy more strapping – either from Bra Maker’s Supply, or another vendor entirely. You’ll need at least a yard and a half, and the kits come with something crazy like 15″.
– Be mindful of what size kit you are buying. My bra cups are preeeeetty small, so I bought the small kits since I wanted to save on shipping as they weigh a tiny bit less. That fabric yardage worked out great, however, I didn’t think about the fact that my size really needs a 3 hook hook and eye! The small only comes with the 2 hook size. It’s not the end of the world (my bra is perfectly supportive with the 2 hooks), but you will need to recut the back band to fit the smaller size if that’s the case. Just fyi!
– I’ll also mention that the fabric that came in the kits, at first glance, looked really cheesy and cheap. It was REALLY shiny and my first impression was that it looked like a crappy Halloween costume. Ha! For one, you can use either side of the fabric (my shiny side is on the inside, so my bra is more matte). Also, it’ll look better when it’s sewn up. Just looking at a flat, shiny piece of fabric… well, it’s gonna look shitty no matter what. So there’s that.
– Speaking of shipping, Bra Maker’s Supply did refund me about half my shipping costs after they sent my order out. That kind of ruled!

Marlborough Bra

Based on my measurements and Norma’s email advice, I decided to make the size 30D. I typically wear a size 28DD or 30D in RTW, so pretty much the same. I actually compared the pattern pieces to my favorite lace RTW bra to see if they were similar, and they were almost exactly the same. Fit-wise, things are very close. The upper cups on my handmade bra are a little more snug than the RTW one, but the RTW one also has stretch lace for the upper cup (whereas on the Marlborough, the lace is rigid), so that might have something to do with it.

The Marlborough Bra pattern is very well-written and covers every step of the process, which is super helpful if you’re like me and have never sewn a bra before. There are tips on where to add topstitching, how to sew in the underwire channels perfectly, what pieces to baste on first so they don’t slip when you zigzag them on. In itself, the pattern is absolutely sufficient for making a bra. However, I did find it incredibly helpful to have Norma’s book at my side during the process. Whenever I found a step in the pattern confusing (more so confusing because this was new and alien territory to me – and less because the instructions were lacking), the book answered it right away. It’s also helpful because there are actual photos of the steps in the book, so if the diagrams aren’t doing it for you, you have back-up. Of course, I don’t think it’s necessary to have the book to make a bra – but I was happy to have it on hand.

Marlborough Bra

Marlborough Bra

The one part about the pattern that I didn’t like was that it wasn’t super clear on what pattern pieces to cut from what fabric. This stalled me for a couple of hours, actually – there’s some general info in the pattern, but I’m the kind of person who needs clear-cut specifics. After googling as many Marlborough bras as I could find, pouring over Norma’s book, and referencing Maddie’s bra-making guide from her Sewing Party class, here’s what I came up with:
– The cups, bridge and frame are cut from the main fabric from my kit. I cut them according to the grainline, since there is a slight stretch in the fabric.
– The straps were cut out of powermesh, with the direction of greatest stretch (DOGS) running around my body.
– Since my lace is stretchy, I lined it with more of my black fabric so it would be rigid (as the pattern calls for)
– I lined the bridge with a second layer of the same black main fabric

The kits also don’t tell you which elastic is for what. I wish I’d bothered to figure that out BEFORE I started sewing – as there is actually a cute little 1/4″ scalloped/lace trim for the upper cup. Instead, I used clear elastic on the inside of my cups. Womp womp. At any rate, I figured out the rest of the elastics pretty easily – just measure them and check the widths against the pattern notions list. One thing to keep in mind, again, is that the small kit has narrower trims. Since my size is a D, I should have had the large kit (and wider elastics, including straps). I did not, but the bra turned out fine. I feel supported.

Oh, and I did not finish my seams. I felt that focusing on construction and fit was more important for this go. I do want to explore seam finishing for future bras, though!

Marlborough Bra

All this aside, I had a LOT of fun putting this thing together! Omg! Once the cups were assembled, it really started to look like a bra and that’s when things got exciting. I got to usse all kinds of cool zigzag stitches (these are all covered in the pattern instructions) and play around with lace and trims. So fun! One tip I will give is to be careful with those 1/4″ seam allowances – if you’re not used to sewing them (I’m not), you might have issues with the machine trying to eat the edge of your fabric, especially if you’re sewing something delicate. I have found that by *very* gently pulling the thread tails away from you when you start each seam, it will guide the fabric along until your feed dogs have a good grip and you’re past the danger of your machine chomping a hole in your fabric. Just be sure to hold both thread tails and don’t force it.

Also, that favorite RTW bra that looks a lot like this one? I kept it on hand while I was sewing my Marlborough, so I could refer to it when needed. That was pretty helpful, especially when I needed to visualize how the elastic was supposed to look.

Marlborough Bra

Marlborough Bra

The only downside to bramaking is, unfortunately, it’s very hard to tell if the bra will fit until it’s mostly finished. Of course, you can mock-up with crappy elastics and temporary underwires, but because the fabric is so essential to determining fit, the mock-up needs to be of the same stuff (aka, not cheap muslin, or whatever). So it’s a bit of a gamble. I’m pretty thrilled that mine fits so well – although it can definitely use a little bit of tweaking before it’s perfect. I’ll let y’all know how that goes! In the meantime, here’s a somewhat awkward photo of how this one fits on me:

Marlborough Bra

Sorry that I had to totally erase my body (I’m not terribly shy, but, this is a public blog, after all), but this should give you an ok idea of how it looks. I’m actually pretty impressed! It’s supportive, it’s comfortable, and it’s SO pretty! Looks like a bra you’d buy in a store. Except better, because I made it 😛 As far as wearing it under clothes – it’s about the same as any seamed/lace bra. Not completely smooth (personally, that doesn’t bother me), but not super lumpy. Since this fabric is kind of thick, I’ve noticed that nipping isn’t too much of a problem, either.

I’m looking forward to making more of these! Once I tweak the fit, I want to try some different kits – I see that Grey’s Fabric has some beautiful kits, and I’ve also been eyeballing the ones from Hooks & Wires. Not to mention the famous Merckwaerdigh kits, the holy grail of all that is beautiful about handmade lingerie. I want to buy all white everything and try my hand at dying the whole set to match (there’s a short chapter on dying in Demystifying Bra Fitting and Construction, yes!). I want to explore trying new fabrics (I’m thinking this might be the PERFECT excuse to splurge on a tiny piece of Liberty fabric while I’m in London!), laces and trims, and mixing and matching for some cray combinations. I want to make matching underwear (yep). I also want to make a push-up bra, but that may require a different pattern 🙂 Making this one bra just has me itching to sew more! It’s SO satisfying! Have I convinced you to make a bra yet? Have I? Huh? 🙂

Bloggy Disclaimer: Norma sent me a copy of Demystifying Bra Fitting and Construction as a gift. I did buy the pattern and kits with my own money, just in case that wasn’t clear!

Ooh, speaking of London – a couple more things –
For those who have asked – there will be a meet-up on Saturday the 22nd! If you emailed me previously, you should have received the details of the meet-up a couple of days ago. Anyone else who wants to join (whether you didn’t contact me, or are just hearing about it now 🙂 ) – we will be meeting at Goldhawk Road at 10:00 AM. We will congregate outside the tube stop until 10 minutes after the hour, then we will be moving on to shop! If you would like to join the meet-up – please, come! You don’t have to email me to get an ~invite~ (nor do you need to have a blog to hang with us). If you can’t make it at 10:00 AM but would still like to try to find us later, you can either email me and I will give you my number (I plan on getting a SIM while I’m there, so it’ll be local!) so you can text me, or just tweet me. Come to buy fabric, come to eat and drink later – whatever works! This is an open invite 🙂

Also, the blog will probably be pretty quiet while I’m gone. I want to really enjoy my vacation and not be sitting at a computer all day! I will have access to the web and will respond to emails and comments as I can (and maybe squeeze a post in if I have downtime waiting at the airport or something), but I don’t have anything autoscheduled and I’m not bringing in guest posters or anything like that 🙂 I’m taking a break and I’ll be back in December! 🙂 In the meantime, if you want to lurk my trip – you can follow my Instagram and/or Twitter.

See y’all laterz!! ♥

V1419 Sewalong: Cutting and Prepping

13 Oct

Good morning, sewalongers! (sewalongees?) Today we are going to go over the final prep work before we start sewing (next week! Eep!). This is the last slow post of the sewalong, which gives you another week to perfect your muslin and choose your fabric. Of course, these posts will also be up indefinitely so don’t feel like you have to rush to keep up!

blog-sewalong-image-650x563

The very first thing you need to do – yes, before you do anything else with that lovely fabric – is pretreat your fabric. How you pretreat your fabric will depend on the fiber you chose, as well as how you plan on cleaning the coat in the future. For those of you who are sewing wool (like meee!), this means you need to get any shrinkage out of your fabric *before* you cut the pattern pieces – otherwise, once you start steaming that bad boy, you may end up shrinking pieces and that’s no good. There are lots of ways to pretreat wool – and none of them involve washing the fabric (please don’t do that!). You can either steam the piece yourself (this involves lots of steam and probably a lot of time), take it to the dry cleaner and have them pretreat it (this involves money)(and also dry cleaning), or you can shrink it up in the dryer (which is what I do). Here’s a blog post outlining the entire process, but basically – you just need to throw your wool in the dryer (finish the edges if necessary to prevent unraveling), add a couple of towels that are soaked in hot water (and then wrung out, so they’re not dripping) and blast the dryer on high heat for however long it takes before everything is dry. Easy! This is the method I use for all my wool fabrics. If you are at all hesitant, try it out on a swatch first 🙂

For other fabric types that are not wool – you may not need to pretreat (unless you plan on washing the coat in the washing machine? If then, defintely prewash that shit!). If using a cotton or silk, you may want to at least steam the crap out of it just to be sure there is no shrinkage. Polys should be fine and not shrink at all.

Once you’ve pretreated your fabric in whatever way need, then it’s time to cut! I’m not going to go over cutting here – I assume anyone brave enough to tackle sewing a coat is probably fine to cut fabric without guidance 🙂 – but if you need a refresher, here is an old post I wrote about cutting and marking your pattern pieces. One thing I did notice while I was cutting my fabric – I was able to reconfigure the layout and use slightly less fabric. Don’t be afraid to change up the layout if your fabric is wide enough, just be sure that you are keeping all the pattern pieces on the proper grain.

If you are including an underlining for your coat, you will need to cut out pieces 2, 3, 4, 7, 8 & 9 from your underlining fabric.

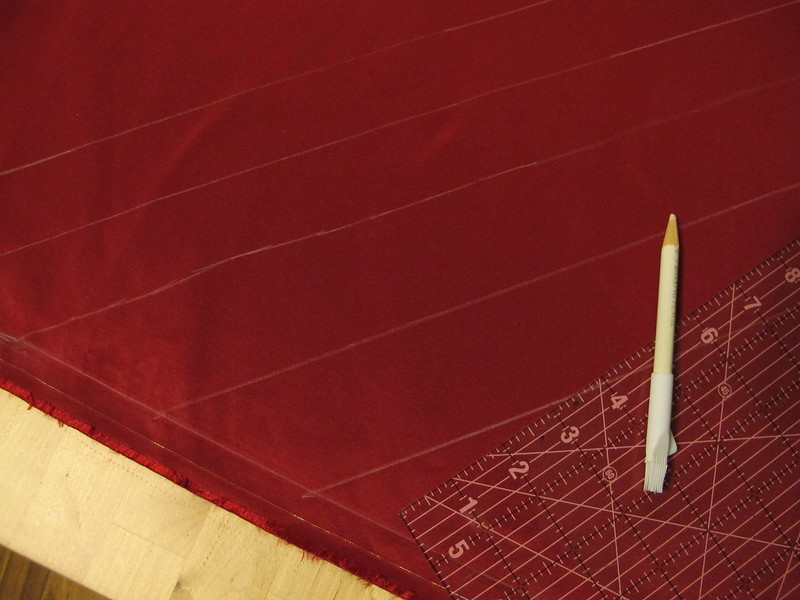
For the contrast – specifically, all those bias pieces – I found it easier to draw the pattern pieces directly on the fabric, rather than try to pin a bunch of stuff and then try to cut a straight line and nope.

V1419 Sewalong: Prep

The long, straight pieces – I just measured them and use a ruler and marking pencil to draw them on my taffeta. For the big bias contrast pieces (those giant parallelograms), I pinned down the pattern piece, traced around the edges with my marking pencil, and then used a ruler to draw in the lines 2″ apart (as they are on the pattern piece). I did all this on the flat fabric before I cut anything out, and I think it made things a lot easier!

Once you’ve cut out all your pattern pieces, you will need to apply the underlining (assuming you are underlining – if not, skip ahead and start marking your pieces). Underlining is very easy. It is also very time-consuming – so I recommend watching some crappy TV or something equally entertaining while you do it 🙂 For this sewalong, I won’t be going over underlining, but here is a tutorial if you need one. Some things to keep in mind:
– Sometimes you can get away with basting the pieces together by machine. This coat is not the time to try that method. Because the pieces are very large, you run the risk of shifting your fabric – which will give you bubbles or hang weird if you’re not careful. Try to keep things as flat as possible. Meaning: sit at a table, underline by hand. Watch a movie. Drink some wine. Whatever makes you happy!
– I use silk thread to underline, because it removes very easily. I also happen to have several spools on hand in strange colors, so that’s a big part of the reason. I realize silk thread is a bit expensive, so don’t feel like you have to break your budget on some thread that’s about to get pulled out as soon as you sew a seam. Use whatever you got! I would recommend using a threat in a contrasting color, just so it’s easier to see/remove.
– Feel free to use giant stitches. You’re just basting the pieces together to keep them from shifting when you sew them. Big stitches are ok – and they’re easier to remove!
– Sew well within your seam allowances, especially if your fabric shows pin holes (mine does!).
– I like to underline first, *then* mark the pattern pieces on the wrong side. You can also mark, then underline. Up to you – I just think the former is easier! Don’t freak out if you accidentally snip your basting when you cut notches – it’s ok!

V1419 Sewalong: Prep
See? I did it too. No big deal!

Once you’ve finished underlining (or have skipped ahead), you will need to mark your pieces. It is very important to get every stitch line (for the welts and the button holes), dot and notch – it’ll make things muuuuch easier to match up when we start sewing. You may want to use wax tracing paper and a rotary wheel for the lines, and a marking pen (or tailor’s tacks) for the dots. Just snip the notches. We won’t judge you.

Ok, bias binding! This is the same method outlined on the Coletterie, btw – except you are starting with a parallelogram piece, and not creating one from a square (if that makes sense).

V1419 Sewalong: Prep
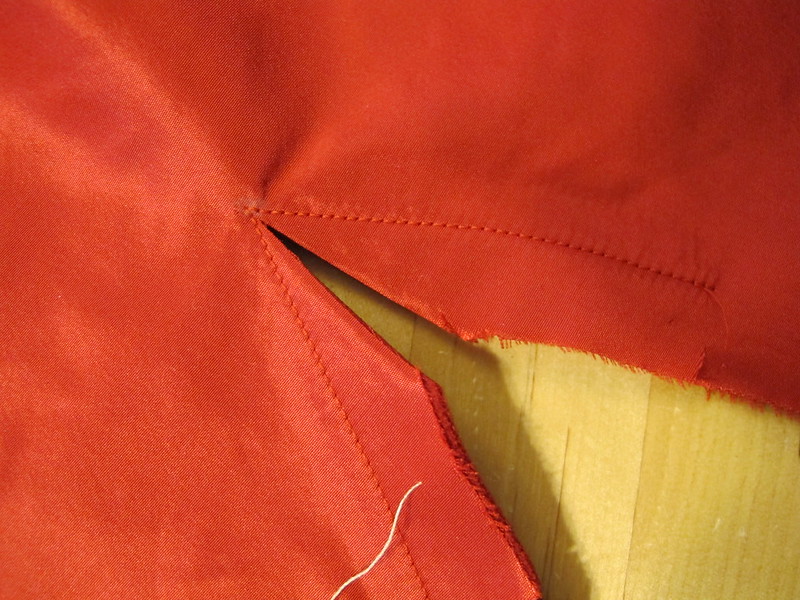
You should have 3 parallelograms with 2″ diagonal lines drawn on the wrong side of the fabric. Matching the notches and markings, pin the two angled edges together, right sides together, to form a strange off-center tube. The edges will not match at the ends.

V1419 Sewalong: Prep
Sew the seam you just pinned. I used 1/4″ because – well, that’s what I always use. I think this pattern was drafted for 5/8″ – even at the bias binding – and if you sew with that amount, you will need to trim it down to 1/4″ after sewing.

V1419 Sewalong: Prep
Press the seam open.

V1419 Sewalong: Prep
Starting at once end, begin cutting along the line you drew. You should end up with a looooong string of continuous bias. Do this for all 3 parallelograms.

V1419 Sewalong: Prep
Once you’ve finished cutting all your bias strips, fold them in half with the wrong sides together and press.
(I promise that big yellow spot on my ironing board cover is not pee. That’s actually what happens when you put your iron on top of a piece of tailor’s wax. Whoops.)

V1419 Sewalong: Prep
You should end up with a big pile of bias strips. Mine kind of look like intestines. Cool.

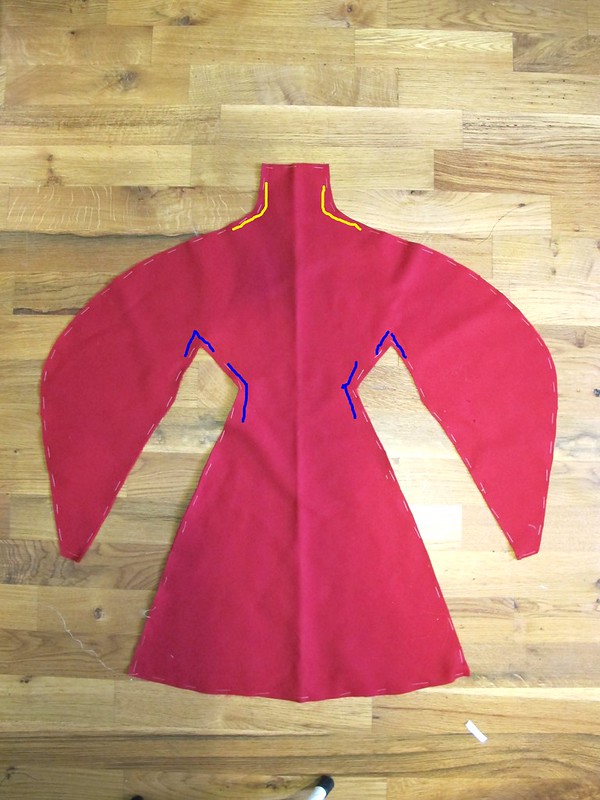
Finally, you will want to staystitch and reinforce your coat pieces as directed in the instructions (steps 1-3 & step 35). For both – use a slightly shorter stitch length (I use 2.0 vs my standard 2.5) and be sure to backstitch at both ends. For staystitching, sew 1/2″ away from the edge. For reinforcing, sew along the stitching line at 5/8″.

Here are the pieces you will be prepping. Lines marked in blue are reinforcement stitching, lines marked in yellow are staystitching.

V1419 Sewalong: Prep

V1419 Sewalong: Prep

V1419 Sewalong: Prep

ONCE LAST THING: Once you’ve reinforced all those tricky edges, you need to clip the seam allowances all the way to the dot.

V1419 Sewalong: Prep

V1419 Sewalong: Prep
Clip to the stitching line, but do not clip the stitching line. This will make it easier to sew those tricky sleeve seams.

And that’s it! Whew! Sorry for the post overload today. Oh, I almost forgot – here’s my fabric!

wool coating
These are the swatch cards I got from Mood. The wool coating I chose is piece piled on the very top (4th one down). It’s a nice, thick virgin wool coating.

taffeta underlining and contrast
I am using 2 different silk taffetas – the brighter red will be the underlining, and the darker red is the binding and contrast.

How are we doing this week, seawlongers? Any questions about the cutting or prep?

Completed: Simplicity 1425

22 Jul

Today’s outfit inspiration comes from a completely new realm for me – watercolor painting!

Eyelet Peplum Top & Thurlow Shorts made with Mood Fabrics

Remember that watercolor class that I signed up for earlier this summer? Well, here’s a shot of one of the paintings I did in my final class (no, it wasn’t a fashion illustration class, but the teacher was open to letting us paint whatever wanted – and she was tickled that I went with fashion illustration, ha!). I had some swatches from Mood Fabrics that I knew I wanted to turn into an outfit for my next MSN post, but the outfit inspiration didn’t come until my pen er, watercolor hit the paper 🙂

Eyelet Peplum Top & Thurlow Shorts made with Mood Fabrics

Let’s start at the top and work our way down! I used Simplicity 1425 for the pattern, and cut the most simple version (sleeveless, no yoke, no collar). I cut the size 4 and took a little in at the waist, as well as made my normal gaping-upper-back alteration that seems to be a running theme for me when it comes to sewing Simplicity patterns.

Eyelet Peplum Top & Thurlow Shorts made with Mood Fabrics

My fabric is this beautiful white cotton eyelet from Mood fabrics, which I underlined with this bright white cotton batiste (also from Mood Fabrics), for modesty and some opacity. It’s still a little on the sheer side – as in, I have to watch what color undergarments I’m wearing! – but the two fabrics together make such a fun light and airy top.

Also, I just noticed that there is a fly on my boob in this picture (at least, I’m pretty sure it’s that fly that was buzzing around). Gross.

Eyelet Peplum Top & Thurlow Shorts made with Mood Fabrics

Sewing was very simple and straightfoward – not to mention fast! Seriously did all this (minus the initial muslin) in the space of a Saturday afternoon. Not too bad! I underlined all the pieces by hand with silk thread (it’s not totally necessary to use silk thread, but it does make it easier to pull out the basting when you attach the seams – which, if you’re as anal-retentive as I am about sewing, you will totally appreciate that, ha!) and I used a 70/10 Microtex needle to prevent puckering, since the fabric is so lightweight. Most of the inside seams are serged, although I did finish the armholes and neckline with bias facing (cut from the same batiste). I can’t really speak for the instructions on this pattern as I didn’t use them at all, but the overall finished top is pretty nice!

Eyelet Peplum Top & Thurlow Shorts made with Mood Fabrics

For an extra lil’ punch, I stuck an exposed separating zip right up the center back. Kind of toughens up the overall sweetness of the eyelet, yeah? 🙂 This pattern was actually written for there to be buttons down the back – which is a cute idea in theory, but they only called for 3. THREE. How that doesn’t look like a fucking hot mess when you’re wearing the top and moving around is beyond me. I imagine that would gape a lot! So I swapped out my buttons for a fun zipper and I’m loving the way it turned out.

Eyelet Peplum Top & Thurlow Shorts made with Mood Fabrics

Getting the zipper in was kind of an adventure in itself. I tried googling around for directions on inserting an exposed zipper (I mean, I had a vague idea of how to do it, but I always like to check and see if my technique is right first), but everything I was pulling up was for close-ended zippers. Since my zip is separating (you know, so I can get the top off and on without destroying something in pure rage during the process), those particular tutorials were kind of a moot point. In the end, I kind of winged it, but I think it worked out!

Eyelet Peplum Top & Thurlow Shorts made with Mood Fabrics

As far as the style of the top – well, I like it. I know it’s super trendy- especially with the dang exposed zipper! – but I’m ok with being trendy. I think peplum tops are super cute and the white eyelet will go with lots in my summer wardrobe. Plus, I can tuck that peplum into high-waisted skirts, so it’s like two tops in one! Woohoo!

Eyelet Peplum Top & Thurlow Shorts made with Mood Fabrics

Eyelet Peplum Top & Thurlow Shorts made with Mood Fabrics

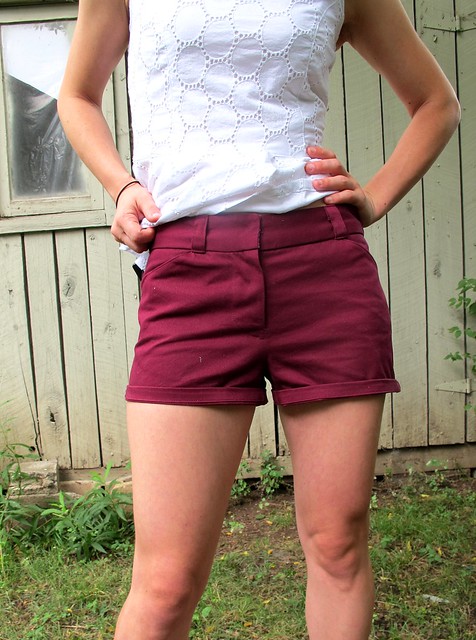
Now for the shorts! I used my beloved Sewaholic Thurlow pattern, matched up with my other beloved plum organic cotton twill from Mood Fabrics. My love affair with that organic cotton twill should be well known at this point, I hope. That stuff is amazing. Soft and cottony with a bright, saturated color… a dream to sew, and a dream to wear. I’ve made so much with this particular fabric in different colorways – including moreeee Thurlows! – and I’m sorry y’all have to see it again. Just kidding, I’m not sorry! These shorts rule! Get you some of that organic cotton twill, you won’t regret it!

Eyelet Peplum Top & Thurlow Shorts made with Mood Fabrics

I don’t really know how much more I can talk about these shorts until y’all tell me to shut up. I’ve seriously made them so many times, it’s kind of like autopilot at this point. I found that I did have to take quite a bit of excess out of the legs this go-round… I think I might be getting too un-curvy to wear this particular pattern 😦 I’m already at the smallest size, so it’s not like I can size down. I’m hoping my adjustments will work for future Thurlow shorts, but I’m kind of afraid to try the pants at this point since there is soo much that needs to be changed now, ugh. I reckon I could find another pants patterns to sub out, but wah! I want to keep making Thurlows forever!

Eyelet Peplum Top & Thurlow Shorts made with Mood Fabrics

Anyway, fitting issues aside, these shorts were a delight to put together. I played around with the topstitching on this pair and I really love how the it looks so gorgeous and crisp against this fabric. I tried topstitching around the welts this time – something I’ve seen in RTW and always wanted to try – and I think it looks pretty nice!

Eyelet Peplum Top & Thurlow Shorts made with Mood Fabrics

Oh, and check out that fun lining! Yeah girl! That comes courtesy of this crazy/awesome psychedelic cotton voile print, which is unfortuanately sold out now (but take a look at the other cotton voiles from Mood Fabrics. Sweet!). I love putting crazy prints in my pants because, dude, why not? Business in the front, party on the inside. Or something like that!

Since we’re on a roll with all these detail shots, here are some of the top:

Eyelet Peplum Top & Thurlow Shorts made with Mood Fabrics

I took waaay too many pictures, but there was so much detail to capture! Sorry bout that!

So I guess the next question is – does she have that outfit from the fashion illustration?

Eyelet Peplum Top & Thurlow Shorts made with Mood Fabrics

Fuck yeah I do! Ok, maybe not so much the shoes, but I’ve got the purse! Ha! This shit’s from Kate Spade – I bought it after I was having a really rough week (retail therapy totally works, y’all.). It was on sale, but it is still also the most expensive purse I’ve ever bought – and it’s totally worth it! I knew I couldn’t find that lemon fabric anywhere, so I justified it with the purse hahah 🙂

Eyelet Peplum Top & Thurlow Shorts made with Mood Fabrics

Just for fun, here I am trying to strike a pose like my fashion illustration. Hmm… probably should stick to painting, not posing! 🙂

Sewing the Robson Trench Coat

22 Apr

Spoiler: There are no finished projects in this post, sry2say! I’ve been working on this coat for the past week, and I thought it might be beneficial to show some progress photos as well as share some tips 🙂

Anyway, let’s get down to business. Have y’all seen the newest addition to Sewaholic patterns – Robson Coat?! AHHH. I’m on Tasia’s pattern tester email list, and every time she sends out an email for testing, I’m almost always too busy with current projects/too poor to buy fabric (as was this case) so I have to pass… and I always think, “Man, I’m going to regret passing on this.” Sure enough, when the official announcement came out, I considered punching myself in the face out of frustration, because, FUCK. That coat is awesome and I need one, weather be dammed.

What really sealed the deal for me was getting an eyeful of Novita’s lace version. It’s just jaw-droppingly beautiful, and I immediately wanted to be a shameless copycat and make my own version (of course I asked first ;)).

This is the lace I am using for my coat:
Robson Progress - lace fabric
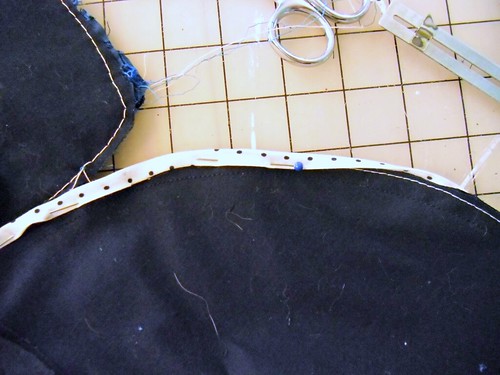
It’s from Mood, of course, and I think I bought the last of the bolt in the store so you can’t have it nyah nyah nyah 😉 It’s labeled an outwear fabric, and it’s nice and weighty for a trench coat. At $20 a yard, it was definitely a splurge (and remember – I had to buy underlining, bias binding, buttons, thread, interfacing, all that fun stuff!), but I recalled Novita saying she only used 4m to make hers, so I ordered 4 yards and it was just enough. Yay! The lace is underlined with navy cotton sateen, and the bias binding is made with white/navy polka dot cotton batiste.

I’m not going to sugarcoat – this jacket requires quite a bit of stamina to make, as it takes a loong time. I spent at least 8 hours just prepping the dang thing, before I even got to sewing! Cutting the fabric pieces (twice, since they are underlined), making my own bias binding (because I clearly don’t have enough to do as it is), attaching the interfacing, basting the underlined pieces together, marking the notches, etc etc. I chose to do all this before I started sewing, just to get it out of the way.

Robson Progress - fusing interfacing

My garment press made fusing interfacing fun! I just stuck the pieces in the press, sprayed them with water, and set a timer on my phone for 30 seconds. After 30 seconds, I flipped the pieces, sprayed them again, and fused for another 30 seconds. Since the press doesn’t require you to stand over it and hold it down (like an iron), I could get other things done in the meantime…

Robson Progress - thread

Such as prepping my thread and winding bobbins. My bobbin winder is amazing and self-motorized (no holding down the pedal!), so I was actually winding bobbins, fusing interfacing, AND dicking around on Instagram at the same time! GLORY.

Since my coat has several different colors going on, I am using three different thread colors. Part of what is making this take so long is that I have to keep changing out the thread with practically every step!

Robson Progress

Deciding on how I would handle the underlining took a lot of thought. Since my lace is see-through and the inside of the coat is not lined, I had to take that into consideration when it came to fusing the (BRIGHT WHITE) interfacing to my pieces. Thankfully, all the interfaced pieces do require a facing on the opposite side, so I simply fused my underlining to the wrong side of my cotton sateen.

Robson Progress - underlining

Then I stacked the lace on the sateen and basted the pieces together – all 30+ of them (yeah, there are a LOT of pieces in this pattern!). THAT PART TOOK FOREVER AND EVER AND EVER. Thankfully, I was able to get them machine-basted, which definitely sped up the process – I think I would have cried if I had to hand-baste all that!

More info on underlining can be found in this blog post, fyi!

Robson Progress - test button hole

I also had to consider how my button holes would look on the lace. Fortunately, my machine makes pretty awesome button holes, so combined with my new button hole cutter, I think they look pretty profesh, yeah?

I was planning to do a whole series of posts on this coat – but honestly, once I started sewing (like, actually sewing, and not prep :B), it’s pretty fast and straight forward! There isn’t a lot to elaborate on as far as the instructions are concerned. I did want to share a how I dealt with the binding, though – the instructions just have you fold the binding in half and wrap around the edges of the seam allowance (as like this), which is fine when you’re working with a lighter weight fabric – but not two thicker fabrics sewn together! I actually tried to bind a seam as per the instructions, and then laughed for about 20 minutes when I saw how ugly and sad it turned out!

So here’s my advice to you~ for those bound seams-

Robson Progress - trimming seam allowances

First, pull your seam allowances apart (you will need to remove the basting stitches holding the layers together) and trim down the shell fabric to 1/4″. This will greatly reduce the bulk of your seams, making it easier to wrap the bias binding around the remaining seam allowances.

Robson Progress - trimmed seam allowances

Here is the seam with the shell fabric (blue lace) trimmed down. You may also want to trim down your underlining at this point – not too much, just enough to get the edges even if they aren’t already. As a sidenote, sorry about all the thread/cat hair. Apparently, cotton sateen is a magnet for EVERYTHING. Who woulda thought?

Robson Progress - bias binding

Open one side of your bias tape and pin it to the seam allowances, right sides together with raw edges matching.

Robson Progress - bias binding

Sew the bias tape to the seam allowances – try to get your stitching line right along the opened fold. I use a long basting stitch for this step; it’s really just to keep things in place while you top stitch.

Robson Progress - bias binding

When you flip the binding to the other side, it should naturally fall into place.

Robson Progress - bias binding

Top stitch with a matching thread. See how nice that looks? It’s an extra step for sure, but totally worth it in my opinion. With a thicker fabric, it can be hard to get that tiny bias tape folded around the edge with an even stitch and both sides caught in the fold. I’d rather take my time and get things done right the first time, rather than try to take short-cuts that result in a personal one-on-one with my seam ripper 🙂

Robson Progress - grading seams

Another tip if you’re sewing the Robson is to be sure to aggressively grade those seam allowances by the collar, because they can get real thick real fast.

Robson Progress

I have the body mostly done at this point and it’s become quite a beast to wrangle under the sewing machine. I’ve taken to pulling my top drawer out and using it as a tabletop for the bulk of the coat.

fucking cat
fucking cat

Since all the interior seams are finished with binding, I haven’t needed my serger at all for this project – so I took the opportunity to take it in for it’s yearly cleaning/maintenance. As you can see, Amelia is pissed that she has to share her ~window seat~ with that dumb ol’ machine.

Anyway, it’s look great so far-

Robson Progress
Robson Progress

I love how nicely that collar rolls! Just beautiful!

I plan to have this finished within the next week or so. Since it’s for the Mood Sewing Network, The Big Reveal won’t be until May – sorry! I’m such a tease.

Underlining: The Why & How

15 Jun

I’m currently working on the madness that is Simplicity 1803 (seriously thinking about calling this dress The Disaster Dress, if that means anything) and I thought I would share a few of my trials & tribulations with y’all. I’ve had a lot of comments requesting a tutorial for underlining (or even just asking wtf underlining is exactly), and while I haven’t been able to fulfill those requests in the past – but today is your lucky day! Underlining day, yaay!

First up, let’s talk shop. What exactly is underlining? Some people tend to confuse it with lining; this is incorrect. Lining is a duplicate garment that hangs separately inside your dress (or skirt, or pants, or whatever) that covers all seams for a nice clean finish. It is constructed separately and generally only attached by a few seams – perhaps a neckline, or the waistband of your skirt. The hem usually left free-hanging for ease for movement. Consider lining the inception of sewing – a garment within a garment (see what I did there?).

Underlining is when you sew two pieces of fabric together & treat them like a single piece – kind of like some relationships (ahhh I’m on a roll today here). Since the underlining is actually sewn to the back of your fashion fabric, the seams do show & the inside of the garment doesn’t necessarily have that clean finish.

Underlining is wonderful for a variety of reasons – you can use it to stabilize your fashion fabric to give it a bit more body (like with my Bombshell dress), to add a layer of opacity to an otherwise sheer fabric (my Swiss Dot Violet really benefited from a batiste underlining), to add a layer of warmth to a coat (the lining of my Lady Grey is underlined with cotton flannel), or even to brighten up your fashion fabric a notch (look at the difference underlining made on my Gingham Peony!) If you were concerned about the integrity of a delicate fabric – lace, or vintage, or… I dunno, vintage lace – you could underline every piece for additional strength. Underlining has lots of uses, it’s awesome!

For my dress in question, I am using this pretty black eyelet from Mood. The whole thing is quite see-through so I knew ahead of time that it would going to need some kind of backing to keep certain places under cover. I originally planned on just dropping a whole lining in the thing & calling it a day, until I realized that you would see every single seam through the eyelet – and by every single seam, I mean eyelet seams & lining seams. I’m using Bemberg Rayon here (LOVE!!!!!) and that stuff frays like nobodies business. I started imagining little shreds of turquoise popping out all over the place & it gave me the willies.

So I decided to underline instead. An added bonus is that it totally negates the two issues I was having with the individual fabrics – the Bemberg was sliding all over the place, and my sewing machine was throwing a giant fucking fit every time I tried to sew over the textured eyelet. By sewing the two fabrics together, the Bemberg stays put & provides a layer over the eyelet that keeps the needle from freaking out. Yeah!

This process is pretty easy. I’m almost embarrassed to even post this.

1
Cut each pattern piece from both your fashion fabric & preferred underlining fabric (as I mentioned here, I’m using Bemberg Rayon – which is traditionally a lining fabric, but it’s main job for this dress is opacity). The pieces should be mirror images of each other. I like to go ahead & snip all my notches, it makes things easier to match up. Don’t worry about your pattern markings (the kind you use chalk or tailor tacks or whatever for) just yet.

2
Place the underlining on the wrong side of the fashion fabric. If your underlining has a right side, make sure it is facing the wrong side of the fashion fabric (so when you flip the whole thing over, both right sides should be facing up). Pin everything together – I used these tiny silk pins because my lining shows pin holes.

3
Then you just sew the lining to the fabric! Here are some tips:
– Yes, you can sew it by machine. I chose to sew by hand because the rayon is super slippery & I wanted it to shift as little as possible. It also makes ripping the basting stitches out MUCH easier. If you sew by hand, you want to keep things as flat as possible – sit at a table! It’s very mindless work, so feel free to watch a movie (or two!).
– Sew giant basting stitches using one strand of thread. Pick something contrasting so it’s easier to pull out the stitches after you sew the seams. I used orange thread; I thought it was pretty haha.
– Try to stay well within your seam allowance – you can see that mine is less than 1/4″ from the edge. I think this makes it easier to pull out the stitches (it’s not anywhere near the 5/8″ SA, so I’m not actually sewing over the basting with my machine) and it hides any pin-marks that may get left behind on delicate fabrics.
– You may also notice that I did not sew along the bottom edge of the piece. Call me lazy, idgaf. The basting for underlining is really there to hold the pieces together until they are properly sewn. I’ve found that I can usually get away with omitting the bottom hem & any seams that extremely short (such as the point between the princess seam & the armscye). Play around & see what works for you!

BONUS TIP:
Next project involves eyelet... And a ridic amount of underlining, ugh
(sorry about the crappy Instagram picture!)
For super precise darts, thread trace the dart legs through both layers after you have basted the pieces together. This keeps the fabrics together while you sew the dart, and eliminates any weird bubbling that may otherwise happen.

4
Here is the other side of my underlined piece. Cute!

Now that you’ve got your pieces all basted together, you can treat them like one piece of fabric. You can transfer your fabric markings to the underlining side of the fabric so it doesn’t show on the front. Sew as you normally would, and make sure to pull out your basting threads as you sew each seam.

Here is how my bodice is looking as of this morning
5
Since this is an underlining, and not a proper lining, you will still have to finish your seams & deal with facings. My seams are serged; my facing is a simple cotton broadcloth as the eyelet was too bulky.

7
I love the subtle peek of turquoise 😀

6
I am including this picture because it looks like a uterus, and that is funny to me.

So that’s it! Hopefully this brings a light to some of the mystique 🙂 As always, let me know if you have any questions!