
Now HERE’S an obvious gap in my summer wardrobe that’s finally been filled! A knit tank dress!
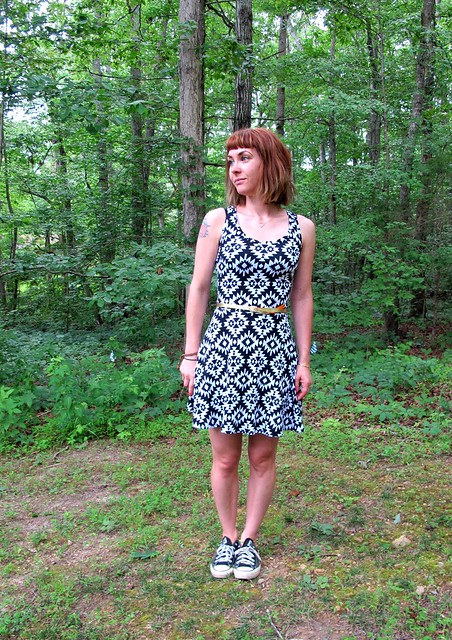
I think we can all agree that wearing knit dresses is the ultimate in comfort/secret pajamas. Especially when it’s nasty hot outside!! I looove my knit dresses in every season, but most of them have sleeves and I don’t like wearing sleeves when it’s more than 95 degrees outside. No way.
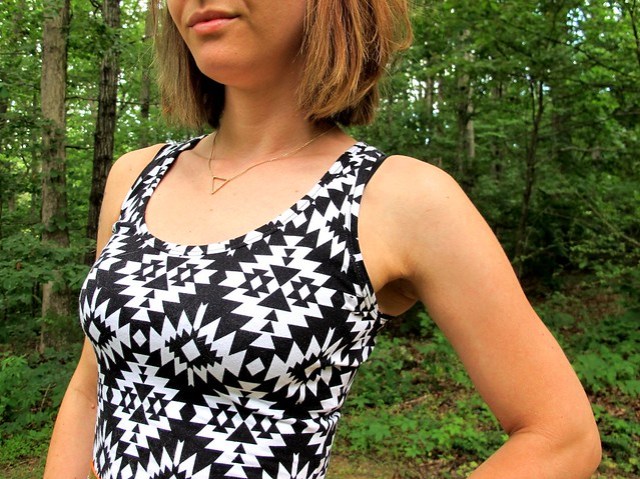
Since I wasn’t seeing a pattern that fit the look I was going for (and I’ll be honest – I didn’t search very hard. I have a LOT of patterns in my stash and I’d rather mash ’em up whenever possible), I used 2 patterns from my stash to create this awesome mash-up Frankenpattern. Most of this pattern – the skirt, the bodice sizing and proportions – were taken from the Lady Skater dress pattern, which is my favorite knit dress pattern ever and is basically the gift that keeps on giving. For the neckline and arm hole finagling, I copied that straight from the Mission Maxi dress pattern. The result you see here is a fitted racerback tank top with a flared skirt attached to it. Which is exactly the look I was going for. Whew.
I am all about some Frankenpattern magic, and it’s 1000x easier when you’re working with a knit fabric. Much easier to tweak with the fit, and much more forgiving if you decide to forgo a muslin (like I did. Yay! Consider this my wearable muslin, ha). Plus, if you already have a garment that fits the way you like – in my case, the bodice of this skater dress is ACE – then it’s super easy to change up the neckline/sleeve options/skirt and have a totally different garment that still fits the way you like. I love buying new patterns, but I REALLY love knocking out projects that don’t require too much fit futzing. The only fitting I had to do with this dress was take a little bit out of the underarm side seam – maybe 1/4″ on each side. Since there aren’t sleeves there, the sides need to be a little more fitted so they don’t pooch out.
I guess the one downside to this is that you don’t have a set of instructions that are tailored to your garment – but that’s never been a problem for me, as I just kind of pick and choose what techniques to use from which pattern (or I ignore the instructions completely and forge my own method). Again, this dress is a knit, so it’s pretty straight forward. I stabilized the waistline with 1/4″ woven elastic, which keeps it from sagging over the course of the day (truth: these photos were taken on day #2 of wearing this dress. Pretty good recovery there, I’d say!). The neckline and arm holes are finished with the same method outlined in the Mission Maxi instructions – it’s similar to applying bias facing, but you’re not pressing that last 1/4″ under. Instead, you just finish the edge and topstitch it down. Here’s a photo of the guts so you can see –
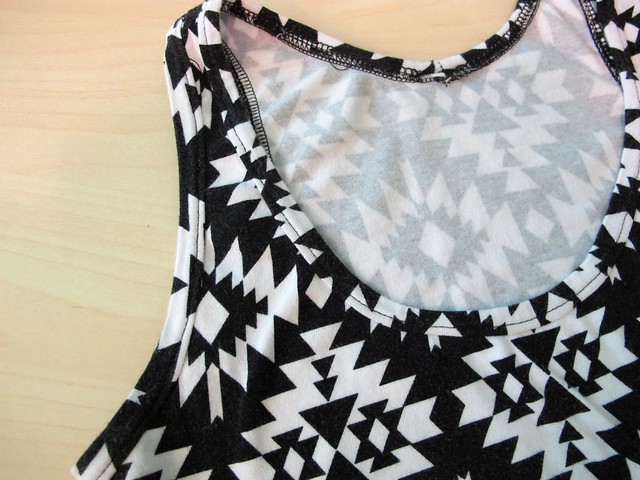
Clear as mud, yeah? 🙂 It resembles a coverstitch, sort of. More like a binding and less like the knit bands that are used on the Lady Skater (and it feels a bit sturdier, which made me feel ok about not stabilizing the shoulder seams). Oh, and I did all my topstitching with a straight stitch/single needle (on my regular sewing machine). A twin needle or zigzag would be fine for this, but I like the way the single needle looks. Since this isn’t an area that gets a lot of stretch, it’s ok to use a stable stitch here. I also did the same with the hem – just sewn with a straight stitch. Again, as long as it doesn’t need to stretch, it’s fine to use a non-stretch stitch!
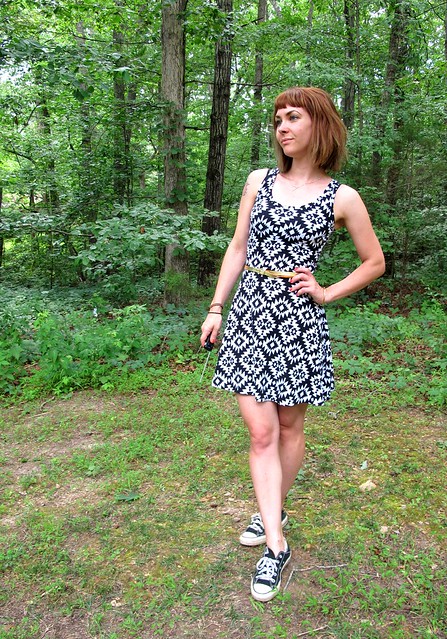
The cotton knit fabric is from Mood Fabrics in NYC, which I bought at the store while I was there in March. I wasn’t sure what I was going to make with it (honestly, I was probably thinking Lady Skater at the time), but I was prettttty happy to use it for this dress! I didn’t bother to match the print – it’s a casual dress, and meh – and I think it looks fine.
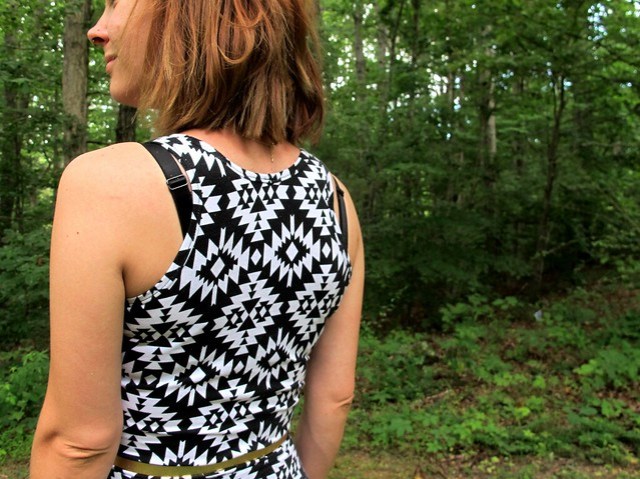
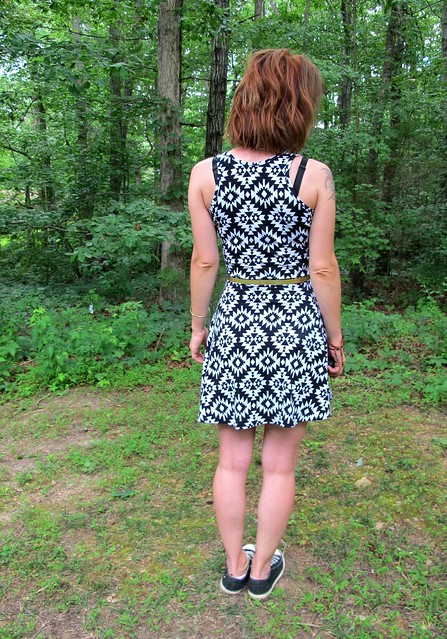
Here’s the back, again! I like the shape of this racerback because it’s a bit more covered than your standard beater tank. Of course, my bra straps still show – again, meh, whatever. I didn’t bother hiding them for this post, mostly because I don’t hide them in real life and I’m just tryin’ to kEeP iT rEaL~

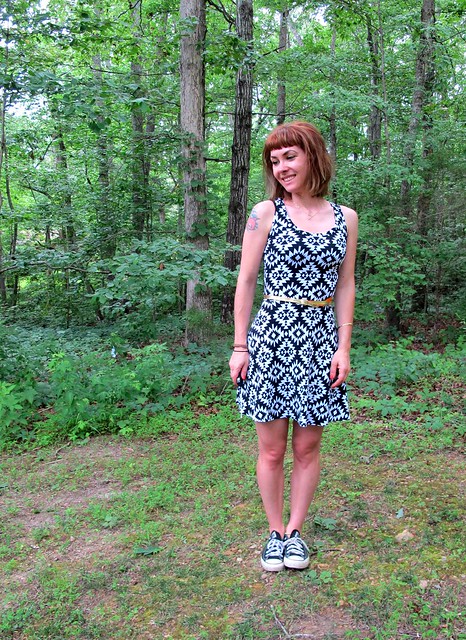
Conclusion: this dress was easy to make, is comfortable to wear, and SECRET PAJAMAS. Expect to see more of these as I churn them out.

One last thing! I wanted to direct your attention to my newest sponsor – Wawak Sewing! Unfamiliar with Wawak Sewing? They’re a giant sewing supply company – offering everything you need for your sewing studio, from Gutermann thread (Mara 100 is the jam – 1000+ yards for $2.50, oh yes oh yes) to invisible zippers (24″ for 88¢? Don’t mind if I do) to professional boiler irons (ok, that’s probably waaay too much iron for the average home seamstress, but we use these at the studio – as well as when I worked at Muna Couture – and they are seriously incredible) to hymo canvas (for tailoring! I always get my hymo/horsehair interfacing from here because the price is unreal). A lot of the items can be bought in bulk, and the price is pennies on the dollar for what you’d pay at a brick & mortar store (I’m not just talking about cheaper than Joann’s – some of this stuff is cheaper than places in the Garment District, but you get the same quality). Plus, shipping is less than $5 (and free if you buy more than $100 worth of stuff)! I highly recommend you get a free catalog because it’s really fun to flip through – like the Toys’R’Us catalog, except for grown-ups 🙂 They occasionally have sales and discounts, so it’s worth it to be on their mailing list! International peeps – you can also join this sewing party, but you’ll need to call or email to place your order (and I’m going to assume your shipping might be a little more than $5, ha).
I’ve been a loyal customer/rabid fan of Wawak Sewing for years – I started with them back when they were still Atlanta Thread Company – and I’ve had nothing but great experiences with both the service and the products. So I’m pretty thrilled to have them on board as a sponsor, as well as to join their affiliate program (sooo any purchase you make after clicking these links is gonna net me a small commission, fyi!). And you should be thrilled, too, because right now through 9/30/15, you can get 10% off your order of $50 or more at Wawak Sewing if you use the code WLB915. Can’t beat that with a stick! Thanks, Wawak Sewing! ♥


Would you please consider writing about how to combine patterns? I have had difficulty changing necklines, armholes, and the biggie is changing up the skirt in terms of shape of bottom of bodice and top of skirt (and how that affects the hemline)? I hope that made sense.
Hm, possibly! It’s honestly pretty easy. You want to start with patterns that have similar measurements at key points (such as the waistline, for example – an inch or less off is ok, but anything more than that will require some finagling). For the necklines and armholes, I just lay the patterns over top of one another, match the shoulders, and then trace the new neckline and armholes on the different bodice. I’ve never had a problem with the hemline when changing out a skirt; I just sew it on and it generally turns out fine haha.
I should also add – this is a LOT easier with knits, since the stretch is so forgiving. I’d start with that before getting into wovens, since from there you have to start messing with darts and really paying attention to seam allowances.
Dress looks great – a perfect fit and so flattering! That’s the other reason I like knit dresses so much, they just seem to hang on my body so perfectly.
Thank you! I agree, knit dresses hang really nicely. Can’t beat that, especially when combined with the comfort factor!
Awesome fit and great summer dress! Have both patterns so I’m ready and eager to try duplicating your success. Two questions:
1. Your Lady Skater skirt appears to be less full than other I’ve seen and I’d love to use your version. Can you tell me how you modified the original?
2. Do you have a ballpark estimate of 55″ wide knit fabric needed for the Ladybird Mission Skater?
Thanks as always for your clear and spicy explanations. Good information for us less experienced, more timid sewists, and entertaining to boot.
I’m not sure why my skirt looks less full than others, because I didn’t do any modifications to the pattern (other than removing length – which should actually make it more flared). It’s sewn up as-is! As far as how much fabric I needed, I can’t recall precisely but I believeeee I bought either 1.5 yards or 2 yards of this fabric originally, and I used all of it. Again, I shortened the skirt by about 2″ so that also plays into it. I’d guess that 2 yards would be more than enough though!
Adorable dress and thanks for the sponsor shout info. I’ll have to check them out. I buy my stuff in the LA garment district but the amount I spend on gas to get there quickly adds up!
Oh yeah, I hear ya on that! Plus, it’s sooo nice to have shit delivered straight to your door – no having to deal with traffic or, well, putting on pants 🙂 haha!
I was starting to wonder if sometimes you just said fuck off to pattern matching… And yes you do! You’re human after all, yay! *relief*
For the bra situation, I love bras with detachable straps (at least on one end of the strap) so you can just cross them when you happen to wear a racer back, and uncross them the rest of the time.
I really only pattern match if it involves stripes or plaids (and in the past, ikat, although I’ve decided that it’s not worth the effort haha). Sometimes you just gotta live and let live! 🙂
Good tip on the bras! I don’t buy bras anymore, but it might be a good idea to keep an eye out for a pattern that has the option to make removable straps.
Lovely work. I like it paired with the metallic belt – dresses up your “pjs” a bit. And thanks for the detail pix on the neckline.
Thank you! I’m glad you like it 😀
Love the look of the frankenpattern! I am crazy about knit dresses in the summer but it’s hard to find cute patterns for the really freaking hot days. Will keep these in mind!
Knit dresses are the BEST for summer – oh, who am I kidding, they’re awesome year-round 🙂 haha!
Knit dresses are so great to wear in the summer! That fabric is to die for. Nice job merging those two patterns. Love the technique on the neck as well.
Thank you! I can’t take credit for the neck finish, though – that’s part of the instructions for the Mission Maxi. That was the first time I’ve used it and I’m really pleased with how nice it turned out 😀
Dress is a great shape 👍 and that print is fab
Thank you!
Awesome sauce!
😀 😀 😀
Your dress is awesome and you look great in it. Thank you for the details for combining patterns, I found it very helpful. I love Wawak as well and will using your code and link through, thank you for that information. Bra straps showing don’t bother me for the most part, but there are times when I’m out of the house that I would rather not have them showing. I have considered making a racer back bra but it seems uncomfortable, have you tried this and/or what are your thoughts on this?
I have always found racerback bras to be weird-fitting and uncomfortable, so I’ve never considered making one. That’s not to say that I wouldn’t – if I found the right pattern, I might give it a try. But honestly, I’d rather make a strapless because they have SO many more uses in my wardrobe. I will eventually get to strapless point, I just need to find a good pattern! 🙂
I love your dress! I am currently planning to turn the briar tshirt into a dress, and I was wondering…how exactly do you stabilise the waist with elastic? Just attach the skirt and then sew the elastic to the seam allowance while stretching slightly? Thanks!
I sew the elastic along the seam allowance of the bottom of the bodice (so the middle of the elastic is in the middle of the seam allowance) when the front and back pieces are still flat. Don’t stretch the elastic at all, just sew it with a 1:1 ratio (a fitted waistline will stretch the elastic for you once you’re actually wearing it). Then when you get to the point of attaching your skirt, just sew it on the bodice as normal. Hope that helps 🙂
It really does, thankyou!
I have two tank lady skaters. I followed a tutorial on the Kitschy Coo blog for making it sleeveless. I made one up in a stable double knit, which I prob should have sized up on, as it ends of feeling like shape wear, and one out of a rayon knit. I have been thinking about scooping out the back more to make a racerback one, and now I think you gave me the extra push to go for it.
I know I’m way late to the party here, but regarding the Mara 100 thread, is that considered a “mini cone?” And does it require a thread stand to use with any old domestic machine?
I’ve never called it a mini cone, but I just googled it and yeah, that’s the Mara 100. Either a teensy cone or a really big spool:) Whether or not it requires a thread stand is entirely dependent on your machine – my Pfaff 7570 can hold the mini cone fine, but my Bernina 350 needs a thread stand. I bought my thread stand at the local Bernina shop for around $13, and it has a nice cast iron base so it doesn’t bounce around. Alternately, you could also put the spool in a coffee cup as a kind of makeshift thread stand (I’ve seen people do this, but I haven’t personally tried it myself!). But your machine might not even need a thread stand! Just depends on how long the thread holder stick spool thingie is 🙂 haha