Tag Archives: McCalls 6887

Completed: OAL2015 (M6887 dress + Vianne sweater)

31 Jul

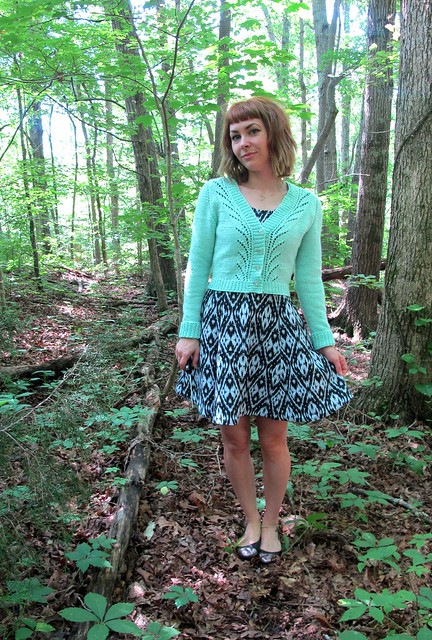
MY GOD, you guys. I am so happy I got this finished in time for the OAL deadline! I’ve had the dress finished for a couple of weeks now, but I worried about that sweater as the time drew closer! I ended up needing to take a couple marathon days in order to finish, but I did finish! And now I’ve got an outfit to show y’all!

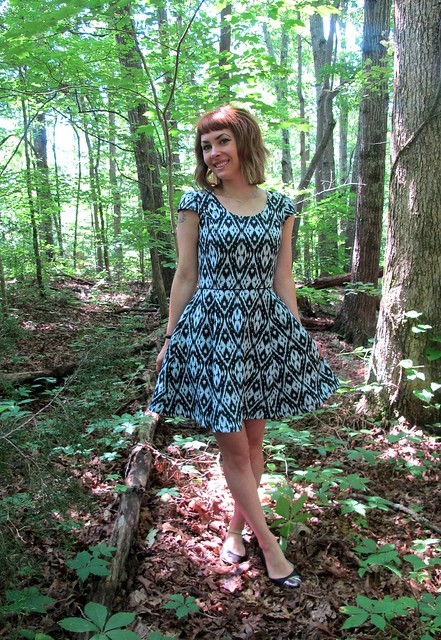
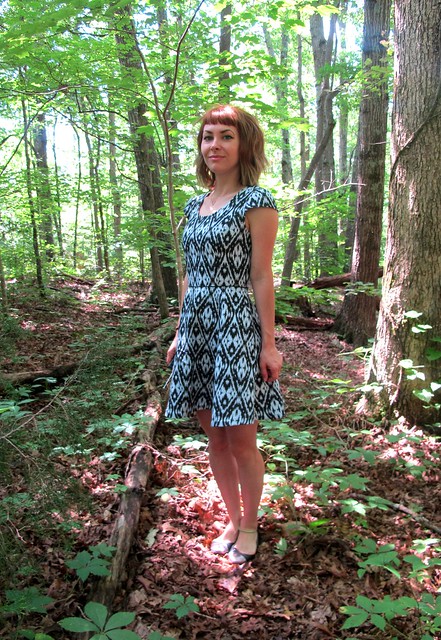
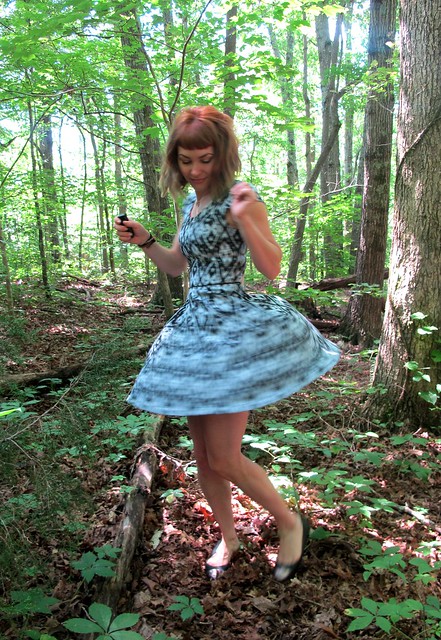
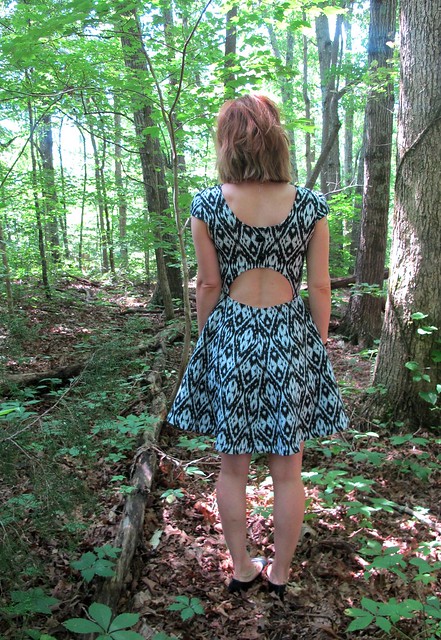
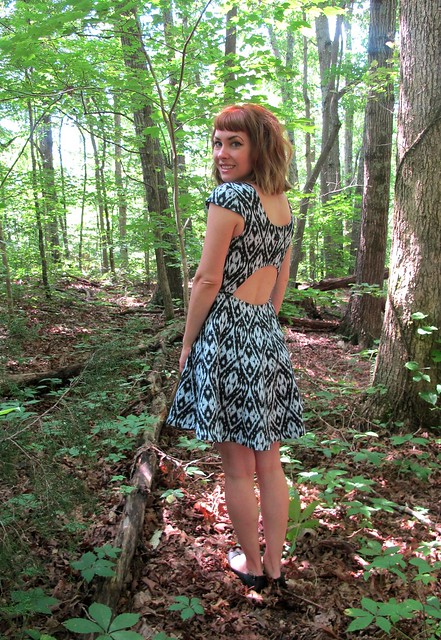
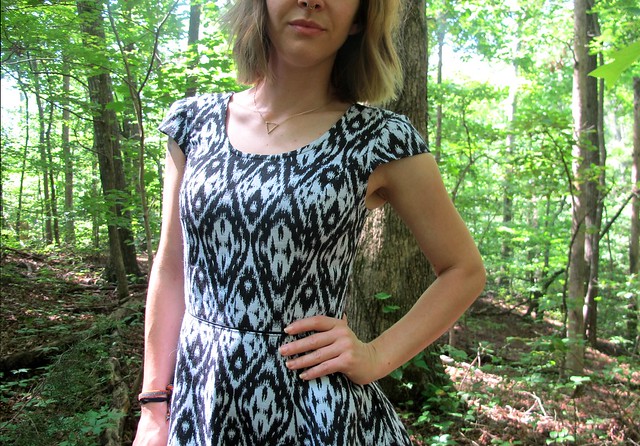
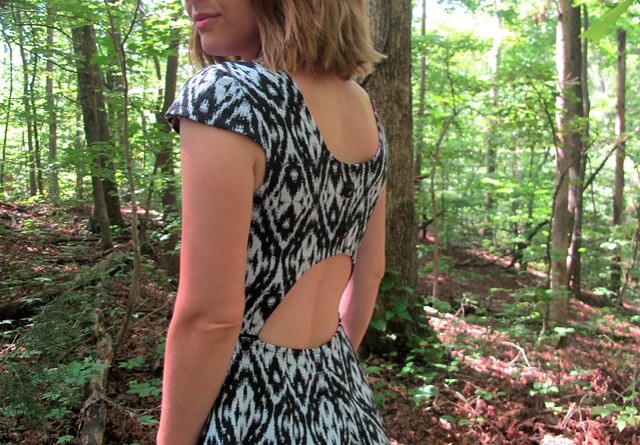
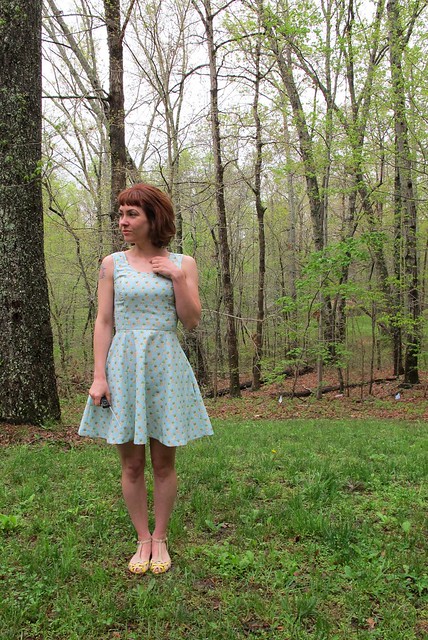
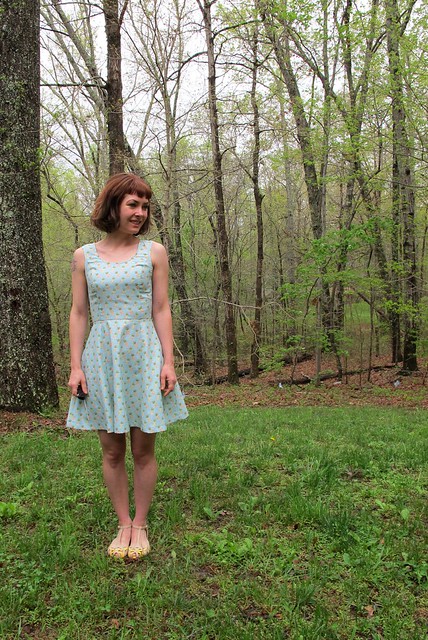
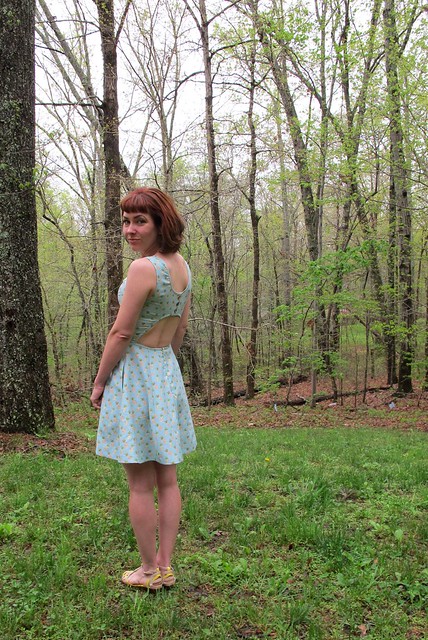
OAL2015 - M6887I’ll start with the dress. Again, this is McCall’s 6887, which I used cotton ikat fabric from Mood Fabrics to make it up with (this isn’t a Mood Fabrics allowances fabric; I bought this on my own dime while I was in NY last year). I used the version with the back cut-out, as well as the cap sleeves, omitted the lining in favor of bias facing, and added pockets. I’m not going to go into detail about the construction, since there’s a whole series of blog posts on the making of this dress! You can see them all here:

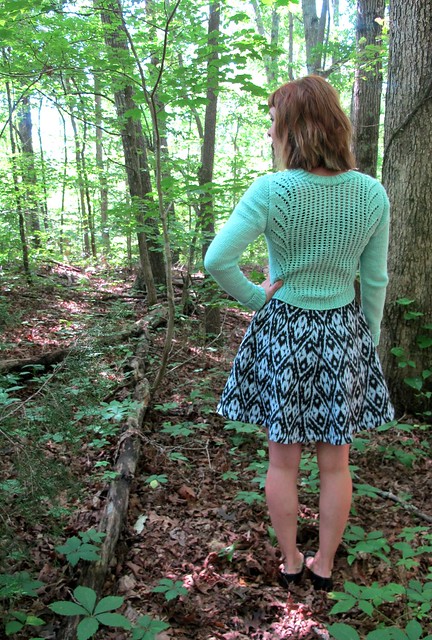
We are just gonna look at pictures instead. Btw, I walked through a lot of spiderwebs to take these. Appreciate me, dammit. OAL2015 - M6887

OAL2015 - M6887OAL2015 - M6887

OAL2015 - M6887OAL2015 - M6887

OAL2015 - M6887Now for the sweater part! OAL2015 - Vianne

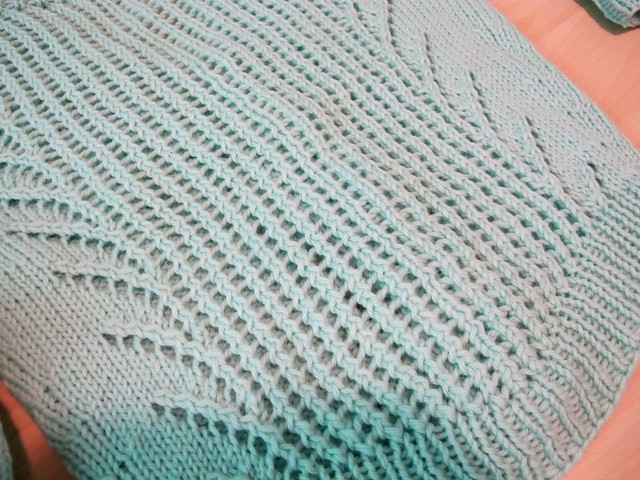
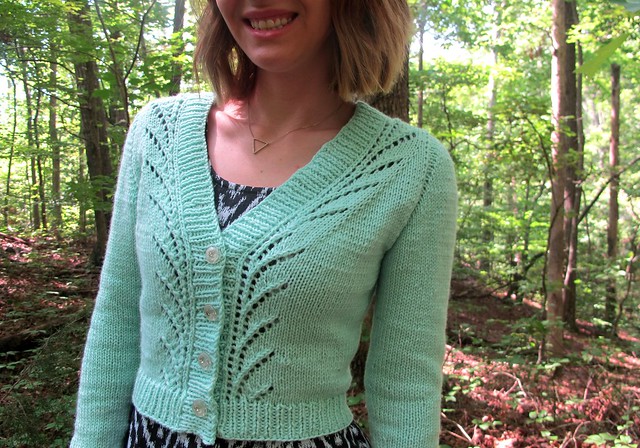
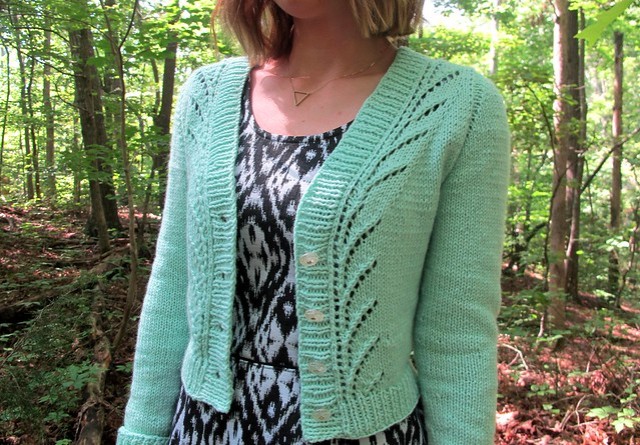
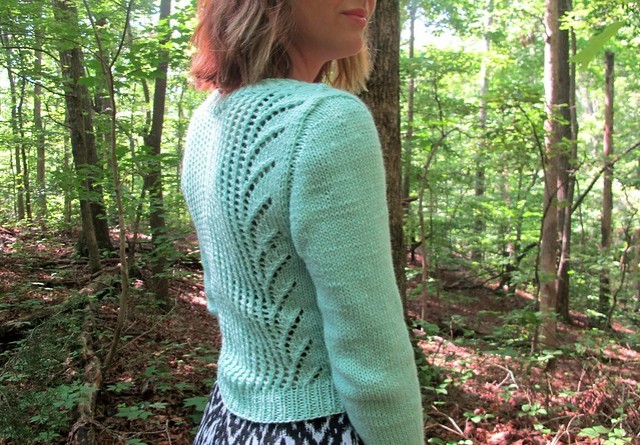
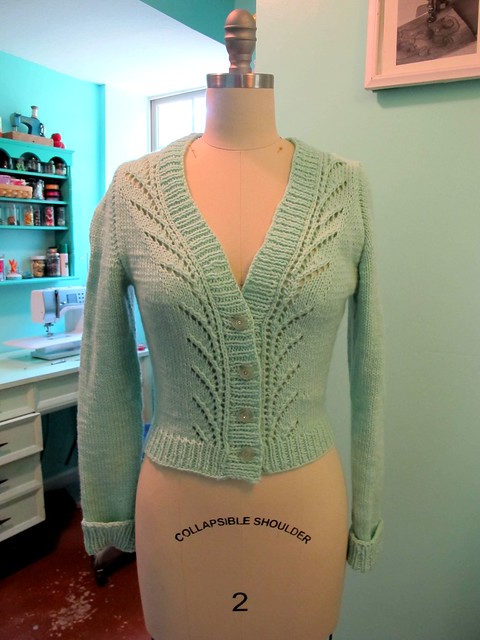
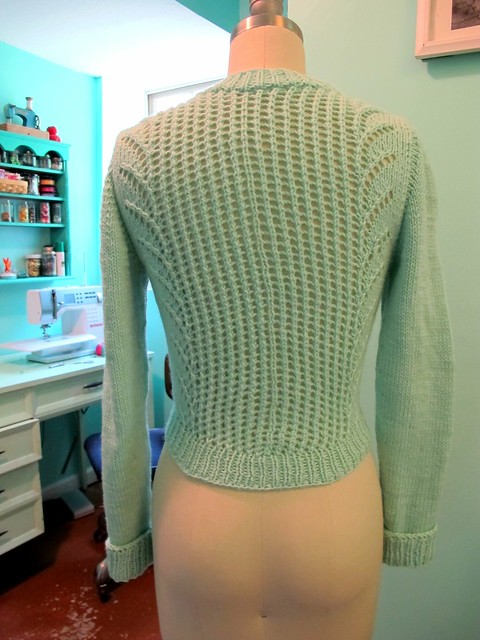
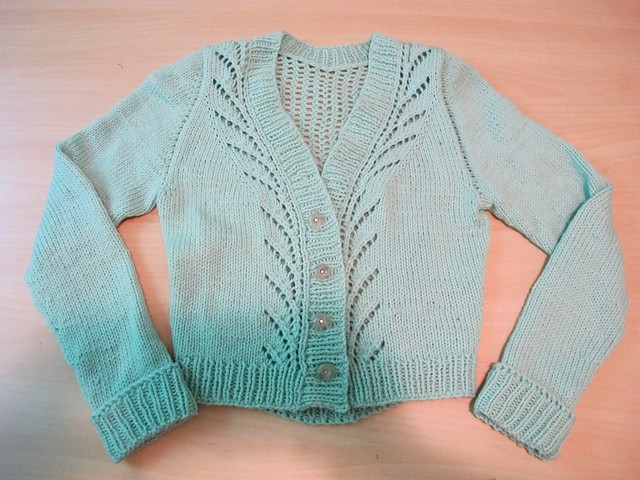
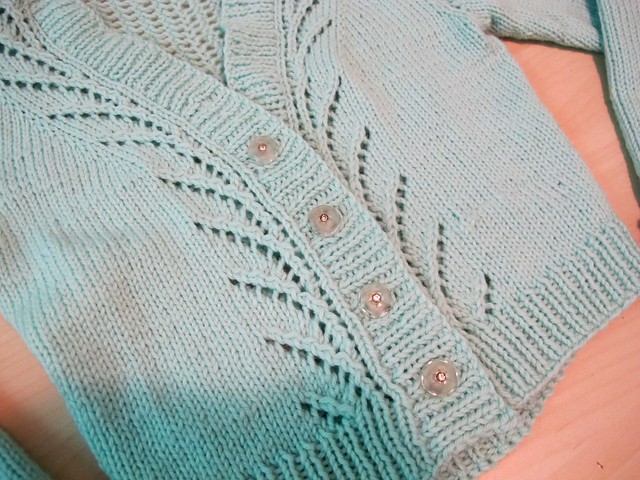
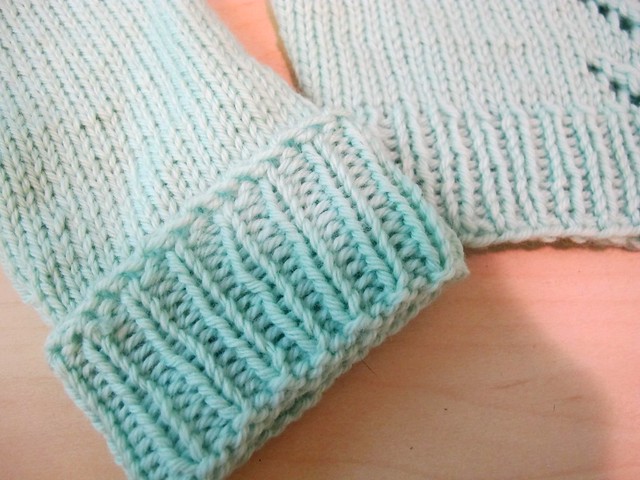
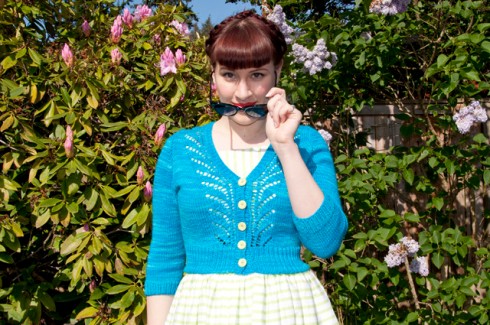
Vianne is a sweet little top-down cardigan with lace details and a open mesh back. It’s supposed to be knitted up in DK weight yarn, but I used Cascade 220 worsted weight and was able to get gauge using size 6 needles. I knit the size XS, and the only modification I made to the pattern was to knit full-length sleeves. As in, I followed the sleeve directions and just kept knitting/decreasing until they were long enough. I’ve found that I don’t have much need for 3/4 sleeves – if I’m cold enough to wear a sweater, I am cold enough to need the full sleeve – so I went with long sleeves. I did keep the mesh back, though. The mesh back is awesome. I found the mesh+lace a little confusing to follow, so I used a bunch of stitch markers to stay on track and that helped a lot.

While I normally finish my buttonbands with a strip of petersham ribbon for stability, I did not do that with this cardigan. Vianne is a looser fit on me, and the button bands are so wide that they don’t really stretch when they are buttoned. So I left off the petersham and just sewed the buttons directly on the ribbing. One thing I will say about using a stabilizer with your button band – it makes sewing on the buttons a helluva a lot easier! Oh well! Anyway, the buttons are vintage glass from my stash – I’ve had them for YEARS and been hoarding them for a special project, which I’m happy to have finally found! I only had 4 buttons, so I left off one of the button holes. And by “left off,” I mean I originally knit it and then later closed it up with a slipstitch haha.

OAL2015 - VianneOAL2015 - Vianne

OAL2015 - VianneOAL2015 - Vianne

OAL2015 - VianneOAL2015 - Vianne

OAL2015 - VianneOAL2015 - Vianne

OAL2015 - VianneOAL2015 - Vianne

OAL2015 - VianneAs with all of Andi’s patterns, I REALLY enjoyed knitting this sweater! The yarn was so nice to work with (after a long Cascade 220 hiatus, I’m happy to be home! And I’m really happy to find a local source that is still selling it – Ewe & Company, who happen to be located here in Kingston Springs! What are the odds?) and the color is my favorite. The only thing I didn’t like was feeling rushed at the end, but that’s my own damn fault for not pacing myself earlier during the OAL. I’m glad I got it finished in time, at any rate!

As a side note, wrangling the last sleeve of the sweater got me really wanting to start doing seamed knitting. I’ve always been a fan of in-the-round, because it’s so easy, but I’m starting to feel a little comfortable and I’m kind of craving a bit of a challenge. It would be fun to learn how to properly seam a sweater. Not to mention all the pattern possibilities that open up when you’re not hung up on just one particular construction style!OAL2015 - M6887

Anyway, that’s it! Here is Vianne on Ravelry (spoiler: not any more info than what you see here!). Don’t forget to post your finished outfit in the OAL 2015 FO Thread on Ravelry for a chance to win prizes! We have prize donations from Indie Stitches and The McCall Pattern Company, as well as from Andi Satterlund herself (winner’s choice with all of these, so you won’t get stuck with something you don’t want!), and there will be 4 winners. Also, if you have blog posts to share with your FO, post them here so I can see! I need to get my lurk on 😉

OAL2015: Attaching the Skirt // Finishing the Cut-Out

7 Jul

Good morning, everyone! My apologies that this post is a day late – I spent one full day of my weekend throwing a 4th of July shindig (complete with a slip-in-slide, food decorated to look like flags, and fireworks at the end of the night. I passed out before the fireworks happened, though, hahahahaha!! I heard they were lovely, anyway!), and then the second full day was much-needed RNR (laying on the couch, coloring and eating leftover party food. I surprisingly was not hungover for this, but I treated it like a hangover day regardless). It was an AWESOME weekend, but I didn’t make the time to write up this post – so you get it on Tuesday! Yay!

ANYWAAAAAY, time to get down to business!

OAL_Banner

Today we are going to attach the skirt to our bodices, as well as finish that back cut-out. The end is so close!!

OAL 2015

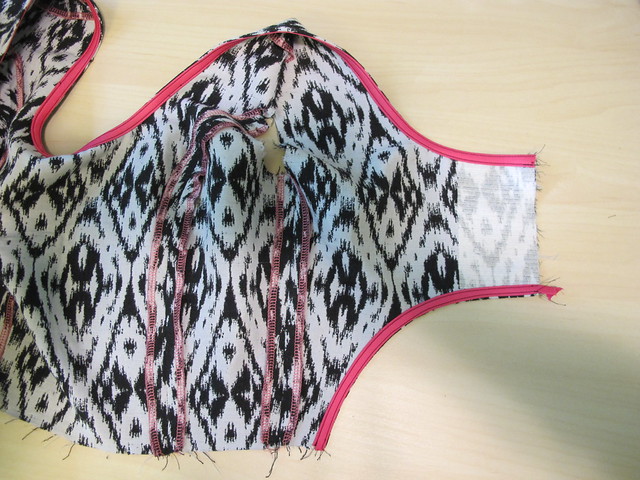
First thing you are going to want to do is finish the edge of the back cut-out, using bias facing and the same method we used for the neckline (here’s a refresher on that tutorial if you need it!). Once you get to the back where the interfacing has been applied, you have two options – you can either leave that part unsewn, or attach the bias facing and then unpick it. I prefer to sew+unpick because I like the guidance of the creased seamline, as well as having the seam allowances already trimmed down, but it’s up to you!

OAL 2015

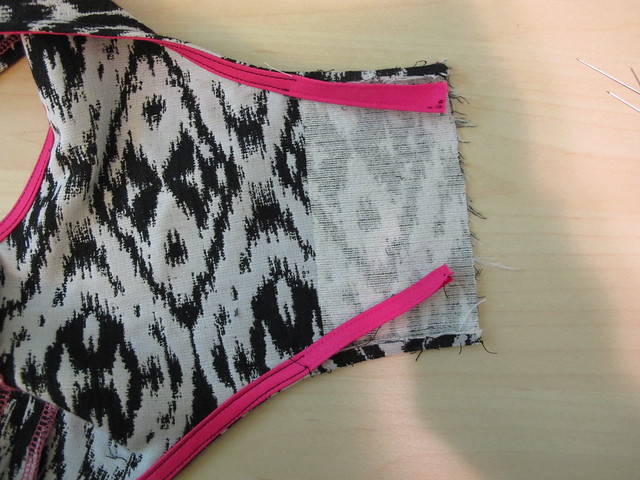
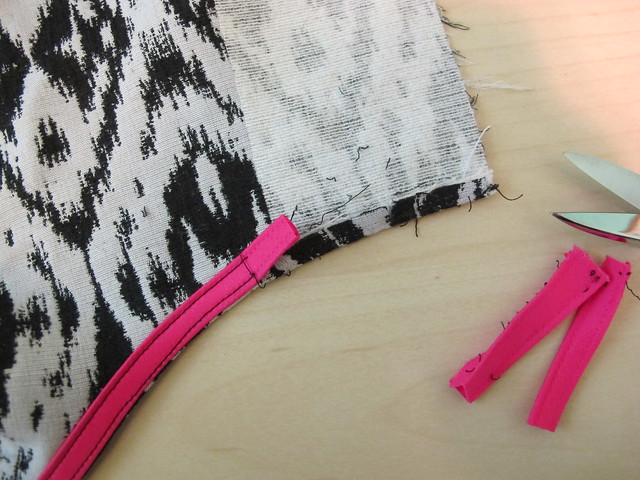
Once you’ve finished that, unpick the facing where the interfacing is, plus a little extra (or pat yourself on the back for saving yourself a little extra work!). You’ll do this at both the top and bottom of the interfaced section.

OAL 2015

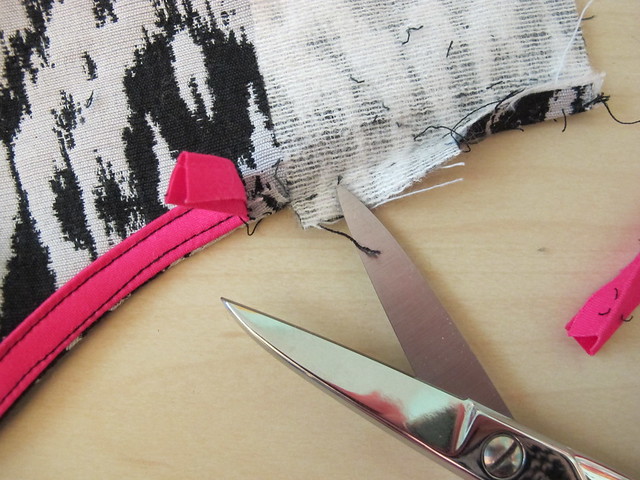
Go ahead and clip off the excess bias facing, leaving at least an inch or so that overlaps where the interfacing starts. Err on the side of longer here – you can always trim off more later if you need to.

OAL 2015

Notch the fabric right where the interfacing starts, going about 1/4″ in, or the depth of your seam allowance.

OAL 2015

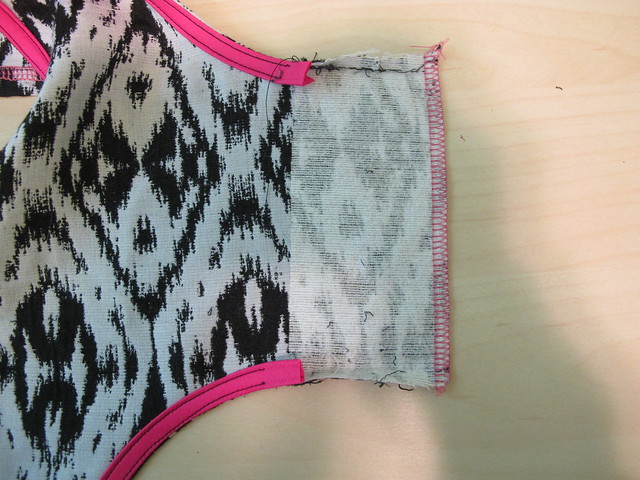
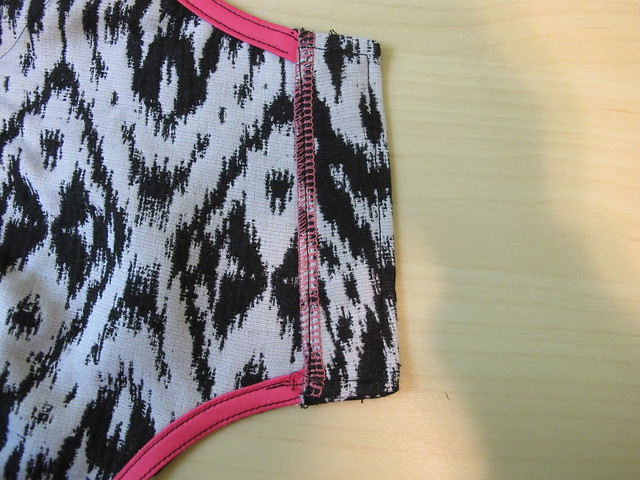
Finish the edge of the interfaced section howeverrrr you want. I just serged mine.

OAL 2015

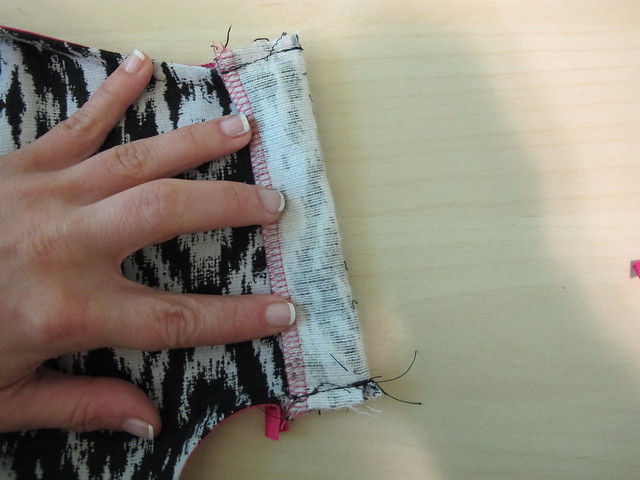
Now fold the interfaced section back on itself, right sides together, along the center. The edge that you just finished should meet right against the edge where you clipped that notch.

OAL 2015

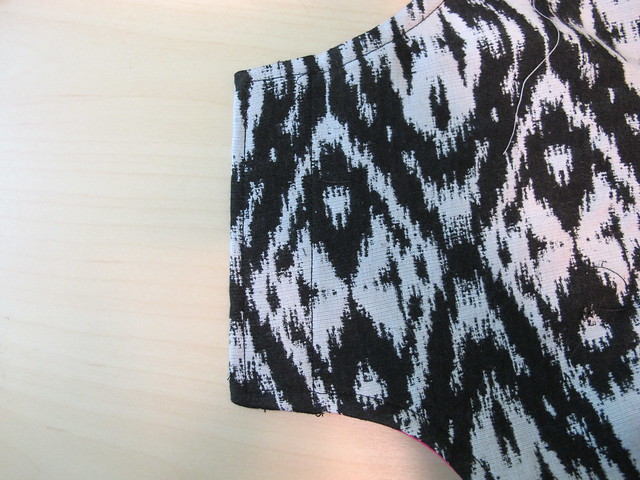
Sew along both short ends, following your seam allowance (this is where the guidance of an unpicked edge comes in handy). Be careful not to catch the ends of the bias facing just yet.

Ooh, look! New manicure! Haha!

OAL 2015

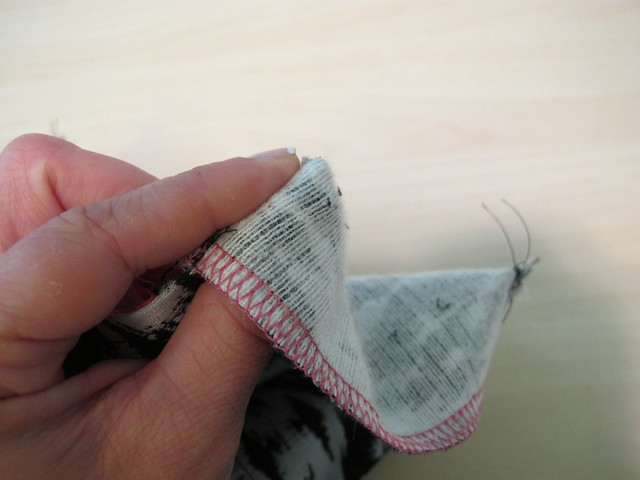
Turn the interfaced section right side out. To get a nice, sharp corner: first off, don’t clip that corner or trim your seam allowances unless they’re bigger than 1/4″. Use your fingers to push the seam allowance in one direction all the way to the point (I’ve found this is easiest when I hold it the way you see in the photo)…

OAL 2015

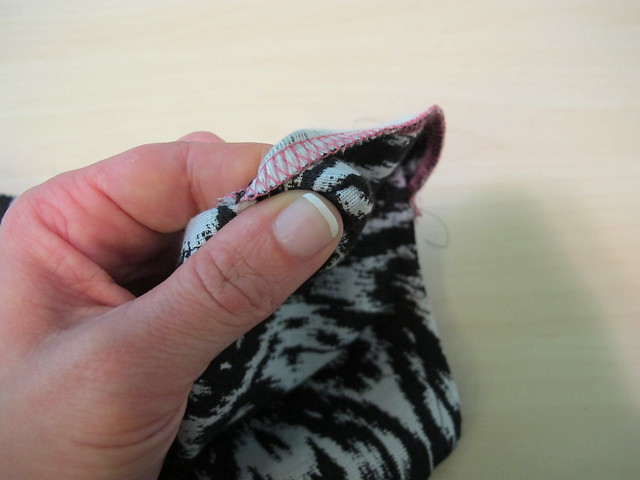
Keep your fingers holding that seam allowance in place and start turning everything right side out…

OAL 2015

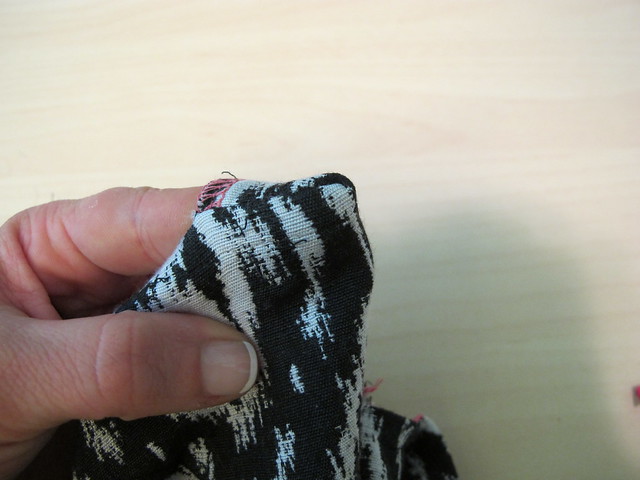
Use your pointer finger for the final little push.

OAL 2015

You should have a pretty good-looking corner at this point, but you can also use a point turner (or a knitting needle, or a chopstick, or a pencil, or whatever you have on hand) to gently coax that corner out a little more. Don’t mash it around, just manipulate the seam allowance over until everything looks good. Repeat for the other corner.

OAL 2015

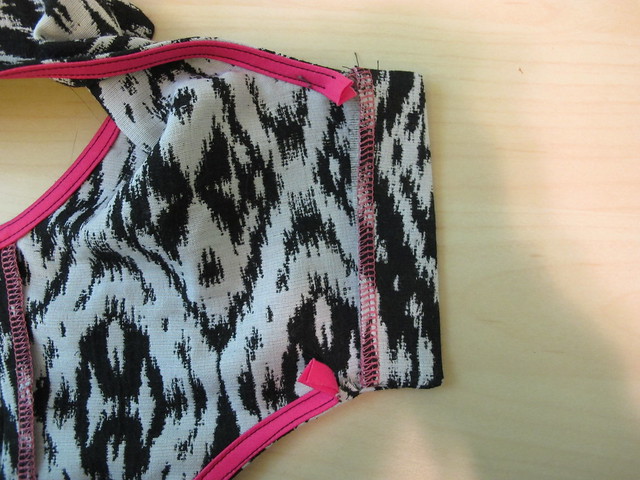
Here’s where we are so far!

OAL 2015

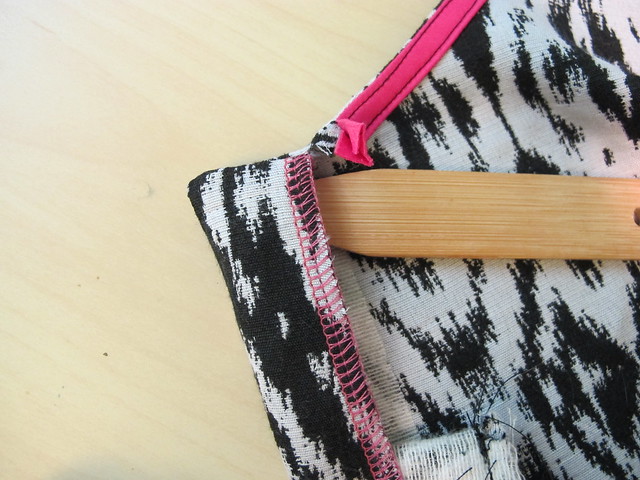
Now take those floppy ends of the bias facing and tuck them into the little pocket you just created.

OAL 2015

OAL 2015

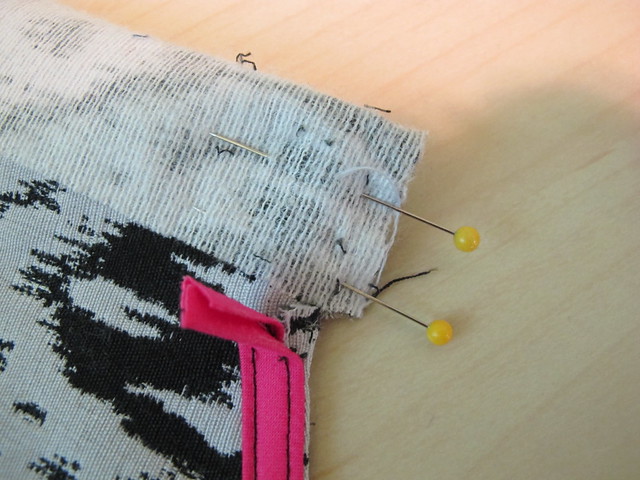
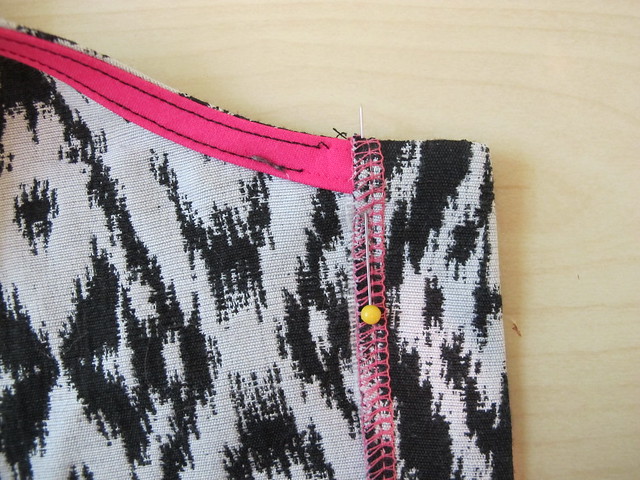
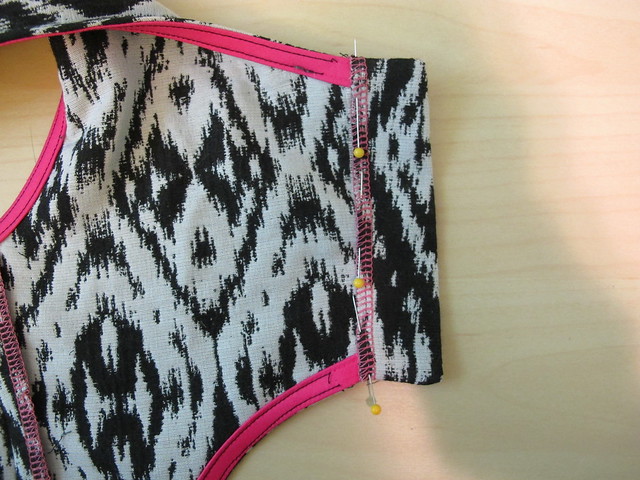
Pin the finished edge into place and sew everything down. I also topstitch 1/4″ around the outside edges, to match the rest of the topstitching on the dress.

OAL 2015

Done! Now do the other side 😛 haha!

Ok, now for attaching the skirt!

OAL 2015

Pin and sew the skirt to the bodice, matching notches and seamlines, and using your normal 5/8″ seam allowance. The bodice will be quite a bit shorter than the skirt – that’s the back cut-out, and we’re gonna deal with that next. If you want to add piping to your waistline seam, now is the time to do it (well, I did it, anyway! ha! It’s easier if the piping does not extend all the way around the waist – end it right where the bodice ends).

OAL 2015

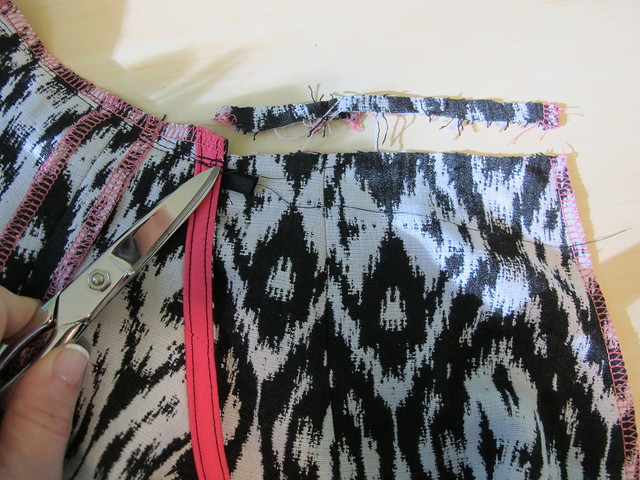
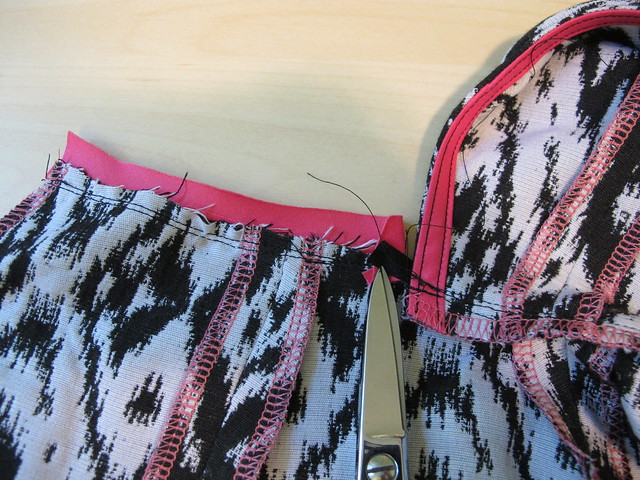
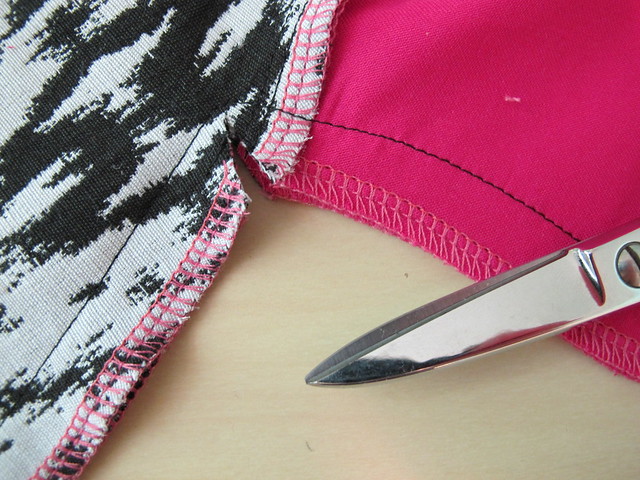
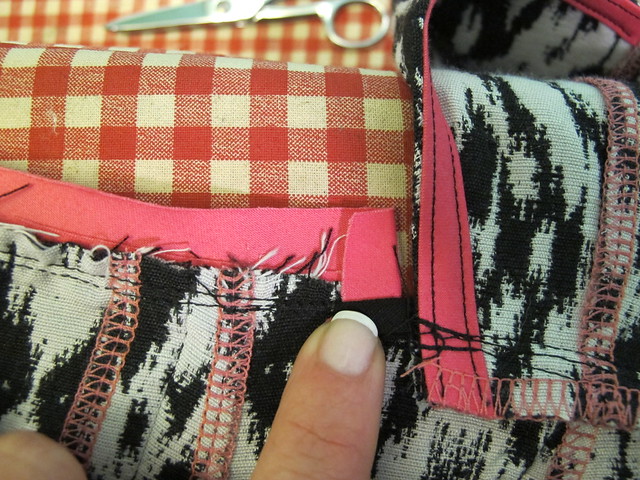
Trim the seam allowance down along the top of the skirt that isn’t attached to the bodice, leaving yourself 1/4″ seam allowance for dealing with the bias facing. Then clip a notch where the bodice stops – this was hard to photograph, so right where my scissors are pointing! You can also see where my piping ends; it’s the little black rectangle below. Don’t clip your notice any deeper than the seam allowance.

OAL 2015

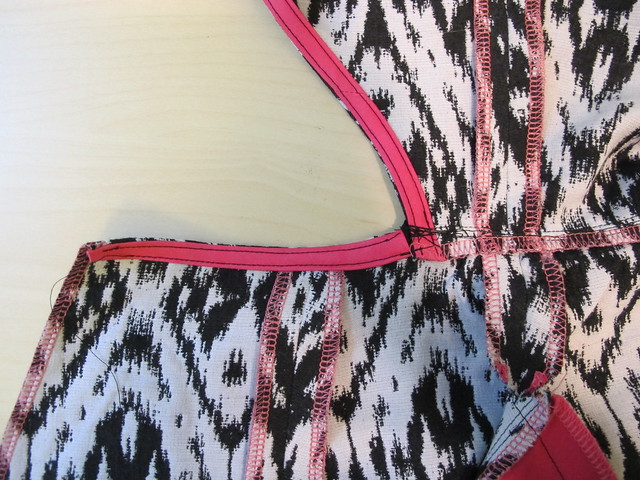
Attach the bias facing along the top edge of the skirt, stopping at the notch you just clipped. Allow about 1/4″ or so of bias excess so you can tuck it under itself.

OAL 2015

Here’s a closer picture. Once you’ve sewn the first swipe of bias facing (and understitched, if you’re doing that), take everything over to the ironing board and press the seam allowances up, and then the excess over to the wrong side (at the end that’s next to the bodice). If you added piping, the tail end of your piping should also be in this equation.

OAL 2015

Now fold the bias facing to the wrong side, as normal, and pin in place. All your raw edges should be encased and the corners of the bias facing should be pretty close to one another (if not butted up against each other).

OAL 2015

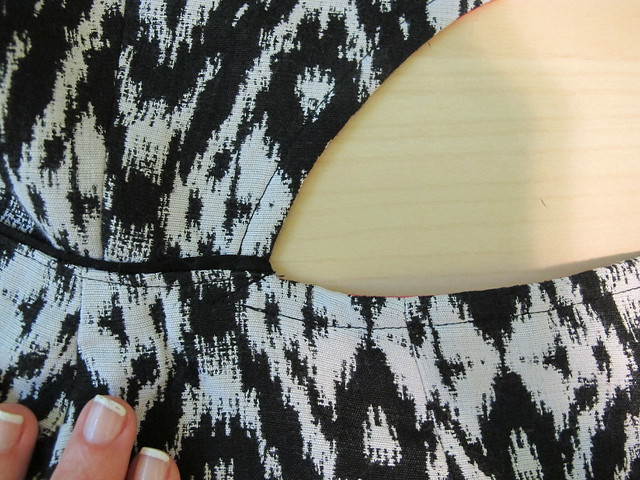
Finally, just stitch the bias facing down. Once you get to the corner where the other section of bias facing is, lower your needle and pivot, stitch along the existing stitching line just a little bit, then backtack. This will reinforce that corner and secure everything.

OAL 2015

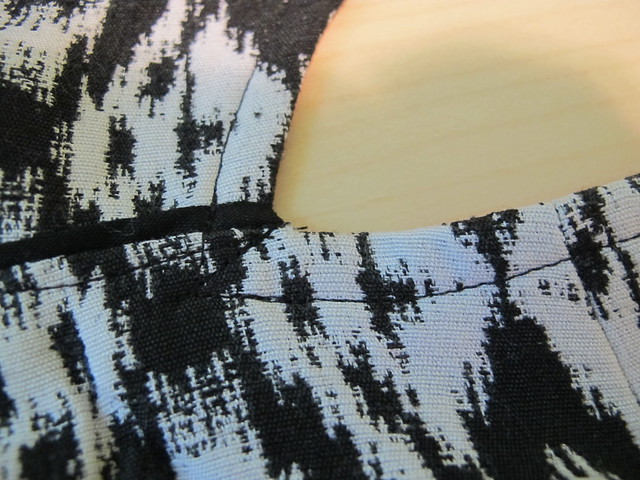
Here it is from the right side. If you want to be extra secure, you can also sew a diagonal line to the point of the intersecting facings.

OAL 2015

I’m not really sure why I took a second picture of this, but here you go.

Ok, that’s all for today! Let me know if any of this needs clarification or if you have any questions 🙂

OAL2015: Adding Pockets // Assembling the Skirt

29 Jun

Good morning, everyone! Time for another dose of OAL goodness!

OAL_Banner

Today is pretty simple – we’ll just be adding (optional) pockets and assembling the skirt pieces. If you don’t want to add pockets, just skip this post and follow the instructions that came with the pattern. Let’s get to it!

OAL 2015
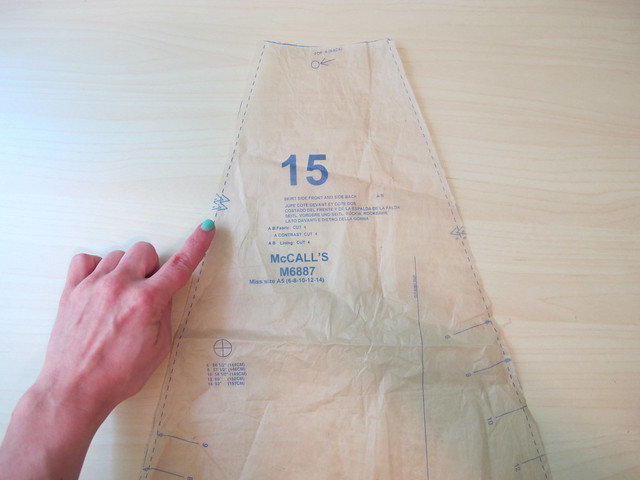
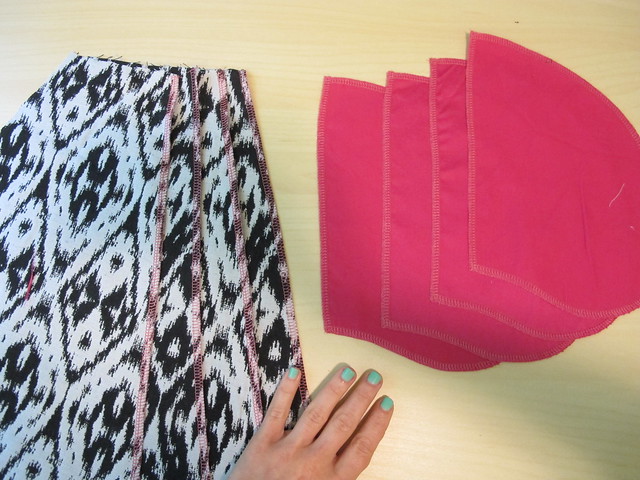
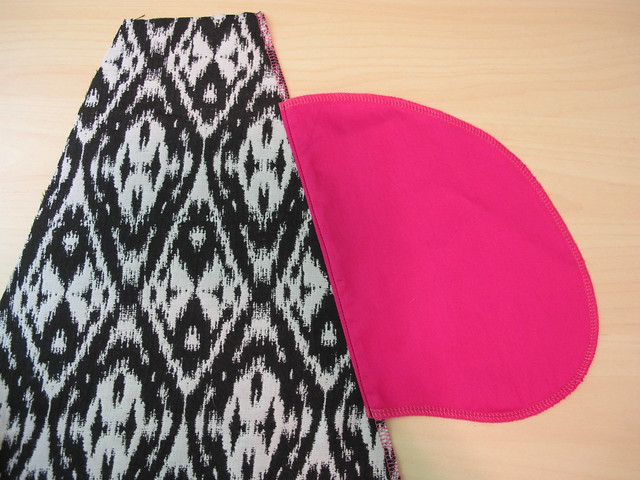
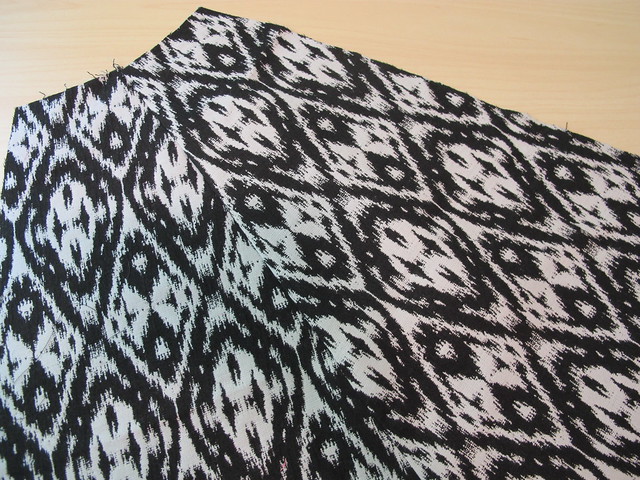
For now, the only skirt piece we will be dealing with is piece #15, the side front. You should have 4 of these pieces cut in total. The side that I’m pointing to – with the double notches – is the side that we will be focusing on for these next steps. Finish the edges of all 4 side front pieces (only on the side with the double notches).

OAL 2015
If you haven’t already done so, you’ll need to cut out 4 pocket pieces from your fabric (you can use self-fabric, but I was on a pink kick so mine are contrasty!). The pattern doesn’t come with a pocket pattern piece, so feel free to swipe one from another pattern you own – mine is from the Saltspring Dress. Finish all edges of the pocket pieces.

OAL 2015
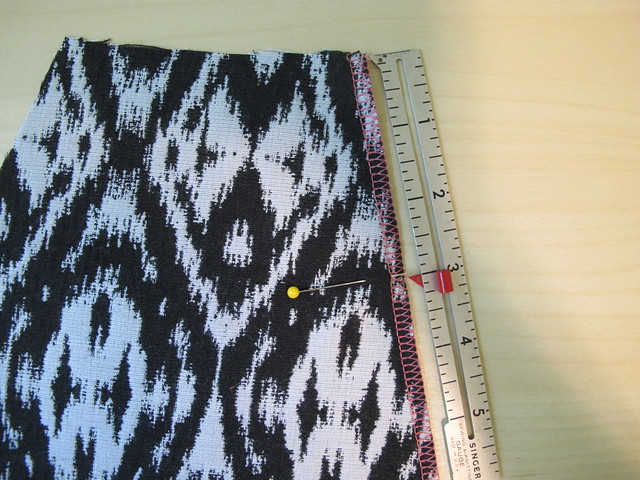
On the finished edge of each side front piece, measure 3″ down from the top and mark with a pin. This is where we will be attaching the pockets.

Note: Depending on your height and proportions, you may want to sew your pockets more or less than 3″ from the waist. I looked at several patterns with pockets – as well as a few of my dresses that have pockets in a good spot – and the average seems to be somewhere between 2.5″-3.5″, with 3″ being a comfortable distance for me. However, if you’re unsure – I recommend checking some of your patterns, or measuring a couple existing garments, to see what works for *you*.

OAL 2015
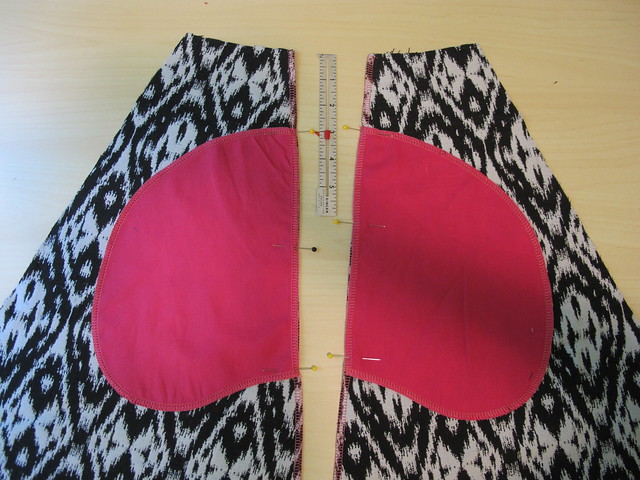
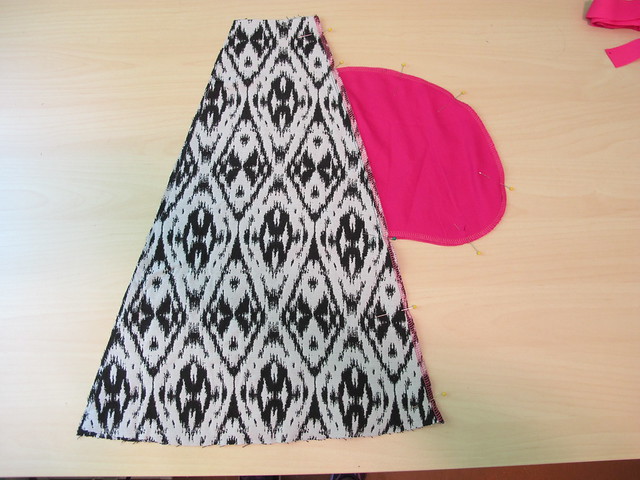
Pin 1 pocket piece to 1 skirt side front (4x), with the top of the pocket 3″ away from the top of the skirt and right sides facing.

OAL 2015
Sew the pocket to the skirt piece at 3/8″ and understitch the seam allowances toward the pocket. Using a smaller seam allowance and understitching will help with keeping that pocket inside the skirt and hidden.

OAL 2015
Now you can pin 2 skirt/pocket pieces, right sides together, starting at the top of the skirt and going all the way around the pocket and to the bottom of the skirt. Repeat for the other pocket.

OAL 2015
Stitch at 5/8″, lowering your needle and pivoting where the pocket meets the skirt at the top and bottom (I can’t seem to explain this very clearly so just look at the photo!).

OAL 2015
At the top & bottom of each pocket bag, clip diagonally in the corner just to the stitching (but not through the stitching). This will enable you to press the seams above and below the pocket open, as well as make your pocket bag lay better inside the skirt.

OAL 2015
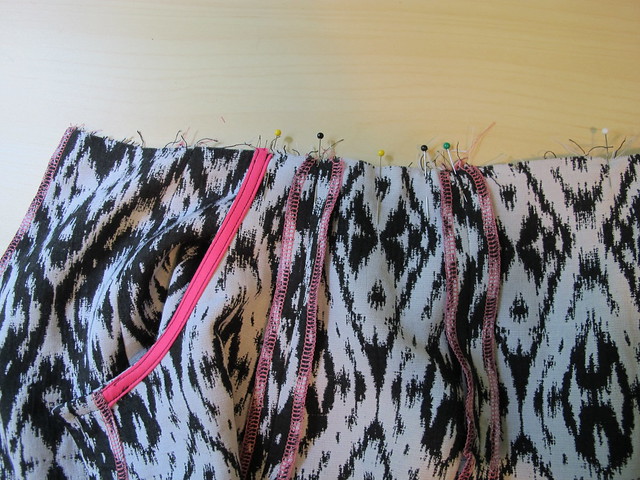
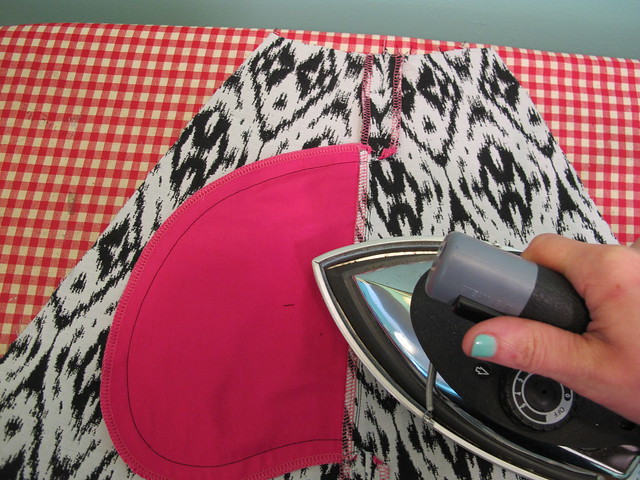
Press the seams open above and below the pocket bag, and press the pocket to one side (it should go toward the center front, so press in opposite directions for each of your two assembled skirt pieces).

OAL 2015
OAL 2015
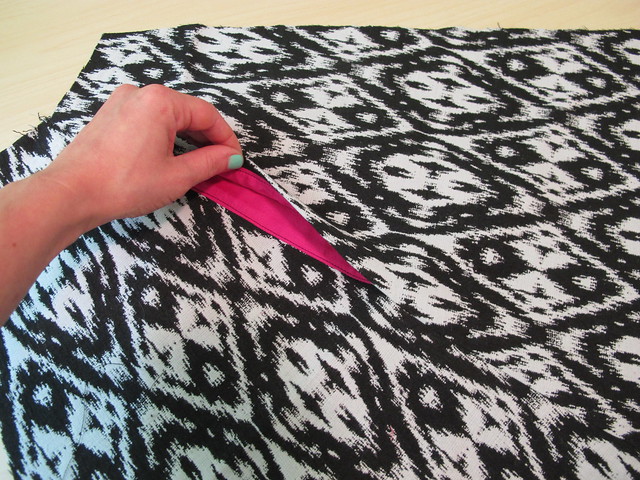
Here it is finished! Yay, sneaky pink pocket 😀

OAL 2015
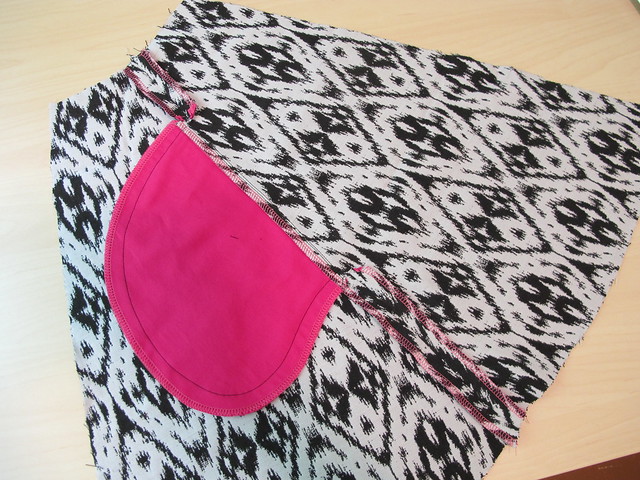
And here is how it looks on the inside 🙂

Once you’ve finished adding the pocket bags, you can attach the front to the side fronts (one on each side of the front) and the two back pieces to the opposite side of the side fronts. Finish your seams as desired and press. Finally, finish the center back seams (again, I just serged mine).

That’s it! Next week, we’ll attach the skirt to the bodice and deal with that back cut-out. Making progress! 🙂

Let me know if you have any questions about anything I covered in this post! How are we doing this week, OAL-gers? 🙂

OAL2015: Assembling the Bodice // Adding Sleeves

22 Jun

Hey hey everybody! I’m finally back from my 2 weeks of traveling Peru with my best friend, and it was amazing. I spent a week in Lima (first half in the Miraflores District, which is absolutely beautiful, and the second half in the San Borja District), where we stayed with the family of a friend and basically ate our weight in ceviche. The second week, we flew up to Iquitos and spent a couple of days in the city, as well as a week deep in the jungle off the Amazon (and before you ask, yes, I was there for the ayahuasca). We did not visit Machu Picchu (I guess this is the main reason why people visit Peru, because EVERYONE asked us if we were planning on going!) – we considered it, but it was too expensive and we had to choose because Cusco and Iquitos… Iquitos won out, and I’ve no regrets 😛  It was an incredible 2 weeks, although I’m pretty happy to be home where I can throw my TP in the toilet and drink straight from the faucet 😉 hahaha

Anyway, it’s back to the real world for me! Which means it’s time to jump straight into business mode and kick this OAL off once and for all! Yay!

OAL_Banner

Today, we’ll be assembling the bodice of our dresses. This part is pretty easy and straightforward (well, honestly, the whole dress is pretty easy and straightforward!), although this post is quite a bit picture-heavy. Sorry in advance, ha. This method of bias facing is for those of y’all who are making their dress without a lining. If you plan on adding a lining, ignore these sewalong posts and use the instructions included in the pattern 🙂

OAL 2015
First things first – if you haven’t already done so, go ahead and fuse your little rectangles of interfacing to the back bodice where indicated. This will give that area a bit of stability for adding buttons later (or, if you’re like me – mock buttons. Either way, don’t skip the interfacing!).

OAL 2015
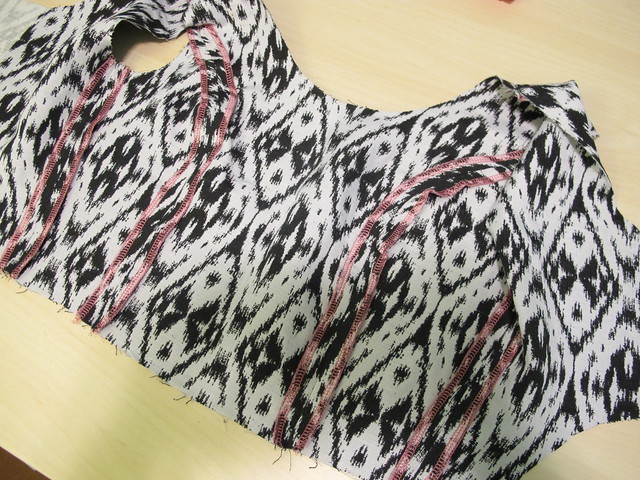
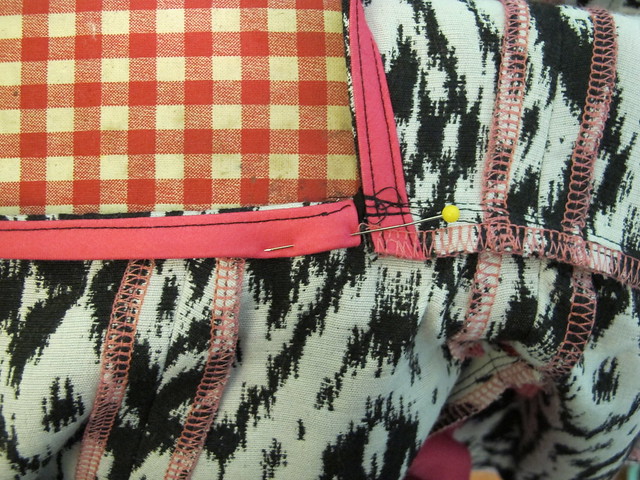
Sew the bodice front to the bodice side front princess seams (need a refresher on sewing princess seams? I got ya!) and finish the seams as desired. Since my fabric is a bit bulky, I chose to serge mine separately (with hot pink serger thread because, obvs) and press them open. You can certainly finish the seams as one and press them to one side, though.
OAL 2015
Next, attach the front bodice to the back bodice pieces, at both the shoulders and the side seams. Again, finish the seams as desired and press.

OAL 2015
Next, we are going to finish the entire neckline (all the way around) with a bias facing. Measure your neckline, starting at the interfacing of one of the back pieces and continuing all the way around the front to the opposite back piece. There are a few ways to do this – you can use a flexible measuring tape, you can measure with the bias tape itself, or you can use a Curve Runner (am I the last person on earth to find out about this little tool? HOLY SHIT that thing is so cool!). Cut your bias tape the length of your measurement and pin around the neckline, right sides facing.

Note: For this particular method of finishing, you will want bias strips that are 1″ wide. You can certainly buy the pre-made packages if you’d like, but I personally like to make my own – it handles and sits better than the pre-made stuff, plus, you have a much better selection of colors and prints (and it’s a GREAT way to use little scraps that are too awesome to throw away). If you haven’t made your own bias strips, it’s super easy! There are tons of methods all over the internet on how to do it; the one I personally use is the continuous bias method since it means you don’t get stuck doing a lot of piecing.

OAL 2015
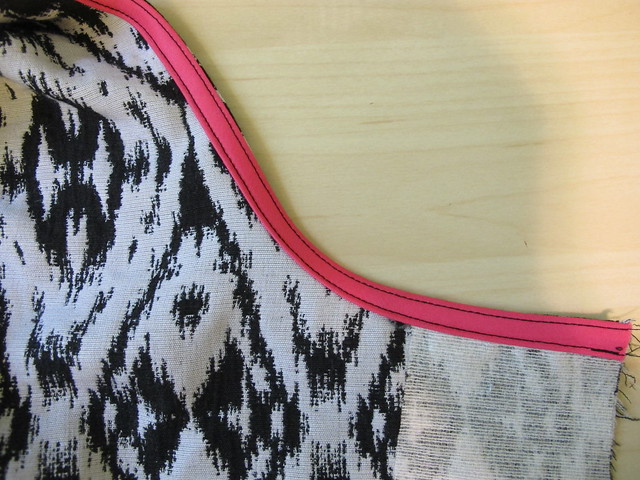
Sew the bias all the way around the neckline – again, starting at one back and continuing across the front all the way around to the opposite back – right sides together, with a 1/4″ seam allowance. Stretch the bias tape *slightly* as you sew, which will help snug up the neckline so it doesn’t gape open.

Note: The pattern is drafted with 5/8″ seam allowances, so you may want to trim 3/8″ off all around the neckline before adding your bias facing. I did not do this and the fit is fine. Just an fyi, though!

OAL 2015
If your fabric is on the bulky side, or your bias is a crazy contrast (like my hot pink), you may want to understitch the facing so it stays in place and doesn’t peek out from the right side. Push all the seam allowances toward the bias and stitch through all the layers 1/8″ from the seamline. I use an edgestitch foot for accuracy, but you can also eyeball it. If your fabric is lightweight and responds well to pressing, you can skip this step.

OAL 2015
OAL 2015
Here is the bias attached and understitched. Take it over to the ironing board; we’re going to press the hell out of this shit now.

OAL 2015
Fold the bias over to the wrong side of the bodice, so that the edge meets the stitching line where it is attached. (yes, it should actually line up with the stitching – my fabric is a little bulky, so the turn of the cloth means that it doesn’t quite meet up. That’s ok, though!

OAL 2015
Now fold the entire thing one more time to the inside, so all of the bias is on the inside of the bodice. Press.

OAL 2015
Topstitch 1/8″ away from the folded edge.

OAL 2015
Take the bodice back to the ironing board and give the neckline a good press, preferably over a tailor’s ham if you have one (and if you don’t have one, might I suggest this lovely tutorial for making your own? har har), to smooth out the curves and make sure that all the bias is pressed to the inside of the garment.
OAL 2015
OAL 2015

Et voilà!

Next, you are gonna want to tackle those arm holes. For those of you leaving your dress sleeveless, you will want to finish the arm holes the same way that you finished your neckline – i.e., with the bias facing (here’s a tutorial on adding bias facing to armholes if ya need it!). For those of you who are adding the standard short sleeves (view B), you will want to follow the instructions to set in the sleeves (or you can follow this tutorial on setting in sleeves, which I find a bit more clear). Don’t forget to finish the seam and press. For the cute little cap sleeves (view D), you will not only set in the sleeve but also need to deal with the underarm finishing (since the sleeve doesn’t go all the way around the arm hole). Normally this is finished with the lining, but since we are little rebels who aren’t playing by the rules, we are gonna finish that with bias facing.

OAL 2015
Start by finishing/hemming the bottom of your cap sleeves, in whatever way you prefer. I just serged, turned the hem to the wrong side, and topstitched.
OAL 2015
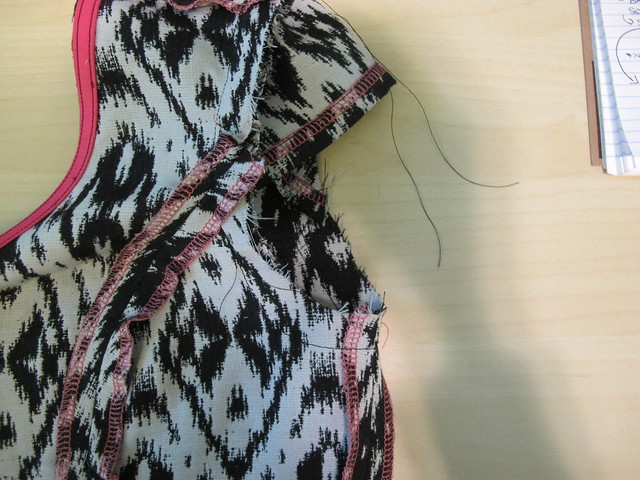
Attach the sleeve to the armscye the same way you set in a standard sleeve – sew a line of basting stitching at 5/8″ all around the curve of the sleeve cap (in a standard sleeve, there are dots to indicate where the basting goes – but for this little cap sleeve, you’ll baste from tip to tip), pin the sleeve into the armscye and pull the gathers so that it fits smoothly inside with no puckers. Sew at 5/8″. (if you need more tutorial help with setting in a sleeve, see the link above 🙂 ). I continued my stitching line all the way around the entire armscye to help with trimming in the next step, although this is not necessary and you can totally eyeball it.

OAL 2015
Trim all your seam allowances down – all the way around the entire armscye, including the bottom part that hasn’t been attached to anything yet – to 1/4″. Measure the armscye (this is where one of those Curve Runners would come in super handy, argh. Or you can measure the trimmings that you cut off, ha) and cut your bias strips to length, minus 1″ (to account for stretching the bis as you sew it on). Sew the ends of the bias together to make a circle, and attach to the entire seam/unfinished edge of the arm hole at 1″, again, stretching *slightly* as you sew. Understitch and press as previously directed.

OAL 2015
Before you make the final press to pull the facing all the way to the inside of the arm hole, be sure to pull the sleeve out so that you don’t accidentally tack the sleeve to the bodice. Been there, done that, and it sucks.

OAL 2015
Stitch the bias facing all the way around the arm hole 1/8″ from the edge, being sure that the sleeve is out of the way and you are *only* sewing through the bodice and the bias facing. Press over a tailor’s ham, to set the curves and get everything to lay nicely.

OAL 2015
OAL 2015
Finished cap sleeves! I really like this method because the extra stitching really strengthens where the sleeve attaches to the arm hole – since it doesn’t go all the way around, sometimes they can start to tear off if there’s too much strain on them (I had a dress like that in my early days of sewing that would NOT keep the cap sleeves attached. Every time I moved, they would rip out. I eventually dumped the dress, too bad I didn’t know how to fix that problem!). And by “strain,” that usually happens from hugging people.  Shitty way to ruin a dress if you ask me hahaha. Anyway, once I started sewing them in this way, my cap sleeves tend to be a lot stronger and I don’t have problems with busted seams. You do have to be ok with visible topstitching – but in a dress like this, there’s already a bunch of topstitching, so it works.

OAL 2015
Here’s the inside of the bodice 🙂 Fun!

Ok, whew, I think that’s enough for today! Do let me know if you have any questions about any of these steps 🙂

How’s your sewing coming along for the OAL?

Announcing the 2015 OAL!

15 May

Happy Friday, everyone! I just wanted to pop in and let y’all know that the Outfit Along is back for a second year! WOOHOOO!!!
OAL_Banner

Once again, I’m joining forces with Andi Satterlund of Untangling Knots to combine a sew-along with a knit-along. The idea behind the Outfit Along (OAL) is to make a complete outfit by sewing a garment and knitting a garment. This is a great opportunity to stretch your crafting skills, and we’ll have two official patterns that we’ll help you with along the way.

The official sewing pattern will be McCall 6887, and the official knitting pattern will be Andi’s newest cardigan pattern, Vianne. I will be blogging about the official sewing pattern and Andi be blogging about the knitting pattern so we can all sew and knit along together. If you don’t love the official patterns, you can still join in! The Outfit Along is about making an outfit you’ll really wear, so to participate, all you need to do is to sew a garment and knit a garment to make an outfit. You’re more than welcome to pick projects that fit your own style and skills. You can look through the 2014 Outfit Along FO thread in the Untangling Knots group on Ravelry to see the variety of patterns people chose to use last year.

Vianne

McCall 6887 - Pineapple dress!

You can read all the juicy details over at Untangling Knots, but in a nutshell:

– We will be kicking off the OAL on June 1, 2015.
– The deadline for completion is July 31, 2015, which gives you two months to finish both garments.
– Did I mention that finishing within the deadline means you are eligible for PRIZES? Yes! We are cooking up some fun pattern giveaways to reward those of y’all who complete their outfit within the allotted deadline, so stay tuned for more information!
– To be eligible for said prizes, you must finish BOTH garments by July 31, 2015 and post them in the OAL Finished Outfit thread in the Untangling Knots group on Ravelry. Prize winners will be randomly selected from those who finish both their knit and sewn garments and post pictures in the appropriate thread by the deadline.

Vianne_Back
The official knitting pattern, Vianne, is a seamless, top-down cardigan, knit using DK weight yarn on US 8/5mm needles, which makes it a lovely lighter weight cardigan for the summer months. The v-neck cardigan features a set of mirrored lace panels that run along the front neckline and frame a large mesh panel on the back. To celebrate Vianne’s launch, Andi is offering 20% off up until the official OAL start of June 1. Use the code OAL2015 to snag the discount! You can read more details in the Untangling Knots shop or check Vianne out on Ravelry.

McCall 6887 - Pineapple dress!
The official sewing pattern, McCall 6887, is a fun little summer dress with a surprise cut out in the back! You probably remember my Pineapple Delight version from a few weeks ago – well, I’m dying to make more, and I want to drag all y’all down with me (mwahaha). The pattern features front princess seams, skirt variations (flared or fitted) and the optional open back (there is also an option for a non-open back if that’s your jam!). I will be covering basic construction of the dress, and including tips swapping out the lining for a clean bias facing, and adding pockets. The pattern is rated as “easy,” so y’all beginners should have no problem tackling this! Also, just a head’s up – I just checked my local Joann’s and it looks like all McCall’s patterns are on sale for 3/$5 through 5/16, so go save some dollaz!

Since I’ll be traveling around Peru during the first couple of weeks of the OAL, we won’t start the sewing portion until June 22nd. Of course, you are welcome to get a head start and begin sewing on June 1; there just won’t be any sew-along posts until the 22nd! Andi will be managing the knitting posts over on her blog starting on June 1. If you knit and sew along with us, you’ll get your projects done in plenty of time.

Help spread the word and grab one of the badges below or use the hashtag #OAL2015. If you want to hang out and chat about the OAL, come join the OAL2015 Discussion Thread in the Untangling Knots group on Ravelry. You do need a Ravelry account to view and post on the thread, but it’s totally free and totally worth it if you do any knitting at all 🙂

OALBadge3


OALtag_2015

Y’all, I am SO EXCITED. Who else is joining in the Outfit Along this year?

Completed: Be-Zazzle’d McCall’s 6887 (+ a GIVEAWAY!)

20 Apr

I shared a little sneak peek of this dress in my last post (which, by the way – if you haven’t browsed through the comments, you absolutely should! I LOVED reading everyone’s stories!), and I had quite a few comments and emails from people asking what the pattern was and where I got the fabric. I’m sorry that I had to hold out on y’all – photography was just NOT happening that day – but I’m happy to be able to share the whole shebang with you today! Hopefully you’ll think it was worth the wait 😉

McCall 6887 - Pineapple dress!

Introducing – my first make for Summer 2015, the Be-Zazzle’d Pineapple dress 😀 I don’t ever name my makes (partially because that would be a LOT of names to come up with, and partially because, well, as you can clearly see – I’m not very good at naming things hahaha), but naming this one was just toooo easy. Sorry if it made you groan. DGAF.

McCall 6887 - Pineapple dress!

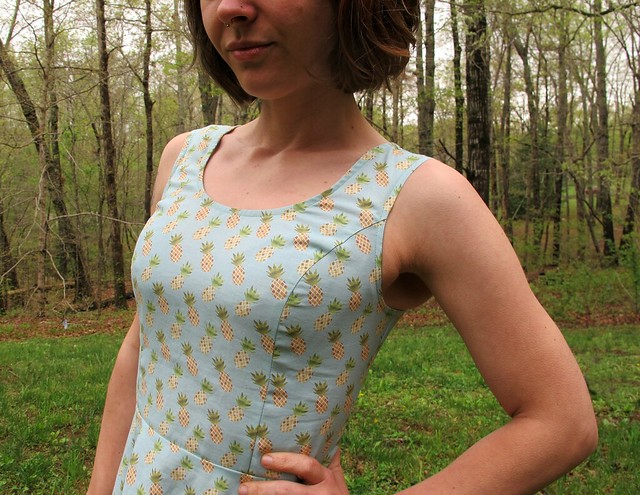
I guess we should talk about the fabric first, because it’s slightly more of a focal point than the pattern (tho I promise we will get to the pattern soon!). It’s hard to see from these far-out pictures, but my dress is covered in tiny pineapples! Cartoon-y pineapples, to be exact, since we all know those are the cutest pineapples. And, unlike cherries, I actually really really really love pineapples. I have been known to eat an entire pineapple in one sitting, and I have no regrets. Well, maybe my mouth does, but it has learned to deal.

McCall 6887 - Pineapple dress!

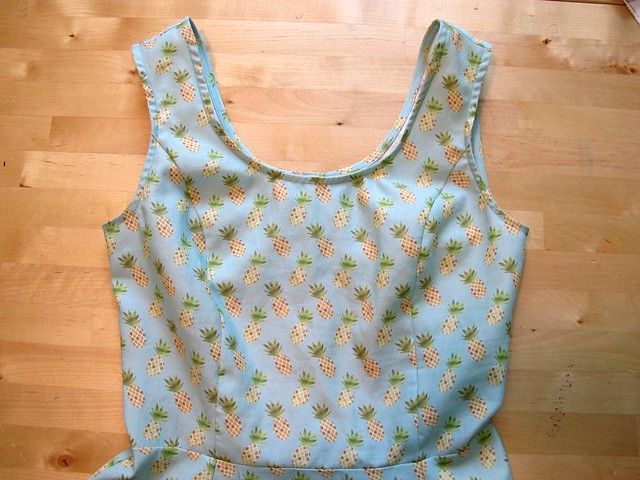
Here’s a close-up of the fabric. Isn’t it so awesome? It’s definitely a cutesy little novelty print, but it’s not quite so in-your-face as some of the novelty prints you find on quilting cottons. It’s a little more subtle (well, as subtle as you can get with cartoon-y pineapples on a watercolor turquoise blue background), and it’s just pretty. I love it so much!

The fabric is called “Tropical Summertime Watercolor Pineapple,” and it from Zazzle. Did you know that Zazzle prints custom, on-demand fabric? Neither did I! This is a new venture that they’ve recently rolled out, and they offered me a few yards to try out and see if I liked it. Um, you guys. IT IS AMAZING. Granted, most of the fabrics offered are Home Decor weight, but they do have a classic combed cotton (similar to quilting cotton) and a Pima cotton, which are both suitable for apparel. I decided to go with the Pima cotton, and I chose an existing design. You can absolutely design your own print – I just didn’t want to go that route personally because I don’t really have a good eye for things like fabric design! I’d rather let someone else handle that part and let me make the dress 😉

McCall 6887 - Pineapple dress!

Pima cotton is very easy to work with – it’s similar to quilting cotton, just lighter (but not quite as light as, say, voile). It doesn’t fray much and it cuts and sews like a dream. It doesn’t press quite as well as some other cottons – I just used my clapper to hold the seams down while they cooled, and that worked fine (your hand also works in place of a clapper, but don’t burn yourself! Ask me how I know. Also, ask me why I ended up getting a clapper, haha). The only minor downside is that, since the fabric is printed, the design only shows on one side – so the wrong side is white. This isn’t necessarily a deal-breaker, but it’s certainly something to be aware of when choosing a pattern. You don’t want to use one that will show the wrong side of the fabric, unless that’s part of your ~design inspiration.

I pre-washed my fabric before sewing it, and I definitely got a little bit of color fading. Not as much as you’d think – the colors of the fabric upon arrival weren’t quite as neon as they are in that product photo! – but they are a little muted. I actually like them better this way, so I’m ok with that! I washed the fabric on cold and dried it on low, same as I pre-treat all of my fabric. Going forward, I plan on washing this as infrequently as I can get away with (I mean, short of stinking up a 5 foot radius around me or anything like that) and when I do wash it, I will turn it inside-out and hang it to dry on the line. I imagine if this was hand-washed and hung to dry, it would probably retain it’s colors a bit better, but I’m a woman who ain’t got time to hand-wash her clothes (and, tbh, I only line-dry because then it means I don’t have to iron hahahahahaha), so I can live with a little fading.

McCall 6887 - Pineapple dress!

McCall 6887 - Pineapple dress!

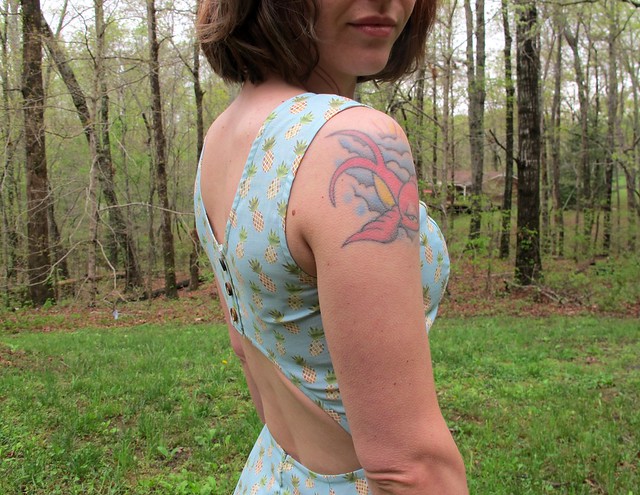
Now for the pattern! Since the fabric has a good amount of body, I wanted to use that to it’s advantage and make something with a bit of sleek structure. I used Mccall 6887, which has front princess seams, a scoop neck, a flared skirt – and this awesome back detail:

McCall 6887 - Pineapple dress!

WHICH IS BASICALLY MY FAVORITE THING EVER AT THE MOMENT.

McCall 6887 - Pineapple dress!

For sizing, I cut the bodice in a size 6 with an A/B cup (I don’t 100% understand these cup sizes because I definitely don’t wear anything close to an A/B cup in real life, but whatever. The sewing pattern fits and that’s all that matters, I guess.) and graded out the waist and hips to the size 8. I chose these sizes based off the finished measurements, and I’m really happy with how the dress ended up fitting (my measurements put me in a “suggested” size 10, which as you could see here would have ended up way too big. Use the finished measurements, y’all! Trust me!). It’s actually pretty perfect straight out of the envelope – I didn’t have to do anything! Even the straps are a good length, which is really surprising to me as I usually have to shorten them. I cut about 3″ off the skirt length because it was otherwise unflatteringly long, but that’s typical for me.

In the future, I am going to re-draw the curve at the bottom of the back cut out, because it’s not quite in the right place. My bra tends to poke out just slightly from the bottom 😦 It’s not the worst deal – honestly, I’ll probably just make a cute bra to wear with this dress bc that’s how I roll – but it’s annoying nonetheless. I tucked it out of the way for these photos, which is why you don’t see it, but I’m pretty sure it’s just gonna hang low and be free when I’m actually wearing it.

McCall 6887 - Pineapple dress!

McCall 6887 - Pineapple dress!

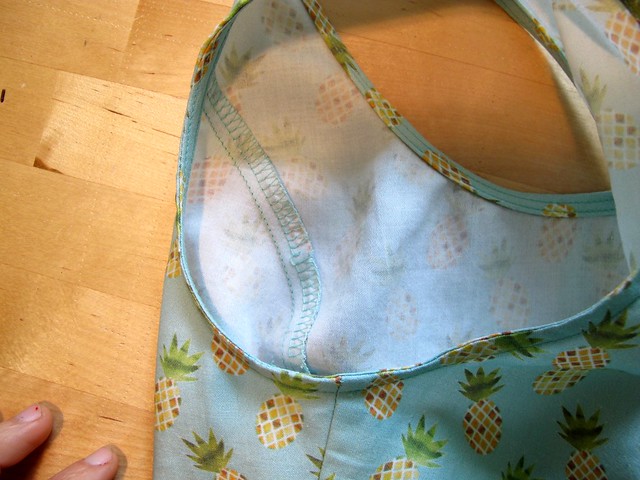
I love the style of this dress, but I don’t completely agree with the construction methods presented in the pattern – some of them seemed needlessly complicated. The dress is designed to be worn with a lining, which finishes the neckline, arm holes and back all in one swoop. Awesome, I guess, but I definitely want to be wearing as few layers as possible during the summer! Instead of lining this dress, I finished all the openings with self bias facing. It was a slight puzzle to figure out the bottom of the back opening and dealing with that zipper, but it turned out pretty nice!

I also did not actually sew button holes to the back – I just lapped those two pieces over each other and sewed them down. The buttons are there strictly for decoration. I had every intention of adding the buttons- there is interfacing there and everything – but I realized that the buttons would gape open and look stupid, and also, they’re hard to close by myself because they’re in that weird spot in the middle of my back that I can hardly wash, let alone button. So this dress just slips right over my head. It’s a little bit of a wiggle, but it’s not too bad.

Oh, and I added pockets! The pattern doesn’t come with them, so I stole a pocket piece from another dress pattern in my stash.

McCall 6887 - Pineapple dress!

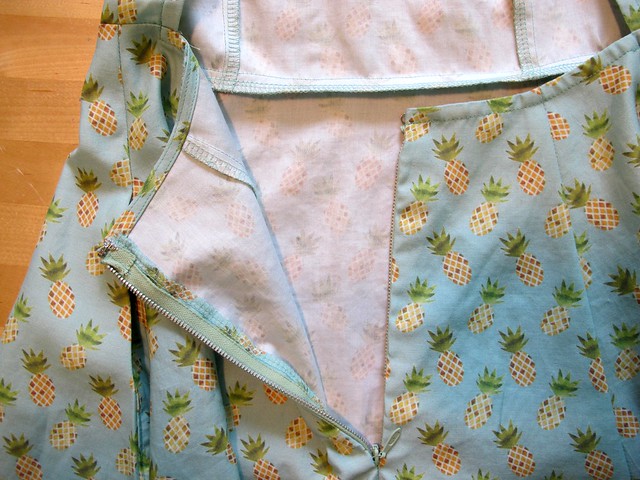
There’s an invisible zipper at the center back of the skirt, which helps with getting everything on. I actually had this zipper in my stash – it’s one of those dumb metal invisible zippers (seems like a good idea, until you try sewing one and realize that it’s basically impossible for it to be concealed, which is the WHOLE FUCKING POINT of a concealed zipper. And now we all know why these zippers don’t exist anymore), which I hate, but it was the perfect color, so I took one for the team and made it happen. Also, check out my matching serger thread – also from the stash! I love it when that happens 😀

McCall 6887 - Pineapple dress!

Here is the bias binding. There are two lines of stitching because I understitched the facing instead of pressing it with the first pass (here is my method for adding bias facing, if you missed that post!). Also, I cut a metric shit-ton of the bias tape and only used a fraction of it, so expect more pineapple bias facing in future blog posts.

I don’t really have anything else to say about this pattern, so have another photo of the back:

McCall 6887 - Pineapple dress!

OH YEA.I definitely love this dress and I definitely plan on making more – I don’t even care if the open back is super one of a kind and that it’ll be obvious that I have several of the same dress. Whatever!

Ok everyone! So, as I mentioned in the title of this post – it’s time for another giveaway! Yay! Zazzle has generously offered to give one lucky reader a $75 gift certificate to spend on the ~custom fabric of your dreams~. You can design your own, or choose from the thousands of designs that they have available, and $75 is enough to get at least 2 yards out of most of the available designs. Below are some of my favorites (I seriously spent about 2 weeks agonizing before I finally settled on the watercolor pineapples), you can also see my entire wishlist here.

Citrus Lemon fabric

Citrus Lemon fabric

And, my personal favorite: this is what I found when I searched for “Butthurt” (look – I was waiting on car repairs and I was bored, and the Zazzle app is really entertaining, ok?):

All right! To enter this giveaway, just leave a comment on this post (PLEASE include an email address where I can reach you – you don’t have to enter it in the comment box, but it needs to be at least viewable to me from an admin end or I can’t count your entry 😦 ) and let me know what fabric you would choose if you won. If you want to tell me what you’d make with your amazing fabric, do that too! You know I like to be nosy 🙂 This contest is open WORLDWIDE, but you must be 18 or older to enter. Winners will receive the equivalent of $75 USD and are bound by the T&C of the Zazzle gift certificate. Entries will close one week from today, MONDAY, APRIL 27, 2015 at 6:30 AM and the winner will be drawn at random.

McCall 6887 - Pineapple dress!

Good luck, everyone!

** Disclosure: Zazzle provided me with this fabric free of charge, in exchange for a review. All opinions expressed in this blog post are my own, though! Also, I am an affiliate with Zazzle, so any purchases you make at Zazzle by clicking the links in this post will net me a small percentage of the sale. Which I will likely use to buy more custom-printed fabric from Zazzle. The end! 🙂