Tag Archives: pink

Completed: The Coziest Loungewear Set

8 Feb

Hi everyone and welcome back to my blog! 🎉

I haven’t posted much in the last couple of years – I moved over to Instagram as it felt more manageable, and that was a good thing. But lately Instagram has shifted into something different, and I don’t like it. I don’t care for the video format and I hate the algorithm (as opposed to showing me the accounts I actually follow!) and the whole app is just really unappealing now.

I do enjoy sharing my projects, though, and having that information accessible for future reference. So I thought I’d bring them back here to my blog! Rather than worry about algorithms and producing videos and getting followers and all the stressful shit that sucks the fun out social media, I’m gonna do what I’ve always done – my own thing! In my own space! I’m going to try to keep these short and sweet and manageable for myself (as time is my most precious resource and blog posts take a lot of time!) (update: I gave myself 20 minutes to write this post, it’s officially been an hour. Oh well!). But anyway. Welcome back!

And to be clear – I’m not jumping the Instagram ship (yet). I’ll still post on there, but I’d like my in-depth stuff to live here, on my own platform. Where there are no videos and I can type using a real keyboard HAHA.

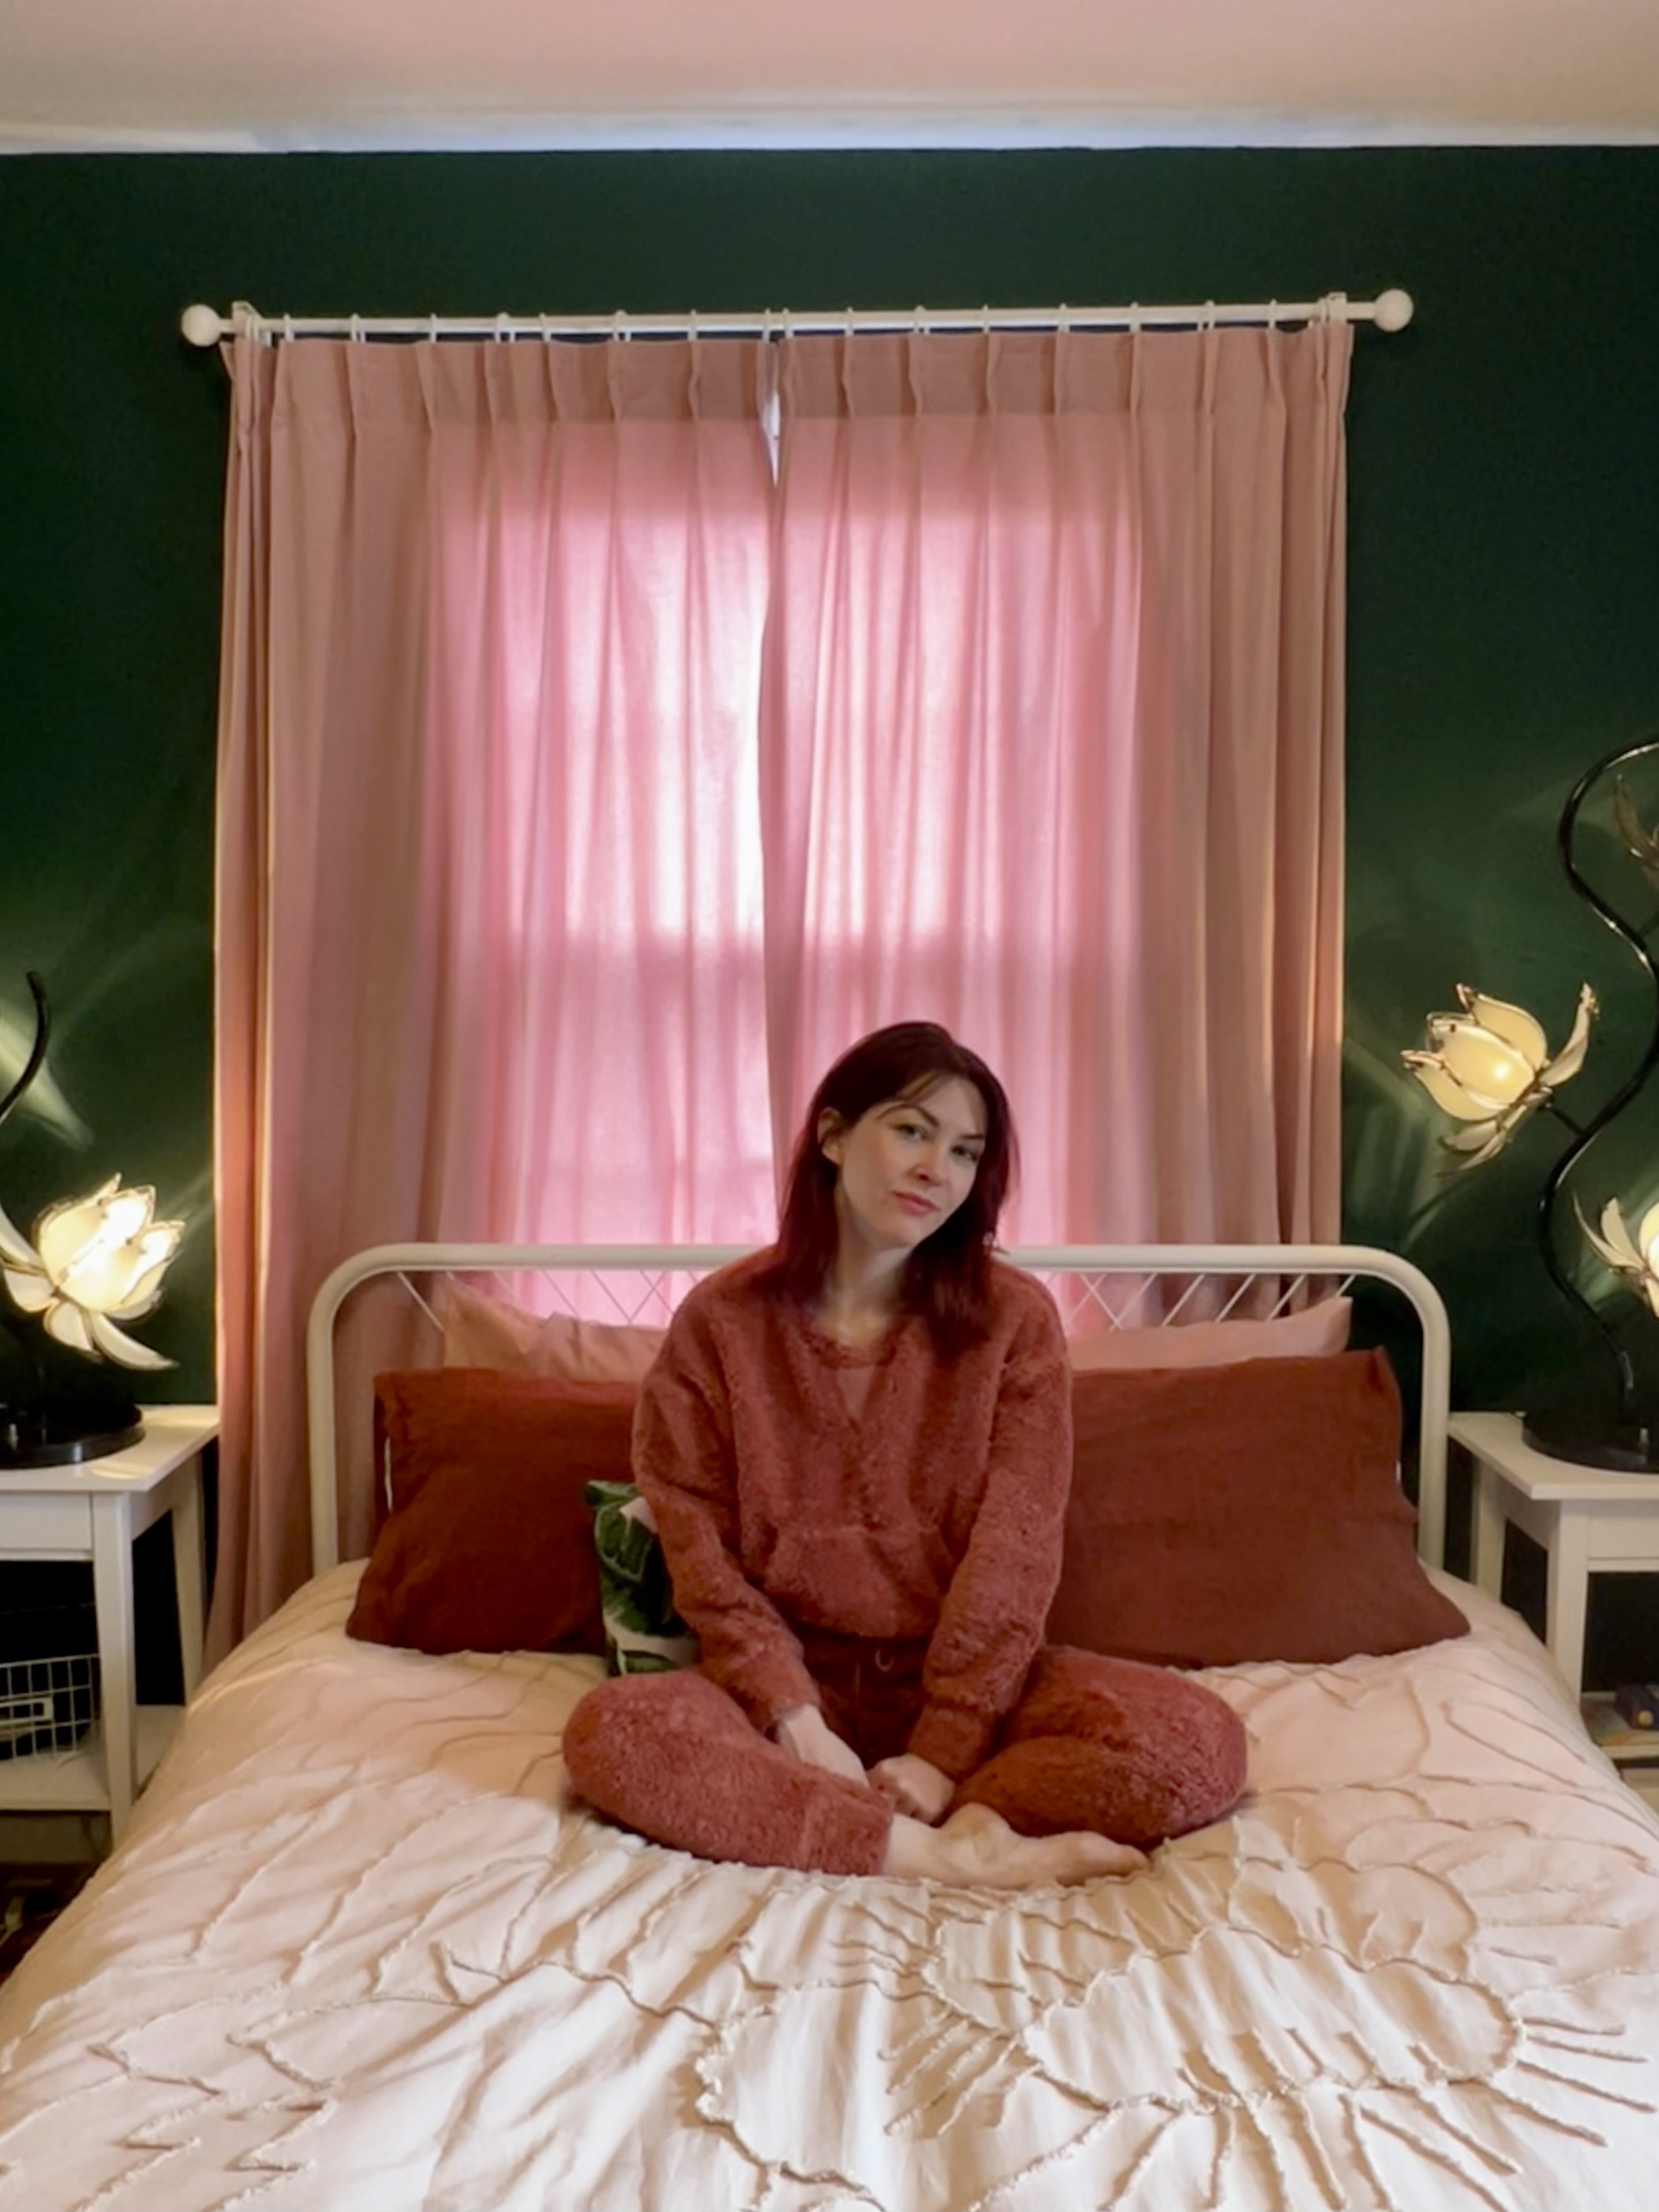
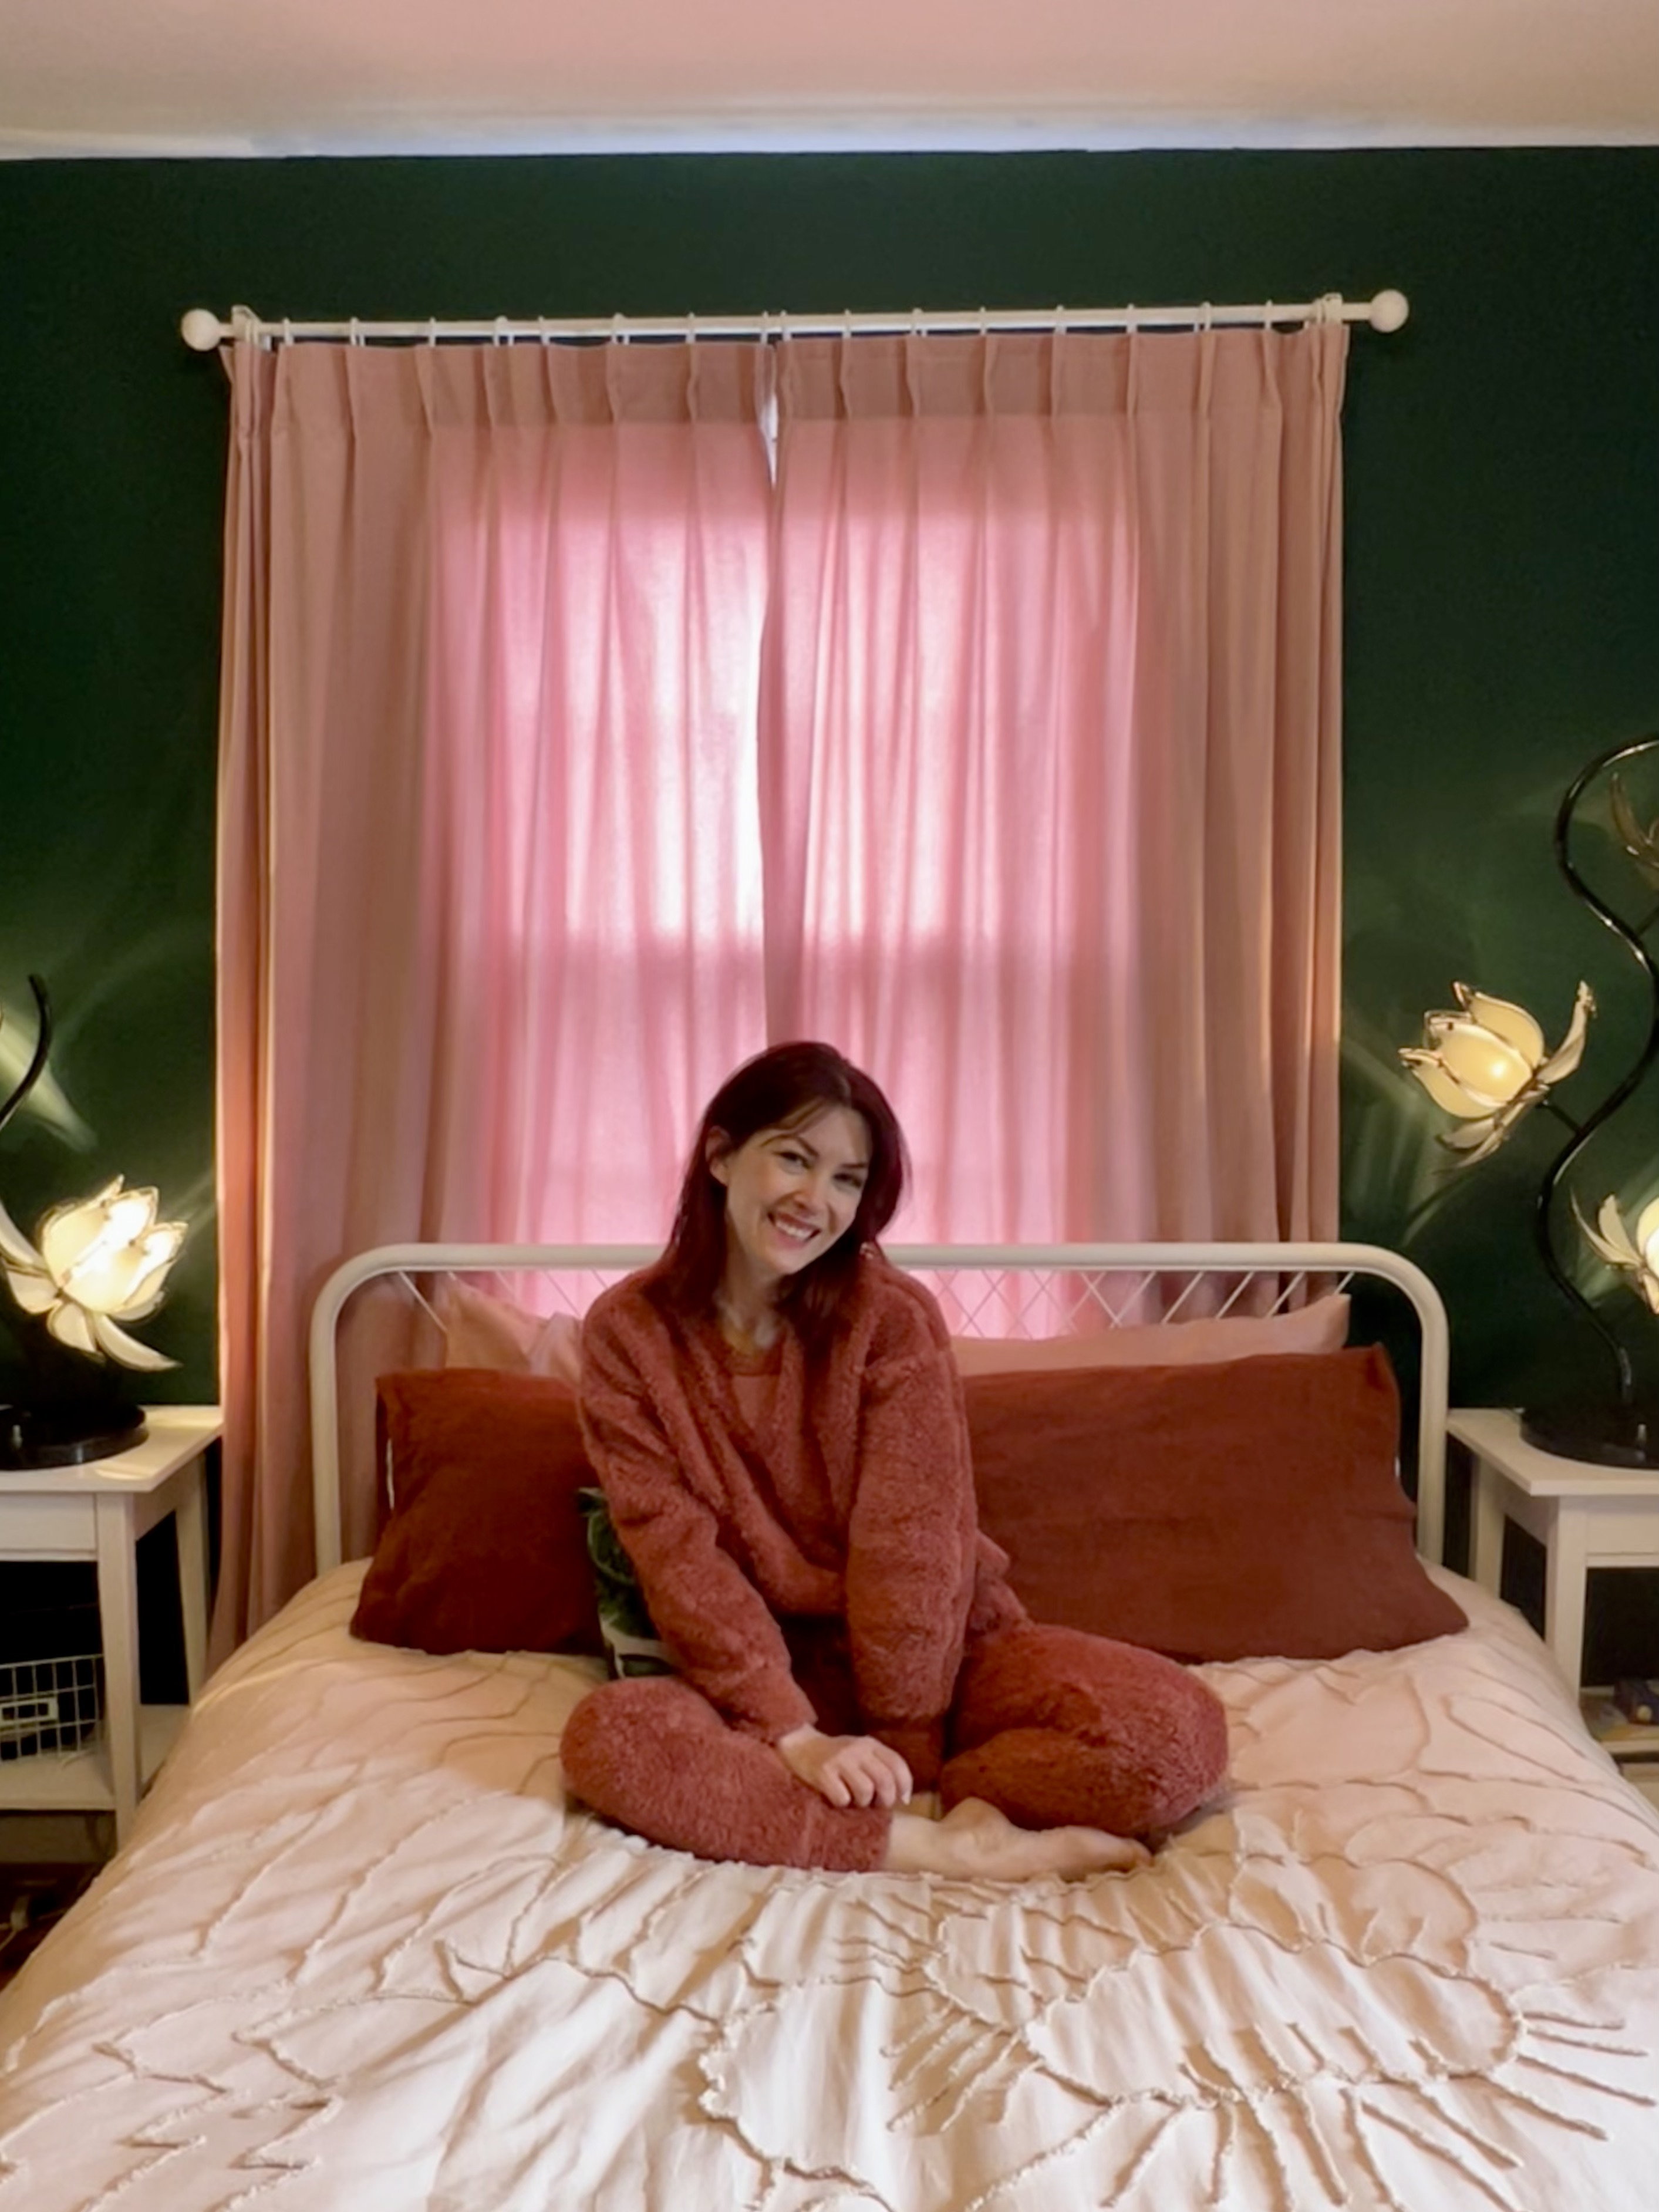
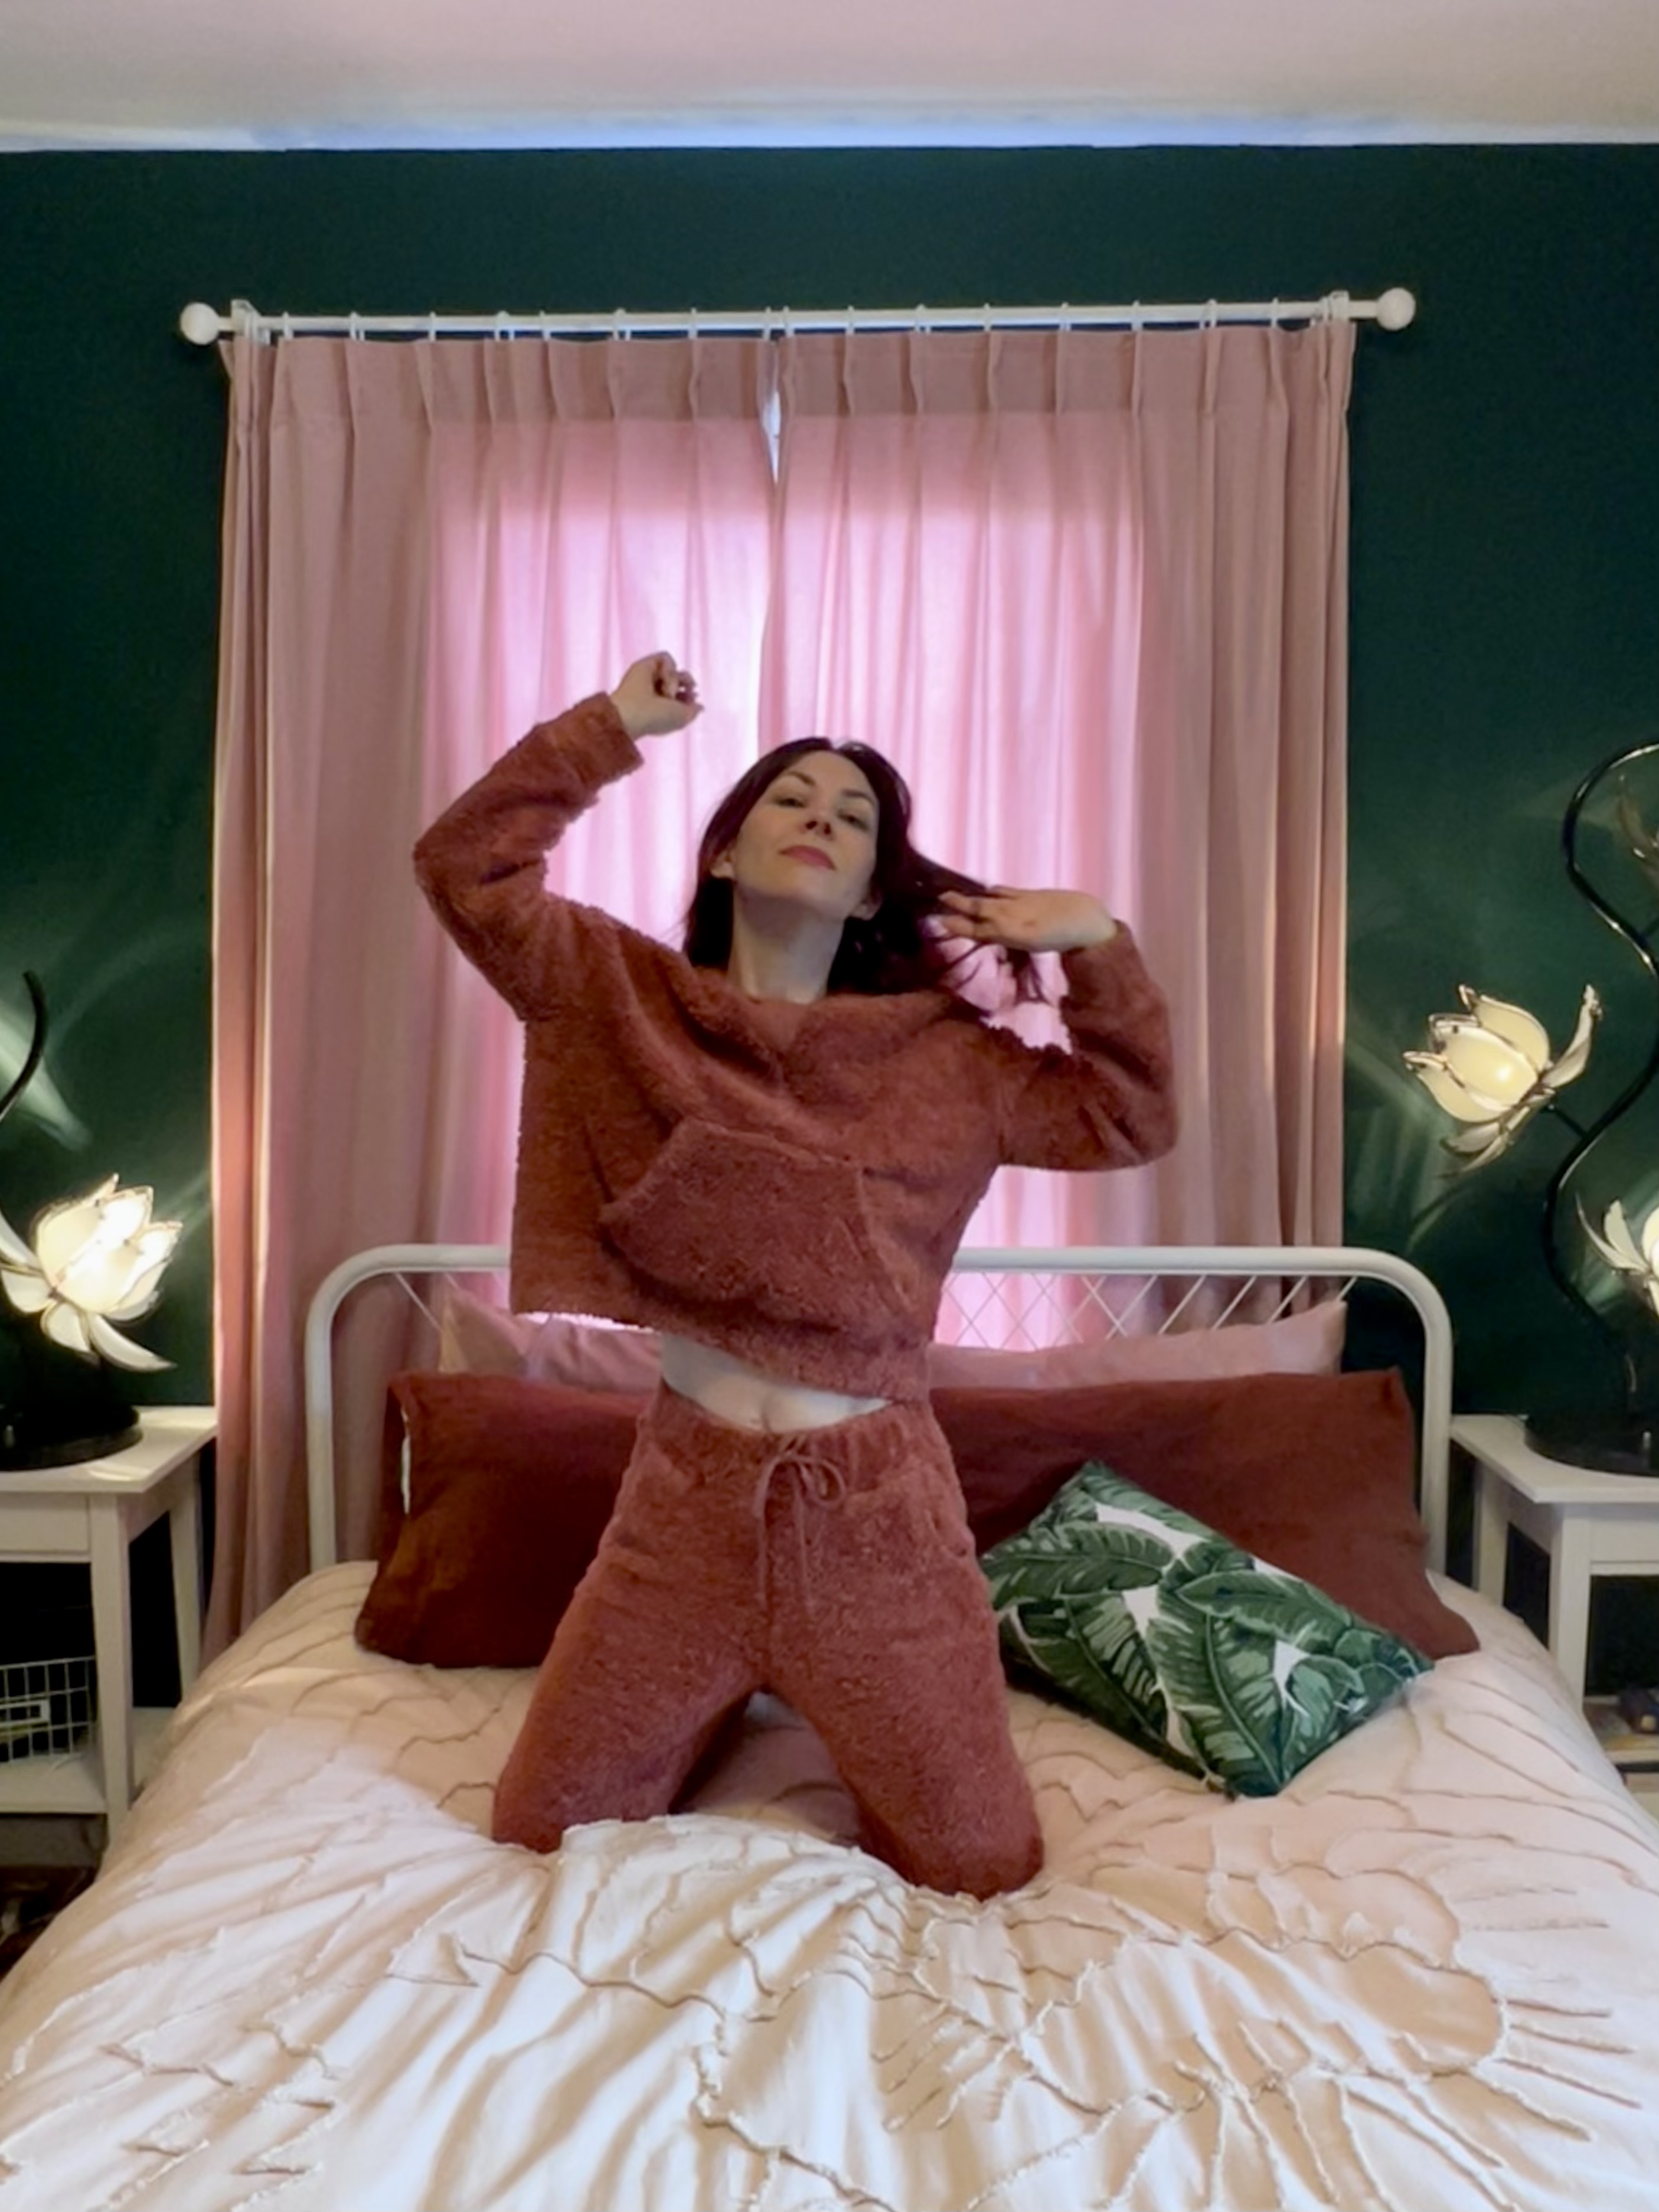
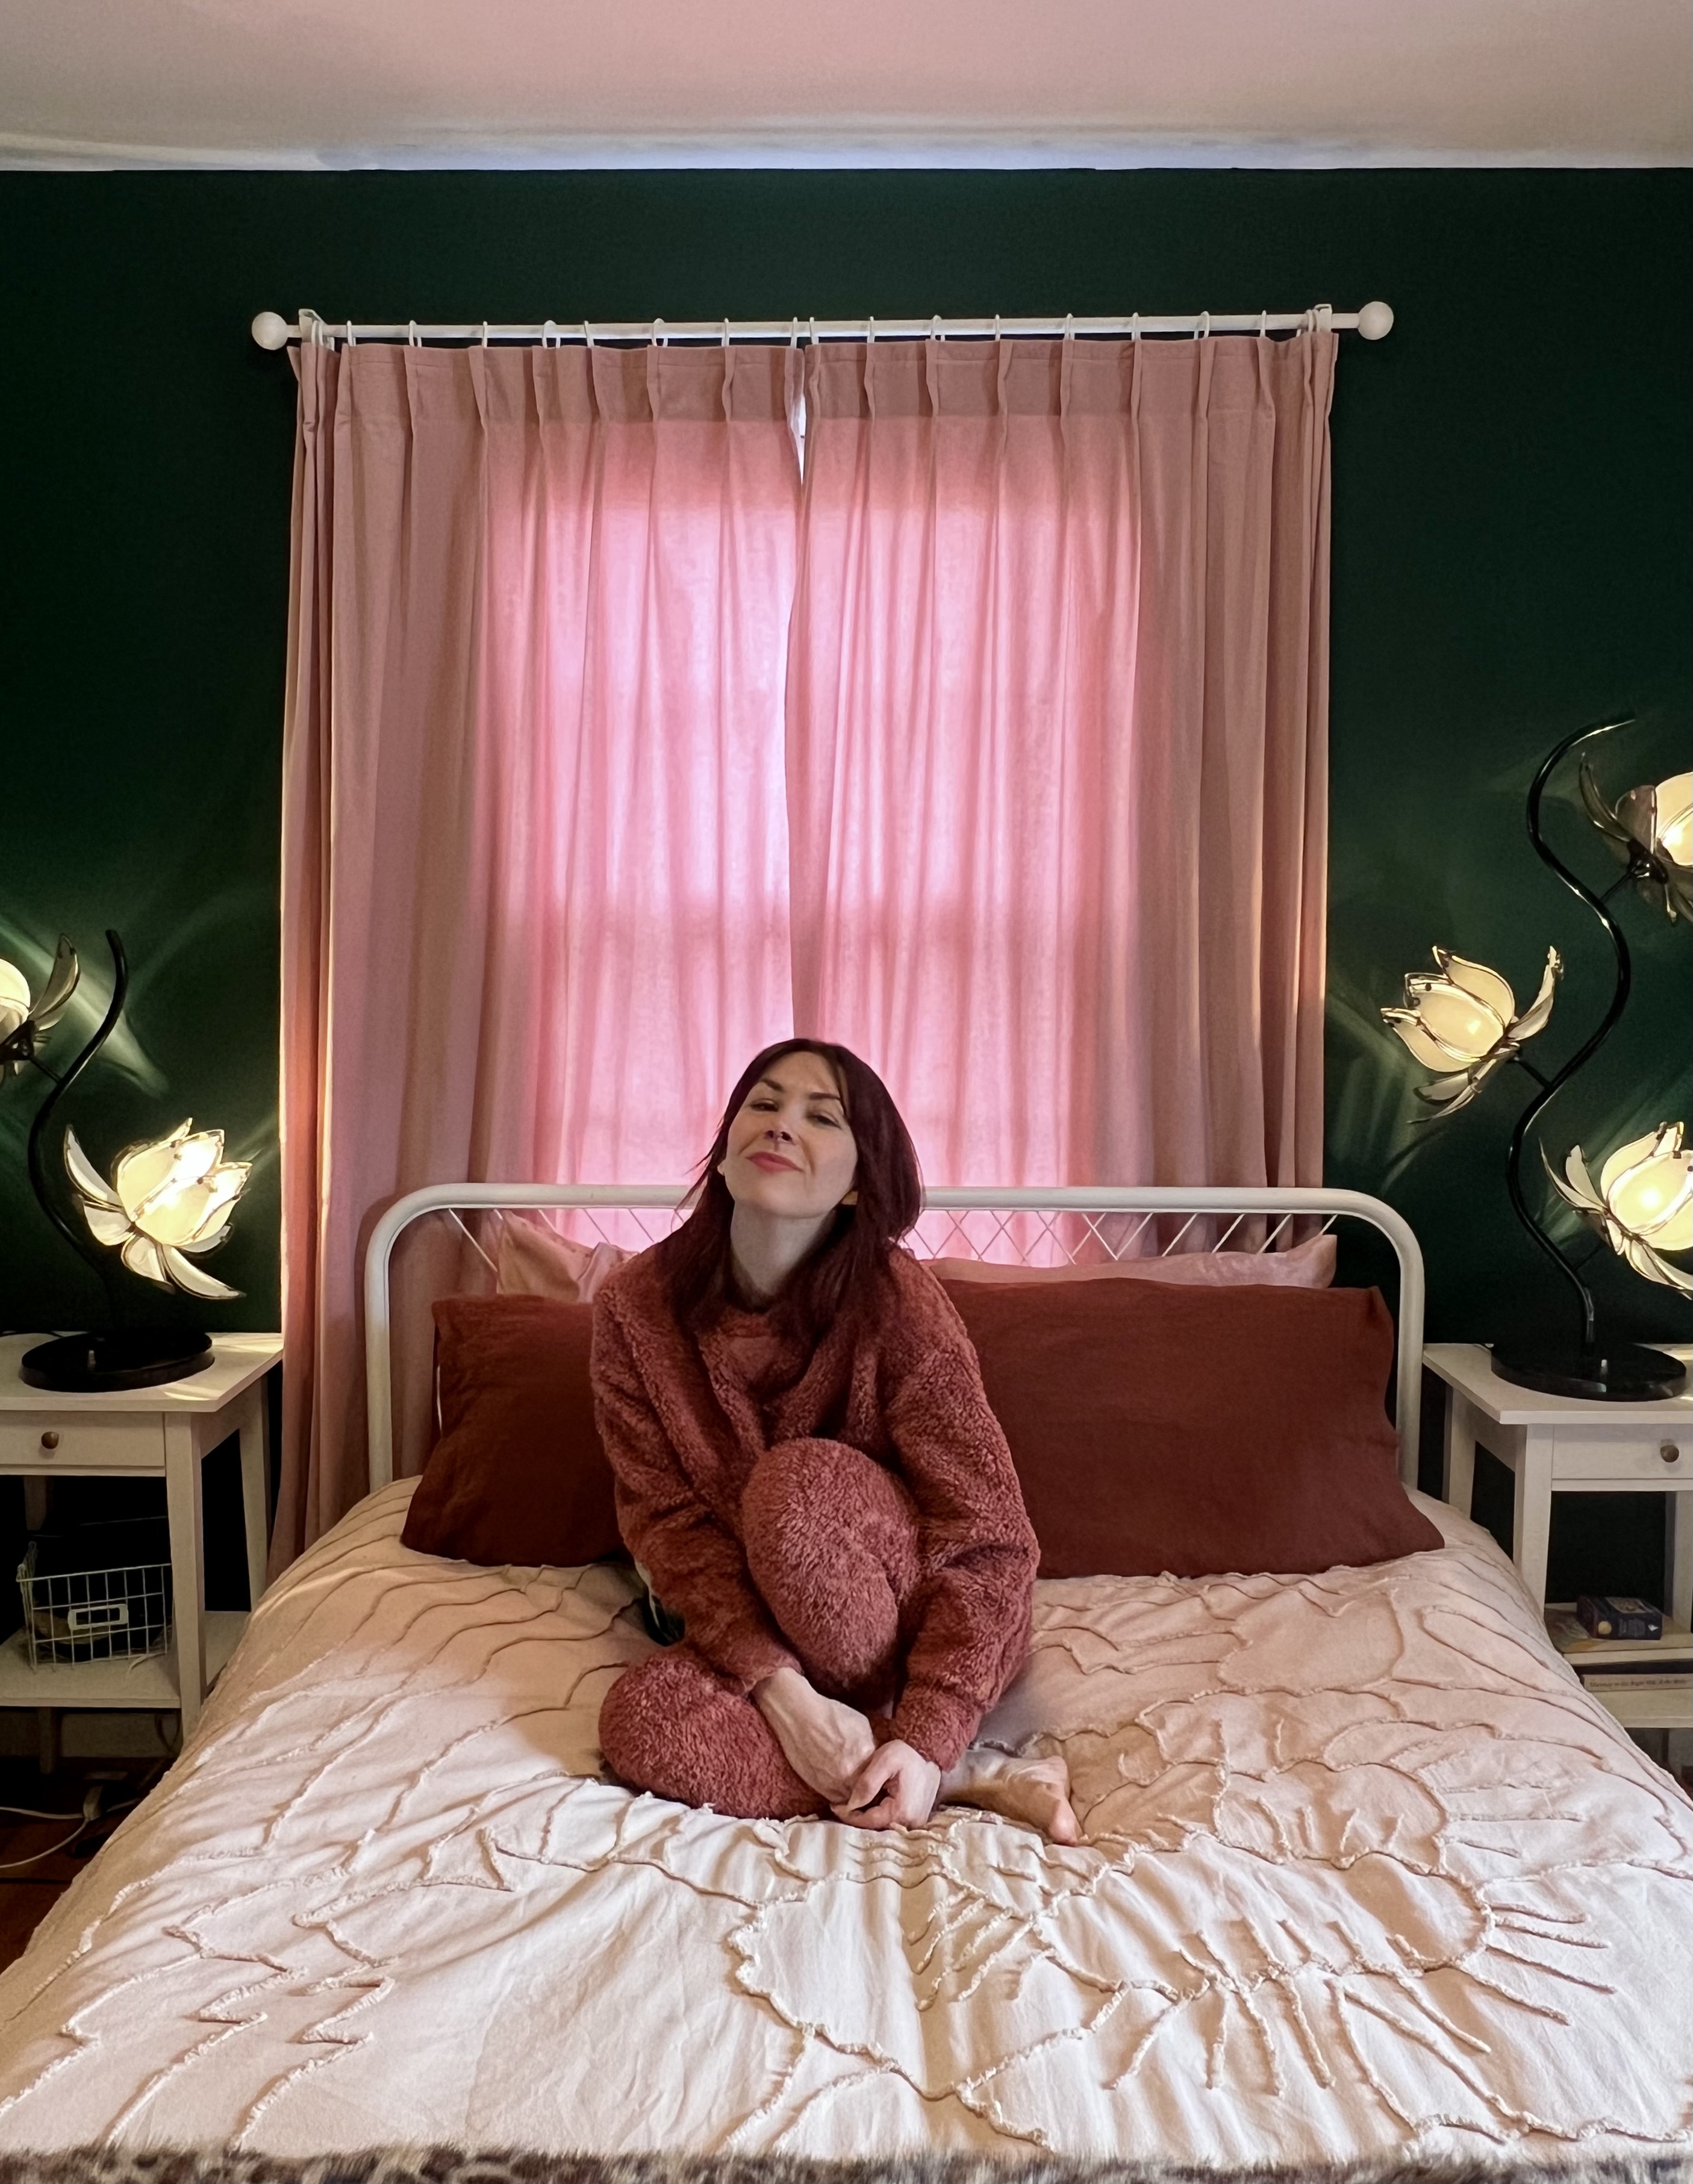
Today I want to share with you my newest, favoritest, coziest loungewear set: The Sherpa Dream 🐑

The sherpa fabric came first, so I’ll talk about it first! This pink fuzzy delight is from Domesticity (by way of Birch Fabrics, although I think it has been discontinued now) and I’ve been eyeballing it since the first time I taught there in June 2021. It’s enormously soft and fuzzy, and 100% organic cotton (which is important for me as I tend to get really sweaty in polyester). The color is just the perfect shade of warm coral pink. At $36 a yard, it was a splurge, which is why it took me so long to finally go all in. But I did and I bought 3 yards! It filled up half a suitcase! No regrets!

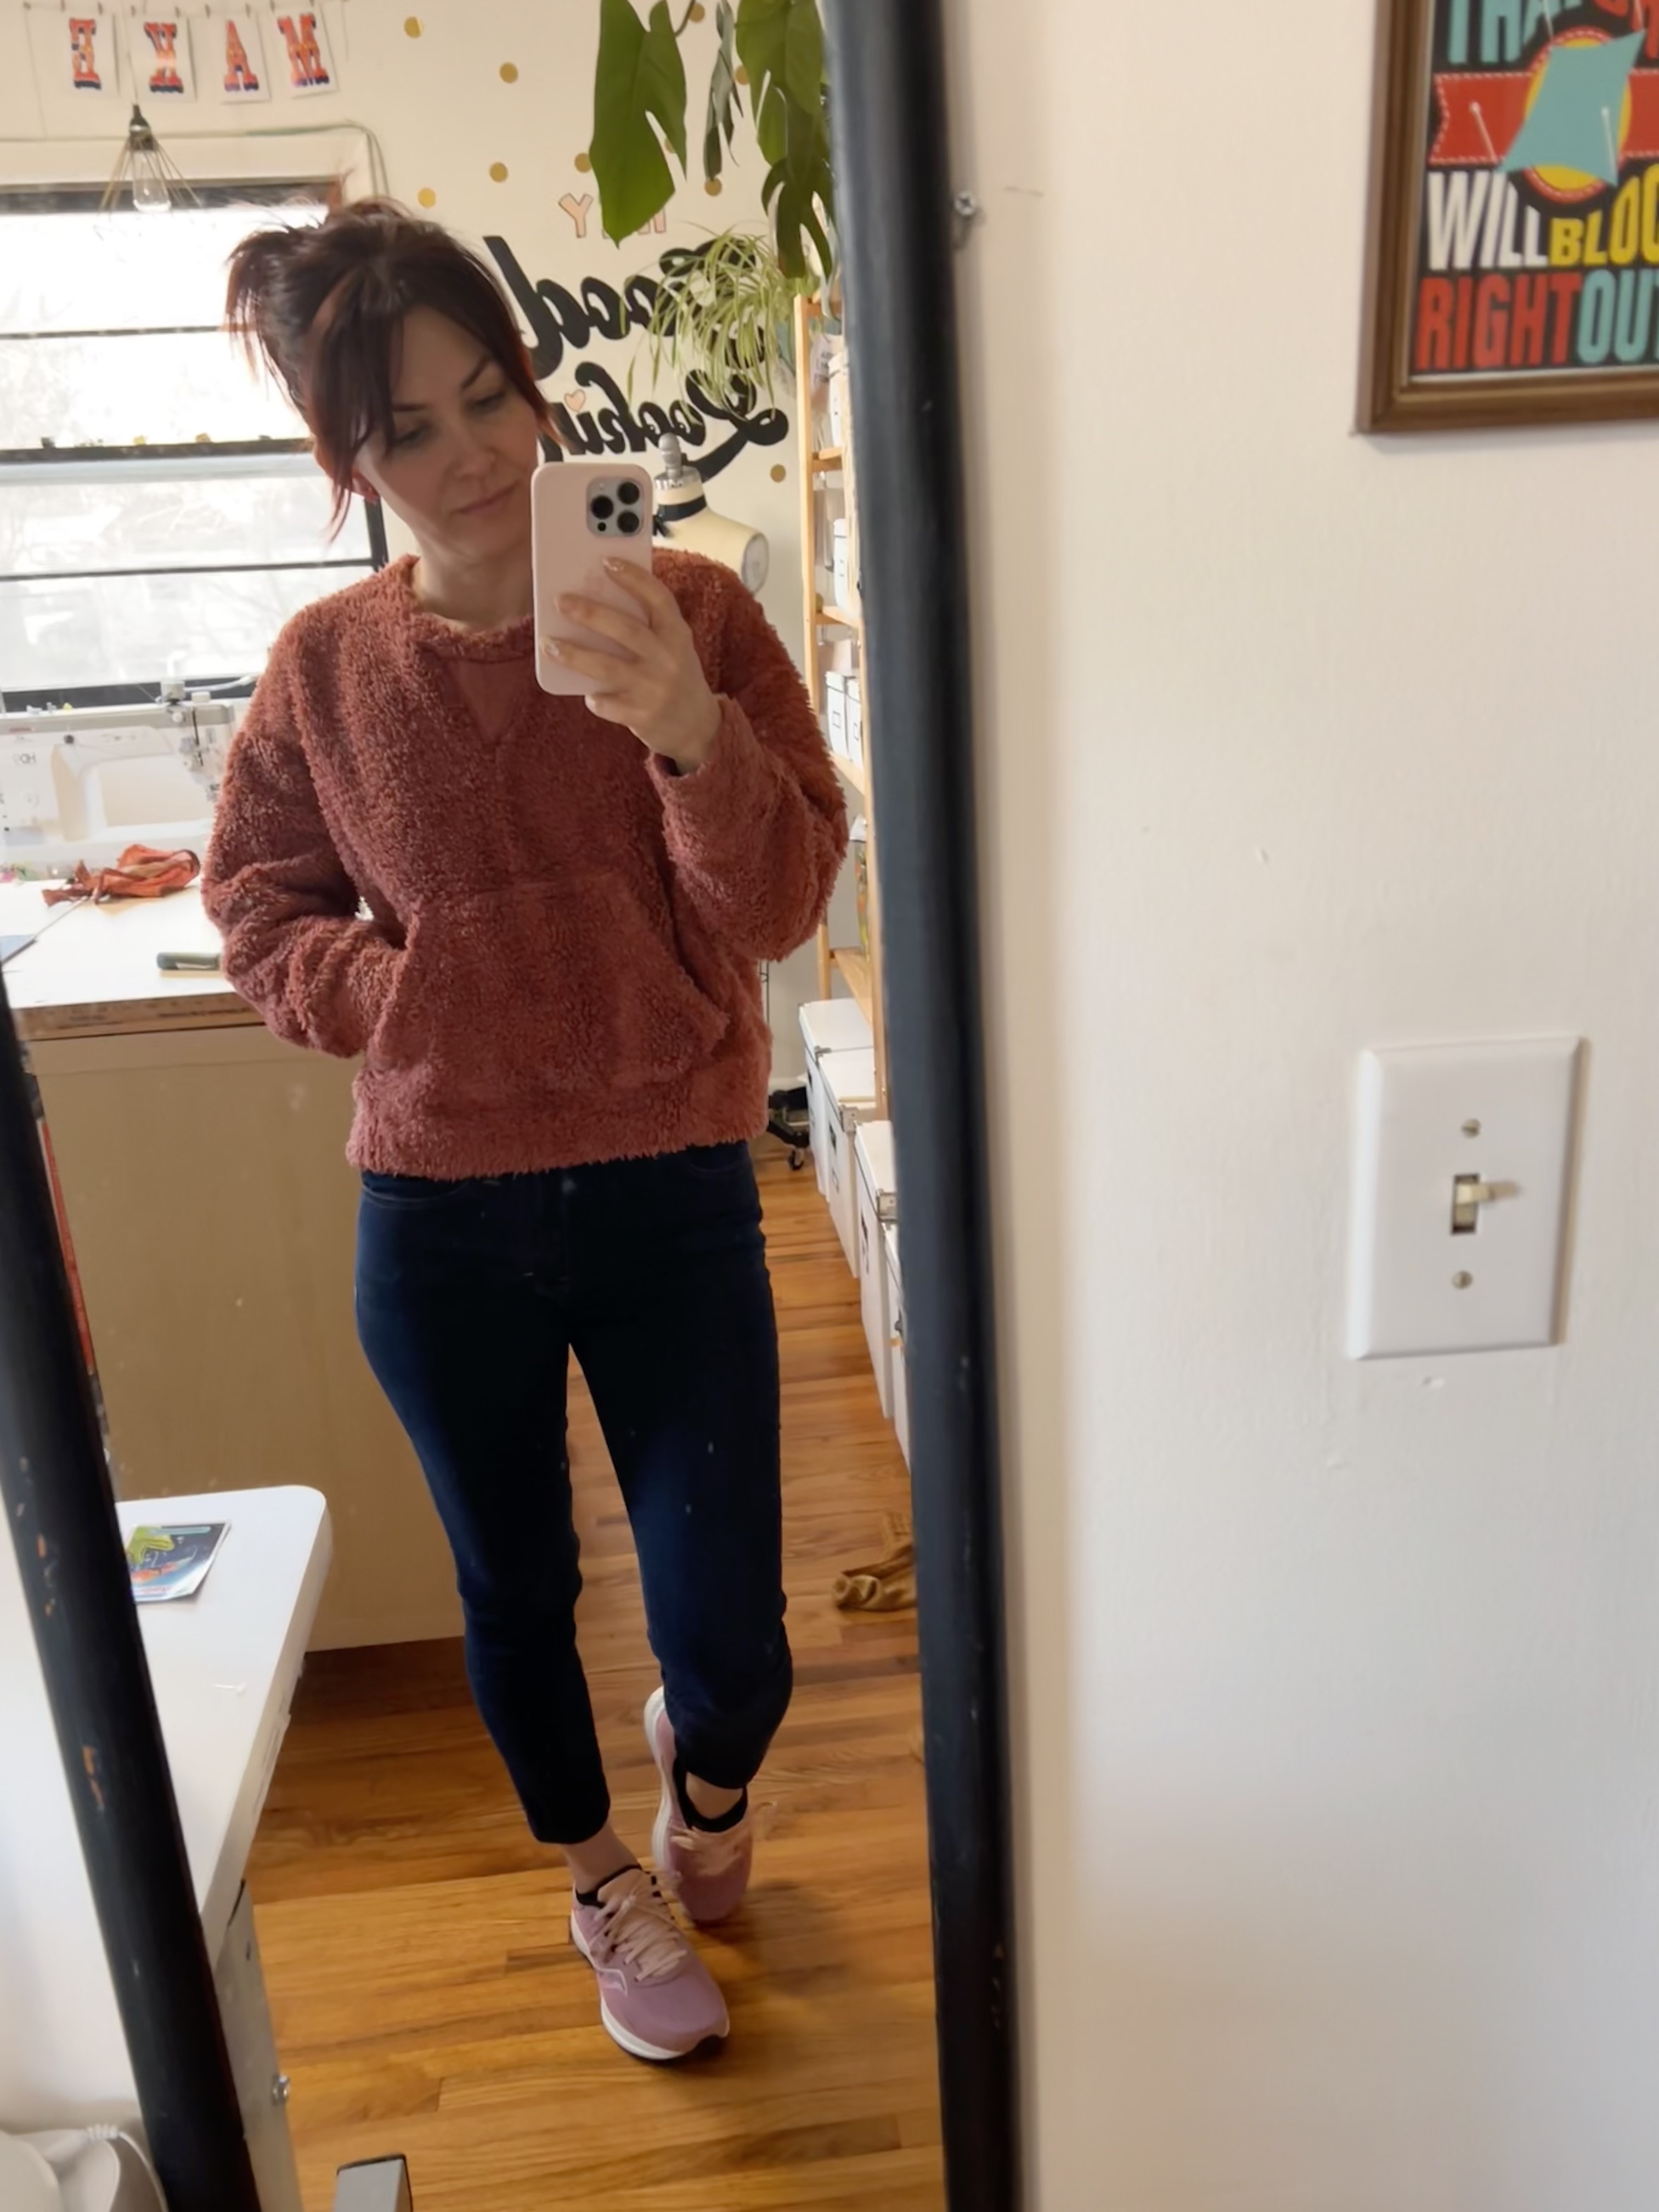
I wanted to make separates – I’ve been very inspired by these fuzzy knit loungewear pieces (lol @ Skims but like… don’t hate). I used both patterns from the Closet Core Montreal Collection – the Plateau Joggers and the Mile End Sweatshirt.

I will admit that when I first saw these patterns, my immediate reaction was “Seriously? Another pair of joggers?” It feels like every single pattern company has released their own version of joggers and sweatshirts. And while I understand that this is the current fashion – I am really just tired of looking at them! A jogger is a jogger is a jogger! But my favorite thing about Closet Core is their unique details on all their patterns – and once I took a closer look at these, I was on board. I love how the joggers lack a side seam at the pocket, which makes for much less bulk. The sweatshirt has some interesting detailing – including a yoke and elbow darts – which unfortunately is lost in this crazy fabric but that’s ok! The set has nice proportions, too – the top is slightly oversized and cropped, and the pants are slim but still comfortable.

I made a size 2 in sweatshirt, and a size 4 in the joggers. Both of these are a size smaller than what my measurements suggest, but based on other reviews I read + knowing how slim I like to wear my clothes, I’m glad I sized down. The only adjustment I made was to increase the rise of the pants by 1″, which I ended up taking out because they were too high! (whoops!)

Here is the sweatshirt originally, with the v-neck and hood!

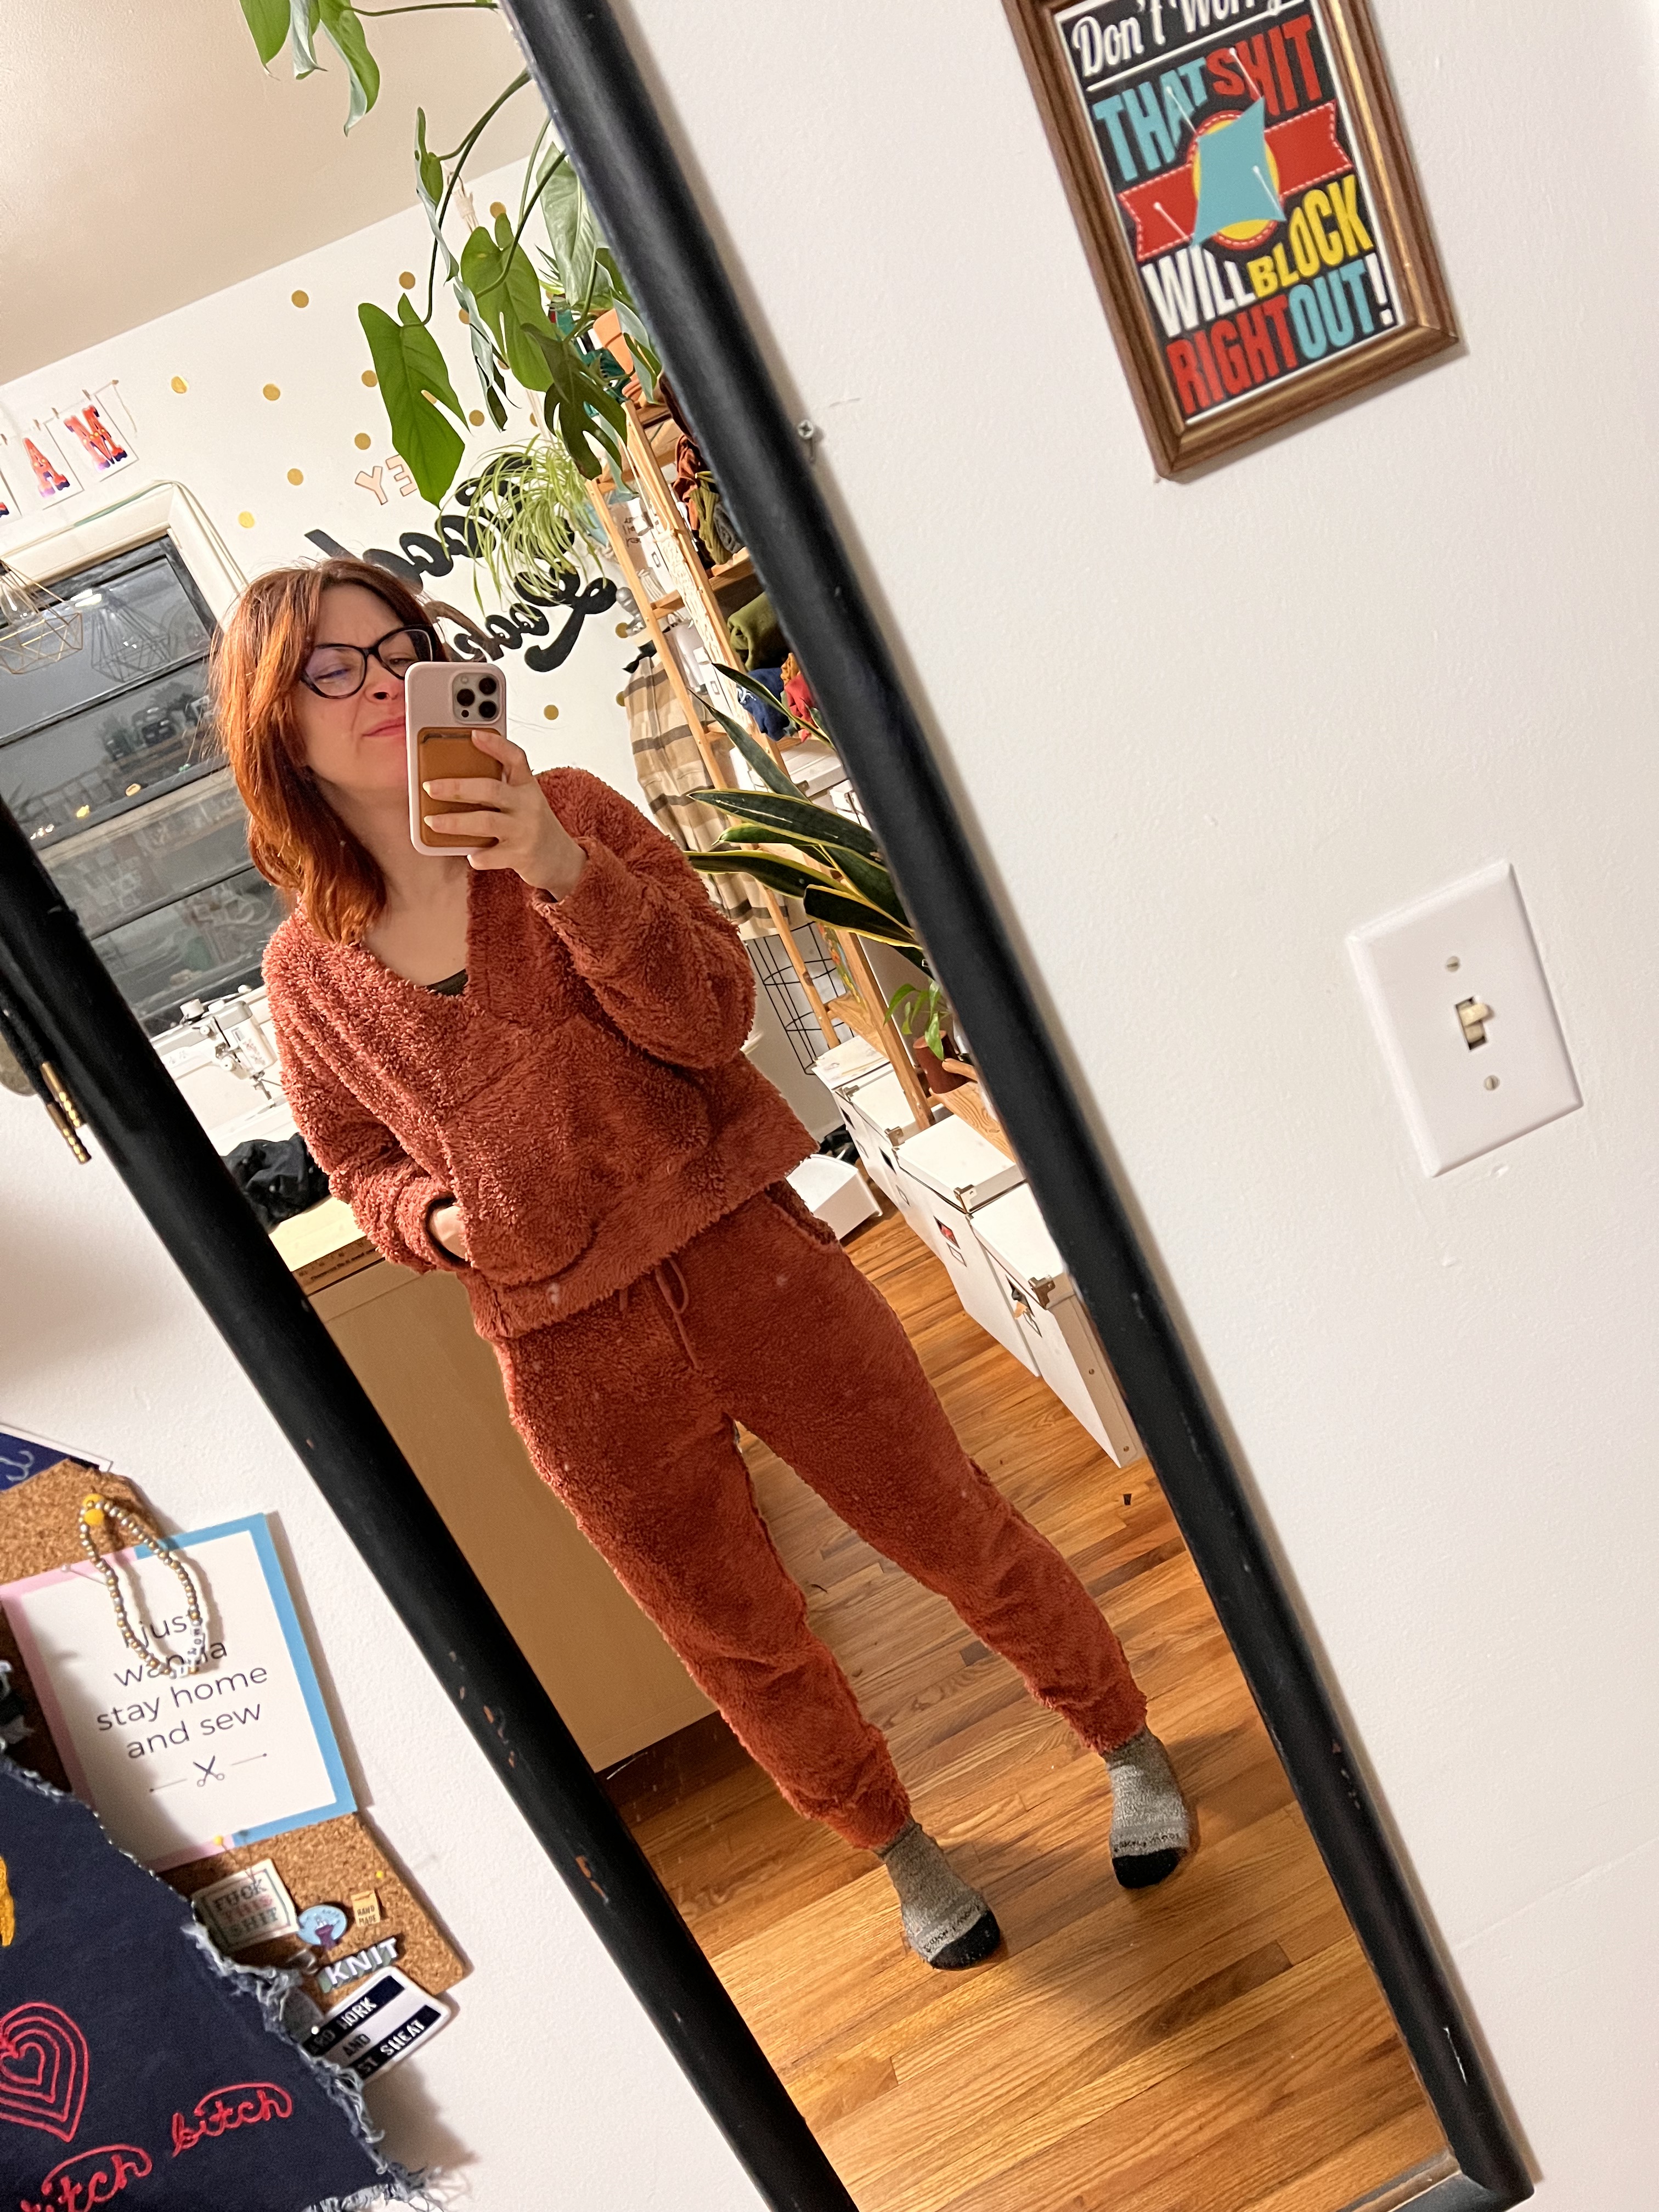
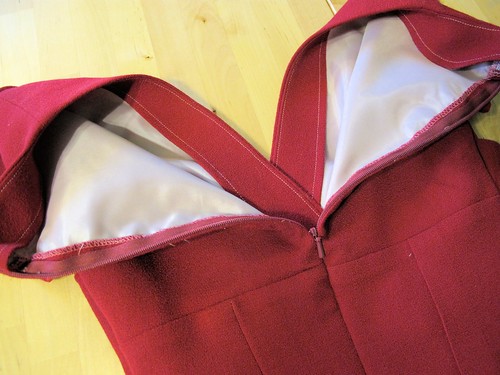
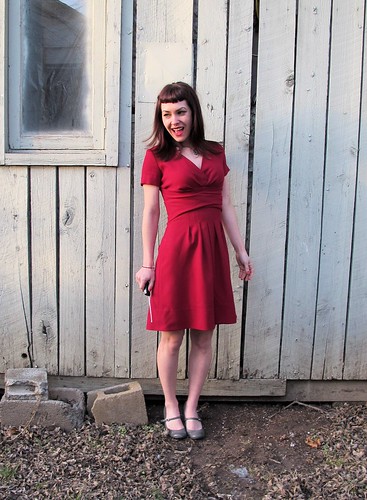
So the other thing I did when I made this set – I actually started with view C of the top; it was originally the crossover bodice with a hood. It is SUPER cute on everyone I’ve seen wear it! But, alas, this was a classic mistake of the wrong fabric + pattern pairing. The sherpa is overly warm, which is weirdly incongruent with the deep V. The deep V was also too wide for my shoulders, so it regularly gaped open and made it hard to wear the sweatshirt without a tshirt underneath. I stitched the first couple inches of the V closed, which helped, but then I had the issue of the hood being suuuuuper heavy and causing the entire top to pull toward my back as I wore it (which might not have been an issue if the shoulders weren’t so wide to begin with?). Further, the hood was so giant and thick, I couldn’t wear it with a coat or jacket – it was too bulky underneath, and the wide neckline meant that it didn’t sit right when it was pulled out, either. It was just a little too fussy and unwearable for me, so after about a month or so I changed it into a standard crew neck.

Doing this was surprisingly easy – I always think the easiest alterations are the ones to garments you’ve already made, since you know them pretty intimately inside and out! I removed the hood completely, opened the top of the kangaroo pocket, and unpicked the turned over hems of the V-neck. From there, I was able to create a vertical seam above the pocket – which is basically invisible due to the nap of the fabric. Since this started as a V-neck, I eventually ended up with a small gap at the top where the edges no longer meet. To fill this in, I added a small piece of the sherpa, wrong side facing out, like the detail on a sweatshirt. Then I finished the neckline with a fuzzy band of self fabric. All in all, the alteration took an hour or so, and resulted in a top that is INFINITELY more wearable than the original version!

And here it is after I altered it – so much more wearable!

Working with this sherpa was pretty easy, although it did require some extra steps. Since the nap runs in every single direction, I didn’t worry about it while cutting my pattern pieces. The fabric sheds like craaaaaazy, so I used my serger to finish all the edges (I kept a longer + wider stitch to help push it though, as it’s quite bulky) and kept my handheld vacuum nearby to periodically clean up (which sort of worked but also my studio is still full of pink fuzz so… there’s that). After sewing seams, I used a comb to pull the hairs out of the seams and fluff them up, same as one would do when sewing faux fur. I did try some topstitching on the top to better show the seamlines, but they are still pretty subtle, so I skipped them on the pants. My fabric is stretchy so I was able to use self fabric for my bands (with no elastic, other than in the waistband). Since the fabric is very bulky, I opted to use a matching cotton interlock knit on the pocket pieces (you can’t see the inside at all and it keeps that area nice and flat). I used the same cotton interlock to make the fabric waist tie. Oh, and while I did try to finish the eyelets that the tie feeds through – nothing would stay in place due to the nap of the fabric. So there are literally just… holes in the waistband. They seem to be stable enough lol.

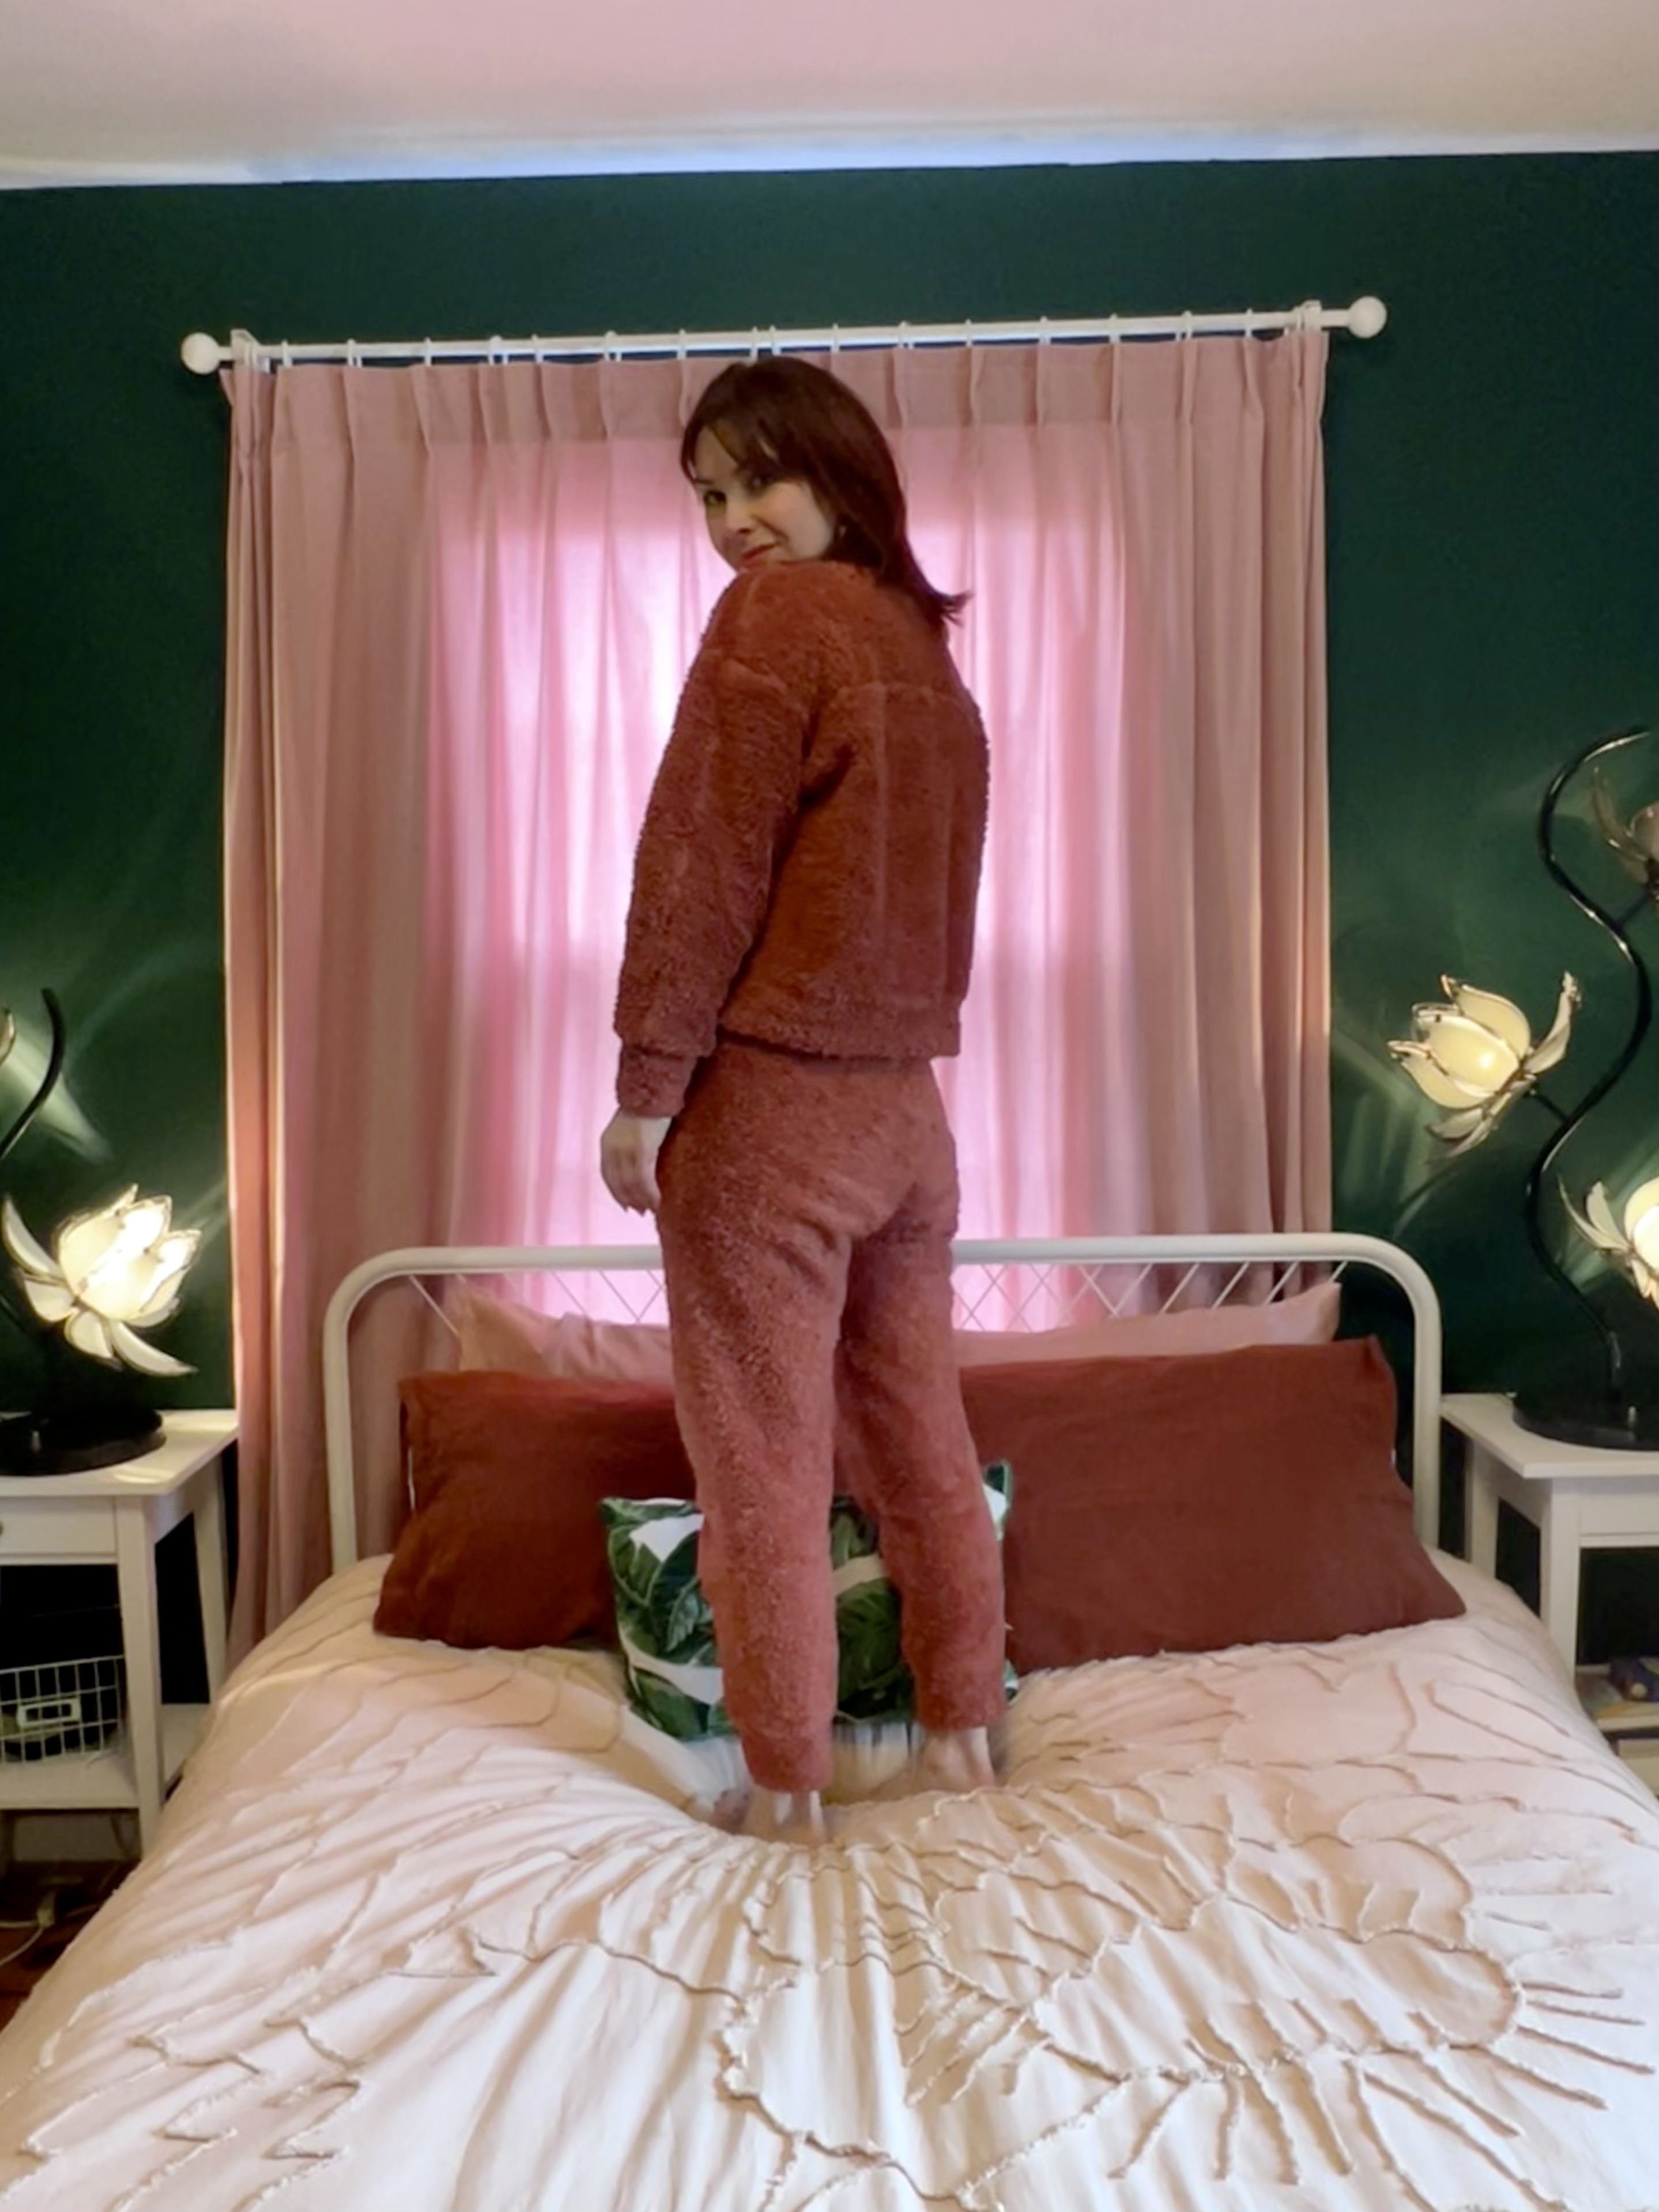
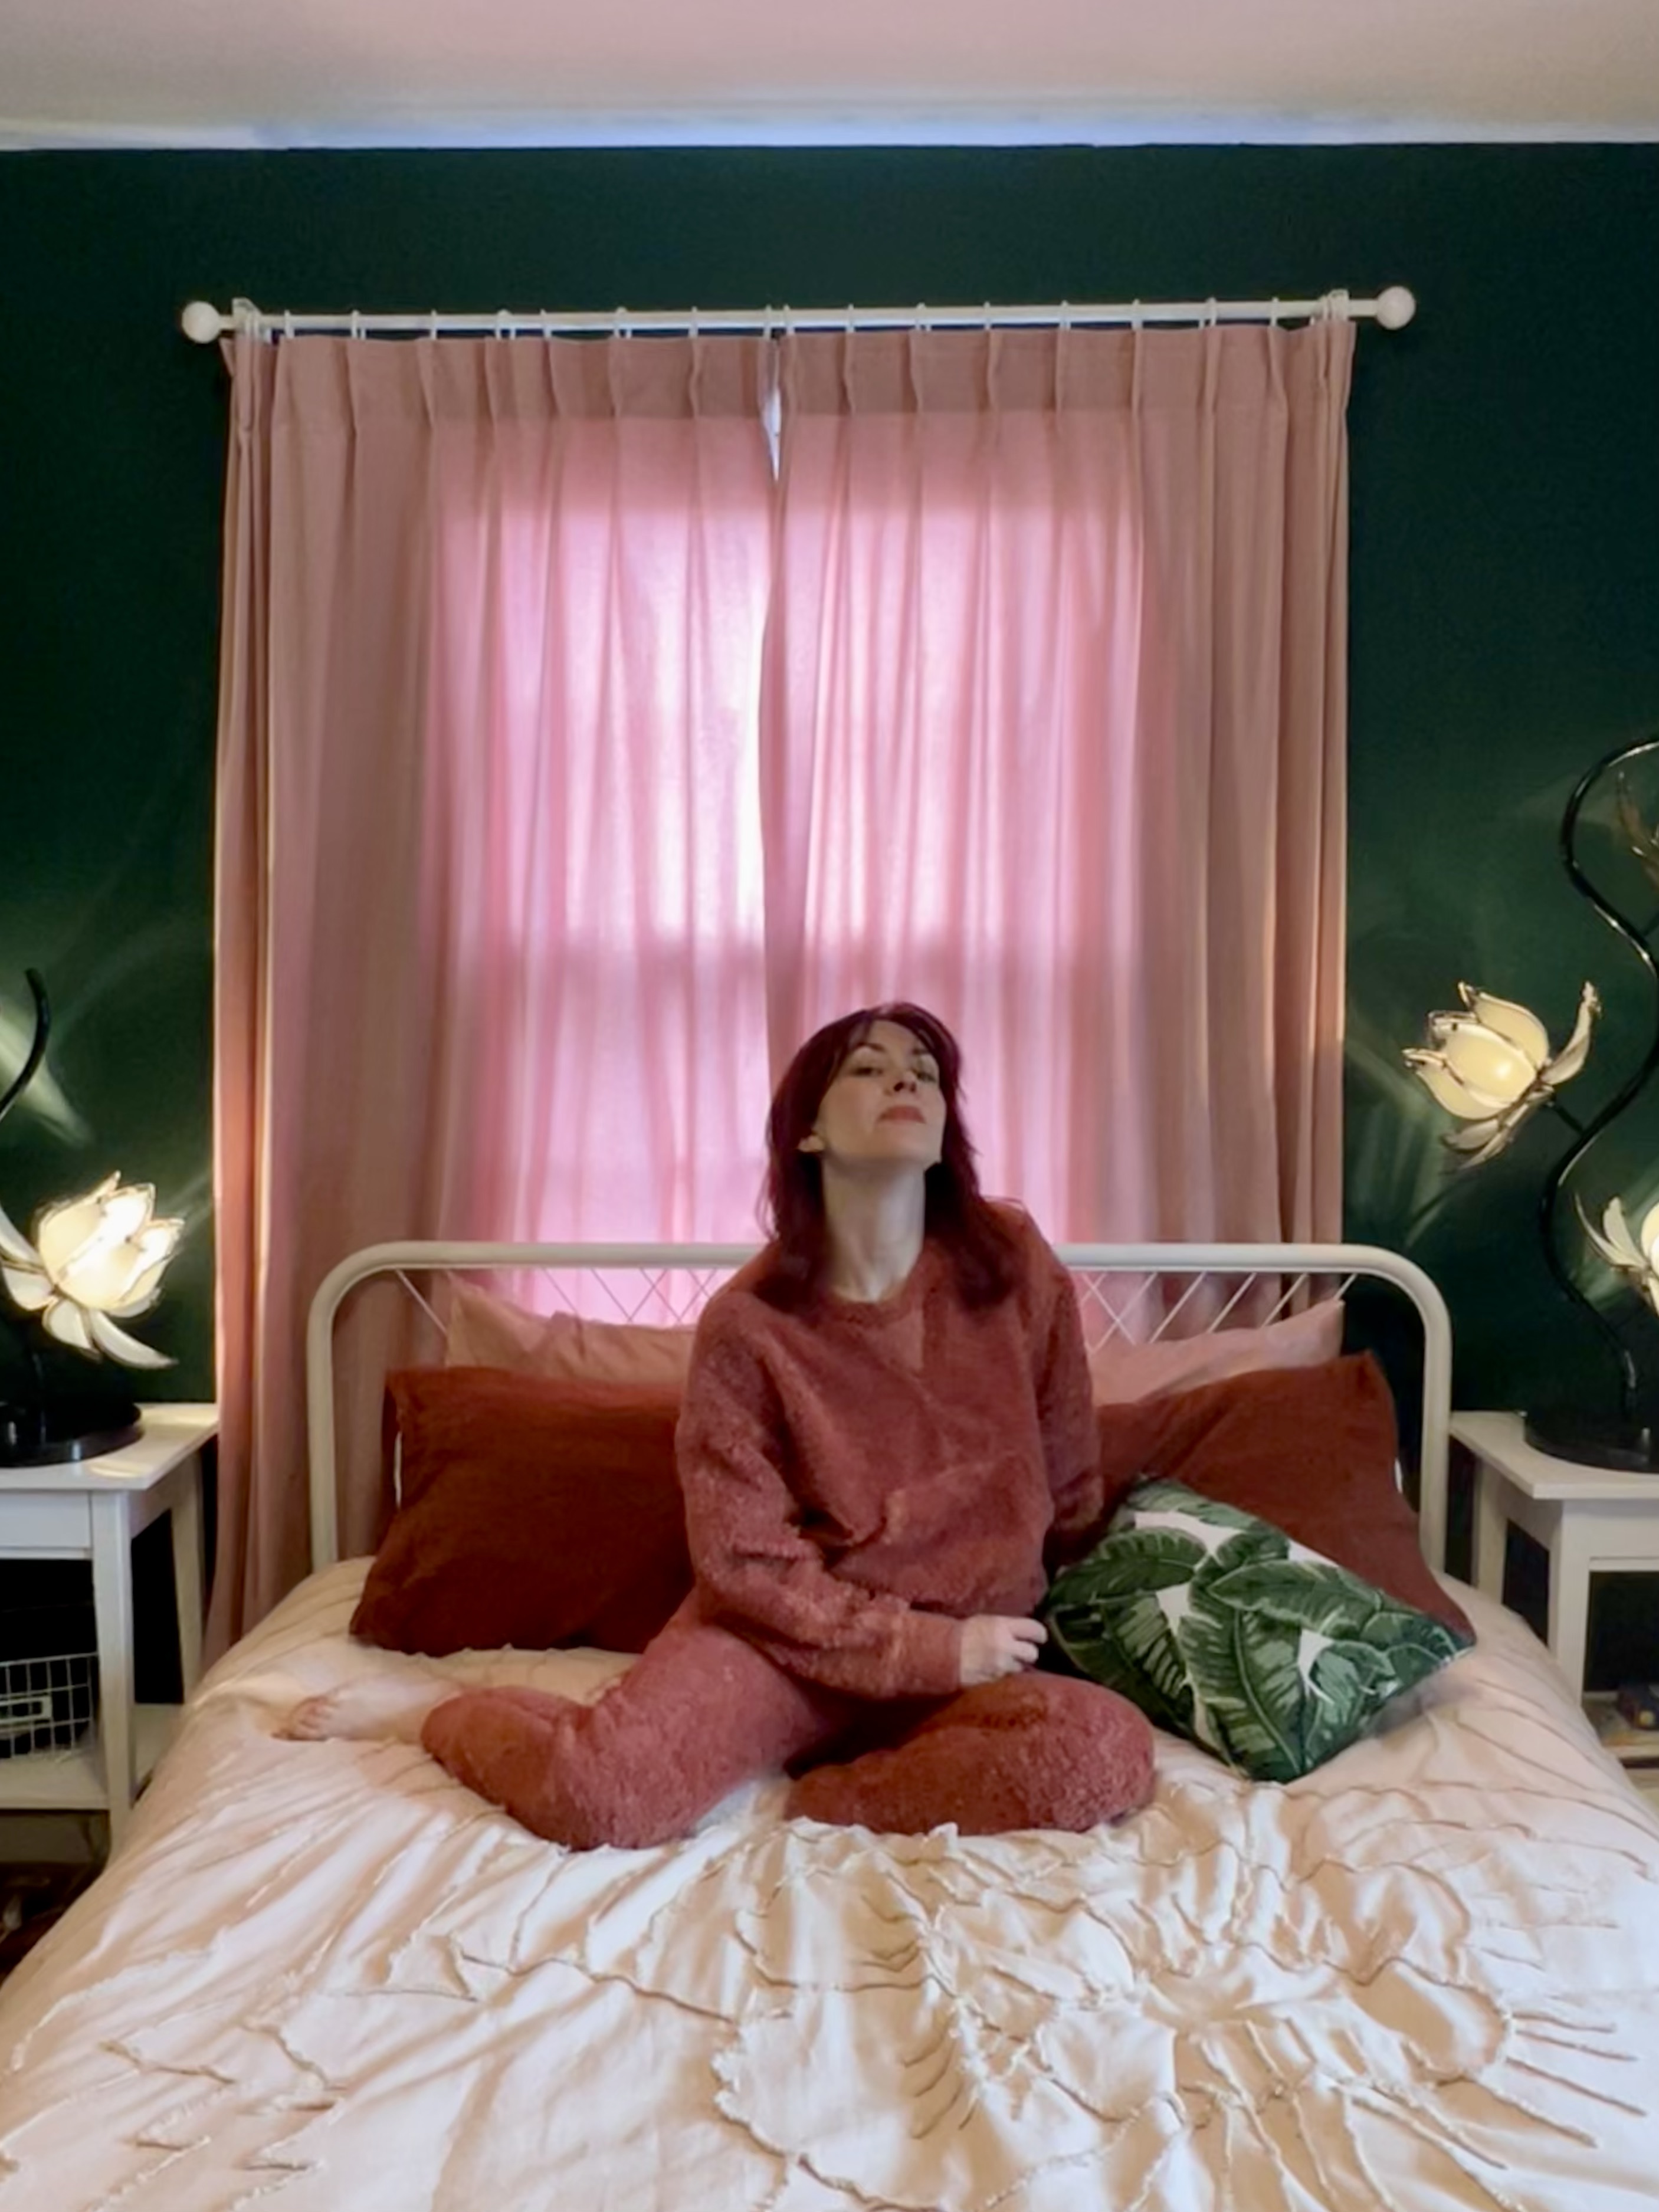
It took me a couple months to complete this set – and then a couple more to get photos. I took these in my bedroom, which I love waking up in every morning! Sorry the photos are blurry – no idea why, but I’m not re-taking them LOL. Oh, and while we are talking about handmade and altered things – I made the rust linen pillowcases (fabric is from Blackbird Fabrics – it felt sinful to use such a nice garment weight fabric for PILLOWCASES but the color was just too perfect for my ~palette!), the tropical throw pillow (leftover fabric from this project!), the pinch pleat curtains (originally from Ikea; I sewed channels at the top to create the pinch pleats) and re-wired the smaller lotus lamp on the bedside table.

That’s all for now! Have a great day!

Completed: Simplicity 2145

10 Feb

Happy Monday, everyone! I have some good news and I have some bad news. The bad news is – I didn’t make it through the first round of Project Sewn. Bummer! Although, I’ll be honest right now – as soon as I saw who I was competing up against, I immediately figured I’d be one of the first to go 🙂 On the flip side, my girl Oona made it as the winner for the first round! YAY OONA GET IT GIRL. Can’t wait to get some celebratory drinks with you when I’m in NYC next month!

Speaking of my short stint with Project Sewn – I’ve received lots of sweet messages and comments since I was eliminated, and I am absolutely floored by all the support. Aw! You guys! I think some of you were more upset about the elimination than I was 🙂 I’m actually a tiny bit relieved to have that heavy workload off my shoulders. I’m not gonna lie – it was tough trying to coordinate all that sewing (for PS, as well some other ~secret~ side projects, stuff for the Mood Sewing Network, not to mention this blog!), and it got a bit stressful. SO MANY UFOS ALL OVER MY SEWING ROOM. Which is certainly a first world problem, don’t get me wrong, but it is what it is. I really don’t know if sewing contests are for me at this point – I always feel too rushed when I’m making my shizz, and half the time I end up with something that isn’t up to my personal standards. I really loved participating in Project Sewn, and I don’t regret my decision to join one bit, but but I think from here on out, I’ll be staying out of contests like that 🙂

So, anyway, the GOOD news – my pink dress is already finished and photographed, and since I’m not one to let a perfectly good project go to waste, I’ll be showing y’all a whole DAY earlier than originally planned. Woohoo!

Simplicity 2145

The color is a deep magenta, although it looks quite red in these photos.

Simplicity 2145

This is Simplicity 2145, which is one of those ~be your own designers~ Project Runway patterns. I’m just going to throw this out there – I don’t like the PR patterns. Sorry! The drafting is fine for what it is, but the method of construction (and instructions) is usually pretty subpar in my experience. I suppose the drafting is more important than the instructions (ok, I KNOW the drafting is more important than the instructions, ha), but they are generally intended for “emerging designers” and I think they just set a bad example. I’ve sewn lots of these patterns in the past – they usually have some neat style lines that I don’t find replicated in other patterns – and if I was dealing with those instructions as a beginner, I think I’d give up on sewing entirely. Lots of unfinished edges, missing information (I can’t remember the particular pattern, but I do recall one that spent 3 paragraphs explaining how to sew a dart, and then forgot to tell you to close the side seams. Really!), and the yardage requirements are waaaay too generous.

I guess my point is – if you want to sew these patterns, great, but make sure you have a good instruction book close by. That is all.

Simplicity 2145

ANYWAY, back to the matter at hand – I think this particular dress turned out great! I really love the front wrap and the pleated skirt, and I think it’s a cute (and flattering!) look. I believe this pattern was intended to be a knockoff of Princess Kate’s engagement dress, although let’s all take a moment to acknowledge that she looks 1000x better in hers than I do. Must be the silk jersey 😉

Simplicity 2145

My version is made from wool crepe, which I picked up at Textile Discount Outlet while I was in Chicago last year. It was cheap, too – I think I paid less than $10 a yard for it (and it’s pure wool, according to my burn test. Nice!). I used a scrap of baby pink Bemberg Rayon to underline the bodice, and left the skirt unlined (only because that’s all the lining I had). I decided to go with underlining because the thought of trying to draft a lining for this style gave me a headache, haha. Underlining also meant that I got to keep the facings without there being a lot of bulk. I like facings.

Simplicity 2145

One thing I will warn y’all about this pattern is that it runs LARGE – like, super duper large! Holy shit! According to Simplicity’s size chart, I should be wearing a size 10. Well, I know how much they (and the rest of the Big 4) looove to make things way too fucking big, so I double-checked those finished measurements and ended up sewing the 4. So freaking ridiculous!

On the flip side, I didn’t have to make many adjustments to get a good fit. I did make a muslin – this has become a very regular thing for me (more so than usual) because I’ve learned that my posture means the back is too large at the top and needs a flat pattern adjustment. So I have to muslin everything I make now. It’s a pain for sure, but I will admit that it is REALLY nice to not have a big gape at the back of my neck! This one didn’t need much of an adjustment – I did a 3/8″ rounded back adjustment, and the fit at the back is pretty much spot-on now. The only other alteration I made was to shorten the sewn-down part of the skirt tucks. They were a little too long on me and it just looked weird.

Simplicity 2145

The dress also has two tucks at the back, which upon viewing these pictures appears to hit a somewhat unflattering spot right above my ass. Oops.

Also, for some reason, I had a DEVIL of a time inserting that invisible zipper. I don’t know why – invisible zips don’t really give me much trouble! – but my feed dogs were trying to make it gather on one side. So weird! I’ve since inserted several invisible zips, and they go in flawlessly. I don’t know if it had something to do with the wool crepe or what. If you super zoom into this photo (which, I mean, uh, don’t. Haha), you can see that my waistline seam at the zipper is off by about 1/4″. That was the closest I could get it, after ripping the zip out like 4 times. Stupid zipper!

Simplicity 2145

Another thing I don’t care much for about this dress is that the sleeves are SUPER tight and it’s difficult to raise my arms very high. So it’s ok for wearing if I’m going to be sitting all day/not moving around, but that’s about it. I need to rip them out and reinsert them and see if that helps. I’ve been told that if the sleeve isn’t eased in the right areas, it can make it difficult to move your arms, but I was pretty careful about that while I was setting these in. I’m thinking it might be another pattern adjustment that I need to address, because it happens a lot to me. Anyone have a suggestion on what I should be looking for? The armhole is high enough (I believe) and the circumference around my bicep is the correct size, so I’m not sure where to go from here, or even what to research.

Simplicity 2145

Sleeve issues aside, the rest of the dress is right up my style alley. You can get a better idea of the true color here – it’s a very rich, deep pink, and it looks super fabulous with all the wool crepe-y texture.

Simplicity 2145

Simplicity 2145

Simplicity 2145

Wish I’d actually had the correct thread color on hand – I had a pale pink, which in retrospect was a horrible decision (you can sort of see it at some seams when I’m wearing the garment, ugh), but at least it matches the lining, I guess?

Simplicity 2145

Oh yeah, and if you were wondering why my hair looks SO good in these pictures – I’d just had a haircut and that blowout they gave me was LEGIT. God, I wish I could afford regular blowouts haha! As it stands right now, my hair doesn’t even look like this anymore. I had it bleached last week, and now it’s neon orange. More on that later 😉

A couple things before I dip outta here:
– Remember Joanna Baker, she of the sweet sewing prints giveaway? Well, I just heard back from her (she’s been busy getting married since then!) and she has listed the 3 sewing prints in her shop for a limited time. I know some people were interested in purchasing them, so if that’s you – here are the dressform, button collection and thread prints.
– Also, She’ll Make You Flip is currently offering a nice discount – use the code VALENTINE25 for 25% off your entire purchase, good through 2/24/14! Someone should go buy this and hang it on their wall, because that is EXACTLY what I would do with that pattern. Ok ok, in all seriousness, how cute is this pattern?? AND IT’S IN MY SIZE. EEP, my neverending quest for the perfect stripe fabric continues!