Tag Archives: applique

Updated: Sequin Cat Hoodie

13 Sep

Y’all remember that Stella Hoodie dress I made last year?

French Terry Stella Hoodie Dress

It was real cute for sure, but I think I literally wore it twice after completion. The fabric was a little too heavy to be comfortable as a summer garment (and I’m sorry, but a mini / sleeveless dress *is* a summer garment, fight me), and it was also real, real fucking short. Like, butt-cheeks-peeking-out-to-say-hello-whenever-I-lifted-my-arms short. And while I think it would make a good swimsuit cover-up, still, I’m gonna be real with y’all and point out that I go swimming about twice a year. There is no room in my life for a swimsuit cover-up.

So, overall, this garment was pretty useless. I thought it might work as a shirt, though, so I kept it around waiting on inspiration. After announcing the 2019 OAL, I went through my UFO drawer and decided to see if I could salvage the dress into something I might actually wear.

Sequin Cat Applique

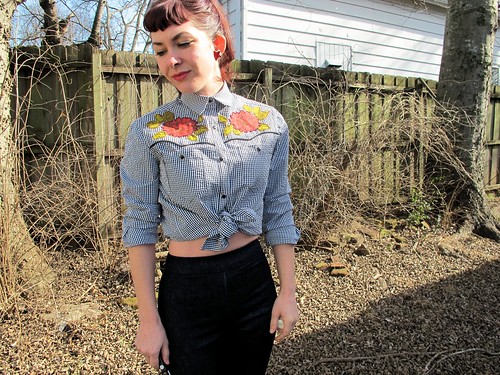
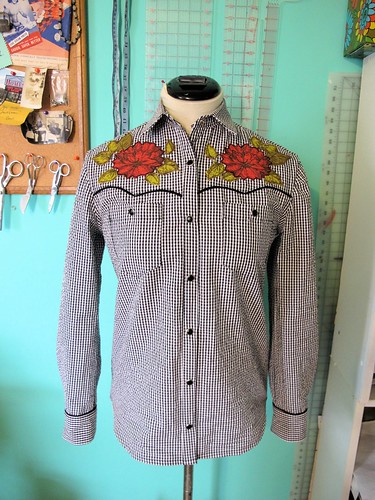
Turns out all it needed was a little chop and some bling! And thank god I saved it, because this is seriously one of my favorite shirts now!

Sequin Cat Applique

Sequin Cat Applique

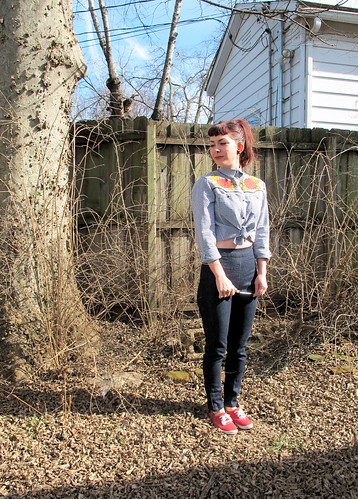
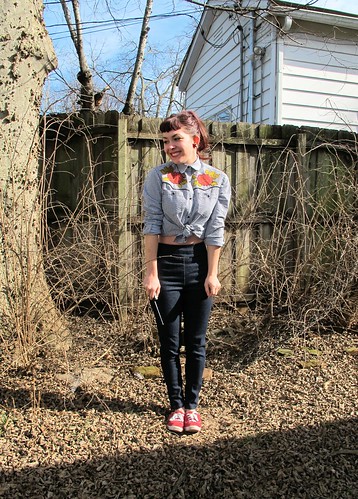
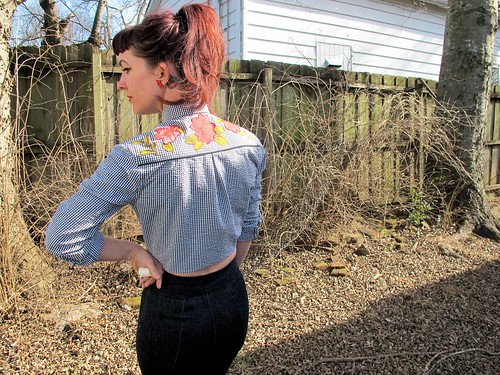
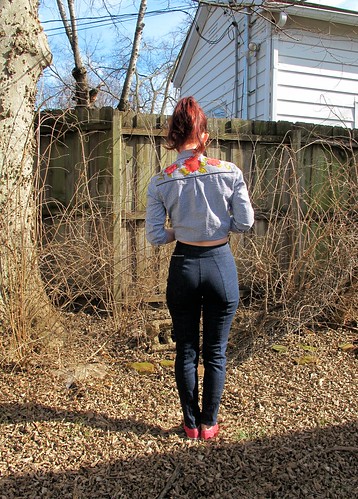
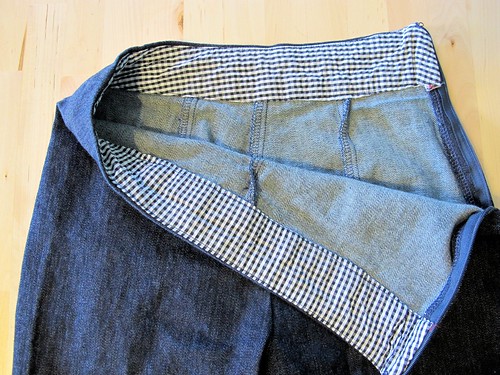
This was a really easy refashion. I removed the kangaroo pocket and tried on the dress to determine how long to make it, then cut about 2″ longer and used that as a hem allowance for a nice deep hem (I chose to make my hoodie cropped, as I’m really into the cropped shirt / high-waisted jeans look these days, but since the hem is so deep I can always un-crop it if I decide I want a longer shirt someday). I then stitched the hem with my coverstitch machine, same as the original dress hem. I was initially planning on sewing the pocket back on, so after hemming I tried the top on again to determine pocket placement, and that’s when this big ol’ blingy cat patch caught my eye…

Sequin Cat Applique

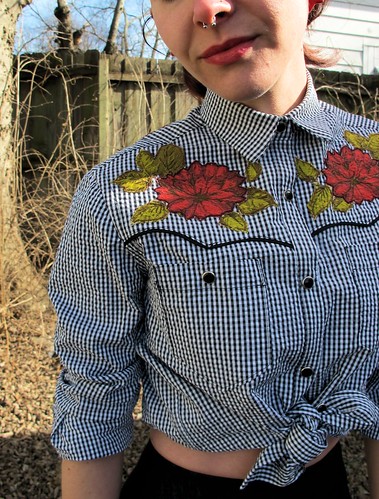
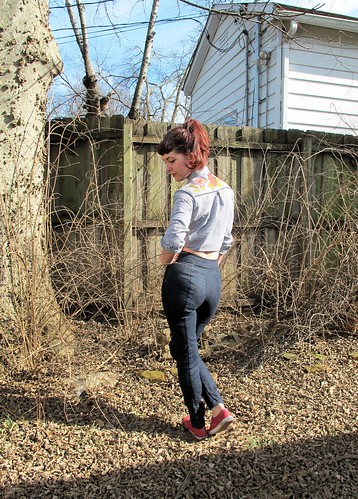
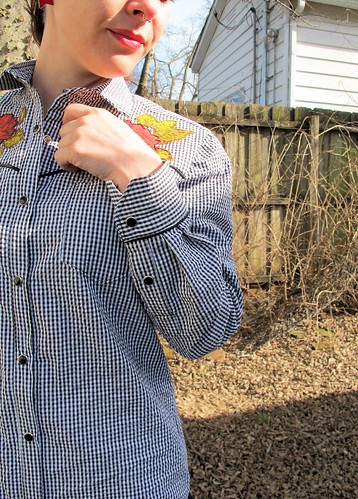
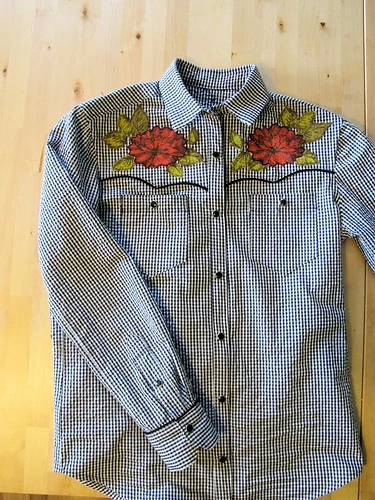
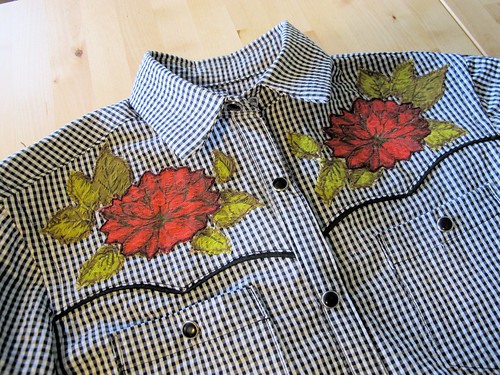
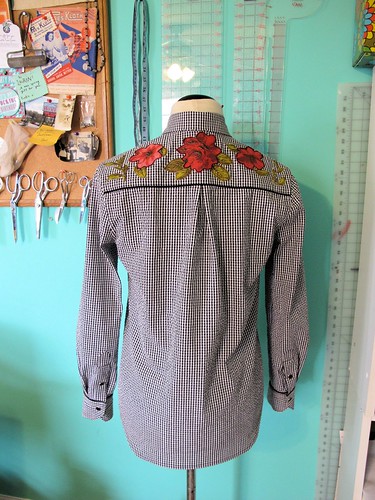
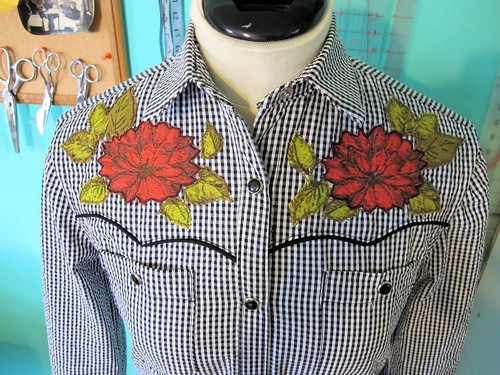
Isn’t this patch AMAZING?! I bought it at Hai Trim in NYC when I was there over Christmas. Honestly there are loads of cool patches in all the shops around the NYC Garment District, but I think Hai Trim has the best selection (and most are $12-$18, which I think is a pretty reasonable price). I bought it without any idea what I’d do with it, and have had it hanging on my wall in the months since. When I held it up to the shirt, I couldn’t stop smiling. As far as I’m concerned, it’s a perfect match.

Sequin Cat Applique

Sequin Cat Applique

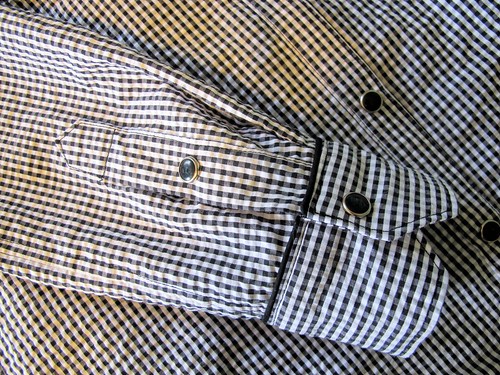
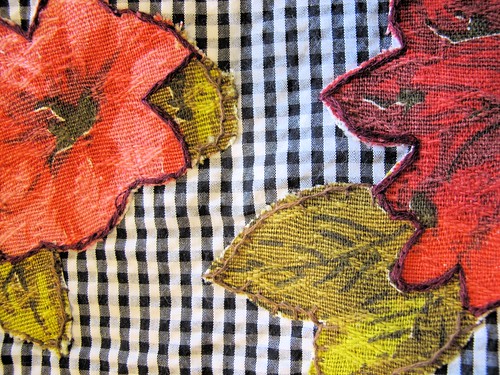
I sewed it to shirt using Invisible thread, which is a thin nylon thread that kind of looks like a spiderweb. Usually when I do this sort of sewing, I just use regular sew-all thread – but I had recently read a Threads Magazine article that mentioned using clear thread to applique and I thought it sounded like a fun experiment to try. You load your bobbin with standard polyester thread, and use the clear thread in the top. Then you zigzag around all the edges, being careful to position the needle so that it lands inside and outside the edge of the applique with each zigzag. I would show you a close-up – but it’s literally invisible lol. So hopefully that makes sense! It is definitely more forgiving than using colorful thread, since you can’t see it at all – so if your zigzag strays off course at all, it can just be your secret.

However, the thread is really delicate and prone to breaking. I found that I got a better experience by loading my thread in a thread stand so that the thread comes from the top of the spool, instead of out the side (whenever I loaded sideways, it would eventually twist around the spool pin and break).

So far, this has held up fine in the wash! I turn the shirt inside-out and then wash/dry as normal (cold, regular cycle, etc). The threads did pop in one small section, but I think that was because a dog jumped on me lol. I just stitched it back down and it’s fine! All good!

Sequin Cat Applique

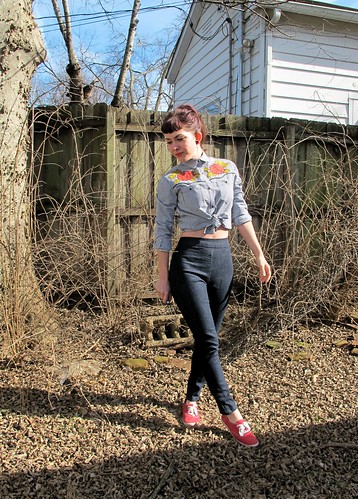
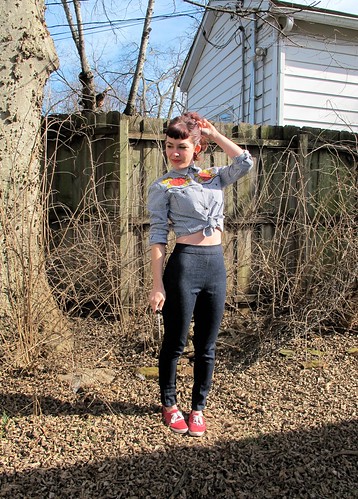
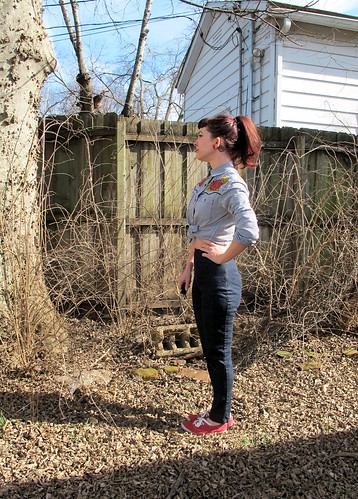
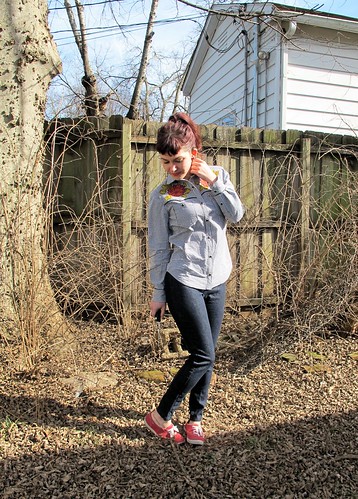
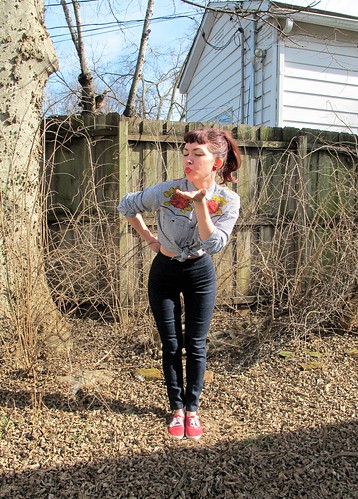
BTW if you’re wondering how the hell I got these BOMB-ASS PHOTOS (tbh the only reason this post is even warranted haha), we shot them in a professional photo studio in Portland, OR when I was up there earlier this year for a jeans workshop at Josephine’s Dry Goods! Since Josephine’s is such a small shop, we opted to move the workshop to this place so we’d have more space… and a great backdrop to take photos (which obviously I took full advantage of). I can’t take any credit for the quality of these photos as Bini’s husband set it all up- as well as let us use his equipment – but hey they are cool and I got some neat jumping shots!

Sequin Cat Applique

I really like my hair in this one 🙂

On a final note – I was creeping on Gucci recently and I was surprised to see this cat all over their F/W 19 collection, but specifically these sneakers

Gucci Cat

They call it “Mystic Cat” which I love but I think mine is better because it actually sparkles.

Sequin Cat Applique

Project Sewn: Hello, Dolly!

4 Feb

All right, dudes and dudettes – Project Sewn is up and running! This first week, the theme is Style Icon.

I’m just gonna be real with y’all – as soon as I saw that challenge, my personal motto started rolling through my head. The thing is – I don’t have a style icon. I honestly don’t have a person (or designer, or whatever) who I use as inspiration for my outfits. I mean, I like the way lots of celebrities dress and I’m no stranger to the siren song of a good Joan Holloway outfit, but as far as picking a particular person… naw. I don’t even know, y’all. In the end, I decided to go with someone who I admire as a person who just happens to have amazing style….

Project Sewn, Week 1: Style Icon

Project Sewn, Week 1: Style Icon

Dolly Parton!

Project Sewn, Week 1: Style Icon

I mean, who doesn’t love Dolly, amirite? She’s such an incredibly smart, funny, generous – and not to mention talented as HELL – woman… a true icon in my book. Speaking of books, have you ever read her memoir, My Life and Other Unfinished Business? Or heard about her program Imagination Library, which sends free books to kids to get them excited about reading? Or, hell, have you been to Dollywood?? This woman, she is amazing. She’s not just a style icon for me – she’s a real life icon, the kind of person I want to emulate.

Project Sewn, Week 1: Style Icon

Plus, Dolly (specifically circa 60s-70s) was no stranger to an overly decorated/borderline tacky western shirt. And, dammit, I wanted a western shirt! I’ve actually been looking for an excuse to sew one for years.

Project Sewn, Week 1: Style Icon

I made my entire outfit, obviously, but let’s talk about the shirt first. My fabric is a tiny check gingham seersucker from Mood. I used the Archer as my base pattern (lol, poor Jen, probably never thought her pattern would get used to make this sort of monstrosity SORRY JEN I LOVE YOUR PATTERN THO), and made a few modifications, beyond my normal ones of changing the sleeve placket, narrowing the side seams, and a different method for attaching the collar and collar stand. There’s quite a bit of piping, since we all know it’s not a real western shirt without gratuitous amounts of piping.

Project Sewn, Week 1: Style Icon

Adding the piping was really fun, and definitely adds some pizazz to an otherwise plain shirt. The piping at the back yoke and top of the sleeve cuffs was easy – I just sewed it along the seam allowance before attaching the other pieces. For the front yoke, I had to do a little bit of drafting and figuring out – I ended up tracing the front piece and cutting off where I wanted the yoke to hit (right above the pockets) and then drew my scallops with a french curve. To attach the piping, I first sewed it to the bottom of the yoke, clipped and trimmed and pressed and it toward the wrong side, and then laid the yokes on top of the front piece and topstitched along the piping. The raw edges of the piping are enclosed inside the yoke, so the inside of the front of the shirt is perfectly clean except for a line of topstitching. I think it worked out pretty well, if I do say so myself!

Project Sewn, Week 1: Style Icon

Once I had the shirt entirely assembled, less the pearl snaps and hem, I hung it on a hanger and stared at it for over a month. What to do next? I liked the way the effect was going, but it clearly needed some embroidery at the yokes to give it that western flair. I realized at the point that the tiny gingham check was working against me – any embroidery was going to get lost in all that action.

Project Sewn, Week 1: Style Icon

I had my epiphany right before I fell asleep one night – APPLIQUE! That would show up against the check, and it would still allow me to involve some of the embroidery I so desperately wanted. I knew I still had a piece of vintage barkcloth in my stash that would be perfect (I used the majority of it for my birthday dress a few years back, and have been hoarding the remaining yardage ever since!). I painstakingly cut around each rose and leaf, arranging the pieces so they would be mostly mirrored at the front, and attached them with fusible web to the yokes. Then I hand-embroidered around every piece – partially to keep them attached to the start, but mostly because I just loove the texture of hand embroidery!

Project Sewn, Week 1: Style Icon

I am pretty freaking THRILLED with how it turned out, what do you think??

Project Sewn, Week 1: Style Icon

The last thing my shirt needed was a little bit of pearl snap action! I got mine from Cowgirl Snaps on Etsy, and I couldn’t be more pleased with the overall experience. I actually bought both red and black pearl snaps, but once I got the shirt finished, black was the clear winner. Also, I just really love hammering shit in my sewing room, ok.

Project Sewn, Week 1: Style Icon

Ok, now let’s talk about the pants! I used a Theory stretch denim from Mood and my pattern is McCall’s 6440. This is my first version of this pattern (you’ve already seen my leopard pair, ooh la la), and I went through a BIG fitting curve with these. I initially cut the size 8, based on the finished measurements – and they were huuuuge! Pretty much every thing about them sucked except the crotch curve, basically. I spent an entire evening trying on, pinning, basting, trying on, repinning, basting, trying on… ad nauseam. I’m happy that they worked out in the end – they are SO fun to wear, and look super pin-up, yay! – but getting there was a process, plus the insides are full of thread tails from all that basting. Oh well!

Project Sewn, Week 1: Style Icon

Some gratuitous butt shots for ya. You’re welcome.

Project Sewn, Week 1: Style Icon

Oh, yeah, and in case you were wondering – I can also wear this shirt untied with the sleeves rolled down, like a proper Archer, which makes it much more wearable in day-to-day life 🙂

Project Sewn, Week 1: Style Icon

Now at this point, I’m sure you’re thinking, “Ok, fine, but where the hell are you going to wear that thing, anyway??” Guys. Guys. I live in Nashville. I’m not so stuck up my own butt that I’m not above rolling down to the tourist district and getting my Honky Tonk on. Let’s be real – Honky Tonkin’ is the best part about living in Nashville, as far as I’m concerned. OF COURSE you can go dancin’ in normal people clothes, but why the hell not throw on your best western digs and cowboy boots and dress the part? This being made of seersucker is even better – it’ll be much more comfortable come summer, compared to my RTW black cotton western shirt, especially with the looser style.

I’m also going to wear it just for the heck of it because, well, it’s awesome 😉

Project Sewn, Week 1: Style Icon

Also, in case you were wondering – I DO have cowboy boots! I just thought this outfit needed a little tone down from the ~country~, hence the Keds 🙂

Ok, hope you’re ready for some detail shots… I took a million :\….

Project Sewn, Week 1: Style Icon

The waistband of the pants is faced with more gingham seersucker. I love when my pants match my top, even if it’s only on the inside!

Project Sewn, Week 1: Style Icon

Don’t look too closely, but the embroidery on the front yokes is actually not a perfect mirror. Since the flowers weren’t printed to mirror, I had to get super creative with my cutting and appliqueing on one side, but I think it worked out quite nicely!

Project Sewn, Week 1: Style Icon

Sleeve placket + pearl snaps + piping = ♥

Project Sewn, Week 1: Style Icon

Yokes

Project Sewn, Week 1: Style Icon

Embroidery – the flowers are outlined in a 4 thread split stitch, and the leaves are outlined in a 2 thread chainstitch. I love the effect and textures with the applique and embroidery – it’s just a little bit Alabama Chanin.

Project Sewn, Week 1: Style Icon

Snaps to anyone who sat through this entire post! I have one gift for you, which I found while I was trolling the nets for Dolly inspiration (click for source):

dolly parton style inspo

NOW do you see why I chose her as my inspiration? God, I love that woman.

Project Sewn, Week 1: Style Icon

Now head on over to Project Sewn and see what everyone else has been up to! Don’t forget to vote for your favorite!

Skully Applique Pillow

24 Oct

Halloween Project

So, I have some pretty sweet furniture, at least in my living room. I’ve got this sexi velvet couch as well as this beautiful midcentury armchair (snagged from my friend and fellow blogger Lisa, after she herself snapped up the couch of her dreams). Oh, and that ace ottoman, which I got for a DOLLAR at the Goodwill Outlet. Score of the year right there!

I’m also, like, really really bad at decorating. Once I get shit on the walls, it’s over. I don’t really decorate for holidays, other than put up a Christmas tree, and I definitely don’t do decor crafts. Whyyy suck up that time when I could be making clothes, amirite?

Halloween Project

I’m taking a step toward my inner Martha Stewart and making at least one craft for the three major upcoming holidays – starting with Halloween. Rather than decorate the front of my house (which would be too easy; we already have enough spiders that the whole front is covered in spider webs. I wish I was kidding about that. Hey, I guess we don’t have other bugs at least), I decided to give my sweet yellow chair an update with a fresh new throw pillow featuring a skull. This also meant I got to try out applique, which is something I’ve been meaning to do for, oh, like a decade. Ha!

Want to make your own – pillow or otherwise? Good, because I wrote a tutorial on that too. I’m on a roll, guys.

This is actually pretty simple, the only time-consuming part is the machine applique, which can easily be left off since the Heat’N’Bond is pretty permanent. All my supplies are from Jo-ann Fabric and Craft stores – quilting cotton (my only excuse ever to peruse those aisles. Ahh, the colors!), Heat’N’Bond, and a 14″ pillow form. Oh, and embellishments! Can’t forget those 😉

You will need to cut 3 pieces for the pillow – one for the front and two for the envelope back. For a 14″ square pillow, I cut the front at 15.5″ square and the two back pieces are 15.5″ x 12″ and 15.5″ 6.5″.

Halloween Project 1

Start by drawing (or tracing, or photocopying, or whatever) the image that you want to applique on the pillow. Try to keep it simple, with the detail impact coming from the negative space, not a bunch of lines. Do you want to sew over a bunch of lines? Neither did I. Negative space!

I sketched out my skull’n’bonez based on a few images I saw on the internet, and then traced over it with a marker.

Halloween Project 2

Cut out your design and admire. Doesn’t he look sassy!

Halloween Project 3

Before you cut your appliques, you need to fuse the heat n bond to the back of the fabric (this makes it easier, and means less goo on your ironing board after the fact). Cut a piece big enough to catch all your pieces, and follow the directions on the package for best results – mine just had me iron it face-down for 10 seconds. Easy!

Halloween Project 4
Halloween Project 5

Trace your pattern on the fabric, cut, and peel off the paper layer. Arrange it on the pillow top as you like, and fuse it down. The Heat’N’Bond keeps everything from shifting, which means a much easier time appliquing. Of course, at this point, you could leave as-is and not bother with the stitching, but whyyy? It looks so good!

Halloween Project 6

Ok, this is the fun part – applique! This is really a trial and error saga, depending on your machine, but here are a few tips:
– Test your applique stitch on a few scraps of fabric (use leftover fused pieces if you wanna be real fancy) to make sure that you like your stitch. For my machine, I used a narrow width zigzag with a slight adjustment to make it longer.
– This stuff is gonna goo up your needle. Sorry, but them’s the breaks. Make sure you remember to change it out after you are finished, otherwise you’ll end up forgetting and gooing up the next garment you sew. Not that that’s happened to me or anything…
– Try to keep the stitch within the edge of your applique pieces – it looks neater.
– For curves, just go slowly. For corners, stop the machine at the end of the line, put the needle down and pivot the fabric, and then continue stitching.

Halloween Project 8
Halloween Project 9

Before you get all flustered trying to get the ~perfect stitch, remember – this is a Halloween project! It’s supposed to be a little messed up 😉

Halloween Project 10

From here, you can leave the applique as-is or add some more embellishment. I decided to add some sequins to my skull’s eyeballs and nose because SPARKLES. I used this Aleen’s glue pen to anchor everything down.

Halloween Project 11

We are going to make an envelope back for our pillow now. Take your two back pieces and press them flat.

Halloween Project 12

Turn under one long edge of each piece and hem.

Halloween Project 13

(Ack! Sorry these photos are so blurry, hopefully you get the idea)
Take the smaller piece and lay it over the top of front piece, right sides together, matching up the edges and the corners.

Halloween Project 14

Larger piece goes on the bottom half, again, right sides together with all sides matching.

Halloween Project 15

Sew around all four edges…

Halloween Project 16

Clip your corners…

Halloween Project 17

Flip right side out and stuff your pillow inside.

Halloween Project

You’re done!!

Time for a sexy skull pillow photoshoot!

Halloween Project

Halloween Project

Halloween Project

I know this is a ~craft~ project, but this method could also be used for clothing (like we could all applique CAT SWEATERS. Oh god, guys, let’s.). I was planning on making myself a matching skull sweatshirt so I could match my living room, but time slipped out of my fingers and well, maybe later. I say this pillow is for Halloween, but let’s be real – you’ll probably see it on the couch during Christmas, and beyond. Welcome to my life.

Want to make one for your own #spookyspaces? Have a coupon! I got ya back!
JF13_Halloween_Coupon
Don’t say I never did anything for ya 😉