Did you participate in Me Made May this year? I used to be really active in the early days, but over the last few years I have chosen to not participate as I regularly wear me-made clothes almost exclusively, which at that point just seemed a little annoying and self-congratulatory to shoot a whole ass month of photos for something I already do without prompt.
However, in the last year or so, I went through a bit of an existential crisis as far as my wardrobe was concerned. I started with changing my color palette (I’m sticking strictly to warm tones now, and holy shit I can’t believe how all my stuff just effortlessly coordinates now, what a rush), then later playing with different silhouettes. I am now starting to slowly branch out from my own personal self-imposed “style rules” and experimenting with new ways to express myself with how I dress. Clothing is supposed to be fun!
So I decided to participate in Me Made May this year, and see what else I could discover.
What I really wanted to focus on was less the fully handmade outfits, and more something that previous Me Made Mays have absolutely fucked up for me when I participated in the past – allowing outfit / garment repeats, and RTW (ready-to-wear) pieces! Old MMM’s gave me this weird aversion to wearing the same thing twice in one month – because you want every photo to be fresh, right? The major problem with this – for me – was that it trickled into my daily dressing, too. It gave me a weird complex to wear the same garment twice, even weeks apart! Y’all, I get that this is a thing that is really pushed on us with our buy-buy-buy culture, but I honestly cannot articulate how fucking STUPID of an idea it is. There is absolutely nothing wrong with wearing the same shit on repeat (especially if it’s something that makes you feel really good!). People don’t notice – do you notice when someone repeats a garment/outfit? And realistically, even if you did notice – does it really matter? Like, who really cares in the grand scheme of things? I really needed to hammer this into my own head. Again – clothing is supposed to be fun!
Another reason for joining MMM this year was to simply get more comfortable taking photos of myself, and to try different locations. Let’s be real here – the main reason why I post less and less is directly related to my comfort level with taking photographs. I’ve never liked taking photos of myself, and over the years I find myself avoiding it more and more. By making myself take a photo every single day, I hoped it would force me to get more comfortable with the whole process. And to make things interesting, I decided to take photos in as many different locations as possible. I love creeping on people’s houses in the background of their photos – I think most people do! So even if you don’t care about the Me Made May aspect of these photos, I hope you can appreciate the mini house tour!
Anyway, I think this year was very successful for me! I stuck with it for the entire month and took a photo every single day – even when I was traveling! And I allowed myself to repeat individual garments – and even full outfits! – which made the whole process less stressful. I thought it would be fun to share these here, since I know a lot of people don’t use Instagram and prefer to read blogs. So here you go! My Me Made May results from 2021 – only a few weeks late 🙂
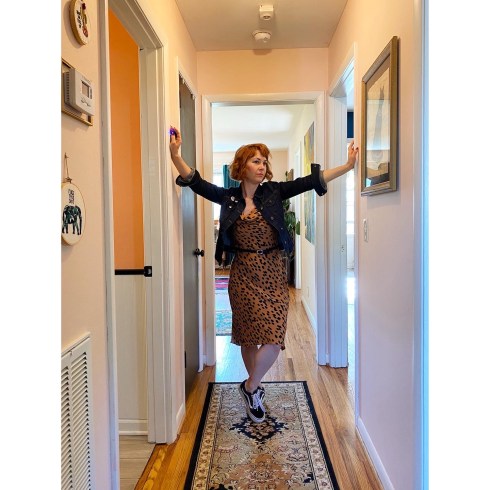
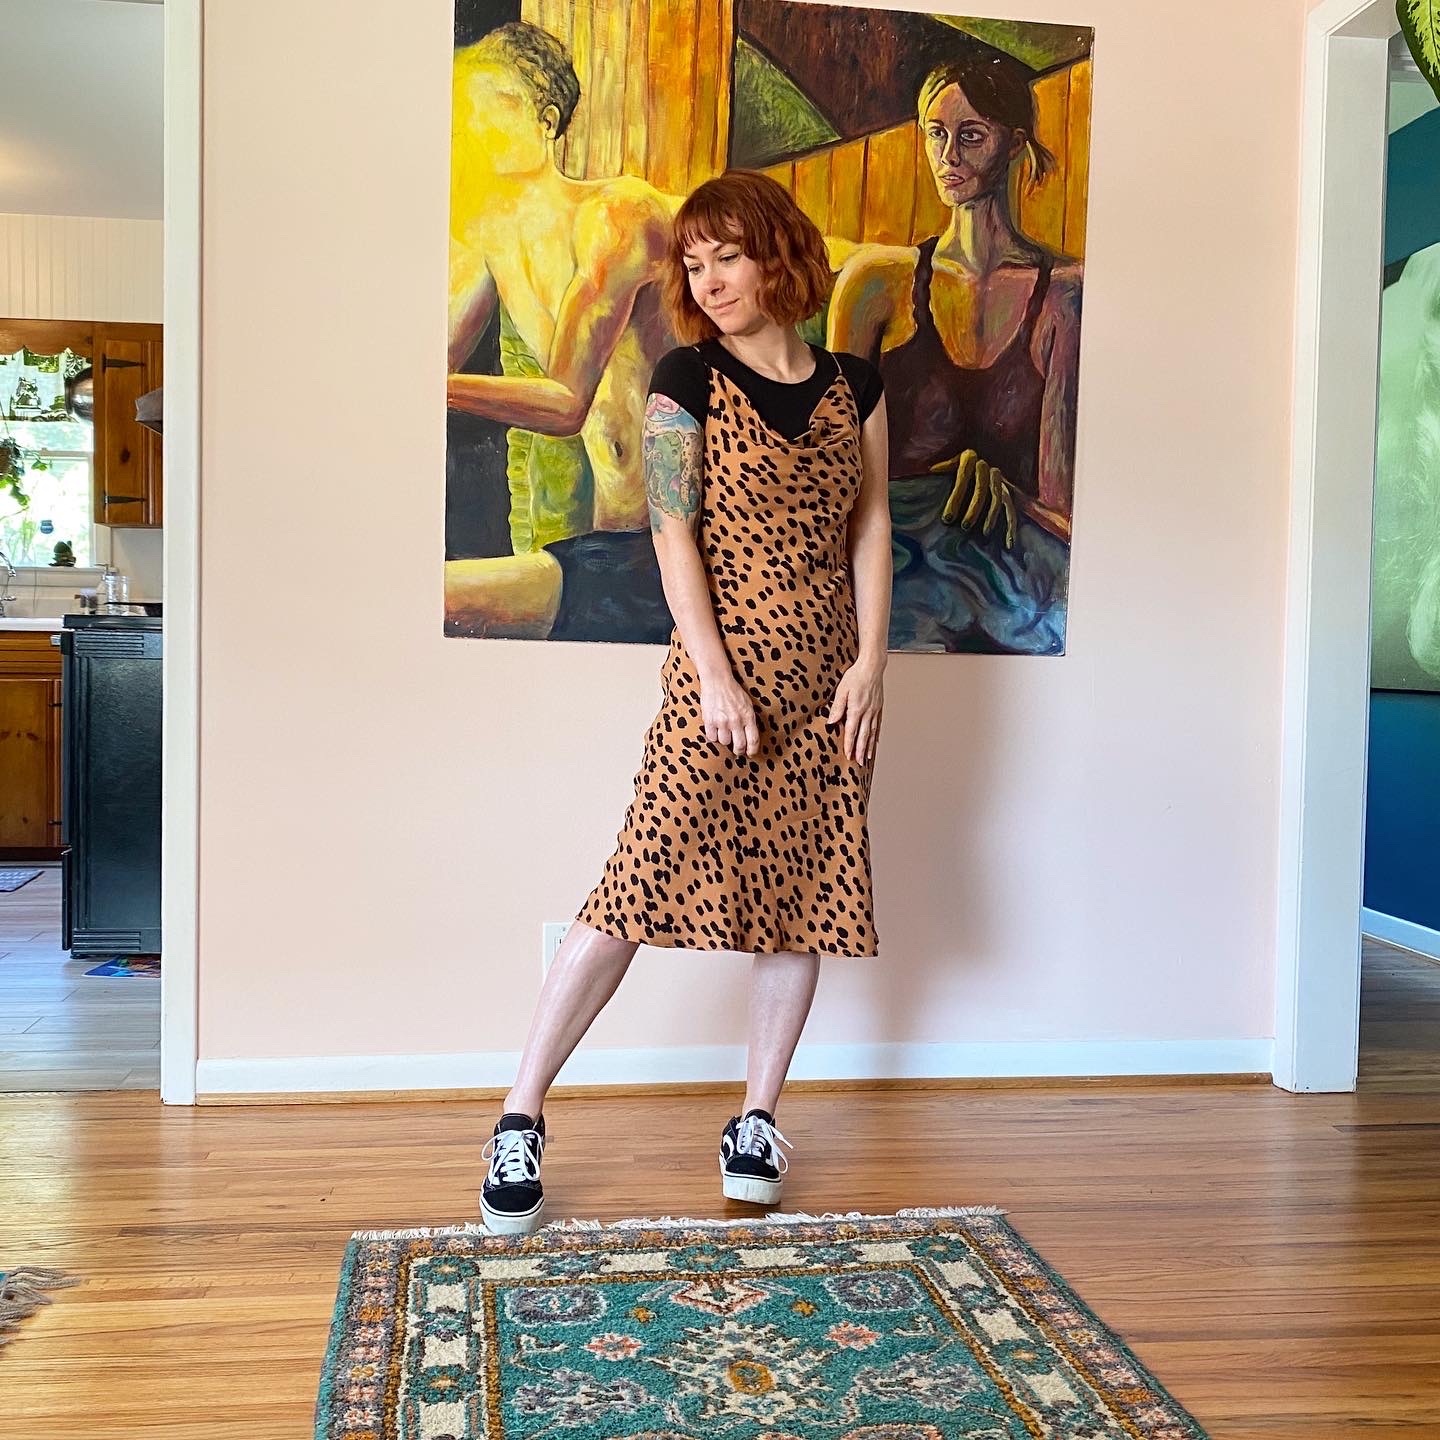
Day 1: Masin Sicily Slip Dress + Alina Design Hampton Jean jacket / This is my hallway! This photo also marks the first time I joined multiple (vaccinated) friends for a dinner party since COVID! In someone else’s house! What a rush!!
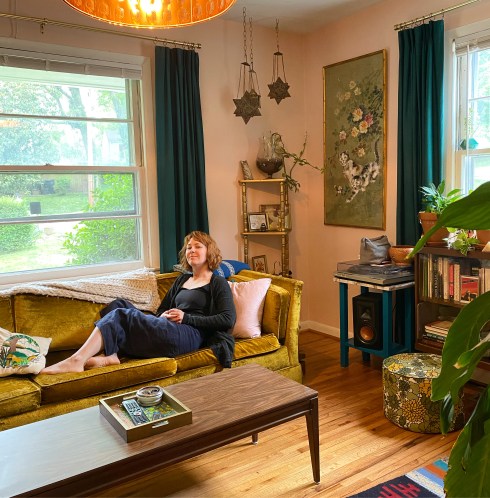
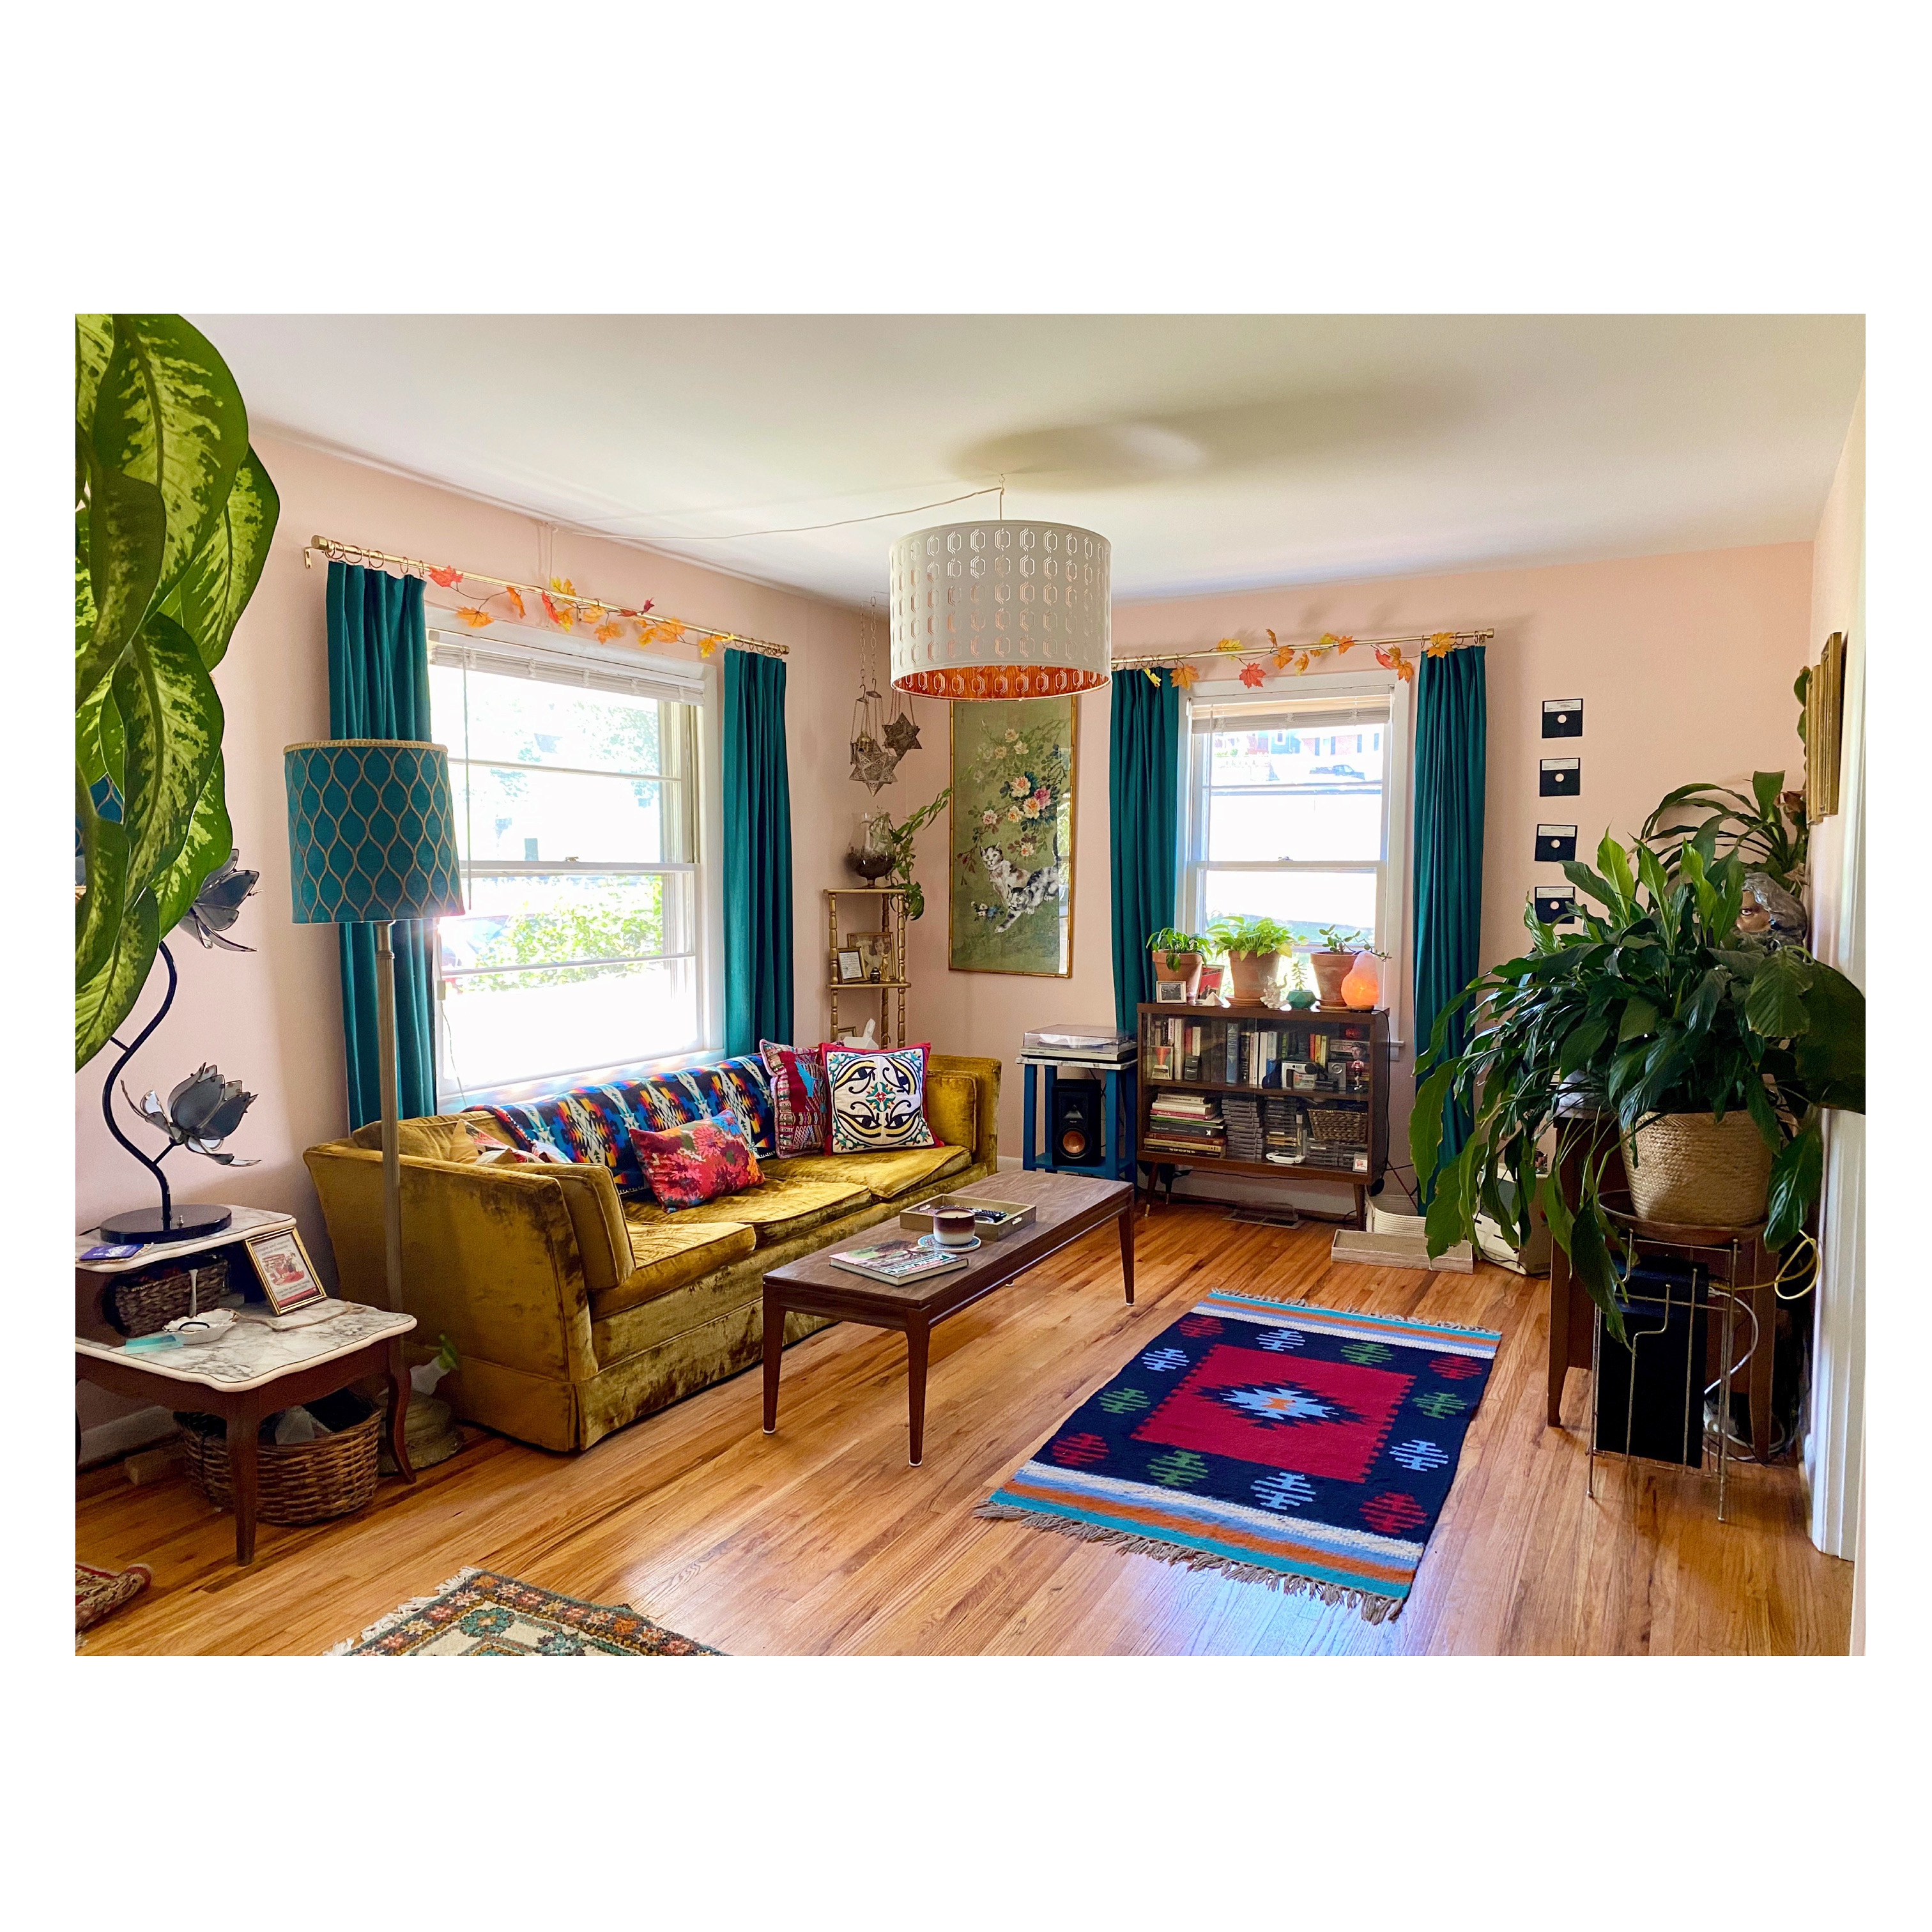
Day 2: (RTW) Elizabeth Suzann Florence pants (I did alter these to have narrower legs and a more cropped length, FYI) + True Bias Ogden Cami + Grainline Studio Driftless cardigan / This is my living room! Obviously I really whooped it up the night before, so I spent my day relaxing on the couch and getting absolutely nothing done 🙂
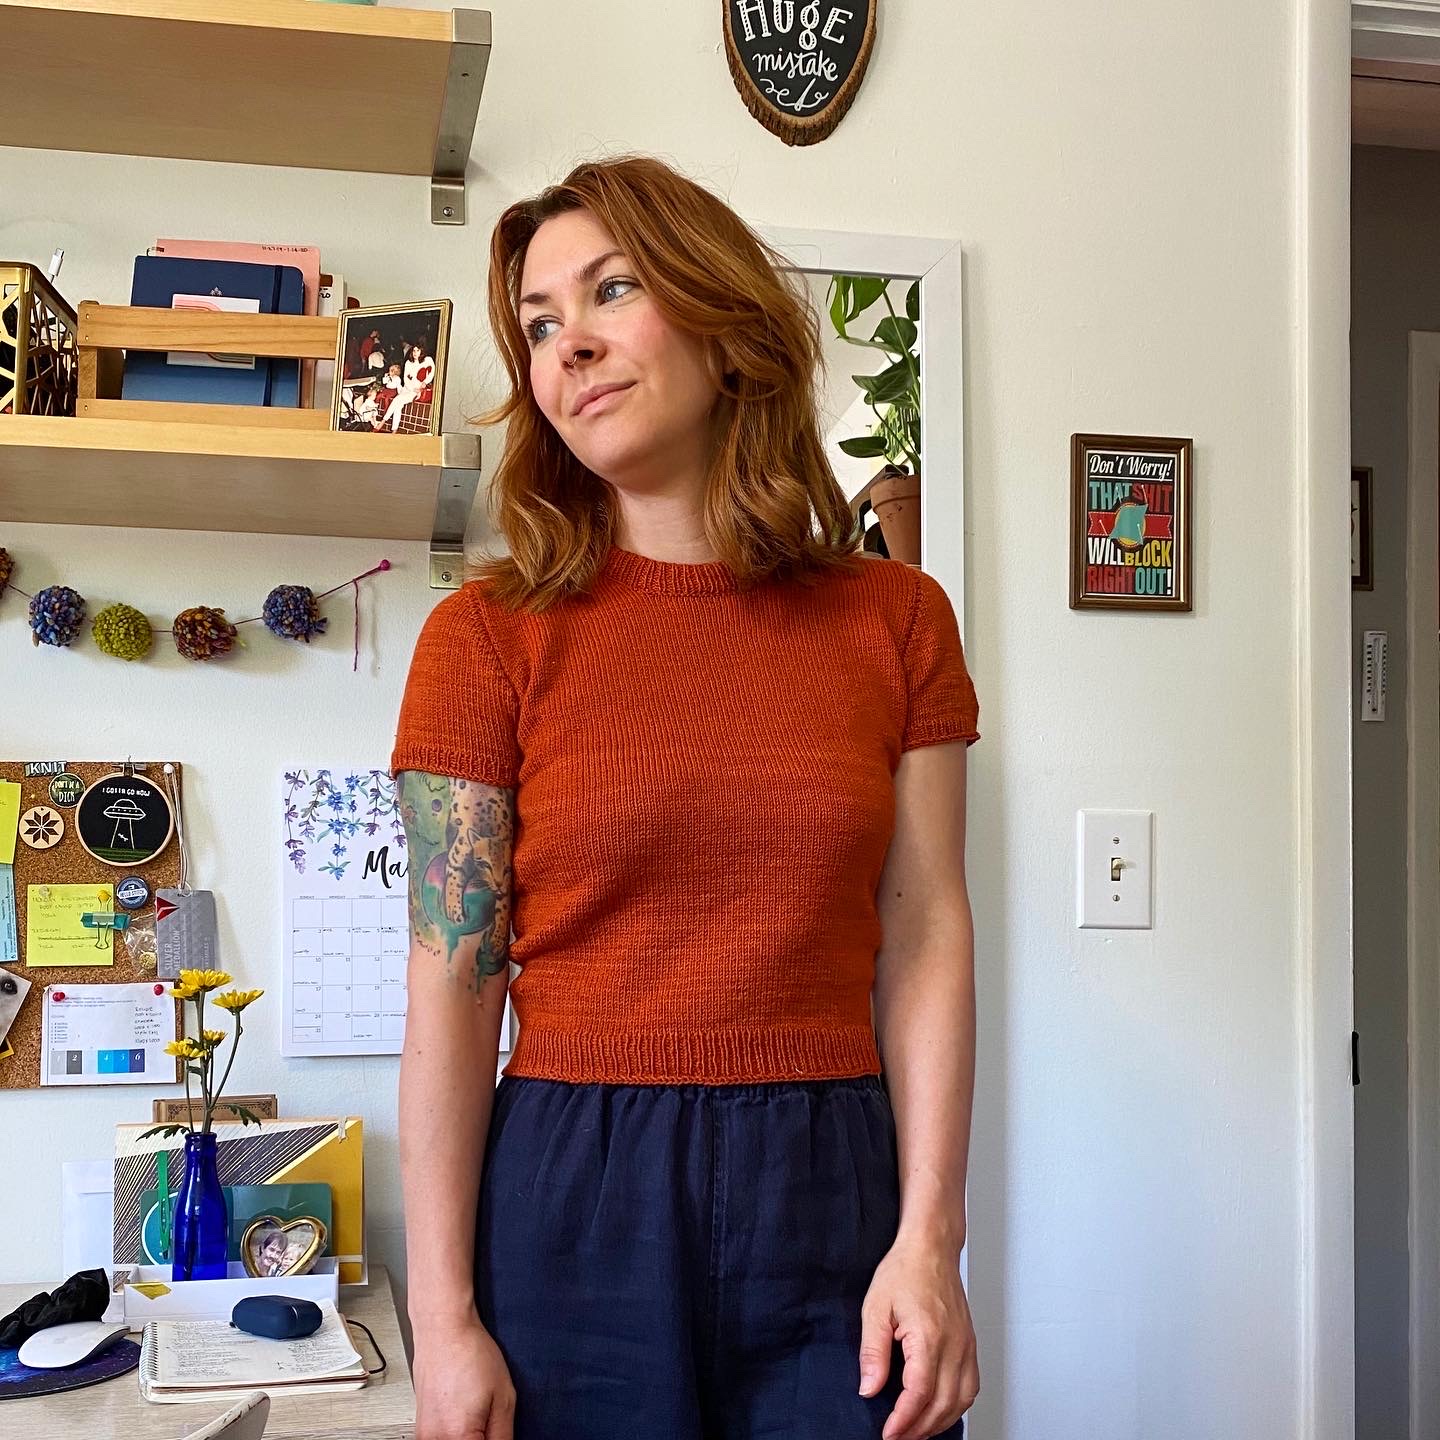
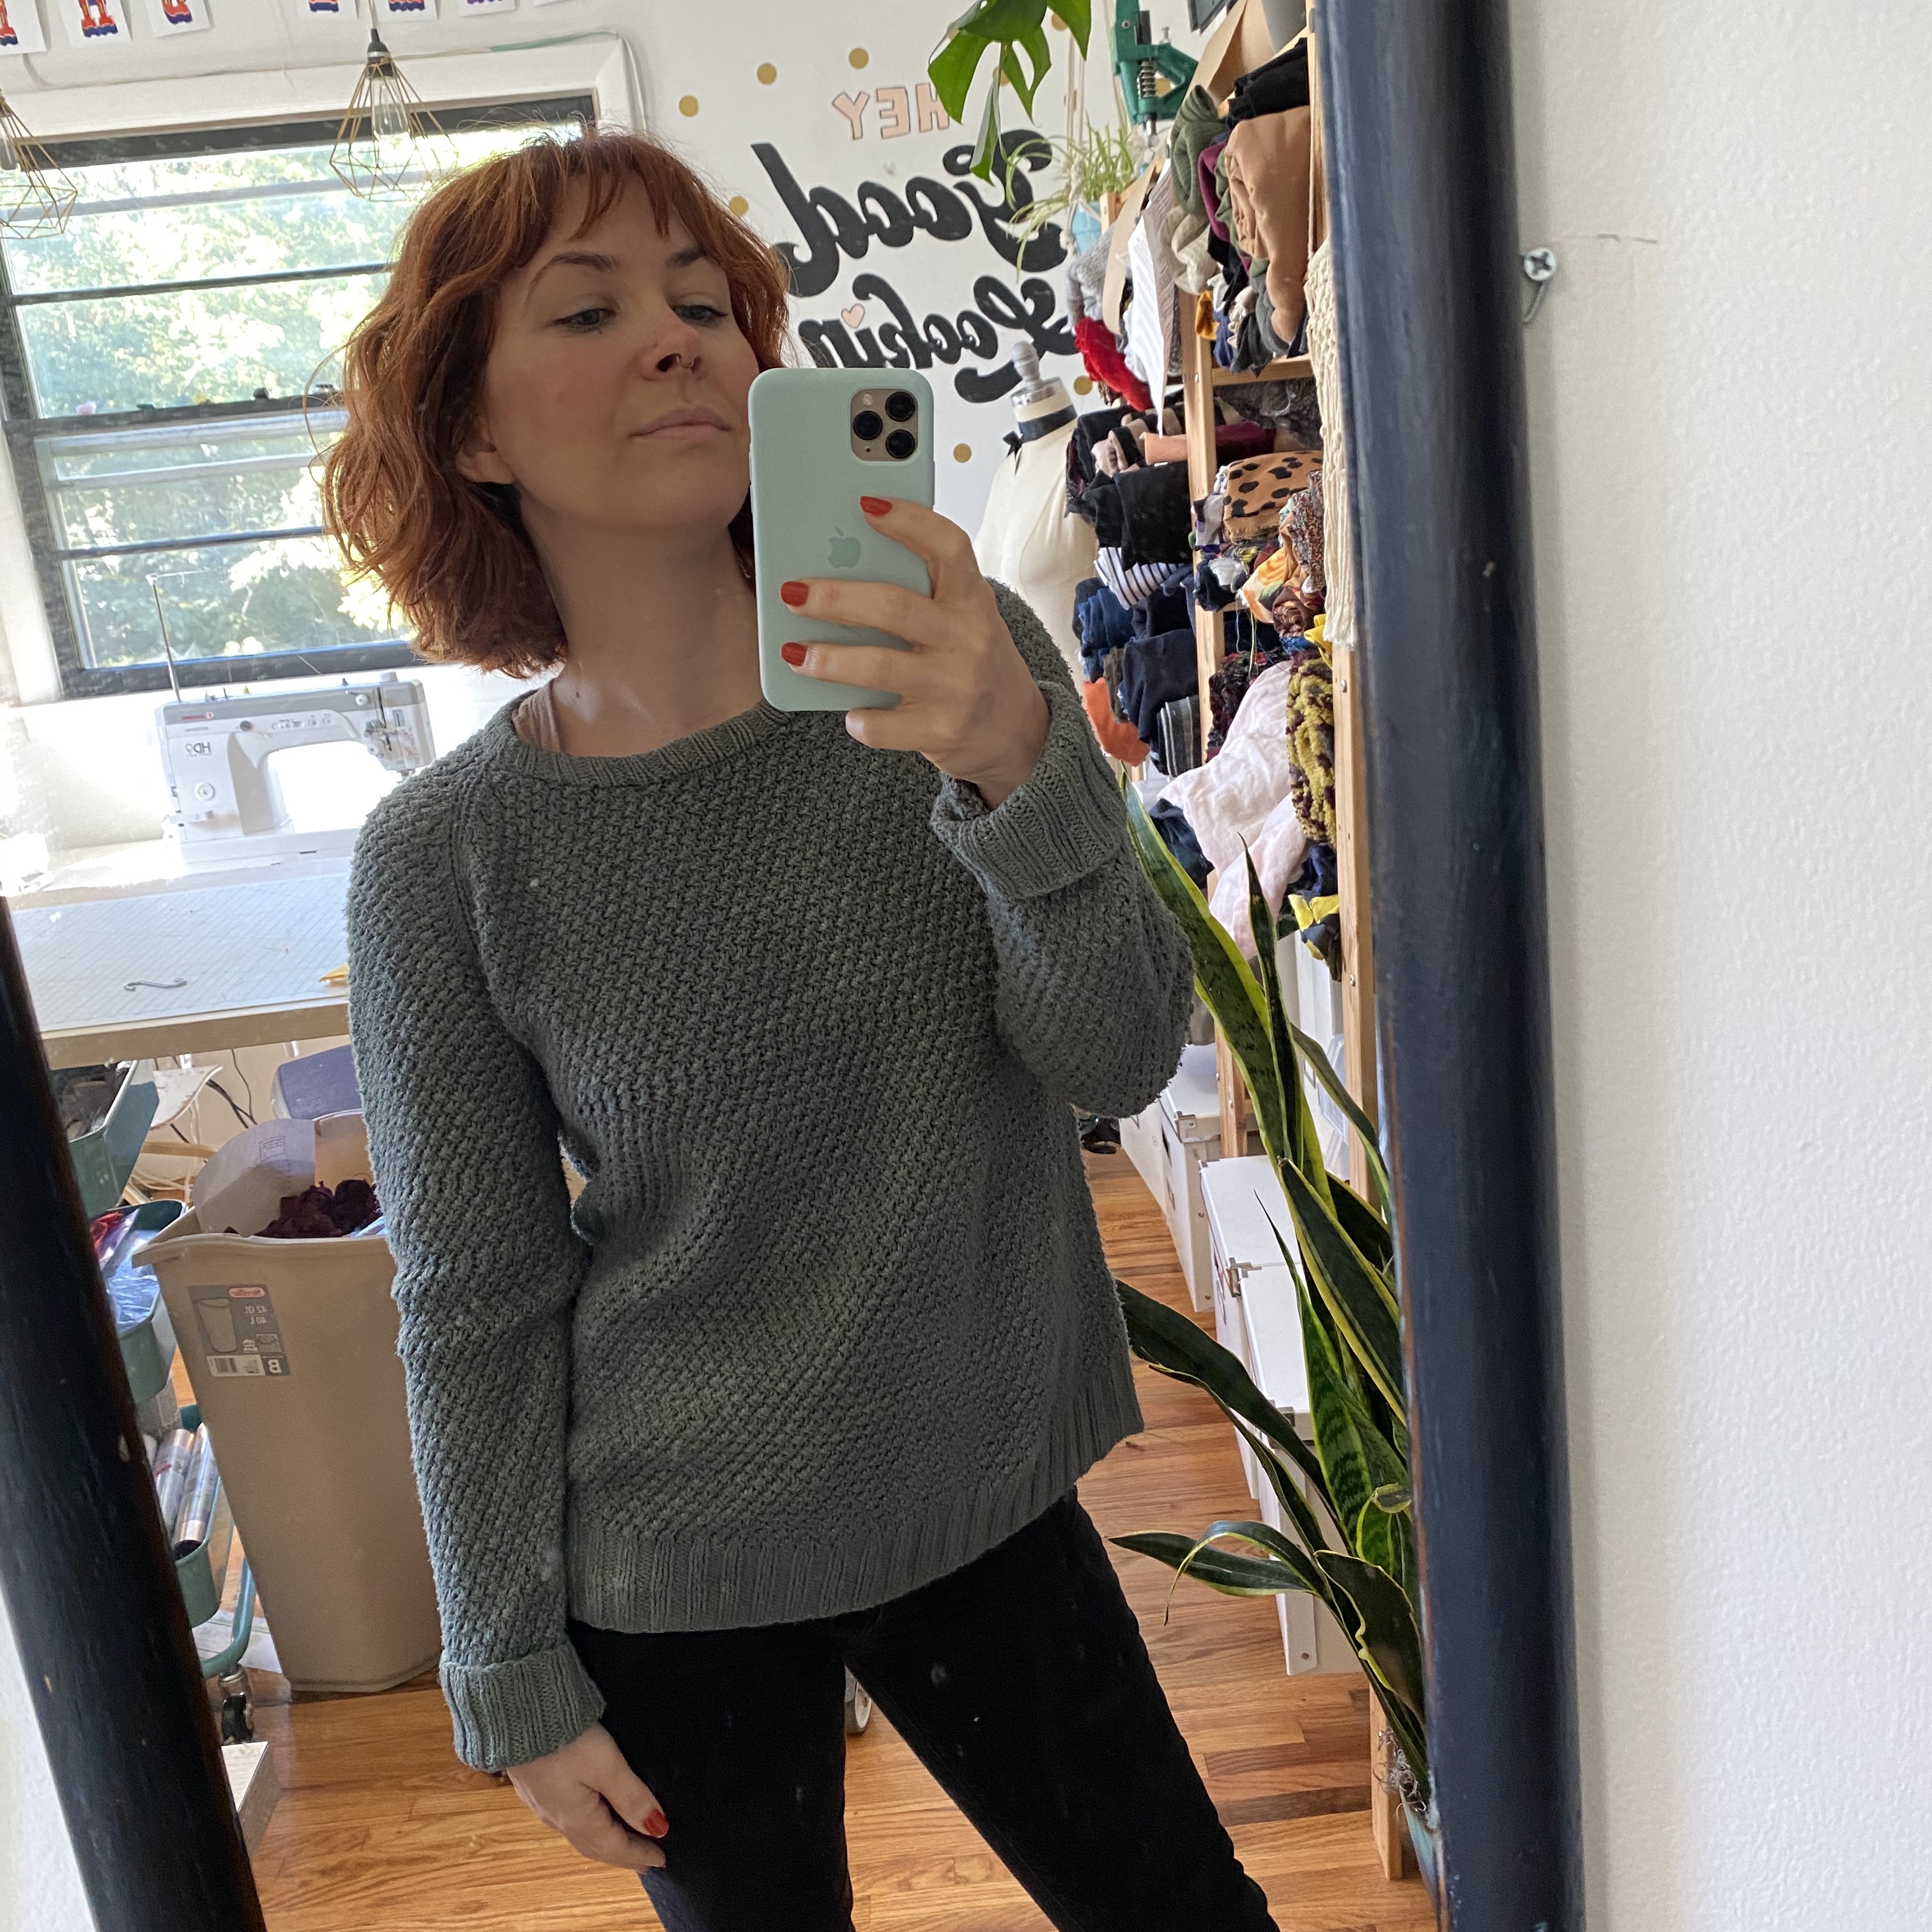
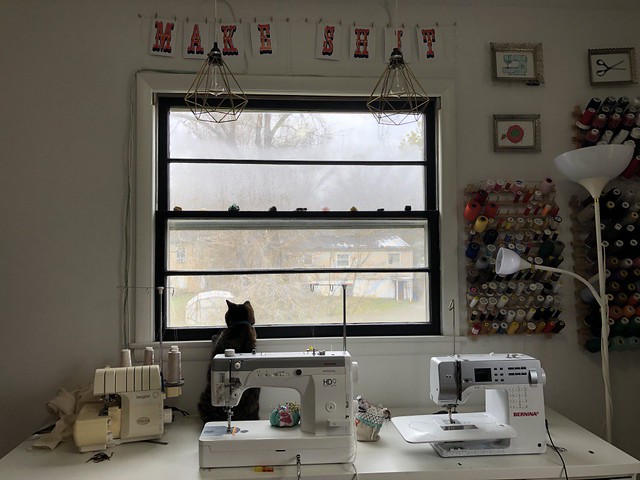
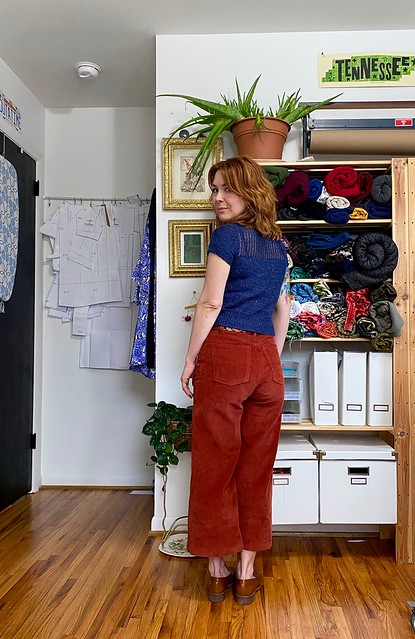
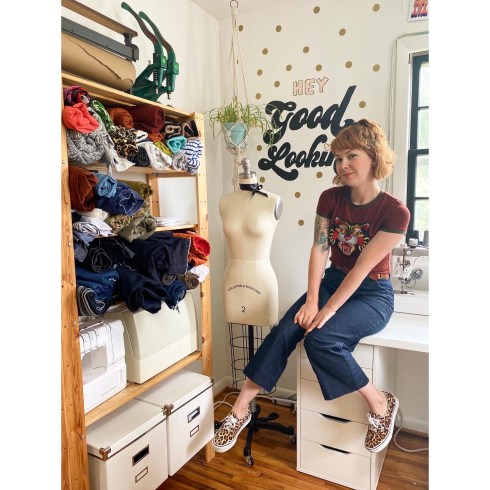
Day 3: Grainline Studio Scout tee + Closet Core Patterns Ginger Jeans / This is my studio, and I spent most of my day in here!

Day 4: Cashmerette Concord tshirt + Deer & Doe Fumeterre Skirt (made with a rayon from Workroom Social!) / This is my bathroom! I was bound and determined to get a shot in here, but it is VERY small (as is my whole house LOL) so I had to improvise 🙂
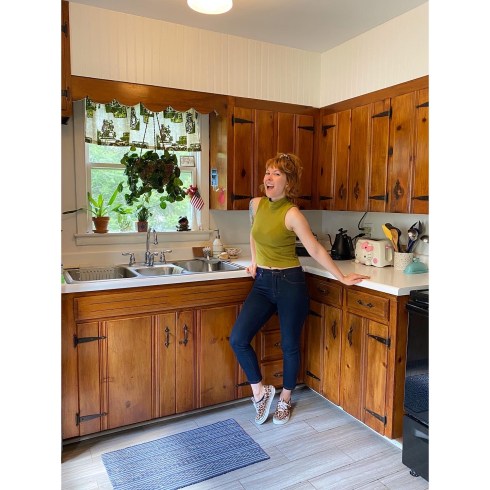
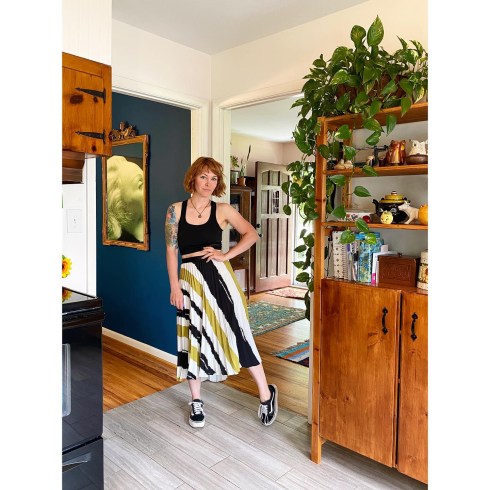
Day 5: True Bias Nikko top + Closet Core Patterns Ginger Jeans (again!) / This is my kitchen! Fun fact: I bought wallpaper (to cover the soffits above the cabinets) immediately after taking this photo.
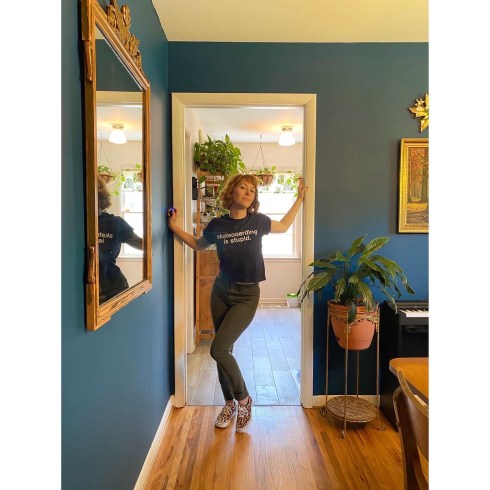
Day 6: (RTW) Skateboarding is Stupid tshirt (cropped + re-hemmed by me) + Closet Core Patterns Ginger Jeans / This is my dining room!
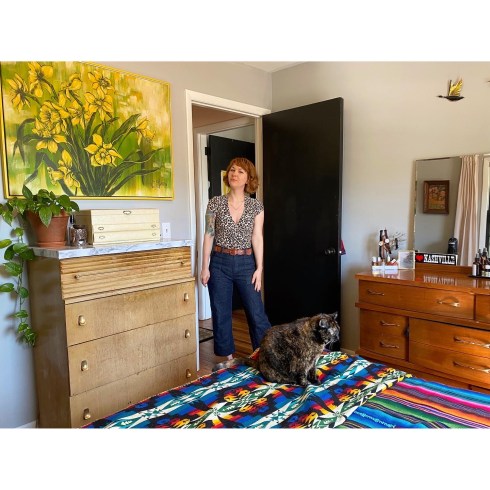
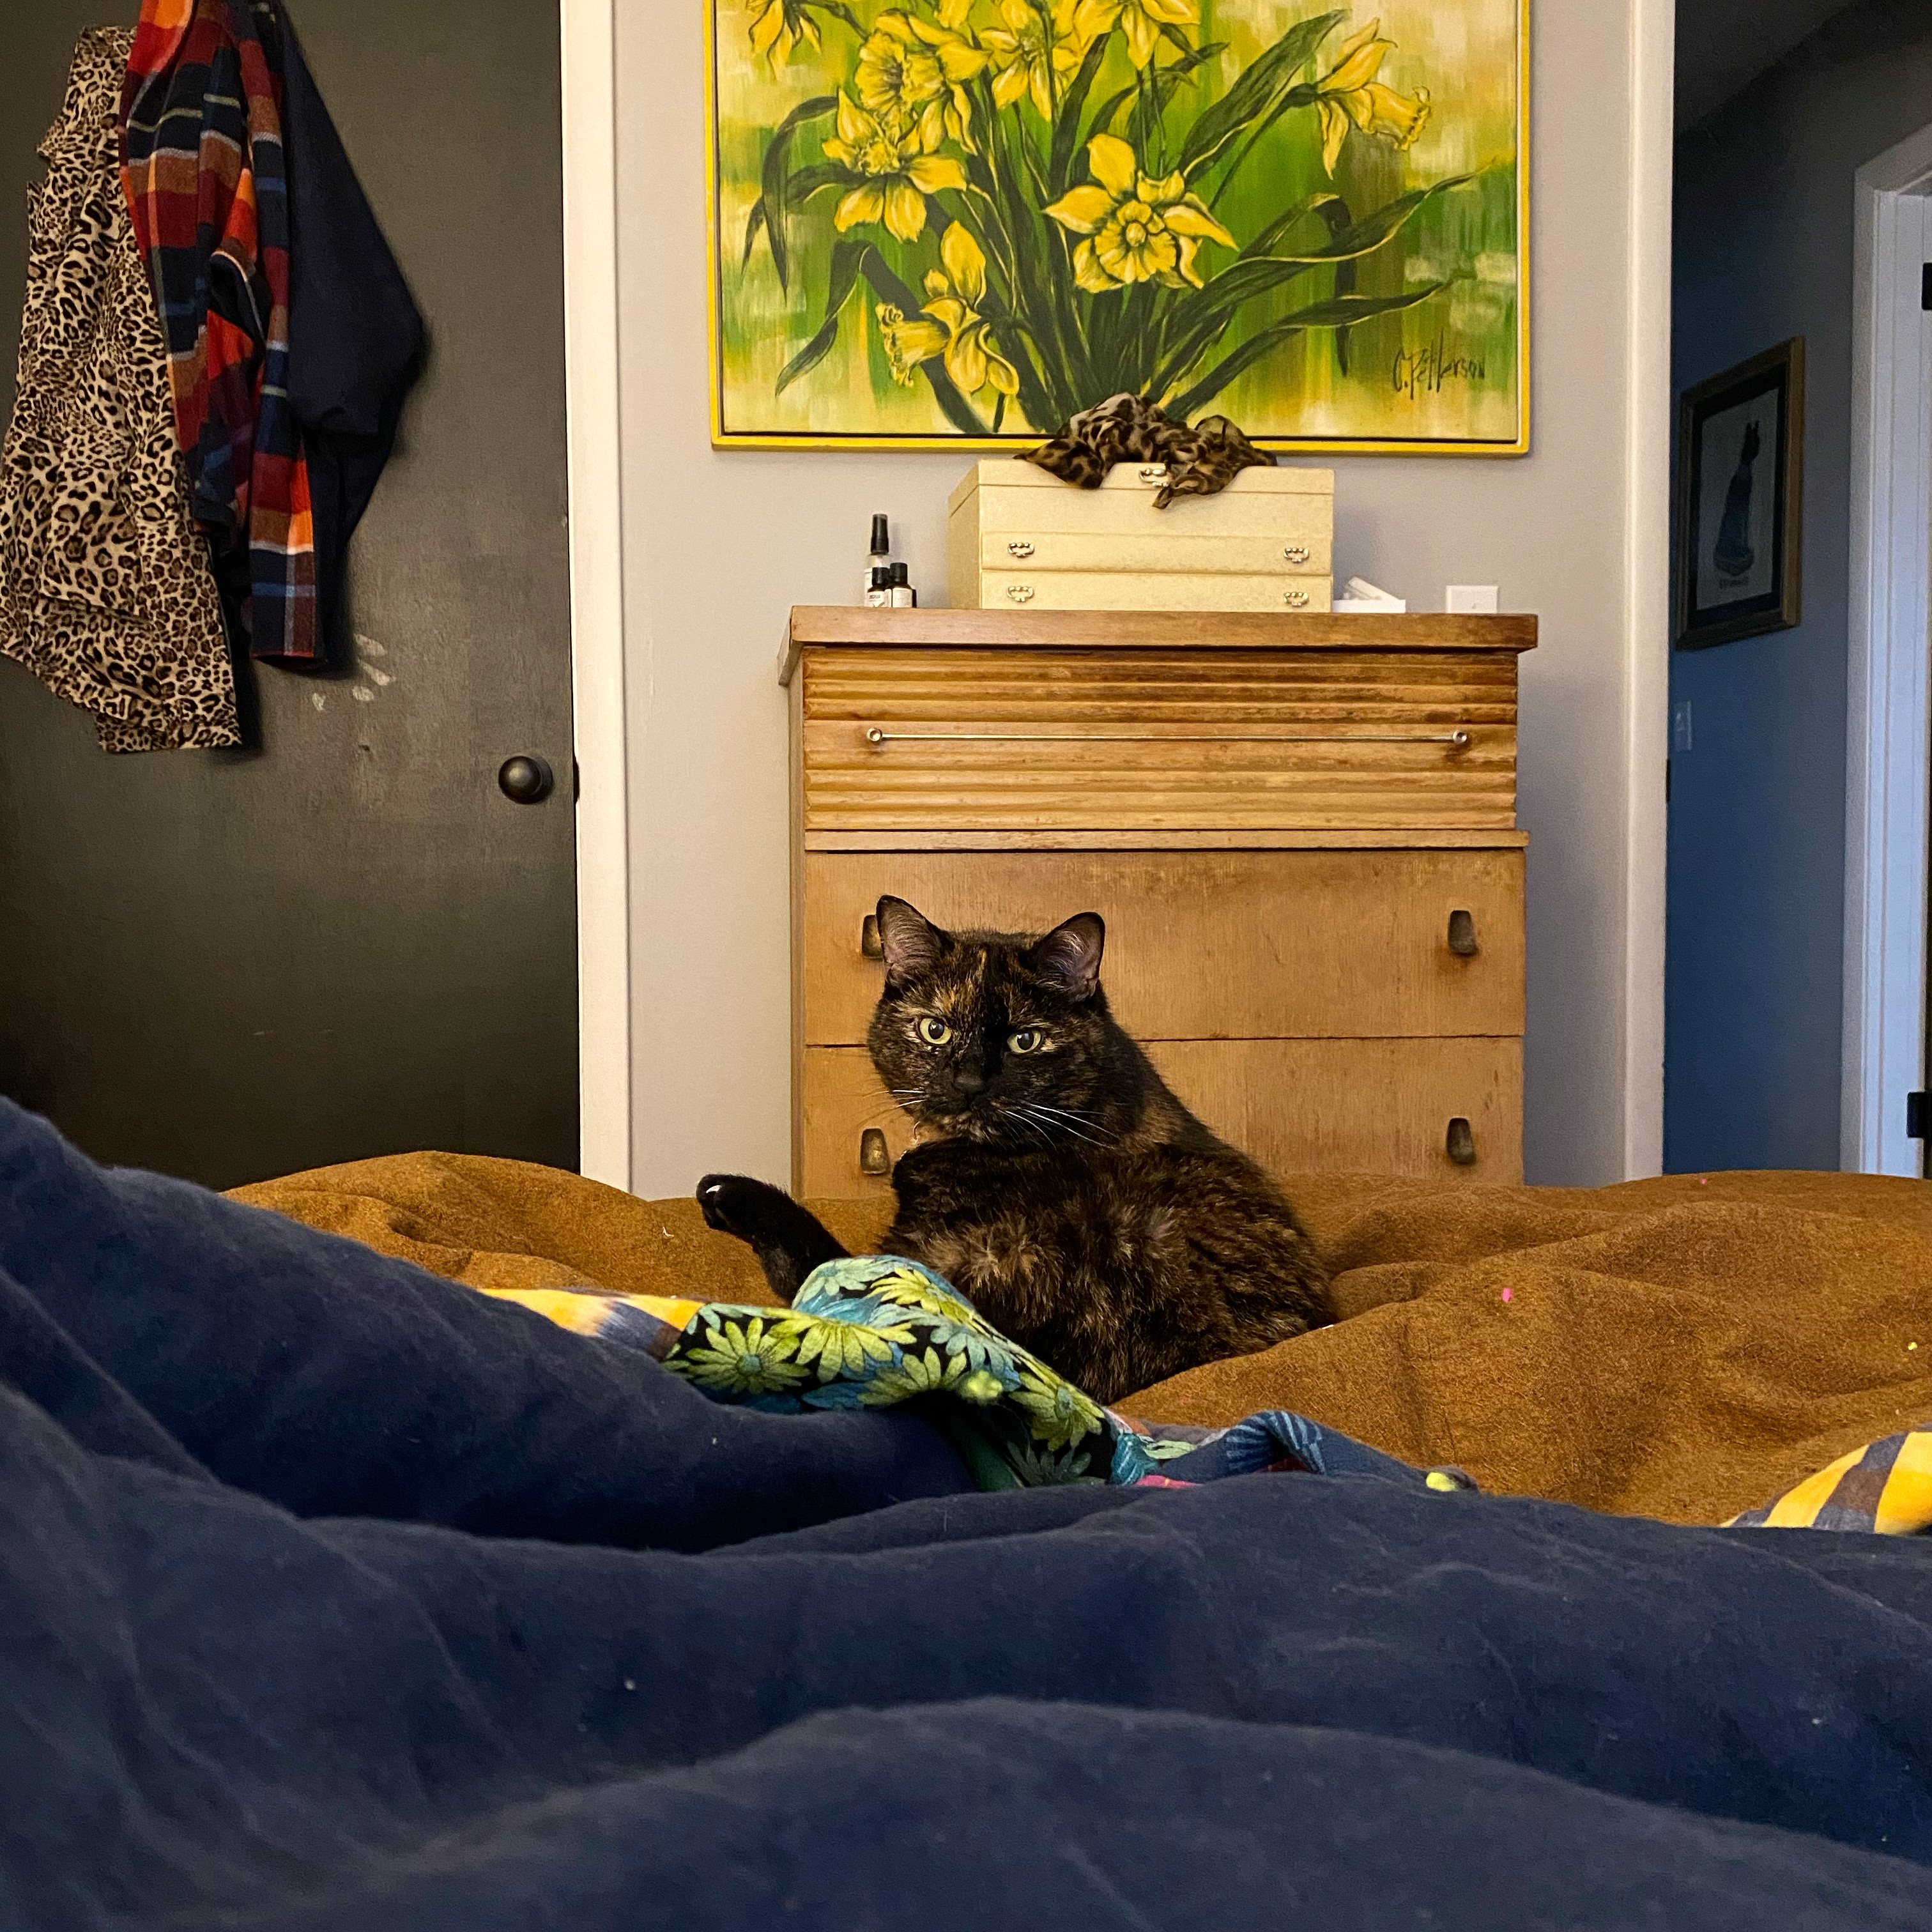
Day 7: Allie Olsen Elio Top + True Bias Lander Pants / This is my bedroom, and also here is an Amelia cameo!
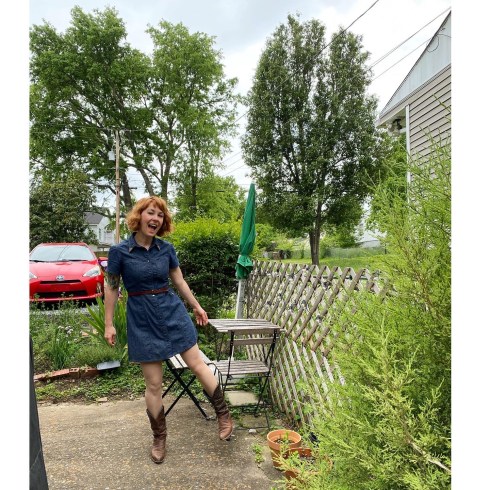
Day 8: Tilly & the Buttons Rosa Shirt dress / Real talk: This is an exact duplicate of the dress in that post LOL I guess I’m a different size now, so I made a bigger one! And I rarely wore it, because it felt so… overwhelmingly denim and kind of heavy. So I cut the sleeves short right before taking this photo, and it feels so much better now!) Anyway, this is my patio!
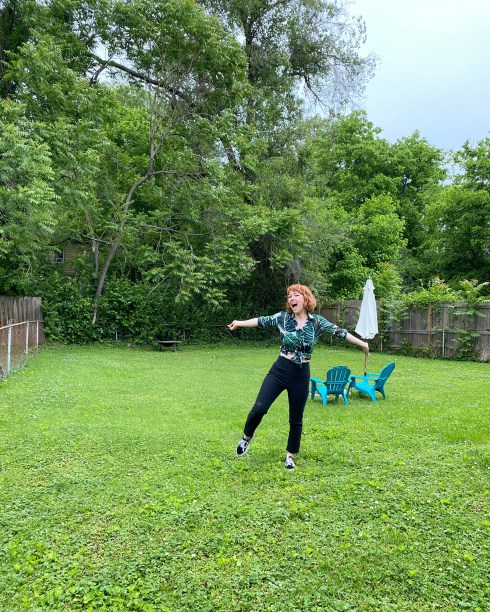
Day 9: Grainline Studio Archer shirt (made with Spoonflower fabric!) + (RTW) Elizabeth Suzann Cecilia pants (altered by me!) (also discontinued – sorry! But they are super high waisted and super stretchy and really awesome!) / Just hanging out in my giant + empty back yard. I love that the blank canvas gives me the option to do anything I want back here, but also, it is a little intimidating to start from scratch! Eventually I’d like to landscape and add some small gardens and maybe a patio (and someday – a separate studio building!!! #dreams), but for now, I mainly use this space to take blanket naps in the sun haha
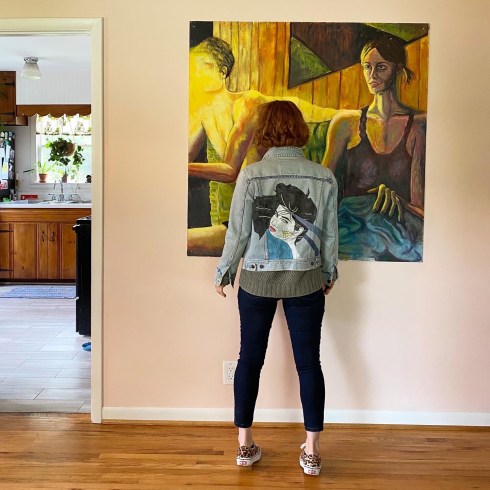
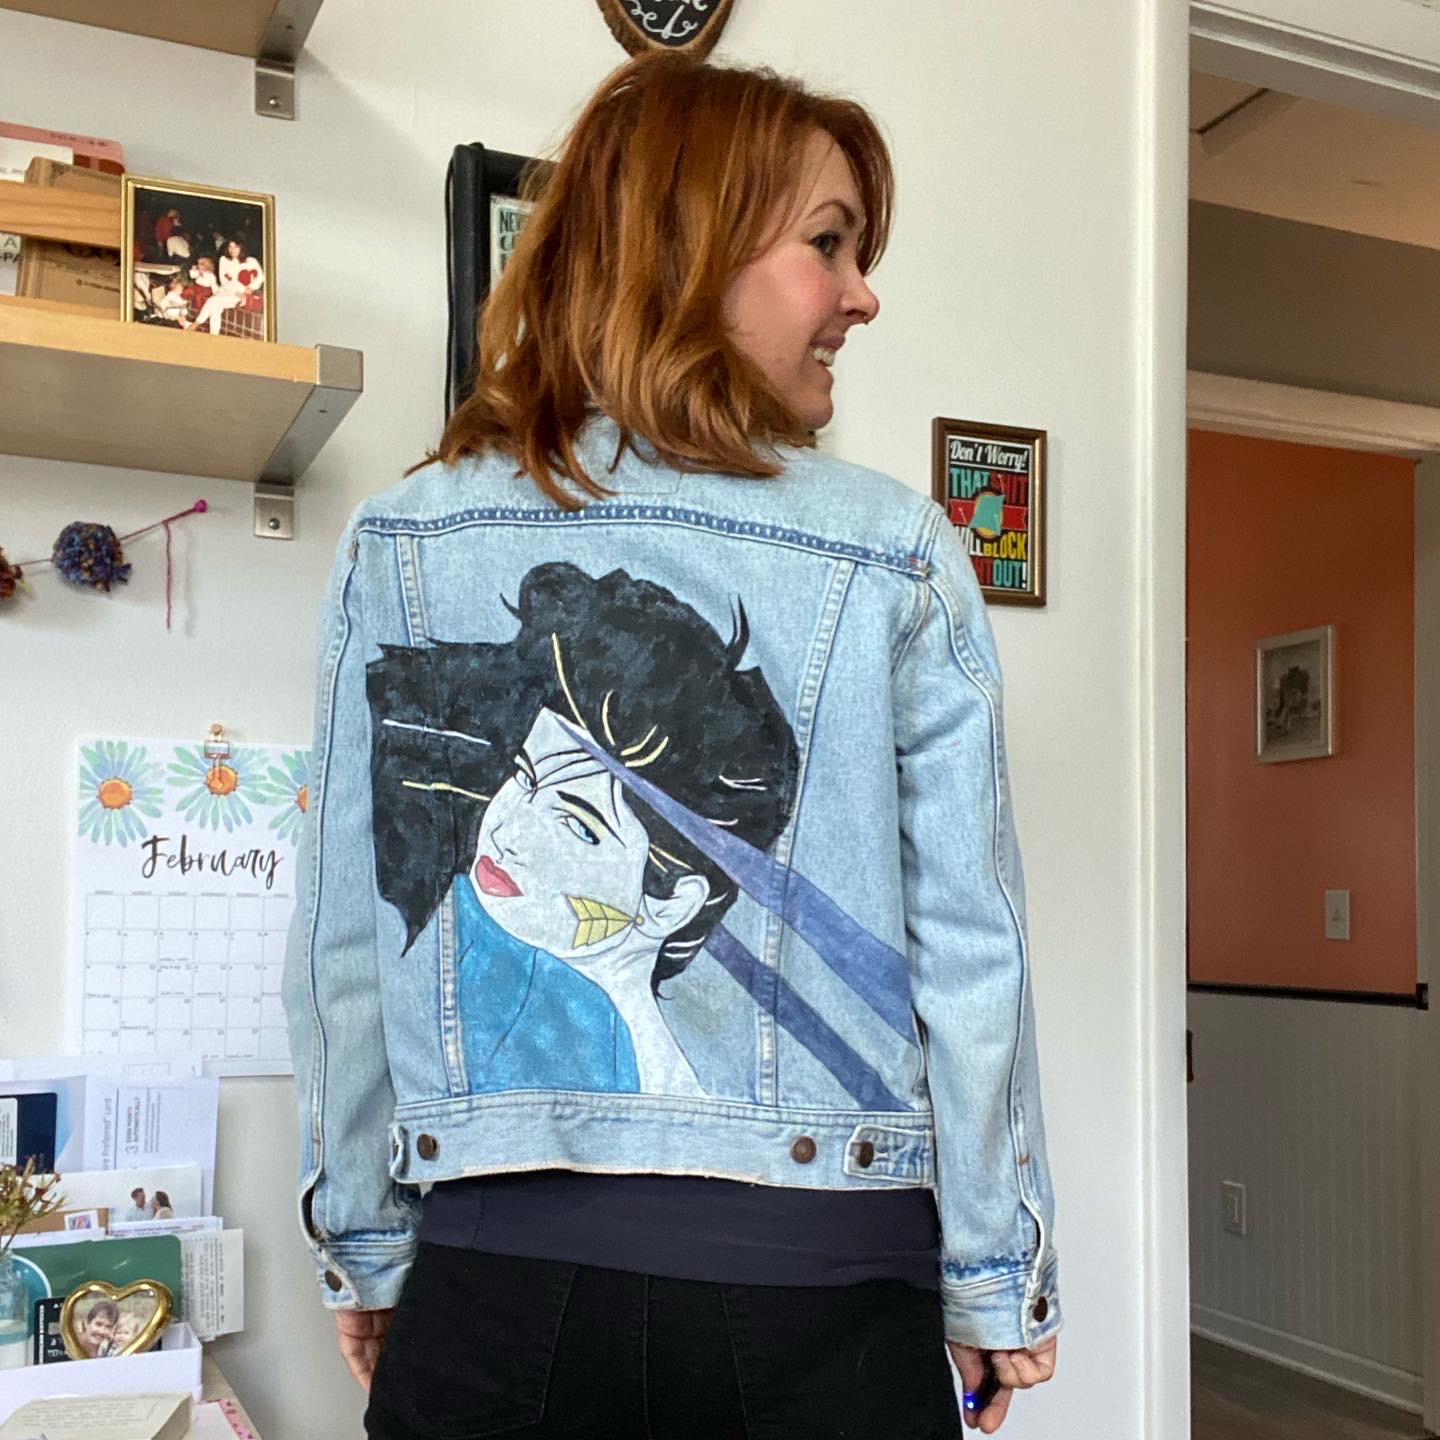
Day 10: (RTW) Handpainted denim jacket, Martine Sweater (originally knitted by me, then later overdyed by me!) + Closet Core Patterns Kalle Shirt + Closet Core Patterns Ginger Jeans (again!) / I ran out of rooms so I’m back in my living room, in front of one of my favorite pieces of art! I found this delightfully creepy piece a a thrift store about 10 years ago and it gets a lot of comments (both good and bad haha).
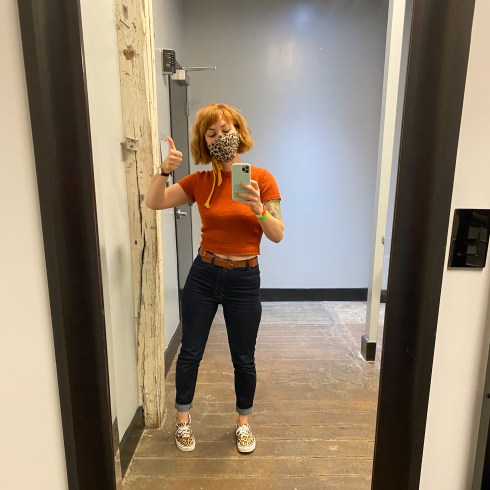
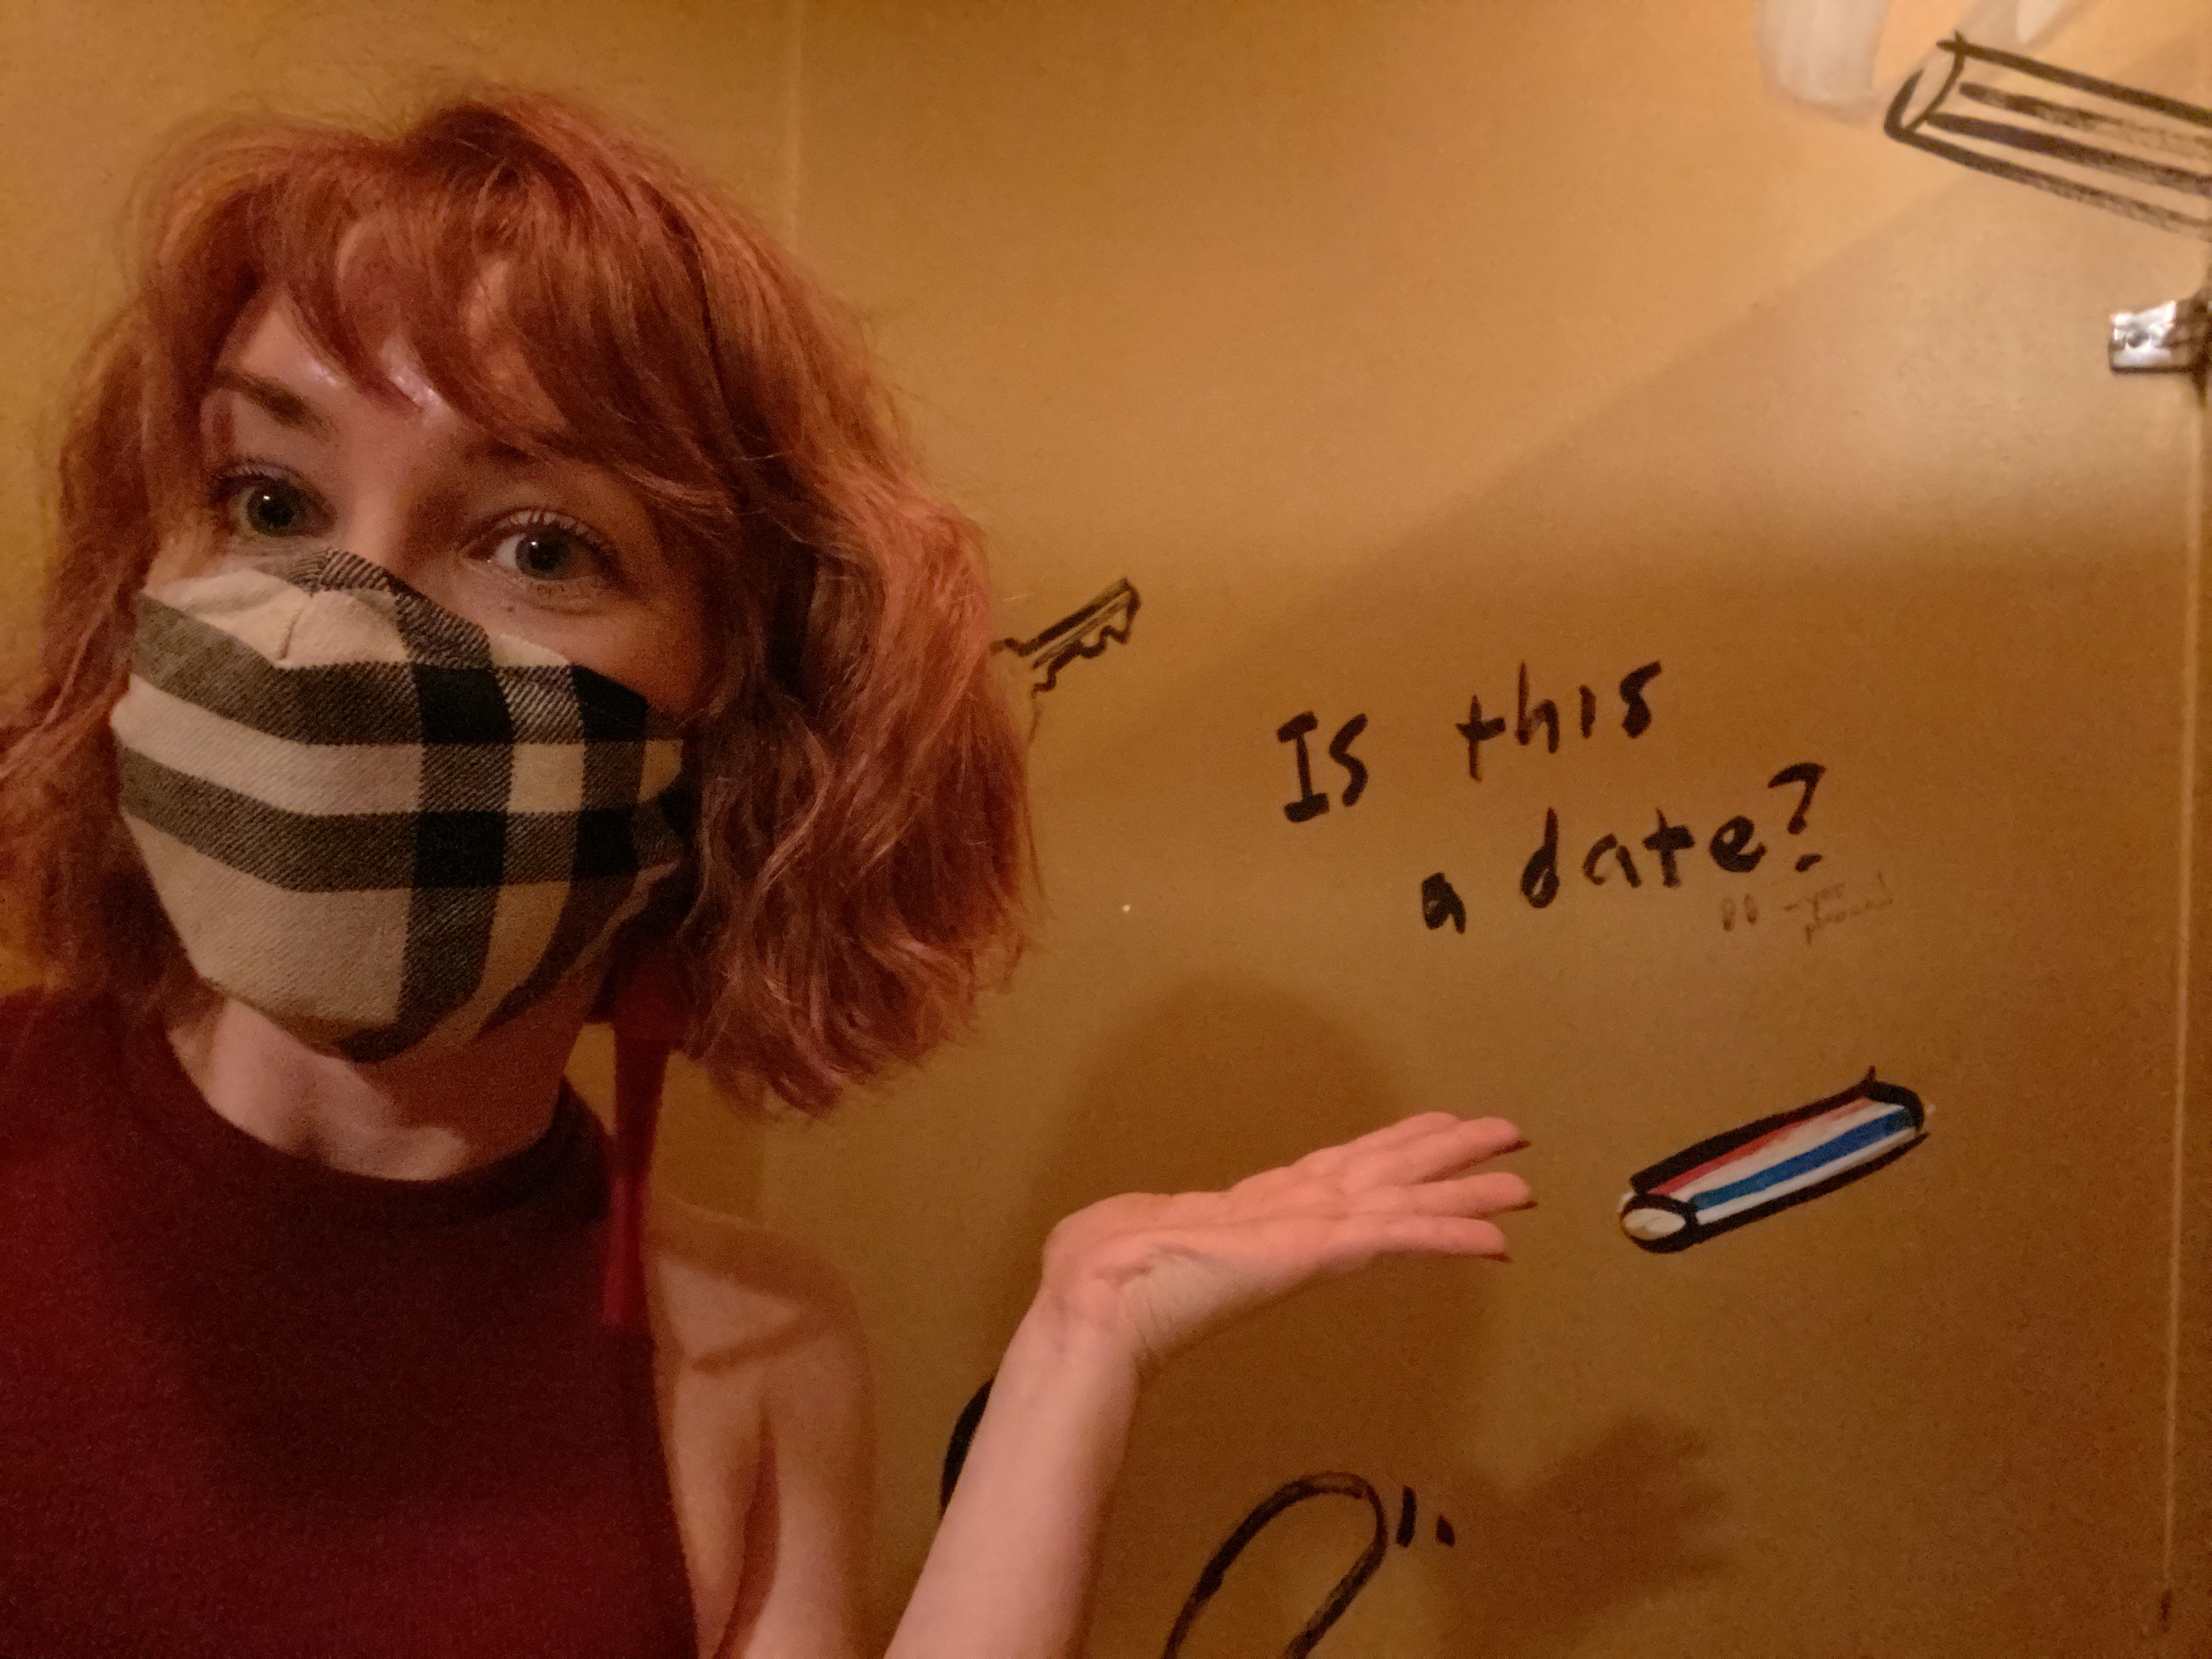
Day 11: Poison Grrls Beauty School sweater + Megan Nielsen Dawn jeans / Ok so this isn’t my house – I was on set (as a tailor!) for a tv shoot! It was a very busy day but I managed to squeeze in a quick bathroom mirror selfie 🙂
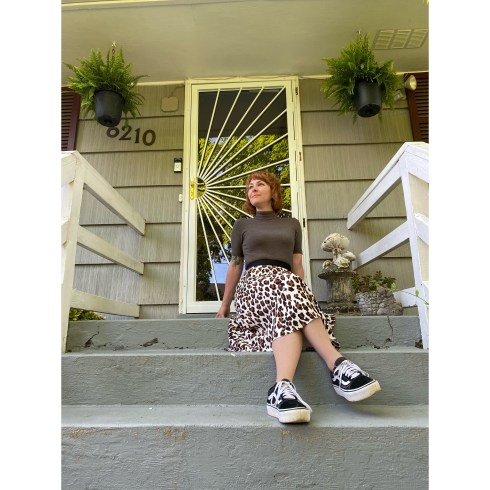
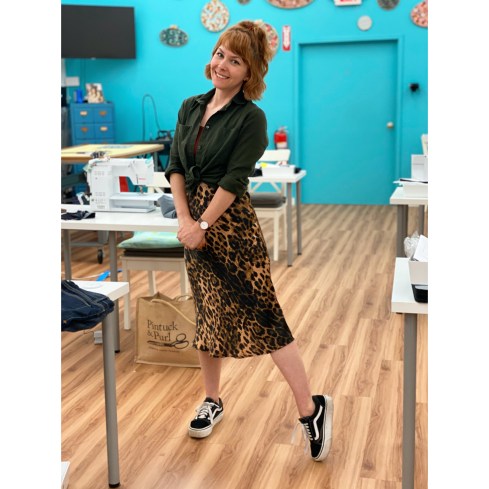
Day 12: True Bias Nikko Top + (RTW) Talbot’s Leopard Midi skirt (I changed out the waistband for a soft, wide elastic!) / Took these photos on my front porch to show up my SEXY NEW SECURITY DOOR (here is the one I got!). I’ve wanted this door since I originally bought my house, and it is everything I dreamed it would be! (ps if you think my legs look really airbrushed… they aren’t, it was just kind of cold so I have on skin-colored pantyhose LOL)
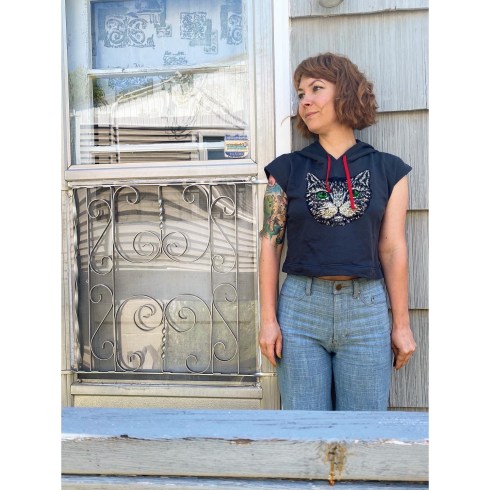
Day 13: Tilly & the Buttons Stella Hoodie (shortened into a top and then I added that sparkly cat patch!) + Vogue Patterns 2442 (the original Calvin Klein jeans!) / While I had the carpenter installing that front door, I also convinced him to re-hang the screen door on the side of my house! It’s original to the house, but the sellers took it down and stashed it in the crawl space because it looked “old fashioned.” So I had it re-hung and I love it! There!
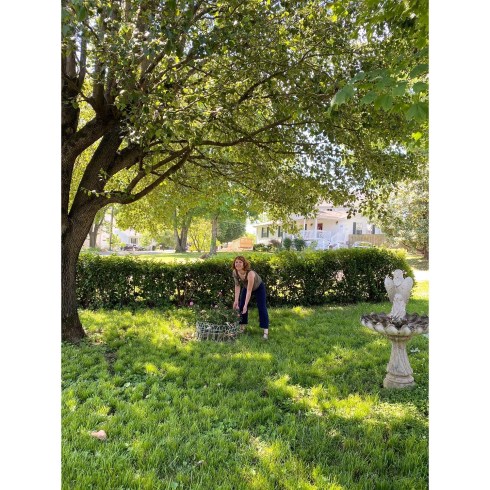
Day 14: Megan Nielsen Eucalypt tank + True Bias Lander pants / Just hanging out with the peonies in my front yard! The previous homeowner planted them and I have never loved a flower more!
Day 15: Cashmerette Concord tshirt (again!) + (RTW) Maxi skirt that originally started out as a huge 80’s dress (I cut into a skirt and then later added a wide elastic waistband. Because elastic is super comfortable and I love myself LOL) / This is the other side of my kitchen! And if you peek into the living room behind me, you can see Amelia’s favorite toy – a horrible thing that looks exactly like vomit (brown, fuzzy, and it’s even the same SHAPE ugh)
Day 16: True Bias Rio Ringer tshirt (with an added CAT PATCH!) + True Bias Lander pants / Here’s another little corner of my studio – I painted the mural on the wall!
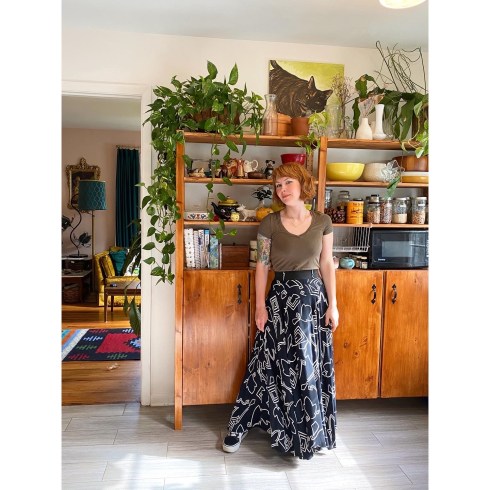
Day 17: Sophie Hines Axis Tank + ThreadyMade Sunburst Monroe skirt (this came as a kit but I sewed it together!) / Here is another corner of my kitchen, and at this point you can see I clearly ran out of spaces to shoot…
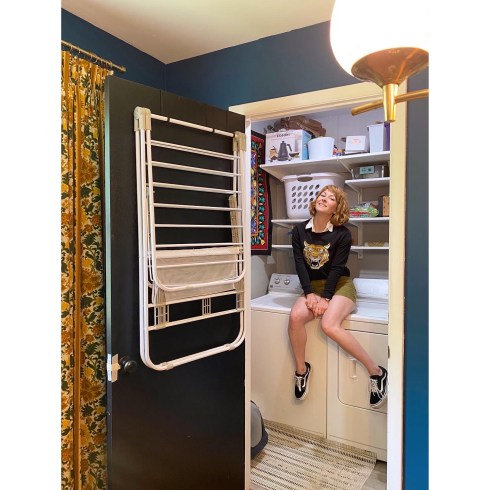
Day 18: True Bias Lander shorts + Closet Core Patterns Kalle shirt + (RTW) Black sweatshirt (that I added another cat patch to LOL) / Someone thoughtfully suggested I take a photo in the laundry area, so that’s what inspired this hahaha.
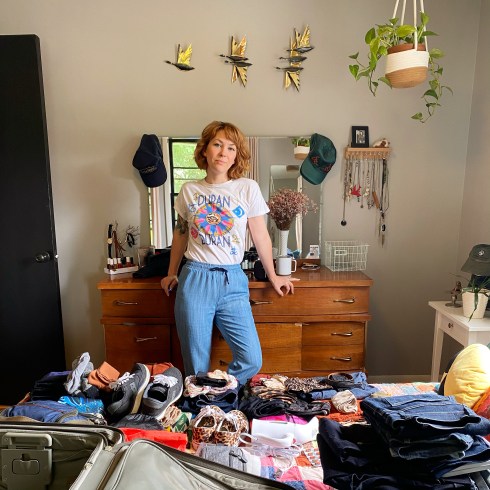
Day 19: Helen’s Closet Arden Pants + (RTW) vintage Duran Duran concert tshirt (shortened by me!) / This is another angle of my bedroom, taken while packing for a workshop at Pintuck & Purl.
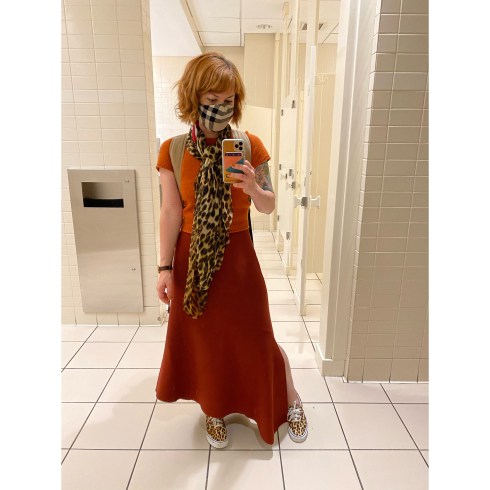
Day 20: (RTW) Thrifted black tshirt (cut + hemmed into a crop top by me!) + (RTW) knit skirt (brand is A.L.C.) (I did take in the waist elastic to make it a little more fitted; otherwise it is essentially un-alterable due to how it is constructed) + leopard print silk chiffon scarf that is basically a really expensive piece of fabric (Alexander McQueen from Darrell Thomas Textiles) cut into a rectangle and then hemmed / Out of my house for the weekend, and in my temporary digs in Exeter NH while I teach a workshop at Pintuck & Purl! This AirBNB was the *cutest* little space!
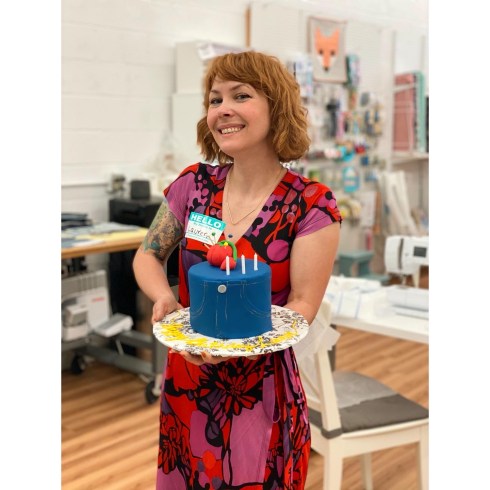
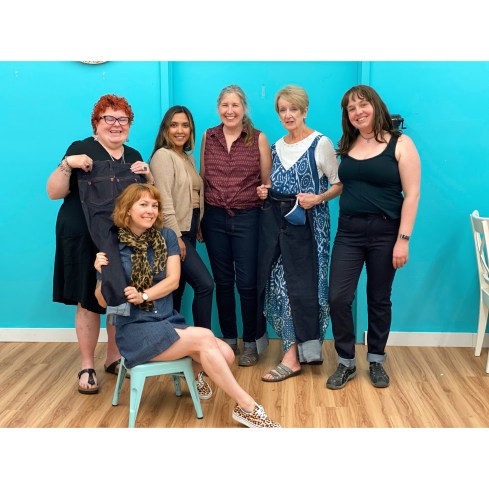
Day 21: Cashmerette Appleton Dress / This was my birthday!! Maggie brought me a CAKE – it’s a little pair of jeans with a pincushion that matches my tattoo / blog header, I mean, COME ON.
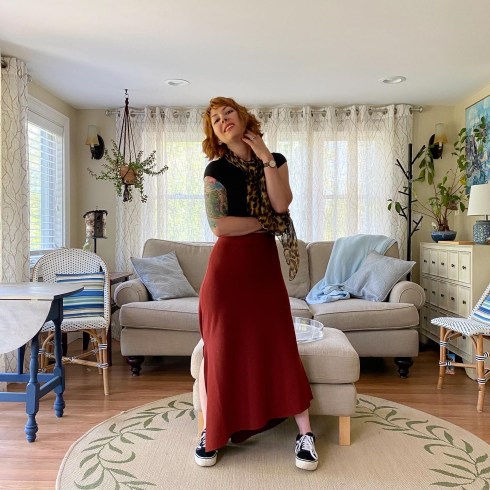
Day 22: Sophie Hines Axis Tank + Grainline Studio Archer shirt + (RTW) thrifted Leopard bias skirt (hemmed by me) / Day 2 of my workshop at Pintuck & Purl! Also, 2020 was the year I discovered just how much I love wearing bias cut pieces. SO. COMFY. (yet so refined!)
Day 23: Tilly & the Buttons Rosa shirt dress (again!) + silk leopard scarf (again!) / Day 3 + a wrap for my second jeans workshop of the year! I loved wearing this dress so much that I decided to bring it with me and wear it again! Although in retrospect, it might not be the absolute best choice for teaching – the skirt is short, and gets dangerously shorter depending on how I sit. That’s a lot of leg!
Day 24: Poisongrrls Beauty School sweater (again!) + RTW A.L.C. knit skirt (again!) + leopard silk chiffon scarf (again!) / I was traveling all day and this was the best photo I could manage! Also, this whole outfit is repeats. Whatever! Amazingly, I did not vanish into a puff of smoke upon leaving the house LOL

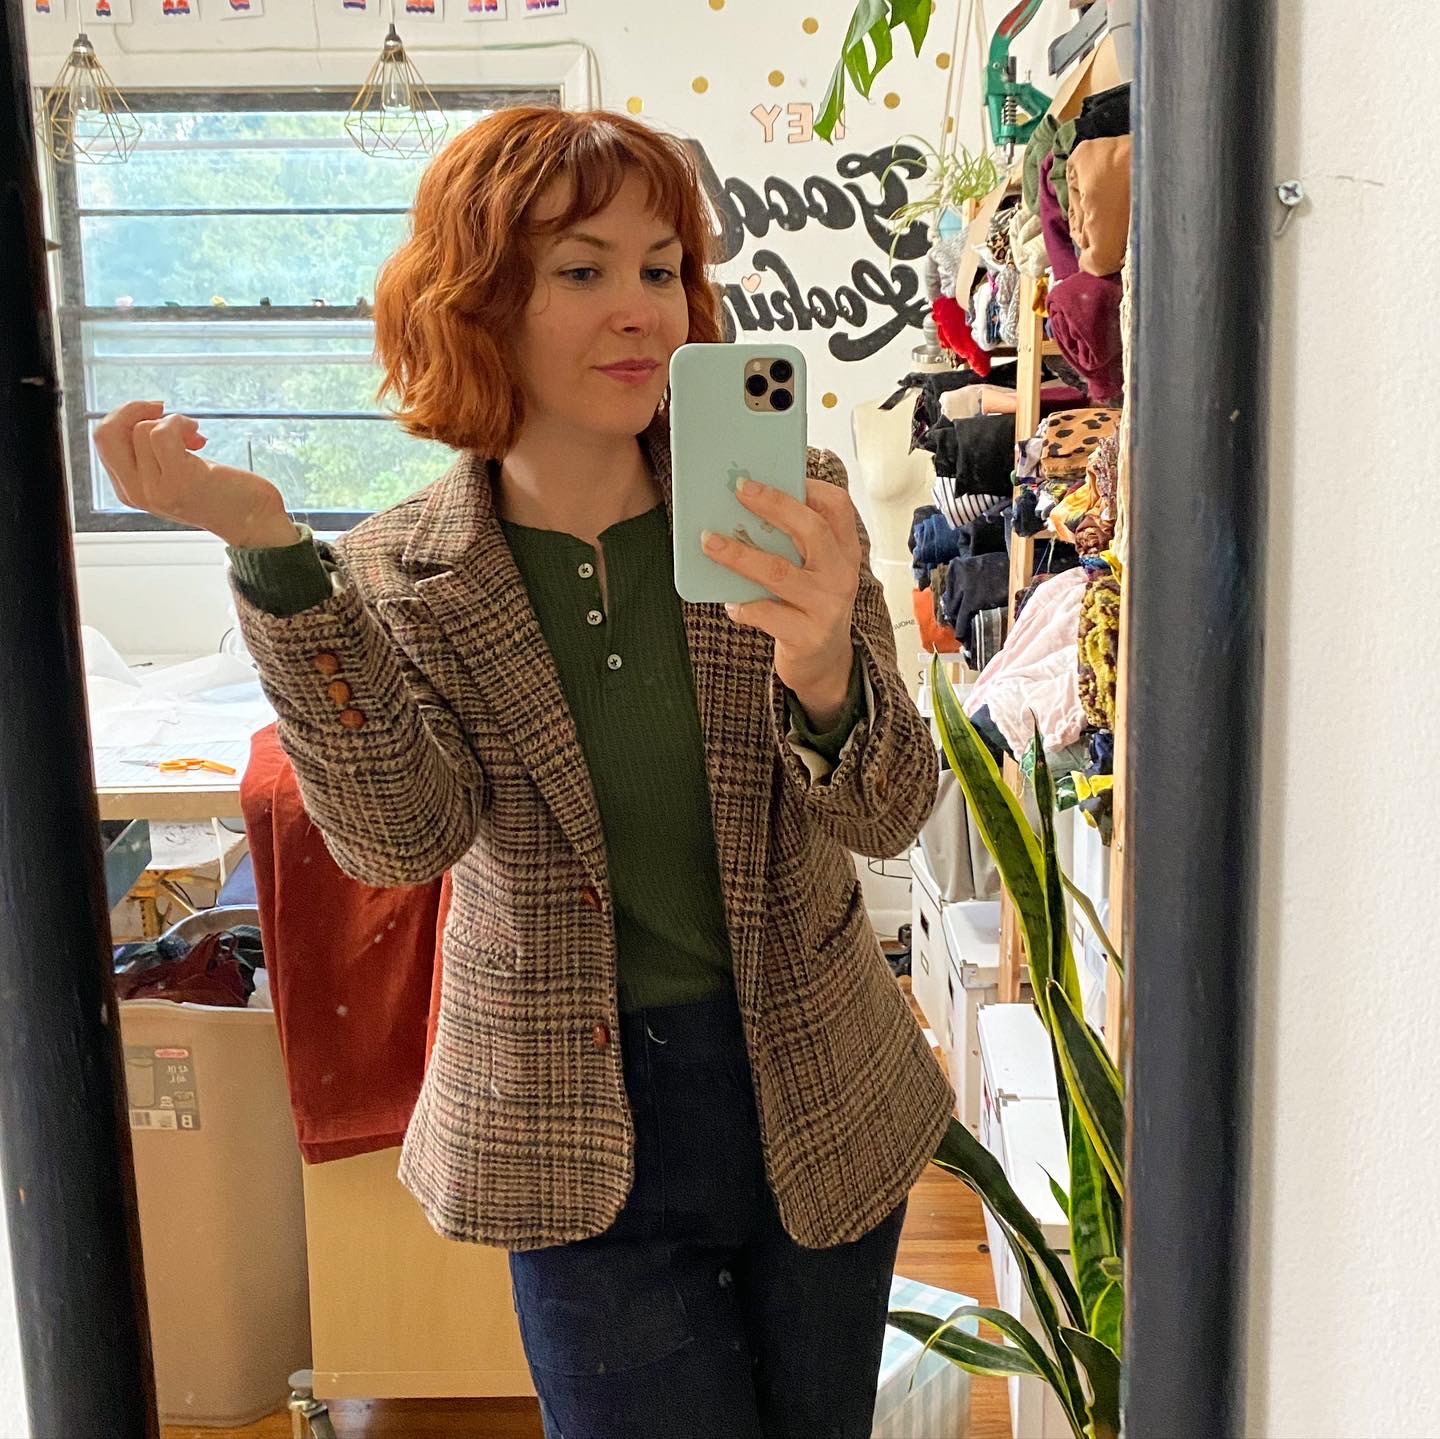
Day 25: StyleArc Patterns Ariana dress + (RTW) Button-up (hand embroidery on the back done by me, and I also shortened it a little!) / Another angle of my living room! This last year I also discovered using button-up shirts as a light layer to wear in the summer. Breathable fabrics such as rayon, silk, linen, and lightweight cotton are perfect for warding off the chill of an aggressive A/C, and also look much more seasonably appropriate (I think!) than a big ol’ cardigan!
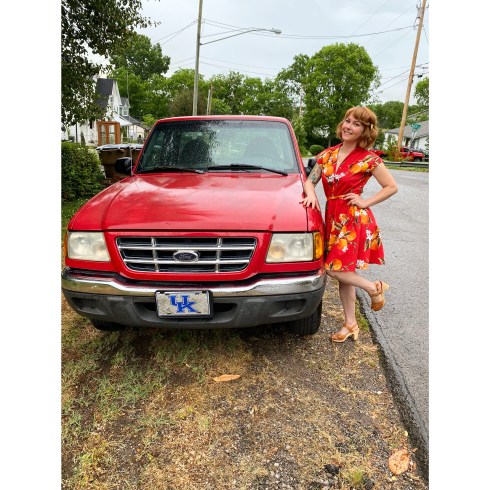
Day 26: Sew Over It Penny dress (made with a fabulous Dolce & Gabbana cotton from Darrell Thomas Textiles) / Went out for my birthday dinner (to House of Cards in Nashville which was SO AWESOME and I highly recommend!) and decided to wear an old birthday favorite! I never posted about this dress, but I made it a couple of years ago! Also, I’m standing with my (new to me) truck! This was my dad’s vehicle and my mom titled it over to me a couple of months ago. It’s been a few years since I drove a truck (my old truck was a Ford Ranger, too!) and I forgot how fun they are!

Day 27: Cashmerette Concord tshirt + (RTW) Talbots leopard skirt (again!) / My niece graduated high school this year so I spent the day celebrating with her! I cannot believe it has been 18 years since this little squirt was born. Where does the time go??

Day 28: True Bias Lander pants + (vintage/RTW) Sheer Embroidered top + Sophie Hines Axis tank (worn underneath) / Another side of my dining room. Can you tell I’m over the daily photos by this point? LOL
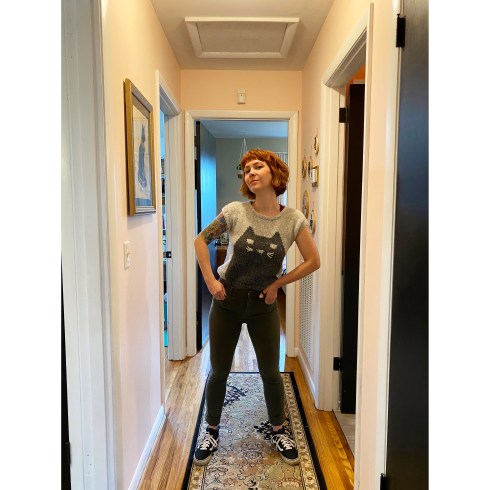
Day 29: Professor Meow sweater + Closet Core Patterns Ginger Jeans / It got suddenly cold again which meant another opportunity to bust out the sweater collection! Yeehaw! Also, this is the other view from my hallway!
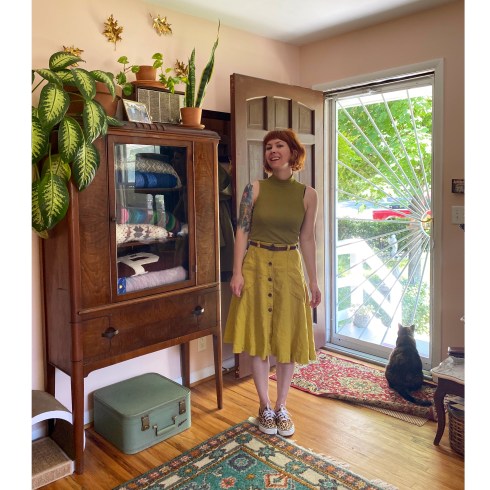
Day 30: Closet Core Patterns Fiore skirt + True Bias Nikko top (again!) / When I made this skirt a couple of years ago, it felt a little risky to sew it in such a weird yellow. But it has ended up being a real workhorse in my wardrobe, and that strange shade of yellow-green matches most of my clothes! I also wasn’t sure how I’d feel about the slightly longer length, but I love it! Here is another side of my living room, and where Amelia spends most of her day when I’m home with the door open (there is a bird feeder hanging on the tree right outside).
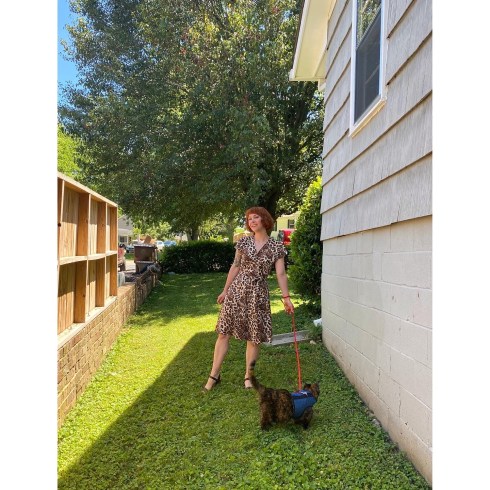
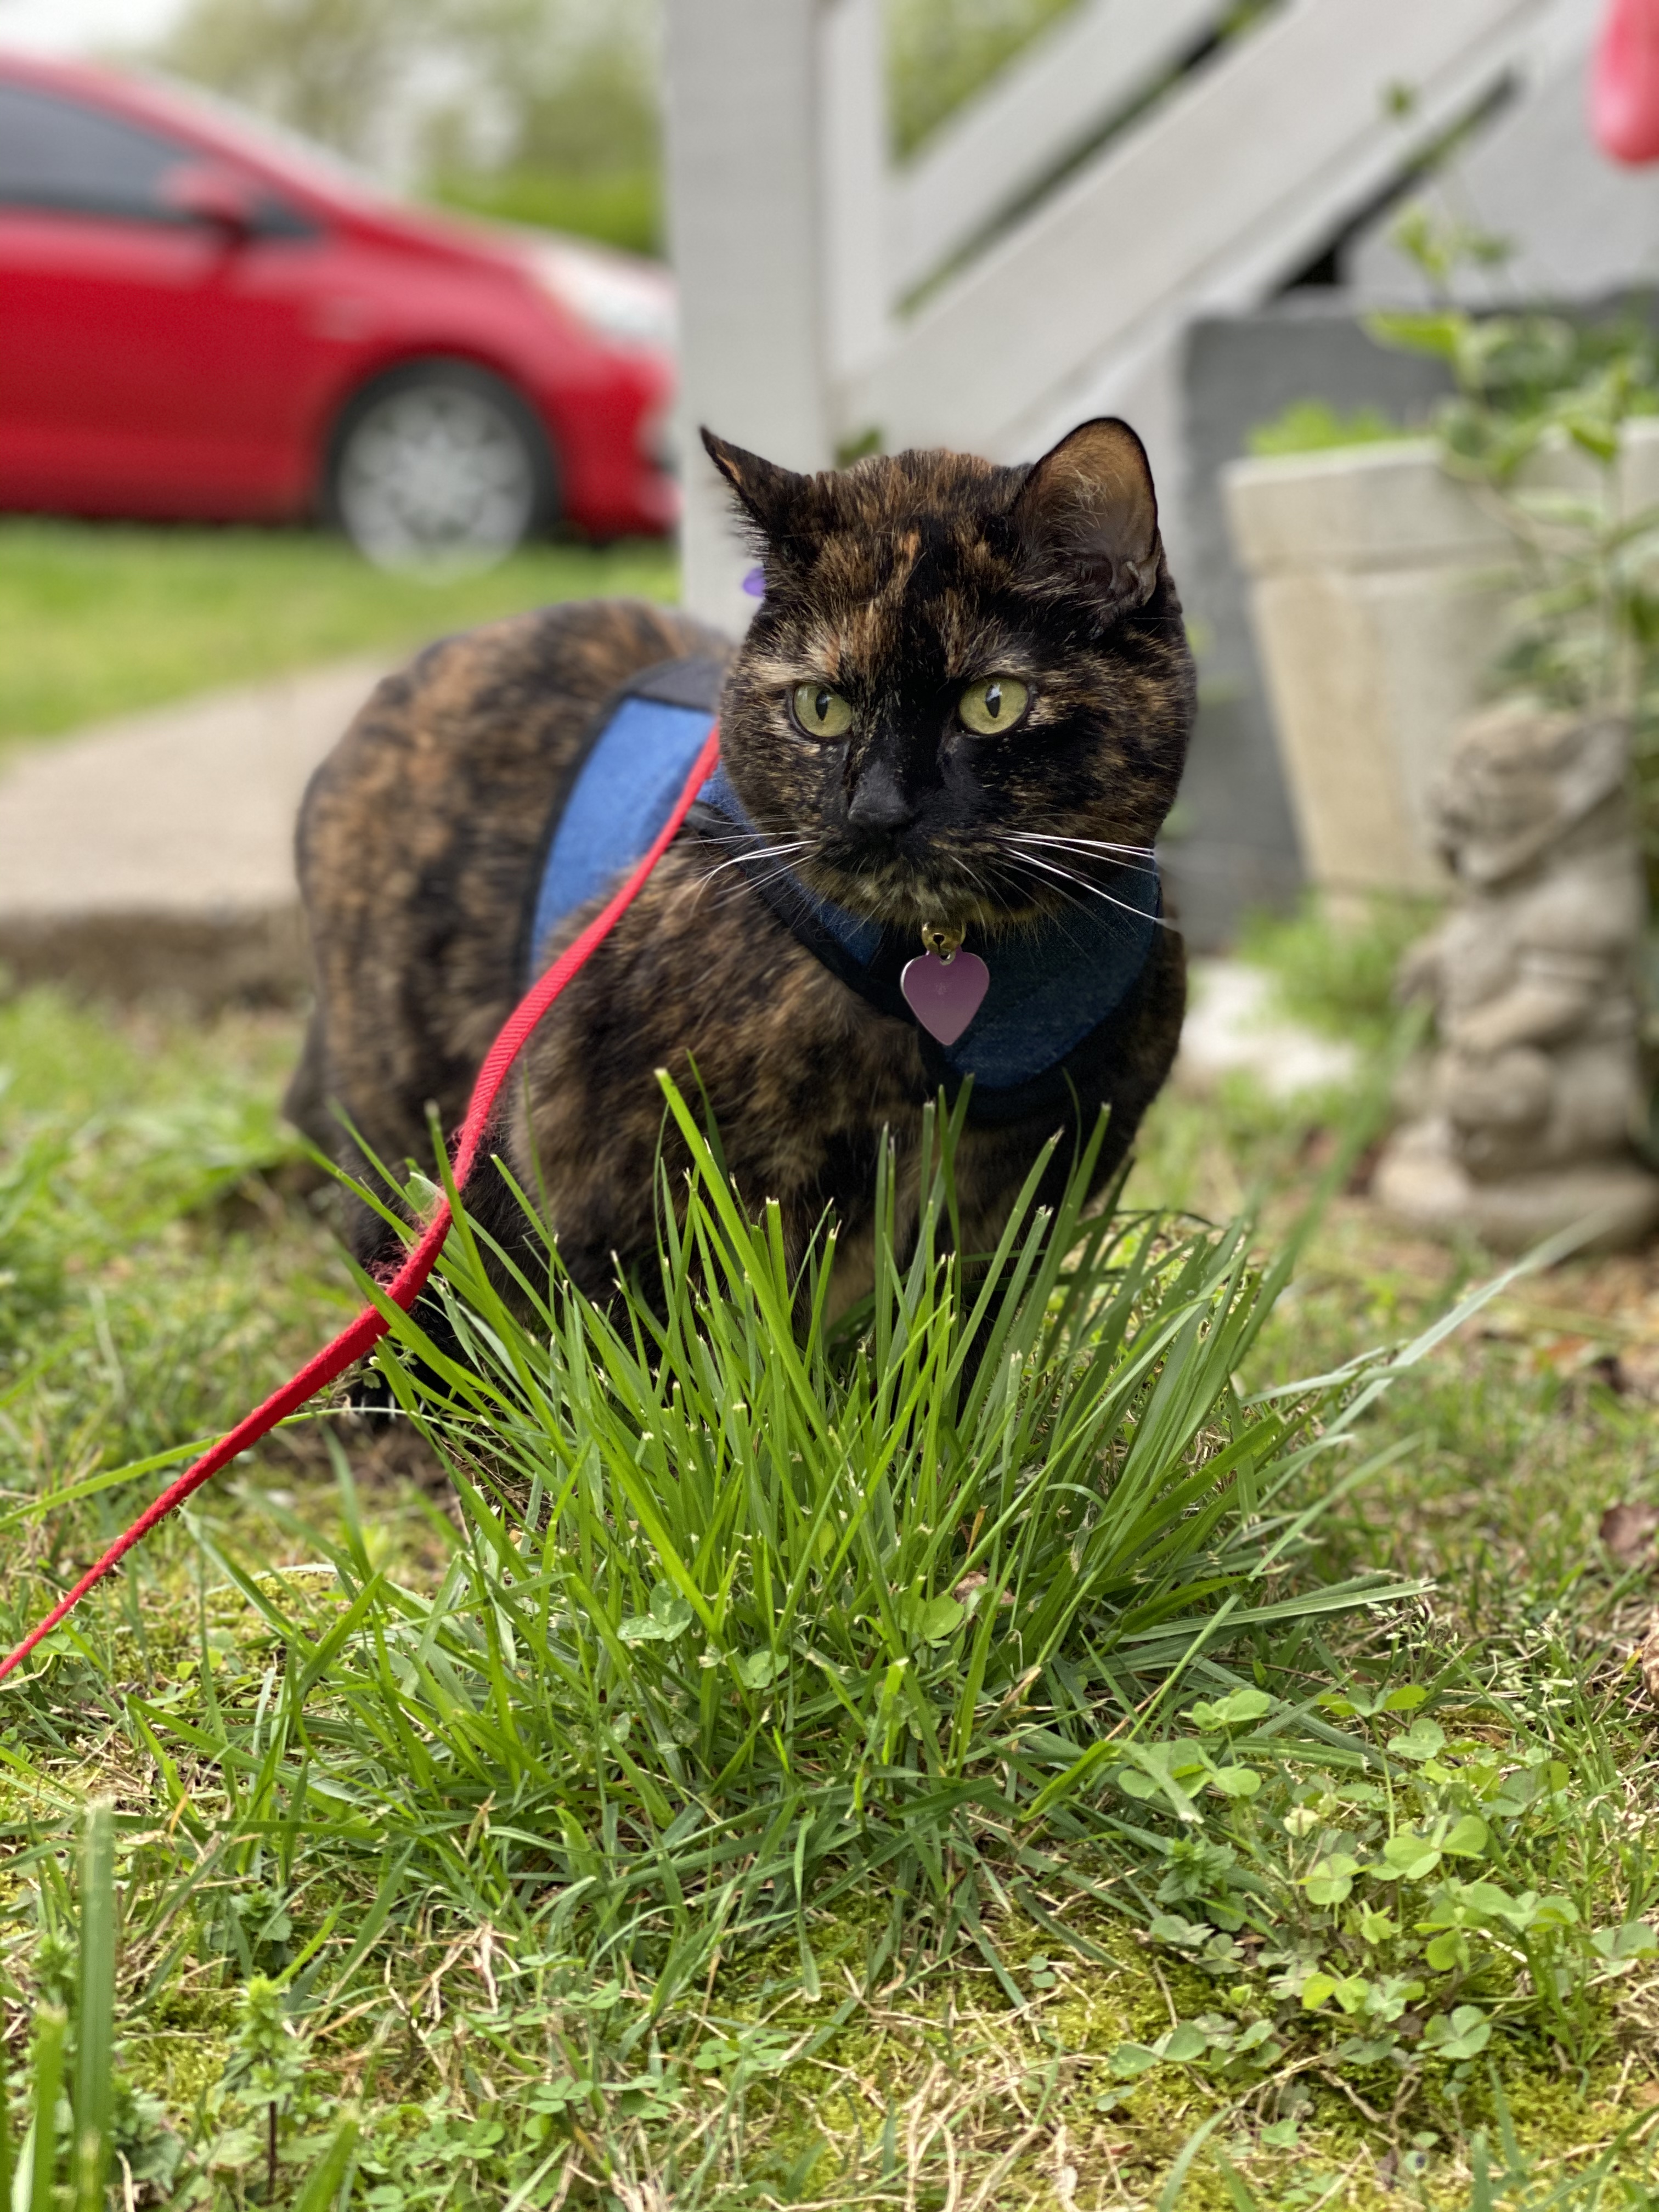
Day 31: Closet Core Patterns Elodie wrap dress / Last day of May, finally!! I leashed up Amelia and took her out for a little photo walk! Of course, she’s a cat so our “walk” ended up with her flopping down on the ground, dramatically eating all the grass around her like it was her last meal. Oh well!
That’s all for Me Made May this year! Not putting any restrictions on my outfits (ex., allowing repeats, RTW, etc) made it a lot easier to get dressed and feel excited about what I was wearing! If you’re thinking that there are barely any repeats here as it is – you’d be correct, as May tends to flip-flop a lot weather-wise here in Nashville, with an equal amount of warm and chilly days. So I pretty much had double the options to choose from when it came to clothes!
The biggest improvement for me was narrowing down the colors I wear, and sticking mainly to warm colors with a slightly limited palette (including lots of leopard, obviously #leopardisaneutral). This made nearly all of my pieces effortlessly coordinate, which I love! I still need to do some work when it comes to silhouettes and proportions, but keeping track of everything for a month has been really helpful.
I’m also happy to report that there were only a couple of pieces I wore that I didn’t feel super excited about. I will be removing these pieces from rotation and seeing if there is something that can be altered to make them more appealing, or releasing them into the world for someone else to wear and love.
Did you participate in Me Made May this year? What were your takeaways?