Tag Archives: alteration

MADE BETTER: TOTE BAG ALTERATION

24 May

I know what you’re thinking: “Who TF alters a tote bag?” Honestly, a lot of people asked me this – my students, my coworkers, my friends, myself. But, dammit, sometimes I wanna do weird things just to see how it turns out. And in this case, it was making this LL Bean Nor’easter Tote Bag 1000x better than straight off the rack.

Here is a photo of the bag as grabbed from LL Bean’s website. It’s a fine bag, very well made. It works great as it is. But I wanted to make it better, so I did.

I bought my tote from the LL Bean Outlet Store in North Hampton, NH. Fun fact: It’s right down the street from Pintuck & Purl, and I make Maggie take me there every time I’m in town for a workshop LOL. This time, I was determined to get a tote bag! I have a vacation coming up in July and I wanted a big ol’ tote bag to strap to my carry-on suitcase. Another fun fact about the LL Bean Outlet – you can buy mis-embroidered tote bags for about 30% off the cost. Which is how I ended up with Essie Kate’s bag.

Thanks, Essie Kate! Love u!

Apparently it is very New England to leave the wrong name on your bag, which I briefly considered, but I just love seam ripping too much. Off it went!

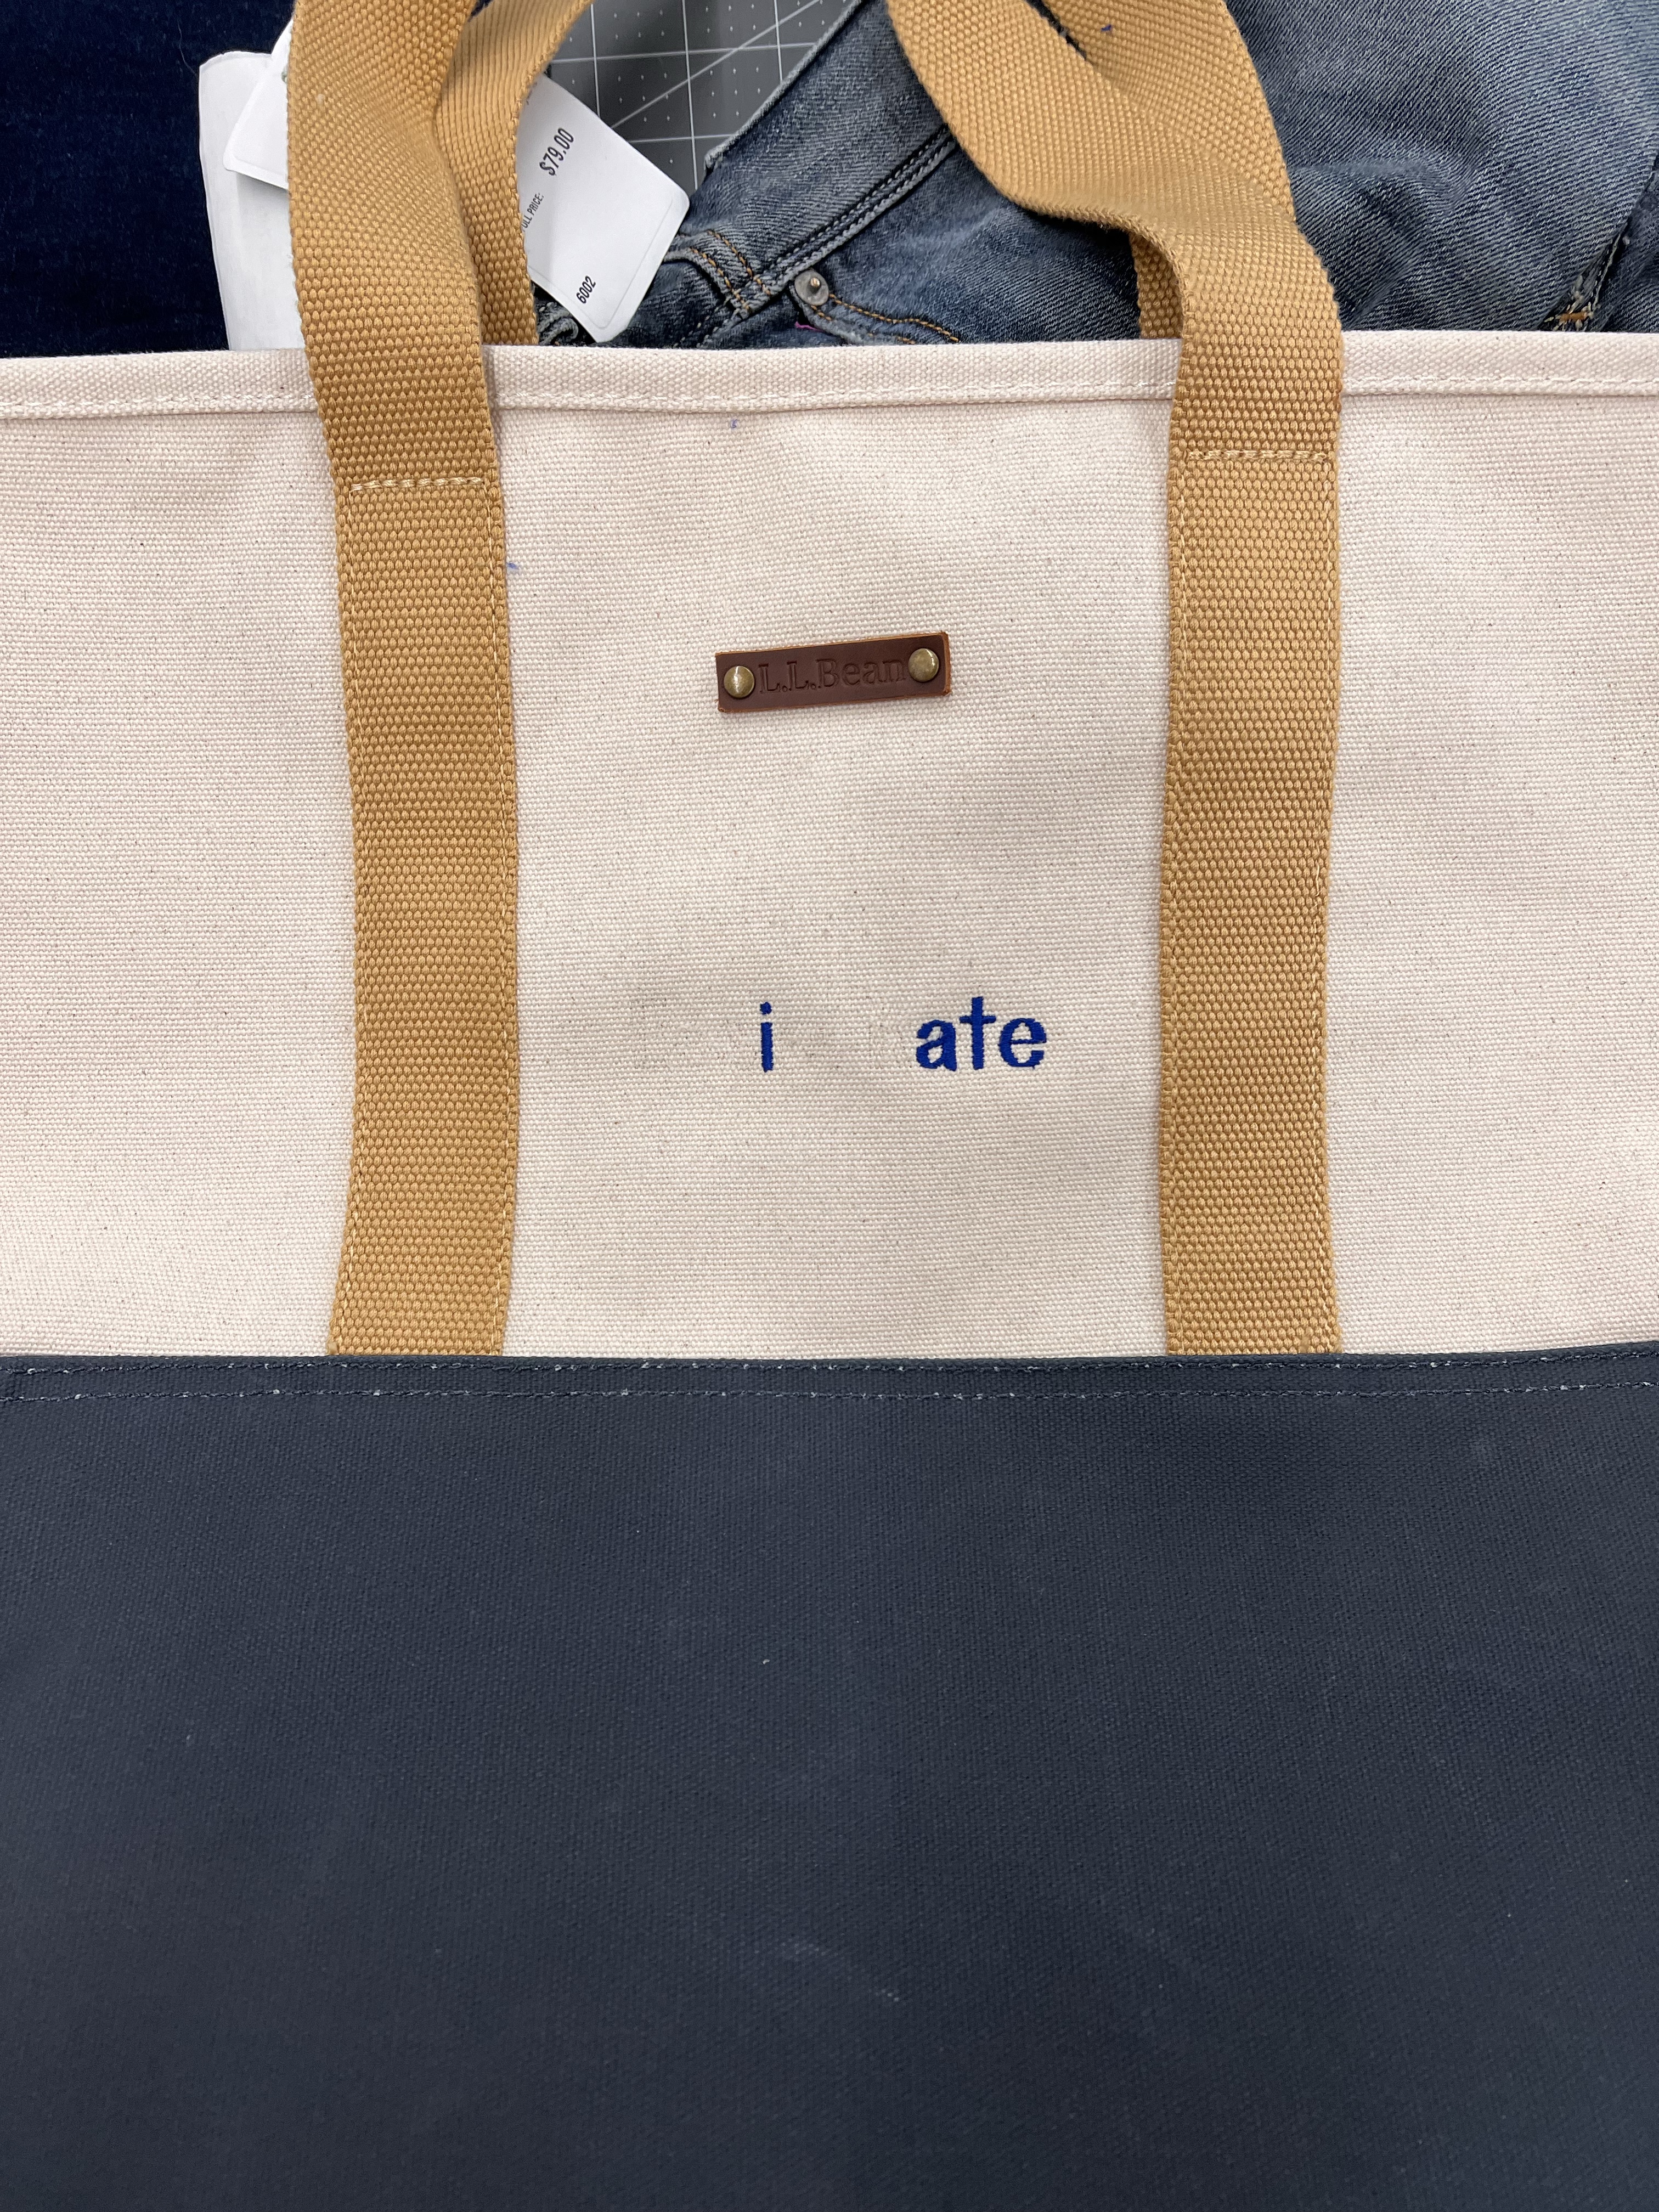
I did also consider just leaving it as “i ate” but the spacing was just too weird. Bye Felicia! I mean, Essie!

Like I said, the bag is great as-is – it is very roomy, has a zipper across the top, and a nice hanging pocket bag that includes a zippered pocket and 2 gusseted pockets. I liked that it included a detachable crossbody strap, in addition to the handles. The fabric is sturdy and heavy, and waterproof (both on the base and the interior). It was pretty close to what I was looking for. But after carrying it through the airport for my trip home, I made note of a few updates that would make it even better:

  • An outside pocket on the front to stash my phone
  • An slip-through panel on the back so I could attach it to my suitcase
  • An interior pocket for my laptop so it doesn’t bounce around
  • Also, the entire bag was just a hair too big. It needed to be about 2″ shorter – the height was a bit cumbersome for using the shoulder strap, and honestly just looks disproportionally large next to me, in all my 5’2″ glory

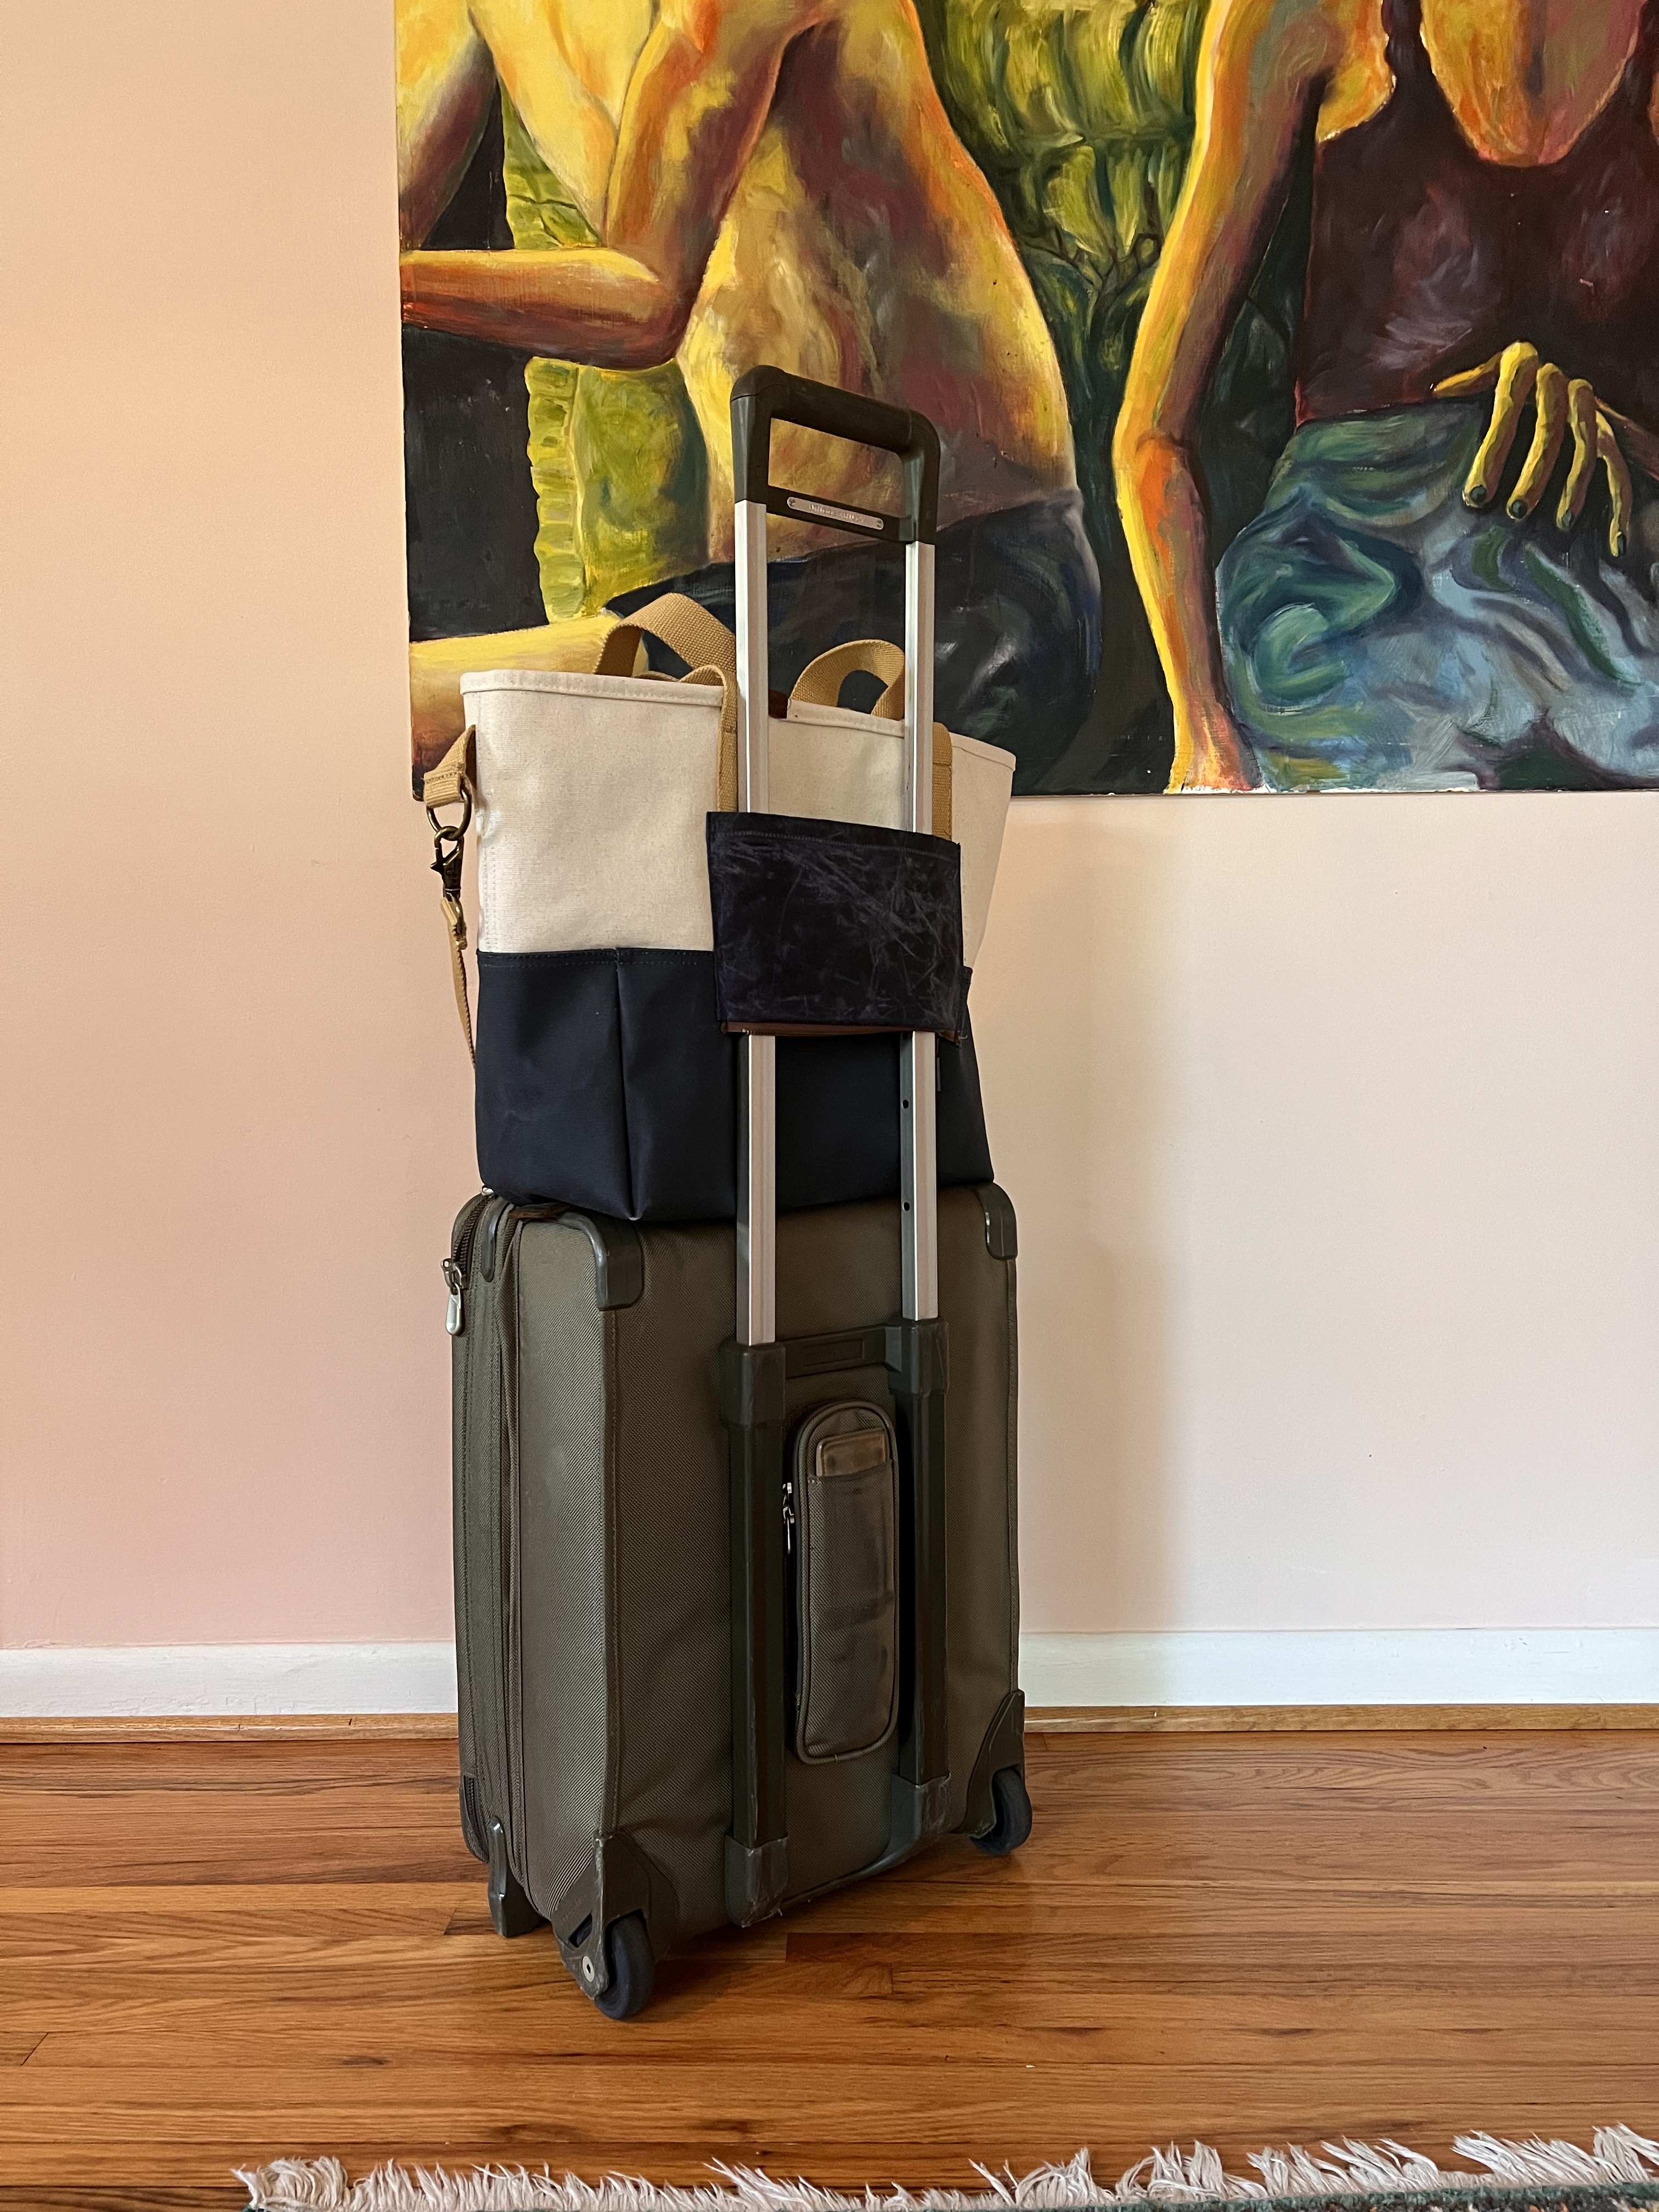
And here it is post-alterations! Hooray!

Making these adjustments actually wasn’t very hard – other than trying to wrangle the bag under my sewing machine (I’m sure you can tell that it’s not my absolute neatest sewing ever – which I’m fine with!). It only took a couple of hours and I was able to use materials that I already had on hand, so my only investment was purchasing the bag itself.

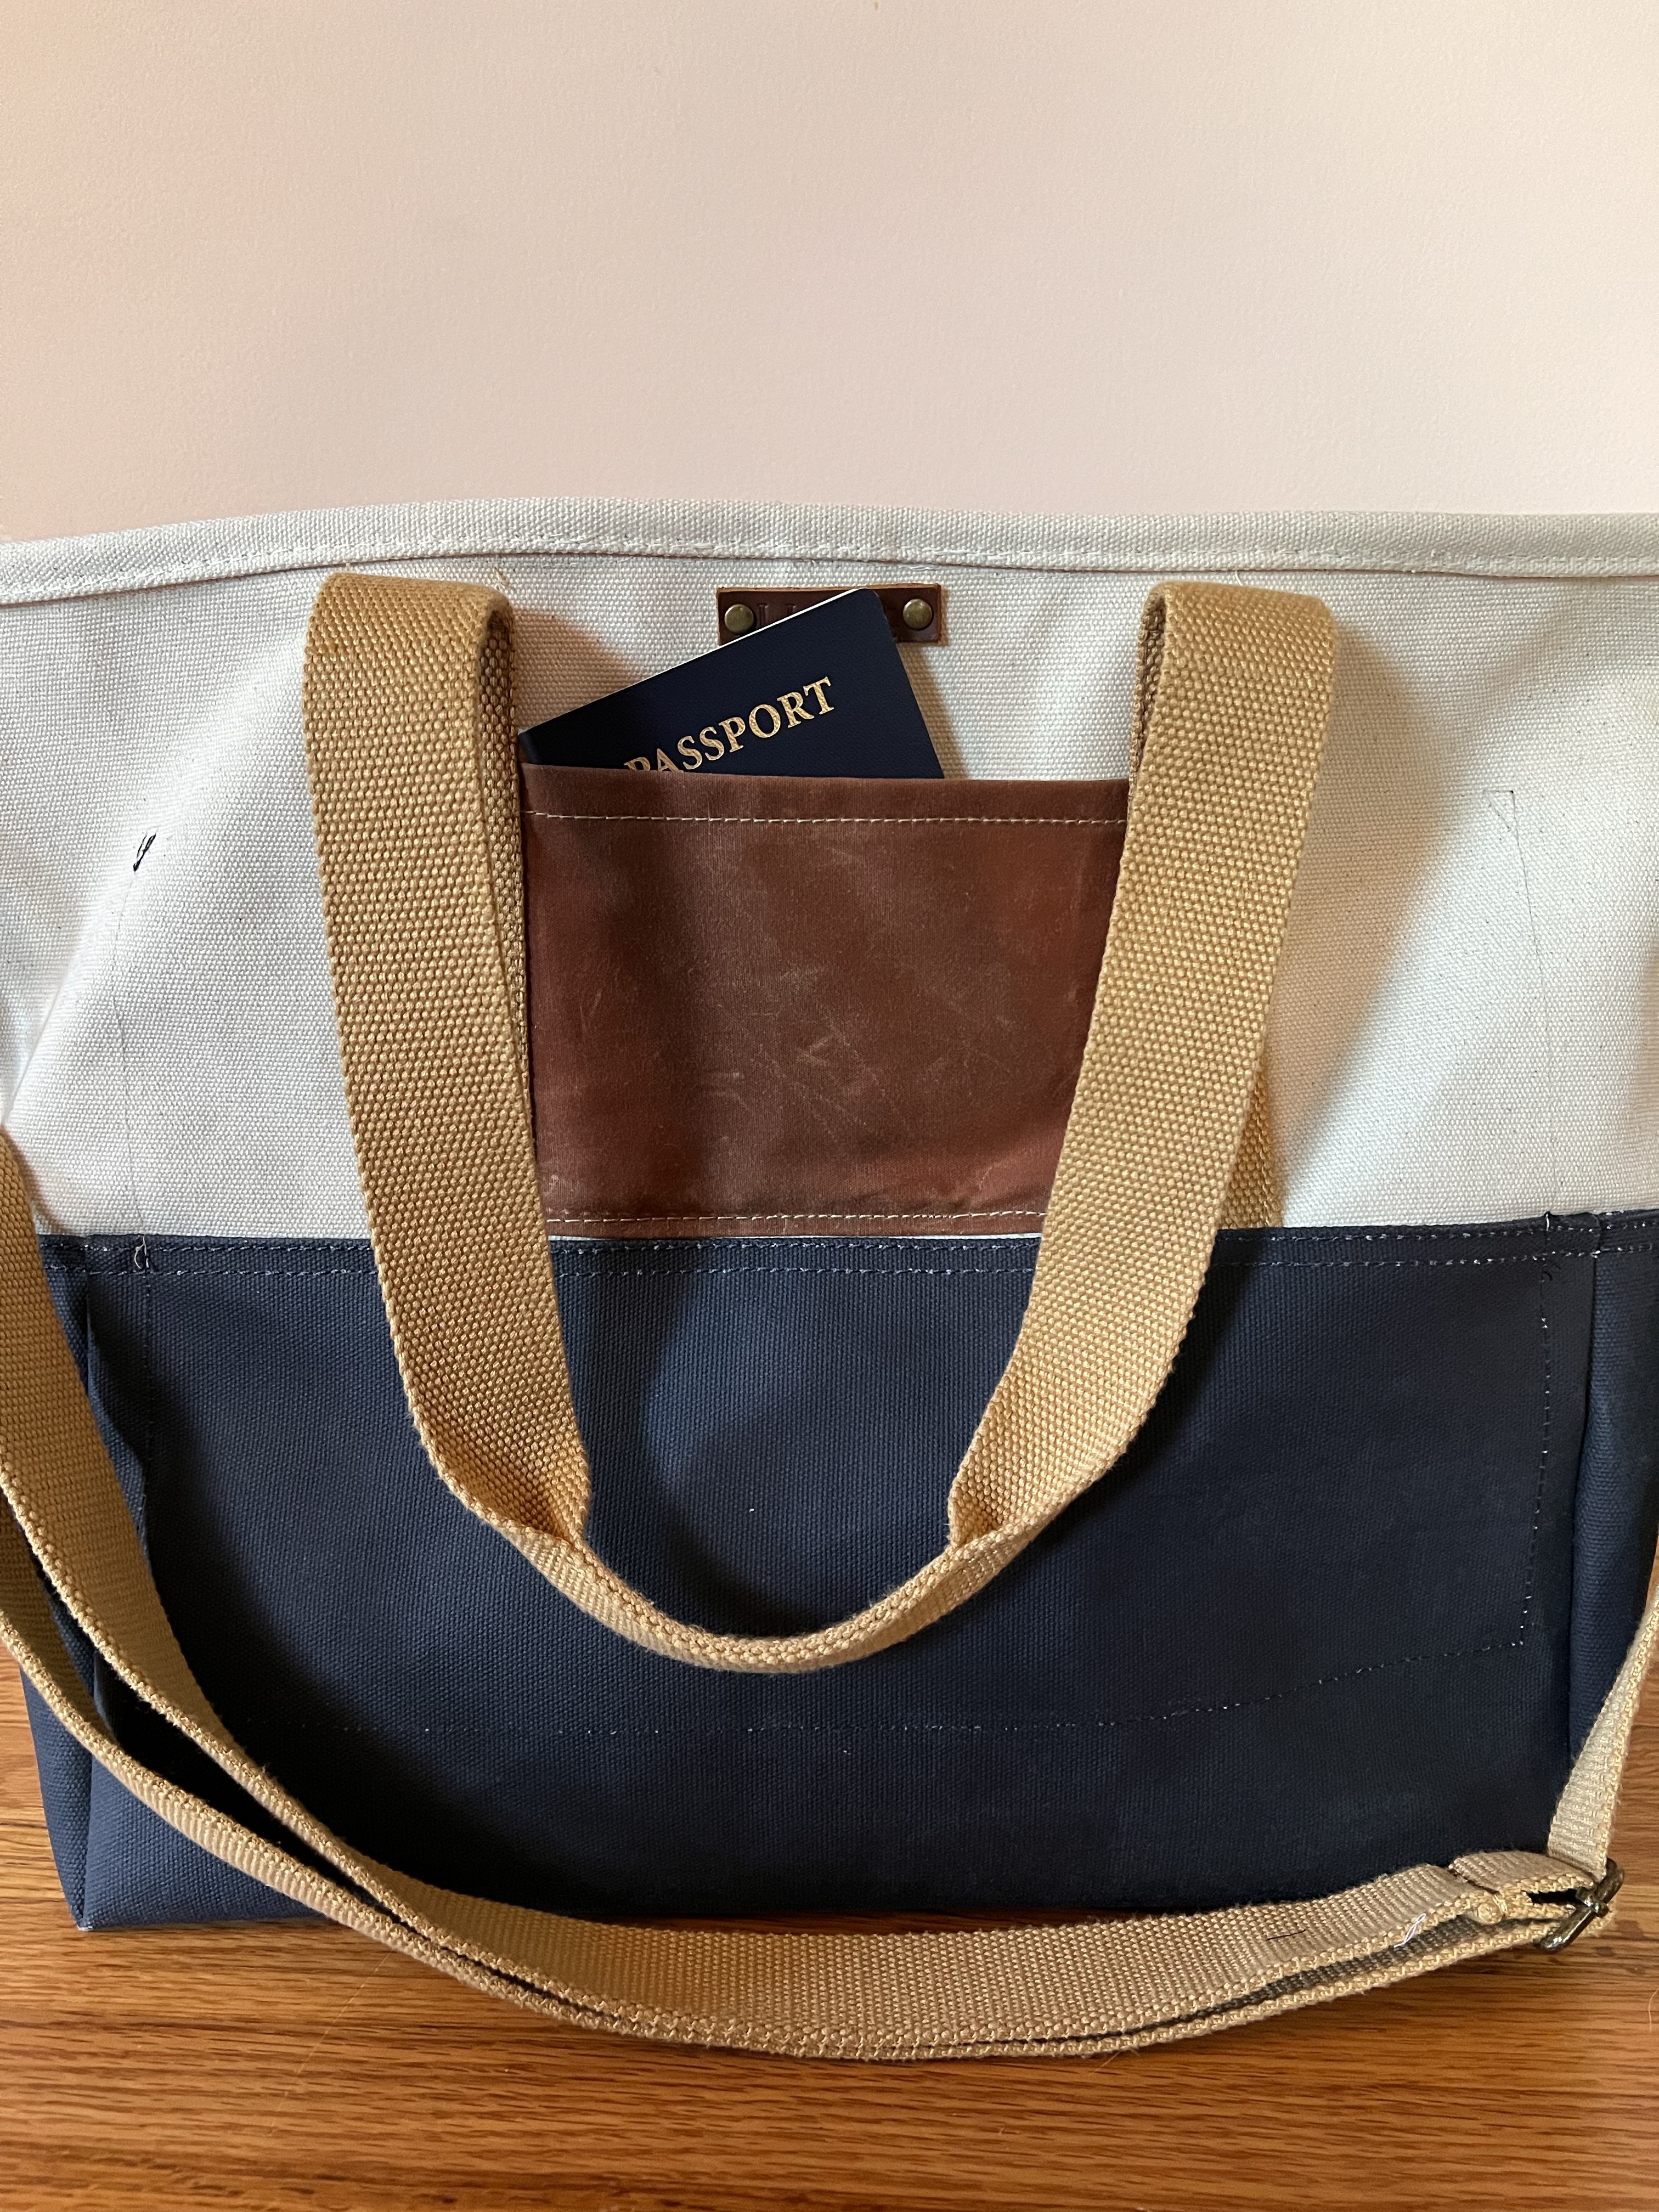
The front pocket was made using waxed canvas – I had the tiniest piece, it was actually used to keep closed a roll of wax canvas that came in a Klumhouse Kit. I saved it because it was a nice color, and it looks so good with this bag! To attach the pocket, I just ripped off the straps and inserted the pocket edges, then sewed the straps back down. I debated whether to insert it in the bottom fabric seam as well, but there was so much finishing and topstitching that I decided to just topstitch it down right above that seam instead.

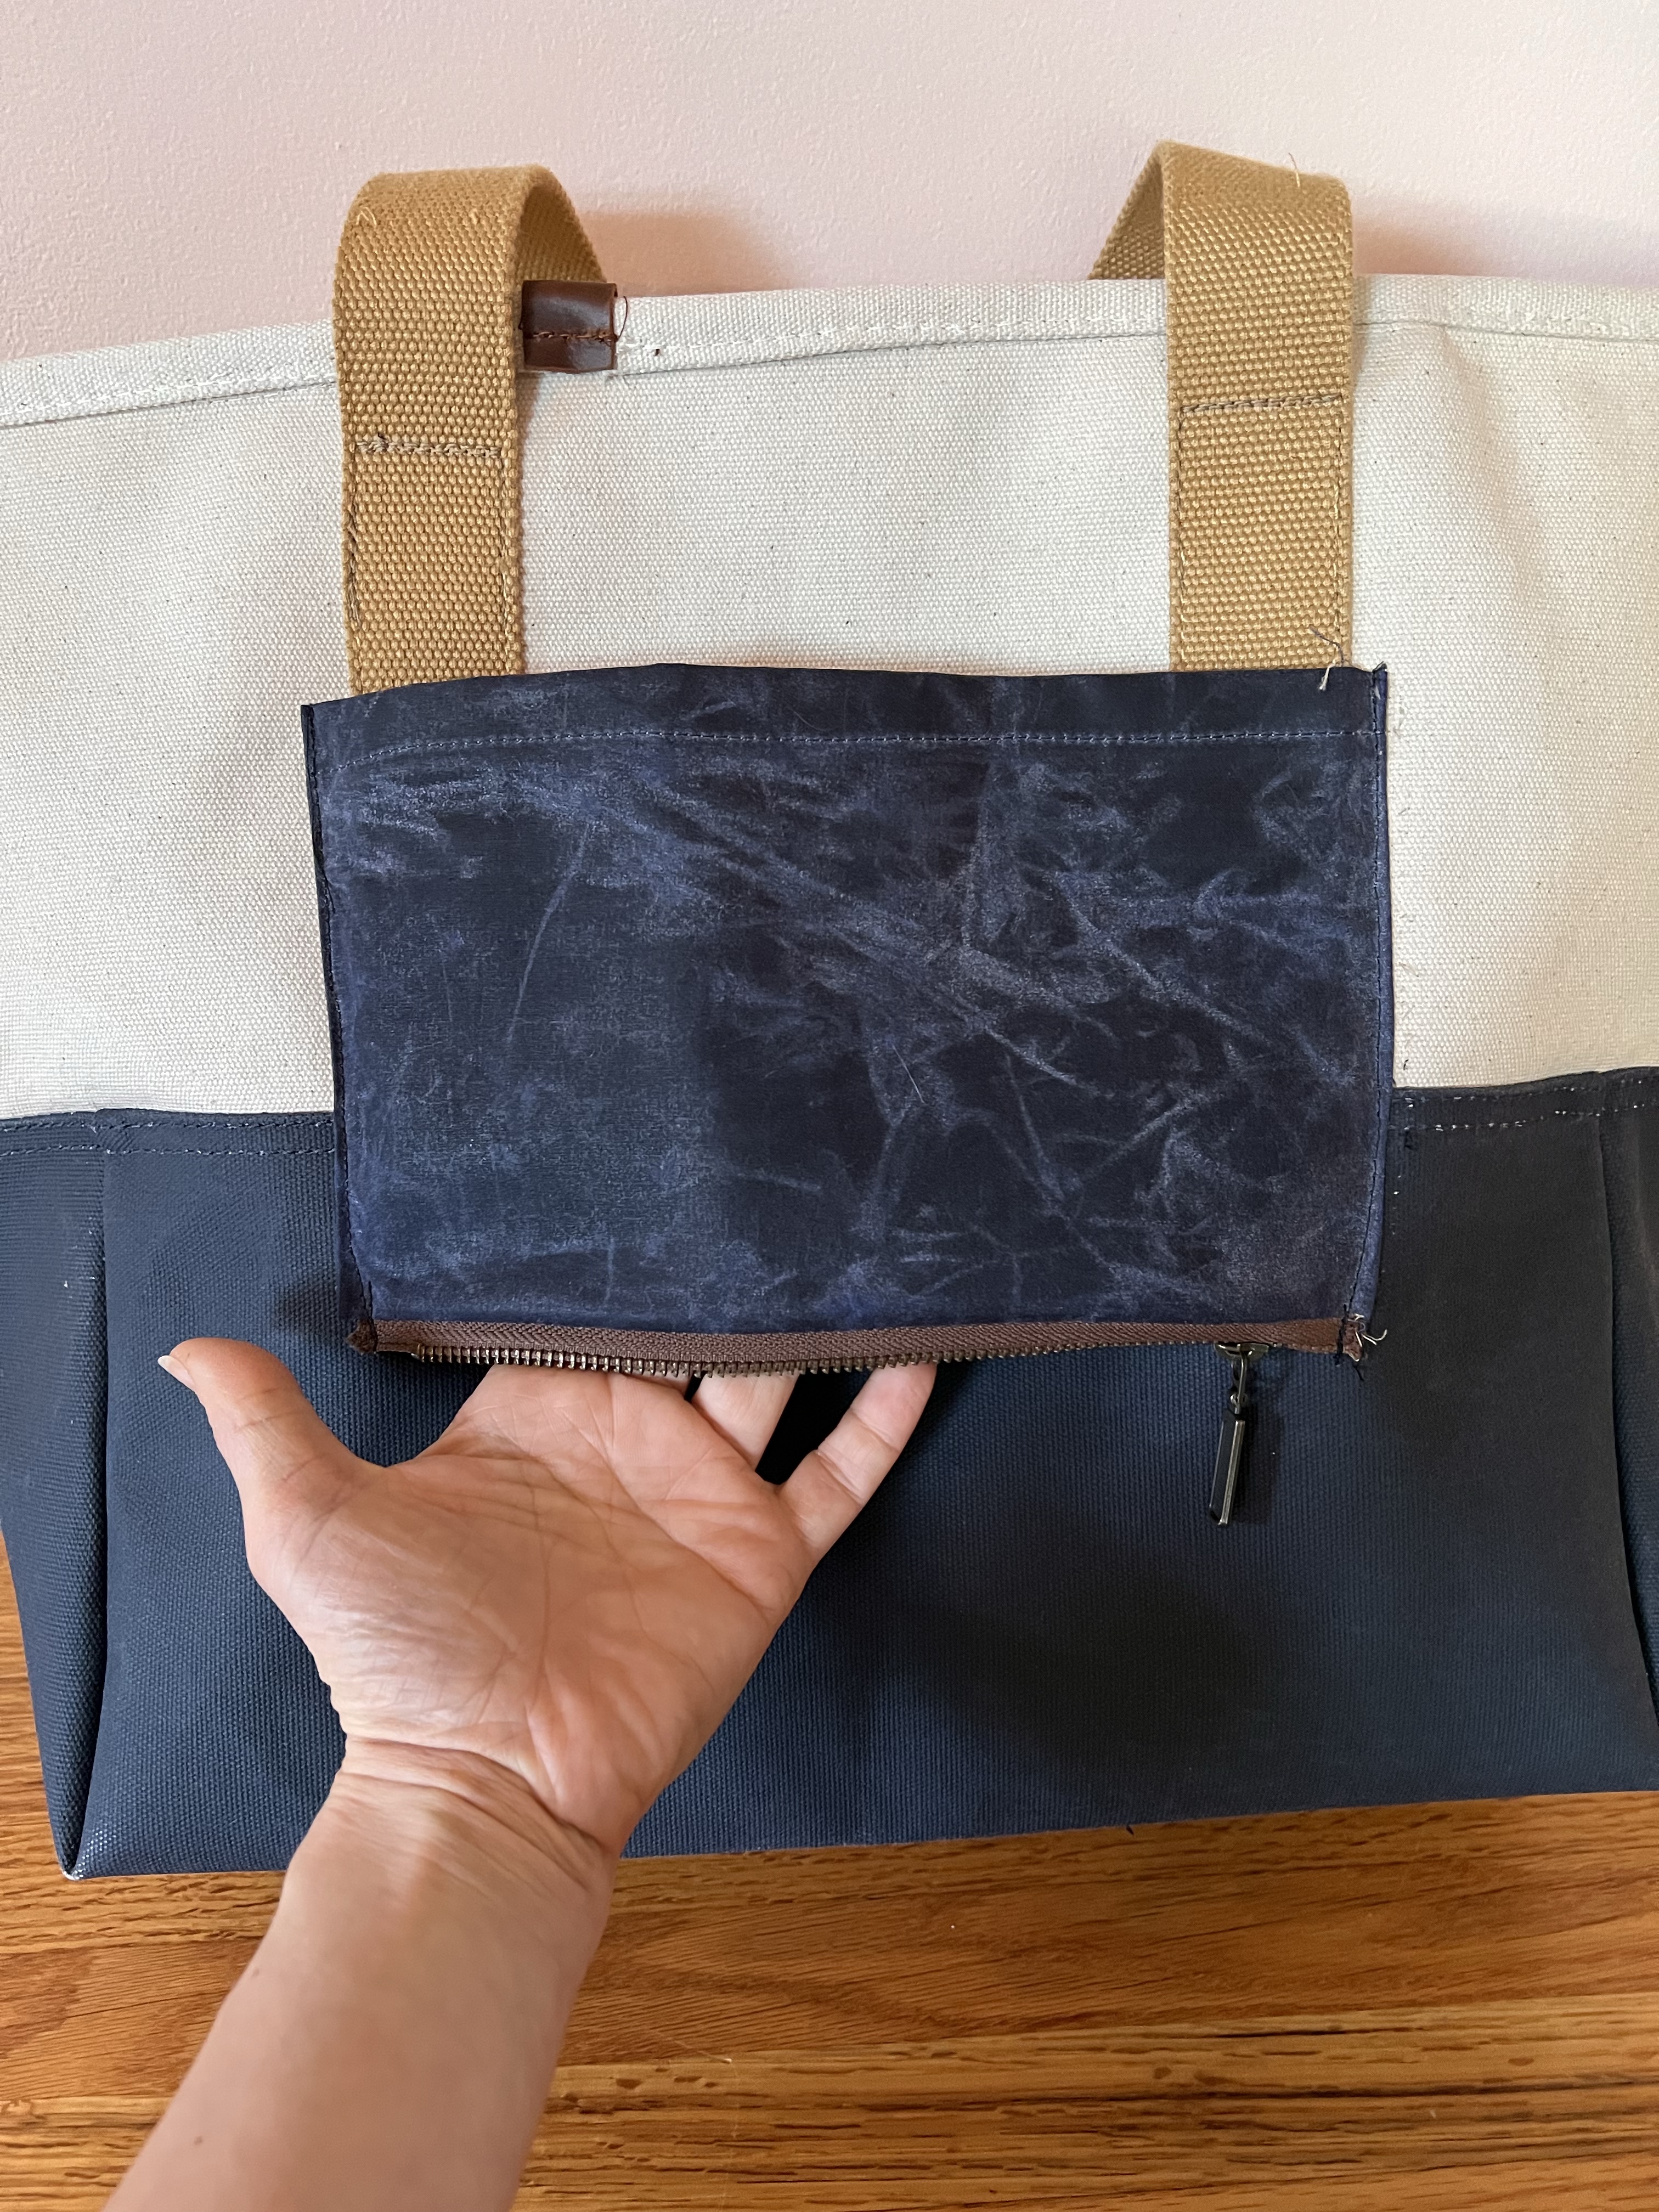
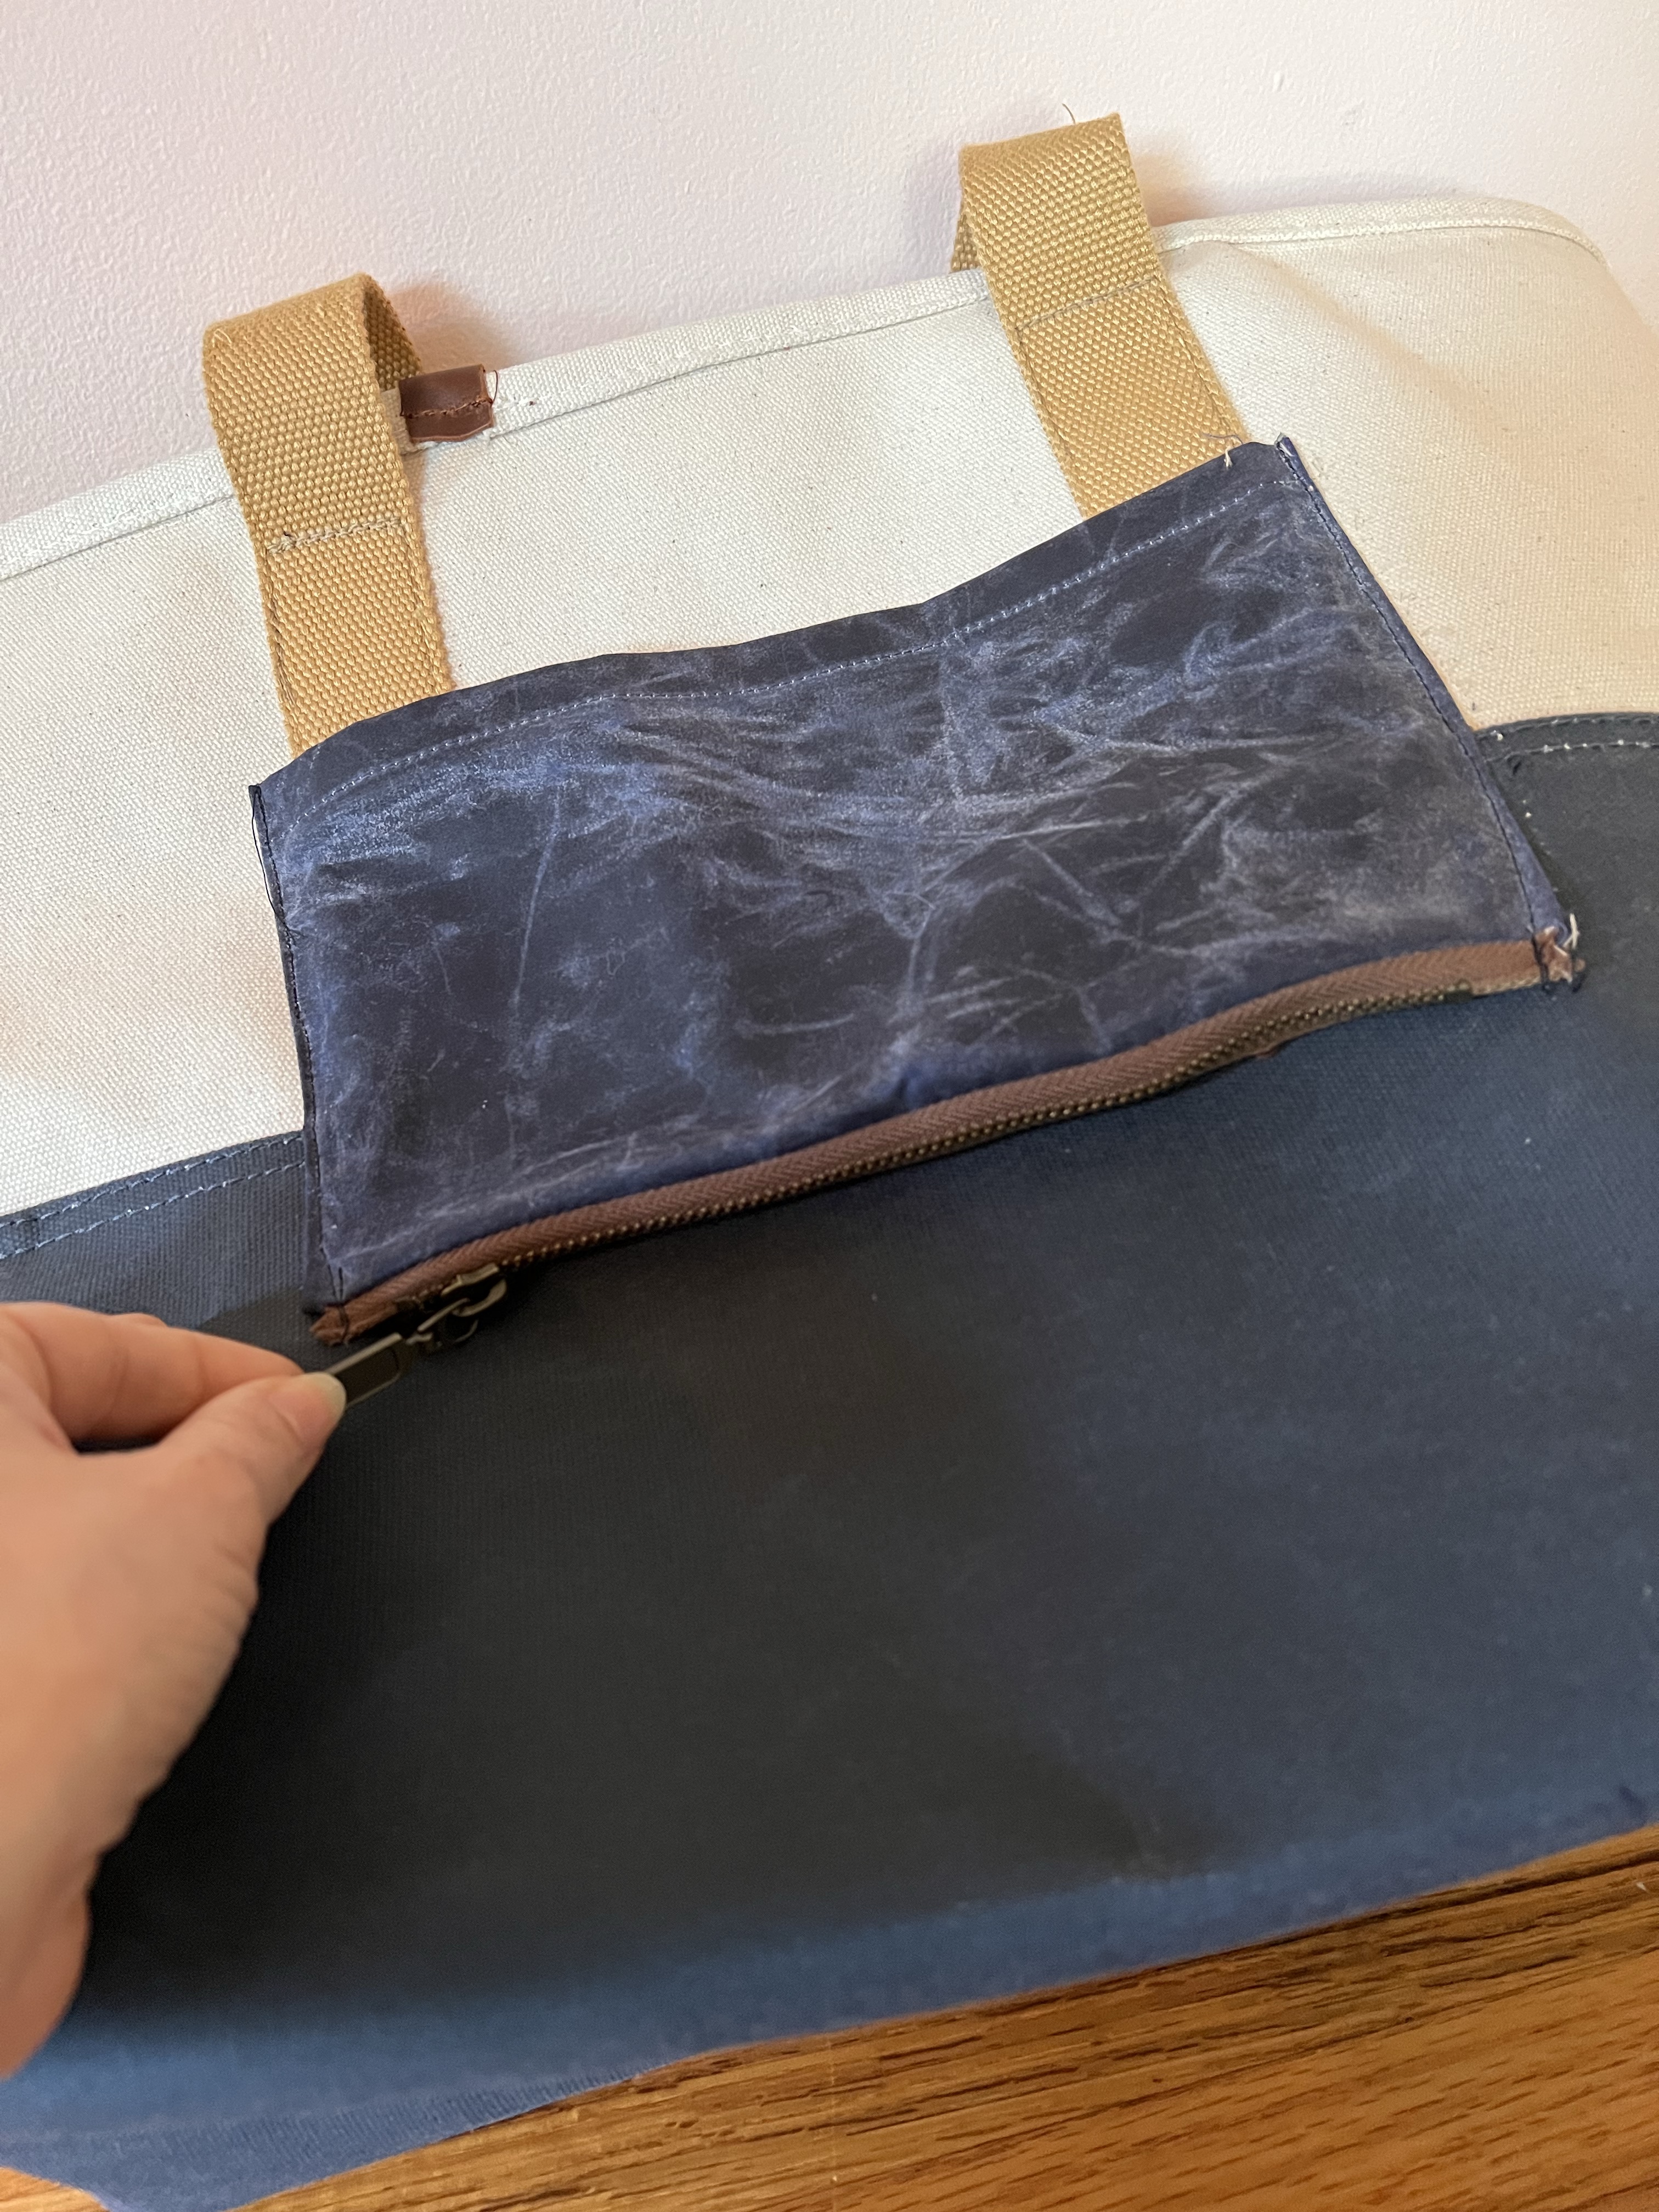
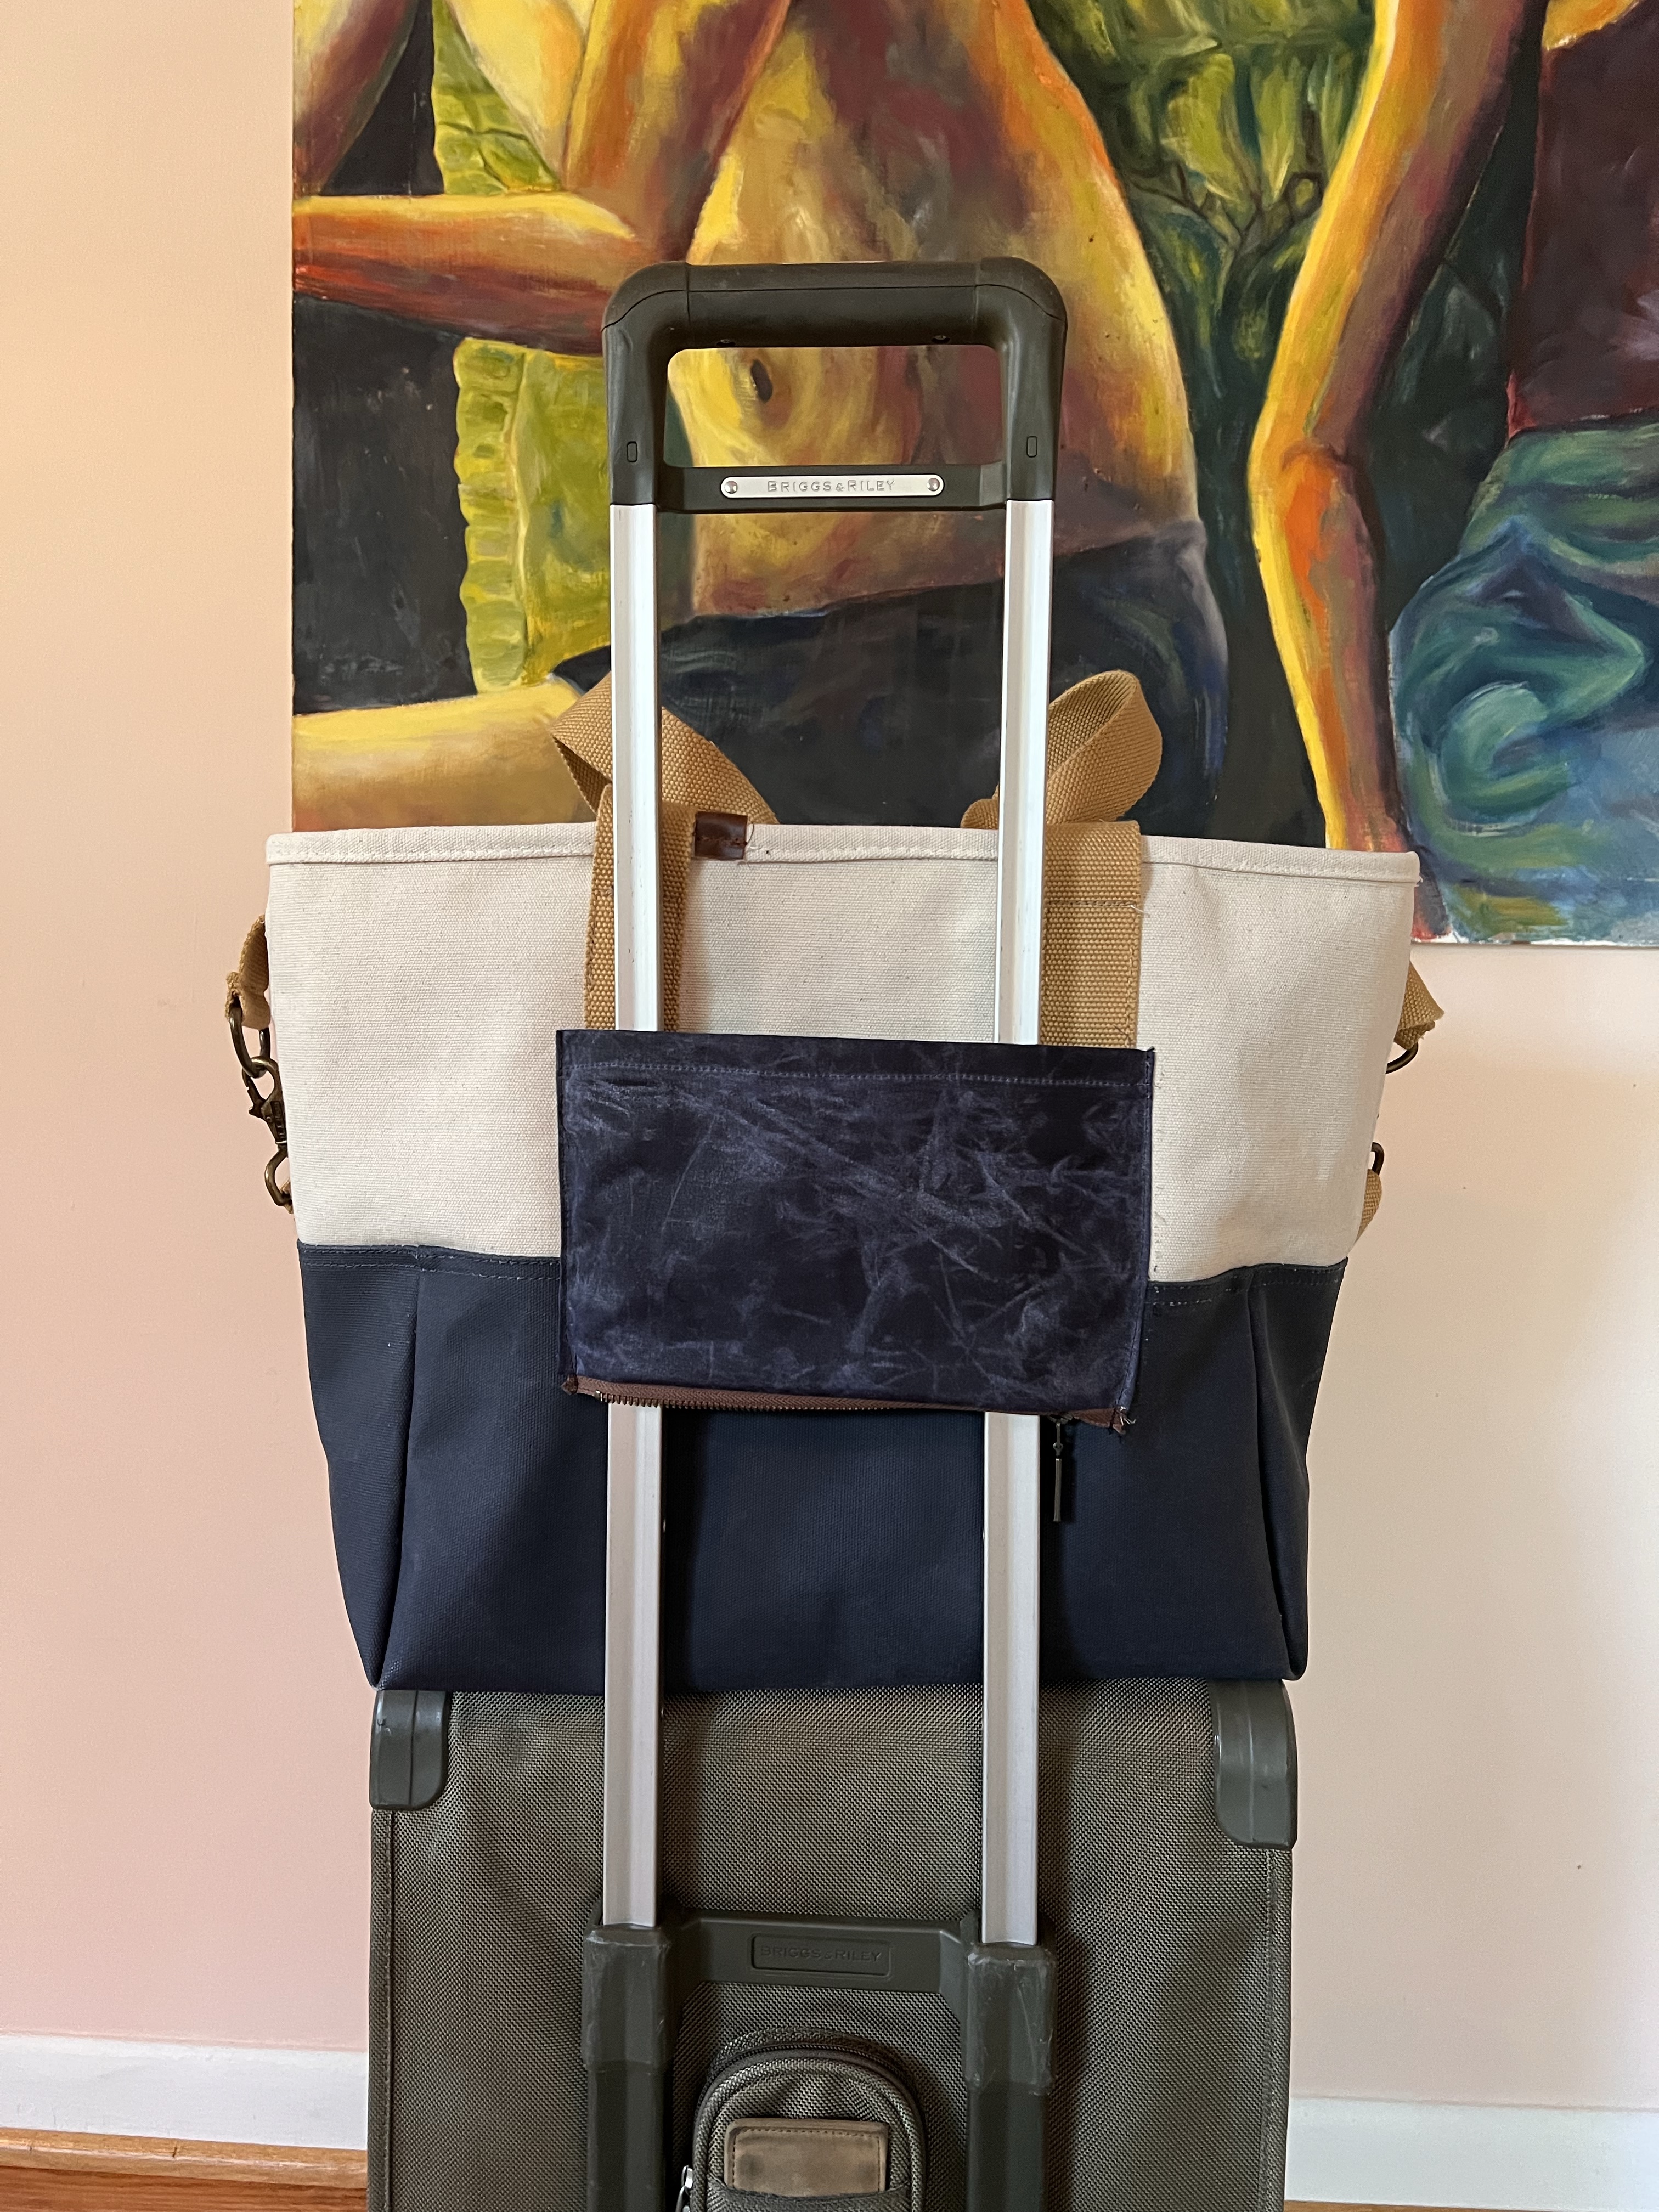
I’m actually pretty stinkin proud of that back slip-through panel – I added a zipper to the bottom (which was a neat idea I nabbed from one of my Briggs & Riley luggage pieces) so it can also function as a pocket when it’s not attached to my suitcase! The fabric is waxed canvas that I bought from the Crafty Gemini ages ago, and the zipper is from an old Niizo bag kit. The topstitching does look a bit sloppy at the bottom – again, I was sewing this on a fully formed (and quite rigid) bag, so I’m cutting myself some slack here. It’s fine.

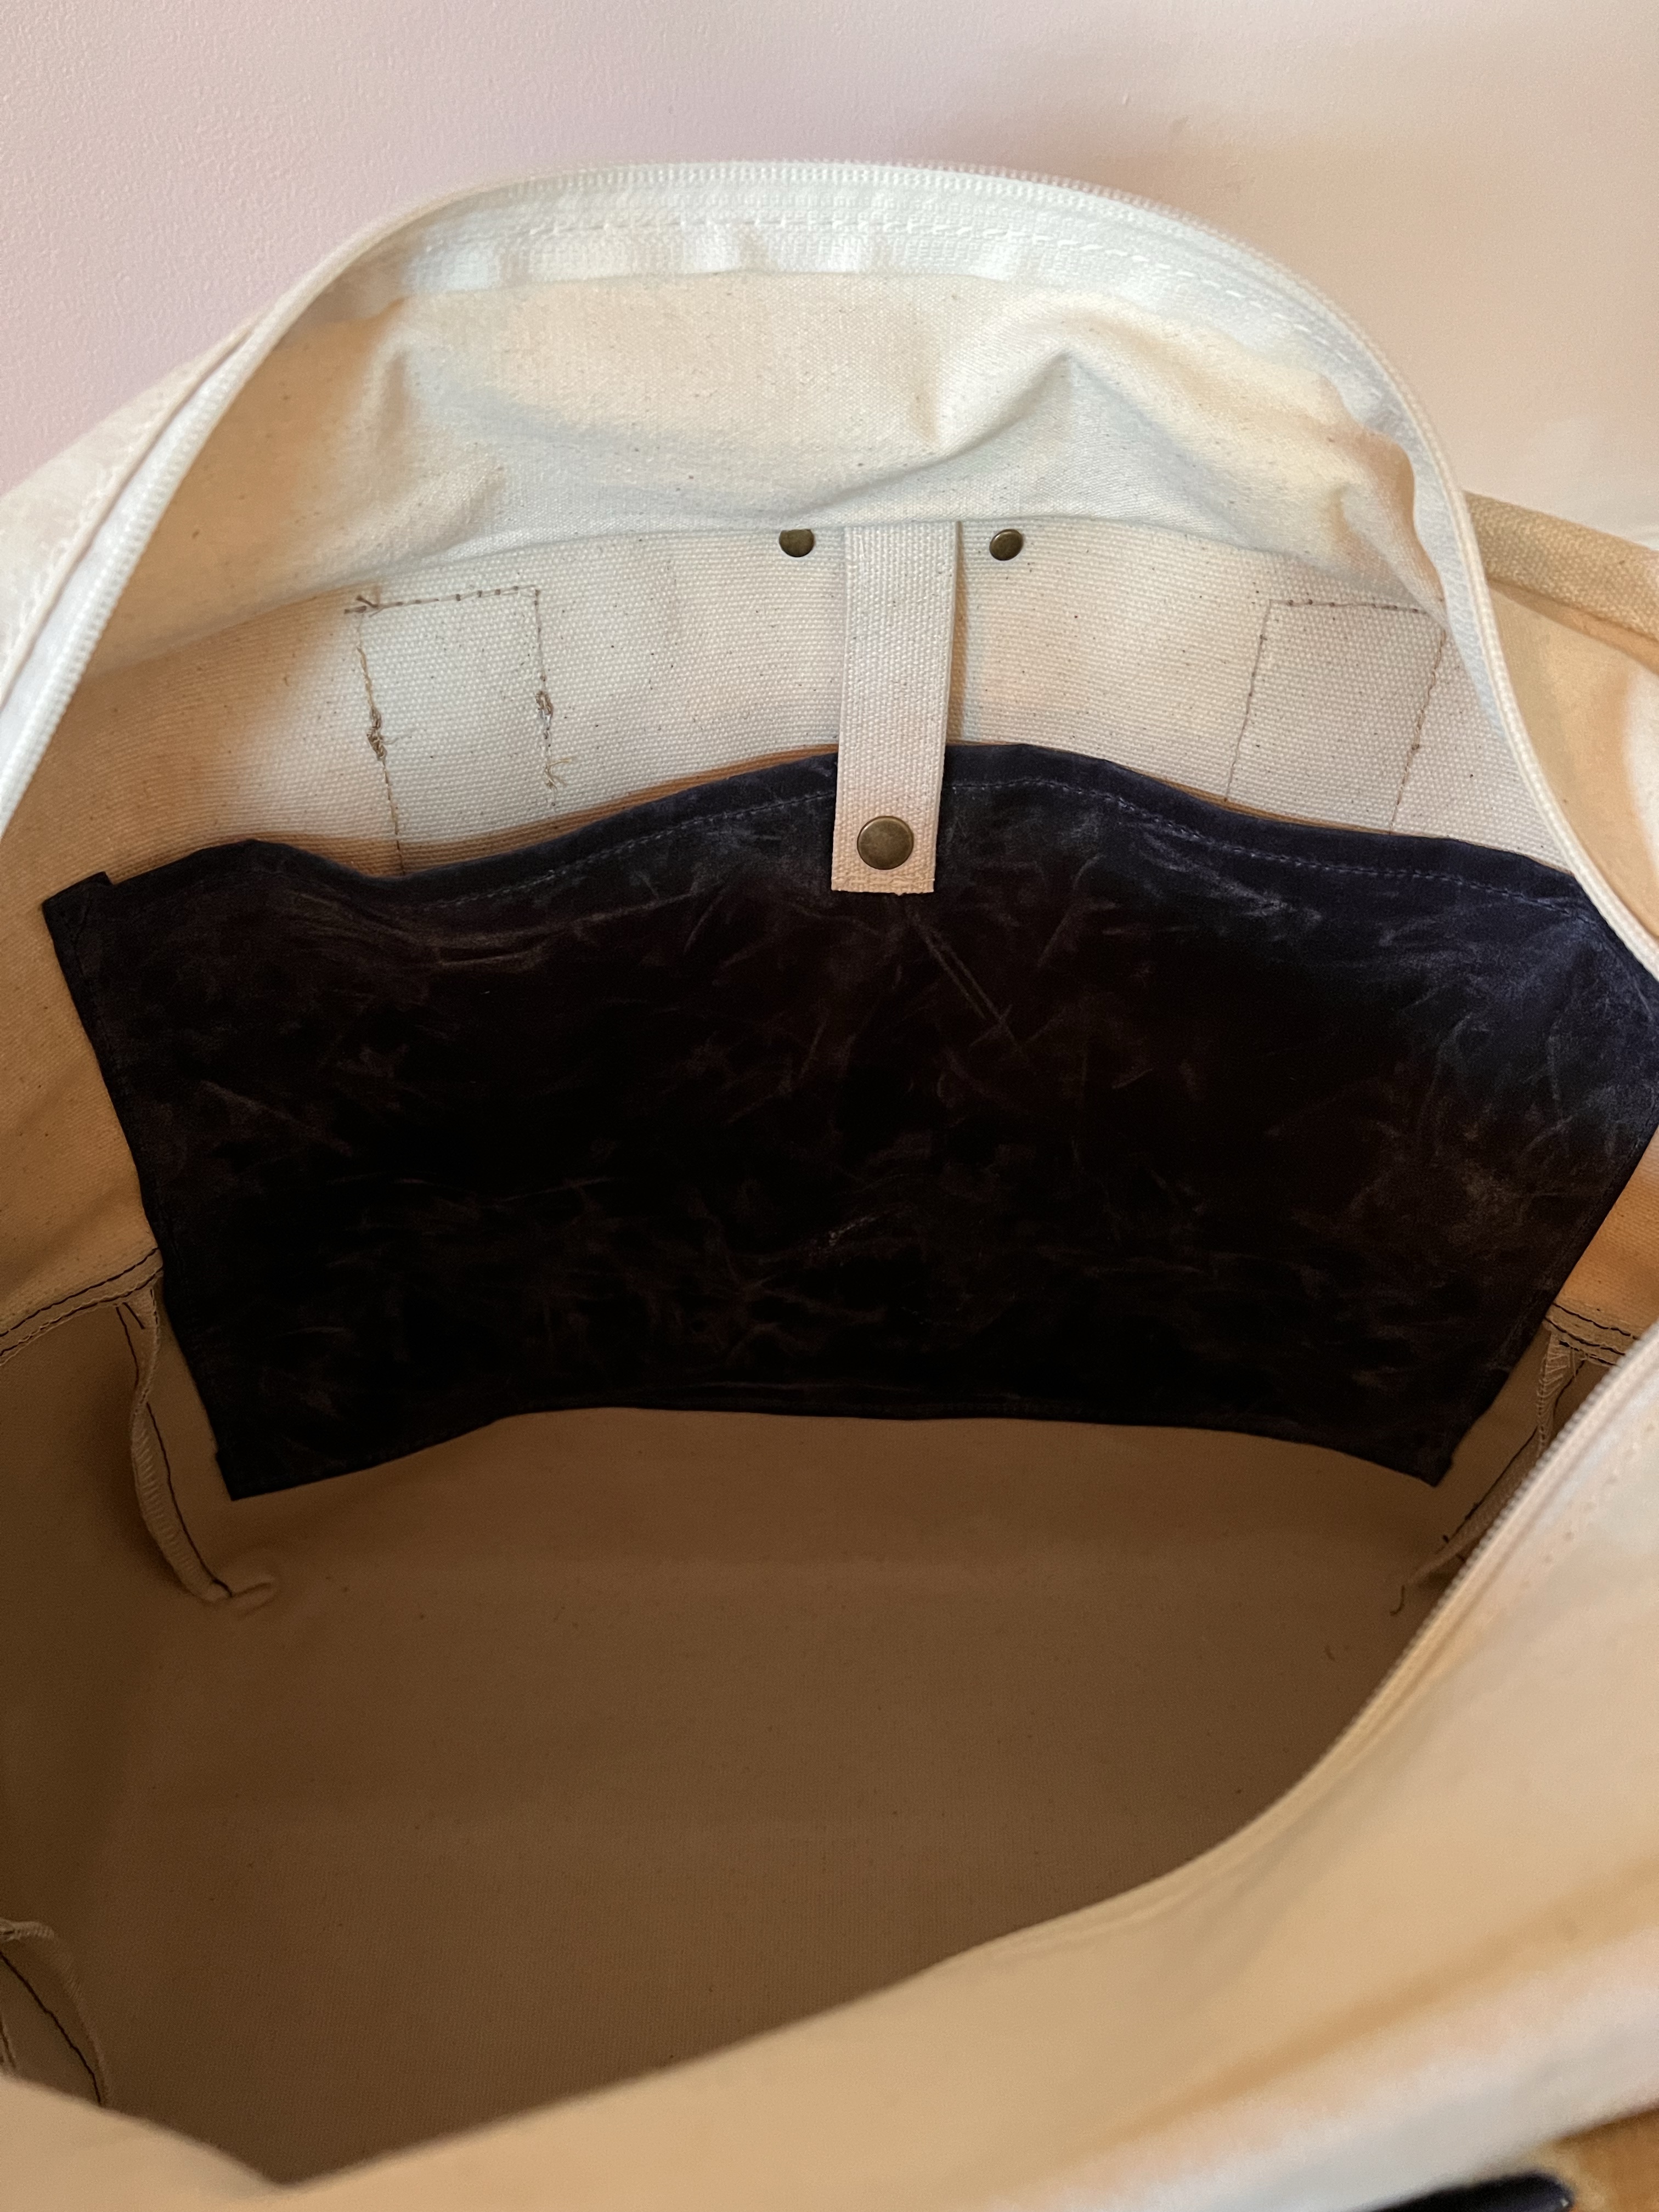
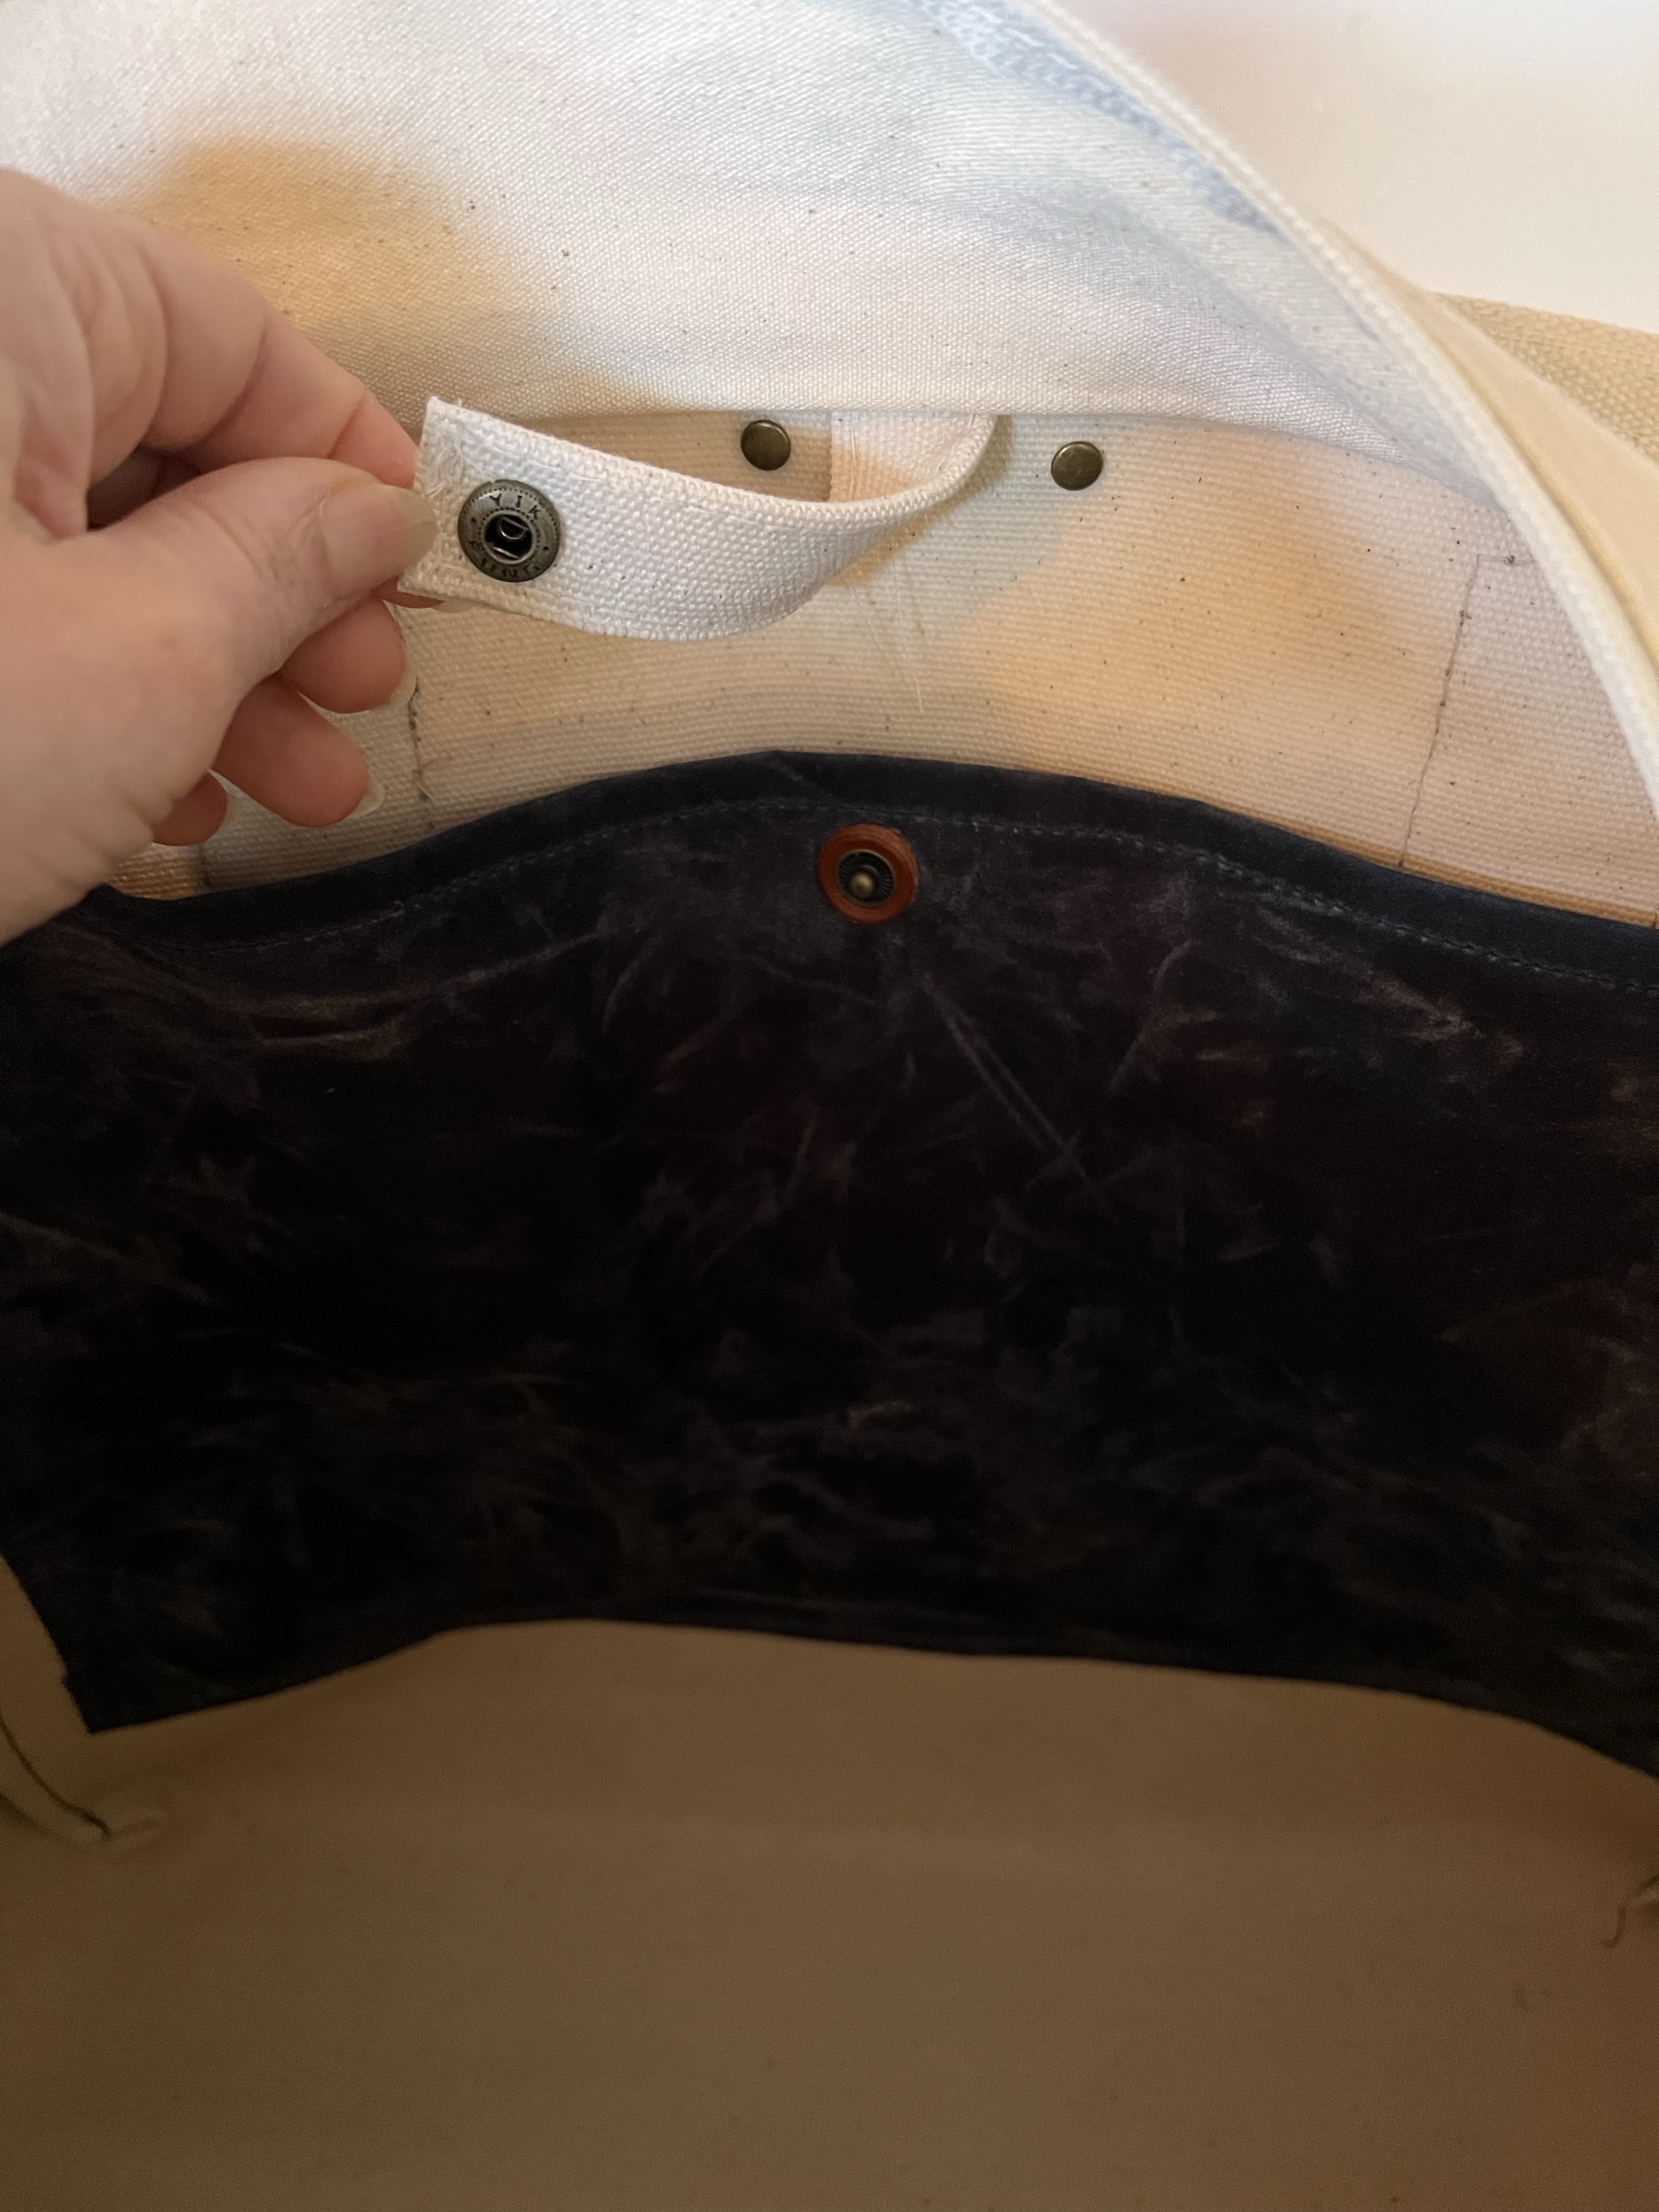
Here is a poorly-lit photo of the interior laptop pocket (can you tell that I didn’t edit these photos at all?). I sized it to fit my laptop and used more of the navy waxed canvas. I did have to be mindful of when I was sewing on white vs navy, and change my bobbin thread accordingly. I originally did not add a closure, but I hate a floppy laptop pocket (you think you’re putting something in the bag and it goes in the pocket, UGH). I used leftover canvas from the bag’s outer, and folded it up to create a tab, which got sewn into the top binding. I added a snap – the tab was sturdy enough to accommodate the snap with no extra reinforcement, but my navy waxed canvas is pretty thin so I supported it with a leather washer (this also came from a Klumhouse kit, and is absolutely 100% where I got the idea from). I use an industrial snap setter so I had no problem getting a strong snap through those layers. I like this closure because it keeps the pocket closed when not in use, doesn’t show from the outside, and also doesn’t risk scratching my laptop.

This is unrelated to my project and not something I added to the bag – but I wanted to share the free hanging pocket, which is really nice! The zipper gusset folds over the open pockets when the bag is not zipped, so your stuff doesn’t fall out 🙂 I thought that was pretty cool! PS sorry about all those threads that I need to snip!

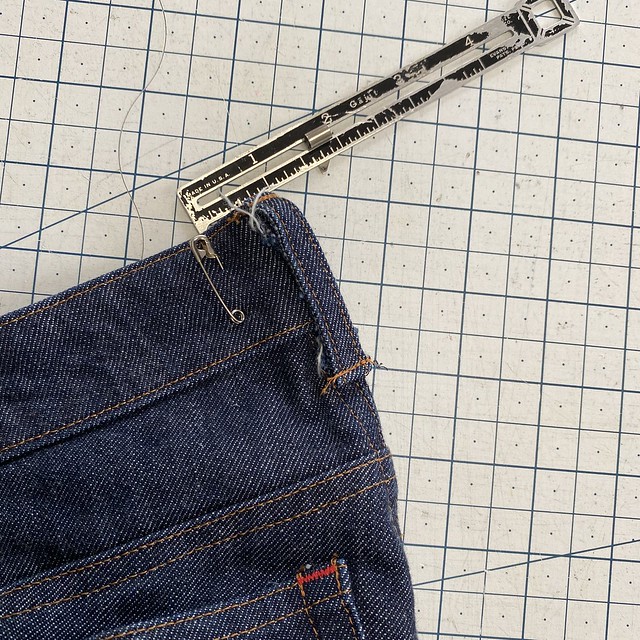
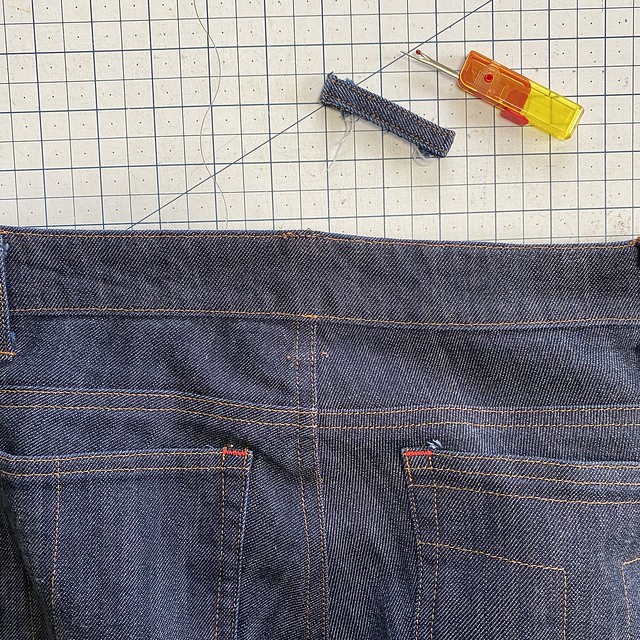
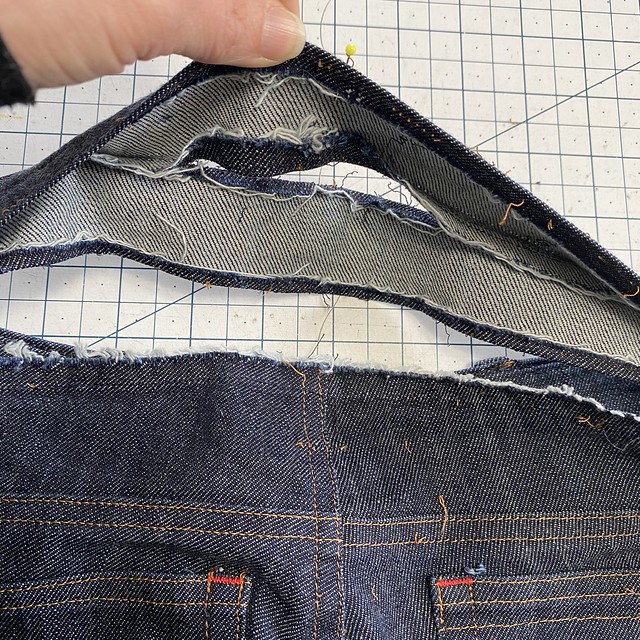
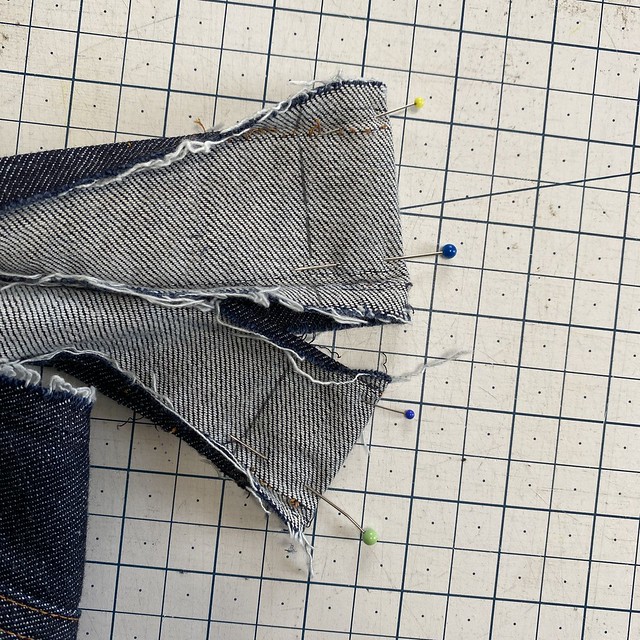
Ok, I don’t have any photos of shortening the bag because that was a pretty straight forward process. The top is finished with a canvas binding, so I pulled that off with my seam ripper, which also removed the zipper gusset and the free hanging pocket. I also had to open the side seams a bit so I could lower the crossbody strap D rings, because they are close to the top and would get cut off. I removed 1.75″ from the top, moved down the D rings, put the gusset and pocket back in, and re-attached the binding. Like I said, the only hard part was wrangling it under then machine (which honestly felt like a walk in the PARK after sewing those pockets in haha).

I used my Janome HD9 machine, which is not an industrial but it can sew a pretty powerful stitch. I don’t know if a standard sewing machine could handle this, the layers got super thick especially when attaching the binding. I equipped with a size 18 needle and 30wt Gutterman thread – except the white topstitching, I actually didn’t have the right weight thread in that color so I doubled up 2 spools of 100wt! (this is a fun little tailoring trick I pull out of my hat when I have a rush jeans hem and don’t have the right thread color – or time to order. NO ONE can tell. Sometimes I even make my own ~custom colors~ by using two different spool colors lmao).

Aaaaaand that’s it! That’s the story how I altered a tote bag. I’m super duper happy with the changes – it’s a better size for me, and the extra pockets are highly useful. We shall see how well it fares on my international trip but in the meantime I’ll be bringing it with me to upcoming classes!

Speaking of upcoming classes – I’ve got a few more dates for my Alterations class scattered throughout the year (including one in October at Pintuck & Purl – you could walk to the LL Bean Outlet and nab yourself a discounted tote to attack!). I say this often, but I can’t say it enough – alterations does not *have* to be pants hems and boring shit. Basically anything that has been sewn can be altered. A big part of the fun of this class is bopping around ideas and changing things up in the most glorious and unconventional ways (although if you want to learn pants hems and other standard alterations – I can teach you that, too!). Read more about my alterations class here in this post, and check my upcoming dates here!

Tutorial: How To Adjust the Waistband of Your Jeans

1 Apr

jeans waistabdn tutorial

Hey friends! I hope everyone is doing well and staying healthy during these strange times. I think most of us are firmly in the “stay home and self isolate” camp (at least, I hope all y’all are! STAY HOME!!) (except for those who are, of course, on the front lines – thank you, thank you, THANK YOU, for your sacrifices every single day. Y’all the real MVPs <3), and while it’s a great excuse to catch up on all the projects we’ve been putting off… I know I’m not the only one who is experiencing a dip in their creative energy. It’s not surprising; stress can really do a number on your mental health and overall energy, and sometimes the first thing to go is the desire to do anything other than [barely] survive. However, for me – and I’m sure this can be said for a lot of us – being creative is what brings me joy, so it is important that I make at least a tiny effort every single day. Sometimes that means I sew, sometimes I draw, sometimes I just read. And sometimes I want to sew, but not necessarily start a new project. This is where alterations are so useful! I can get a little bit of sewing in – 20 to 60 minutes – and let my brain have a little stab at problem-solving. Plus, it feels pretty good to take something previously unwearable and make it wearable!

So with all that being said – today I want to share a tutorial on how to alter the waistband of your jeans! This is something you can do on both handmade and ready-to-wear jeans (I actually perform this alteration frequently for clients as one of my side-gigs). You can of course use these steps for any waistband adjustment – trousers or skirts for example – just be aware that some steps may differ depending on what you are working on.

I am sorry in advance for the quality of the photos. I originally shot these with the intention of posting them on Instagram, but while typing my caption i realized it was too long for the app! So I’m moving it here to a blog post (and I can’t re-shoot the steps since, well, all my pants fit now! LOL). For more mini-tutorials and pro tips, please follow and/or occasionally check in on Instagram – the hashtag is #lladybirdprotips

Some notes about this process – as I mentioned, this is not technically jeans-specific, as you can use this process to alter any waistband, including trousers and skirts. Keep in mind that anything you alter without belt loops will mean a visible waistband seam (which I personally thing is a worthwhile trade-off for having a fitted waistband, but you can be the judge of your own wardrobe!). If you don’t like the idea of a visible waistband seam, you can either re-cut a new waistband (I keep leftover fabric from projects specifically for this purpose!) or remove volume from multiple areas (which would make the adjustment appear more of a ~design element~ rather than an alteration).

Heart on Ginger Jeans

When determining the amount of take out of your waistband, you will be tempted to overfit. Don’t do this. You want to aim for snug, but not tight. It’s hard to really articulate this into specific words, but I’ll try. A waistband should not have negative ease (unless it’s super stretchy), but should be quite close to your own actual measurements, if not slightly larger (no more than 1”, but this will vary based on body shape and personal preference). For me, I like a waistband that is fitted enough to only allow a couple of fingers, but not so snug that it gives me back fat / love handles. I know with some body shapes, this can be unavoidable – so use your best judgement, and understand that it’s totally fine if you end up needing to re-adjust later down the line. It’s a learning process, after all! Better to not take out enough and need to re-do the adjustment (think of it as another chance to practice, rather than that you did it “wrong” the first time), than take out too much and render the pants unwearable. Because of this, I tend to err on the side of a looser waistband when first sewing my pants, with the understanding that I can always make adjustments later down the line. Sometimes your fabric – especially if you are working with a rigid denim – takes a bit of wearing and washing before it really settles into its shape. A LOT of my pants start out needing a belt for the first few wears, then the waistband shapes itself over time and washing. I recommend waiting a couple of months before doing this alteration!

I know a lot of people recommend adding darts to your yoke to get a better fit, or subbing a curved waistband. While these are certainly viable solutions, I personally find a curved waistband uncomfortable (and it’s something you rarely see in RTW – most waistbands are cut straight and eased in) and I think darts in a yoke look terrible (there, I said it! Fight me!). So my method is a little different, but it works! Try it!

Now, without further ado- Altering the Waistband of Your Jeans: A Lil’ Tutorial!

Jeans Alteration: Waistband
1. Try on your jeans and pinch out the center back waistband until it fits snugly. Pin this measurement (or use a binder clip), and then measure the distance from the pin to the fold. This is how much you will need to take out- in my case, 1” total. Don’t worry about doubling the measurement or anything, we aren’t mathing here! If you are fitting yourself, you may need to pinch the side seam rather than the center back.

Trying to figure out if you just need to adjust the waistband or the whole back of your pants? A good rule of thumb is if it fits everywhere *except* the waistband (like you just need a belt to snug it up, or else the waistband shelfs open when you sit down)- then you will just work on the waistband. If you’ve got quite a bit of extra space down the center back of your pants as well (like you can easily shove your whole hand down there), then you will want to also take in the center back seam in addition to the waistband. If you’ve got loads of unnecessary room everywhere in the back, you probably just cut a size too big – so take a bit out of the side seams in addition to the center back. Don’t be afraid to pin shit until you’ve got a fit that feels good!

Jeans Alteration: Waistband
2. Ok, time to start unpicking! Completely remove the center back belt loop, and remove the bottom stitching lines from both side back belt loops.

Jeans Alteration: Waistband
3. Remove the back waistband from the jeans, from side seam to side seam. Depending on how much you are taking out of the waistband, you may be able to get away with unpicking less (although I tend to err on the side of removing more than less, since you’ll be closing the whole thing up later anyway). I do not recommend unpicking far beyond the side seam!

Jeans Alteration: Waistband
4. Remove all top stitching and under stitching from all sides of the waistband, so that you can completely separate the waistband from the facing. You don’t need to unpick completely from side seam to side seam here – 3”-5” is plenty, depending on how much you are taking out. If you are removing understitching, you will need to unpick about 1” of top stitching beyond the understitching on either end. Mark the center back of the waistband (I used a pin here).

Jeans Alteration: Waistband
5. Fold the waistband at the center back together short ways, with the right sides facing, and open out all folded seam allowances so it is completely flat. Sew a new seam line from one end to the other, with the distance from the fold being whatever measurement you took in step #1. Repeat for the waistband facing.

Jeans Alteration: Waistband
6. Cut open the fold, trim seam allowances if needed (I like to trim my facing seam allowances slightly shorter so there isn’t a bunch of bulk right at the center back), and press both seams open.

7. Sew the waistband and the facing together along the top edge, and understitch.

8. Pin the center back seam of the waistband facing to the center back seam of the pants, with the right side of the facing against the wrong side of the pants, then ease the top edge of the pants to match the new length of the waistband (no photo, sorry!). You will probably need to pull the waistband quite a bit to stretch to fit (#unintentionalpoetry), but it can be done! I took out 2” total from my waistband (1” on the fold), using a very low stretch denim cut on the cross grain, and was able to ease it in with some womanpower. If your fabric is very rigid or you need to take out a lot, you may want to unpick the top stitching from the center back seam of the pants and remove some of the excess there, grading to nothing along the CB seam line. Use your best judgement here!

10. Now sew the facing to the top edge of the pants, pulling the waistband to stretch and easing the top edge of the pants to fit (pro tip – keep the facing on top and the pants against the feed dogs of your machine. This will kept ease the excess fabric, as well as give you more control over stretching the waistband). Press the seam allowances up toward the waistband, steaming out any ease wrinkles at the top edge of the pants if necessary.

Jeans Alteration: Waistband
11. Now just sew everything back together! Pin the waistband on the outside to cover the previous stitching line, then topstitch along the top edge of the pants. Topstitch the waistband to the facing along the top of the waistband. Re-attach the center belt loop (which ideally will cover your CB stitching line) and the bottom of the side back belt loops. Give everything a good press and you are done!

Claryville Jeans

And that’s it! Honestly, this is a very easy (and very emotionally fulfilling!) adjustment – I think writing this blog post might have taken longer than actually making the alteration! I encourage y’all to give this a whirl if you have a pair of jeans that’s just a little loose in the waist – even the smallest adjustment can make a huge difference!

Some notes: The jeans in this tutorial are the Claryville Jeans from Workroom Social (blog post can be found here). Also, I am still offering Virtual Private Lessons if you have an alteration need that you’d like to chat about or get a little guidance with! So far they’ve been a blast!

How is everyone holding up these days? What are you doing to bring a little creative joy to your life?