Tag Archives: sewing books

TUTORIAL + GIVEAWAY: The Sewtionary (+ last week’s giveaway winner!)

22 Sep

Sorry, y’all, I’m in giveaway overload this month! Can’t help it if my friends are releasing awesome shit all at once, you know?

Adobe Photoshop PDF

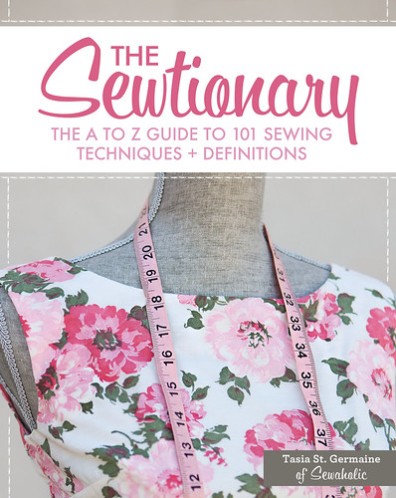
I’m sure most of y’all have heard all about this fabulous little book by now – The Sewtionary, written by Tasia of Sewaholic (one of my FAVORITE sewing pattern companies! Seriously, some top 5 shit right there). A couple of months ago, Tasia reached out and asked if I’d like to be a part of her Sewtionary Blog Tour to help promote the book. While I do realize that blog tours can be a little redundant if you read the same blogs over and over (I know I can sometimes get jaded at looking at the same photos/reading the same gushing daily for 2 weeks or whatever), I really wanted to help promote this book because I really do give a shit about Tasia and her business. She’s one of my friends, and I like to do things for my friends. Plus, the book is beyond excellent- a great resource of 101 sewing techniques, written out like a dictionary. The photos are beautiful, each technique includes why it’s necessary (something my nerdy brain just loves), and it’s spiral-bound, so it’ll lay nice and flat on your sewing table. Lots of wins here!

Anyway, that’s about as much of a review as you’ll get from me (if you want a true review, definitely check out some of the tour stops that I’ll be linking at the bottom of this post!). Today, I wanted to do something different. I’m going to share a tutorial from the book with y’all .Everyone likes tutorials, right? 🙂

How to Make a Tailor's Ham & Seam Roll - Sewtionary Giveaway

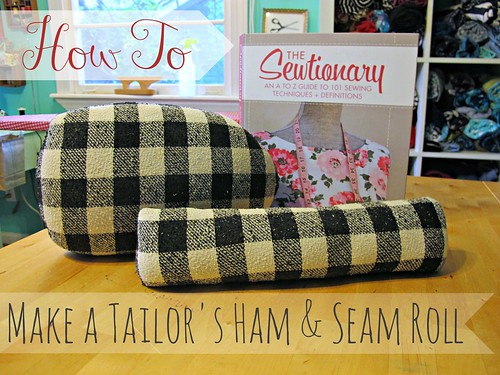
Today’s tutorial: Making a Tailor’s Ham & Seam Roll.

First up – you’re probably thinking, “What the hell are these things and why the fuck would I spend my time making them?” Well, I’m so glad you asked! Both are used as pressing aids – the Tailor’s Ham is a big pillow-shaped tool that is used for pressing curved areas (such as darts and necklines), and the Seam Roll is a long, narrow stuffed tube that is used to press hard-to-reach seams (such as the inside of a sleeve), as well as a helpful way to avoid making seam allowance impressions on the right side of your garment. While I have a Tailor’s Ham that I’ve used for for years (and no lie, my cat literally uses that shit as a pillow when she naps on my ironing board), I’ve yet to get a Seam Roll. They are both great to have, but can easily cost you $20+ a pop when you buy them from the fabric store. So here’s where we learn to make our own – at the delightful price of FREE NINETY-NINE. You heard me!

You will need:
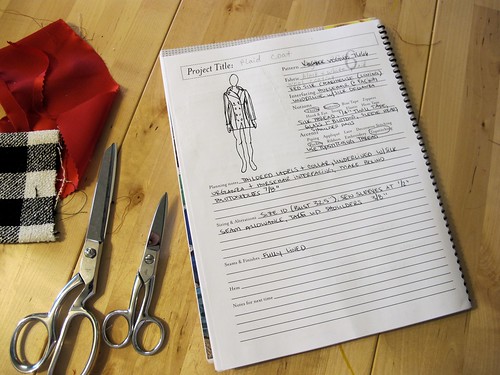
– Large scraps of wool fabric & cotton fabric. Try to choose something with a dense weave that does not stretch, that is 100% (aka – no poly blends!). I used leftover wool coating from my Vogue Coat and black quilting cotton.
– Something to stuff it with. Traditionally, these things use sawdust. You can also use cedar shavings (from a pet supply store), wool fabric scraps, or even old nylon stockings. For the purposes of this tutorial, I am using sawdust. It is *extremely* messy. It is also extremely free. No lie, I just waltzed right into my local Home Depot and asked for a bag of sawdust, back where they cut wood to spec. I can’t speak for other countries (Tasia tells me that you can’t sell sawdust in Canada, say whaaaat), but here in the good ol’ US of A, lots of hardware stores will give you free sawdust because they would otherwise throw it away. My sawdust man also informed me that it makes a nice mulch for the garden. Isn’t that handy!
– Sewing machine, thread, and hand sewing needles.
– Outdoor space, or a really really good broom. I told you, this shit was messy. You have been warned.

How to Make a Tailor's Ham & Seam Roll - Sewtionary Giveaway

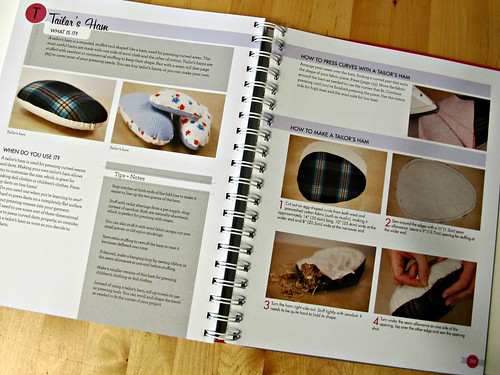
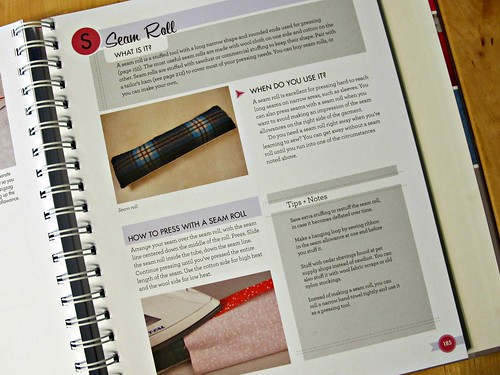
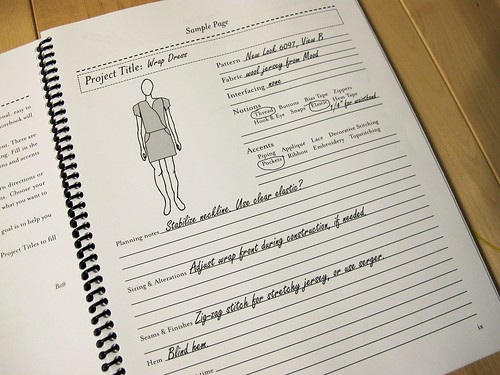
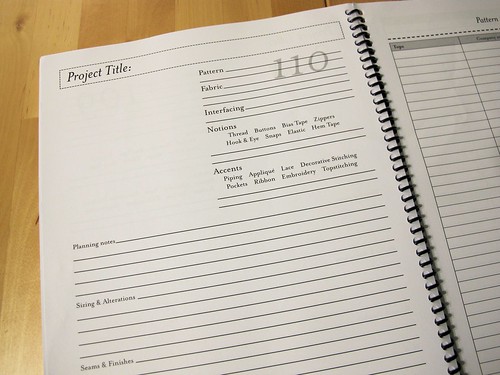
Here are the instructions, Sewtionary-Style. Told y’all that book is just lovely.

Now here are my steps.

TO MAKE THE TAILOR’S HAM:

How to Make a Tailor's Ham & Seam Roll - Sewtionary Giveaway
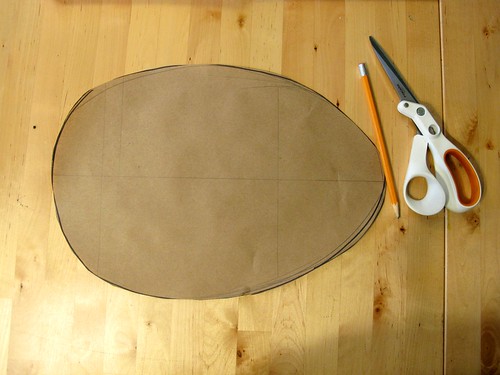
I found it easiest to start with a paper pattern piece, since the shape is so weird. You’ll want to make your ham 14″ long; 10″ wide at the wide end and 8″ wide at the narrower end. This will result in a bit of an egg shape.

How to Make a Tailor's Ham & Seam Roll - Sewtionary Giveaway
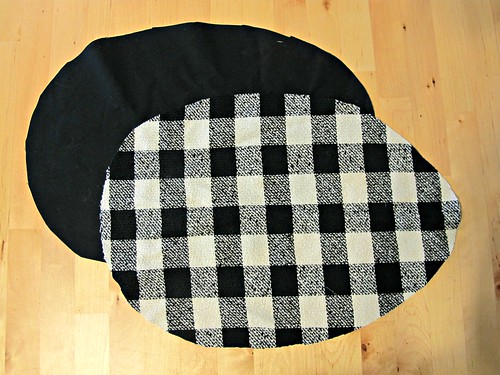
Using your paper pattern piece, cut one egg from both the wool and the cotton.

How to Make a Tailor's Ham & Seam Roll - Sewtionary Giveaway
Pin the pieces, right sides together, leaving a nice 5″ gap at the wide end. PROTIP: Whenever I’m sewing something that requires an unsewn gap, I mark each end with a double pin. This reminds me to stop sewing when I get to the double pin! Otherwise, I’ll just keep going my merry way and complete the circle, which is exactly what we don’t want right now.

How to Make a Tailor's Ham & Seam Roll - Sewtionary Giveaway
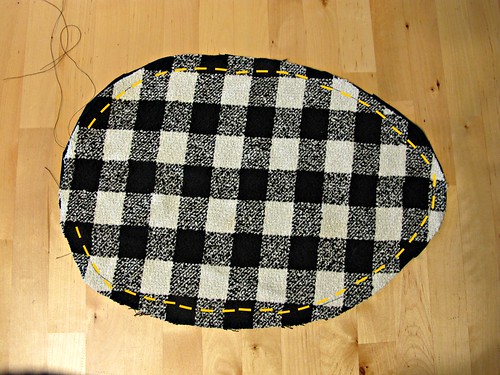
Using a 1/2″ seam allowance, sew around the entire circumference of the ham, again leaving that 5″ gap at the wide end. Make sure it’s 5″, too – you’ll need the room for stuffing (don’t make it more than 5″, or you’ll hate yourself for it).

How to Make a Tailor's Ham & Seam Roll - Sewtionary Giveaway
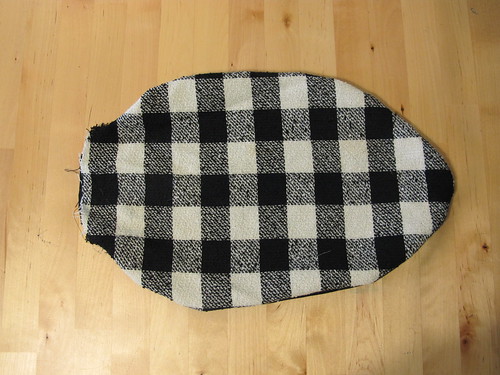
Turn the ham right side out.

How to Make a Tailor's Ham & Seam Roll - Sewtionary Giveaway
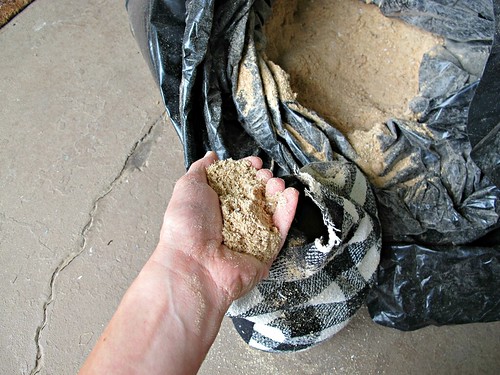
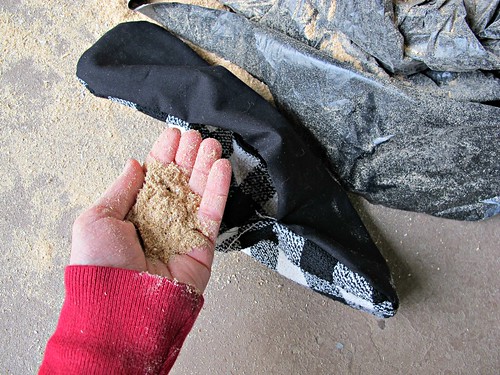
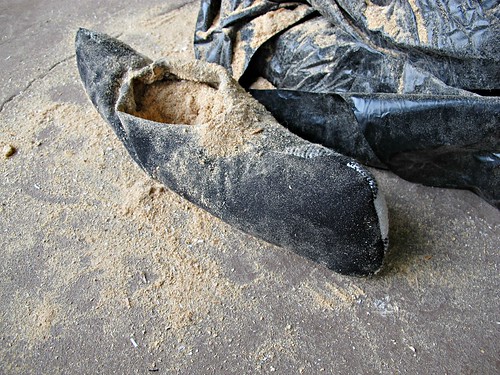
Ok, time to get messy! Take that ham outside and start stuffing your stuffing in it! If you are using sawdust, expect a big mess that will get everywhere.

How to Make a Tailor's Ham & Seam Roll - Sewtionary Giveaway
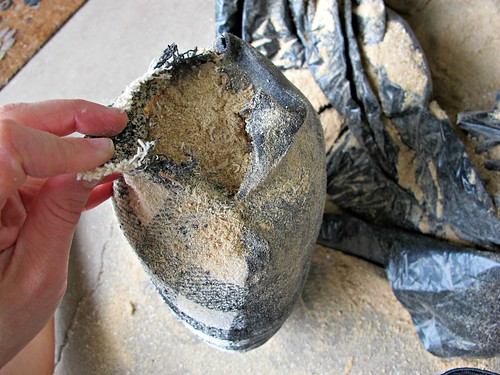
Instead of just quickly trying to fill the ham with sawdust, take the time to pack down the sawdust with each handful. The narrow end of the ham especially needs to be packed pretty tight, or else it will collapse. Once you’ve packed it down, work on the next section and pack that. Again – this IS messy, and it will take longer than you think, because sawdust loves to pretend it’s tightly packed when it’s secretly not. You want the ham to be pretty hard so it will retain it’s shape. When you think it’s full – keep stuffing. Then stuff some more.

How to Make a Tailor's Ham & Seam Roll - Sewtionary Giveaway
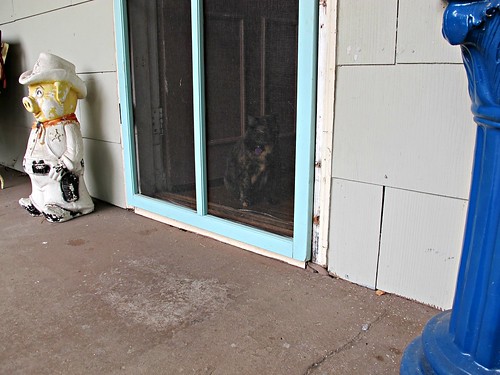
In the meantime, here’s a photo of my cat glaring at me for daring to sit outside without her, haha.

How to Make a Tailor's Ham & Seam Roll - Sewtionary Giveaway
Once you are sure the ham is packed as tight as it can go (Are you sure? Are you sure you’re sure?), it’s time to sew it up!

How to Make a Tailor's Ham & Seam Roll - Sewtionary Giveaway
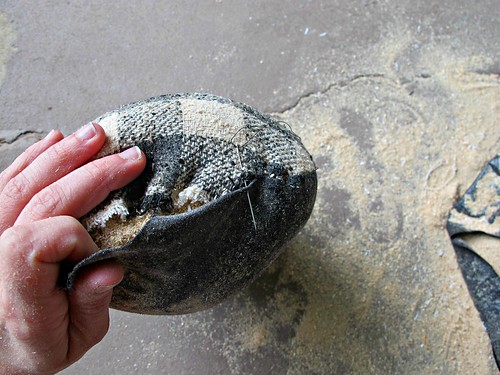
Holding the ham between your legs (do as I say, not as I do – don’t set it on the ground; you don’t want to push the narrow end back in!), turn under the seam allowance on one side and lap it over the opposite side. Using a tight whipstitch, sew the opening shut by hand.

Next, you’ll probably want to beat the shit out of your ham (if it’s covered in sawdust like mine, anyway). I just pounded mine against the porch railing until all the dust was knocked off.

This post is turning into one long “That’s What She Said” joke, isn’t it?

How to Make a Tailor's Ham & Seam Roll - Sewtionary Giveaway
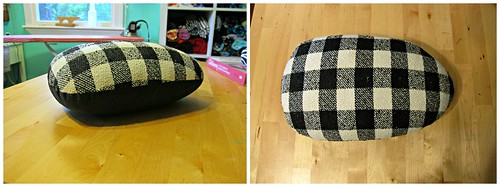
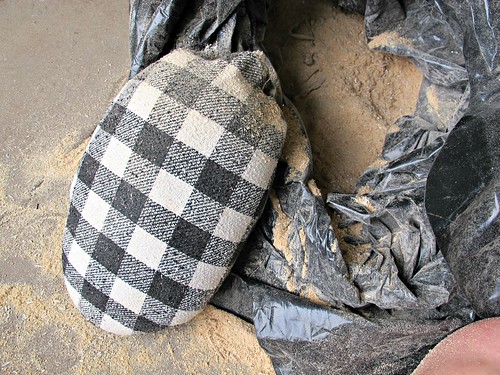
End result: Completed Tailor’s Ham!

TO MAKE THE SEAM ROLL:
How to Make a Tailor's Ham & Seam Roll - Sewtionary Giveaway
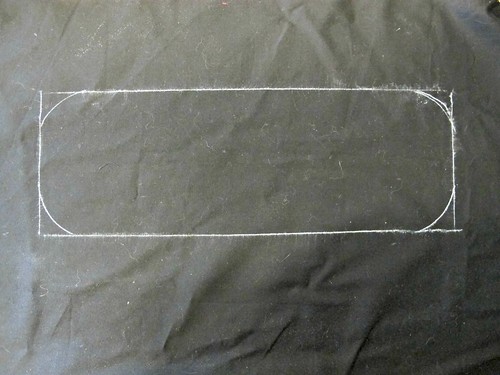
Unlike the Tailor’s Ham, I didn’t bother making a pattern piece for this one – I just drew it directly on my cotton with a Chaco pen. Draw a 14″x5″ rectangle and round the four corners.

How to Make a Tailor's Ham & Seam Roll - Sewtionary Giveaway
Cut one of each of these rectangles from both your cotton & wool.

How to Make a Tailor's Ham & Seam Roll - Sewtionary Giveaway
Using a 1/2″ seam allowance, sew the two rectangles, right sides together, leaving a 5″ opening in the middle of one long side of the seam roll (I have no idea why I don’t have a photo of this, but I trust you can work this step out). Turn the roll right side out.

How to Make a Tailor's Ham & Seam Roll - Sewtionary Giveaway
Time to stuff that bad boy!

How to Make a Tailor's Ham & Seam Roll - Sewtionary Giveaway
As with the Tailor’s Ham, really stuff and pack each long narrow end before focusing on the middle of the roll. This will ensure that your roll is nice and tightly packed, and hard enough to hold it’s shape.

How to Make a Tailor's Ham & Seam Roll - Sewtionary Giveaway
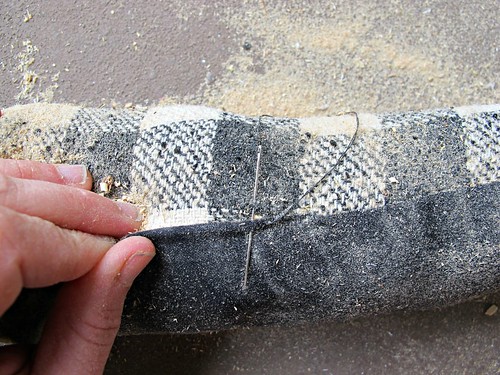
Once you’ve packed the roll nice and tight with sawdust, turn one seam allowance under and lap it over the opposite side of the opening. Sew this closed by hand.

Again, you’ll probably want to beat the shit out of that thing to get all the dust off. Be aggressive! Honey Badger Seam Roll don’t care!

How to Make a Tailor's Ham & Seam Roll - Sewtionary Giveaway
And here’s the finished seam roll!

How to Make a Tailor's Ham & Seam Roll - Sewtionary Giveaway
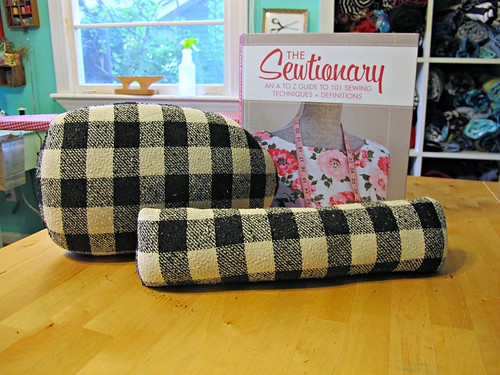
And here’s my new pressing family! Yay!
BTW, be sure to save some of that remaining sawdust – once you use the ham or seam roll, you may find the sawdust settling and thus need to be repacked to firm up the shape. Unless you just really love having an excuse to go to Home Depot – in that case, don’t let me stop you.

GIVEAWAY IS CLOSED
All right, I promised y’all a giveaway so let’s get on that. To win your own copy of the Sewtionary, simply comment on this post and tell me your favorite sewing technique. Are you a freak about pressing (high five!) or is sewing patch pockets your thing, or…? You tell me! This giveaway is open WORLDWIDE and I will close the entries a week from today, on SEPTEMBER 29, 2014 AT 7:00 AM CST. Good luck!
GIVEAWAY IS CLOSED

If you’d like to buy your own copy of the Sewtionary, you can pick up a signed copy at the Sewaholic website (or a boring ol’ unsigned copy on Amazon). Thanks so much, Tasia, for letting me be part of this book tour & for generously donating a copy to giveaway!

How to Make a Tailor's Ham & Seam Roll - Sewtionary Giveaway

Want to read some more Sewtionary reviews and/or enter some more giveaways? Check out the full blog tour here:

ONE LAST THING – We have a giveaway winner to announce! Lucky number generator says:

winner1

winner2

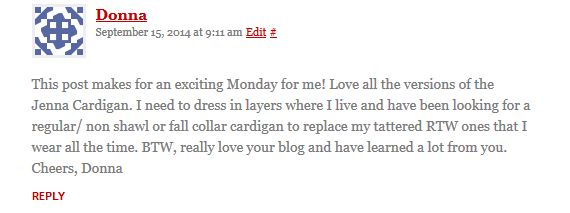
Donna, you’re a winner! Is this now offically the second time I’ve made your Monday exciting? 🙂 Congratulations! Sending your email now!

Everyone else (and there were a lot of y’all – nearly 400 entries, wow!) – I’m not turning you away completely empty-handed. Kat has generously offered a coupon code, which is awesome! Use the code LLADYBIRD to get 15% off the purchase of the Jenna Cardi from Muse Patterns, good through 9/29. Thanks to everyone who entered the giveaway! Y’all are the best 😀

Giveaway: The Complete Photo Guide to Clothing Construction

13 Mar

blog-tour-banner

Hey everyone! Remember Christine Haynes, maker of the Emery dress pattern? Well, Christine has recently released her second book, The Complete Photo Guide to Clothing Construction, and I’m excited to be the next stop on the blog tour!

CPG Clothing Contruction High res

When Christine originally asked me if I wanted to preview the book and take part in the tour, I didn’t even finish reading her email before I started typing my ‘YES YES YESSSSS’ response right back to her (good thing I did finish reading before I actually sent it, though- because at first, I thought she was saying she was planning a physical book tour and would end up in Nashville! Doh! Christine, you should still come to Nashville, tho :)). I really love sewing books, almost to a fault – I have a few dozen on my bookshelf, and only that few because I tend to cull them pretty aggressively so they don’t end up taking over my sewing room. Even though I’m not a beginner, I especially love the books geared toward beginners – I love all the photos and how-tos, and I still find myself learning new things from time to time!

IMG_6999

The Complete Photo Guide to Clothing Construction is a book that is definitely geared toward beginners – if you need hand holding, this is the book for you. I’m actually pretty amazed at all the information Christine managed to cram in this deceptively small looking book – from choosing the correct thread and needle, to pretreating fabric, to deciphering the envelope of a sewing pattern, to those amazing step-by-step photo guides for a whole array of techniques. The general consensus on this book seems to be that everyone wishes they had it when they started sewing – and I absolutely agree! Just the zipper section alone would have sent angels singing to my sewing room if I’d had this shit back when I was first trying to understand how to operate my sewing machine. I think the best way to learn it hands-on with a good tutor, but that’s not always an option for everyone. Having this book would be the next best thing – it’s like having a tutor in your sewing room 24/7, but in print! Ha!

IMG_7003

I think this was the tutorial that excited me the most about this book. Yes, it’s geared toward beginners, but then she throws things like this in the mix. A full color, photo tutorial on sewing a front fly zipper! And it’s a good one, too! See – a beginner could TOTALLY tackle this technique with Christine by their side.

(psst! You can click the photos to enlarge!)

IMG_7002

I also love this how-to on shortening a zipper- isn’t it sooo much more clear than the sad little insert that comes with your Coats and Clark zip? Especially since, yes, you can totally shorten a zip by machine. I think I did mine by hand for the first, oh, 7 years of my sewing career – and trying to find a needle with matching thread in the heat of the moment? Forget about it! Half my stuff from back then has self-made zipper stops in some obnoxious mismatched shade of whatever I happened to find in the nearest pincushion. Again, I would have LOVED to have this book at my side when trying to figure this stuff out.

IMG_7006

This is probably my favorite part of the book – scattered throughout are photos of garments with numbers denoting what technique was used for each part, and where to find it in the book. Isn’t that genius? Plus, all the patterns Christine used (both finished garments and for the photo tutorials) are from indie designers. No Big 4 to be found anywhere in this bad boy, yeeeah!

IMG_6994

GIVEAWAY IS NOW CLOSED
Ok, that was fun, but let’s get to the REALLY fun part! Christine has generously offered up a signed copy of The Complete Photo Guide to Clothing Construction, plus an extra Emery pattern for one lucky winner! Yay! To enter, all you gotta do is leave a comment on this post and tell me what technique you’d like to master. That’s it! This giveaway is open WORLDWIDE and I will close the comments one week from today, THURSDAY MARCH 20, 2014 AT 8:00 AM CST.
GIVEAWAY IS NOW CLOSED

Don’t forget to check out the full blog tour here on Christine’s blog – lots of awesome ladies involved, lots of cool giveaways going on!

Good luck! I’ll be off the blog and prowling NYC this weekend with my best blog gal, Clare. Expect lots of photo spam on Twitter and Instagram… and possibly an extra little surprise in that winning package 😉

Review: 110 Creations: A Sewists Notebook

29 Nov

Hi everyone! Hope y’all had a good Thanksgiving (or Thursday, if you live in non-Thanksgiving land. So sorry for your loss). Mine was most excellent as I managed to eat a giant meal TWICE in once day. Before I settle into a food coma, though, let’s talk about this cute little book that I recently received!

110 Creations Book

110 Creations: A Sewists Notebook is literally, exactly what the title describes. It’s a spiral bound notebook specifically designed for us sewists – with places for notes, line drawings, etc – and there’s room for, well, 110 creations! Wanna have a look with me?

When Beth originally emailed me asking if I’d like to review a copy of the book, I’d barely finished reading her email before I had started my own reply with something along the lines of “OMGOMG OMG PLS YES GAHHHHH!!!” See, this type of book is exactly what I’ve been looking for, notebook-wise, for a few months now. Somewhere to write all my plans, notes, and LINE DRAWINGS. Sticking that shit on the wall is good and fine, but carrying it around is like a little whipped topping on the sweet cherry pie of organized sewing.

I know, I just told y’all I got this book for free, and I totally did. However, this review is totally honest, even though I am absolutely gushing. I’m not afraid to rip something apart if I think it sucks and is a waste of money. Fortunately for everyone, this shit rules.

110 Creations Book
110 Creations Book

When Beth sent me the book, she filled out the first few pages based on my F/W 2013 sewing plans. I love that she even wrote my name in the beginning, it’s like a real library addition now 🙂 Of course, a few things have changed since I wrote up that post – like, I chose a new pattern for my coat, I used a different fabric for the Lola dress and the Zinnia skirt, but those can easily be changed out in the book. I mean, what’s a notebook without a bunch of scribbles and edits and doodles, am I right? 🙂

110 Creations Book
110 Creations Book

Here you can see a blank page, and a “sample” page of how to go about filling out all the blanks. There are spaces to write all the info you need – from Project Title (if you’re more creative than I am and give you projects names that contain more than just the color+pattern, ha!), to pattern/fabric/notions, to planning notes, alterations, finishes, hems, and even a place to write notes for next time. Not to mention, there’s a little croquis so you can even draw out the garment and attach a swatch of fabric for more organization. How many times have you planned a project, but forget to execute some vital part while you were actually making it up? I always leave off something – a special hem finish, some type of decorative accent, an alteration, something. With everything clearly laid out in one place, you can easily keep track of everything that’s going in and out of your project space.

110 Creations Book

Oh, there are also a few blank pages in the back, croquis-less, so you can plan menswear, children’s clothing, bags, etc.

110 Creations Book

There’s ALSO a Pattern Catalogue, so you can keep track of what you already own (if you’re a hot mess like me with hundreds of patterns and no real system for avoiding duplicates… oops)…

110 Creations Book

… a wish list…

110 Creations Book

… and even a place to keep track of when you last changed the needle in your sewing machine!

Seriously! She has thought of EVERYTHING!

110 Creations Book

I’ve had a lot of fun writing out my project plans in this book! Here you can see my coat plans, all in one place! I love all the little spaces to write notes – it’s like filling out the most fun survey ever (surely you guys agree with me that filling out surveys is stupid fun, ha). I can also see myself tweaking this to include plans for knitwear as well. Mostly because I looove planning. Ugh, it’s just so good.

The only thing I would change about this book is to make the croquis a little lighter, so the lines of the garment show better when they’re drawn on. If the croquis was sketched in grey, instead of black, it would be perfect.

If you want to see more of this book, you can read more about it here. Also, if you’re staring down that croquis and thinking, “Yep, my body does not look ANYTHING like that!”, just know that Beth also offers books with customized figure drawings.

110 Creations Book

So here’s the fun part – Beth is offering a 10% discount on this book, as well as free shipping! The offer is good through Monday 12/2. This would be an excellent holiday gift for any crafter on your list – I totally would ask for a copy if I didn’t already have one (or maybe I’ll just end up with two. Why not!).

You can buy your copy here for $13.49 (marked down from $14.99, and again, free shipping!). There is also an ADORABLE smaller size (6″x9″ ee!), although it’s not 10% off since it’s a pretty new release.

So what do you think? Are you the type A who salivates at the thought of having ALL THE PLANS, ALL IN THE SAME PLACE? Is this book just appealing so hard to you right now?

One last thing before I peace out for the weekend – I noticed that a LOT of places are running some pretty epic Black Friday specials right now, so if you’ve got your Shopping Hat on and are looking for a few discounts to sweeten the deal, check these out –
Papercut Patterns is running 15% off ALL patterns (through Monday 12/2)
Mood Fabrics has 20% off all fabrics through end of today (through Friday 11/29)
A Fashionable Stitch has 25% off the entire shop, use the code THANKS2013 (through Saturday 11/30)
Grainline Studio is offering 20% off the entire shop, use the code GIVETHANKS20 (through Monday 12/2)
Colette Patterns has 20% off the entire pattern shop (through Friday 11/29)
Victory Patterns is 30% off all paper and PDF patterns, use the code happyanny (through Friday 11/29)
Disparate Disciplines has a fun Black Friday sale – get a free $5 gift certificate for every $10+ gift certificate you buy (through Friday 11/29; after that it’s $5 for every $20+ gift certificate you buy through Monday 12/2). She just released a new Mitten pattern that is SUPER adorable – and 15% off, to boot!
Sleuth Patterns is 30% off your entire order, use the code BLKFRIDAY (through Saturday 12/7)
Christinie Haynes is 20% everything in the shop (plus she is donating 10% of every sale to the LA Regional Food Bank! Awh yeah!), use the code thanksgiving (through Monday 12/2)
She’ll Make You Flip has 20% off your entire order, use the code LLADYBIRD20 (through 12/31) (Ok, this isn’t a Black Friday deal – just a sponsor deal! – but I thought I would mention it anyway$)

Wow, that list got way longer than I meant it to! Happy shopping, I guess, ha! Let me know if I missed any good sales – I know there’s a lot out there today!