Tag Archives: Diaster Dress

Completed: Simplicity 1803, aka, The Disaster Dress

19 Jun

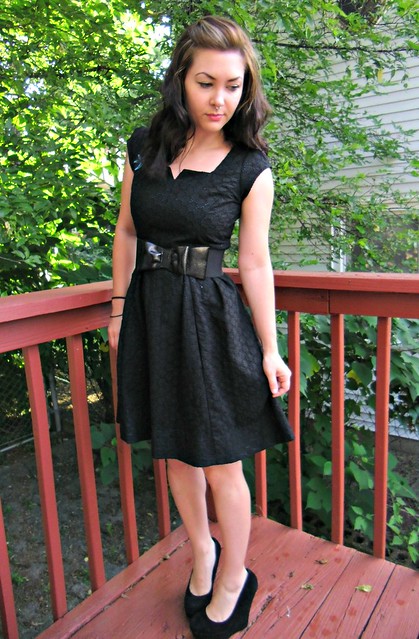
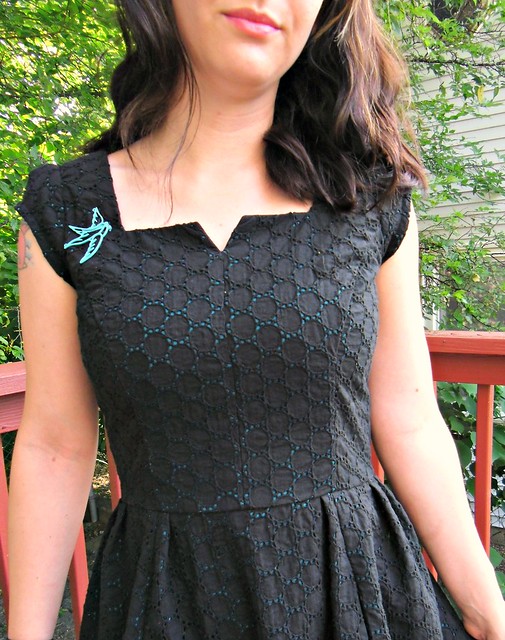
I am calling this The Disaster Dress, but it’s really not that bad. Promise! My main issue could have *easily* been solved in the muslin stage – had I actually been paying attention when I tried it on.

Simplicity 1803

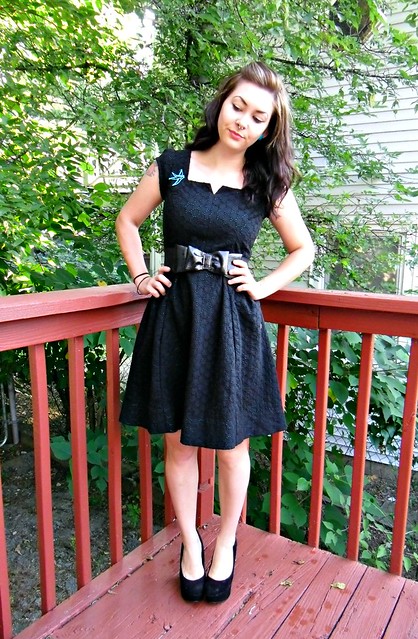
Anyway, this is the ever-popular Simplicity 1803. If my dress looks familiar, it is because I was quite obviously influenced by Gertie’s perfect version. I had to have one for myself!

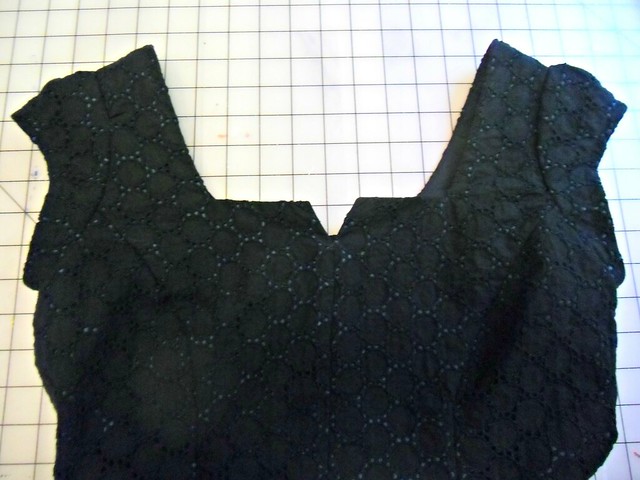
I guess I should mention exactly why I chose to call this dress a disaster. It doesn’t look much like a disaster now – I worked around all the fitting issues. But hoo boy, getting there was an adventure! This pattern has some wacky shit going on with it, y’all. WACKY, I tell you. First, we have the issue of ease. I know this has been talked to death about all over the sewing blogesphere, but seriously – this dress has a LOT of ease. Let me put it this way: according to Simplicity’s size chart, I fit in the 12-14 range. I cut a 4 in this pattern and it fit perfectly. There is about 4.5″ of ease in this pattern… consider yourself warned. Anyway, I cut my 4 & sewed up the muslin, put it on, glanced in the mirror, and started working on the real dress. I am a fit-as-you-go type sewist – constantly pinning & basting to double-check the fit. Right before I sewed up the shoulder seams, I realized that the curves of the princess seams were nowhere near the fullest part of my bust – how I missed that, I have no idea. The shoulders were WAY too short – which is actually kind of ironic, since I usually have to shorten that stuff quite a bit for my teensy shoulders. Of course, I already had the bodice half-sewn (and underlined!) at this point. Long story short, my shoulder seams are sewn with the scantest of scant seam allowances – like, less than 1/4″. The fit and everything is in it’s proper place – but barely. Also I have no idea exactly where I’m going with this story, except that you should definitely scrutinize your muslin.

Also, another beef I had with this pattern was that they skipped some vital steps in the instructions – such as sewing up the side seams. Wtf, Simplicity? You will give me half a page on ~how to sew a dart~ but then forget to tell me to sew up the side seams? You cray.

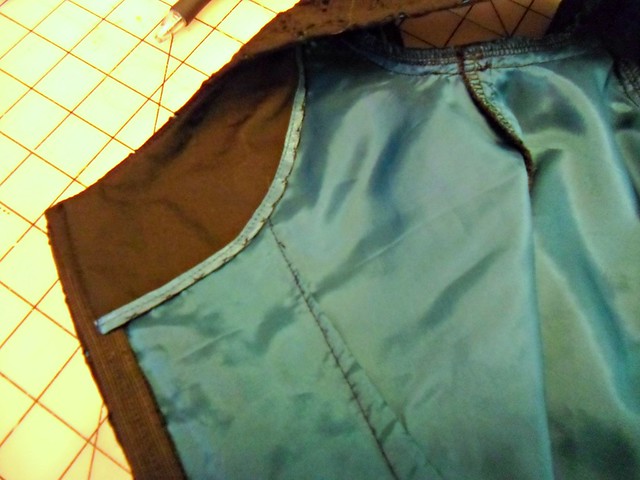
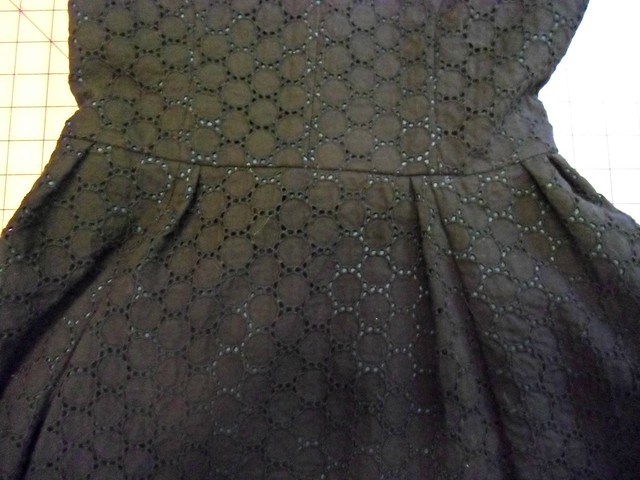
This is part 2 of Stuff I Made Using Birthday Gifts – the teal Bemberg rayon lining was sent to me by Alicia of Iron On Maiden (can we also collectively agree that she has the coolest blog name ever? Yes.) for my birthday! Yeah! It is underlining this awesome black eyelet from Mood. I also finally got to test out my new interfacing from Fashion Sewing Supply – I used the light-weight fusible and it is AWESOME. I never thought I would actually like fusible interfacing, but I think I just officially converted.

Simplicity 1803

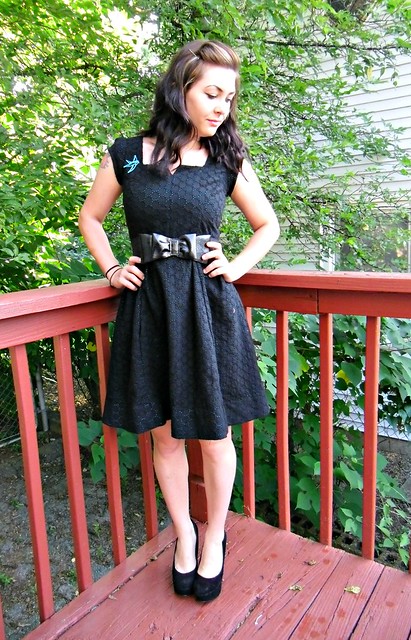
Other than the above rant on sizing/fit (and lack of side seams), this dress went together pretty quickly. The only other change I made to the pattern was to swap out the gathers for soft pleats – there was a LOT of gathering involved, and my fabric is quite thick so I was afraid it would get too bulky around the waist. To make the pleats, I matched up all the seams/notches as I would if I was gathering, and then just pleated the fabric until everything looked good & matched up. Pretty easy! I think I like this much better than I would have liked the gathers, too!

The pockets are really fucking stupid, though. They are in the right place according to the pattern – but WTF!? Who puts pockets on the princess seams of a full-skirted dress?! I know the Iris Shorts have similar pockets, but they actually contribute to the design… in this dress, they’re hidden in the folds. Of course I didn’t notice this until I actually sewed them in – and of course it is displayed prominently on the envelope. Oh well.

Simplicity 1803
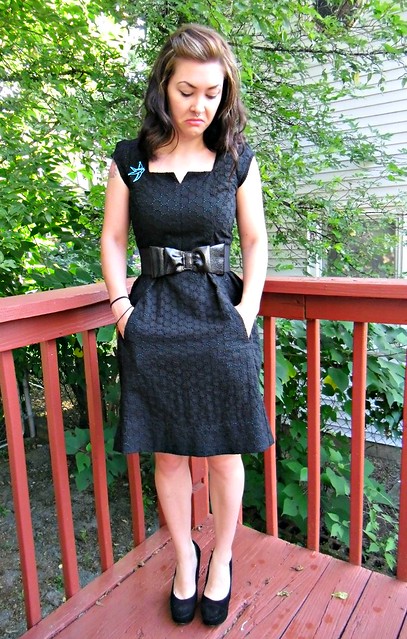
This is how I feel about the pockets.

Simplicity 1803
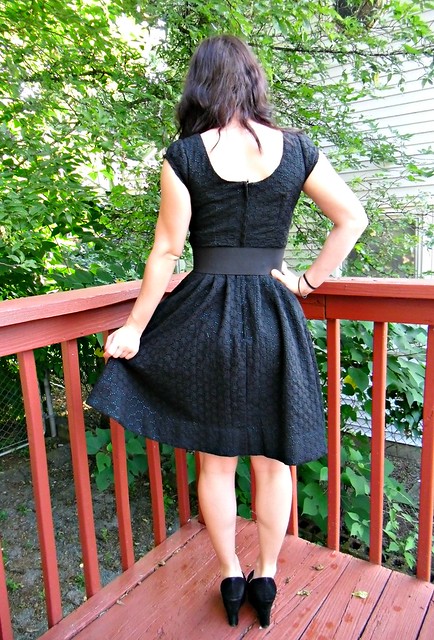
I do like the scoop back!

Simplicity 1803
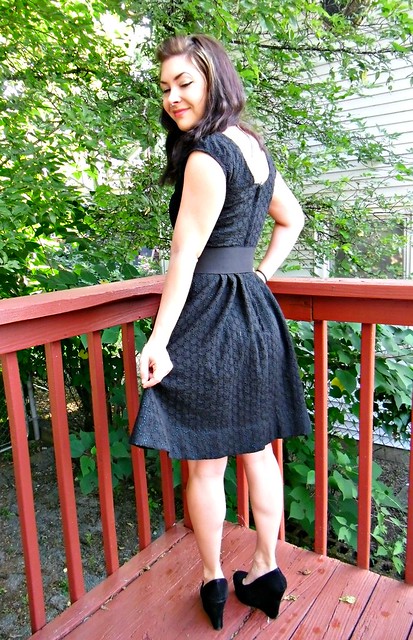
Bonus drunk-looking picture of me.

Simplicity 1803

Simplicity 1803 - bodice, belt
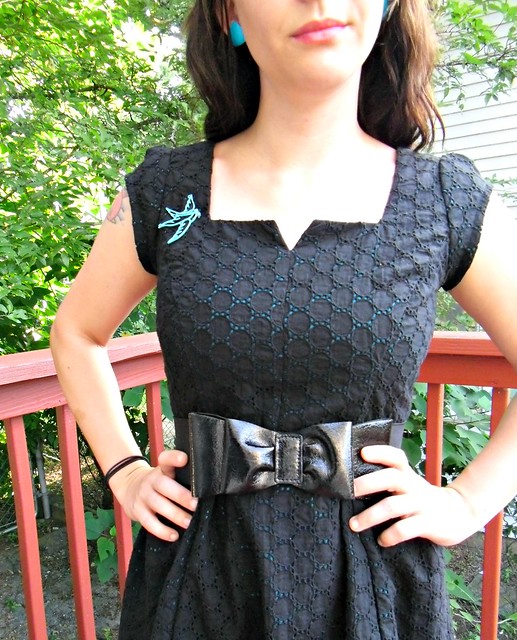
Do you like my birdy brooch? 🙂 I tore up an old necklace (well, it was already broken), glued a pin to the back & spray painted it blue.

Simplicity 1803 - no belt
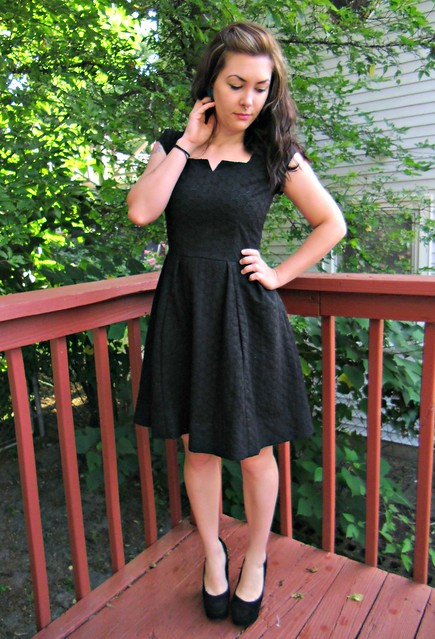
Here it is without the belt!

Simplicity 1803 - Bodice, no belt

Simplicity 1803
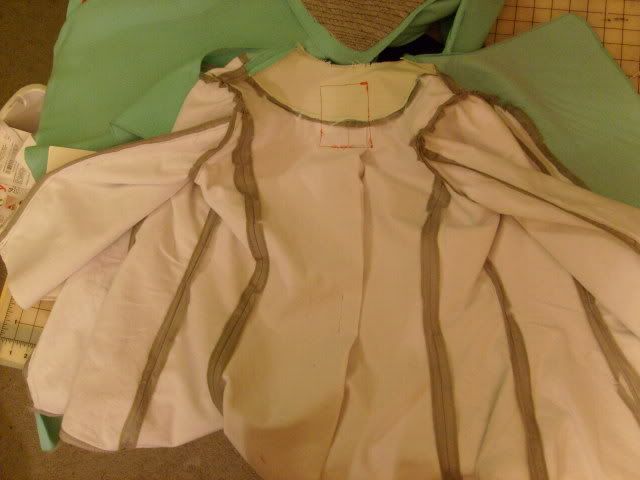
I love how bluuuue the inside is. The facing is a simple black broadcloth – again, the eyelet was too bulky for facing. I trimmed it with some matching rayon seam binding (also in the package from Alicia – told you she was awesome :D) and catch-stitched it to the lining.

Simplicity 1803

Simplicity 1803

Simplicity 1803
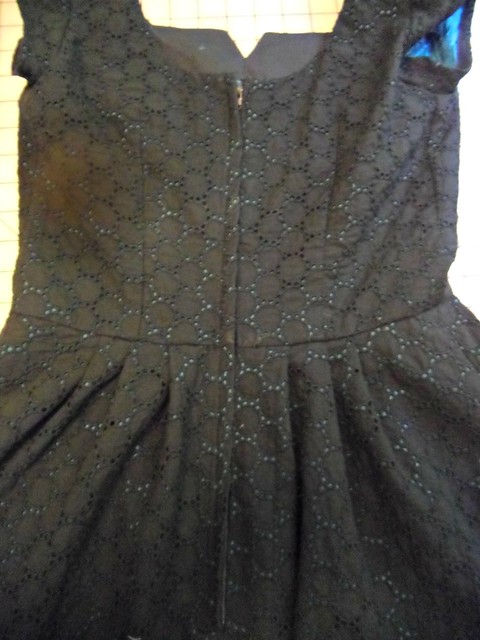
Lapped zipper & soft pleats (and that red spot is from my camera – I was wondering why it kept leaving a spot of haziness in every picture. Then I noticed that the lens was incredibly dirty. At this point, I am sure you are questioning how much I actually pay attention to things. Not much, I’m afraid).

Simplicity 1803

Anyway, despite all the shit I went through to get this thing put together, I’m absolutely happy with the finished dress! I think it’s quite flattering & can be worn for a number of occasions (and seasons, for that matter!). So yeah! Now that I’ve sorted out my issues, I will probably make another one… I have this awesome/wacky rayon fabric that I picked up at Goodwill recently; I think it’s perfect for this style. What do you think?

Simplicity 1803

Underlining: The Why & How

15 Jun

I’m currently working on the madness that is Simplicity 1803 (seriously thinking about calling this dress The Disaster Dress, if that means anything) and I thought I would share a few of my trials & tribulations with y’all. I’ve had a lot of comments requesting a tutorial for underlining (or even just asking wtf underlining is exactly), and while I haven’t been able to fulfill those requests in the past – but today is your lucky day! Underlining day, yaay!

First up, let’s talk shop. What exactly is underlining? Some people tend to confuse it with lining; this is incorrect. Lining is a duplicate garment that hangs separately inside your dress (or skirt, or pants, or whatever) that covers all seams for a nice clean finish. It is constructed separately and generally only attached by a few seams – perhaps a neckline, or the waistband of your skirt. The hem usually left free-hanging for ease for movement. Consider lining the inception of sewing – a garment within a garment (see what I did there?).

Underlining is when you sew two pieces of fabric together & treat them like a single piece – kind of like some relationships (ahhh I’m on a roll today here). Since the underlining is actually sewn to the back of your fashion fabric, the seams do show & the inside of the garment doesn’t necessarily have that clean finish.

Underlining is wonderful for a variety of reasons – you can use it to stabilize your fashion fabric to give it a bit more body (like with my Bombshell dress), to add a layer of opacity to an otherwise sheer fabric (my Swiss Dot Violet really benefited from a batiste underlining), to add a layer of warmth to a coat (the lining of my Lady Grey is underlined with cotton flannel), or even to brighten up your fashion fabric a notch (look at the difference underlining made on my Gingham Peony!) If you were concerned about the integrity of a delicate fabric – lace, or vintage, or… I dunno, vintage lace – you could underline every piece for additional strength. Underlining has lots of uses, it’s awesome!

For my dress in question, I am using this pretty black eyelet from Mood. The whole thing is quite see-through so I knew ahead of time that it would going to need some kind of backing to keep certain places under cover. I originally planned on just dropping a whole lining in the thing & calling it a day, until I realized that you would see every single seam through the eyelet – and by every single seam, I mean eyelet seams & lining seams. I’m using Bemberg Rayon here (LOVE!!!!!) and that stuff frays like nobodies business. I started imagining little shreds of turquoise popping out all over the place & it gave me the willies.

So I decided to underline instead. An added bonus is that it totally negates the two issues I was having with the individual fabrics – the Bemberg was sliding all over the place, and my sewing machine was throwing a giant fucking fit every time I tried to sew over the textured eyelet. By sewing the two fabrics together, the Bemberg stays put & provides a layer over the eyelet that keeps the needle from freaking out. Yeah!

This process is pretty easy. I’m almost embarrassed to even post this.

1
Cut each pattern piece from both your fashion fabric & preferred underlining fabric (as I mentioned here, I’m using Bemberg Rayon – which is traditionally a lining fabric, but it’s main job for this dress is opacity). The pieces should be mirror images of each other. I like to go ahead & snip all my notches, it makes things easier to match up. Don’t worry about your pattern markings (the kind you use chalk or tailor tacks or whatever for) just yet.

2
Place the underlining on the wrong side of the fashion fabric. If your underlining has a right side, make sure it is facing the wrong side of the fashion fabric (so when you flip the whole thing over, both right sides should be facing up). Pin everything together – I used these tiny silk pins because my lining shows pin holes.

3
Then you just sew the lining to the fabric! Here are some tips:
– Yes, you can sew it by machine. I chose to sew by hand because the rayon is super slippery & I wanted it to shift as little as possible. It also makes ripping the basting stitches out MUCH easier. If you sew by hand, you want to keep things as flat as possible – sit at a table! It’s very mindless work, so feel free to watch a movie (or two!).
– Sew giant basting stitches using one strand of thread. Pick something contrasting so it’s easier to pull out the stitches after you sew the seams. I used orange thread; I thought it was pretty haha.
– Try to stay well within your seam allowance – you can see that mine is less than 1/4″ from the edge. I think this makes it easier to pull out the stitches (it’s not anywhere near the 5/8″ SA, so I’m not actually sewing over the basting with my machine) and it hides any pin-marks that may get left behind on delicate fabrics.
– You may also notice that I did not sew along the bottom edge of the piece. Call me lazy, idgaf. The basting for underlining is really there to hold the pieces together until they are properly sewn. I’ve found that I can usually get away with omitting the bottom hem & any seams that extremely short (such as the point between the princess seam & the armscye). Play around & see what works for you!

BONUS TIP:
Next project involves eyelet... And a ridic amount of underlining, ugh
(sorry about the crappy Instagram picture!)
For super precise darts, thread trace the dart legs through both layers after you have basted the pieces together. This keeps the fabrics together while you sew the dart, and eliminates any weird bubbling that may otherwise happen.

4
Here is the other side of my underlined piece. Cute!

Now that you’ve got your pieces all basted together, you can treat them like one piece of fabric. You can transfer your fabric markings to the underlining side of the fabric so it doesn’t show on the front. Sew as you normally would, and make sure to pull out your basting threads as you sew each seam.

Here is how my bodice is looking as of this morning
5
Since this is an underlining, and not a proper lining, you will still have to finish your seams & deal with facings. My seams are serged; my facing is a simple cotton broadcloth as the eyelet was too bulky.

7
I love the subtle peek of turquoise 😀

6
I am including this picture because it looks like a uterus, and that is funny to me.

So that’s it! Hopefully this brings a light to some of the mystique 🙂 As always, let me know if you have any questions!