Tag Archives: completed

Completed: McCall’s 7351 // Style Maker Fabrics Spring Canvas Blog Tour

1 Apr

Hey guys! I’m excited to be the final wrap-up stop for the Spring Canvas Blog Tour with Style Maker Fabrics!

McCall's 7351

It’s always really flattering to get asked to participate in a blog tour – although I typically send my regrets, as I think they can be a little exhausting if you’ve got a dozen people talking about, say, the same book or whatever. Kind of boring and personally I skip right over those posts! I found the idea of this particular blog tour a little more intriguing, though, as it is all about spring fabrics and spring fashions and all the fun stuff that comes with that! I’ll be the first to admit that I’m not a necessarily fashionable person – I like the way I dress, of course, but I don’t exactly go out of my way to follow trends as they come into fashion. So this might not be a very “on-trend” outfit for me to make, but it is something that I will wear! So there’s that!

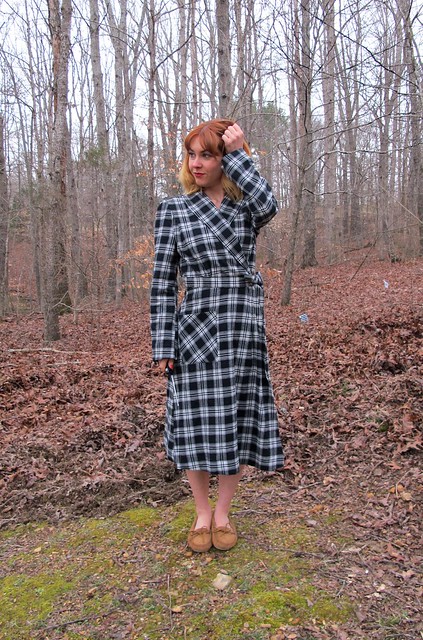
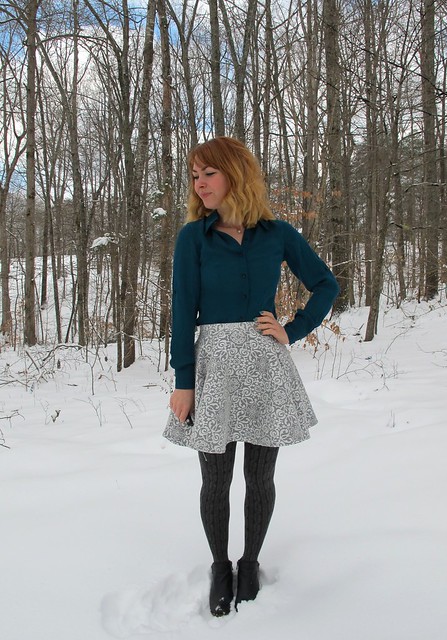
For this tour, I was given free range to choose whatever fabric I wanted from the new spring arrivals available at Style Maker Fabrics. Surprise surprise – I went with this navy rayon challis printed with cherries from Cotton + Steel, because I am nothing if I’m not predictable (I don’t even like cherries, but this is my third cherry print dress. See one and two. Hey, at least this one isn’t black hahaha!). It was a bit of a crunch to get this finished in time for my ~tour date~ – what’s with being out of town, getting sick, and then playing mad catch-up at work. But, spoiler, I finished it just in time to wear for Easter Sunday! Yay!

McCall's 7351

I used McCall’s 7351 to make my cherry dream dress, which is a new pattern from the McCall’s spring collection. It’s a classic shirt dress with a few extra options. I liked the idea of the straight skirt with the curved hemline that looks like, well, a shirttail, so I went with that option. Originally, I considered adding sleeves – but upon making my muslin, they were weirdly restrictive and I didn’t feel like going through the drama of figuring out how to fix it. Sleeveless dress it is! I actually prefer it this way; I think it’ll be more comfortable in the summer without sleeves.

McCall's 7351

McCall's 7351

McCall's 7351

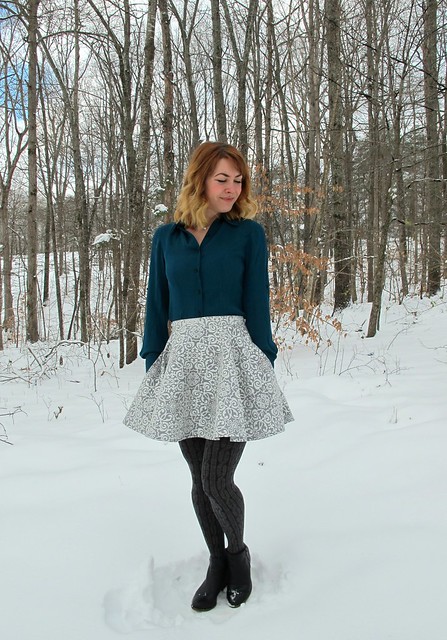
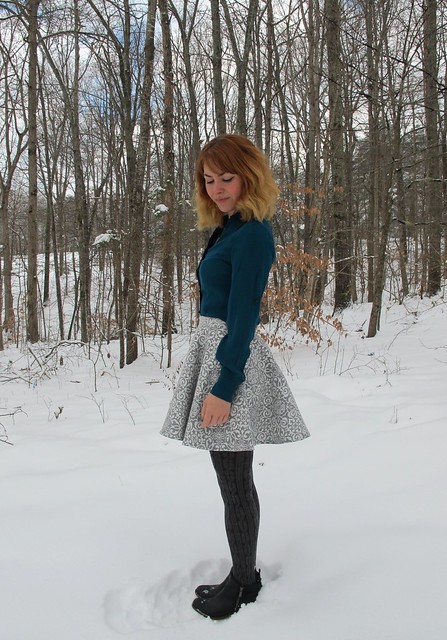
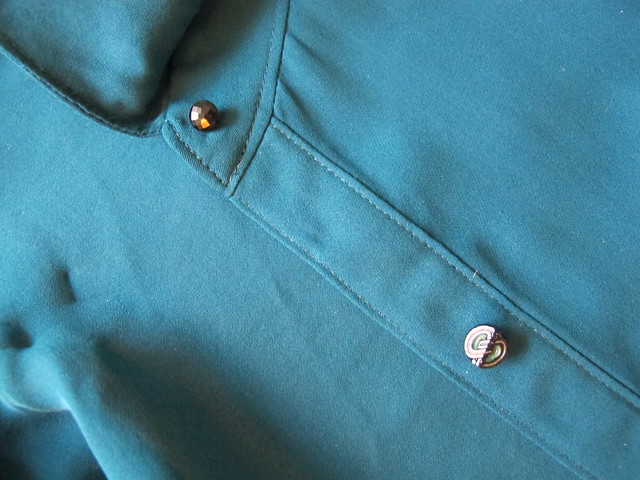
I cut the size 6, based on the finished measurements, and didn’t make any pattern adjustments except the shorten the hem quite a bit at the end. The waist is a bit bigger than what I’m used to wearing – hence the belt – but I’m going to leave it like this for now because I suspect I will looove that loose waist come 95* weather 😉 I experimented with moving the placement of the buttons at the apex of my chest to eliminate button placket gap – but as you can see in the photos below, there’s still a tiny bit of pulling as it’s not *quite* in the right place. Whatever, I’ll figure it out with the next dress haha 🙂

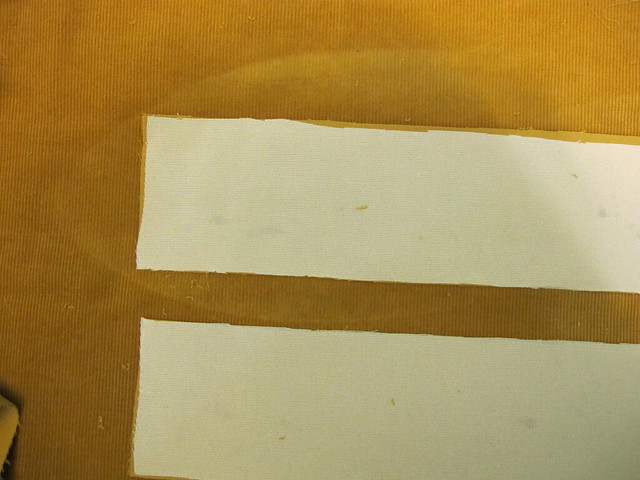
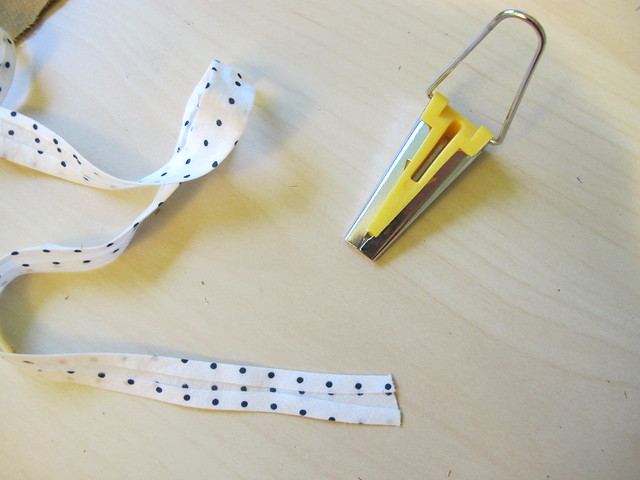
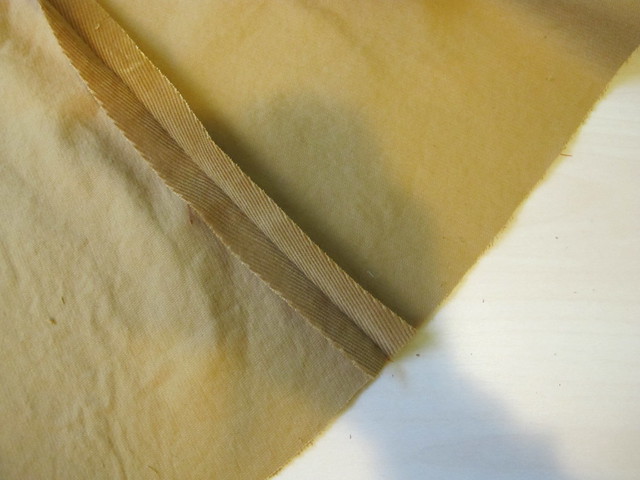
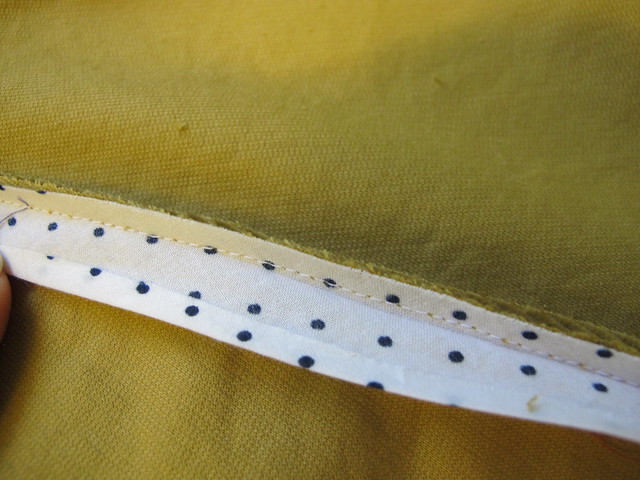
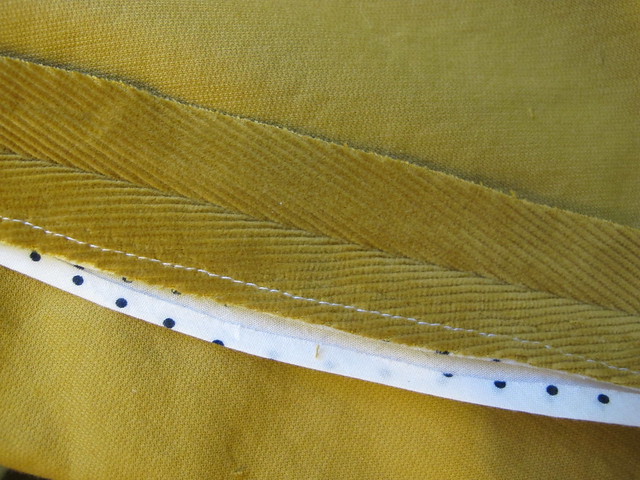
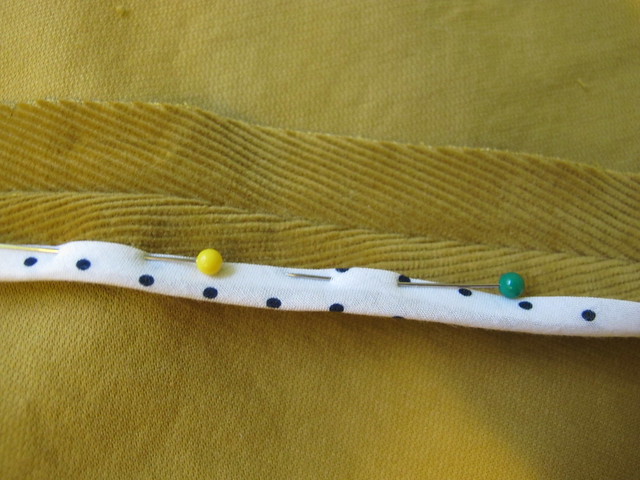
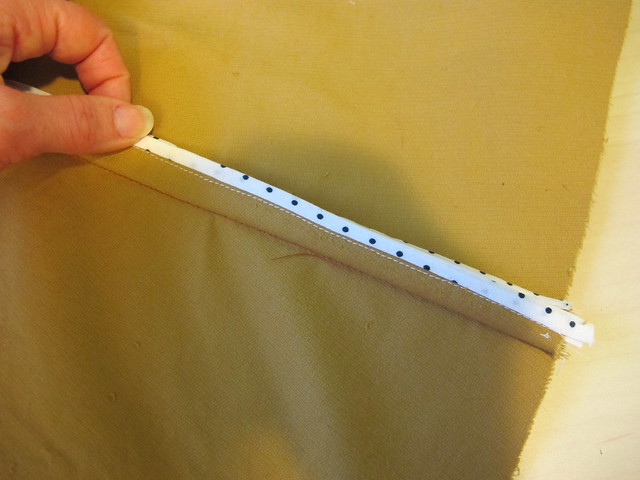
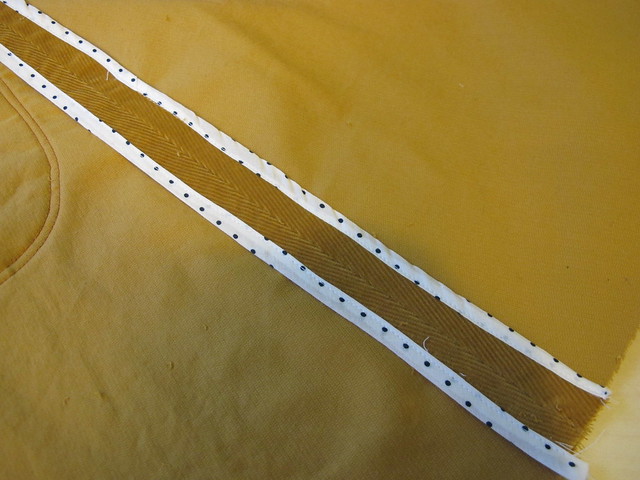
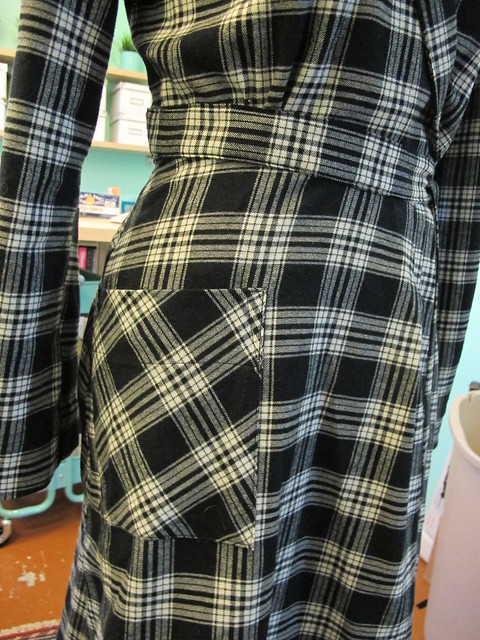
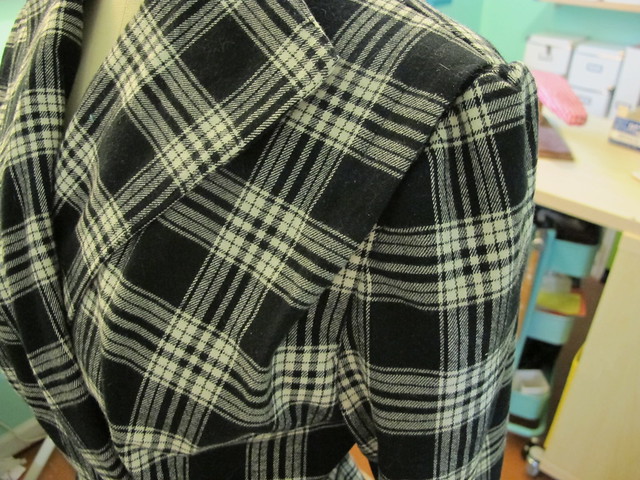
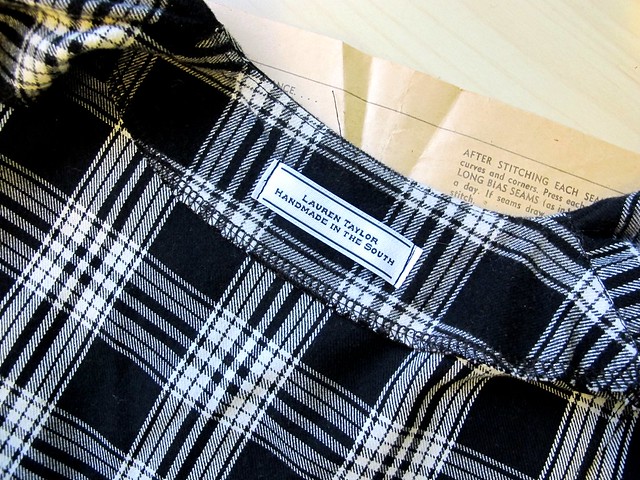
Construction-wise, this is a really easy pattern. It has all the pieces of a proper button-up – separate button placket, collar stand, self-lined yoke – and I’ve made so many of those, I could do that in my sleep at this point. I used a very lightweight interfacing as not to interfere with the drape of the fabric, and finished all the seams with French seams and bias facing for the arm holes and hem. I used navy thread for the construction, and red thread for the topstitching and button holes. The buttons are from Mood Fabrics in NYC. I had to bring a swatch of fabric with me to get a good match – the cherries are more of an orange red than a true red – but this looks pretty good to me!

McCall's 7351

McCall's 7351

I LOVED working with this fabric! Rayon challis is one of my favorite things to wear – not necessarily to sew, as it’s pretty shifty and hard to wrangle (honesty, I’d rather sew silk crepe – I think it’s easier to work with!), but it’s worth the effort because it feels SO GOOD in hot weather. This rayon is a little heavier than most of the challis (challises? challis’? challi?) that I’ve worked with in the past. It’s almost the same weight of a poplin, so it’s not sheer at all and has a nice heft to it. It’s also easier to work with and not as shifty (but still feels really good!). This was my first experience using fabric from Cotton + Steel and I get why people love this stuff so much. It’s really luxurious feeling, wears and washes well. And cherries! 🙂 I still can’t get behind their quilting cotton (well, not as garment fabric. Sorry. Old habits die hard), but they can continue to make this rayon and I will continue to sew it 😀

McCall's 7351

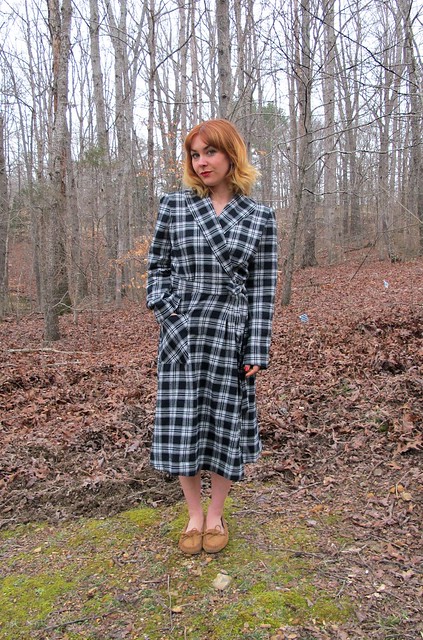
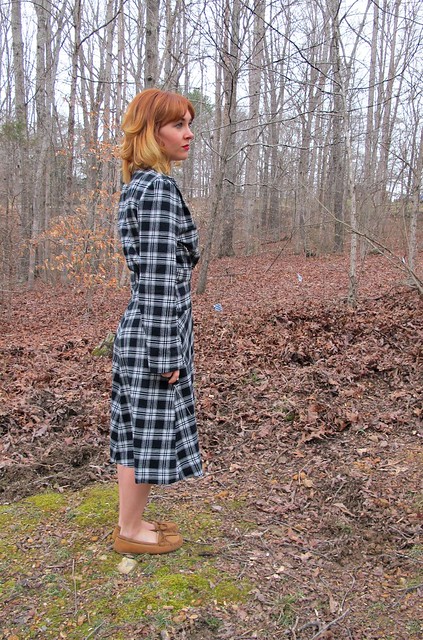
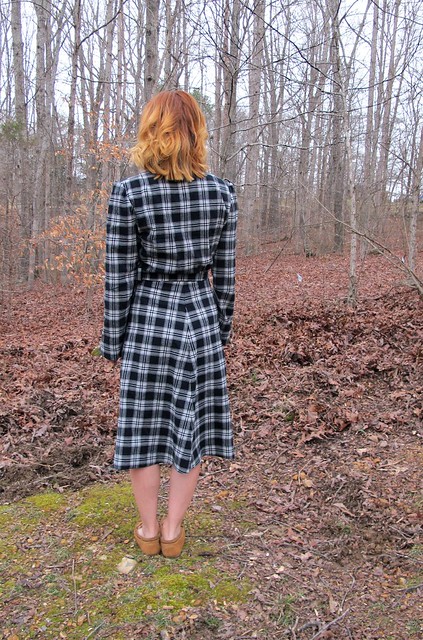
Here it is on the form. I prefer it with the belt – I definitely need the waist definition (and the fact that the waist is already too big is also a factor here).

McCall's 7351

McCall's 7351

McCall's 7351

McCall's 7351

McCall's 7351

I always put a hook and eye at the waistline of dresses like this – it keeps things from gaping, but still allows me to wear a belt (buttons are too bulky under a belt, ew).

McCall's 7351

I know my photos don’t look very springy! It’s all green and flowering here in Tennessee, but not in my yard apparently haha. And while my neighbor has a beautiful cherry blossom tree that is in FULL GORGEOUS BLOOM right now, I do not have those kinds of guts to stand under it for photos! This is who was watching me take these photos – which is nerve-wracking enough:

McCall's 7351

Kevin & Wilbur! Did I mention that my roommate bought a second pig as a companion for Kevin? Well. Kevin has a boyfriend now. Also, we are pretty sure she’s pregnant now with his babies. Her stomach is massive – like about to drag on the ground because it hangs so low. Hopefully there will be piglet pictures in a future post! 🙂

blog tour

Hey, so that’s all for this part of the Spring Canvas blog tour – but be sure to check out all the other participants if you haven’t done so already! Lots of really amazing stuff to see 🙂 ALSO, just an FYI – but all domestic orders, regardless of size, ship for $5 from Style Maker Fabrics (and discounted international shipping, yo!). Cheap shipping is good through 4/3/16, so you’ve still got a couple days 🙂

Thanks again to Style Maker Fabrics for letting me be a part of this blog tour! 😀

McCall's 7351

Note: The fabric was provided to me by Style Maker Fabrics so that I could participate in their blog tour!

Completed: Silk Polka Dot Blouse + Corduroy Skirt

29 Mar

Its time for the ~big reveal~ – my first completed outfit, sewn entirely on my new Spiegel 60609 sewing machine 😀

IMG_2438

I love that this machine is pretty enough to make even a subpar photo look great 🙂 Ha!

Silk Top & Corduroy Mini Skirt

I covered a lot of ground about the making of these garments in my previous posts, however, I’ll include some notes and highlights in this post in case you missed/skimmed/didn’t care then but suddenly care now 🙂

Silk Top & Corduroy Mini Skirt

The silk top was made using silk crepe from Mood Fabrics (purchased at the NYC store last year) and a combination of Butterick 5526 (my TNT button-up shirt pattern) for the body of the blouse, and vintage Simplicity 4676 for the tie neck. I used Sullivan’s Spray Stabilizer to wrangle the drapey silk into submission for ease of cutting and sewing, which worked great! The shirt is finished with French seams and self-bias facing at the arm holes and hem.

Full details on the silk top can be found in this blog post 🙂

Silk Top & Corduroy Mini Skirt

Silk Top & Corduroy Mini Skirt

I wanted my first project on the Spiegel 60609 to be something silk, because, honestly – I wanted to see how it could handle working with a notoriously difficult fabric. Of course, stabilizing the whole yardage first definitely helped, but that doesn’t solve all issues (such as when your sewing machine tries to eat delicate fabrics – not a problem with this one, I will add!). I’m really impressed with how the machine sewed through this fabric with absolutely no issues – it even did a great job on the button holes! I do wish that the measurements on the throat plate were marked differently, as it’s hard to get a narrow seam with what’s standard on this machine, but that’s a relative non-issue (I just use post-it notes to mark my seam allowance lines and it works fine). So yeah, Spiegel 60609 + silk gets a thumbs up from me!

Silk Top & Corduroy Mini Skirt

The mini skirt was made also on my Spiegel 60609! I used the Rosari skirt from Pauline Alice Patterns and some lightweight/stretch corduroy from Mood Fabrics. The skirt includes pockets, bound seams on the inside (for a bit of extra pretty cos why not?) and professionally set snaps down the front.

Full details on the corduroy mini can be found in this blog post!

Silk Top & Corduroy Mini Skirt//embedr.flickr.com/assets/client-code.js

I don’t necessarily find corduroy difficult to sew – most of the problem lies in making sure everything is cut and pressed correctly, as not to mess too much with the nap. Sometimes, depending on what machine I’m using, it’s a good idea to use a walking foot to help keep all layers feeding evenly, but I didn’t have any of these problems with the Spiegel 60609. The feed dogs were good enough on their own without any extra help. Always a plus! 🙂

Silk Top & Corduroy Mini Skirt

Silk Top & Corduroy Mini Skirt

Silk Top & Corduroy Mini Skirt

Corduroy Mini Skirt

Corduroy Mini Skirt

That’s all for this outfit! Stay tuned next month for that project – all I can say is, it’s gonna be FANCY 😀

Silk Top & Corduroy Mini Skirt

Note: The fabric used is part of my monthly allowance from Mood Fabrics, as part of my involvement with the Mood Sewing Network. The Spiegel 60609 was given to me by Spiegel, and it’s awesome!

In Progress: Corduroy Mini Skirt

22 Mar

IMG_2367

Following up on part one of my Spiegel 60609 sewing project for March (here is that post, in case you missed it!), let’s get to part 2! The bottom half 🙂

bdg-corduroy-button-front-mini-skirt-mustard-6

My original inspiration came from a skirt I saw at Nordstrom a couple of months ago – the most adorable a-line mini skirt, made in mustard corduroy with pocket flaps and snap closures down the front (above is an image of it – I think. It’s been a while and I’m forgetful!). I liked it enough to actually try it on (which was weird enough in itself – I haven’t been in a fitting room in ages, ha), but the fit wasn’t very good so it didn’t leave the store with me. Instead, I thought I’d try to make my own (surprise!).

I found this mustard cotton corduroy on the Mood Fabrics website and immediately set about finding a good skirt pattern for the fabric (unfortunately, that fabric is already sold out – sorry! I guess a lot of us snapped it up at the same time – it’s really the perfect shade of mustard, and a nice light weight with a subtle stretch. Just gorgeous!). Lots of googling around led me to eventually settle on the Rosarí skirt as it included pretty much all the elements of the original inspiration skirt, minus the separate side panels and with big (usable) pockets instead of just flaps. Honestly, it totally looks like something I’ve already made, I still wanted to give it a try. The patterns were just different enough to justify a second purchase, and plus, I’ve been wanting to try a Pauline Alice pattern.

Going by the finished measurements, I cut a size 34 and made the mini length with pocket C. Spoiler: The fit is really excellent and I’m totally gonna make this again with those zippered pockets. Anyway, back to the corduroy!

Corduroy Mini Skirt - cutting

One of the most important things to keep in mind when dealing with corduroy is the very visible nap. On fabrics with a pile (basically… hairs. Velvet, velour, corduroy, even fake fur – are all examples of fabric with a pile), the hairs lie in a particular direction, which is referred to as “nap.” If you run your hands up or down the pile, you can feel the pile. The pile can change color very subtly depending on the direction of the nap, so it’s extremely important to cut everything in the same direction – or else you run the risk of your pieces looking like they are slightly different colors. For my skirt, I made sure to lay all my pieces with the top facing the same end of the yardage, as shown in the picture.

Corduroy Mini Skirt - pressing naps

Another issue with naps and piles is that it’s *really* easy to crush the pile with your iron if you’re not careful. To prevent, this, the fabric can’t be pressed against a flat surface (like the ironing board, or the iron itself). One way to do this is to use a velvet needleboard, which has a million tiny wires to make a not-flat surface that the pile can lay against while you press. However, needleboards are freaking expensive (that one is $40, there, I just saved you a click haha)! They are fun to use, but ain’t kind on the wallet. So the cheap alternative is to just use a scrap piece of your napped fabric, and lay it right side up on your ironing board. You can press all your pattern pieces with the right side down, against the scrap fabric, and that provides enough texture to keep the nap from crushing. I had about 1/4 yard leftover from cutting my skirt, so I had a nice big piece to lay on my ironing board for pressing. Look at the picture above – do you see the iron imprints around my interfaced pieces? That’s what happens if you don’t protect the nap before pressing!

So those are two big things to keep in mind if you’re sewing with corduroy (or any other napped fabric, for that matter). Mind the nap 🙂 And just FYI – some napped fabrics (especially velvet and faux fur) require a little more finesse with sewing as they don’t like to feed evenly through the sewing machine. That being said, I didn’t have any problems with this particular fabric. Normally, I would use a walking foot – but the feed dogs on the Spiegel 60609 did a good job on their own, no extra foot required. Yea!

Since this is a really straightforward pattern with very few seams, I thought it would be fun to go the extra mile and do some pretty seam finishing on the inside 🙂 I decided to bind my seams with bias tape, which not only looks nice, but prevents the seam allowances from unraveling as the skirt gets washed/worn. This particular corduroy frays like a MOTHER, so it’s a very necessary step. I could have used my serger, but this looks prettier (and I didn’t have matching thread, ha!)!

Corduroy Mini Skirt - bound seams

You can use pre-packaged bias tape to bind your seams, but I like to make my own because it’s a bit softer (and you get a waaaay better selection of colors and prints). This particular fabric has showed up on soooo many of my makes – I made a truckload of bias strips with it and it’s like the gift that keeps on giving! 🙂 I will be so sad when it runs out hahaha. Anyway, I like the Clover 1/2″ bias tape maker – I find the width is great for this finish, and the Clover brand ones in particular work really well. I’ve tried cheaper bias makers and they just don’t work as well for me. This one is tight enough at the opening to really fold the bias, and then it’s easy to press it flat so it stays that way.

Corduroy Mini Skirt - bound seams

For this skirt, I did a Hong Kong bound finish – so both sides of the seam allowance are bound and then pressed open. You can also press the seam allowances to one side, and bind them together.

Corduroy Mini Skirt - bound seams

On the first seam allowance, sew the bias binding to the underside (the side that is against the garment when it’s pressed into place),  keeping your stitching line right along the pressed crease of the binding.Corduroy Mini Skirt - bound seams

Corduroy Mini Skirt - bound seams

Pull the unsewn side of the bias around so it comes to the top and just covers the stitching line you created. Pin into place, and then topstitch close to the fold. Repeat for the opposite seam allowance, then press the seam allowances open.

Corduroy Mini Skirt - bound seams

Here is what the underside of the seam allowance looks like. I do the first pass on the underside, so any stray topstitching is hidden when the seam allowances are pressed open 🙂

Corduroy Mini Skirt - bound seams

And here are both sides bound 🙂

Corduroy Mini Skirt - bound seams

AND HERE IS THE WHOLE DAMN SKIRT 😀

I love this finish! It’s definitely a time-consuming addition, but it’s not so bad when the garment in question only has 3 seams to bind 🙂 And it looks soooo pretty on the inside!

Corduroy Mini Skirt - grading seam allowances

Last corduroy tip! This fabric tends to be really bulky, so it is important to really grade down your seam allowances in any part where there are multiple layers – such as the waistband. I trim my seam allowances down at staggering heights so that there isn’t a giant bulky ridge showing from the outside once the skirt is complete.

Corduroy Mini Skirt

And that’s it! Here’s a little sneak of the pretty insides 🙂 I also bound the lower edge of the waistband – instead of turning it under 1/4″ to hide the raw edge – as I’ve always liked the way that looks in dress pants hahaah. Oh, and my snaps were set using a professional snap setter (cos I work for a clothing manufacturer!)! They look GOOD.

Corduroy Mini Skirt

Corduroy Mini Skirt

Some shots of the finished skirt on my form 🙂 I’ve already worn the hell out of this thing – the fit is great, I love the mini length, and the mustard color goes with pretty much everything in my closet. It looks EXTRA good with black and white polka dotted silk, though 🙂 I will be sharing the completed outfit next week!

Completed: Black Lace Boylston Bra

11 Mar

Ooh la la, y’all!

Black Lace Boylston bra

Hands down, this is definitely the sexiest bra I have ever made. Although, to be fair, it’s kind of hard to steer away from sexy anything if it involves black lace amirite.

Black Lace Boylston bra

It’s been a couple of months since I made this thing, which means I am going to have to dig deep into the recesses of my brain to try to remember all the little construction tidbits. On the flip, however, it does mean that I’ve worn it a lot in that time and can seriously vouch for the fit and comfort factor.

Black Lace Boylston bra

Black Lace Boylston bra

I used the Boylston bra from Orange Lingerie as the base for this pattern. Having made this pattern several times before, I did not make any additional changes to the fit (other than my previous edits to the back band). I sewed a 30D, which is in line with the size I wear in RTW. The big changes I made were in terms of construction – namely, trying to figure out how to incorporate both foam cups and a lace outer, while retaining all those cool little scallops that make the bra so pretty. I think this rendition is pretty good, although there is definitely room for improvement in future versions. Always learning 🙂

Black Lace Boylston bra

Black Lace Boylston bra

Like I said, getting that form cup + scallops gave me a bit of a head scratch, so I took to some store-bought bra snooping to try to figure out how to make it work for this lil guy. It appears that most RTW bras have the foam cup and lace outer cup sewn separately, and then tacked together at the top in a few places. With this in mind, I finished the top edge of my foam cup with a simple 3 thread overlock (it’s not really imperative to do this, as the foam doesn’t unravel – but it does look nice!), and then simply laid the constructed lace cup on top and lined the innermost points of the scallops with the edge of the foam cup. Rather than tack it down, I actually stitched all the way across. The lace is super busy, so the stitching doesn’t show- but it’s very secure. For the remaining edges of the cup, I followed the pattern as instructed.

I also had to figure out how to do the straps, as the patterns calls for self-fabric straps with a little bit of strapping elastic at the back. I actually spoke with Norma (she of Orange Lingerie, and the mastermind behind these patterns) at length about this when I met with her in Boston, and while she gave me some really good advice on how to do the fabric straps with a scalloped edge – I ended up not having enough lace to cut them! Whomp whomp. Maybe for the next one. For this particular bra, I had to stick with regular elastic bra strapping. I sewed the underarm elastic as instructed, stopping right where I planned on adding the straps (as the pattern is written, you attach the fabric straps and then sew the underarm elastic all the way up. Since I had no fabric straps, I had to improvise!). When I trimmed the excess elastic, I made sure to keep intact scallops so things looked more intentional. The front of the straps are attached with the rings going through a tiny piece of elastic – again, something I snooped on existing bras. The back is attached the same way the pattern instructs.

Black Lace Boylston bra

To get the scallops along the bottom, I used the same method of flat attaching the elastic, instead of turning it back, as I did on my lace Watson bra. Since having finished this bra, Erin has published a wonderful post on how to make a lace frame bra, one method which gives a beautiful gothic arch along the bottom (instead of the straight band you see here). I am really excited to try that method!

Black Lace Boylston bra

I really love the lace I used for this bra! This is the second piece that was given to me by Tailor Made Shop, and if it looks familiar – it’s because I also have some in navy (which I made into a lace Watson bra). It looks like the shop is out of this stuff in black, but they do have navy, pink, purple and white 🙂

Because the lace is a bit lightweight, I underlined all the pieces. The bridge and frame have sheer cup lining for stability (mine is from Bra Maker’s Supply, but you better believe I am excited to restock from a US source haha!), while the band pieces are underlined with power mesh. I didn’t underline the cups, since there are foam cups and that’s pretty supportive enough 🙂

All elastics and notions are from my stash, which the exception of the scalloped bra strapping – which is also from Tailor Made Shop 🙂

Black Lace Boylston bra

Black Lace Boylston bra

Black Lace Boylston bra

Fit-wise, this is one my best yet! The bra is super comfortable, super supportive, and gives me a really nice shape (hell yeah my boobs look awesome in this thing). It’s not a push-up, but there is definitely some lift action going on in there. If you would like to see a picture of me wearing it, click here. This should go without saying, but, again, PLEASE do me a solid and don’t post this image all over social media 🙂 Posting strictly for science purposes.

My only complaint is the horizontal wrinkle along the bottom of the bridge. It only shows on the outside, when I’m wearing the bra, which leads me to believe it’s from excess lace fabric in the front (the inside stays smooth regardless). Ugh! It’s not a huge deal – the bra is still wearable and absolutely no on has noticed (or at least pointed out) the wrinkle, so I ain’t gonna let it bother me. But the next one will be wrinkle-free, hopefully 🙂

Black Lace Boylston bra

Ok, I think that wraps up about all the bra talk I have in me for today! 🙂 Happy Friday, y’all!

Completed: Vintage Simplicity 1799

29 Feb

Raise your hands if you’re ready for spring!

Simplicity 1799 robe

This is the time of year that I spend the majority of my day wrapped up in a robe, at least those days when I’m hanging around the house. My old fleece robe has truly served me well during these trying times, but its really starting to look its age (nearly a decade, I have recently realized!). I wanted to upgrade to something that was a little classier than the ugly fleece – something that wouldn’t make me feel quite so embarrassed to run to the mailbox in. I know, I live in the middle of nowhere – but the moment you run to the mailbox in your robe, that’s the moment someone you know decides to cruise on by.

Simplicity 1799 robe

Simplicity 1799 robe

Simplicity 1799 robe

Since more fleece was out of the question, I went with a soft cotton plaid flannel from Mood Fabrics. Mood has tons of great cotton flannels on their site, but I picked this particular one because it kind of matches my plaid flannel Carolyn pajamas. It’s a thinner plaid, with one brushed side (the other side is smooth, which I used on the inside of the robe). My only complaint is that it’s quite a bit off-grain – which, combined with using a pattern that was decidedly NOT plaid-matching-friendly, meant that I really fucked up the plaid matching on this garment. Or, rather, just threw my hands in the air and gave up about halfway through cutting. I did manage to get the center back and sleeves to have a nice continuous line, but those side seams are all kinds of wrecked. Whatever. Sometimes in sewing, we have to pick our battles. I’m not going to argue with a garment that will get the majority of it’s judgement from my cat.

Simplicity 1799 robe

Simplicity 1799 robe

The pattern I used is Simplicity 1799, a 1940s vintage pattern I’ve had my stash for quite some time. I don’t really sew much with vintage patterns these days – I find the styles to be a little too cutesy and/or dated for how I roll with my clothes lately – but I still collect and appreciate them. And sometimes, you need a little cutesy glamour to make your day prettier, especially when we’re talking about an otherwise ugly robe. Look at how classy those ladies are!

One thing I really love about vintage patterns are all the beautiful details that they include in the design. This pattern has tucks and gathers all over the places, elbow darts, and a boxy 1940s upper silhouette paired with strong shoulders. The instructions are pretty sparse as you can see, but anyone with common sewing sense can easily figure them out. I mostly went my own way – finished all the seams with my serger, left out the shoulder pads, and gave nice 2″ hems on the sleeves and bottom.

It’s really hard to see the pretty details in this, thanks to the plaid clusterfuck I’ve got going on, but I’ll try to show you some highlights:

Simplicity 1799 robe

Simplicity 1799 robe

Simplicity 1799 robe

Simplicity 1799 robe

Simplicity 1799 robe

Simplicity 1799 robe

Not much else to say about this one! Keepin’ it simple and cozy this month!

Simplicity 1799 robe

Note: This fabric was provided to me as part of my participation in the Mood Sewing Network. All declarations and opinions are my own!

Completed: Ginger Jeans + Silk Cami

15 Feb

Well, it’s finally too cold to take photos outdoors.

Ginger Jeans + Silk Tank

Hello, wall!

Ginger Jeans + Silk Tank

Anyway, I made another pair of Ginger jeans – and finally used up my second piece of the Cone Mills denim I’ve been hoarding since I bought it last year (FYI, in my last post it was brought to my attention that Threadbare Fabrics also sells Cone Mills denim by the yard. I haven’t ordered from them yet – but it made it much easier to cut into my precious stash knowing that I could get more of the stuff. Yay!). This is the lighter weight of the two denims I received in my kit; I think it’s a 10oz. It’s thinner and a little stretchier than what I used in my previous pair, and I like it a lot more. Actually, it’s almost identical to the denim I used in my very first pair of Gingers – same color and everything. I realize I essentially made two pairs of the same pants, but that first pair is starting to show it’s age (saying that I wear them a LOT is a huge understatement), so I am just thinking I’m ahead of the curve for once.

Ginger Jeans + Silk Tank

I was originally saving this denim to make a pair of flares – either using the Ginger jeans flare expansion add-on (um, btw, how genius is that idea?!) or the new Birkin flares that everyone is obsessing over, but in the end I just decided to remake my ol’ TNT (especially since the fabric on the first pair is a bit subpar quality, and one of these days I might have an unfortunate butt-rip happen. Hopefully not in public. I am wearing cute underwear at all times just in case, though). Like I said, I can reorder more of the Cone Mills, so perhaps there will be flares in my future. Just not this pair. No ragrets.

Ginger Jeans + Silk Tank

I wanted to improve on my last pair – they’re ok, but the bunching at the knee really bothered me way too much. I tried to research what the issue was – some people suggested that I might have knock-knees which is causing the bunching, but I’m pretty sure that’s not the case (I definitely don’t look like I have knock-knees, anyway). One of the comments in my last jeans post suggested checking out Cation Designs as she has a few posts on pants fitting. I usually refer to my pants-fitting bible, Pants for Real People, as it has never steered me wrong. However, this particular fit issue wasn’t covered in the book (I think it’s a product of tight/stretchy jeans, which they certainly don’t show any of in the book hahaha), so it was good to have a back-up resource! And this post in particular is FANTASTIC – plus, I think I found my solution! Yay! The #10 Hyperextended Calf alteration sounded like what I was dealing with – the calves of my tight pants are always REALLY tight, which then causes them to ride up and bunch at the knee (I have muscular calves, so this makes sense!). I did this alteration to my jeans pattern, adding 1 1/8″ to the calf (this was just a wild guess; I wasn’t about to slash up a pair of pants to figure out the exact amount I needed). It worked pretty well, but I think I could stand to add even a little more width. How they are now, though, is pretty magical -they only bunch a little, and I think that’s just from moving around. I don’t have giant folds of denim hanging around my knee. It is AWESOME. However, I am not a huge fan of how big it makes the ankle – I can deal with this pair, but on my next pair I would like to figure out a way to keep the tightess at the ankle while still allowing some room in the calf. Anyone have suggestions? Just tapering the ankle at the side and inseams doesn’t work, FYI. haha.

Ginger Jeans + Silk Tank

Other than that one alteration, not a lot of changes to this pair. I added the length back and then removed about 2.5″ – I wanted them to be long enough to pool a little at the ankle. I used my original Ginger pattern – the one before it was updated with a pocket stay – and sewed the size 2 instead of the 4. Topstitching and all that is pretty simple – one color of jeans topstitching thread. I did add an X to one leg in lieu of a bartack. Kind of a riff on the + on my I+W jeans haha. What, they’re made of the same denim!

Silk Tank

This silk cami is something I made ages ago and completely forgot to photograph for my blog! It’s a Ruby Slip that I modified to include gathers at the bust and silk bias finishing on the edges and straps, and then shortened to cami length. I made this slip a couple of years ago out of some really amazing 4ply silk, and I love how it looks so it was only natural to use it for a cami pattern.

The silk I used is a really wonderful new silk from Organic Cotton Plus, called Peace Silk. I really love OCP and I’ve been happy with all the fabrics I’ve received from them, and this silk is pretty fantastic too. It’s a wonderful lightweight, organic silk, with a feel similar to a thicker china silk or a less crepey crepe de chine. Really easy to work with, and feels amaaaazing after a wash in the machine. It’s called Peace Silk because it’s produced in a way that does not kill the silk worm and instead allows it to emerge from the cocoon first. While I definitely have no problem eating meat or wearing animal fibers, I thought that was a pretty neat solution! Plus, the name just makes me happy 🙂

That’s about all I have left to talk about, so here’s a bunch of pictures of my butt:

Ginger Jeans

Ginger Jeans

Ginger Jeans

Ginger Jeans

And some flat jeans shots:

Ginger Jeans

Ginger Jeans

Ginger Jeans

Ginger Jeans

Ginger Jeans

Everything was constructed on my Pfaff 7570, and topstitching was done on my Bernina 350PE. I used regular black poly thread for piecing, and Gutterman jeans topstitching thread for the topstitching. The aqua serging thread is just a fun color that matched my pocketing (which I got from the free fabric pile at A Gathering of Stitches because GOD it’s beautiful!) and my zipper (from the Garment District!). I wanted to add rivets, but they need to be trimmed down and I apparently don’t own wire cutters anymore, womp womp.

Overall: A+ jeans, would sew again (and I will – I have enough Cone Mills left to make a couple pairs of jorts! HA HA HA IT NEVER ENDS).

In closing, two things:

One, here is my Calvin Klein ~modeling~ shot. Can’t you see people just banging down my door to be a jeans model? Gah.

Ginger Jeans + Silk Tank

Two, the Spiegel 60609 winner! Yay! First of all, I cannot BELIEVE how many entries that giveaway got – over 1,100! That’s definitely the biggest one I’ve ever hosted on this blog (and I guess y’all agree with me that one should never say no to a free sewing machine, amirite). Thank you for blowing up my email last week and making me feel super duper popular haha. I enjoyed reading everyone’s comments – and yes, I read every single one of them! – but there can only be one winner:

winner1 winner2

Congratulations, thefilling!! I want to also mention that this comment filled me with delight – although, what is exactly is a snapback hat? (Can I see a picture? Can you tell me more about this cheeseburger print? We have a lot to discuss, dude) We will be in touch to get your new 60609 out to you ASAP 😀 😀 😀 Happy belated Valentine’s Day!

If you’re still trying to holler at the 60609, watch this space – I have some upcoming projects and tutorials that use the machine so you can see it in ~action~. And if you don’t care about the 60609, well, I hope you at least find the content interesting 🙂

Have a great day, everyone!

Completed: Fancy Silk Georgette + Brocade

2 Feb

Here’s something a little different than my normal meat-and-potatoes (mmm… meat and potatoes) sort of dressing – FANCY GARB. YAY!!

Silk Georgette B5526 + Stretch Brocade Circle Skirt

Also: SNOW! Like, holy shit it snowed soooo much last weekend! I had a nice snow-in for a few days (it’s true that Tennessee all but shuts down when the snow comes in – but, before you make fun: we don’t have snow tires, we don’t know how to drive in it, and the roads are not properly salted or cleared so they’re actually pretty dangerous. Also, come and deal with our 100* heat in August ffs. Ok, soapbox off haha), which was even better considering that I basically was in a Winter Wonderland. We ended up with a little over 6″ – y’all, I can’t even remember the last time I saw that much snow. Shit was crazy. Also, it all melted within like 3 days, and then the temps went back up to 65*. Yay I love Tennessee and it’s fickle weather haha.

Anyway, I wasn’t planning on taking snow pictures – it was obviously very very cold outside, and so bright that I could barely keep my eyes open (sorry in advance for all the squinty haha). But the indoor lighting was just terrible, so I took one for the team and tromped outside. You are welcome.

Ok, back to the real subject of this post!

Silk Georgette B5526 + Stretch Brocade Circle Skirt

I made these two pieces about a month apart, so I didn’t actually wear them together for NYE – although I definitely wanted to. Considering I didn’t start sewing for the party until a few days before the end of the year, I knew that shirt would not turn out nice if it was rushed. So I focused on the fancy skirt, and wore it with a fuzzy black sweater knit Renfrew (you can see a photo of the outfit on Instagram). It was the perfect New Year’s Eve outfit for my plans – reasonably warm, yet stylish, and had these big pockets so I could carry my phone, wallet and flask without worrying about a purse. Which, by the way, my phone ended up leaving my pocket at some point that night (I think it was more that it didn’t *make* it to the pocket, rather than leapt out on it’s own accord). Here’s the New Year’s Miracle, though – someone found it – in a pile of trash on Lower Broadway, apparently – and then returned it to me the next day. How awesome is that?! 2016, you’re off to a promising start! ♥

Silk Georgette B5526 + Stretch Brocade Circle Skirt

Silk Georgette B5526 + Stretch Brocade Circle Skirt

The metallic stretch brocade that I used for this skirt has been in my stash for a long time – over a year, at least (if not longer). I never knew what to do with it – it’s kind of thick, it has a really heavy stretch, and it’s pretty freaking fancy. I figured a pencil skirt or bodycon dress would be suitable, but I rarely wear stuff like that. When I was planning my NYE outfit, I decided to find a use for this stuff. I’ve been on a circle skirt kick lately, so that’s what I went with. I used my self-drafted circle skirt pattern (I used Casey’s circle skirt tutorial aaages ago, which I can’t seem to get a valid link to now 😦 There’s also the By Hand London circle skirt app, which does the maths for you!), pieced to include side seams and a center back seam. This was mainly due to fabric restrictions – I had only a yard of this fabric. It’s super wide, though, so I was just barely able to squeeze it out. I also knew I wanted an exposed zipper and side seam pockets, which mean seams were necessary. The waistband was cut so the greatest amount of stretch ran along the length; I stabilized it with a piece of stretch interfacing to retain that comfy-ass stretch. Yeah man, it’s comfy.

Silk Georgette B5526 + Stretch Brocade Circle Skirt

Sewing was easy, and relatively straightforward. My only complaints are that this fabric frays like a MOTHER, and it’s basically all polyester so it’s a nightmare to get a good press. For the fraying, I serged each seam separately to minimize the fuzz potential. For the pressing, I just used my super awesome, super hot gravity feed iron and then just held the seams in place with my clapper until they cooled. One thing I will note is that my iron has a shoe (basically a cover that acts as a press cloth), which keeps things from melting. If your iron does not have a shoe, you’ll want to use a press cloth on poly fabrics + high heat. Otherwise, melting will happen!

Silk Georgette B5526 + Stretch Brocade Circle Skirt

Silk Georgette B5526 + Stretch Brocade Circle Skirt

Silk Georgette B5526 + Stretch Brocade Circle Skirt

Silk Georgette B5526 + Stretch Brocade Circle Skirt

I thought an exposed metal zipper would look cool next to the fancy brocade, so I pulled a metal zip from my stash and used Megan Nielsen’s method to insert it (these are the same instructions that are included with the Brumby pattern, fyi). The pockets are silk crepe, also pulled from my stash. Nothing like using silk pockets to stow your whiskey amirite 🙂

Silk Georgette B5526 + Stretch Brocade Circle Skirt

This past month, I finally gathered up all my cojones and made the intended matching shirt. Remember when I made Butterick 5526 in silk Georgette? I want to hate that shirt so bad – it’s pretty poorly constructed, I mean, that fabric was EVIL – but every time I put it on, I can’t deny that I like the way it looks. I want more floaty button-ups in my closet. I figured enough time had passed to forget the trauma, and I tried again, this time with much more success.

Silk Georgette B5526 + Stretch Brocade Circle Skirt

There are two major factors that contributed to the success of this version of B5526 in silk Georgette. First of all, I chose the fabric in-person, rather than blindly ordering online. Which means I don’t have a link for the exact fabric I used – I bought it at the Mood Fabrics in NYC when I was there in November. I have since ordered some swatches from the website, and it’s definitely not the same fabric as what I have here. Mine is more like a double Georgette – it’s much thicker, and less see-through (I’m not wearing anything under this top, except a bra. I think it’s a nude bra, but I’ve worn a black one underneath too and no one has noticed, HA!). That alone made a world of difference in handling the fabric. I also prewashed it in the washing machine/dryer (just a cold wash, ma’am!), which helped beef it up a little more. The second factor is that I used a spray stabilizer on my fabric before cutting or sewing. I’ve heard of people using a spray stabilizer – and allegedly, you can also soak your fabric in unflavored gelatin for the same effect, although I haven’t personally tried this yet – but I never cared to try it myself because I wanted to be able to tackle the fabric without any outside help. Also, a can of that shit is like $12, which is way too rich for my blood (says the girl who is currently looking at $45/yard silk faille lolwut). It just seemed silly and unnecessary. I always felt like using outside tools like that almost negated my skills as a seamstress, but you know what? That’s not true. It’s not any different than using a special presser foot to get good edgestitching. Whatever works… it just works. And that’s ok.

I am not going to go into too much talk about using spray stabilizer because this was my first experience with it – and I want to try it a few more times before I give it a big write-up (aka I don’t want to eat my words later haha). But I will say that it REALLY changed how the fabric handled, in a good way. Instead of it slipping around like butterfly wings, it held more like a silk organza. It made cutting things straight much more easy, and the shirt fits better as a result. I think my topstitching looks really good, and all those fiddly pieces weren’t quite as fiddly. Spray stabilizer isn’t going to turn your silk into quilting cotton – you still need some finesse with those fine layers – but it helps tremendously. It won’t work for anything that you can’t wash it out of – such as a coat lining (unless, I guess, you assembled the lining separately and then wash/dry it before putting it in the coat?) – but it’s perfect for this sort of project. These photos are post-washing, so it has the proper drape, fyi. I soaked it in the sink with some lingerie wash, hung it to dry, and then re-pressed. I have since worn the shirt and washed it in the normal wash, and it’s held up fine.

Silk Georgette B5526 + Stretch Brocade Circle Skirt

Silk Georgette B5526 + Stretch Brocade Circle Skirt

All that being said, I don’t think there’s much else to say about the sewing of this shirt. I’ve made it like a dozen times at this point, so there’s nothing new for B5526. The shirt is constructed with French seams and I used a very lightweight interfacing to stabilize while retaining that beautiful drape. I added buttons and button tabs to the sleeves, so I can wear this shit into the warmer weather. Yay!

Silk Georgette B5526 + Stretch Brocade Circle Skirt

Silk Georgette B5526 + Stretch Brocade Circle Skirt

Silk Georgette B5526 + Stretch Brocade Circle Skirt

Silk Georgette B5526 + Stretch Brocade Circle Skirt

Silk Georgette B5526 + Stretch Brocade Circle Skirt

Silk Georgette B5526 + Stretch Brocade Circle Skirt

I finally go to use some of my fancy vintage glass buttons for this top – yay! I didn’t have quite enough, so I had to mix them. There are beautiful black/green/gold Art Deco buttons for the front placket and sleeve tabs, and then solid black faceted buttons for the cuffs and collar. The white buttons you see on the inside of the placket prevent gaping at the boobs (I can’t take credit for this tip – I got it from Emmie and Jane). Speaking of which, if I’m getting boob gape… that probably means I need to start doing a FBA to my pattern. Sigh. Or else just keep adding hidden buttons hahaha.

Silk Georgette B5526 + Stretch Brocade Circle Skirt

I think I’ve run out of things to talk about with this outfit, so I’ll wrap up. What’s your best tip for sewing the slinky? Have you tried spray stabilizer? Hey, how was your New Year’s Eve, anyway?

Note: Fabrics were purchased with my monthly allowance for the Mood Sewing Network. Also, there are affiliate links in this post FYI. Click at yo’ own risk.

Completed: The Agnes Dress

20 Jan

I’m still trying to catch up on my last projects from 2015! Although I’m glad I waited to post this one because:
1. I got new shoes and I think they look pretty awesome with this dress
2. Such a good hair day for these photos. As a result, there are extra pictures in this post. No apologies for that!

T&TB Agnes Dress

Anyway, let’s talk about the dress itself because that’s why y’all are here! I tried something newish for this project in terms of silhouette and I gotta say – I’m pretty happy with how it turned out! I don’t normally like the way gathered skirts look on me, and strong shoulders always make me feel like I’m wearing someone’s mom’s old clothes (not my mom, though, she’s a pretty sharp dresser hahah), but this dress does me good! I made it to wear during recently-ended holiday season – the thin jersey isn’t necessarily appropriate for cold weather, but we had a 70*F Christmas down here in Tennessee, so it suited me just fine at the end of 2015! Of course, now we’re in for the serious cold snap (you can’t tell in the pictures, but it was COLD outside when I took these! Like below freezing, eep), so I currently can’t wear it because it’s simply not warm enough!

T&TB Agnes Dress

T&TB Agnes Dress

To make this dress, I used the Agnes shirt pattern from Tilly and the Buttons. I love special and unique details on an otherwise plain knit tshirt, and this pattern is pretty good for that! I love the runching at the neckline and sleeves, and the shape is really fitted and flattering for me. I have made this top before (there’s not a full post – but I’m wearing it with my 70s denim skirt), so I had a good idea of how it was going to fit. My own complaint with the first version is that the armholes were too high on me, and thus a little uncomfortable. I lowered the armholes by about 1/2″, using my adjusted Renfrew tshirt pattern as a comparison. Size is right between a 1 & 2, which suits me pretty well for this pattern line.

Now, the pattern only gives you an option to make a top – and this is a dress, obviously. I confess that I didn’t even consider Dress Possibility until Tilly posted this tutorial for making an Agnes dress. SCORE. How cute does she look in those photos, btw?! Oh god I just realized our outfits are pretty similar hahahaha!

Anyway, it’s an easy change to turn this into a dress. Cut the pattern piece at the waistline (or where you want the waist to hit – I used my Lady Skater bodice as a guide, personally), sew up the shirt, and then add a gathered skirt (literally, a rectangle that is the width of your fabric + whatever length you want). I stabilized the shoulders and waistline with 1/4″ elastic, just so everything would stay in place and not stretch out (I learned the waistline elastic trick from the instructions in my Lady Skater pattern and it’s THE BEST. Keeps the skirt from pulling the bodice down with it’s weight and making things all saggy). Everything was pieced on my serger, and all the topstitching is done with a plain straight stitch. Easyyyyy. So fast! I finished in like 2 hours and actually wore the dress out that night 😀

T&TB Agnes Dress

T&TB Agnes Dress

T&TB Agnes Dress

As I mentioned, I don’t really care for the way gathered skirts look on me – I think they add unnecessary bulk. But I do like the way this one mimics the gathers and fullness at the sleeves. I think the key is to use a fabric that is a lighter weight and has some drape. Then you get soft gathers, instead of big, weird bulk.

T&TB Agnes Dress

T&TB Agnes Dress

T&TB Agnes Dress

The fabric I used here is from Lillestoff. I’d never heard of this company before, but they are located in Germany and offer some really nice, high-quality organic cotton knits. They reached out to me several months ago and ended up sending me a few of their fabrics to try out. I can’t find this star print on the website anymore, but it’s pretty awesome. It’s a lighter weight without being sheer, and it has a good drape that looks fantastic with the gathers in this pattern. I was impressed with all the stuff I got – the colors are nice and saturated, and the fabrics are soooo soft. They wash well and have a good recovery when you wear them, so they tend to hold their shape. I also have a hoodie that I recently made with some of their French terry, gotta remember to get photos of that!

I originally earmarked this piece for another Lady Skater dress (linking because I’ve officially mentioned that pattern 3x in this post now hhahaha), but changed my mind to make something with a little more ~pizzazz~. Don’t get me wrong – I love me some LS, but sometimes a plain dress is a plain dress and sometimes you need those details! I guess that’s one downside to this particular dress – I can’t make a dozen of them without people noticing that I’m using the same pattern over and over again. Oh well I’ll probably do it anyway hahahahahah

T&TB Agnes Dress

If you can’t stop staring at that ONE long rogue hair, just know that I can’t either.

T&TB Agnes Dress

Detail shot – the neckline and sleeve runching is done with 1/4″ elastic, btw! You cut it to length, and zigzag it down while stretching it to the max. When it snaps back, you have lovely yet easy runching!

T&TB Agnes Dress

Ok, I think that’s enough talk about one dress. Here’s a picture of me being cold hahaha. Have you ever sewn with Lillestoff fabrics, and if so – what do you think about them? When I posted on Instagram, people were going NUTS. Apparently they have a pretty die-hard fan base 🙂

Note: The fabric for this dress was given to me by Lillestoff. And the pattern was given to me by Tilly! Free or not, all opinions are my own 🙂

Coral Lace Watson Bra (+ upcoming workshops!)

15 Jan

Coming back after a hiatus – even if it’s a mere 2 weeks – always feels a little awkward writing that first sentence. I have missed you guys, though! Thank you so much for all your thoughtful comments + general encouragement on my last post – I appreciate every single one of you! ♥

Before I bring in the fun underwear portion of this post, I want to address a few orders of business first. Promise I’ll be quick!

Peach Lace Watson Bra
But first, a bra to tempt you to stick around. Ooh la la! Enjoy that butt view in the mirror, too.

ONE I am having a difficult time contacting one of the winners from our Shutters & Shuttles giveaway in December, Shesewsswell. Both Allison & I have sent emails and we haven’t heard a peep back 😦 Neither of us are terribly keen on the idea of passing the prize on to someone else just yet (I would feel absolutely rotten if it turned out those emails went to a spam filter or something), but we will need to if we don’t get a response from the original winner. SO, Shesewsswell, pleaseeeee contact me at lladybirdlauren at gmail to claim your prize! There is a beautiful piece of handwoven, Nashville-made fabric waiting for you 🙂 UPDATE: Found her! Yay! 😀

TWO Upcoming workshops! First one is in March in Brooklyn, NY! I’ll be coming into town to teach the Weekend Pants Making Intensive at WORKROOM SOCIAL, which, if you’ve heard me talk about this class before – you know I’m pumped about it! This is a fun, 2 day class (3/19 & 3/20) at WORKROOM SOCIAL studios in Brooklyn, where we will cover all the basics of making a fine pair of pants – from basic fitting, to following the pattern, to all the little details that make pants look, well, like pants 🙂 This is a really popular class and it always sells out pretty fast, so if you want a spot you better act fast! We also have an afternoon of fabric shopping in the Garment District the Friday before, for those who need some guidance with selecting their pants fabric – or just want to take advantage of a Garment District tour and all the discounts! All the info for the class + shopping trip are on the WORKROOM SOCIAL website, as well as where to sign up! If you want to learn more about the class from my perspective, here’s a post I wrote about the first one I did (wow, that was a long time ago!).

THREE Other workshop! In April, I’ll be in Portland, ME, to teach another open-sewing weekend at A Gathering of Stitches! I had SOOO much fun teaching this open workshop last year, and I’m super delighted to come back for a second round! The workshop is in Portland, ME, and starts Wednesday, April 13 for a pizza + booze get to know you night, then four days (4/14 – 4/17) of awesome fun sewing times! What I love most about this workshop is that it isn’t specific project-based – you get to pick whatever project you want to bring, and sew away in the beautiful shared space, use the cool equipment (like the gravity feed iron), and hang out and socialize with everyone else. And, of course, I’ll be on hand to provide assistance and ~expertise~, as well as comic relief and general cheerleading 🙂 Whether you want to make a pair of jeans, tailor a coat, whip up a bra, get some help with fitting and making muslins, or just want to take a solo sewing hobby and make it social for a weekend – this is the class for you! Plus, Maine is SUPER beautiful (truth, if it weren’t for the winters, my southern ass would figure out a way to move there in a heartbeat. I already have my house picked out and everything haha) and full of such delicious food. For more info on the class, visit A Gathering of Stitches. Official registration isn’t live until February 8th at 12PM EST, fyi, but this gives some time to plan and save before worrying that it will sell out 🙂 (it sold out last time. Actually, we oversold! Whoops! I loved all 11 of y’all though! ♥). If you want to read a brief write-up of my experience with the class last year, you can find that here.

Ok, that’s enough housekeeping! Onwards to the undies 😀

Peach Lace Watson Bra

Peach Lace Watson Bra

Actually, I don’t have too much to say about this project so I’ll keep this (relatively) short! This is another Watson Bra, which is a non-underwired soft bra pattern. Perfect for a first bra project, I think! The fabric + notions are a kit from Tailor Made Shop, which is one of my favorite sources for bra kits and supplies. Everything is sooo nice and the kits are just beautiful! The particular kit I used is for coral and light pink, which doesn’t appear to be available anymore, but this one is pretty similar. And this yellow one is awesome. Ok, enough, Lauren!

Peach Lace Watson Bra

I love the effect of the scalloped lace, and I wanted to use that to my advantage with this bra. This makes for some finicky cutting – not only do you have to be sure that you’re cutting the right edge along the scallops, but it’s also nice to mirror them so everything is balanced. Having made this pattern before with scalloped navy lace, I used that knowledge to make the coral lace. The elastics along the scallops are sewn flat and not turned back (such as what you’d do with a picot edged elastic), so the lace retains the scallops. Since the lace is pretty stretchy, I underlined the entire bra with the included powermesh. There was plenty of fabric in the kit for all this – I even have some left over 🙂 I guess I could make some matching undies, but realistically, I probably won’t. I have realized that I don’t like sewing underwear. It’s just… meh.

Peach Lace Watson Bra

Peach Lace Watson Bra

Peach Lace Watson Bra

Peach Lace Watson Bra

For the pattern, I used my normal size 30D and made the version with the normal band (i.e., not the long-line). Sewing the bottom elastic was a little tricky since there’s not much real estate to work with there – I used the included picot that came with the kit, since it was narrower than the 1″ stuff I used on my navy lace version, and that helped a little. I had originally requested the kit with the 3 row hook and eye, thinking that I’d make a longline – but changed my mind and thus had to change the hook and eye. I noticed that RTW bras just zigzag along the top of the hook and eye, so that’s what I did with this one after I trimmed it down. Then I melted the edges with a lighter to really smooth them out (it’s poly, so it works). I don’t think you can even tell there was a surgery on that thing. Go me.

Fit-wise, this one is ok. It’s not nearly as awesome and supportive as the longline versions – which I had suspected would be the case, especially since there’s no underwire to bear the brunt of the support. If I tighten to the tightest hook, it does help some. I reckon this short style is just better suited for smaller cup sizes. If you’re rocking a D or larger (or maybe even a really full C), you probably want to stick with the longline so you can take advantage of that support. It really makes a difference!

This is mostly a bra for lounging around and being all fancy in-house, because it’s PRETTY comfy. And it’s really beautiful on! I think lace bras with scalloped edges are just beautiful regardless, but this one is a lovely shape and the colors are just fantastic. I really love that the kits have different colored elastics that all match the lace, and that the hardware (rings + sliders + hooks + eyes) are metal. Even the strap elastic is fancy. LOVE ALL OF IT.

Peach Lace Watson Bra

So anyway, there’s that. Happy first post of 2016! 😀 😀 😀 Who’s got bra making on their reSEWlution list this year (I am so sorry about that awful word haha)? Who’s coming to NY or Portland? Shesewsswell, where areeeee you? Let’s talk!

Note: the supplies (bra kit) for this project were given to me by the Tailor Made Shop. The Watson bra pattern, however, was purchased by me! And all gushing is 100% my opinion 😉

Completed: The American Flannel Archer

28 Dec

Another Archer for my winter wardrobe! Yay!

Flannel Archer shirt

I actually finished this shirt nearly 2 months ago, but here I am just now getting around to posting it. I’d apologize for the delay, but honestly, I’m not sorry. It is what it is. On the flip side, I’ve been able to wear it plenty since completion, so I can actually comment on the fit from the perspective of wearing it all day. On the other hand, I’ve already made a bunch of Archers so it’s not like this is some kind of breaking news in my personal pattern collection.

Flannel Archer shirt

Flannel Archer shirt

Since I’ve made this pattern multiple times (see: one two three… well damn, there’s another one somewhere but I can’t find it oh well), I’ll spare you the nitty gritty. Like my previous versions, I cut a size 0, sewed the side seams at 5/8″ and flat-felled all the seams for a nice clean finish on the inside. The buttons are just standard shirting buttons that I had in my stash, and I matched the plaid everywhere except on the back yoke and the pockets, which are cut on the bias. Oh, and I used the pocket piece from my Negroni pattern. It looks like it belongs on a western shirt, and I like that.

Flannel Archer shirt

I really love this fabric, but this particular shirt almost didn’t happen. See, back when I bought flannel from fabric.com for my Carolyn Pajamas, I added a few yards of this Robert Kaufman Mammoth Plaid flannel to my cart so I’d qualify for free shipping (because I just love saving money when it means I have to spend more money first :P). A few days after I placed the order, I received an email from Fabric.com saying that they didn’t have the 3 yards I requested, but they did have 3 cuts (totaling around 1.5-2 yards) of a smaller amount if I wanted that. I didn’t think I’d be able to cut a shirt – let alone plaid-match – out of that small of an amount, so I picked a different plaid from the site and asked them to just change my order. When I received my order processing notification, it said I was only getting 1 yard of the new flannel (not 3, like I’d asked for in the email). I had to call the company and sort things out, and while all this was happening – they completely sold out of my back-up flannel! Argh!! Obviously, that shit wasn’t in the cards for me. I told them to cancel the second cut of flannel and just send me the original piece that I needed to finish my pajamas (which they thankfully still had! Pretty sure I bought the last of it). I was refunded for the 3 yards that were out of stock and I got free shipping too. Cool!

And then they ended up giving me the off-cuts anyway, for free. Just threw them in the package where I was surprised (but also happy because, YAY FREE FABRIC) to find them hanging out with my actual order. That’s cool, I ain’t complaining.

Flannel Archer shirt

Flannel Archer shirt

Since I had the fabric, I decided to try my original plan and make that Archer. Like I said, had 3 cuts – one was a full yard, one was a half yard, and the last was a bit less than half a yard (I’m sorry I don’t remember the exact amounts, but it was a while ago and my order history on the site doesn’t reflect the freeb). It took some ninja cutting skills to cut everything so that the plaid lines matched, but I did manage for the most part. Cutting everything on the single layer helped immensely. That being said, I was still a tiny bit short on one of the fronts, so I ended up having to piece it and there is an extra seam. It’s only a little noticeable, but, again, free flannel shirt. Not complaining.

Flannel Archer shirt

You can see the piecing here, sort of. The top seam that I’m pointing to is the actual shoulder seam. The bottom seam is the result of piecing. By carefully matching the plaids and flat-felling the seam, I was able to get it to blend pretty well.

Flannel Archer shirt

Another minor complaint is that I wasn’t able to properly match the sleeves. The lines of the plaid are uninterrupted, which is good, but the sleeves themselves are not sleeve twins. Again, fabric restrictions. Again, free flannel shirt. Not complaining.

Flannel Archer shirt

Here’s a crappy picture of the inside, in all it’s flat-felled glory. Yay!

Flannel Archer shirt

This flannel shirt is a bit different than my other ones, since the fabric is SO thick. It almost feels like I’m wearing a light jacket, as opposed to a shirt. It’s pretty awesome and super snuggly. The fit is a little more boxy, too, since this fabric doesn’t drape as well as a shirting plaid flannel. I’m pretty ok with that, though! It works well with leggings (shown here with navy Ooh La Leggings which btw FAVORITE comfy lounge legging pattern, hands down!), but also looks good with jeans. I almost wish I’d put in pearl snaps instead of regular buttons, because I really like Hulking out of my clothes, but I think the fabric is just too thick for pearl snaps. But at least I resemble an American Flag! Can’t be mad about that, not one bit.

Oh, right, and I have some winners from the Shutters & Shuttles giveaway a couple of weeks ago! First, thanks for all your awesome comments on that post – Allison and I both really enjoyed reading through them and see what you’d do with the fabric 😀 (even if it just makes me want more of that fabric now so I can steal your ideas). Second, the plural “winners” is not a typo – there are two of you! A little belated Christmas bonus and all that 🙂 Sooo congratulations are in order to both shesewsswell and Samantha! I hope you ladies love this fabulous fabric, and I cannot WAIT to see what you make up with it! ♥