OAL: Sewing Sleeves or Bias Facing

23 Jun

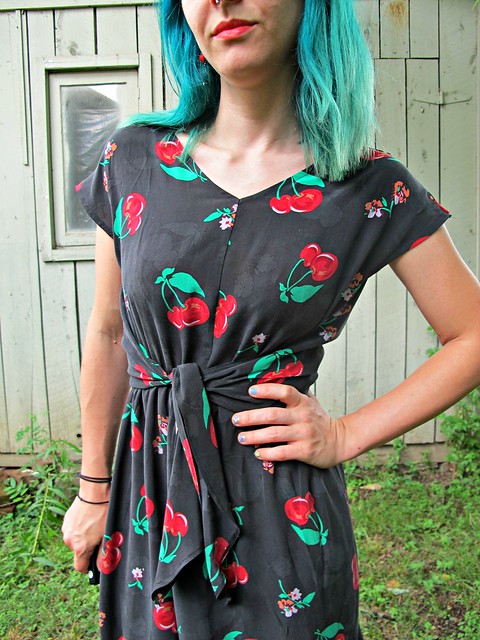
Hiya OAL-gers! Today we are going to attach our sleeves and/or finish our arm hole edges with bias facing (depending on which version of the bodice you are sewing). Again, this is a long, picture-heavy post, so sorry! I will be covering my favorite way to sew bias facing (as I mentioned in my silk cherry Vogue 1395 post last week), so you may want to check this out even if you’re not sewing along with us 🙂

For the version with sleeves, read on!

OAL 2014 - Sleeves and Bias Binding
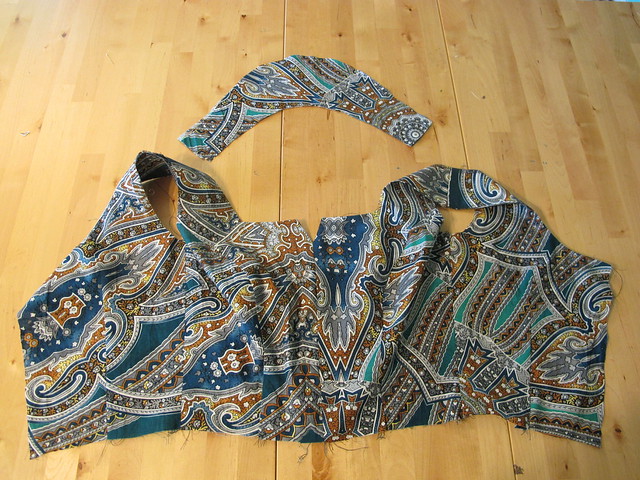
You should have a bodice and two sleeves. If you have not already done so, you may want to baste the edges of the facing along the arm hole, as that will all get attached in just a moment.

OAL 2014 - Sleeves and Bias Binding
Make sure your pleat markings for the sleeves are marked on the RIGHT SIDE of the fabric. I used chalk so it will just brush out and not leave a permanent mark.

OAL 2014 - Sleeves and Bias Binding
To form the pleat the top of the sleeve, fold the fabric exactly along the solid line and bring it to the dashed center line. Pin in place. Do this for both sides, forming two pleats.

OAL 2014 - Sleeves and Bias Binding
Baste the pleats into place.

OAL 2014 - Sleeves and Bias Binding
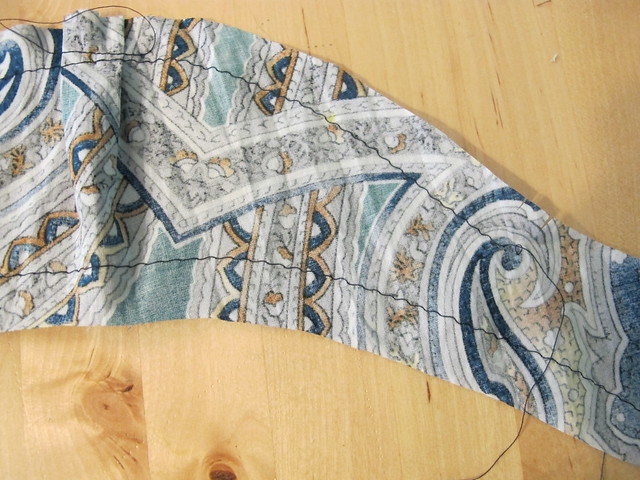
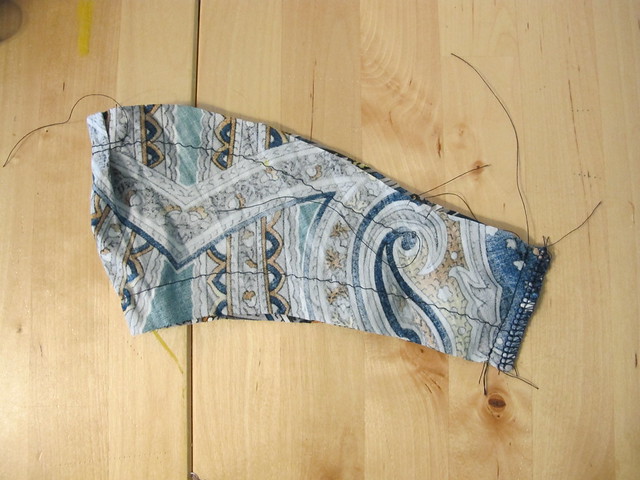
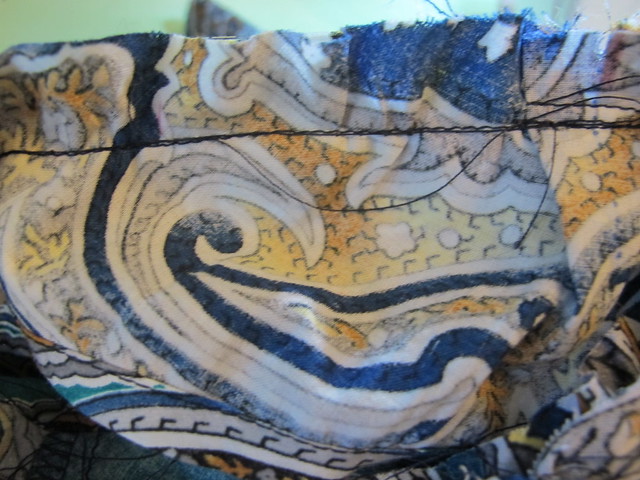
Now you are going to sew two lines of basting stitches. The first line of stitching is along the curve of the sleeve cap, starting at one set of notches and ending at the opposite set, at exactly 5/8″ from the raw edge*. Leave long thread tails. This basting will be used to ease the sleeve into the arm hole. The second line of stitching is along the hem edge of the sleeve, from end to end, at 5/8″ as well. This basting will be used to hem the sleeve. You can leave it off if you feel confident in your sleeve-hemming skills, though!
* Note: Lots of people like to ease their sleeves in with two lines of basting, at 5/8″ and 1/2″. You are more than welcome to do that if that’s your jam, but I’ve found that I get much more gentle easing with less puckering if I use one line at 5/8″. Totally up to you!

OAL 2014 - Sleeves and Bias Binding
Sew the underarm seam of the sleeve, right sides together. Finish the edges and press.

OAL 2014 - Sleeves and Bias Binding
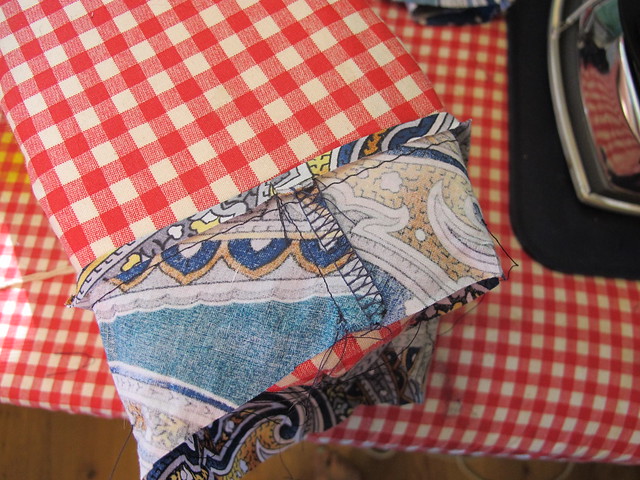
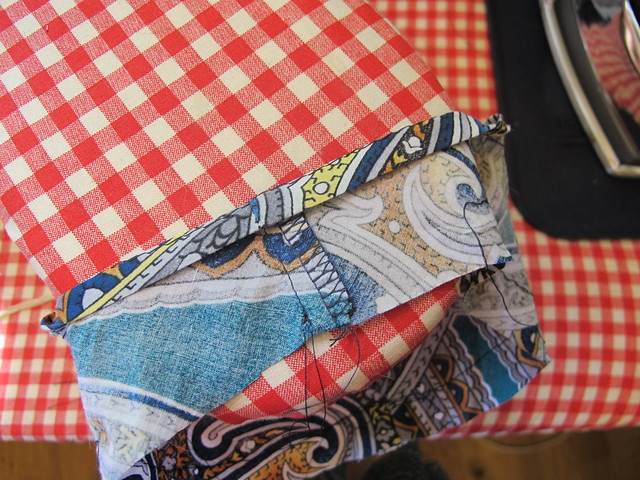
To hem the sleeve, first fold up the bottom edge 1/4″ and press. Fold up the remaining hem allowance, exactly along the line of basting stitches that you created, and press again. All raw edges should be encased inside the hem at this point.

OAL 2014 - Sleeves and Bias Binding
Topstitch the sleeve hem into place and press again. If you’d like, you may use a slightly long stitch length (I use 3.0 to my normal 2.5) – I personally just think it looks a little nicer 🙂

OAL 2014 - Sleeves and Bias Binding
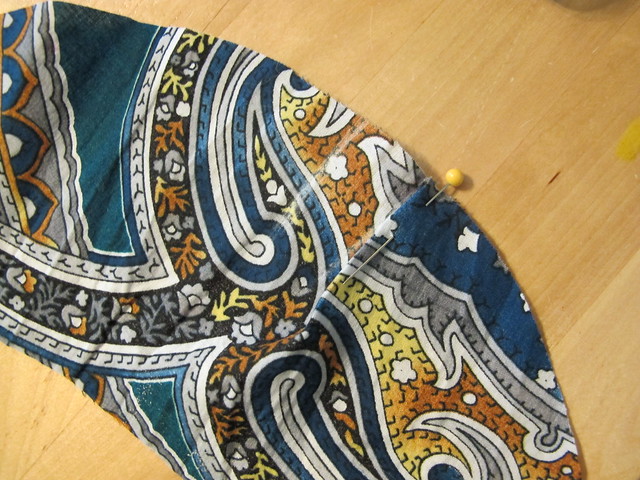
Time to stick that shit in the arm hole! Starting at the bottom, match up the side seam with the underarm seam, and match the notches. Match the dashed line at the sleeve cap (the one that both pleats are folded to) to the shoulder seam. Your sleeve will be obviously too big for the arm hole, that’s fine, we are going to fix that.

OAL 2014 - Sleeves and Bias Binding
Very gently pull the line of basting stitches, easing the sleeve excess to fit the arm hole. We don’t want to create big gathers here – we just want the sleeve to be a little smaller so it fits smoothly. Once you’ve got the sleeve eased in, pin everything into place.
* Note: Easing sleeves can be a little difficult! These sleeves will ease in smoothly, but if you are having problems with puckers, you may want to open up your pleats at the top of the sleeve and make them a little bit deeper. That’ll use up some of the excess ease 🙂 Don’t go too crazy with that, though, as you do need a little bit of easing so the sleeve has a pretty curve and enables you to move your arms around and all that.

OAL 2014 - Sleeves and Bias Binding
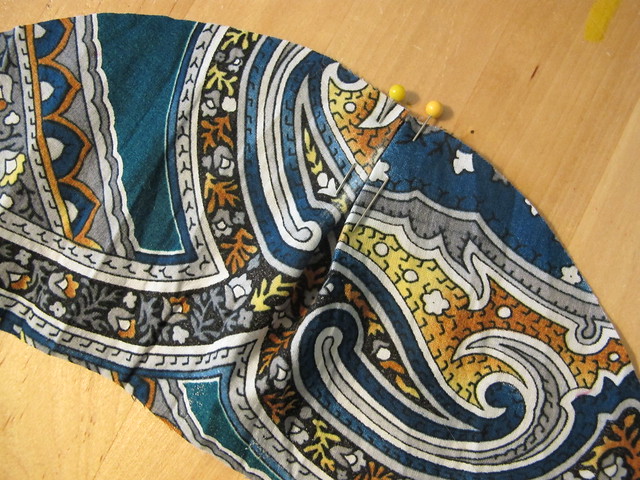
Now you can sew the sleeve in! Sew exactly along the 5/8″ line of basting, being careful to make sure there are no puckers or gathers and that your sleeve in eased in smoothly. I like to sew my sleeves in with the gathered side facing up – that way, I can periodically lower my needle, raise the presser foot, and adjust the easing as I go.

OAL 2014 - Sleeves and Bias Binding
Once you’ve got the sleeve sewn in, double check both sides to be sure that there is no gathering or puckering. Your sleeve will probably have a bunch of excess at the seam allowance like I have here – that’s fine! As long as it’s smooth at the stitching line 🙂 Now go ahead and finish your seams.
* Note: The instructions tell you to sew a second line of stitching right by the first one. Honestly, I’ve never done this before – even before I had a serger – and I’ve never caused a Sewing Apocalypse, so take that as you will.

OAL 2014 - Sleeves and Bias Binding
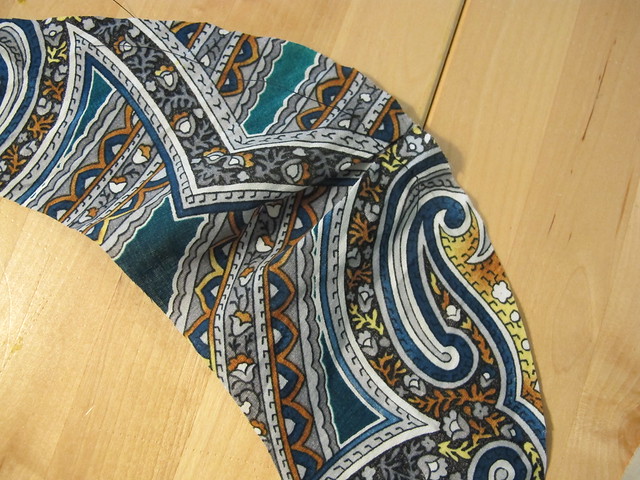
Press the seam allowances (I press toward the bodice) and steam the sleeve cap to remove any excess fullness.

OAL 2014 - Sleeves and Bias Binding
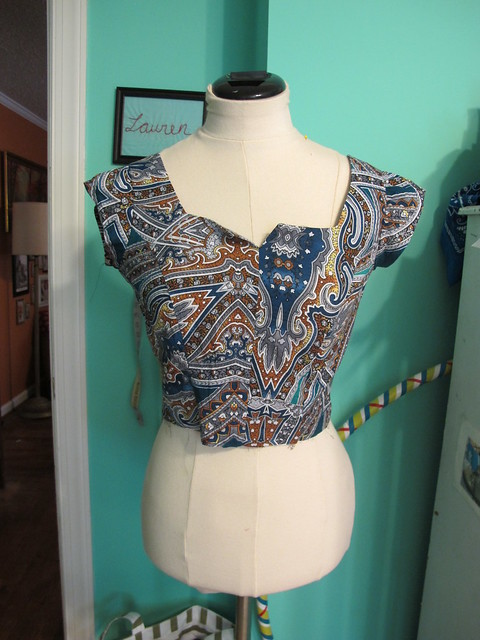
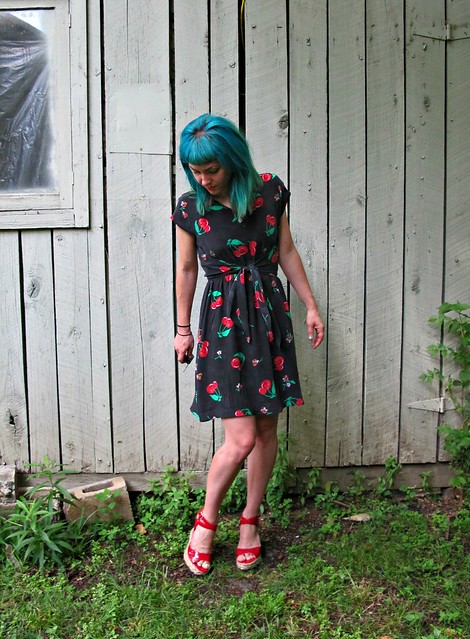
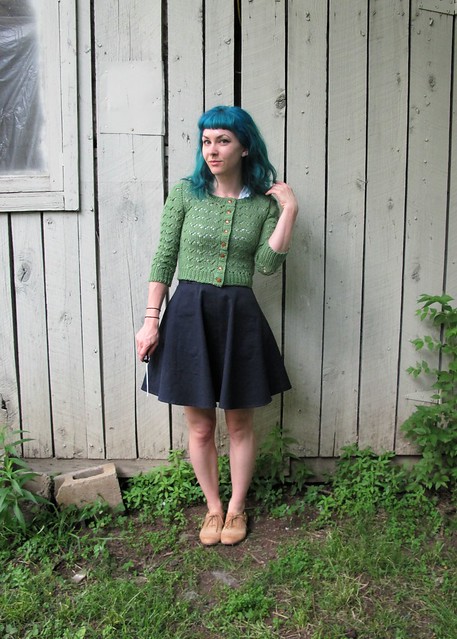
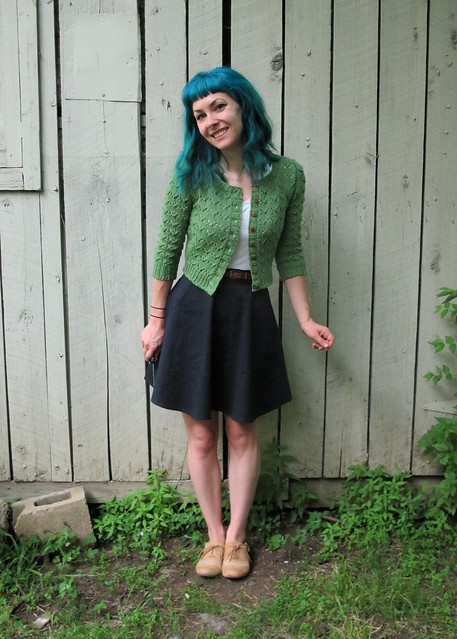
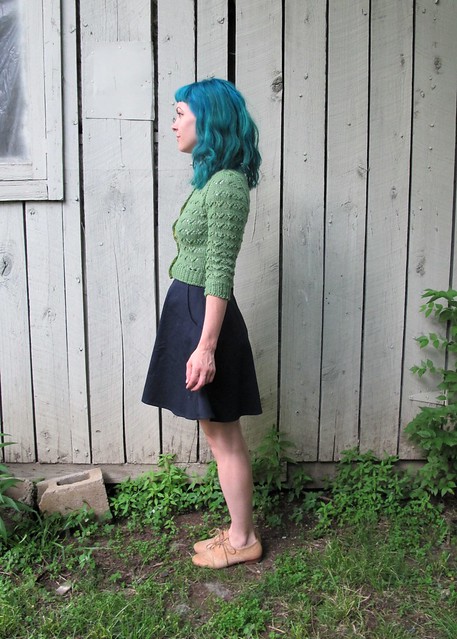
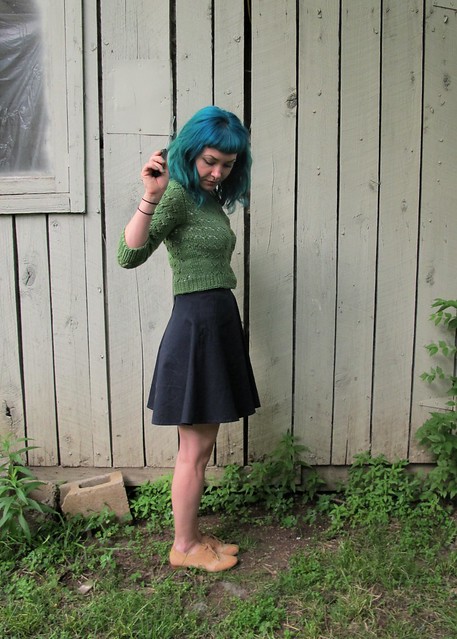
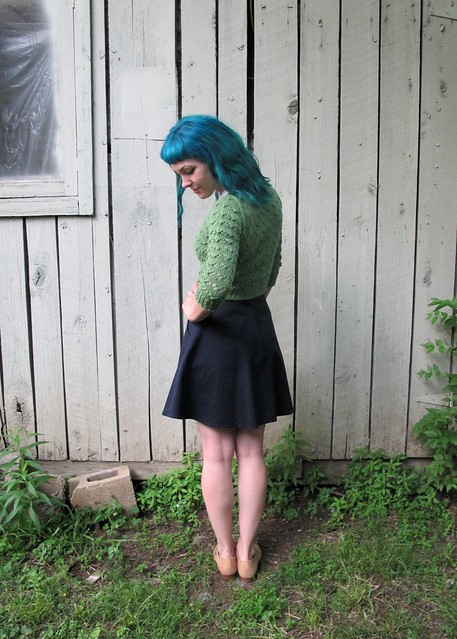
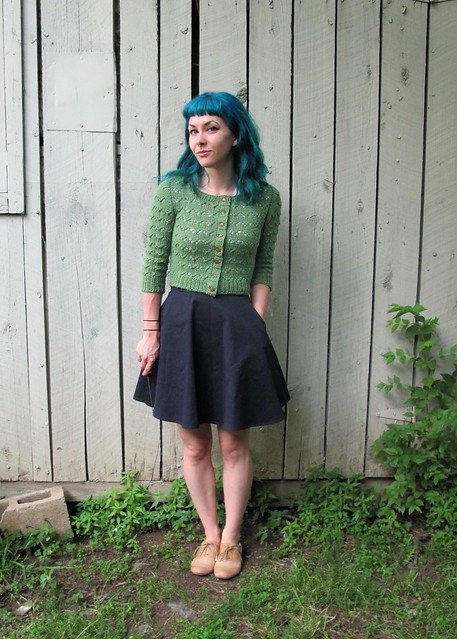
Finished: Cute little cap sleeves! Yeeeahhh!!

For the sleeveless, read on for the bias facing tutorial!

OAL 2014 - Sleeves and Bias Binding
The first thing we want to do is remove some of the seam allowance from the arm hole of our bodices. This bodice is designed to be sewn with a 5/8″ seam allowance, and we will be attaching our bias strips at 1/4″. So you’ll want to shave off about 3/8″ from the entire circumference of the arm hole.

OAL 2014 - Sleeves and Bias Binding
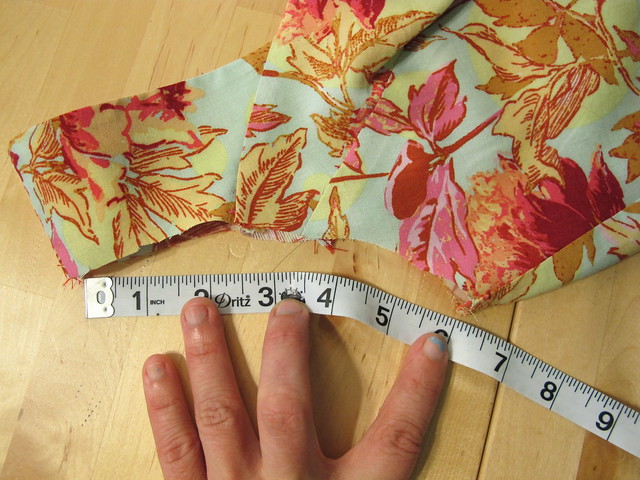
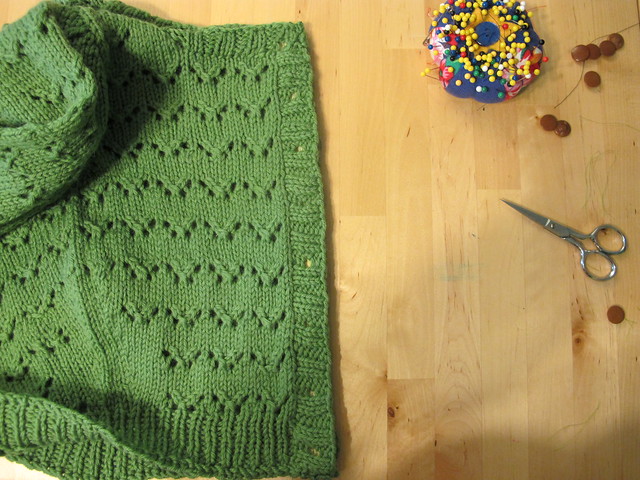
Now measure the arm hole, so you know how long to cut your bias strips.

OAL 2014 - Sleeves and Bias Binding
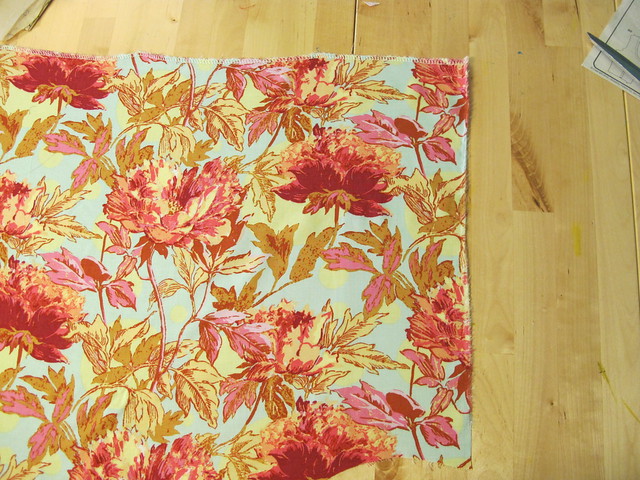
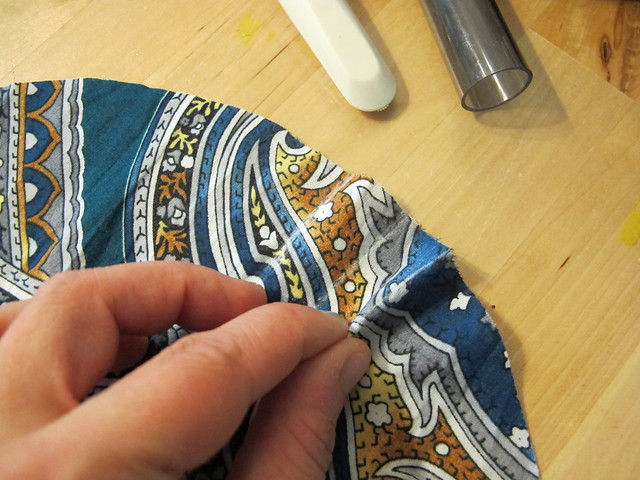
Next, we are going to cut bias strips from our fashion fabric (or cool contrasty fabric, if you want!). There are lots of tutorials on how to do this; I am just showing you my preferred method 🙂 Start with a piece of fabric that has two straight edges at a right angle. For the cross grain, you can just rip your fabric, which will give you a perfect straight edge without cutting.

OAL 2014 - Sleeves and Bias Binding
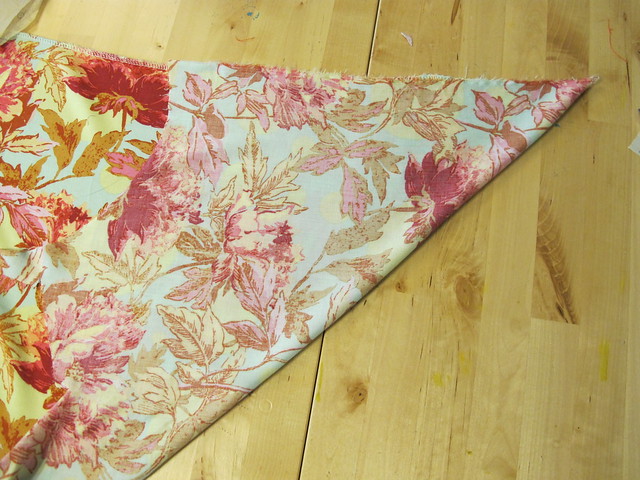
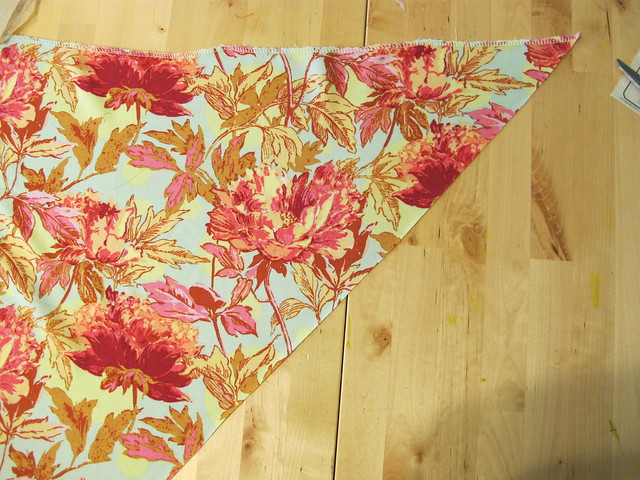
Fold the ripped edge up to meet the top straight edge, thus forming a diagonal line. Cut along the diagonal line (you may want to gently press first, if you need a guideline); you have just created a bias edge.

OAL 2014 - Sleeves and Bias Binding
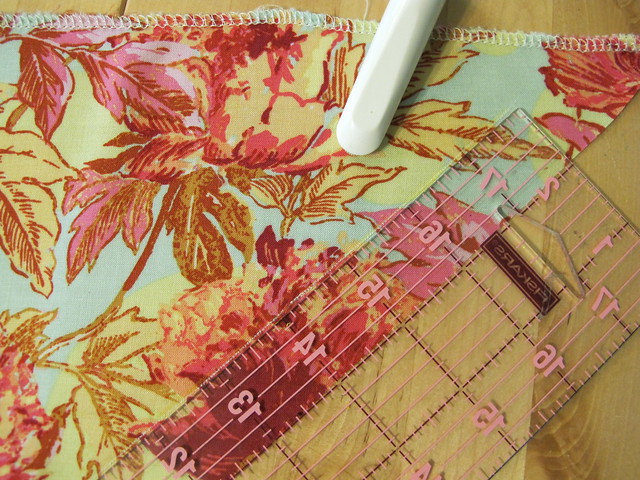
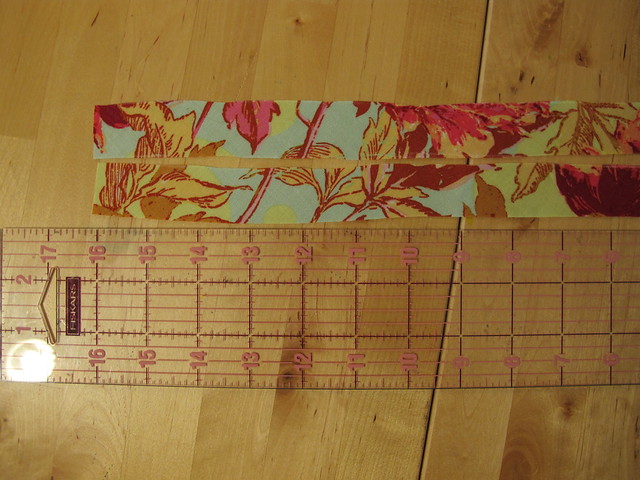
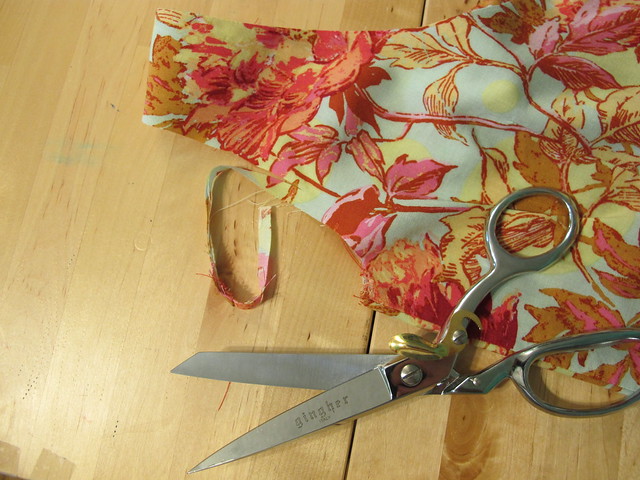
Now cut two strips on the diagonal/bias – 1″ wide and the length of your arm hole measurement. I like to draw my lines with chalk and cut with scissors; you can also use a ruler and rotary cutter if that’s your jam.

OAL 2014 - Sleeves and Bias Binding
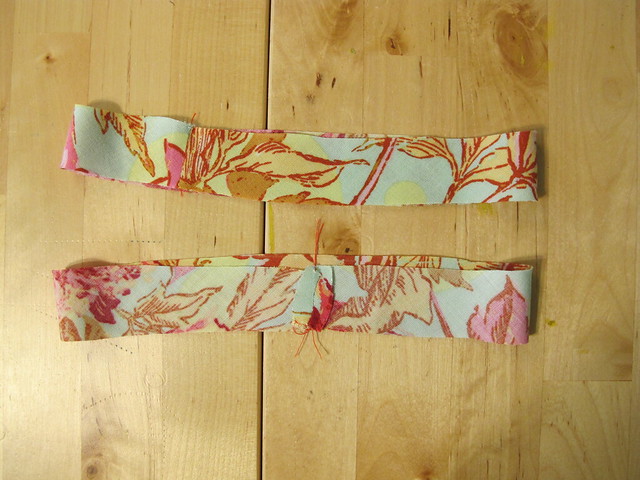
Sew each little bias strip into a circle with the right sides together, using a 1/4″ seam allowance. Press the seam allowances open.

OAL 2014 - Sleeves and Bias Binding
Next, we want to make sure the facing will fit inside the arm hole before we actually sew it in. *Generally* speaking, most bias facing is fine at 1/2″ shorter than the measurement of what it’s being sewn into (which is why we cut our strips at the measurement of the arm hole – 1/4″ seam allowance x2 = 1/2″), but some stretchier fabrics – such as my rayon challis – require a shorter bias strip. So we are going to check that measurement now. This pinning/sectioning also makes it easier to sew the bias strips in if you’re a newb.
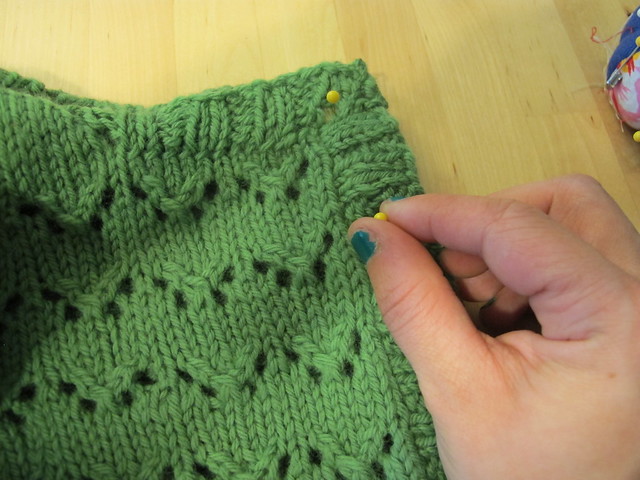
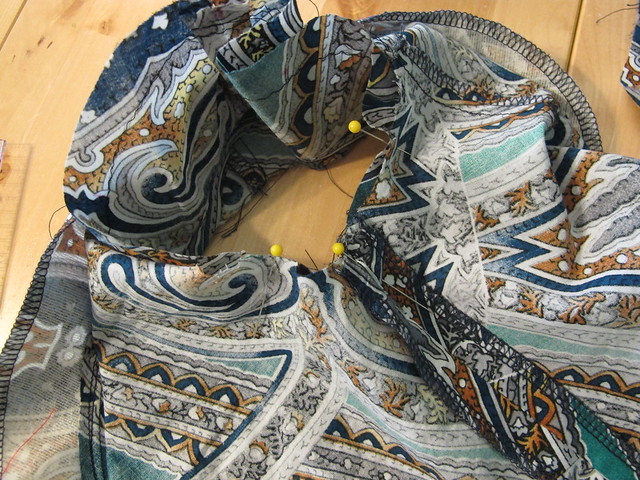
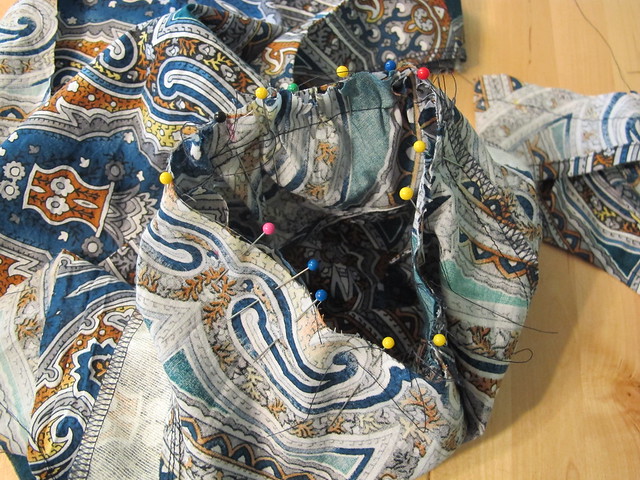
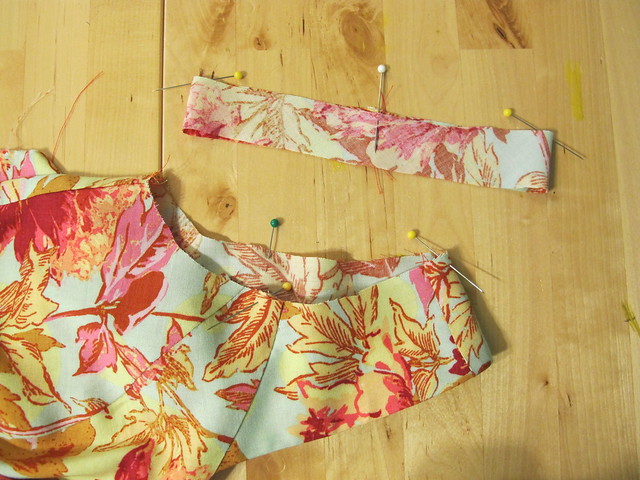
Anyway, section your arm hole and bias strips into 4 equal sections, and mark with pins.

OAL 2014 - Sleeves and Bias Binding
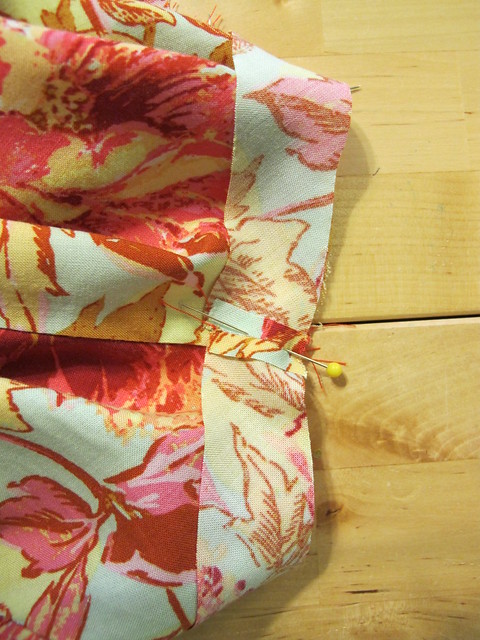
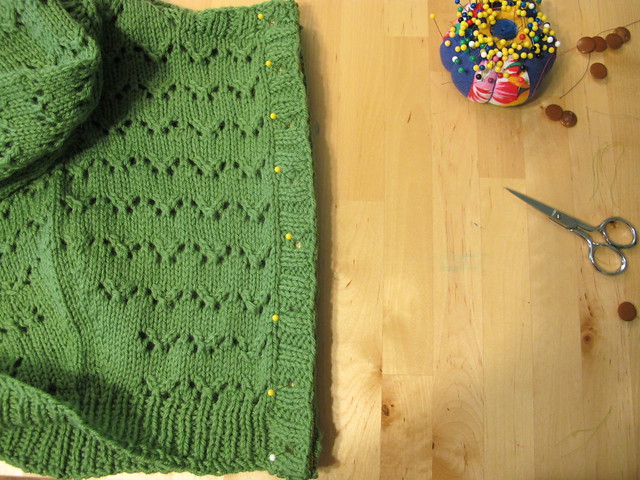
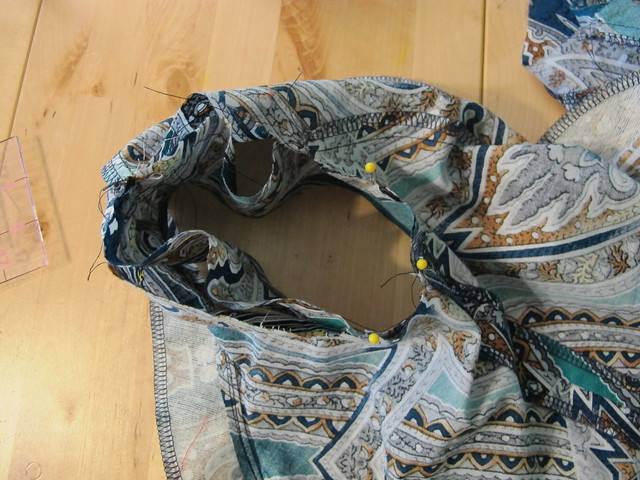
Pin the bias facing to the arm hole, starting with the seam matching the side seam, with right sides together (so your bias facing is on the outside of the garment). Match each section, so your bias facing is pinned at 4 points. From there, check one section and see if the facing is short enough for the arm hole – you just need to be able to gently stretch it to match the length of the bodice arm hole (gently, I say! We are not sewing ribbing onto tshirts here!). If it’s too long, pull it out and shorten the bias strip accordingly, then repin. I had to shorten mine by another 1/2″ to get it to fit.
* Note: If you want your bias facing on the OUTSIDE of your garment (again, cool contrasty thing), you will need to pin it to the inside of the arm hole.

OAL 2014 - Sleeves and Bias Binding
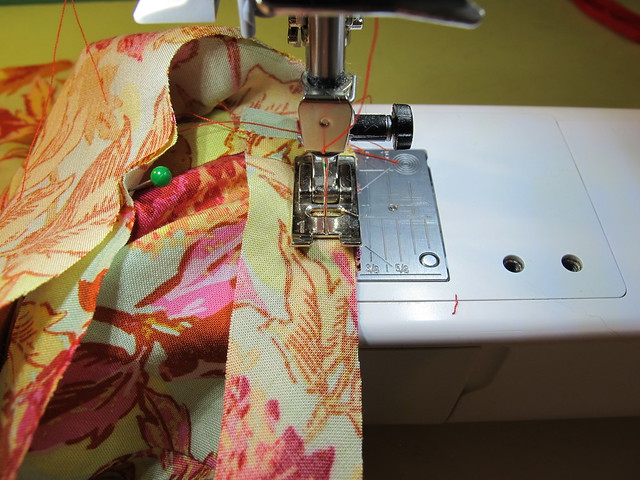
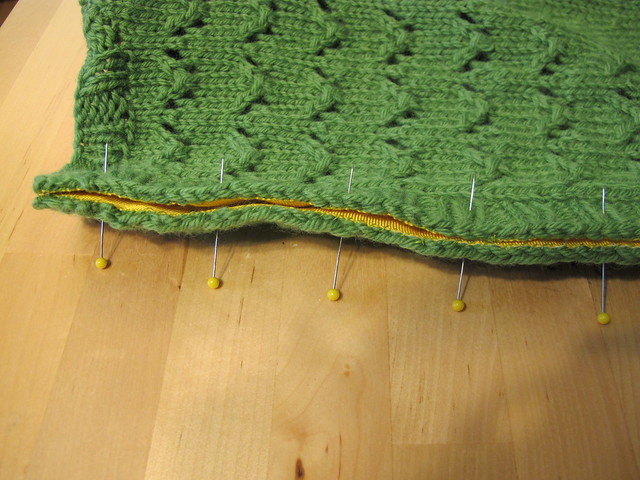
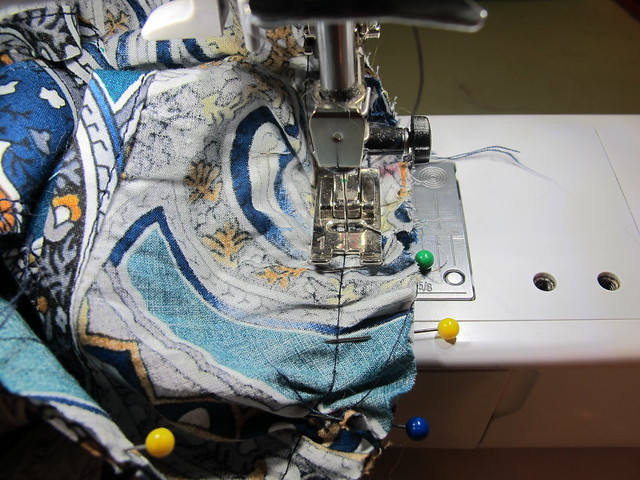
Once your facing is the correct length and pinned into place, sew it down with a 1/4″ seam allowance, catching the edges of the bodice facing in your stitching as you come across them. Again, the bias facing needs to be on the outside of the garment, right sides together.

OAL 2014 - Sleeves and Bias Binding
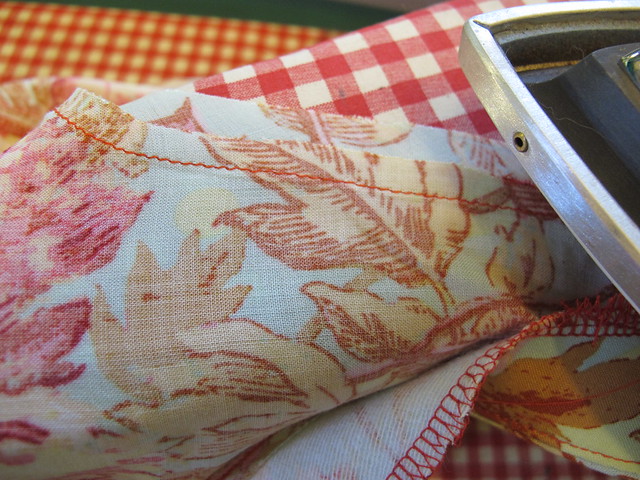
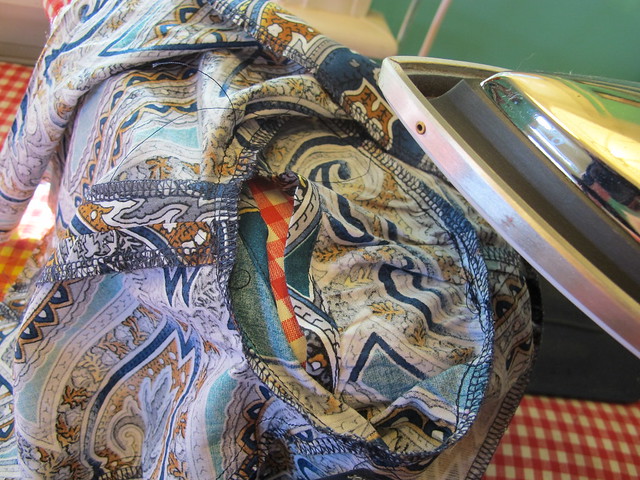
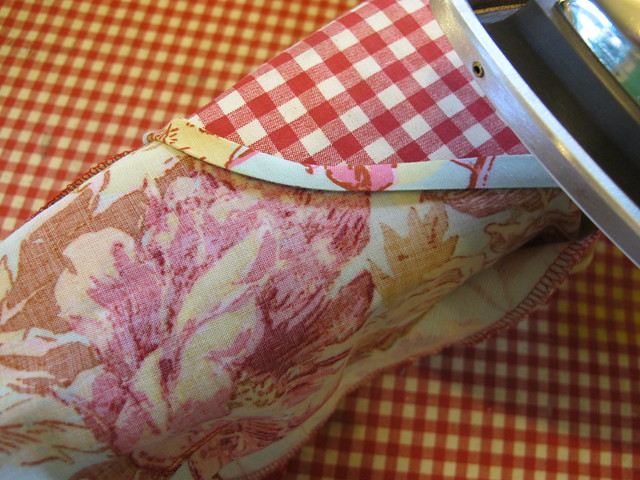
Now take the whole thing to the ironing board and press the seam allowances toward the facing.

OAL 2014 - Sleeves and Bias Binding
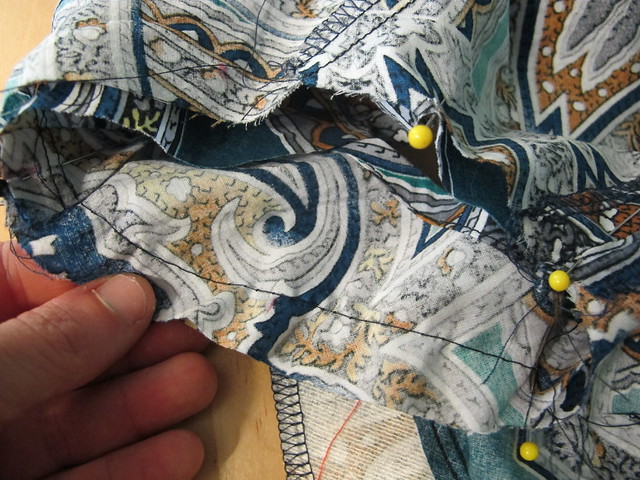
Fold the facing down toward the arm hole, wrong sides together, matching the raw edge of the facing with the stitching line you just created. Press.

OAL 2014 - Sleeves and Bias Binding
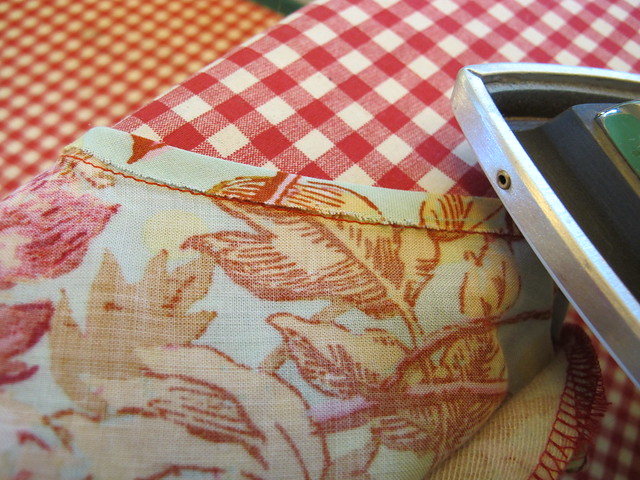
Fold the entire thing down one more time, along the stitching line, to the inside of the arm hole (or outside, if you’re going that route). All raw edges should be completely encased at this point.

OAL 2014 - Sleeves and Bias Binding
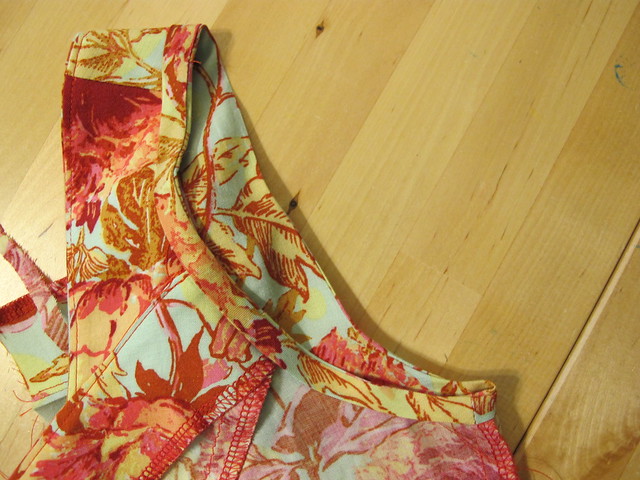
This is what your pressed/unstitched facing should look like. Note that I also caught my bodice front facing in the stitching/binding, so it’s all encased and won’t need to be tacked down later.

OAL 2014 - Sleeves and Bias Binding
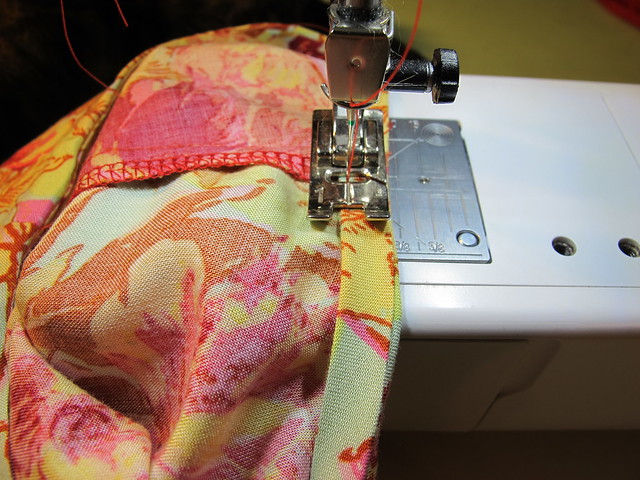
Now topstitch your facing to the arm hole, about 1/8″ from the fold. Try to keep your stitching line consistently spaced, as this will show on the outside of your garment. You may need to gently stretch the binding as you sew the curves. Alternately, you can slipstitch this binding if you don’t want the stitching to show on the outside, but I’ve found that works best if you have underlining to sew it to (otherwise you may have little thread puckers).

OAL 2014 - Sleeves and Bias Binding
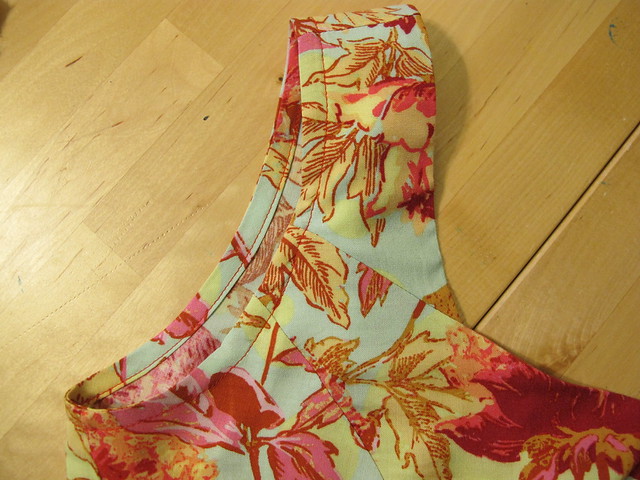
Once you’ve sewn down your bias facing, take it back to the iron and give it one last press, to ease out any wrinkles or fullness, and to make the edges nice and sharp.

OAL 2014 - Sleeves and Bias Binding
And that’s it! A gorgeous bias facing that doesn’t require using a fiddly tool (man, those things can be obnoxious). I LOVE this method and I find it much easier than any other binding method I’ve used before. This works for both necklines and arm holes, and can be done either flat or in-the-round as I demonstrated.

Phew! That’s all for this week! As always, let me know if you have any questions 🙂

Tutorial: How to Stablize a Buttonband with Petersham

20 Jun

Stablizing a buttonband with Petersham

A promised, here is the much-requested tutorial for adding Petersham ribbon to the button band of your handknits! This is a little trick I’ve done for nearly all my handknits since I started cranking ’em out… it’s not 100% necessary for finishing your knits (so please don’t be freaking out if you’ve never heard of this technique before!), but it is super handy if you wear knits with negative ease and have problems with the button band/button holes gaping open. We are basically going to take a firm woven ribbon and sew it to the inside of the button band, so it will stabilize the knit and prevent it from stretching and thus gaping open.

I know there are a million ways to do this particular technique; this is my personal favorite TNT. It involves hand sewing and machine-worked button holes (although they are not sewn through the sweater as done in (Tasha’s tutorial from a few years ago). I personally like to use Petersham ribbon as my stabilizer – it’s relatively inexpensive, wears well and feels luxurious. You can also use grosgrain ribbon, seam binding, firm lace, satin ribbon, or even fabric selvedge – whatever you want! I ain’t here to judge 🙂

Stabilizing a button band with petersham
You will need: your finished+blocked cardigan, a length of petersham ribbon (this will vary depending on the length of your sweater, but aim for approximately the length of your button band x2 plus a couple inches to fold under), and your buttons.
NOTE: I am using 1″ wide petersham for this particular sweater. The width of your petersham may vary, depending on how wide your button band is. Always measure to be sure!

Stabilizing a button band with petersham
Measure your ribbon to the length of your button bands plus about 1″ extra (for 1/2″ overhang at both the top and bottom of the button band), and cut two pieces to this length.

Stabilizing a button band with petersham
OPTIONAL: You may want to interface one piece of the petersham, so the button holes are reinforced. Just cut a strip of interfacing on the straight grain and fuse it to one side of one piece of ribbon. Set the non-interfaced ribbon aside for now.

** Yes, your interfacing will show slightly on the outside of your sweater, if your gauge is loose enough. If this is a concern (obviously it’s not a concern with this sweater; but I could see how using white interfacing+black sweater miiiight look a little weird!), you might consider making a Petersham sandwich and using two lengths of the ribbon with the interfacing in between. I haven’t personally tried this, but it makes sense in my head. Also, now I want a sandwich. I just ate breakfast. Fuck.

Stabilizing a button band with petersham
Pin the interfaced ribbon to wrong side of the button band with the button holes, interfacing side on the inside, and fold under the top and bottom edges by 1/2″. Try to center the ribbon so that there is about a stitch’s worth of overhang on the outside edge of the button band.

Stabilizing a button band with petersham
Use a marking tool to mark a small dot in the center of each button hole, on the interfaced side of the petersham. You may want to use chalk or disappearing ink; I used a sharpie because I’m a terrible person with no morals.

Stabilizing a button band with petersham
Take the petersham off the button band and, using your sewing machine, stitch button holes at each of the markings you made. Dab each button hole with a drop of Fray Check (this is optional, but I think it makes for a cleaner/non-hairy button hole) and allow to completely dry. Carefully cut all the button holes open.
PROTIP: Test your button hole size first on a scrap of interfaced petersham so you can be sure that your buttons fit the holes! Ain’t nobody got time for wrong size button holes.

Stabilizing a button band with petersham
Open your sweater up and pin the petersham to the inside of each button band. Match the petersham with the buttonholes to the button band with the button holes (being careful to make sure that each button hole is aligned so that they can be used!), and match the other petersham on the button side of the button band. On both bands, fold the petersham under 1/2″ at the top and bottom. Again, try to center the ribbon so that there is about a stitch’s worth of over hang on the outside edge of each button band (this is just so it looks nice 🙂 ).

Stabilizing a button band with petersham
Here’s a close-up of my ribbon pinned to the button band. You can see there is a little bit of button band overhang on either side of the ribbon.

Stabilizing a button band with petersham
Now is a good time to check and make sure that the button bands are the same length on your sweater. If one is longer than the other (which can totally happen if you stretched the button band while pinning everything down), unpin and readjust until they are the exact same length.

Stabilizing a button band with petersham
Now time to stitch! Using doubled-up thread, whipstitch all the way around all 4 sides of the petersham, starting at the top and working your way around. Do this to both button bands.

Stabilizing a button band with petersham
Here’s another photo of the handstitching. Try to keep your stitches evenly spaced (this will give them more strength, in addition to just looking nice!) and try not to gouge a big chunk your sweater yarn with each stitch.

Don’t worry about stitching around the edges of the button holes. I always leave mine loose, and I’ve never had a problem with the buttons getting stuck and/or not being stabilized enough. I imagine if you were using super huge buttons – like, 2″ big buttons – you might want to sew around the edges, but for buttons smaller than 3/4″ it’s fine to leave them unsecured.

Stabilizing a button band with petersham
Once your button bands are stabilized with ribbon, lay them petersham sides together and raw edges matching.

Stabilizing a button band with petersham
Stick a pin down the center of each button hole.

Stabilizing a button band with petersham
Gently pull the button bands apart, pulling the head of the pin through the button hole and leaving it sticking in the button side of the ribbon.

Stabilizing a button band with petersham
Now you can use the pins as a guideline for where to sew your buttons! This ensures that they are exactly centered in the button band and also aligned with the button holes.

Stabilizing a button band with petersham
And there you go! Stabilized button bands with NO GAPE!

Stabilizing a button band with petersham

Stabilizing a button band with petersham

Stabilizing a button band with petersham
God, is that just like, the sexiest button band or what.

Hetty
And here’s the sweater on me! (Hetty, in case you missed the post!) Notice that the lacework is nice and open, thanks to the negative ease – but the button band is strong and secure and there is no pulling at the button holes. Oh petersham, how I love you ♥

Aaaaaand, that’s it! Told y’all this was an easy technique 🙂 Now, go forth and conquer that button gape once and for all!

Completed: Vogue 1395

18 Jun

Confession: I don’t like cherries. Not for eating, anyway.

Vogue 1395

What I DO love are cherry prints, though (or any fruit, for that matter!). It probably makes me look like a total asshole wearing a fruit I won’t even eat (I’m currently having flashbacks to my high school days, back when I used to make fun of kids for wearing band tshirts of bands they’d never actually listened to. No, really, who does that?? High school kids, that’s who), but you know what? No fucks given. Go ahead and judge me.

Vogue 1395

Whatever, anyway, my point is – I like wearing cute prints. Cute prints can be hard to find though – and when you do find them, at lot of them tend to be printed on, like, quilting cotton. Or worse – silk chiffon (seriously, who the fuck is buying up all those crazy silk chiffon prints? I am so intrigued!). I feel like 3/4 of my sewing time is spent just trying to source cute prints that are printed on the type of fabric I actually like to sew and wear.

Vogue 1395

Sooo, with that being said – I was pretty excited to find this Anna Sui cherry print at Mood Fabrics. Not only is it basically the cutest fabric in the history of ever – it’s silk crepe! So glorious! Unfortunately for y’all, they are also completely sold out of it. Whomp whomp.

Vogue 1395

Immediately after securing a length of this stuff for my very own, I zeroed in on Vogue 1395 as my dream match pattern. Pretty cute, right? Vogue has really been stepping up their game with the last pattern release – as in, they had more than one wearable pattern this time (yay, Vogue!). Vogue 1395 intrigued me with it’s loose fit and strange overlay, and I thought the casual shape would look really nice with such a sweet fabric.

Vogue 1395

Sewing up this pattern (and fabric, for that matter) was pretty easy, although I did make some changes to the construction. The pattern calls for you to sew everything with a double-stitched seam – as in, literally two lines of stitching next to each other, and then finished. I couldn’t wrap my head around that one – why? for extra… strength? what? – so I compromised and used french seams for construction. I figured – hey, it’s technically a double-stitched seam, right? Plus, a french seam just looks way more elegant than a serged seam.

The armholes and neckline (sorry, didn’t take a photo, whoops) are finished with self-made bias binding (aka SILK CREPE bias binding). It looks really beautiful, if I do say so myself. It was also way less of a bitch to sew on than you’d think – despite the fact that we’re talking about bias silk crepe here. I used a lot of steam and manhandled that shit into submission. I also didn’t follow the directions on the pattern for adding the binding – they kind of had a weird method of construction, and I have a better one (sorry, but it’s true. Stay tuned for a photo tutorial during the OAL!). One big awesome plus is that the bias binding is applied flat, so you don’t have to worry about it stretching out and not fitting the area it’s binding – you can just cut the excess off! Hells yeah!

Vogue 1395

Size-wise, I cut the smallest size, which is an 8 in this design (anyone know why some patterns go all the way down to a 4 and some stop at 6 or 8? What’s up with that?). It fits ok – the arm holes, though. Whoa. Those arm holes were TERRIBLE. When I say they showed my bra, I don’t mean they just showed the very top edge. I mean they showed the ENTIRE SIDE of my bra (and a little bit below it!). Suffice to say, the arm holes were way too low! The back overlay does cover some of that, but it’s a moot point once you start moving around.

I fixed my dress in the most MacGyver way possible – I just pulled the shoulders up and gave them a new seamline. This was actually really easy thanks to my french seams, haha! I ended up pulling off about 1.5″ from the top of the shoulders – which yeah, that’s a lot! – and now the dress fits a hell of a lot better. The neckline obviously raised a lot too, but that’s ok – I kind of like it higher, I think it looks better with the shape/length. Plus, now I can bend over without fearing the gapeage.

Vogue 1395

Trying to figure out how the dress is pieced together? It’s really simple – there’s a front and back bodice (unlined, so make sure your fabric is opaque!), and the back bodice has an overlay that is only stitched down about 4″ at the center back. The slightly curved skirt is lined (I used china silk), and there is an elastic waist.

Vogue 1395

The back overlay crosses the side seams and ties at the front, which gives the dress a little bit of shape (that you can totally loosen after you’ve eaten a bunch of cupcakes because, fuck yeah, elasticized waist). Keep in mind that the wrong side of the ties show – it’s just a rolled hem all the way around, no lining – so you want to make sure you use a fabric that is relatively the same on both sides. The wrong side of this fabric is a little lighter than the right side, but it’s hardly noticeable.

Vogue 1395

What else did I change about the instructions? Well, I hated the way they had you hem stuff – lots of basting, pressing, and trimming. BOOORING! I used my rolled hem foot and finished much faster (with better results to boot!). I also could not FOR THE LIFE OF ME figure out how they had you attach the shoulders of all 3 layers. It just plain didn’t make sense, and I was french seamin’ that shit anyway (this was before the Armhole Disaster), so I did it my way and used french seams. Best way, I think!

Vogue 1395

Vogue 1395

Per usual, I threw both silks in the washing machine on cold before cutting, so now I don’t have to dryclean this guy! Yay! Talk about a casual day dress. I did notice that the black faded quite a bit on this silk crepe – so it’s more like, I dunno, light black or dark grey – but I don’t even care. It’s worth it just to know that I don’t have to schlep out to the dry cleaner every time I want to wear this. Which, btw, I would never do, because dry cleaning is the worst. Not because it’s terrible for the environment (although I reckon that’s a factor), but because I actually have to GO somewhere and PAY for it. Ew! Nope!

Vogue 1395

Anyway, cute new summer dress for meeee! I love it when my casual duds crossover into involving luxe fabrics. THIS, my friends, is why I sew.

As a sidenote – my pal Beth is gearing up to release her first pattern, and she needs testers! I know a lot of y’all were dying to dip your toes in to the tester pool, so here’s your chance to shine! Check out this blog post to see the skirt pattern in question (it’s super cute – I was actually on the list to test this, but my schedule this month has blown up all crazy so I had to bow out) and go ahead, throw your name in the hat 🙂 You know you wanna 🙂

OAL: Sewing the Bodice

16 Jun

Hey OAL-gers! Today is the day we get to start SEWING! Yay! Just a warning – this is a VERY long, picture-heavy post! Seriously, there are like 50+ photos in this post. I considered splitting it into two posts, but I figured anyone who is bored with sewalong posts will probably be more pissed that there are two of them. So, long post, apologies in advance.

Part of the reason why this post is so long is because I decided to make two versions of the dress! I wanted to cover both of the bodices (well, both basic shapes – I won’t be covering that weird yoke thing. SORRY), as well as sleeved and sleeveless versions. Not to mention, I want two dresses out of this 🙂 So, in this post, I’ll be going over the construction for both bodice B (v neck and shoulder straps) and bodice C (notched neckline).

OAL 2014 - Sewing the bodice
The very first thing we will want to do is staystitch our necklines so they don’t stretch out of shape. Staystitching is one of those really important steps that frequently gets skipped over – and I admit, I was one of those people for a long time! – but you really really should not skip it. Staystitching prevents the bias edge of the neckline from stretching out over time – which can happen more quickly than you’d think, especially when you’re manhandling your bodice into submission while you’re sewing it. Please don’t skip the staystitching!

Ok, soapbox rant over – your instructions will tell you what direction to staystitch. For bodice B (and A, I guess), you are going from the center front to the outer edges. Bodice C and also the back bodice are staystitched from the shoulder to the center front. Pay close attention to what direction you will be stitching, and follow that.

OAL 2014 - Sewing the bodice
To staystitch, reduce your stitch length to be slightly smaller than the standard on your machine (my machine stays around 2.5, so I staystitch at 2.0), and sew at 1/2″ seam allowance. Don’t forget to backstitch at each end. That’s it!

OAL 2014 - Sewing the bodice
Next, let’s tackle those darts in the back bodice (I know, I’m skipping around the instructions – I like to do the “prep” sewing first to get it out of the way. Just roll with it). Start by marking your dart with your preferred method. Here I used wax tracing paper and a rotary marking tool; but you can also mark the legs and point and connect the lines with a ruler. Whatever works for you!

OAL 2014 - Sewing the bodice
Start by pinning the legs of the dart together at the bottom. I pin horizontally along the marked line, this way I can check both sides to be sure the lines are matching up. Continue all the way up the dart until you get to the point, and mark that with a pin as well.

OAL 2014 - Sewing the bodice
Now you can start sewing along the marked line of your dart. Do NOT sew over your pins!

OAL 2014 - Sewing the bodice
Here’s a fun party trick I learned from Papercut Patterns – when you taper out to the dart point and have about one thread left before your needle sews off the fabric, stop and lower your needle.

OAL 2014 - Sewing the bodice
With the needle down, lift your presser foot and rotate the fabric 180*. Lower your presser foot and sew down the inside of the dart until you’re about halfway down, then backstitch.

OAL 2014 - Sewing the bodice
Your dart should look like this. I love this method because you don’t get a weird bump at your dart tip (which can happen if you tie it off or backstitch at the point), and the dart is nice and secure thanks to the backstitching. Pretty cool!

OAL 2014 - Sewing the bodice
Now press that dart toward the side seams. Use a tailor’s ham if you got one!

OAL 2014 - Sewing the bodice
Finished dart! Do this for both back bodice pieces.

OAL 2014 - Sewing the bodice
Now let’s sew up our princess seams! Princess seams can be a little tricky at first if you don’t know what you’re doing, but they don’t have to be! You should have two front bodice pieces – the center front, and the side front. See how the side front is bigger than the center front? Those two pieces will ease together.

OAL 2014 - Sewing the bodice
Start by pinning the side front to the center front, starting at the bottom and stopping when you reach the notch.

OAL 2014 - Sewing the bodice
Now pin the two pieces together at the top, again, stopping when you reach the notch. You should have a small section of not-pinned bodice.

OAL 2014 - Sewing the bodice
Gently manipulate the fabric of the center front piece to curve along with the side front, and pin into place. Try not to include any wrinkles or puckers. I’ve found these particular pieces ease pretty well without needing to cut notches, but if you are having trouble getting a smooth curve, you may want to snip a few small (1/2″ max!) notches into the curve of the center front piece, which will help the seam allowance spread out and lie flat against the side front curve.

OAL 2014 - Sewing the bodice
Stitch the curve along the seam allowance (PROTIP: the side that needs to be eased – the side front – should be on the bottom; the feed dogs will help ease it in!), and then finish as desired. I used my serger for my dress.

OAL 2014 - Sewing the bodice
Now press the seam allowances toward the side front. Again, use your tailor’s ham if you got one!

OAL 2014 - Sewing the bodice
Repeat for the other half of the front bodice. Yay princess seams!

The next few steps are for bodice B…

OAL 2014 - Sewing the bodice
Take your yoke front and stitch it to the bodice back, matching notches. Finish the seam allowances and press toward the back (or press open, depending on your method of finishing).

OAL 2014 - Sewing the bodice
Fuse your interfacing to the back facing (I also interfacing my front yoke facing, since this rayon challis is pretty spongey!) and sew to the front facing, matching notches. Finish the long unnotched edge of the sewn facings – in this case, I used my serger, but you could use pinking shears, turn the seam allowance under and stitch, or even bind with bias tape. Whatever you want, it’s your dress!

OAL 2014 - Sewing the bodice
With right sides together, pin the facing to the back bodice, matching notches and raw edges. Stitch.

OAL 2014 - Sewing the bodice
Trim and clip your seam allowances so they’re not so bulky – I trim mind in half, and clip the curved edges so they will lie flat when pressed (note – I notched these so you can actually see where it’s notched – but you actually only need to clip the curves. Take small snips and don’t cut into your stitching line!).

OAL 2014 - Sewing the bodice
Finally, you’ll want to understitch your facing so everything stays in place and rolls to the inside. This is really easy – just open the facing up away from the bodice, and push all the seam allowances so they’re against the wrong side of the facing. Sew through the facing and seam allowances, about 1/8″ away from the seamline.

OAL 2014 - Sewing the bodice
Turn the facing to the wrong side of the bodice back, and give everything a nice press.

OAL 2014 - Sewing the bodice
Take one back bodice and one front bodice, and pin the two together as shown, matching your dots and raw edges (yes, I know, the instructions have you sew the center front seam before this. I forgot. Oh well.). Baste into place, about 1/2″ from the raw edge.

OAL 2014 - Sewing the bodice
Sew the two front facing pieces together up to the marked dot, and backstitch to secure. There will be a small space above the dot that is unsewn – this will make it easier to sew that slight v-seam. Press the seam open and finish the edges of the long unnotched edge.

Do the same for your center front pieces – sew up to the dot and backstitch. Finish your seams separately and press them open.

OAL 2014 - Sewing the bodice
Same as with the back facing, match the front facing to the front bodice, right sides together and raw edges matching. Spread the unsewn sections of the bodice and facing apart; when you get to the dot, lower your needle, pivot, and continue sewing back up the v.

OAL 2014 - Sewing the bodice
Understitch the seam allownace to the facing, turn the facing to the inside, and press.

Finally, sew up the side seams and finish the edges.

OAL 2014 - Sewing the bodice
Hey look, your bodice is done! High fives all around!

Remaining steps for bodice C…

OAL 2014 - Sewing the bodice
With ride sides together, sew the center front pieces up to the dot, and backstitch. Finish the seam allowances separately and press open. Sew the front bodice to the back bodice at the shoulders, finish seams and press.

OAL 2014 - Sewing the bodice
Your bodice front should have a nice deep notch, like so.

OAL 2014 - Sewing the bodice
Fuse your interfacing to your facing pieces. Sew the front facings together at the center front, up to the dot (same as with the bodice front), and stitch the front facing to the back facing at the shoulder seams. Press all seams open and finish the long unnotched edge.

OAL 2014 - Sewing the bodice
With right sides facing and raw edges matching, pin the facing to the top of the bodice, all the way around.

OAL 2014 - Sewing the bodice
Sew the facing to the bodice at your normal 5/8″ seam allowance. When you get to that center front notch, sew all the way to the corner, lower your needle, and raise your presser foot.

OAL 2014 - Sewing the bodice
Pivot the fabric and continue stitching until you reach the dot (where you joined the front pieces and stopped stitching). Go very slowly and be sure that the fabric is completely flat underneath the presser foot – you don’t want to sew any wrinkles!

OAL 2014 - Sewing the bodice
This is what your front bodice will look like once you’ve sewn it. Hm, my staystitching is crooked as hell.

OAL 2014 - Sewing the bodice
Now trim all your seam allowances in half, and clip the curves, points, and corners.

OAL 2014 - Sewing the bodice
Understitch your facings (scroll up to view B if you need more info on how to do this!) all the way around. You will not be able to understitch all the way into the center front notch – that’s ok! Just go as far as you can.

OAL 2014 - Sewing the bodice
Turn the facing to the inside and use a tool (I have a point turner, but you can use a knitting needle or chopstick or even a dull pencil) to push the notch points out. Give everything a good press.

Sew up your side seams and finish the edges as desired.

OAL 2014 - Sewing the bodice
Bodice C is finished!

WHEW! Was that the longest post or what!? Promise they’ll get easier from here 🙂 As always, let me know if you have any questions!

Completed: The Rambo Project

13 Jun

the_rambo_project

As much as I like to make garments that I know will get lots of use and wear and fulfill a gap in my wardrobe, sometimes you just gotta switch it up and make something completely ridiculous just for the fun of it.

Which is where this particular make comes into play today.

A couple months ago, Seamstress Erin hollered at me and a mess of other ladies and asked if we’d be interested in participating in a group project that involved a very unlikely fabric source. See, this particular fabric actually came straight off the set of Rambo III. You can read the whole saga here, but basically, what we have here is a piece of famous fabric.

While I am trying to really limit the group projects I sign up for (my time management is so seriously out of whack right now, y’all have no idea), how could I say no to that?? Never mind that I’ve never actually seen Rambo III (or I, or II, for that matter) – never mind that when I tried to read the movie plot, the overuse of the word “explosion” about made my eyes roll back in my head (also, I still have no idea what that movie is about) – never mind that I actually don’t like action movies one bit… we are talking about a piece of fabric that Sylvester Stallone might have potentially touched, holy shit. You bet your ASS I signed up for that shit!

Simplicity 1426 - The Rambo Project

And this is what ended up in my mailbox a few days later. It’s not really the most amazing piece of fabric – and, to be fair, Erin fully disclosed in her initial email that it was a strange scarf size, had a weird bit of stretch to it, and also was a little stained – so it’s not like I was going to make some heirloom-quality piece out of it. For a project like this, naw, I decided to make something SLUTTY!

Simplicity 1426 - The Rambo Project

I like to think I did ol’ Rambo proud with this… what do you think?

Simplicity 1426 - The Rambo Project

Ok, in all seriousness, I’m really sorry that y’all have to keep looking at my freakin stomach. I swear I don’t normally traipse around the city dressed like this, but something about this project just screamed boobie top. While I did initally plan on wearing this with something high-waisted, when I tried it on with my jorts, it just looked way white trash in the best way, and I decided it was meant to be.

Oh, and also, I figured y’all might want to know that I got my Jorts situation under control. No, I did not make these. I bought them from Goodwill and cut the legs off.

shit

Yep.

Simplicity 1426 - The Rambo Project

This little bralette top is made using Simplicity 1426, which is a vintage reissue. I was initially drawn to the cover art – the model on the front is freaking gorgeous – and figured it would be a good pattern for making comfy loungewear bralettes. You know, just stuff to hang around the house in when I don’t feel like rocking something with underwire (and, despite what these photos would tell you, I’ll probably wear them underneath a shirt, ha). Thanks to Rambo, I had the perfect opportunity to test out the pattern in a wearable muslin.

Simplicity 1426 - The Rambo Project

Using the finished measurements to determine my size, I cut the size 6. It fits pretty nicely straight out of the package, although I did have to pull in the back slightly tighter so it would fit my ribcage (again, I’m about 28″ at the ribcage, so most stuff tends to be too big right there!). The instructions were easy to follow, although I never did see how to finish the end of the back band? I just serged the raw edges and folded them down. Nothing fancy here! I did change up the back closure – the pattern calls for buttons, and while I reeeeally wanted to do pearl snaps (because, god, that would be amazing), my fabric was just too thick to even try to hammer those suckers in. I instead opted for flat hooks and eyes – the kind you put on a waistband.

Simplicity 1426 - The Rambo Project

The cups do have a tendency to gape open if you don’t pull the neck straps tight enough (and once you do that, you run the risk of giving yourself a headache!). One thing I would do differently is ease the edge of the cups with a piece of twill tape, similar to how I constructed the bodice of my Flora dress. This would help the cups hug the contours of my body and thus lay more flat along the edge. Something to keep in mind if you plan on making this!

Simplicity 1426 - The Rambo Project

Overall, though, it’s a pretty cute top. Personally, I’m just tickled that I was able to take a rather classy looking pattern and turn it into something that looks this trashy. I am awesome.

Simplicity 1426 - The Rambo Project

Simplicity 1426 - The Rambo Project

Simplicity 1426 - The Rambo Project

The top is lined (I used self-lining in this case) and the edges are bound (again, I used self-fabric), which makes for a very clean inside. I found the binding was super easy to apply in this case, due to the slight stretch of the fabric.

Obviously, this wouldn’t be a true Rambo tribute without the addition of some sort of weapon. I don’t personally own any weapons (can you believe that? Not even a giant stick that I can use to ward off intruders… seriously, Lauren), but I did find this pocket knife on Landon’s dresser. Shhh, don’t tell him!

Simplicity 1426 - The Rambo Project

THAT’S MORE LIKE IT!

Simplicity 1426 - The Rambo Project

Check out The Rambo Project to see what happened to the rest of the turbans! Big thank you to Erin, for letting me participate in the ridiculousness that is The Rambo Project!

Completed: The Hetty Cardigan

11 Jun

Omg, when was the last time I posted a completed knitting project? It’s been far too long.

Hetty

I guess we can make up for it now! Everyone, meet Hetty 🙂

Hetty

Hetty is a sweet, cropped cardigan knit entirely in lace, which makes it perfect for warmer spring/summer months. The cardigan is knit seamlessly from the top-down, which means there’s no seaming after you’ve finished the knitting – just a block and buttons and it’s ready-to-wear! I really prefer these seamless top-down (and occasionally bottom-up) patterns, as the whole seaming thing just really puts me off haha.

Hetty

As you can see, I went the copycat route and basically copied Andi verbatim with my pretty spring green yarn. Both the pattern and the yarn were actually gifted to me by reader/Ravelry follower, Julia. I was planning on joining the Hetty Knit Along when I received these goodies (which means I’ve been sitting on this pattern+yarn for… almost a year now, eep!), but other projects got in the way and I wasn’t actually able to start this until March. Oh well! Better late than never 🙂

Hetty

So… let’s talk about this pattern a little. Theoretically, this is a fairly simple pattern with VERY easy lace work. The open lace work, the cropped length, and the short(ish) sleeves mean that this should be a pretty quick knit. For me, I did struggle a lot with getting the lace work to properly match up. This is because the side seams are knitted in stockinette, so that the decreases can fit. Since the stockinette count can change from row to row, I had a hard time remembering *where* to start my lacework pattern, and thus a lot of it did not line up. I ripped out a significant amount of this sweater – including the entire back about four times (I think, I lost count because it was just too depressing haha), because I hated how the lacework wasn’t lining up. Despite all this ripping out, I still got the sweater finished in about two and a half months. I can only manage to knit a couple of hours a week at this point, so that’s pretty freaking fast!

Hetty

Here is my biggest tip regarding that damn lacework – once you start getting to stockinette territory, place a marker at the beginning of one of the lacework repeats. Doesn’t matter which one (although I’d recommend one that is a couple repeats away from where the stockinette begins) – this will just give you a visual indication of where a lace repeat needs to START, and from there you can count back to the beginning and see how many lace repeats will fit/need to be turned into stockinette. I hope this makes sense! It’s kind of hard to tell where the repeats start when you’re in the middle of a row, and I’m pretty fucking awful at tell where patterns start when I’m looking at them vertically, so this was the only way I could keep the lace pattern consistent and stacked correctly. I also only figured this out one I got to the second sleeve, hence all my ripping out. Oh well – learn from my mistakes, ok? 🙂

Hetty

Here you can sort of see the lace repeat as it turns into stockinette. Very clever for the way this is constructed, as you don’t have to worry about messing up the lace with additional decreases, but like I said – it can totally get confusing. Use those stitch markers!

Hetty

Hetty

Also, that “easy to memorize” lace pattern was VERY hard for me to memorize! I did finally get the hang of it… again, about halfway through the second sleeve. Haha! Oh well!

Hetty

Despite my big giant lace-induced headache, this was a fun sweater to knit up. I really love the open lace design and I’ve already gotten quite a bit of wear out of it – the light, open lace makes this so nice to wear in chilly air conditioned buildings, and the color is nice and summery 🙂

Hetty

Hetty

I used Cascade 220 yarn (my favorite! ♥) to knit this, and I made the size Small. Based on my gauge swatch, I was able to get gauge with size 6 needles (seems about right for me + worsted weight yarn). Fair warning – this sweater is pretty tiny while it’s being knitted. I can’t even tell you how many people asked me who’s baby I was knitting a sweater for haha (Answer: NO BABIES! Are you fucking KIDDING me?? haha!). But as you can see, it blocked out very nicely! I soaked this guy in warm water and squished it around on a towel until the lace opened up and the size was accurate for my body. I just love how it turned out!

Hetty

Hetty

Hetty

Oh, and I’m wearing my navy Hollyburn in these photos, fyi. Thought they kind of showed the skirt better than the photos in the last post! Plus, I love combination of these two colors 🙂

Hetty

I promise I did take photos of the sweater laid out in all it’s fully glory, but Flickr REFUSED to believe that the files were actual photo files. So… have some close-ups, I guess?

Hetty

Vintage buttons + petersham at the button band! I used neon yellow petersham because that’s what I had on hand, and I think it looks really pretty with the green 🙂

Speaking of Petersham, I did take photos of the process of attaching it to the button band, so keep an eye on this space next week for a TUTORIAL! Woohoo! I’ve had loads of people ask how I attach the petersham, so hopefully this will be helpful to ya 🙂

Hetty

Love looking at close-ups of handknits 🙂

Hetty

Sooo, there ya go! Pretty Hetty, just in time for… summer 😉 Now to finish my Sunshine yellow Myrna for the OAL (which is coming along FAST – almost done with the first sleeve!). Full Ravelry notes on Hetty can be found here.

OAL: Cutting and Marking Your Fabric

9 Jun

Hey guys! Today we are going to cut and mark our fabric for our dresses! Woohoo!

I’m going to go out on a limb here and say that most people don’t like this part of the sewing process. I get it – you’re ready to start sewing, but first you gotta futz with those tissue pattern pieces, cutting, and marking all the little dots and clipping all the little notches. Such a pain when you really just want to get to the fun part!

I personally don’t mind cutting – I actually find the process a little fun – I listen to dancey music and use the opportunity to get pumped about my project. CUTTING PARTY WOOHOO! While I do like to get everything with cutting done in one session (and marking, too, if I have the time), I do not try to rush the process. I’ve found that rushing just causes more harm than good – you get sloppy, you cut things inaccurately or off-grain. No good! Please don’t try to rush through this – take your time (trust me, y’all, we’ve got plenty of time here) and just try to enjoy the process. You might surprise yourself!

One thing I’ve found that I do mind, though, is taking photos while trying to cut – and I think it really shows in my pictures here, unfortunately. If anything about this post is unclear, please do not hesitate to post your question in the comments and I will get back to you as soon as I can!

OAL - Cutting and Marking Fabric
If you haven’t already done so, check your pattern instructions to see what pieces you cut and how many of each. I always like to look at this first, just to be sure I don’t end up with some unfortunate surprise (such as realizing too late that a certain piece needed to be cut 4 times, and I’ve already cut up all my fabric. WHOOPS!).

Make sure your fabric is prewashed and that you have pressed all the wrinkles out. You may also press your pattern pieces (dry iron, no heat) if you prefer, but I’ve found these thin tissue patterns can usually be smoothed out enough to skip the ironing. Up to you!

OAL - Cutting and Marking Fabric
Now for the fabric! The first thing you want to do is make sure that your cut edges are nice and straight. This will help you keep the folded fabric straight, and thus, cut the pattern pieces on grain. See how the cut edge of my fabric is wavy? We are going to fix that.

OAL - Cutting and Marking Fabric
Cut a little snip about 1″ below the cut edge of your fabric (or 1″ lower than the lowest dip, if it’s super wavy like mine)

OAL - Cutting and Marking Fabric
And then just rip straight across the edge. Ah! Doesn’t that feel nice? Totally my favorite part of cutting HAHA!

OAL - Cutting and Marking Fabric
Now that the edges are straight, you may fold the fabric lengthwise, wrong sides together*, and lay it on your cutting table. At this point, I also like to pin my cut edges together, as well as the selvedges – it keeps the fabric from shifting around, which is especially helpful if you are cutting something that tends to slip around. Make sure the fabric is completely smooth all the way to the fold (no wrinkles or anything); else you may end up cutting an inaccurate piece. If your fabric is twisting, try shifting the cut edges until everything lies smooth.

*You may also fold your fabric right sides together, if you prefer. My stance on this is that the fabric is easier to mark on the wrong side if it is folded with wrong sides together (as you can just open the two pieces and mark them at the same time; it’s also easier to use wax paper+tracing wheel this way), so this is the way I fold/cut. Also, if you fold with the right sides out, you get to stare at your pretty fabric while you cut it. Bonus! 🙂

OAL - Cutting and Marking Fabric
Once your fabric is folded and completely flat, you can start pinning down the pieces! I like to start with the pieces that need to go on the fold – as you can see in my poorly-cropped picture, this is indicated by an arrow (it’s also in the cutting instructions of the pattern, fyi). I do this because otherwise I’ll forget! Not good! For pieces on the fold, butt your pattern piece right up to the fold of the fabric and pin all the way around.

OAL - Cutting and Marking Fabric
A note on pinning – how you choose to pin your pieces is entirely up to you. Some people completely omit pins and just use pattern weights and trace the pieces, or a rotary cutter. That is perfectly fine if that’s your jam. I personally like pins and scissors, so this is what I will be demonstrating for this sew-along. I like to pin parallel and about 1/4″ away from the pattern piece. I also use a lot of pins – the more the merrier! – as I find it helps me cut more accurately. Don’t be afraid to go overboard on the pins, is what I’m saying here.

OAL - Cutting and Marking Fabric
One other thing I’d like to bring up is the topic of grain – and making sure that your pieces are all cut on grain. What is grain? Grain is the direction of the threads that make up a woven fabric. Lengthwise runs parallel to the selvedge, crosswise is perpendicular, and bias runs at a 45 degree angle. Grain is EXTREMELY important when cutting your fabric – if you cut things off grain, you run the risk of your dress doing some funny things. Ever worn a pair of jeans where the seam kept trying to twist around your leg? That’s what happens when something is cut off grain. We want to be sure that everything is cut accurately on grain – i.e., the lengthwise grain goes straight up and down your body. This is super super simple to do, but you’d be surprised how many people don’t bother with it (for more information on grain, check out this Threads article)

In the picture above, I’m pointing at the grainline on the pattern piece. This line needs to run parallel to the selvedge of your fabric to ensure that your fabric is cut on grain.

OAL - Cutting and Marking Fabric
All you need to do is make sure that the grainline printed on your pattern piece is the same distance from the selvedge all the way across. I like to use a clear ruler for this – you can see straight through it, which makes it easy to adjust the pattern piece until it’s straight. I start in the middle, check the distance the grainline is from the selvedge (in this case, it’s 4.5″), stick a pin to hold the pattern piece in place, and then check that the distance at each end of the grainline is also 4.5″ (and stick another pin in there to keep the piece from shifting). Once I’m sure the entire grainline on that one pattern piece is completely straight and parallel to the selvedge, then do I finish pinning and cut.

It sounds like a lot of extra work, but it’s really not – and you’ll absolutely see the results (or, rather, won’t – because your garment won’t be hanging funny!). This also means that you can plan your cutting layout howeverrrr you want – as long as you keep the pieces on grain. The pattern instructions do include a suggested cutting layout – and if this is your first time making a pattern, I definitely suggest that you follow it, just to keep things simple – but it’s not always the most economical way to cut your fabric. As long as you’re keeping all your pieces on grain, feel free to see if you can find a better way to get the most out of your fabric 🙂

Ok! So that being said – time to finish pinning and cutting! Go ahead and pin the rest of your pieces down to the fabric (you may follow the cutting layout in the pattern if you need some guidance), and make sure you have everything pinned before you start cutting!

When you cut, keep the fabric completely flat on the table (or floor, but it’s better for your back/sanity if you can at least find a temporary table space to cut on!) with your shears at a 90 degree angle. Slice completely through the entire length of the shears – no timid little baby cuts! – and use your opposite hand to hold the fabric down so it stays flat on the table. Try to be as accurate as possible with your cutting, and take your time going around curves and sharp points.

OAL - Cutting and Marking Fabric
Once you’ve cut aaaall your pattern pieces (yes, all of them! Remember, there are 4 pocket pieces to cut!), time to mark! For notches (the little triangles printed sporatically on the edges of the pattern pieces), I just take a tiny snip all the way to the point of the notch. I know some people cut the notch outward, like a little triangle. That’s fine if you want to do that, but I find it too time-consuming and less accurate than just a simple snip.

OAL - Cutting and Marking Fabric
For marking dots – such as where the sleeve is attached to the bodice – I like to stick a pin in the pattern piece, directly through the center of the dot. Gently pull the two pieces of fabric apart, and mark where the pin enters each piece of fabric.

For marking dots and the stitching lines on the bodice (the notched version), you can use wax paper and a tracing wheel. I didn’t take any photos of this, but it’s pretty self-explanatory. Lay the paper with the wax side facing down on the wrong side of the fabric, and just trace over the lines of the dart with the tracing wheel. Easy!

Ok, that’s all for today! If you’ve still got a little bit of sewing stamina left, go ahead and cut out your interfacing pieces as well. We start sewing next week! Yay!

Completed: The Soma Swimsuit, V2

6 Jun

I’m back again with my second Soma Swimsuit!

Soma Swimsuit - v2

Aaaaaand, omg you guys, this is my favorite of the two. Definitely my favorite out of all the swimsuits I’ve made, possibly my favorite swimsuit EVER. Seriously! I really really love it!

Soma Swimsuit - v2

Cheeky butt and all 😉

Soma Swimsuit - v2

For version 2, I decided to up the ante and try it in a cool striped fabric – I’ve had this striped swimsuit fabric since 2013; I bought it at Spandex House (or World?) in NYC, along with a nude lining. I’ve always wanted a navy and white striped bikini, and I could not have found a better pattern to make this fabric up in. Although, I still have more that I could potentially make more bikinis with – a yard of swimsuit fabric goes a LONG way. Forreal, I had to recut the bodice on this swimsuit after an error in construction, and I still have sooo much left over. Yay for swimsuits!

Soma Swimsuit - v2

There are tons of ways you could play with the stripes on these pattern pieces – I drew out a few croquis and sketched some stripe variations, which led me to decide that horizontal stripes with a vertical center looked the best (to me, anyway). I also think it would be cool to cut the triangle out of a solid fabric – possibly even the bottoms be solid as well – but I didn’t have any solid navy, so I went with full stripes.

Also, the stripes give my boobs x-ray eyes, which is kinda cool in and of itself.

Soma Swimsuit - v2

Soma Swimsuit - v2

I’m very pleased with how the stripes match up on the sides! To get a good match, I cut the bottoms on one layer (they’re supposed to be on the fold, which means you will need to retrace your pattern pieces so they are a full piece) and cut all the pieces for the cups before cutting the back band. After I assembled the entire front of the swimsuit, I then used the stripes as a guide for cutting the back band, to ensure that everything matched up.

Soma Swimsuit - v2

While my first Soma was sewn entirely by following the directions, I did intentionally veer a little off course with this one. The pattern has you use plain elastic to construct both the top and the bottom – it is folded over and topstitched down, so it is essentially hidden once you put the suit on. I had this cool decorative elastic that I’ve been hoarding since 2013 (bought it on the same trip, from Pacific Trimming), and I was DETERMINED to use it. Katie suggested that I sew the elastic to the right side with the decorative edge facing down (i.e., the straight edge is matched with the raw edge of the suit), and then flip everything to the inside so the decorative edge peeks out and topstitch down. That’s exactly what I did, and I think it worked out quite nicely if I do say so myself!

Soma Swimsuit - v2

I did this for both the top and the bottoms.

Soma Swimsuit - v2

Another thing I wanted to add to the swimsuit was bra cups – as I’ve said before, I’m not a fan of the beach nip. While this suit is lined, one layer just doesn’t cut it for me, so I experimented with my options. My first suit did attempt bra cups, but it ended up a fail. I’m sure there’s a way to get them in there, but you’d have to change the order of construction – this suit is sewn so the lining and swim fabric are attached at the center bust seam, which means you can’t exactly cram a bra cup in there. After some thought and lurking those torn-up swimsuits, I threw out the failed bodice and started over. Ultimately, I decided to just cut multiple layers of lining for the bra cups and use that as a sort of padding – I think there are a total of 4 layers of lining on the bra cups (3 for padding, one for the outer layer), plus the actual swimsuit fabric. By doing this, I was able to follow the instructions as written, I just had a little more bulk to deal with 🙂 Trimming the bulk down and then topstitching made everything lie nice and smooth. And yes, in case you’re curious – the padding did pay off! Woohoo!

Soma Swimsuit - v2

Soma Swimsuit - v2

Again, for sizing, I went with the XXS. I’m actually surprised at how well this fits my ribcage – my underbust is 28″, so stuff tends to be waaaay too big right there. This swimsuit has a nice, snug fit, which helps keep it in place while you’re swimming. I did pull my elastic a bit more taut than instructed in the pattern – I don’t want any gaping on the beach, thankyouverymuch – but as far as adjusting the circumference of the longline, I didn’t have to do anything. Also, fyi, as per the last swimsuit – this was sewn almost entirely on my sewing machine. Wooho!!

Here are some close-ups!

Soma Swimsuit, v2

A couple things I will mention if you plan on making this with decorative elastic: for one, definitely trim those seam allowances before you attach it. The hidden elastic that the the instructions call for is fine for the 3/8″ seam allowance, but decorative elastic needs a much smaller seam allowance (I think this is 1/4″), which means you get overhang if you don’t trim. I figured this out after making the bottoms, which you can see the excess (I did catch it and remember to trim for the top, which you can see a couple pictures down). Not a big deal, but definitely worth mentioning.

Soma Swimsuit, v2

Also, see where the elastic is broken at the leg? It’s actually not broken – it connects in a full circle – but it sure looks like it. I should have cut the elastic to include a full repeat of the decorative part, and then overlapped by at least one scallop just to ensure that there are no broken parts. Oh well! Learn from my mistakes, guys.

Soma Swimsuit, v2

Like the first suit, this one also calls for bra strapping for the straps. Since I didn’t have any on hand (this was before I discovered the white at Joann, which still would not have worked for this particular project), I improvised by using plain elastic and topstitching my decorative elastic right on top. I used two rows of straight stitching since they don’t need to stretch that much.

Soma Swimsuit, v2

I did change one small order of construction when doing the bodice – the way the pattern is written has an exposed edge at the center triangle. I figured out how to burrito roll the fabric (similar to how one attaches a yoke to a button-down, with all seams hidden) so all my seams are enclosed. It was a little finicky but it certainly paid off! I haven’t seen the updated instructions on this pattern yet, so I’m not sure if it’s been changed to reflect that technique (it was part of my feedback when I tested the pattern, but the process can be a little tricky to explain so I’m not sure if Katie included it or not, in an effort to keep the construction very simple), but just know that it *can* be done if you don’t want exposed seams in your suit!

Also, oops, probably should have caught the raw edge at the top of the triangle when I was topstitching down OH WELL.

Soma Swimsuit, v2

As far as support goes – again, I can’t really vouch for it personally, but I will say that this version of the suit has a lot more options if you need a little boost. You could experiment with adding swimwear cups (I feel like even just sewing the bodice cups separately and slipping a swimsuit cup between the fabric and lining would probably work… don’t try to attach it to the lining, though, that’s where I went wrong!) to the bra, boning to the side seams, and potentially even underwire. As it stands for just a fabric+lining+elastic top, though, it’s supportive enough.

Again, these photos were taken before the swimsuit ever saw water, but I managed to wear it twice on my vacation, and it performs just as well as the black one. It may even be a little more secure, since you’re less likely to have a bathing suit malfunction due to the design.

I definitely plan on making this version again – I have plans for this bustier top with the high-waisted bottoms, in some cute lemon/flower swimsuit fabric. I almost made it up during the testing – but then realized I should probably take this striped one out for a spin so I can address any fit adjustments if needed. The suit does not need fit adjustments, btw, but on the next one I will pull the elastic a little tighter around the top edge of the top. It’s not quite as tight as it’s like it.

Also, I think this would make a really cut bralette. Ooh!

Soma Swimsuit - v2

So, who’s convinced they should take the plunge into sewing swimwear? Seriously, guys – it’s really fun, it’s fast (and gratifying!), and once you realize just how little it costs to make a swimsuit, you’ll be side-eyeing the $80 ones at the mall for the rest of summer. Don’t think you have it in you to make a bathing suit? Ladies. If you can sew a tshirt, you can sew a swimsuit. Promise.

Completed: The Soma Swimsuit, V1

4 Jun

As promised, I’ve written up a couple of posts about the new Soma Swimsuit from Papercut Patterns. I was a tester for this pattern, so I’ve actually had this finished and completed for quite some time now! While I initially agreed to test just the cross-over bikini variation, I ultimately ended up sewing BOTH bikinis because they are just so damn fun to make! In this post, though, I’ll be going over the first version – the black cross-over bikini.

Soma Swimsuit - v1

A note on pattern testing – it’s come to my attention that there has been a bit of discussion and debate about what exactly goes on for pattern testing, and what us testers get out of it. Some people have speculated that we are paid off to promote the designs, which could NOT be farther from the truth! Seriously, I WISH I was getting paid to to this – but I’m totally not. Pretty much all I get out of testing is a copy of the beta pattern, hopefully a copy of the finished pattern once it’s gone to print (not all companies offer this for testers but I think it’s a really nice gesture, personally), and a chance to see the pattern before anyone else. That’s it! Sometimes companies will give me fabric for testing – which I will always disclose if that’s the case – but for the most part, I am on the hook for providing my own fabric and notions. It is not required – or even requested – for me to post about the finished patterns, I just do it because I like what I make and I want to share it! I know some of the debate was about the same bloggers doing the testing, and while I can’t speak for the pattern designers, I will say that I have worked with the same designers for multiple testings, and it’s my assumption that they like to stick with the same people because they know they will get relatively consistent results, especially when it comes to sizing (it’s easier to tell if your size whatever has something wrong with the grade if you have that same person testing the same size for you consistently, if that makes sense).

I personally test my patterns the same way I sew a normal pattern – make a muslin if needed, do any alterations for fit that are necessary, and change the construction steps if I think it makes more sense to do so (and sometimes that ends up in the finished pattern – such as the lining method for the Flora dress, some of that was my feedback 🙂 ). I provide very detailed and honest feedback (VERY! Like to the point of maybe even being annoying 😛 haha), and I always meet the relatively short deadline. I would like to assume that’s why companies continue to reach out to me for testing, however, I’m recently aware that there are probably also people who use my feedback strictly for promotional purposes. If I offer good feedback and I don’t see translate to the finished pattern, that’s my sign that they probably don’t actually want my feedback and I just don’t work for with company anymore. Further, I don’t always blog my finished test makes (sometimes I only have time to do a fit muslin and tear the instructions a new asshole), so if anyone is contacting me in hopes of getting a sales boost from a finished project, they may be in for a rude awakening hahah 🙂

I’m so sorry if anyone got the wrong idea when it comes to pattern testing; the unglamorous truth is that we have a quick turnaround to check out the fit and instructions of the pattern and provide as much feedback as we can before the release. That’s it! Obviously I’d love to earn money doing this (ahh, who woulnd’t??), but the pattern barter is fine with me for now. I like helping my friends and giving them feedback so they can put out an even better product. Any other questions about testing from a tester’s perspective? Holler at me in the comments!

Ok, now that that’s off my chest – swimsuit time!

Soma Swimsuit - v1

Like I mentioned earlier, this is the Soma Swimsuit from Papercut Patterns, version 1. I’m afraid I went the boring route for this one – I had black swimsuit fabric & lining on hand (destashed from a friend’s supply, so I’m not sure where it originally came from) with the intention of making a black bikini, and I liked Katie’s version in the promo photos soo much that I decided to blatantly copy it because I have no shame.

Soma Swimsuit - v1

This swimsuit includes a lining, regular elastic, fold over elastic, and little bra notions (hooks, rings, and bra strapping). While I did have the fabric and lining on hand, I had to venture out to the fabric store to buy everything else. I was able to find almost everything I needed at Joann; however, be aware that they have a VERY limited selection of colors in these notions. Basically, they only have black and white – and their fold over elastic is expensive as shit, btw. I recently discovered Peakbloom as a wonderful source for FOE- seriously, look at all the prints and coloursssss omg – but I have yet to actually purchase anything from them. If you’re stuck in a FOE desert and need something other than black or white, definitely give them a look!

Soma Swimsuit - v1

The only thing I could not find at Joann was bra strapping. I actually didn’t even realize that’s a thing that exists! It’s not exactly the same thing as elastic – it’s sturdier, it doesn’t stretch as much, and it just looks more polished. After making this swimsuit, I did eventually find it at Joann’s (it’s in the section where you buy trim by the yard), but it only comes in white. For my bathing suit, I took a more creative approach and bought a bunch of $1 elastic headbands from Walmart (the kind that feel like they’re made from bra strapping, hahaha) and cut those apart to use. They probably aren’t ideal – they are starting to fray where I cut them and it looks kind of bad – but it’s a good option in a pinch.

Soma Swimsuit - v1

Another notion I used that is not listed in the instructions is bra cups! I don’t know about y’all, but I absolutely abhor the idea of nipping at the beach, so a little extra coverage was a must. While the insertion of bra cups is not included in the instructions for the swimsuit, it was pretty easy to figure out. After sewing the darts, I placed the lining over the bra cups in the correct position and smooshed the cups down flat. I sewed around the entire cup with a zigzag stitch to secure it, and then assembled the bikini top as instructed. That’s it! It was really easy and YAY NO NIPPING!

Soma Swimsuit - v1

Oh, and in case you were curious – my bra cups are cut from old swimwear. I pick up tops at the thrift store when they’re on sale for $1, and I cut the cups out. It’s cheaper than buying new cups (which I’ve found can run as high as $8 a pair, ouch), it recycles the old cups, *and* I’m 100% sure they are swimwear appropriate since I literally cut them out of swimwear.

Soma Swimsuit - v1

This was my second attempt at sewing fold over elastic (my first attempt is now buried in the trash, ha)(first attempt was not this swimsuit, btw, it was a few months ago) and I think I did a pretty ok job, all things considered! I was originally trying to sew the elastic in one fell swoop – which seems to be the way most people instruct you to attach it. The instructions for this suit instead have you sew it on in two gos – once with the elastic flat, and once with it folded over itself (on top of the first stitching). It takes a tiny bit longer since you are essentially sewing the same seam spot, but it actually goes faster since you don’t have to worry about your fabric sneaking out of the elastic. Which is AWESOME. Consider me a FOE convert – this stuff is fun!

Soma Swimsuit - v1

The swimsuit bottoms just have plain ol’ elastic encased in the legs (just like the Bombshell swimsuit). I used black because that’s what I had on hand. I love the high cut of the back leg – cheeky! 🙂

Soma Swimsuit - v1

The instructions on this pattern are really great, by the way! From attaching the elastic (both plain and FOE), to dealing with the bra straps, everything is very clearly written out and has helpful illustrations. I especially like how the lining is attached to the fabric – the bottoms have some pretty clever attaching so there are no exposed seams. Everything is attached flat, similar to underlining, which means you don’t deal with a lot of fabric shift.

For sizing, I chose the XXS, which is my normal size for Papercut Patterns. I didn’t have to make any alterations for fit – this is exactly how the pattern is drafted, both the top and the bottom. For fit reference, I generally wear a 28DD in bra and a S in underwear.

Here are some close-ups of the construction:

Soma Swimsuit - v1

I know these don’t look lined, but I promise they are. My lining is black, so it matches the outside fabric 😉

Soma Swimsuit - v1

Almost this entire bikini was sewn on my sewing machine, btw. I did use my serger to construct the main seams of the bottoms, as well as for finishing all the edges when attaching the lining to the shell, but that’s just bc it’s faster! All the finishing was done with a zigzag stitch. You can ABSOLUTELY make this on a standard sewing machine – I (mostly)did!

Soma Swimsuit - v1

Soma Swimsuit - v1

Soma Swimsuit, v2

Soma Swimsuit - v1

I’ve had a few people ask me about the support on this bathing suit, and I’m afraid I can’t really give you a good answer as I don’t personally need a lot of support for my lil’ boobs. I’d venture to guess that it probably gives about the same as a string bikini – it’ll keep the girls in place, but you prefer a lot of lift this probably isn’t the pattern for you. As far as adjusting the cups for a bigger size, again, no idea! This size fit me straight out of the envelope.

Now, if you want to talk about whether or not this guy is suitable (lolz) for actual swimming – I can vouch for that! While I did take these photos way before I actually got in the ocean (in retrospect, probably should have waited… I’m not quite as pale anymore! SORRY FOR MY WHITENESS Y’ALL), I wore this suit twice while in Florida, both times in the ocean. I’m not a crazy swimmer or anything – more of a jump in the waves and bob around on a float kinda girl – but I had no issues with the suit falling open or anything like that. It’s comfortable *and* cute! What more could you ask for?

Soma Swimsuit - v1

I guess that’s it for now! Big thumbs up to Papercut for offering up such a great pattern – I’m so excited to see everyone’s versions that come out of this!

A couple things before I sign off here –

– Please give a warm welcome to my newest sponsor, Indie Stitches! Caitlan has a gorgeous little shop full of some of the best handpicked indie patterns – and she’s currently offering 10% off all purchases through June! Use the code LLADYBIRD to claim yo’ discount!
– As a side note, whenever my sponsors offer a discount to my readers, you can find it by hovering over the badge in my sidebar. If there is a discount offered, it will show in a white box if you hover your mouse over it. Just an fyi 🙂
– Lookeeeee me, I got my first ~magazine spread~! My favorite machine needle company, Schmetz, has a free online magazine Inspired to Sew and I’M IN THE JUNE ISSUE. A whole two-page spread, woohoo!! You can download the free issue featuring moi here. Let me know what you think!
– Also, I’m apparently in a recent issue of All You magazine as well. Nothing super exciting – it’s just a photo and quote about my experience with Healthcare Bluebook (that shit is awesome, btw. Saved my ass when I was stressing over a kidney stone+no insurance last year!). If any of y’all see my mug in there, pleaseeeee let me know! I’m dying to know what part of my conversation they quoted haha 🙂

Ok, that’s all! Stay tuned later this week for version 2 of the Soma Swimsuit! :DDD

OAL: Choosing Your Fabric and Size

2 Jun

Time to kick the sewing portion of this OAL! Wheee!!

Today, we will be going over fabric options and choosing your size. Just a head’s up – I know a lot of y’all already have your material picked out, and may have even started sewing. That’s great! You are welcome to forge ahead if you so choose – my posts will be aimed at beginners, so don’t feel like you have to stick with the slow pace if it ain’t your thang. Those of you who have not chosen your fabric and/or plan to make a muslin, just be aware that you have a couple weeks until we actually start sewing. These posts will, of course, stay up long after the sewalong is over, so they will always be available for reference if ya need it 🙂

Ok, that’s out of the way – let’s talk fabric! A few of you mentioned that you’d like a little guidance on fabric, and I aim to please, so I’ve pulled a few pieces out of my stash to show you. Just a side note – the majority of these pieces are from Mood Fabrics. Not because they are sponsoring this OAL or anything – I just have a LOT of fabric from Mood. That’s all! I’ve linked to everything that you can get from the website, so you can buy it yourself if you so please. No sneaky affiliate links are hidden in this post, so feel free to click away 🙂

When it comes to choosing fabric, the first thing you want to decide is what you want your overall dress silhouette to be. The fabric you choose will ultimately determine if your dress is drapey, or has a skirt that likes to stand out on it’s own. Here’s an example – this is the same pattern I will be making for the sewalong (Simplicity 1803), sewn up in two completely different types of fabric:

Simplicity 1803
Version 1 was sewn up in a thick cotton eyelet that had a lot of body. There is a nice structure to the bodice, and look at the skirt – see how the pleats stand on their own? The thickness of the fabric help give the skirt some structure.

Simplicity 1803, v2
Version 2 was sewn in a drapey rayon fabric, which means the resulting dress is much softer. See how the pleats in the skirt look more like soft, draped folds? This fabric does not have a lot of body, so it hangs in soft drapes (I just think that’s so pretty!). The bodice does not have a lot of structure – the notch in the neckline has folded over itself over time (not really shown in this picture, but if you look at more recent photos of me wearing this dress you will see what I mean).

Still confused about how body and drape can affect how a pattern looks? Check out these two versions of my Tania culottes – version 1 is sewn in a lightweight drapey cotton, and version 2 is made in a nice linen/silk suiting with a lot of body. Both of those are made the in EXACT same size from the EXACT same pattern, but they are very different!

Hopefully those visuals will give you a good idea of how drape can affect the finished dress! How you want your dress to look is totally a matter of personal preference – however, I will point out that if you are concerned about adding bulk to your waist, you will probably want to stick with a drapey fabric. Anything with body will stand out at the gathers or pleats (however you decide to do the skirt), and it will make your waist look bigger. Just an fyi! I personally love the drapier stuff, but again, it’s totally up to you. If you’re having trouble envisioning how a particular fabric will drape and whether or not it has body, just hang some folds over your arm (or a chair, or whatever) and that should give you a good idea of how it’ll hang off your body. In the following pictures, I’ve hung my fabrics off my dressform so you can see what I’m talking about.

Once you’ve decided if you want a structured or drapey dress, now comes the time to pick fabric! The pattern gives you lots of options for various fabrics – and this is a pretty flexible style, so *most* anything will work as long as it’s not a knit.

OAL- Fabrics
If you’re a n00b to dressmaking and want something easy to work with, a lightweight cotton is my #1 suggestion! This is the fabric I will be using to make my dress for the OAL; it’s a lightweight cotton that I picked up at Mood while I was in NYC earlier this year. Cottons are great because they are easy to cut, press, and sew, and they feel wonderful to wear in the summer. Plus, they usually come in cool prints and colors! Other types of cottons to look for: cotton lawn, cotton bastiste, cotton voile, cotton shirting.

OAL- Fabrics
Here is a gorgeous cotton/silk blend that I just LOVE. Isn’t it beautiful? The addition of silk makes this a very lightweight, very drapey fabric – it’s practically tissue-weight. This fabric is also on the edge of being sheer, so an underlining is recommended.

OAL- Fabrics
Another good choice for this dress (assuming you want drapey) is rayon! This gorgeous rayon challis was sent to me from Grey’s Fabric!

A word on rayon: Rayon is amazingggg to wear, one of my favorite fibers. It’s also a big giant pain to sew, because it’s very shifty. I would not recommend this fabric if you are brand-new to sewing, but do give it a thought if you’re up for a challenge! It is absolutely worth the extra effort, I promise.

OAL- Fabrics
Here’s another drapey challis that looks and hangs similar to the rayon, except it’s polyester. Poly is a nice cheap alternative to rayon, although be warned that it is a little more difficult to press due to the nature of the fibers. This fabric is from Metro Textiles in NYC.

OAL- Fabrics
Another lovely choice is a lightweight chambray! This one is from my man Sam at Chic Fabrics in NY.

OAL- Fabrics
Here’s a lightweight cotton dotted swiss that has a little bit of body – see how it stands away from the form? This is another fabric that would benefit from an underlining as it’s a bit sheer. Also, I’m just now remembering how pretty this fabric is (from Mood in NYC) and why the FUCK haven’t I sewn anything out of it yet??

OAL - Fabric
Ooh oooh I LOVE this fabric!! This is a mediumweight silk crepe, also from Mood NYC. Silk crepe is great because the “grabby” texture makes it easier to sew than most silks, and it has a lovely drape and very saturated colors.

OAL- Fabrics
The last of my drapey options – cotton gauze. This stuff very lightweight – it’s semi-sheer and almost floaty – but it does have a little bit of body (compare it to the cotton/silk near the top). This fabric is *also* from Mood NYC. Haha that place is awesome.

Moving onto the more bodylicious of the fabric options…

OAL- Fabrics
Linen is, of course, always a good choice! This is a medium weight linen. There’s a fair amount of body in the fabric – which will show in the gathers – but it has a nice drape that results in soft folds.

OAL- Fabrics
You could always go with my ol’ TNT, eyelet 🙂 I think eyelet (or any lace in general) is a beautiful option for this pattern. Just keep in mind that you will need to underline the dress so it’s not see-through. This fabric is from Muna’s, but I’ve seen similar ones at different retailers.

OAL- Fabrics
The pattern suggests silk Shantung as a fabric option, so here’s what that looks like! Notice how the fabric practically stands up on it’s own – silk Shantung (and dupioni, for that matter) has a very crisp drape before it’s washed.

OAL- Fabrics
If you’ve ever been curious to know what silk Shantung looks like after it’s been washed, here ya go! This striped Shantung originally looked more like the silk above – very stiff with a definite sheen – but after a go in the washer and dryer, it’s softened up quite a bit and has a much more subtle luster. It definitely still has a good amount of body, but the drape is much softer now.

OAL- Fabrics
Hahaha how’s this for body? 😛 This is a polyester brocade, with lurex for sparkles. It’s probably not for the meek, sure, but I think it would look awesomeeee in this pattern!

OAL- Fabrics
Finally, here’s a stretch cotton sateen. I don’t want to say I don’t recommend this fabric- because, honestly, it would be fine for this pattern – but it wouldn’t be my first choice. I personally don’t care for the way stretch wovens hang- I think they always look a little stiff and awkward. If you have your heart set on a stretch woven, go on with your bad self, but I do suggest that you consider sizing down since the stretch factor will give you a bit more room. Fabric is from Mood NYC, btw!

Speaking of sizing, let’s talk about that now!

The back of the pattern has sections for body measurements and suggested sizes. Just ignore that. If you go by what the pattern tells you to do, you are gonna end up with some sad sack of a dress headed straight for frumpsville.

I always (always always always- regardless of indie designer or Big 4) base my pattern size off the finished measurements. Too often, patterns come with a lot of extra ease built in (ease= the difference between your actual measurements and the measurements of the garment in question), which usually ends up being too big for how I like to wear my clothes. I figured out a looong time ago that the finished measurements generally give you a better idea of fit, so that’s what I go by now.

For the sake of keeping things simple, I’m just showing the Simplicity pattern, but this works for pretty much any pattern. Every company has a different place they like to print the finished measurements- some do it on the pattern pieces, some do it on the envelope, some include it in the instructions, oh, and some don’t include it at all! – so you may have to hunt it down. For those companies who don’t include their finished measurements (also: Really??? No seriously, how hard is it to add a least add that information??), I’m afraid you’ll have to measure your pattern pieces and subtract the seam allowances. Sorry! Simplicity prints their finished measurements at key fitting points – the bust, waist, and hips.

OAL - Sizing
Take a look at your front bodice piece and you should see the measurements. This tells you what measurement the bust will be, assuming you made no modifications and kept the same seam allowance. Your ease preferences are completely up to you, but I personally like about 1/2″ of ease or less as I wear my clothes very fitted. If you don’t know how much ease you like, measure a dress you have that fits the way you like and that should give you an idea. A good rule of thumb is that you want to aim for 1/2″-2″ in the bodice, depending on how fitted you want the final dress to be. Anything more than 2″ runs the risk of looking too big.

OAL - Sizing
Here are the finished bust measurements. Fun fact: according to Simplicity’s measurements on the envelope, I should be sewing a size 10 as I exactly fit those body measurements. Looking at the finished measurements, I’m going to sew a 4, as 33.5″ is the perfect amount of ease for my 32.5″ bust. If I went by the envelope, my size 10 would have a finished measurement of 36.5″ – a whopping 4″ above my actual measurements. That’s pretty loose-fitting – too much for me! So I’m going with the 4. You may find that the size you cut is smaller than the size indicated on the envelope – or you may like the amount of ease, and want to stick with that. Either one is fine! The only thing that matters here is that you end up with a dress that fits the way YOU like.

OAL - Sizing
After you’ve decided what size to cut the bodice based on the finished measurements, find the waist measurements and proceed the same way. Again, I’m going with the 4 because I like very little ease at my waist- and that 10 would be much too big for me.

You may or may not be the same size throughout the pattern – perhaps you’re one size at the bust, and a different one at the waist. That’s fine! You can grade between sizes to get a custom fit – just mark the size you want at each point, and use a ruler to connect the lines at an angle. That’s it! If you find that you are between sizes, then I suggest going with the bigger size, as it is easier to take something in than let it out. Keep in mind that this pattern includes a 5/8″ seam allowance, so that does give you a little bit of room to play with.

A few more things to consider (sorry, I know this is long, but I swear I’m wrapping up!)
– Make sure to prewash your fabric! You absolutely don’t want it to shrink after you’ve made it into a dress (talk about a huge bummer!), so get that taken care of now. Prewashing means you just treat the fabric the same way you will launder the finished garment. I throw mine in the wash on cold (cottons, rayons, silks, polys – everything except wool gets a prewash) and hang it to dry if it’s sunny out (not because I’m opposed to the dryer – but because I’m opposed to ironing. All my handmades get hung to dry because I hate dealing with wrinkles!). It can be helpful to serge or zigzag the raw edges before washing, just so the fabric doesn’t fray.
– Does the fabric need an underlining? Does it feel nice against your body and is it opaque enough that you feel comfortable wearing it? I will not be covering underlining in this OAL, but you can reference my post on underlining here if you’d like more guidance (The dress I was making in that post is the same black eyelet one posted near the top, fyi 🙂 ).
– If your fabric is on the thicker side, consider using a lightweight fabric for the facings to reduce bulk. I usually go with cotton broadcloth for this purpose – it’s cheap, it’s stable, it’s lightweight, it does the job – but you can use anything you want.
– Planning on matching stripes or plaids? Make sure you buy enough fabric! An addition 1/2-1 yard should be fine (err on the side of more if you have any suspicion that you might need to recut – better to have too much than not enough!)
– You will also need interfacing and a zipper to complete the pattern. For interfacing, I recommend this lightweight fusible from Fashion Sewing Supply – it’s the best! Really! You can use whatever interfacing you want, just make sure it is the right weight for your fabric. *Most* fabrics are ok with lighweight fusible, though. As far as zippers – I like standard lapped zippers for this pattern, but you can use an invisible if that’s what you prefer (unless your fabric is very thick; in that case, I recommend using a lapped zipper as an invisible won’t be strong enough). Either one works as long as it’s 16″!
– If you have not made this pattern before and you are still unsure of what size to choose, make a muslin! This can be as simple as just cutting the bodice pieces (don’t worry about the facings) out of old fabric and inserting a zipper so you can get an idea of the fit. In addition to helping you determine that the finished dress *will* fit you, it will also give you a little practice with sewing the bodice before you cut into your nice fabric. I will not be covering muslins in this sewalong, due to time, but I am happy to help you assess fit if you need some assistance. Just holler at me – leave a comment on this post, tag me on Instagram (please make sure your account is public, otherwise, I won’t be able to see your post!), or link me in the OAL Ravelry Thread – and I’ll get back to you as quickly as I can 🙂 You can try Twitter, but I’m only getting about 1/3 of my notifications when they happen so that’s probably not the best way to reach me, fyi.

Ok, that’s all for today! Sorry this post was so long! Next week, we will cover cutting your fabric and marking your pattern pieces.