Tag Archives: vogue coat

Completed: The Vogue Coat

9 Jan

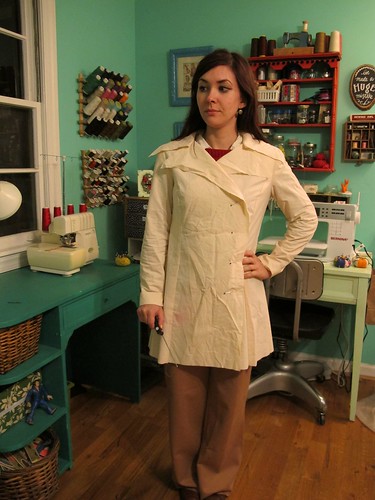
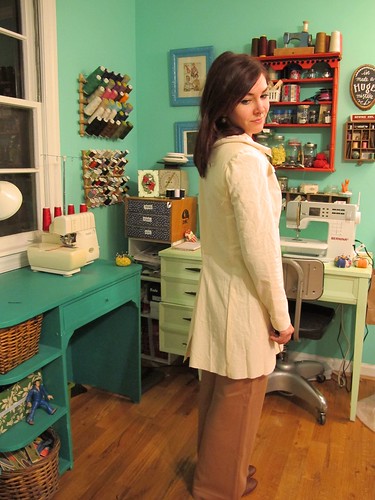
Ahhh, it’s finished! A little past all my self-imposed deadlines, but whatever – I have a new coat! Finally!

Vogue Coat - Done!

Of course, now I wish I’d given it a catchier name than “the Vogue coat,” but ehhh, too late now. Let’s just look at how nice my coat looks, yeah? 🙂

Vogue Coat - Done!

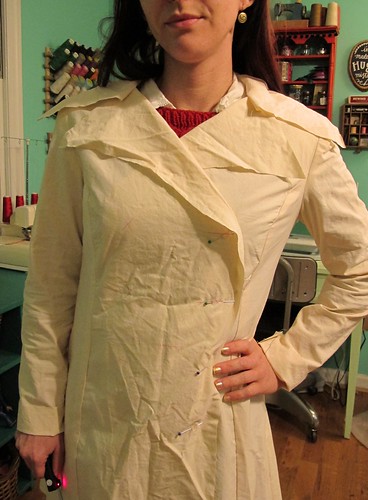
I guess there’s not much else to say about the making of this coat- I’ve outlined it pretty heavily here and here. Once I finished with all the pad stitching and steaming and general tailoring funsies, the rest of the coat came together quite quickly – especially since I’d already sewn up my lining and had it waiting for me.

Actually, let’s talk about inserting the lining real quick because I thought it was interesting how the pattern had me do it – I sewed the entire coat to completion – finished the backs of the bound button holes, sewed on the buttons, hemmed the bottom and the sleeves, stitched down the facings with long running stitches – and then inserted the lining by hand with slip stitches. At first, I tried to think up ways to not have to do this so I could just bag the lining like in RTW (one thing I learned how to do at Muna’s, man, we sewed sooo many coats there haha), but I eventually decided to just go with the instructions because I liked the way the finished coat felt with everything securely sewn down (bagging a lining, at least the way I learned, means that the facing and hem are left open and then you have to go back in and thread tack everything, which I sort of hated). Plus, the lining will be easy to remove and re-attach should I ever need to replace it. Considering that I plan on keeping this coat for a long time – or, at least, as long as I continue to fit into it 🙂 – I’ll probably end up shredding the lining long before the coat needs to be repaired.

Vogue Coat - Done!

Oh, you wanted to see the lining? Sure thing!

Vogue Coat - Done!

It’s red! Shiny shiny red!!

Vogue Coat - Done!

I can’t even tell you how happy I am that I decided to go with the silk charmeuse instead of the Bemberg Rayon or China Silk that I was originally considering. This stuff is LUSH. It’s so heavy and wonderful, which makes it easy to sew and press, and it’s so shiny and gorgeous! I can’t get enough of it! Totally takes that coat game up a notch, don’t you think?

Vogue Coat - Done!

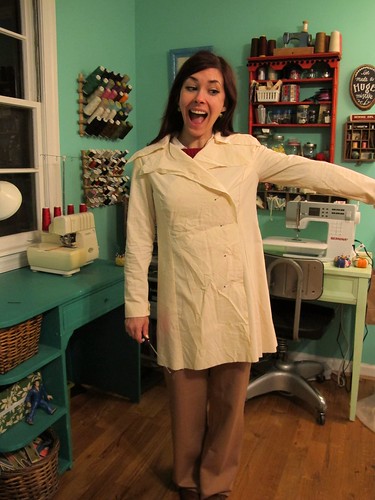
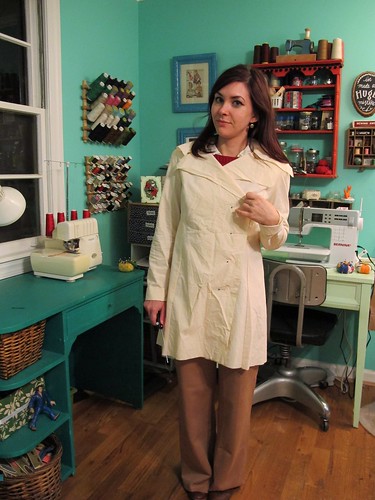
I am just really happy with this coat. It’s surprisingly warm, considering how light the wool is and the fact that I only underlined it with silk organza – when I took these pictures, it was like 25* outside, and I felt fine. It’s also pretty lightweight, making it easy to carry around (after I took these pictures, I spent the day at the mall with my BFF and the coat fit easily in my purse strap while I walked around. So nice!).

Vogue Coat - Done!

Not to mention, it’s just awesome. I’ve always wanted a plaid coat. And now I have one!

Vogue Coat - Done!
Vogue Coat - Done!

And unlike mall coats, my plaid actually matches 😉

Vogue Coat - Done!

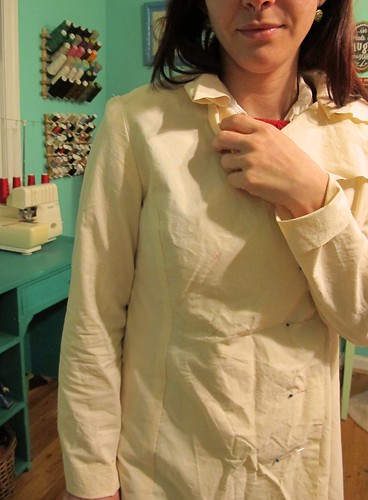
I love the topstitching on this coat. I used proper topstitching thread so you can really see it, and my machine had no trouble plowing through all the layers of coating and hair canvas.

Vogue Coat - Done!

Here’s a dorky fact about me – I love setting in coat sleeves! Really! Instead of using gathering stitches and all that nonsense, I use this cool little trick that uses a bias strip of fabric (for this coat, it was pajama flannel, ha!) to ease the sleeve head before you attach it to the armhole. Lolita patterns has a great tutorial on exactly how to do this, and even some tips of on what kind of fabric to use. I’ve used this technique for all my coats and I pretty much always get perfect results.

Vogue Coat - Done!

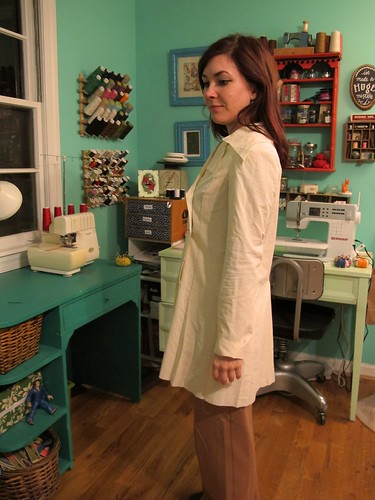
Here’s the coat without my distracting cowl. I ended up going with these black glass buttons as I like how they are simple enough to not distract from all the plaid going on with the coat fabric.

Vogue Coat - Done!

One thing that really upped my game with the coat this year was that I had a new iron to steam the shit out of things with! I ended up getting a gravity feed iron for Christmas (yay! Thank you, mom!!) and I can’t even tell you how delighted I am with the pressing output from that thing. It gets SO HOT, doesn’t auto shut-off (!!!) and I also got a shoe with it so there’s no shine or melting. It’s SO awesome. My coat really benefited, too, as you can tell – see how sharp the creases are at the hems and lapels? Love. Love love love!

Vogue Coat - Done!

Y’all probably already guessed this, but I also made my little knitted cowl to go with my new coat. It seemed appropriate, especially since I had a ball of Cascade 128 in the perfect shade of red just waiting to be used. I used the Blue Streak pattern, which was easy enough to memorize so I just carried the project around in my purse and knitted a row or two during downtime. Which was all the time – Christmas morning, knitting a cowl. Sitting in the movie theater waiting for the previews to end before The Wolf of Wall Street started, knitting a cowl. Waiting in line at emissions testing, knitting a cowl. Whatever, I love how portable knitting is! Ha!

Vogue Coat - Done!

No need to knit new gloves, as it goes perfectly with my childish skeleton gloves 😉

Vogue Coat - Done!
Vogue Coat - Done!

In other cool coat-making news, I finally found a home for my Fabiani coat – my mom! It fits her perfectly, so she’s been wearing it for the past month. Yay!

Vogue Coat - Done!

Anyway, I guess that’s it! Yay for coat-making, and yay for this giant project to finally be over! 🙂

Tailoring the Vogue Coat, pt 2

23 Dec

Man. Tailoring. It is always (always!) worth the extra cost and effort, but lord I always forget how much extra effort is actually involved. I’ve been plugging along on my coat since I last posted my progress, so here’s what I’ve been up to in the meantime!

I finally got the padstitching on the lapels done. That alone took the longest – not because padstitching takes forever, necessarily (well, I guess it depends on the size of the lapels), but because I kept putting it off for as long as possible. I was not looking forward to how long it would take. Guys – when I finally sat down and made myself do it, I finished both lapels in like 45 minutes. I’m such a baby, haha! Fortunately, while I was putting off the padstitching, I was not sitting idle – I skipped ahead of the instructions, and assembled the coat back (minus the tailoring) and lining, so that should save me some time now.

Now, I totally could have skipped the padstitching – it’s not 100% necessary, although it will 100% of the time make your coat look sooo much nicer. RTW coats do NOT have this sort of tailoring in them, and they obviously get away with it because people still buy them. But look at what a difference it makes:

Vogue Coat - Tailoring

If you can’t tell, the padstitched lapel is on the left (the side that overlaps), and the one that hasn’t been padstitched is on the right (the underlap). Do you see how flat the non is in comparison to the one with stitching? It’s pretty incredible!

Vogue Coat - Tailoring

LOOK AT THAT ROLL LINE, JUST LOOK AT IT.

Padstitching, in a nutshell, is basically just sewing diagonal stitches in straight lines (eventually forming a bunch of chevrons) using silk thread, so the hair canvas adheres to the coating fabric. You don’t sew all the way through the fabric – just pick up a little nip here and there to keep things connected. You hold the fabric+canvas over your fingers so it is encouraged to roll while you sew, and then when you’re finished, you steam the shit outta that sucker so it is hold it’s shape. Again, time consuming and not totally necessary, but it really is the difference between “Hey, I made a coat” and “~*Hey I tailored a fucking coat are you so impressed*~”. I mean, I’m impressed with myself and I haven’t even finished the thing yet!

After I finished the Dreaded Lapels, I focused my attention on the collar.

Vogue Coat - Tailoring

First, I sewed the two under collar pieces together. These are cut on the bias, so they will stretch and sit correctly underneath the upper collar. They are also cut slightly smaller than the upper collar, so the seam will roll to the underside and you won’t see it. That’s the plan, anyway.

Vogue Coat - Tailoring

To sew the interfacing pieces together (remember, they need to be on the bias so I can’t cut them on the fold), I removed all seam allowances and zig-zagged the pieces together at the center, secured with a piece of seam binding. I then marked my roll line and, I know, it looks really shitty. Sorry about that.

Vogue Coat - Tailoring

As with the lapels, I marked the padstitching lines with my trusty Sharpie. Above the roll line gets heavy padstitching (1/4″ tall, spaced 1/4″ apart) and below the roll line is more lightly padstitched (1/2″ tall, spaced 1/2″ apart). This will help the collar to stand so it looks nice and full and not sad and flat.

Vogue Coat - Tailoring

After I finished padstitching, I wrapped the collar around my tailor’s ham and, again, steamed the shit out of it. So qt, so pro.

Vogue Coat - Tailoring

I drafted a back stay, although my pattern doesn’t call for it. It’s always a good thing to include, though – it’ll reduce the strain on the coat back from moving your arms around/hugging people, and thus give your coat a longer lifespan. Plus, you can use cheapie muslin and I love me some cheaping out.

By the way, I use the term “draft” veryyyy loosely. I pinned my back and side back pieces together (so they would be one continuous piece with no seams) and marked 8″ below the neckline and 3″ below the armhole, then used my curved ruler to connect the two lines.

Vogue Coat - Tailoring

The resulting piece (cut on the fold, because, again, no seamlines) is the back stay. I pinked the bottom edge so there wouldn’t be a sharp line on the outside of my coat. Real talk: this is the only reason why I own pinking shears at all. For tailoring. I’m not even kidding about that a little bit.

Vogue Coat - Tailoring

The back stay then lays on top of the coat back and is basted to the arm holes, side seams, neckline, and shoulder edges. The bottom just kind of flaps free in the breeze. And that’s all there is to it!

Vogue Coat - Tailoring

I also stabilized my shoulder seams with twill tape – no real reason, except that my Tailoring book (lol why the fuck is that listed at $65 what is this madness) said it was a good idea so I just went along with it. It should reduce the strain at the shoulders, which is good because this coat is starting to get a little heavy!

Vogue Coat - Tailoring

Finally, I catch-stitched down all my seams on the coating fabric, catching only the underlining. Honestly, I should have done this as I sewed each piece – I really had to reach up under the back stay to get some of those seams sewn down – but I wasn’t thinking about it at the time. Catch-stitching down the seam allowances is one of those weird optional steps that isn’t necessarily bad if you skip it (like I was planning to), but it does help keep everything in place on the inside, thus prolonging the life of your coat. And, I mean, it’s sort of relaxing. I really love to catch stitch, what can I say?

So there’s that! I’m mostly done with the fiddly tailoring at this point – I still have the sleeves to deal with, but they shouldn’t be too bad. Since I’ve already assembled the lining, it’s really now just a matter of putting everything together.

My original plan was to have this finished by Christmas, but I’m now shifting that to a (hopeful) NYE completion date. Construction hasn’t necessarily been dragging- I just haven’t been home at all to work on it! My dad ended up in the hospital last Monday, where they discovered that his colon was completely blocked due to cancer, so they wheeled him into emergency surgery on Tuesday and cut out 30% of that shit (pun intended). They also removed a bunch of lymph nodes and tested those – turns out that stuff is cancer-free, which is AWESOME – but he does have spots on his liver that will require him to go through chemo. Scary, scary shit, man. Fortunately, my dad has been a total trooper and by Wednesday morning he was walking up and down the halls like a champion. Things are good now – he finally passed gas yesterday (lol @ us being excited about my dad farting, considering he regularly likes to stink us out), and we’re hoping he can be home in time for Christmas. Fingers crossed! Although, to be honest, I’ll totally spend Christmas in that tiny hospital room if I have to!

I don’t like to discuss my personal life here much, this being a sewing blog and all, but my dad is a pretty inspiring/amazing dude. He regularly runs ultra marathons – 50-100+ miles at a time, up a mountain, sleeping in the bushes, that’s all normal for him. I laugh when someone corrects me for saying 500k (“Oh, you mean 5k, silly.” “No, dipshit, I meant 500k. He ran 314 miles.”) when I brag about his racing. And dude is fast – he regularly smokes out all the little 25 year olds who run the same races. Not bad for a 54 year old who looks like Santa! Not to be a total sap, but getting to spend the last week with my family (despite the less-than-ideal circumstances) and knowing that my dad is going to be a-ok is literally the best Christmas present I could have ever asked for. I’m just so thankful.
❤️❤️

Anyway, I hope everyone has a Merry Christmas! I’m hoping to get in some much-needed sewing time – my machine has been idle for way too long 🙂

Tailoring the Vogue Coat

5 Dec

When I originally posted my Vogue coat muslin posts, there was quite a bit of interest about what goes in the process of making a coat from start to finish. I’m not one to tease, so here’s a glimpse into what I’ve been up to, coat-wise, for the past couple of weeks.

The first thing I should mention is that coat-making isn’t hard. It is time consuming, for sure, but anyone with a few projects under their belt could easily tackle this. It might take you a couple of months, and you may have some hair-pulling moments (either with deciphering instructions or actually trying follow them), but it’s doable. I don’t know who started this whole thing of ~omg coat-making is so hard~ (probably the same person who said that sewing with knits was also difficult. Nope! It sure ain’t!), but, ugh, just ignore them. It’s not hard. It’s time consuming, it’s expensive, and you definitely need to muslin the shit out of your pattern before you even think about cutting into your coating… but in reality, it’s not terribly different from making a lined skirt or dress. You just need to follow a few more steps. You can also totally omit the whole tailoring part, with the special interfacing and padstitching and bound button holes and all that – and then shit gets super easy (well, as super easy as sewing a lined garment can get :)). Personally, I don’t see the point in spending all that money on a garment if you’re not going to go all out and do the whole nine yards, but then again, I think tailoring is fun. So do what you will.

My first task, post-muslin, was to start cutting the plaid coating. I won’t go into detail on that process – basically the same steps as the tutorial I posted on matching plaid – and it took foreverrrr. Seriously, I think I spent close to three hours just cutting the outside fabric! WOOF. I also had to cut interfacing (I am using hair canvas, which is a hefty interfacing commonly used for tailoring purposes, such as coats!), lining, and silk organza. The silk organza was a last-minute addition – I originally wasn’t planning on underlining, although the pattern calls for it, since I don’t need my coating to be super warm in our mild winters. However, my pattern is a fairly structured peacoat, and the coating has a bit of a loose weave, so I decided to underline with silk organza to give it that nice crisp hand without adding a lot of bulk or unneeded warmth.

Vogue Coat WIP

Silk organza can be expensive, and some people like to use poly if it’s not touching the skin… but personally, if I’m going to dump all this time and money into a coat, the couple dollars in price difference doesn’t really effect my final budget. So I went with silk, since it presses nicely along with the wool.

The bonus part of using an organza underlining (or really, any underlining at all) is that you can mark directly on the underlining and you don’t have to worry about it showing through the coat fabric. I totally use a sharpie. Go ahead, judge me.

I underlined my pieces flat on my tabletop (see this tutorial if you need more info on underlining!), using silk basting thread and going alllll the way around each piece. Every piece is underlined except the facing – only because I ran out of silk organza :). I will be interfacing that piece with a fusible. This process took a long time, but it’s pretty relaxing work – perfect for grabbing the computer and watching shitty documentaries. That’s my excuse, and I’m sticking to it.

After underlining, it was time to put in the bound button holes!

Vogue Coat WIP

I was actually a little scared of this part! I don’t know why – I’ve sewn plenty of successful bound button holes in my day, and used a different technique each time. Maybe I’m out of practice, but for whatever reason, I was not looking forward to this part and I definitely put it off for like, a week. Which is shitty because bound button holes are the kind of thing that get done before you do any other work on the coat, so that meant the project was put on hold until I got my ass in gear and put those damn button holes in the front piece!

To make my button holes, I wanted to try yet another technique, so I downloaded Karen’s e-book on bound button holes and followed her instructions. Folks, these are the prettiest, most perfect button holes I’ve ever made on the first try. Seriously! If you have any concerns about doing these, or have fucked them up in the past, you should definitely check out her book. I think I paid about $3.50 for it after the rate conversion. For $3.50, you really have no excuses.

Vogue Coat WIP

I mean – look at them! I even managed to match up the plaid on that particular one, ha!

Vogue Coat WIP

As I mentioned previously, the instructions include all the steps needed for a fully tailored coat, so fortunately I don’t need to compile a list of steps and modify the pattern to suit my needs. They are a little different from the previous coats I’ve made, in that some of the pieces are sewn together before you start with the interfacing and pad stitching. Personally, I like to do all that before I assemble the rest of the coat because it makes it easier to handle, but I’m also a stickler for following instructions. So, I attached the pocket, the front and side pieces (being careful to match up the plaid, which for some reason took me like an HOUR. Shifty plaid, go die.). I attached the interfacing using long basting stitches with my silk thread. This took a while, but I also recently rediscovered all my favorite awful pop-punk and ska bands from my youth, so I may or may not have had a personal dance party in the process.

Vogue Coat WIP

Here you can see some of the details – the hair canvas, the uneven permanent basting with the silk thread, my underlining, the pressed open seams. It’s coming along, that’s for sure!

Vogue Coat WIP

Next, I sewed my twill tape to the roll line of the collar. This will help the collar keep it’s shape as a wear it, since the twill tape will dictate how it falls at the fold line. You measure your twill tape to the length of the roll line, then subtract 1/4″ from the length and ease the coating to the tape and catch stitch it down. Pretty simple, but it makes a huge difference in the finished coat.

I also marked my pad stitching lines on the collar, but I forgot to take a photo. I totally used that sharpie, too. Ha!

Vogue Coat WIP

So that’s where we are now! The coat fronts have been mostly assembled – I just need to pad stitch the collar, and it’ll be ready to attach to the back and side back pieces. Obviously, it’s not anywhere near completion, but that doesn’t stop me from pinning it to my dress form and pretending it’s a coat. Call it inspiration, or call it a kick in the pants, or whatever. Either way, I’d love to finish this by Christmas, but we’ll see!

I know the plaid looks like it doesn’t match in those pictures, but the fronts are not properly overlapped. Trust me. Three hours of cutting means all the plaid fucking matches, dammit.

What’s on your sewing table this week?

The Vogue Coat: Muslin #2

15 Nov

Well well, 3 posts in one week! That doesn’t happen too often, huh? Hopefully y’all aren’t tooooo sick of hearing from me, because I have lots to say apparently!

Starting with yet ANOTHER muslin post. Forreal, tho, y’all were so helpful in my last muslin post, that I’m sticking my hand back in the cookie jar again. A little help, yes yes?

Coat Muslin, part 2

First things first, you probably noticed that this coat looks entirely different – that’s because it’s a different pattern altogether! I ended up scrapping the original Vogue pattern plan – a shame, because I really wanted to use it (it was a gift from a reader, and I like to make use of awesome things, see), but there’s no point in trying to make something work that needs, well, that much work. Especially considering all the modifications I’d have to make beyond just sizing – including drafting a new lining, facing, and undercollar. No, no thank you.

So I dug around in my stash and pulled out Vogue 7666, which happens to actually be in my size. And to make things extra exciting, this pattern has all sorts of fun goodies in the instructions for creating a beautiful hand-tailored coat – things like separate lining pieces, instructions for padstitching, a marked roll line, etc. Fun!

Coat Muslin, part 2

I made up a quickie muslin and here are the pictures! Based on everyone’s suggestions, I am wearing this muslin with a sweater underneath, and I slipped some shoulder pads in the muslin as well. The shoulder pads may be on the large size, I dunno, they were in my stash.

Coat Muslin, part 2

I think it fits much better than the first, off the bat. Look, the arm holes are normal!

Coat Muslin, part 2

I can’t tell if the shoulders need to be narrowed a little, though?

Coat Muslin, part 2
Coat Muslin, part 2

Back and sides look ok.

Coat Muslin, part 2

I know the back looks a little loose, but I honestly can’t go much smaller without making the coat difficult to move around in.
Also, ignore that weird shit going on at the bottom half – there will be a back vent there, but I didn’t bother sewing it in the muslin, ha.

Coat Muslin, part 2

I know the collar and lapels are kind of weird and pointy, but I like them! Keep in mind that they will be a little bit smaller – the 5/8″ seam allowance is there, and once I get the facing installed there will be notches and topstitching and all that.

I also need button help! What would you choose? I really love these black glass buttons from Mood Fabrics – one, two, three or four?

Or do you have a better suggestion? My only requirements are that they are black (sorry, but I think anything other than black is just going to look off with my fabric choice), 1″ with shank, and they reeeeally need to be $3.50 or less because I need 8! Again, you can see my fabric and pattern in this Instagram picture.

Coat Muslin, part 2

Sooo, to sum up: coat muslin #2, y/n? See any fitting changes I need to address before I start slicing in to my beautiful coating?