
Holy shit, do y’all even realize what is going on today.
FINAL COUNTDOWN PANTS PARTY TIME.
Ha! But in all seriousness… we’re just a few steps away from being finished! Let’s get excited, yeah? 🙂

Today we are attaching the waistband, steps 15-19. You should have a semi-finished pair of pants at this point, all major seams sewn except the back extension. We will get to that today!
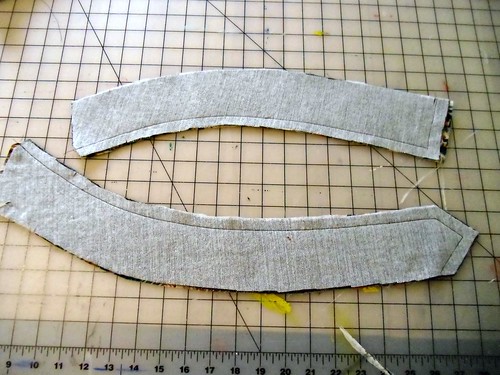
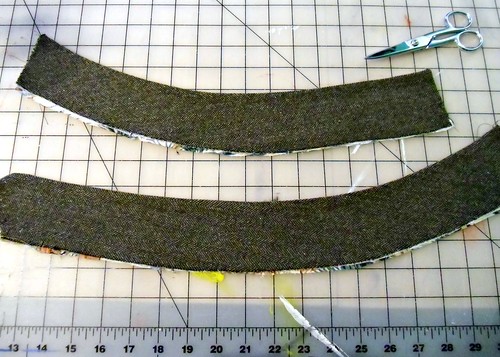
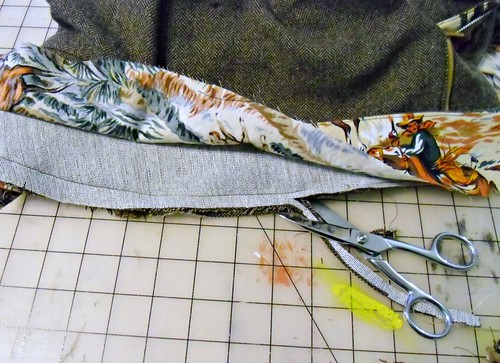
You should have two waistband pieces – a right side (with one square end) and a left side (with one pointed end) – cut in both your regular fabric and your lining fabric, and one set should be interfaced (I opted to interface the side with my fashion fabric, as it needed a bit more structure. Do what works best with your particular fabric, though!). Stack both left pieces together and both right pieces together, and sew along the top edge – the un-notched, concave curve – and the center front (the aforementioned square/pointed ends).
Trim, grade, and understitch the seam allowance.
You won’t be able to understitch all the way into the center front sections – that’s ok! Just understitch as far as you can 🙂
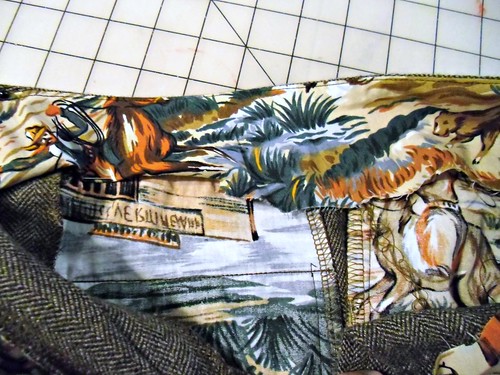
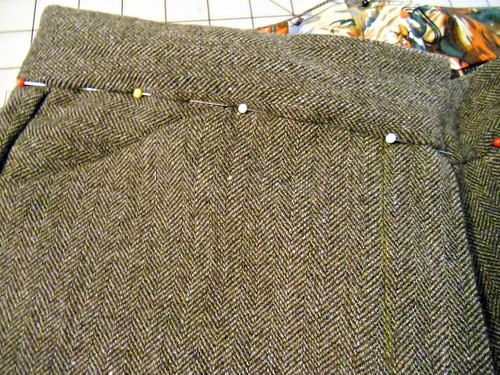
Open up your waistband pieces, and start pinning the main fabric side to the top of your pants, right sides together. Don’t worry about the lining at this point. Go all the way around, center front to center back (and yep, back extension is still open. We’re getting there!). Sew this seam.
Trim your seam allowances.
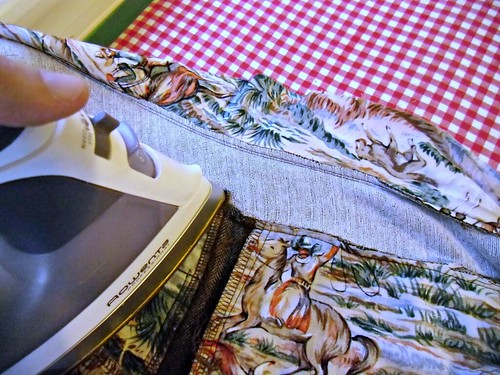
And press everything up toward the waistband.
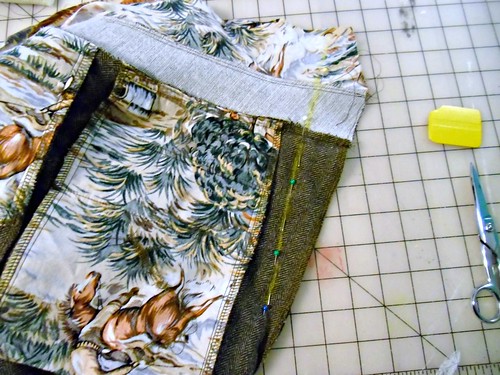
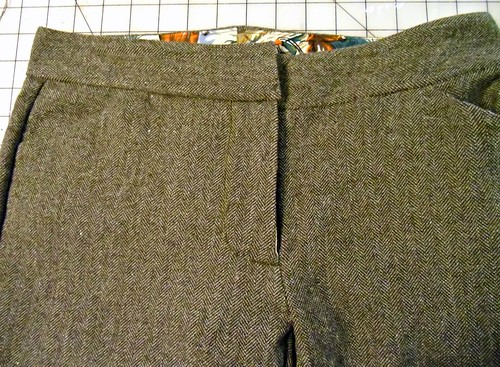
Now for that pesky back extension! See my pretty, bright pattern markings? We are going to sew right over that. Pin along the marked line, all the way up through the waistband. I know, the marking doesn’t extend that far but do the best you can. The instructions indicate that you should baste first, check the fit, and then sew your permanent seam. However, if you already made a muslin, you don’t need to worry about basting first – unless you really want to fine-tune the fit. Personally, I always baste first. Even after multiple muslins 🙂
Be very careful to ensure that all your seams are aligned when you sew up the center back seam! If one side of your waistband is wider than the other, it will result in one side that has a little peek of lining popping out. So double-check before and after you sew!
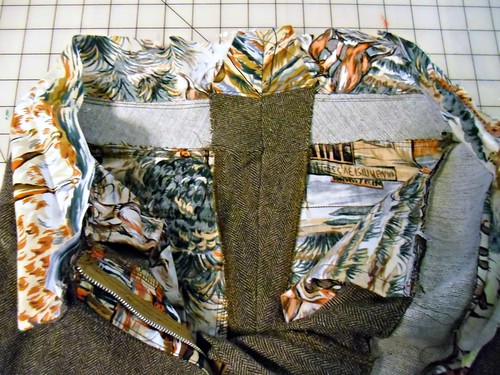
Press open the center back extension. Those giant seam allowances are supposed to hang around – later, you can adjust the waist of your pants, making it bigger or smaller as needed 🙂
Sooo… pinning the waistband. Fair warning: this part is a bit fiddly and you will probably end up hating me for making you slog through it. I know, it sucks! But it’s better than unpicking a bunch of stitches, or having a janky looking waistband. Spend a little extra time up front making sure everything is lined up, and it will save you hours of banging your head against the wall when you realize that your third waistband attempt looks even worse than the first one.
Start with your lining all spread out and hogging the spotlight inside your pants.
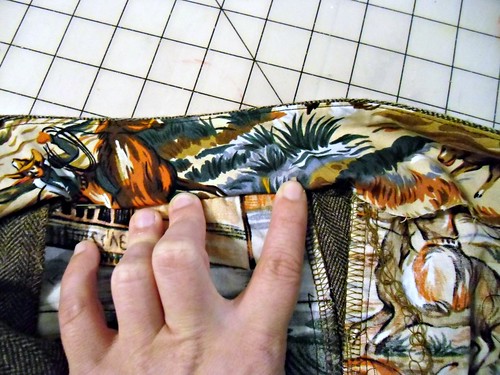
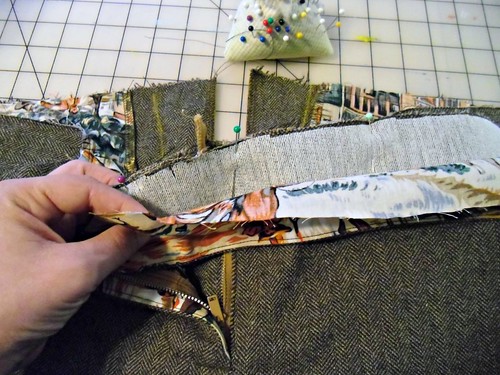
Fold the lining under to the inside until the fold is covering the stitching underneath by about 1/8″-1/4″.
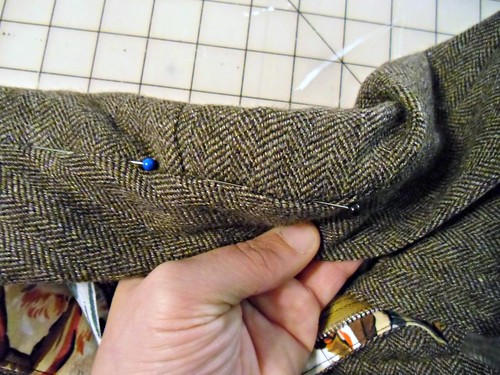
Now flip the waistband over and pin through the front, right in the middle of the ditch between your pants and your waistband.
When you flip the waistband back over to the lining side, the pin should just be catching the lining. The fold underneath the pin should be no more than 1/4″ – anything more than that will just look sloppy.
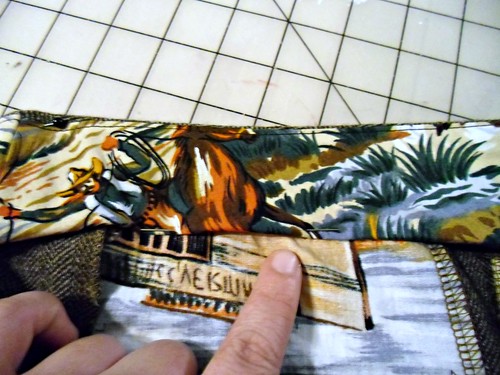
Repeat all the way around the pants, skipping the 3″ or so section of lining that covers the back extension. We aren’t going to stitch that part down, so just leave it open.
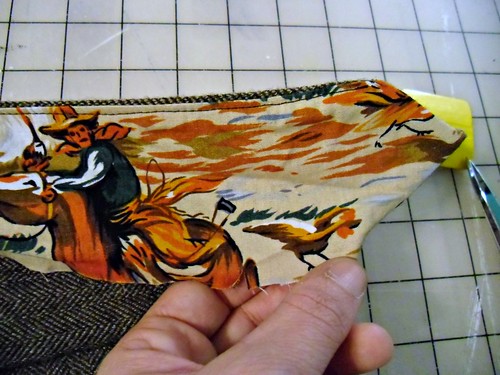
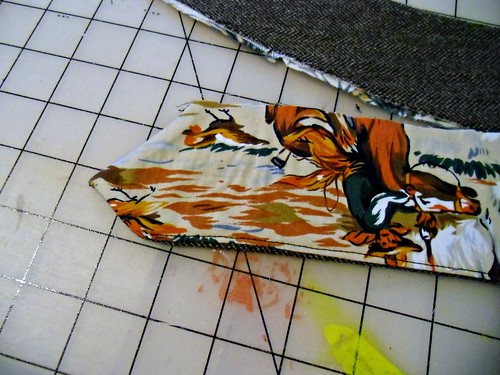
STOP PRESS. Are those chickens?? SHUT THE FUCK UP.
ahem.
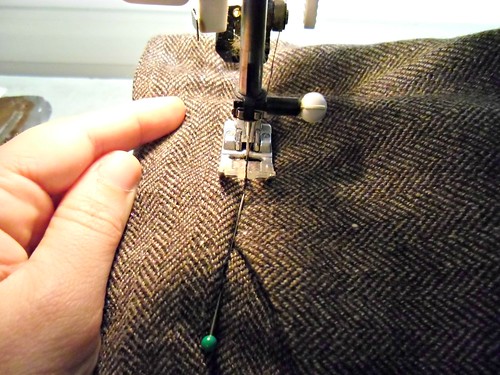
With your sewing machine, stitch all the way around the lining, exactly in the little waistband/pants ditch that you pinned into. This is called stitching in the ditch. Yes, I know. It’s so clever.
Again, don’t worry about the section with the back extension is. Just skip over it and continue stitching in the ditch.
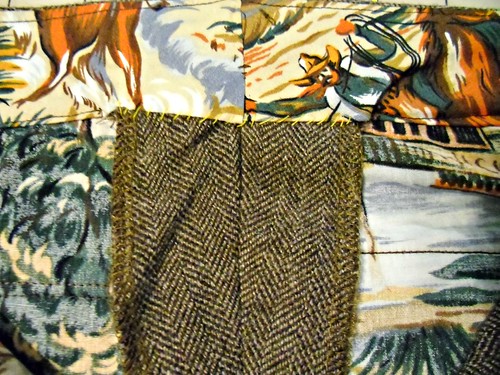
Afterwards, you can tack down the lining over the extension. The instructions call for just a few stitches worth of tacks, but I like to slipstitch mine down all the way so I know it’s not going anywhere. And also, I used yellow thread, because yellow is delightful.
Give the waistband a good steam press, both inside and out.
That’s all! That wasn’t so hard, huh? 🙂
Expect a wrap-up post in a couple of days – belt loops, buttons, and hemming. And then PANTS PARTY 2012, YO.


Seriously, your lining fabric is THE BEST SHIZ EVER! Also, I’m so behind, i really need to catch up so I can join the pants party! http://www.youtube.com/watch?v=oFSWsKiWNBc
AHAHA THAT VIDEO. THE BEST.
I fucking love you and everything you do. JUST. SAYING.
Love you too, bb! ♥
Omg, final countdown makes me scream it is SO FUNNY!!!
Ahem, seriously, these posts have been great and tonight is the night, oh yes, that I’m going to start sewing mine. I feel armed and fully dangerous to hit them thurlows. And mine are now full length trousers as guess what? I had enough fabric for legs….here we go….
YOU are delightful.
I am not sewing along but i still read your posts on the sew-along cos I love your humour!
“Are those chickens? STFU” hahahahhaha
Alas, I have run into more pesky fitting issues, so I still don’t have a decent muslin. Not sure handmade pants are in my future without an expert’s help 😦
Well shit 😦 I wish I had more help to offer you, but I’m still a bit of a n00b at fitting pants myself. Perhaps there is a class in your area that you could take?
I am joining the American Sewing Guild Boston chapter, so I hope the lovely ladies I met this weekend can help. I’m still going to keep working on them, but I’m going to step back and isolate each adjustment. That should help 🙂 And thanks for the advice you gave! It helped a lot 🙂
I admit I haven’t been following along since I’ve been so busy and didn’t intend on making Thurlows, but was going to go back later to bookmark things for reference… but my first stop in and ack! Is that the fabric we both got when you were in Chicago?? Awesome! I still am not sure what to do with mine yet. And that fabulous lining is KILLING me. I totally want to line something with wackiness now.
It is the same fabric! BFF fabric haha! And yay for wacky lining – the best part about making pants, seriously. I have cowboys in my pants. And chickens, apparently 😛
Who doesn’t love cowboys in their pants 😉
I don’t have a decent muslin yet either. Neeo a swift kick in the pants (haha) to just sit adown and work on it as I have four fabrics already for these thurlows just taunting me. Alas, maybe this weekend I will do them and be able to have a party in my pants too. ;p
This sew-along is my third go on this pattern. First one was a size too small 🙂 and the second one is my most worn pair of pants. But for some reason my left waistband is always too short. The right one fits perfectly on all three pairs, but the left one is too short. And I can’t figure out why. I know, that I traced it correctly. Three times, three different sizes. Yours seem to fit. Why????
Besides that, I love your blog 🙂
You know, I noticed the left waistband was shorter on mine too, but I figured I had fucked something up with my tracing (as I don’t normally trace my patterns – I’m a cutter! NO SHAME.). For those pairs, I just eased the pants into the waistband and let the slack stay on the end where the extensions are. For future pairs (including this one), I added about 1/2″ to the length of the waistband.
haha, I was about to ask about this very thing… I notice that the waistband pieces are the only pieces that don’t have ‘seam allowance included’ written on them…maybe that was it?
Hi! I’m doing the sew-along a little late, but better late than never, right? I used a 7 inch zipper instead of a 4 inch one and I just wanted to check before I attach the waistband — are there any special tips or tricks about that, or just make sure the zipper pull is below the waistband and sew over it, la-di-dah, like it’s not there?
Also my waistband came out too short too, but by kind of A LOT, like 2 or 3 inches. If I have enough fabric, I will recut it…if not, I guess I’ll try adding a little extension. How did it come out so wrong?!
Thanks a bunch! Other than the waistband, so far so good, knock wood!!
Yes, exactly what you said – just make sure the zipper pull is below the waistband. When you sew the waistband on, it’ll create it’s own zipper stop 🙂
As far as the waistband coming too short, a few people have pointed that out 😦 I noticed it with mine too, although not quite that drastic (and since this is pretty much the first time I’ve ever traced a pattern, I chalked it up to *my* error, not a pattern error. Looks like I was wrong!). The best thing I can suggest is to see if you can omit some of the extension and then ease the waistband in as much as possible. That’s what I did, rather than cut another waistband. If you have to add an extension, play around and see if you can get it under the underlap where you button the pants – then no one will see the seams.
Hope this helps!
Thanks for your help!! It is taking me forever to finish this waistband, for chrissakes! But I’m getting closer…
Do you always sew with your pins in-line with the seams? Do you pull the pills out as you go? I do as my mother did, cross the seams and sew right over the pins.
I don’t – I usually keep the pins perpendicular to the seams because they’re easier to remove while sewing (I don’t sew over pins unless I’m doing something reeeally fiddly and match-important, and even then, I go SLOW! Hitting a pin can really fuck up your machine in a really bad way :/). For this waistband, I keep them in-line with the seams because it makes it easier to keep everything in place while it’s being sewn. I just remove them as I go 🙂
Hi! Me again from the muslin page. I just did a face palm. The freaking extension!! I didn’t sew that up properly. No wonder they were falling off!
I’m curious how many muslins this will take! Haha
haha whoops! Well I’m glad you figured it out 🙂
Are there any news about the waistband? 2016 and it still too short, is it the idea of the pattern or nobody cared enough to rectify it? I just got there and was so stuck until I’ve read the comments…. So sad.. But that you for clearing things out! Great help!
i’m late to making my first thurlows… your tutorial was a life-saver! thanks tons for posting it. but man, i think these will have to be “at home” shorts for me. looks like a uni-pocket in back (which i messed up on the pocket-sides making them appear super-wide & had to redo the seam… the list goes on). so wanted to love these… will-try-again… i hope! 🙂