Tag Archives: work in progress

Next Knitting Project – Another Sweater!

20 Jul

A few months ago, I mentioned that I was working on a second Agatha sweater – this time in black yarn. After about 2 weeks of knitting, I put it aside to work on something new & fresh, i.e., the Miette. Welp, that’s all done now & I’ve learned that I am unable to chill between knitting projects, so we’re back at the black Agatha. And, wow, is it knitting up WAY faster than the first one!

This is essentially just a dupe of the first Agatha – same yarn, different color. Same gauge, same size, etc etc. I am using Cascade 220 in a heathered black (although it looks super jet black in these pictures, there are subtle streaks of grey irl) with my trusty size 5 needles. I picked it up about 3 weeks ago & I’ve already finished the body. Magical!

This post also explains a little of my absence this past week – I’ve been housesitting since Tuesday, and while I did drag both my machine *and* my serger to the house (!!!), I haven’t gotten much sewing done because the commute is stupid long (I am staying in Hendersonville for those who know Tennessee… and I work in Midtown. Ughh!) and by the time I get back, I really just want to sleep. Ha! At any rate, I’ve been working on a pair of shorts that I’m REALLY excited about, so hopefully those will be finished soon!

Agatha v2.0 - body finished
My friend Amanda took these pictures of me. The background is where I’m housesitting – isn’t it gorgeous?! I made her crop my face out because I wasn’t feeling well & it totally shows.
Also, I had to lighten the pictures a bit since the black did not want to photograph at all.

Agatha v2.0 - body finished

Agatha v2.0 - body finished

Agatha v2.0 - body finished

Ok, this next picture is a really terrible picture of me, but look at the view!
Agatha v2.0 - body finished
LOOK AT THE VIEW

I have also just decided that this sweater will be formally named the “blagatha.” That is all.

A Day At The Flea

25 Jun

Alternately titled: Why I Love Tennessee And It’s Awesome Flea Market!

The flea market here is monthly, and I do try to go every month (last month I had to miss because I was in Florida – but I’m not complaining!!). The whole thing is MASSIVE – and full of vendors selling all kinds of stuff, from priceless antiques to dirty junk. I personally like the dirty junk 🙂 There are also vendors who sell boring shit like socks & discontinued Clariol hair dye & door mats with whimsical pictures of your preferred dog breed, but I tend to avoid those booths because, well, boring!

Anyway, I took my new friend Jenna with me this time, as she had never been before! We met up with Lauren Winter after about an hour. We also ran into Kaelah as we were leaving – Nashville is such a small town! I’m not going to go into detail over what everyone else bought – let’s just say we had to make an extra trip to the truck about an hour in, because we already had too much stuff to carry around! 🙂

I didn’t make out with quite as much bank as I customarily do – no huge garbage bags of fabric for $4, or stacks of patterns for pennies apiece – but I did come home with some perfect little gems.

$15, yo!
My absolute favorite thing I bought was this dress – I bought it right before we left (after seeing it first thing & obsessing over it for the next few hours, ha!). I haggled the lady down to $15, which is totally a steal I think. The fabric feels like some kind of silk-blend; it is unfortunately much too hot to wear during out 100*+ days. Anyway, the colors are kind of autumnal. But I love it so much!

Silk Shirtwaist Dress
I did end up swapping out the buttons to these – the ones on there obviously weren’t original, as they didn’t match the dress at all. Also, there was one missing. I am quite sure I bought these brass buttons at the flea as well, so it seems like a good fit 🙂

Silk Shirtwaist Dress
Those are the old buttons on the right – silver rhinestones. lolwut

Silk Shirtwaist Dress
One thing that really delighted me about this dress is that there is a lot of hand-mending all over it – including these little darned holes at the hem. It was obviously a favorite dress.

Embroidered Pillowcase
I also bought this pillowcase (filled it with polyfil from my sewing room – for some reason I have like 3 bags of it?) for $1 – I love all the embroidery! The lady who sold it to me said the woman who did the embroidery was in her 80s at the time. I just think it’s so pretty!

Brooches
Some pretty brooches – the pinecones came from the same booth that the silk shirtwaist dress is from.

As far as sewing notions, I found a few…

Crazy Zipeprs
Crazy zippers! Lol I have NO idea what I will do with these, but they had to come home with me.

Bias Tape!
Crazy bias tape – I see a floofy Christmas dress in my future…

Plaid Taffeta Fabric
Plaid taffeta… good for another Christmas skirt? Man, I love Christmas.

Green Lining Fabric
Celery green lining fabric… kind of boring, but it was also kind of only a $1 sooo no complaints here.

In the world of things I didn’t buy but considered taking home with me anyway –
The puppy that @bloomingleopold tried to buy today.
THE CUTEST PUPPY I’VE EVER SEEN
He’s a miniature Australian Sheepdog! At 19 weeks, he weighed about 6 pounds. We all fell IN LOVE, but apparently he already sold (lol who sells a dog at the flea market anyway?).

I love the flea market, but this is creepy as shit
Well, no, I didn’t actually want to buy this. Thought I would share anyway. Apparently, this is Farrah Fawcett’s head, in a wooden box.

I actually started – and mostly finished – a new dress over the weekend, but the weird slinky poly was giving me an absolute fit, and the pattern wasn’t looking too hot on me (maybe because of the fabric?), so I ended up tossing it (rather violently, I might add) in the corner & instantly felt 100% liberated. I haven’t had a proper UFO in about 2 years, so this is a very new experience for me.

In the meantime, I started a new dress – we are revisiting Simplicity 1803. In the loudest print I have ever purchased.
Simplicity 1803
Headed toward Tackyville, y/n?

Underlining: The Why & How

15 Jun

I’m currently working on the madness that is Simplicity 1803 (seriously thinking about calling this dress The Disaster Dress, if that means anything) and I thought I would share a few of my trials & tribulations with y’all. I’ve had a lot of comments requesting a tutorial for underlining (or even just asking wtf underlining is exactly), and while I haven’t been able to fulfill those requests in the past – but today is your lucky day! Underlining day, yaay!

First up, let’s talk shop. What exactly is underlining? Some people tend to confuse it with lining; this is incorrect. Lining is a duplicate garment that hangs separately inside your dress (or skirt, or pants, or whatever) that covers all seams for a nice clean finish. It is constructed separately and generally only attached by a few seams – perhaps a neckline, or the waistband of your skirt. The hem usually left free-hanging for ease for movement. Consider lining the inception of sewing – a garment within a garment (see what I did there?).

Underlining is when you sew two pieces of fabric together & treat them like a single piece – kind of like some relationships (ahhh I’m on a roll today here). Since the underlining is actually sewn to the back of your fashion fabric, the seams do show & the inside of the garment doesn’t necessarily have that clean finish.

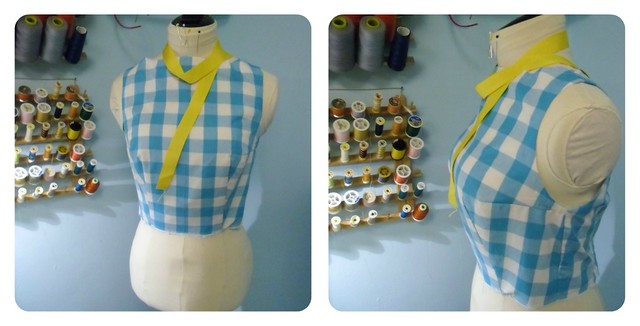
Underlining is wonderful for a variety of reasons – you can use it to stabilize your fashion fabric to give it a bit more body (like with my Bombshell dress), to add a layer of opacity to an otherwise sheer fabric (my Swiss Dot Violet really benefited from a batiste underlining), to add a layer of warmth to a coat (the lining of my Lady Grey is underlined with cotton flannel), or even to brighten up your fashion fabric a notch (look at the difference underlining made on my Gingham Peony!) If you were concerned about the integrity of a delicate fabric – lace, or vintage, or… I dunno, vintage lace – you could underline every piece for additional strength. Underlining has lots of uses, it’s awesome!

For my dress in question, I am using this pretty black eyelet from Mood. The whole thing is quite see-through so I knew ahead of time that it would going to need some kind of backing to keep certain places under cover. I originally planned on just dropping a whole lining in the thing & calling it a day, until I realized that you would see every single seam through the eyelet – and by every single seam, I mean eyelet seams & lining seams. I’m using Bemberg Rayon here (LOVE!!!!!) and that stuff frays like nobodies business. I started imagining little shreds of turquoise popping out all over the place & it gave me the willies.

So I decided to underline instead. An added bonus is that it totally negates the two issues I was having with the individual fabrics – the Bemberg was sliding all over the place, and my sewing machine was throwing a giant fucking fit every time I tried to sew over the textured eyelet. By sewing the two fabrics together, the Bemberg stays put & provides a layer over the eyelet that keeps the needle from freaking out. Yeah!

This process is pretty easy. I’m almost embarrassed to even post this.

1
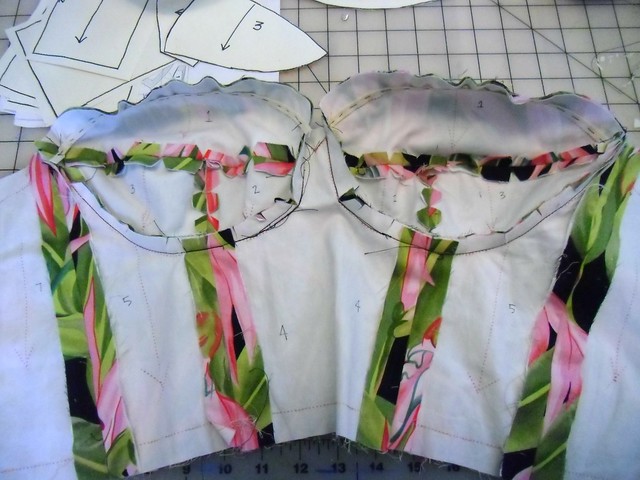
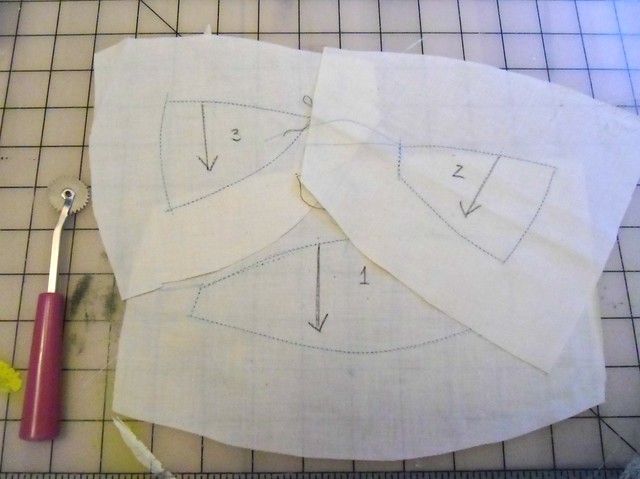
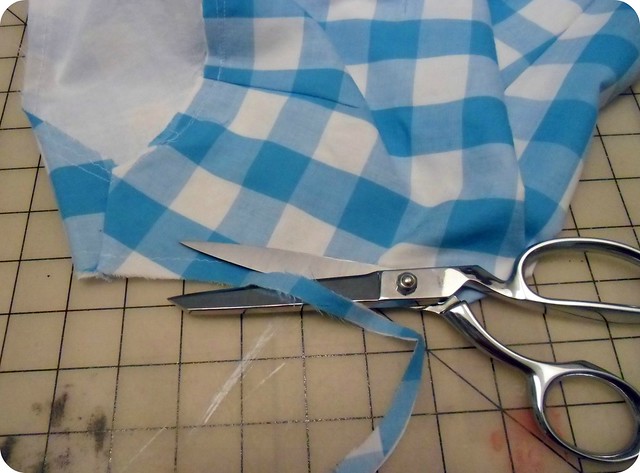
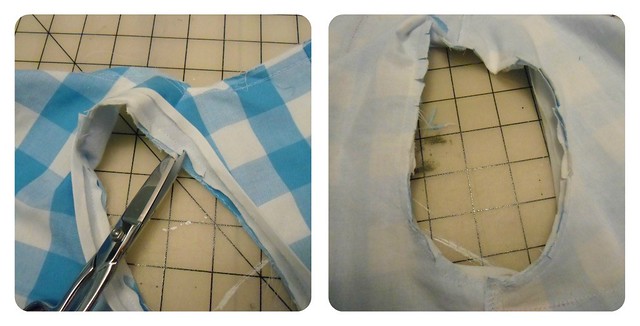
Cut each pattern piece from both your fashion fabric & preferred underlining fabric (as I mentioned here, I’m using Bemberg Rayon – which is traditionally a lining fabric, but it’s main job for this dress is opacity). The pieces should be mirror images of each other. I like to go ahead & snip all my notches, it makes things easier to match up. Don’t worry about your pattern markings (the kind you use chalk or tailor tacks or whatever for) just yet.

2
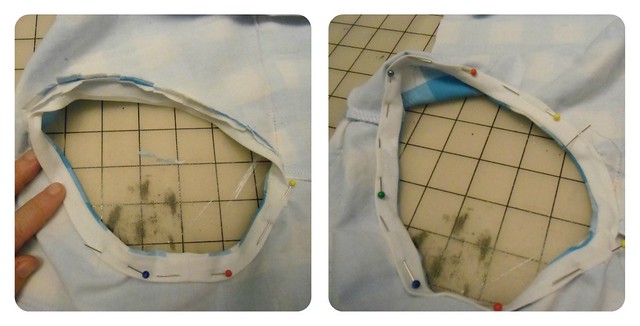
Place the underlining on the wrong side of the fashion fabric. If your underlining has a right side, make sure it is facing the wrong side of the fashion fabric (so when you flip the whole thing over, both right sides should be facing up). Pin everything together – I used these tiny silk pins because my lining shows pin holes.

3
Then you just sew the lining to the fabric! Here are some tips:
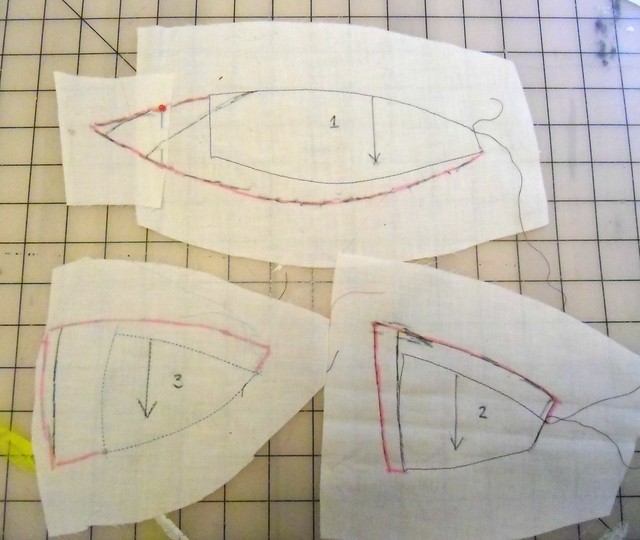
– Yes, you can sew it by machine. I chose to sew by hand because the rayon is super slippery & I wanted it to shift as little as possible. It also makes ripping the basting stitches out MUCH easier. If you sew by hand, you want to keep things as flat as possible – sit at a table! It’s very mindless work, so feel free to watch a movie (or two!).
– Sew giant basting stitches using one strand of thread. Pick something contrasting so it’s easier to pull out the stitches after you sew the seams. I used orange thread; I thought it was pretty haha.
– Try to stay well within your seam allowance – you can see that mine is less than 1/4″ from the edge. I think this makes it easier to pull out the stitches (it’s not anywhere near the 5/8″ SA, so I’m not actually sewing over the basting with my machine) and it hides any pin-marks that may get left behind on delicate fabrics.
– You may also notice that I did not sew along the bottom edge of the piece. Call me lazy, idgaf. The basting for underlining is really there to hold the pieces together until they are properly sewn. I’ve found that I can usually get away with omitting the bottom hem & any seams that extremely short (such as the point between the princess seam & the armscye). Play around & see what works for you!
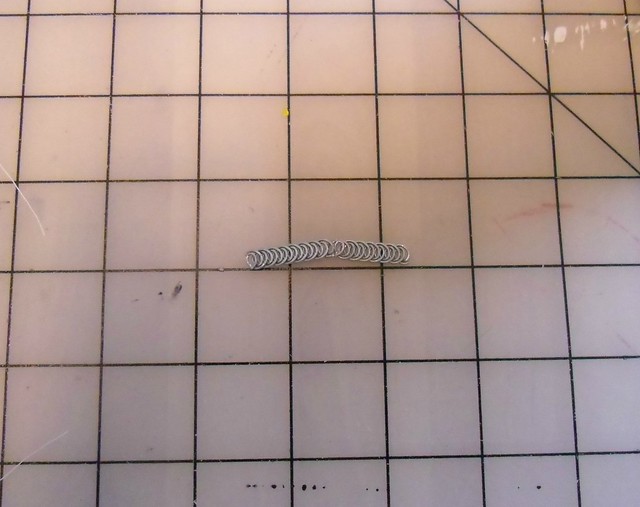
BONUS TIP:
Next project involves eyelet... And a ridic amount of underlining, ugh
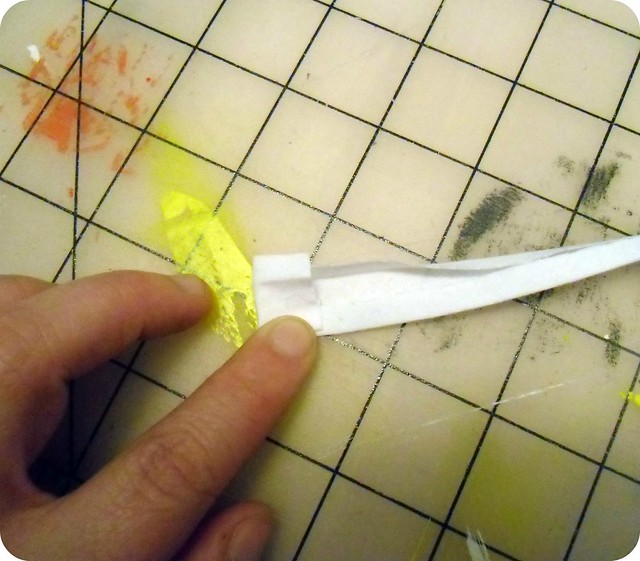
(sorry about the crappy Instagram picture!)
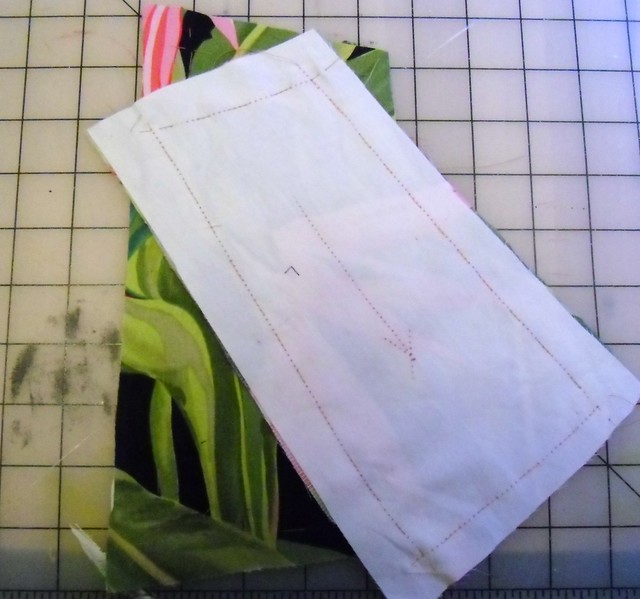
For super precise darts, thread trace the dart legs through both layers after you have basted the pieces together. This keeps the fabrics together while you sew the dart, and eliminates any weird bubbling that may otherwise happen.

4
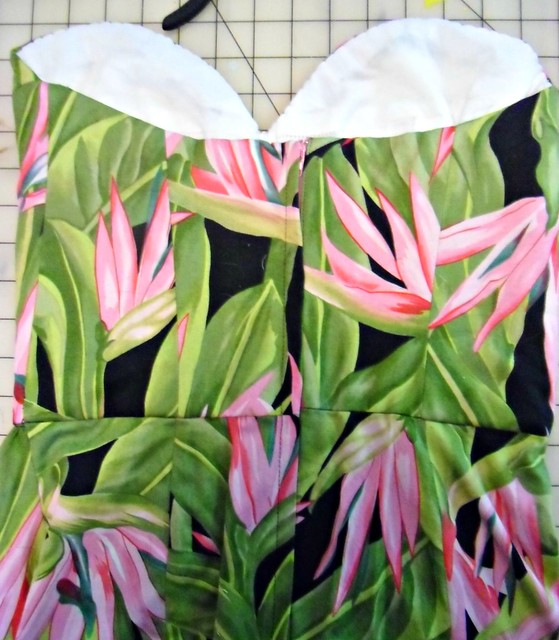
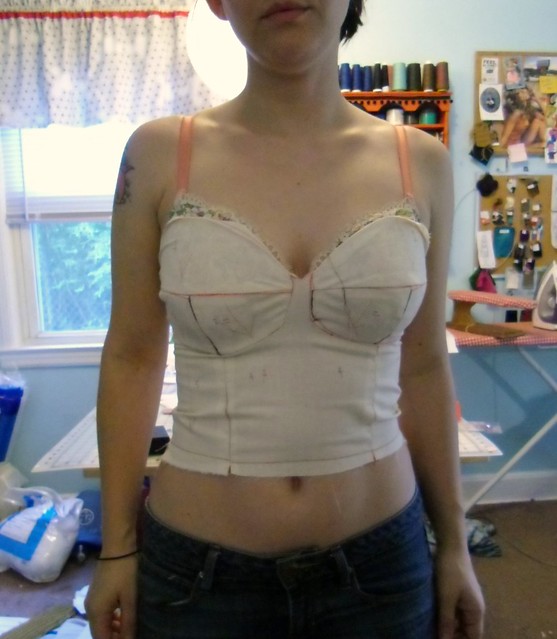
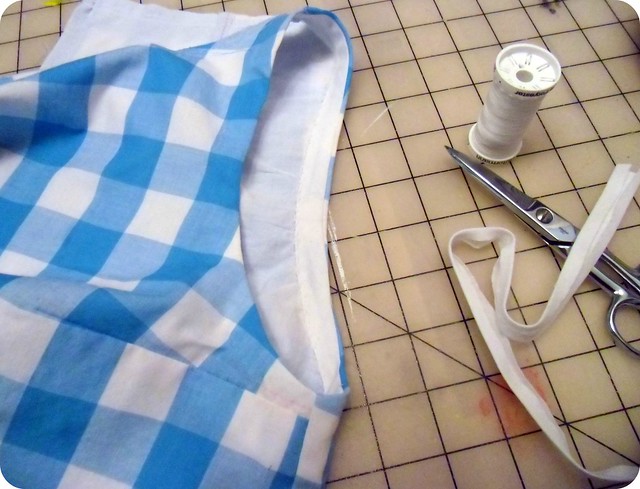
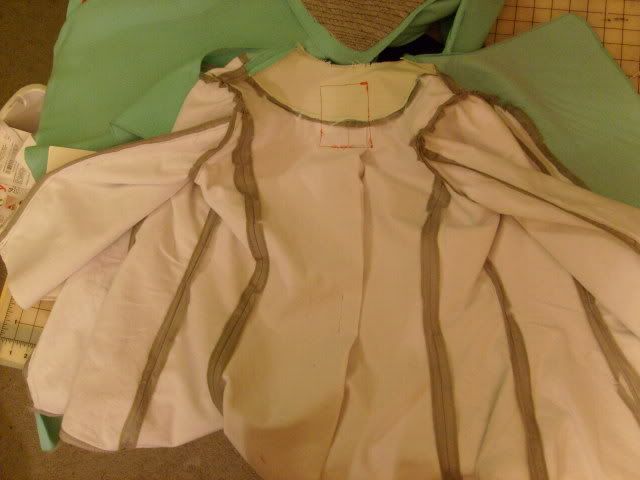
Here is the other side of my underlined piece. Cute!

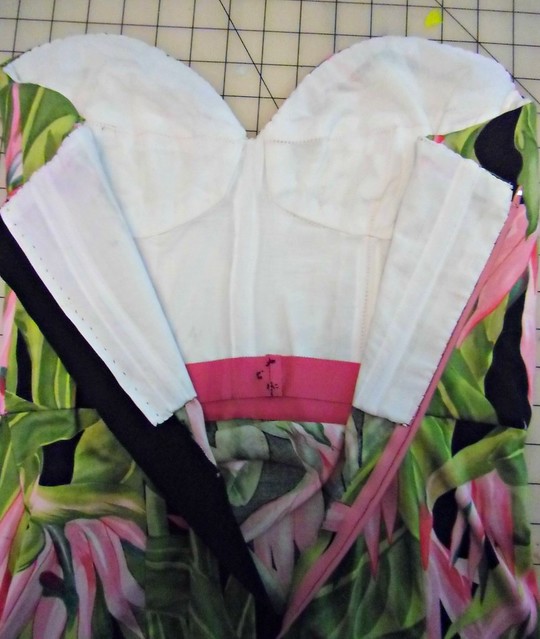
Now that you’ve got your pieces all basted together, you can treat them like one piece of fabric. You can transfer your fabric markings to the underlining side of the fabric so it doesn’t show on the front. Sew as you normally would, and make sure to pull out your basting threads as you sew each seam.

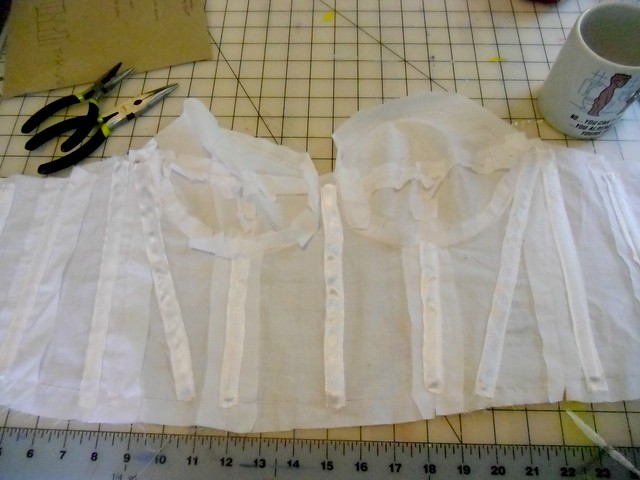
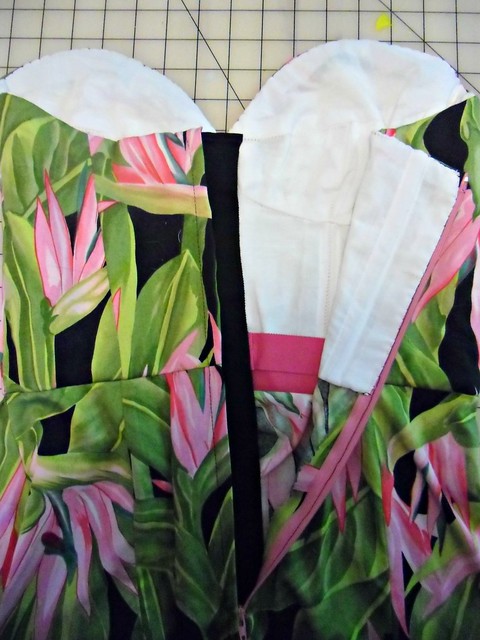
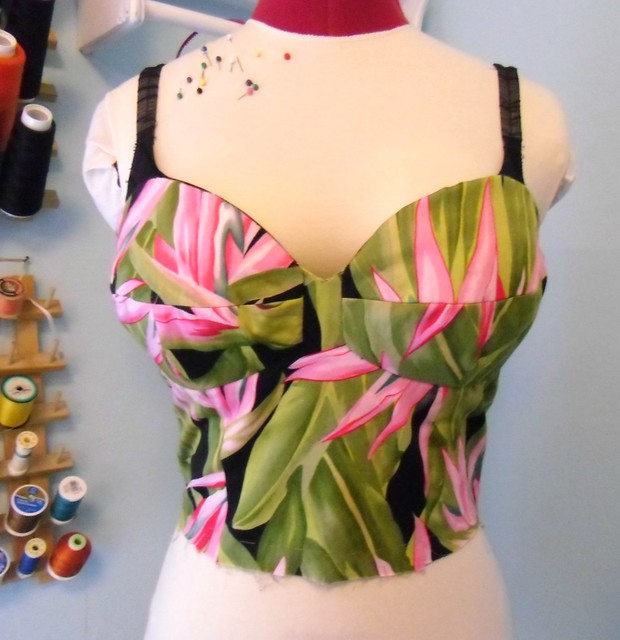
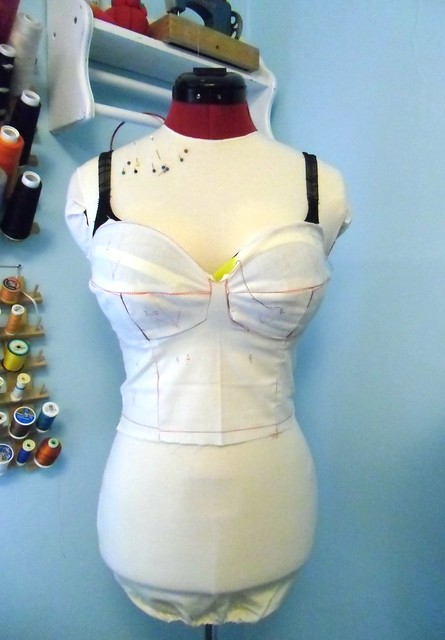
Here is how my bodice is looking as of this morning
5
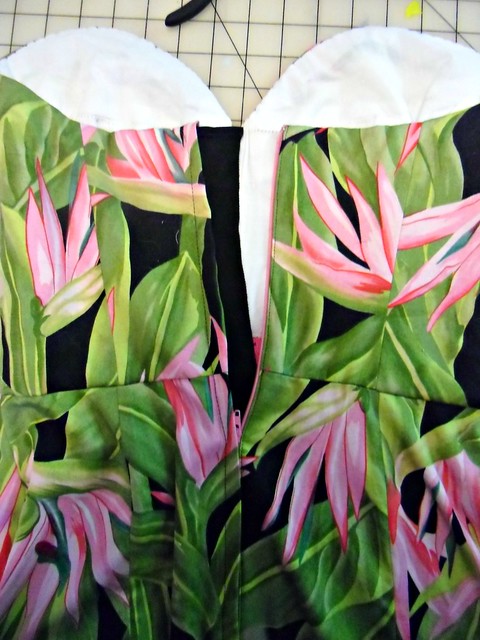
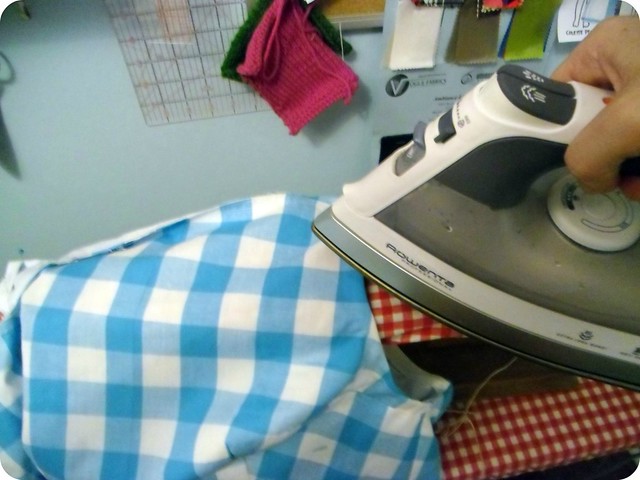
Since this is an underlining, and not a proper lining, you will still have to finish your seams & deal with facings. My seams are serged; my facing is a simple cotton broadcloth as the eyelet was too bulky.

7
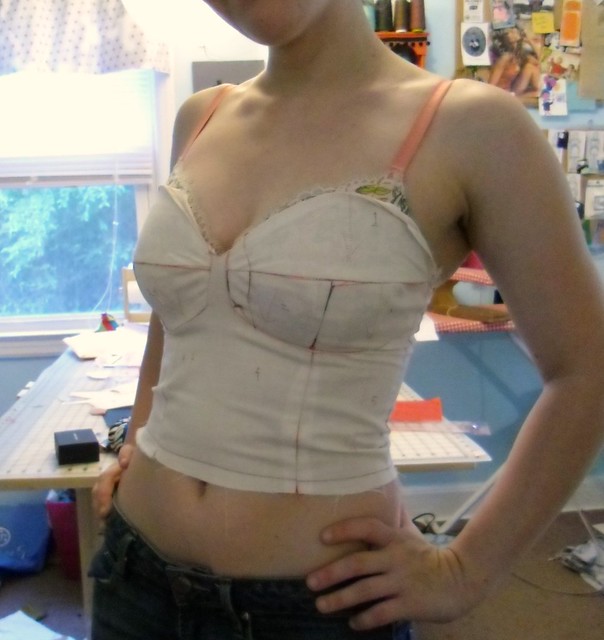
I love the subtle peek of turquoise 😀

6
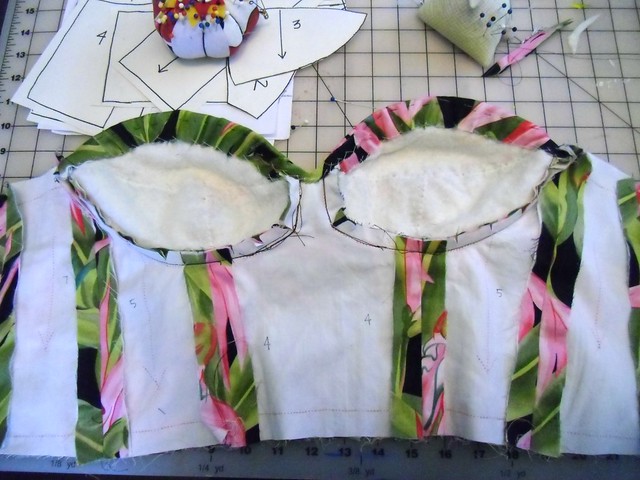
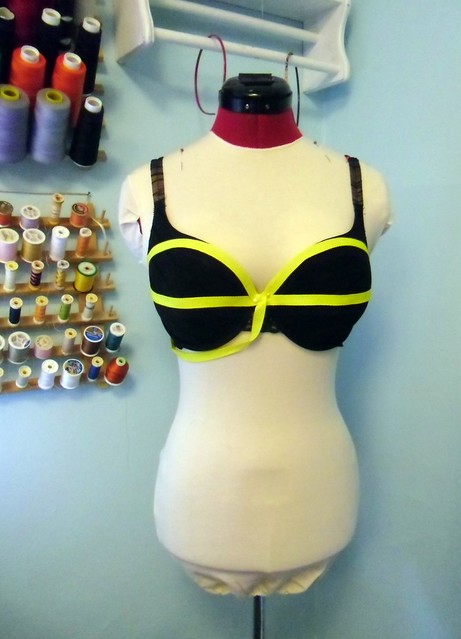
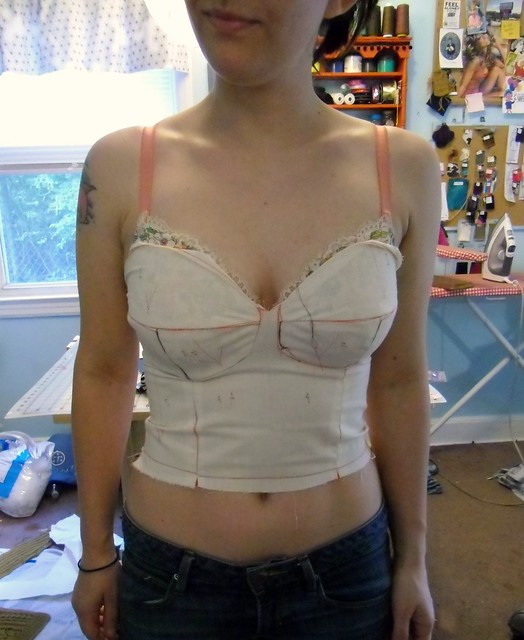
I am including this picture because it looks like a uterus, and that is funny to me.

So that’s it! Hopefully this brings a light to some of the mystique 🙂 As always, let me know if you have any questions!

The Makings of a Bombshell

2 May

Hey-o! I’m not quite finished with my Bombshell yet (only one video left! ::sob::), but I thought we could discuss some of the inner workings that are going on inside this monster of a dress.

Bombshell
I have the zipper & lining inserted & I’m pleased to report that everything still fits exactly as it should! Yay! I don’t know about y’all, but when I’m fiddling with a dress this snug, I end up trying it on a LOT. Lots of pinning & basting & walking around my sewing room in my underwear. I’m sure my neighbors just love me, ha.

Here is my lining – completely boned (lol)
Boning the lining
The lining is 100% cotton batiste (and it is quite sheer, as you can see all my little red markings, oh well) and the boning casing is double-sided satin ribbon that I sewed into little tubes.

Putting the boning (lol) in was a BITCH. OH MY GOD I HATE CUTTING SPIRAL STEEL BONING. There are 11 pieces inserted here, all different lengths, all tipped with their little metal tips… it took me an entire episode of LOST to cut & tip those little suckers. Putting on the tip was easy – Karen has a good picture showing exactly what this entails – but the cutting was so so awful. I was using Landon’s wire cutters, and when I complained that they weren’t cutting the boning (lol), he gave me the side-eye until I made him try it himself:
Spiral Steel Boning
This is how far he got.

Anyway, I got them all cut (obviously). And I’ve heard lots of people say to cut the side spirals & it will just pop apart – well, good luck with that, I basically just manhandled mine until they gave up & fell apart in sheer agony lol.

Everything else has been smooth sailing, though!

Bombshell
The lapped zipper turned out gorgeous.

Bombshell
There is a black petersham zipper guard (1.5″ wide, if yr curious!)

Bombshell
Oh, right, the zipper is hot pink!

Bombshell
As is the petersham waist stay 🙂
I just love fun/colorful surprises in my clothing 🙂

I still need to have this dress finished by Saturday afternoon… all that’s left is the vent, hem, and halter strap. The dress fits fine without the strap, but I really don’t like how I look in strapless stuff. Right now I’m debating how wide to make the strap – WWYD?

As a side note, Me-Made-May is going splendidly (you know, the whole 2 days it’s been May), and I have made an executive decision to not post daily outfit photos on this blog. Instead, I’m going to compile them weekly & dump them all that way. I am posting daily in the Flickr Pool if you feel like lurking everyone’s progress, though!

Also, this has nothing to do with the Bombshell dress, but look at the chicken I painted last night!
LOOK AT THE CHICKEN I PAINTED
I went to a painting class with my friend Carla. So much fun! The chicken’s name is Bud, by the way 😀 This will go nicely with the poppies I painted with my mom. Yessss.

Me Made May – Count Me In!

23 Apr

So… Me Made May.

I didn’t originally intend on signing up for this endeavor, mostly because it’s not really a huge challenge for me – I wear everything I make, very regularly. I’m not saying this to make anyone feel bad who does find this sort of thing a challenge, but rather to point out that it seemed kind of sneaky to sign up for something that I can coast along on and call it a “challenge,” you know?

At any rate, regardless of how much I do wear my handmade clothing – I wear them the same way, every time. No mixing up! How boring is that? Plus, I love lurking everyone’s handmade creations long after the “big reveal” – seeing how they are worn on a day-to-day basis. So, with that in mind…

‘I, Lauren of LLADYBIRD, sign up as a participant of Me-Made-May ’12. I endeavour to wear at least one (preferably two!) handmade item each day for the duration of May 2012.’

I would love to force myself to wear 2 handmade items every day, but most of my summer (that would be May) clothes are dresses… so the majority of my outfits will consist of one item anyway (other than shoes, but I’m not awesome enough to make my own shoes… yet.). So let’s just put that little “preferably” in there and call it a day, ok?

Yay! I’m so excited! Also, it’s not too late to join in, if you haven’t done so already 🙂

Now let’s talk about the Bombshell.

I have done a LOT of work on this dress over the past week, and I’m feeling pretty good about it! Here are some photogs of my current progress:

Bombshell dress progress
I cut out my pattern pieces, and underlined the bodice with muslin. That took FOREVER! I actually watched an entire episode of LOST during this part, heehee

Bombshell dress progress
Pieced the entire bodice together – complete with stay stitching, clipping, notching, and lots and lots of pressing. Oh, and twill tape at the top of the cups, for a nice body-hugging curve.

Bombshell dress progress
I made molded cups to give the bust some shape – mine are made with cotton batting, but man I wish I had needlepunch, because it just looks so nice & shapely. Anyway, I know this picture doesn’t look too different from the one above, but there is actually a lot of hand stitching here.

Bombshell dress progress
So then we have a bodice!

Bombshell dress progress
And then I got all excited & started putting the skirt together. I haven’t attached the bodice yet – I have a few more seam finishes I need to complete – so this is just pinned, but doesn’t it look nice?

I just found out that I have a wedding to attend in a little less than 2 weeks, so I’m going to try to bust ass & get this dress done so I can wear it! New deadline, yeah!

In other news, I got my hair did last Thursday!
new hair! :D
They re-dyed my hair a lighter brown (which, fuck yeah, now I don’t have to Photoshop my roots anymore) and gave me these sweet highlights around my face. I love it and I feel like a total babe with babe hair.

next knitting project - u-lock cozy
And here’s my next knitting project – a U-lock Cozy (told you, I can never have enough cozies!). Totally easy & mindless, which is just what I need after frying my brain on that sweater.

Speaking of my sweater, I have worn it every day since finishing last Tuesday – we are going through a bit of a cold snap, which is great for me! 🙂 But now I’m all worried about it getting stinky- so knitters, how frequently do you wash your hand knit wool garments? And do you wash in cold or lukewarm water? Also, do I need to reblock every time I wash? (please say no, I hate blocking haha) Inquiring minds need to know!

The Bombshell Dress – At Last, a Muslin that Fits!

16 Apr

I’m putting a temporary hold on the majority of my projects so I can concentrate on sewing up my birthday dress – I have a little over a month, so time should not be an issue here. I don’t even have plans for my birthday yet (it’s on a Monday lol) but I like to have a dress anyway!

I’m sewing up the Bombshell Dress, following the Craftsy course. I have this lovely floral cotton that I plan to make it up in… well, assuming I have enough fabric (don’t worry, I have a back-up plan!) 🙂 I have stressed WAY too much about the fit of this pattern, but after countless muslins, I have the fit down & I’m ready to start constructing the actual dress. Yay!

A little word about working with this pattern – the cups of this bustier top are drafted for a B cup. Not only that, they are made to be a little on the revealing side. They are small. If you are anything larger than a B, you are going to want to redraft the cups – and it is going to be a giant pain in the ass, sry2say. But it’s totally doable and it’s totally worth it, promise.

For my pattern, I initially cut out the second smallest size (I think it’s a 6?), based on the waist measurement. For the record, I wear a 32DD so I have a fairly small ribcage in comparison to a rather prominent bust. I knew I was going to have to make some adjustments but I had no idea there were going to be so many!

Here are the size 6 pattern pieces, thread-traced all lovely:
Bombshell Muslin

And here are my pieces after I made a million adjustments:
Bombshell Muslin

I also had to adjust the rest of the bodice pieces:
Bombshell Muslin
My adjustments are the black marker lines – basically, completely different pattern pieces! ARGH.

I do have some fit tips for those large-bust-with-small-ribcage ladies, however!
First of all… if you have access to a dressform, make use of it! To get those proportions, you need to put on a well-fitting bra & pad it out. Use your favorite bra – you can always take it back when you’re finished fitting.

Style lines

Style lines are EXTREMELY helpful with fitting – they give you a nice roadmap for where your pieces need to hit & where your seamlines should be. I know they make tape for this purpose, but I didn’t have any on hand… I used some (neon yellow)twill tape I had in my stash, and just pinned it into place. I can’t even tell you how much easier it made fitting that muslin (this was muslin #3 at this point – first one was pinned to my body – a disaster -, second was pinned on the form without the style lines – also a disaster).

Bombshell Muslin
The twill tape pulled down a little on the left cup, but you get the idea.

My other major tip for fitting this muslin is to cut GIANT seam allowances. Depending on how much room you need to add to those lil cups, you are going to want a minimum of 2″ SA to play with (preferably closer to 3″ or even 4″ though). This will save you the effort of cutting out a zillion little bodice pieces (and thread tracing all of them, argh) when you realize you don’t have enough seam allowance to cover the bust.

I ended up making several muslins – I think 4 complete (bust & midriff), and 2 more of just the bust cups. And yes… all of them were thread-traced and had the grainlines marked and everything lol. Took forever! In addition to all the size changes, I raised the top of the pieces by about 5/8″ to get all the seam lines to match up. I think this is something that most larger-busted gals are going to have to do, so just a word of warning.

I don’t want to frighten anyone away from trying this pattern, however! I really learned a LOT fitting the bodice, and I feel really confident with the finished muslin. I absolutely recommend this course if this kind of fitting is something you want to explore more in-depth. I think the fitting sections alone are worth the price of the course 🙂

Ok, with all that blab… let’s see the finished muslin, yes?

Bombshell Muslin

Bombshell Muslin

Bombshell Muslin

I don’t plan on wearing this dress with a bra – and it fits great without, but I didn’t want to take bra-less pictures to post on the internet! I don’t think we’re that close, yet 😉

As a side note, my sweater is almost finished – I blocked it over the weekend!
Agatha - blocking!
Just need to stabilize the button bands & sew on the buttons 🙂

Well I’ll Be Damned – It’s A Sleeve!

28 Mar

so proud of my sleeve
Well, what ya look at that?

Argh, sleeve!
My sweater has a sleeve!

yeah, sleeve!
Sleeves are awesome!

I think it’s safe to say I’ve got a pretty good handle on knitting in the round. I still have some areas I would like to improve – namely, pulling the yarn between the needles (I’m still getting little gaps occasionally), but I feel pretty good about my progress. And hey, a sleeve came out of it! Short rows, knitting in the round, lacework… and all!

sleeve

It is a little tight, but not uncomfortably tight (I can still easily fit my hand between my arm & the sleeve). I’m not one to wear long sleeves (other than sweaters and hoodies), so I’m not too concerned about layers. And I haven’t blocked it yet, obviously, so I may be able to squeeze a little more room out of it.

back

lace!

decreasing at the elbow

I love the lacework & the decreasing at the elbow.

There are some boo-boos, though 😦

:(

:(

But you know what? I think it’s pretty good for a first try! I’m trying not to think about the fact that now I have to knit the OTHER sleeve lol. At least I can get more practice out of it, I guess 😉

sleeve
SLEEVE.

As a side note, here is my next sewing project:
Next project - shirtwaist dress!
It doesn’t look like much, but there are actually 10 darts in that thing… and I haven’t even started the skirt yet. Eep.

We’ve Officially Reached Sweater Vest Territory!

1 Mar

First of all, I want to thank y’all for all your amazing comments on my gingham Peony post. I basically spent the entire day (and the next day, and the next day), blushing like a little kid. I also got pinned all over Pinterest which was kind of exciting all on it’s own. You are all so sweet! Way to make a girl feel like a sewing champion lol 🙂

Today, we are going to discuss knitting. I have sweater progress to share! This is a big deal~

Agatha Sweater
SERIOUSLY OMG EXCITING

I am SO EXCITED that this little shit actually fits me! I mean, obviously it should – I made soo many gauge swatches haha. But I was still pretty apprehensive – there is about 2″-3″ of negative ease, so pre-blocked (this is still pre-blocked, fyi), it’s pretty tiny. I was afraid to try and pull it on while it was still on the needles (and too scared to pull it off the needles onto scrap yarn), so I waited until I finished the ribbing. It fits! It fits!

Agatha Sweater
Look at how cool the side decreasing is!

Agatha Sweater
The back looks good too! I could have bound off a little more loosely, but oh well!

Agatha Sweater
I hope my excitement is just radiating out of this post.

Agatha Sweater
One more sweater picture! All that is left is the sleeves & the ribbing around the neck and where the buttons go. And then blocking, of course.

The sleeves are knit in the round. For those of you who are newbies to my corner of the internet, I only learned how to knit over Thanksgiving… and upon starting this sweater, hadn’t quite mastered knitting in the round (or even attempted it, to be honest). I made an executive decision that I would finish the sweater up to the sleeves, and then figure out this multiple needle shit (I know, I know, “magic loop” or whatever, but I want to try double pointed needles first!). I bought some bamboo needles & sat down with my knittin’ buddy on Tuesday night to try it out. I’m not gonna lie – joining those stitches in the round was hard. It took me something stupid like 15 minutes to join 2 stitches. At one point – I shit you not – I actually forgot how to knit. HAHA. But once I got started, it was surprisingly easy. I made a little tube that I later discovered fits my iPod perfectly…

It's an iPod cozy!
(It’s the correct size, I just wanted to show you that an iPod is in there!)
So that’s my first knitting in the round project! I want to make one more thing, because I still need a little more practice – there are a couple of holes where I didn’t pull the yarn tight enough between needles. Ooops! But I think it’s pretty good for a first attempt, yeah? 🙂

Next mini-project
My next project is going to be a coffee cozy, and I’m going to make it out of this ugly-ass yarn 🙂 I love knitting in the round! COZIES FOR EVERYTHING.

On a COMPLETELY unrelated note – I biked to work this morning! First commute-to-work bike ride since winter started 😀
Biked to work this morning :)
This is my halfway point – the Shelby Street Bridge! Isn’t it lovely? It’s a pedestrian bridge, so there’s always a lot of foot/bike traffic going on. I love how pretty the city looks from here! See that weird red thing in the right hand corner? Unfortunately, it’s not a roller coaster – it’s a completely useless sculpture called Ghost Ballet and it’s ugly as shit. I don’t know any Nashvillians who actually think this thing wasn’t a waste of taxpayer money. Blech.

But nevermind that, look at the rest of the bridge.
Shelby Street Bridge
YEP.

Agatha Sweater
This is me saying, “Well shit, I just knitted a vest-thing.”

Tutorial: Using Bias Tape As A Facing

22 Feb

Continuing with my sewing-for-the-wrong-season theme (spring, please get here now!), my current project is a simple little gingham sundress. As I mentioned yesterday, I am using the Peony pattern sans sleeves – summer dresses don’t need sleeves! Here is my inspiration, if you wanna be inspired too!:) I squeezed this out of a sale remnant (1.5 yards @ 44″, if you’re curious!), which left no room for facings. That’s fine, I guess, because I don’t really feel like drafting facings for those arm holes. Onto the next best thing – bias tape!

Bias tape is a great alternative to facing – whether you are working with a fabric that is too thick to use as a facing, or too uncomfortable to wear next to the skin, or maybe you just want something lightweight & unfussy! It gives a nice clean finish with considerably little effort. I personally like to make my own bias tape – the Coletterie has a great tutorial on how to do this – as I find the packaged stuff to be too stiff and bulky. Making your own bias tape also gives you all kinds of options – contrasting colors, patterns, something to give the inside of your garment a little pop! Yellow bias tape would be so fun with this dress! I had to make do with what I had on hand, though, so mine is white.

Here is my method for sewing in a bias tape facing – I understand there are different ways to do this (such as Colette’s Sorbetto top), so use what you will!

You are going to start by sewing up your garment as usual – should seams, side seams – as we are going to insert the bias tape in the round. If you are using bias tape to face the neckline, insert your zipper as well. I’m just focusing on the arm holes here.

1
Trim down the seam allowance minus the width of the fold of your bias tape – in my case, my bias tape is 1/2″, so the folds are 1/4″. I trimmed off 1/2″, as the seam allowance for this is 5/8″.

2
Open up the bias tape and fold under 1/2″ at the beginning. Press.

3
On the right side of the garment, pin the opened bias tape right sides together around the arm hole, matching the raw edges.

4
Sew the whole thing down, positioning your needle in the crease of the bias tape. Don’t sew over your pins!!!

5
Clip the seam allowance every 1/2″ or so to ensure that the tape will lie smoothly. Be careful not to clip into your stitching. If your main fabric is bulky, you may want to grade down the seam as well.

6
Now fold the bias tape over so it is on the wrong side of the garment and carefully pin into place.
You can sew the tape down on your machine, or by hand (like I did). Sorry the picture doesn’t show so well! I slip-stitched to the underlining only, to keep the stitches from showing on the right side.

7
Give your arm holes a good press with the steam iron to ease out any wrinkles.

8
And you’re done!

9

My next dilemma – how to trim up this dress! I do want to incorporate some yellow, so I pulled out all my yellow notions & threw them in a pile in the middle of my sewing table. I have buttons (1/2″ and giant 1.5″!), tiny rick-rack, wide lace, a scant piece of piping (enough for maybe a neckline or a waist), seam binding, and of course the petersham that is choking poor Dolly. The petersham is probably going to turn into a belt, since I only have a yard of it. What would you do? Jazz it up, or keep it simple?

New Projects!

26 Jan

Since my coat will not be ready for it’s unveiling this week, I embroidered a little L tag to make me feel better:
Coat tag
I just love putting these tags in my garments (and making them, too!). I think they really pull the piece together and give it a nice little personalized touch – you know, since sewing/hand-tailoring/fitting the damn thing wasn’t personalized enough. (this is where I roll my eyes)

Also, I love embroidery! I don’t get to do it enough, but I just find it so relaxing & free-flowing. This particular monogram is from Hoop Love Vintage Transfers – I use transfer paper to draw the design directly onto muslin, and then fill it with pretty embroidery stitches 🙂 This piece has satin stitch, back stitch around the satin stitch, and split stitch swirlies. Yay! I DO feel better, thanks for asking!

During coat downtime, I’ve been cooking up some sewing schemes to keep my occupied ’till then.
next sewing project
A croquis for your viewing pleasure. Also, shoe fail.

sheer white dotted swiss
I will be making the Colette Violet out of some nice sheer white dotted swiss – I barely had enough to cut my pattern out (the under collar is actually pieced – whoops), but I managed 🙂 This fabric is SUPER sheer, though, so the body is underlined with cotton batiste, and I replaced the interfacing with a sturdy muslin (collar, facings). Debating on whether or not to underline the sleeves – what do you think? The fabric is still pretty sheer even with the underlining. Mostly I don’t feel like hand-basting anymore but I’ll totally take one for the team if need be. Opinions, please!

next project
The skirt fabric – some poly blend plaid that I picked up at Denver Fabrics a year or so ago. I love how bright it is, but yeesh that plaid repeat is GIANT! I think it translates nicely into a circle skirt. I let myself buy a couple yards of bright yellow rayon lining… and a piece of matching petersham ribbon to stabilize the waistband. That creepy black blob in the corner is 3″ horsehair braid for the hem. Oh yuck, I just noticed that you can see part of a broken button in that picture too. Ew quit haunting my dreams.

These are all cut out and ready to be sewn up – the skirt has been hanging for about 2 days now, and I just finished basting all the underlining for the shirt. First non-coat of 2012, yo!

What have y’all been working on?