Me-Made-May ’14: Week 5 Round-Up

30 May

Ahhhh, you guys! Me Made May (and thus, the daily photographs) is almost over! Can I get a FUCK YEAH!?

This is going to be a longer than usual round-up, because I went on vacation and obviously I had to change outfits a couple times each day. That’s what you do on vacation, right? ps, sorry in advance.
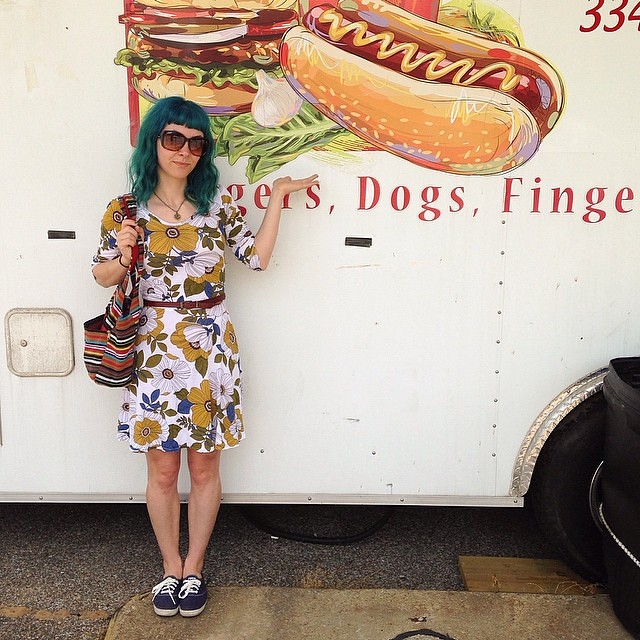
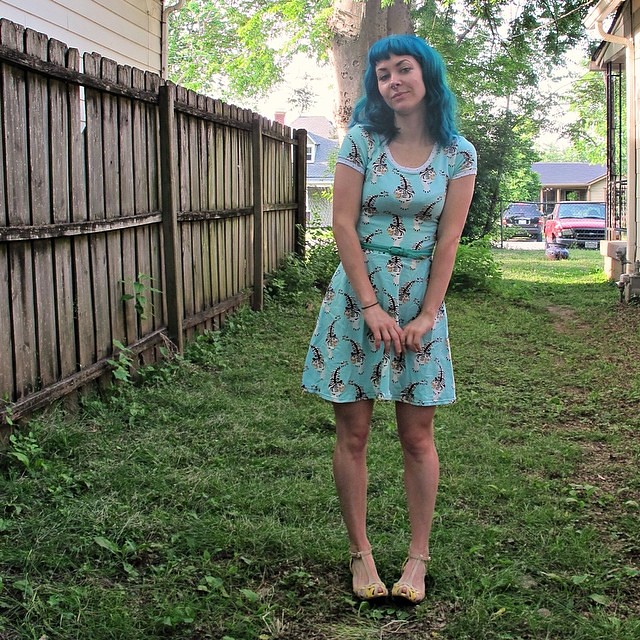
5/24
5/24, Saturday
Dress: Lady Skater
Shoes: Keds

First day of our vacation! Here we are en route to Santa Rosa Beach, at a food truck somewhere in Alabama. I knew we’d spend the day in the car, so I opted for a comfy knit dress. I’ve always thought this dress was very fall-like, due to the colors, but the fabric is definitely summer-appropriate as well 🙂
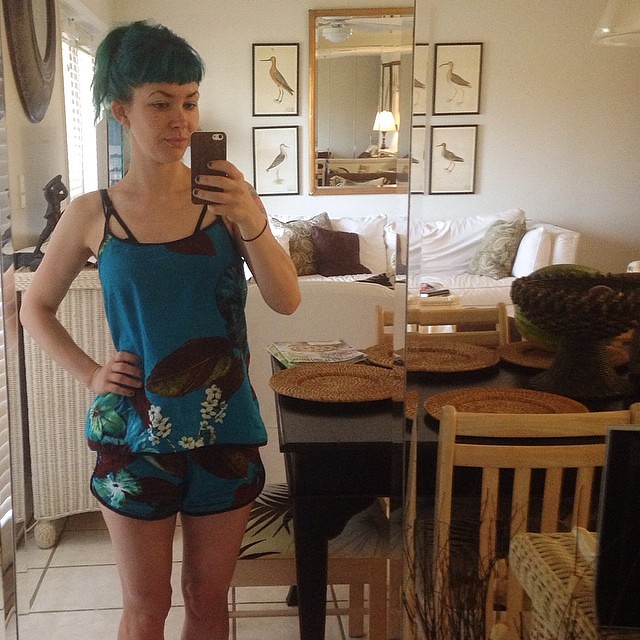
5/25 pt. 1
5/25, Sunday I
Pajamas: Lakeside pajamas

I’ve been wearing various other me-mades throughout the month that haven’t made it into photos (workout wear, pajamas, leggings, underwear, etc), so here’s some proof! I brought two pairs of Lakeside pajamas to wear while on vacation – the ones you see here, plus a new set I made a couple days before (I used this cute strawberry print cotton lawn to make them, if you were wondering!)- and wore them all week. In addition to being awesome pajamas, they also make a great swimsuit cover-up! Although, to be fair, I started out wearing the set and ended up in only the shorts(+ bikini top, obvs) by the end of the week.

Speaking of bathing suits…
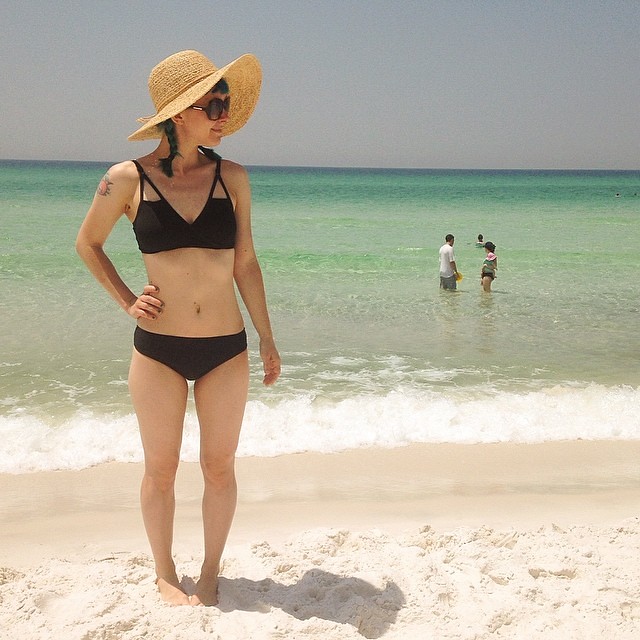
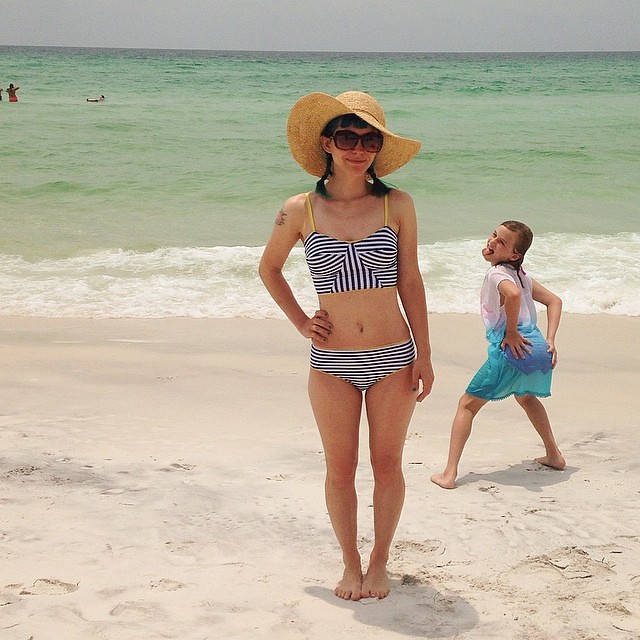
5/25, pt. 2
5/25, Sunday II
Swimsuit: Papercut Patterns Soma Swimsuit (no blog post on this… yet! But here’s the link to the pattern :))
Sunglasses: Franco Sarto
Hat: Scarlet Begonia

Hell yes I came with a handmade swimsuit! THREE, in fact! This is the first – the result of my pattern testing for Papercut Patterns a couple of months ago 🙂 I haven’t had a chance to write up a proper blog post, but here’s a sneak preview 🙂
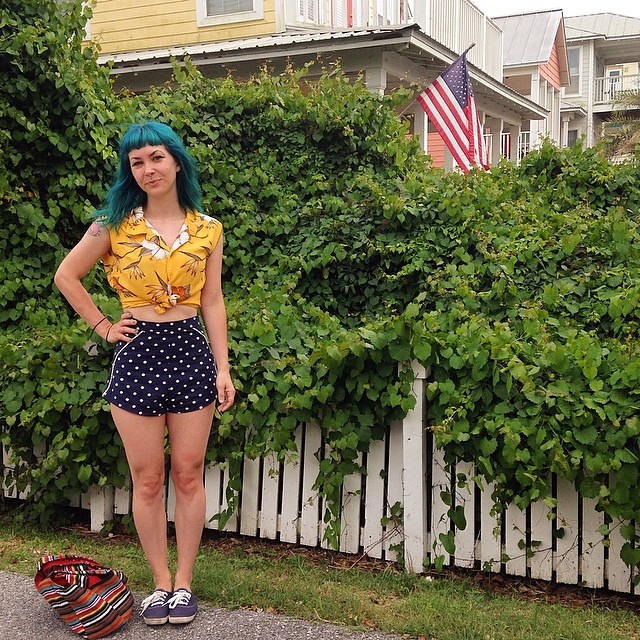
5/25, pt. 3 (sorry! Last one for today)
5/25, Sunday III
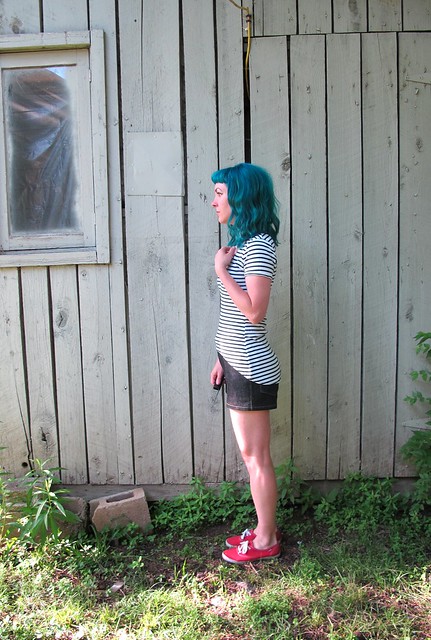
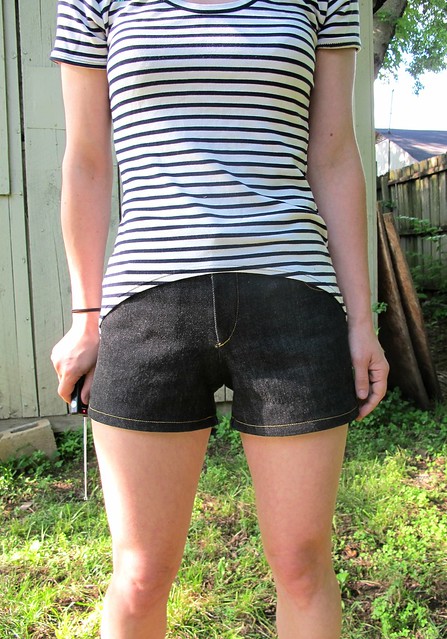
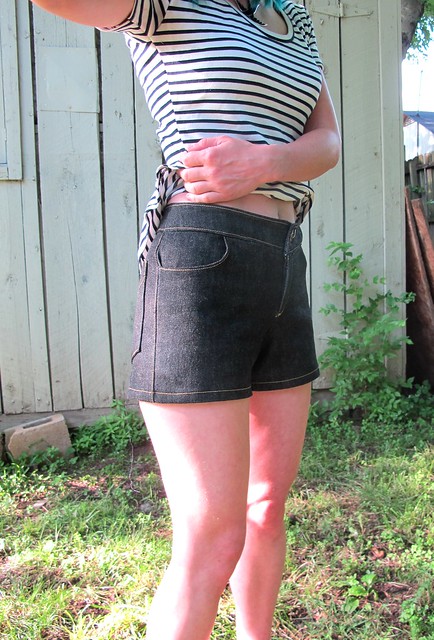
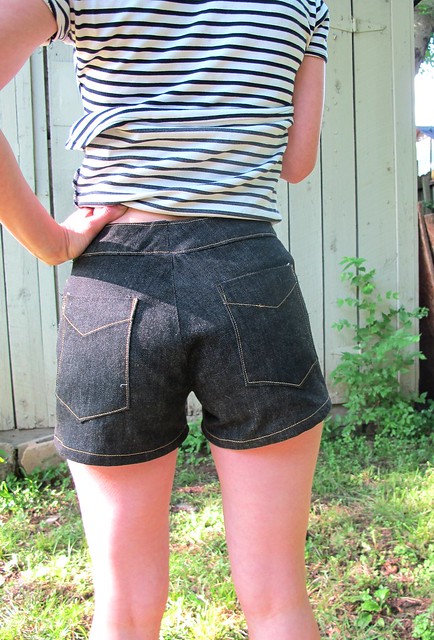
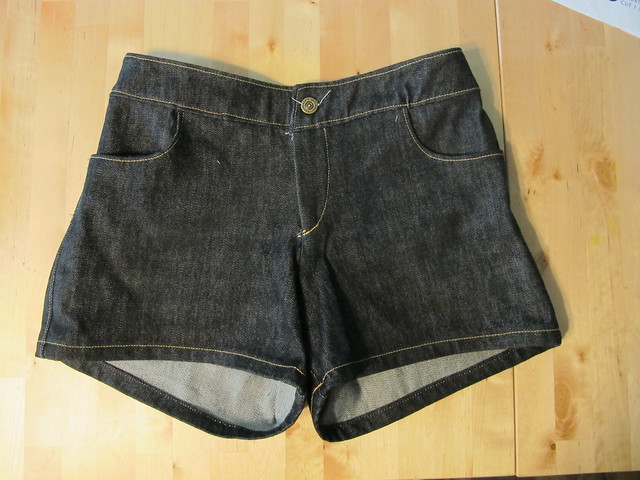
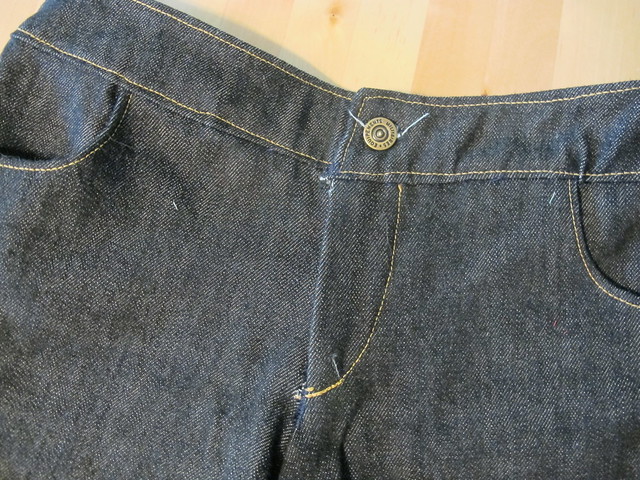
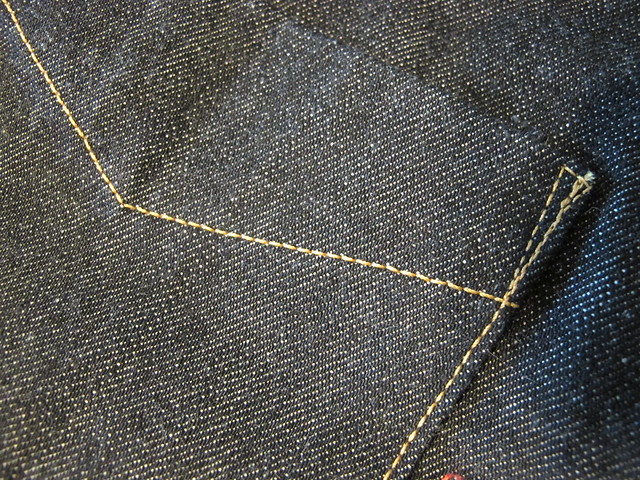
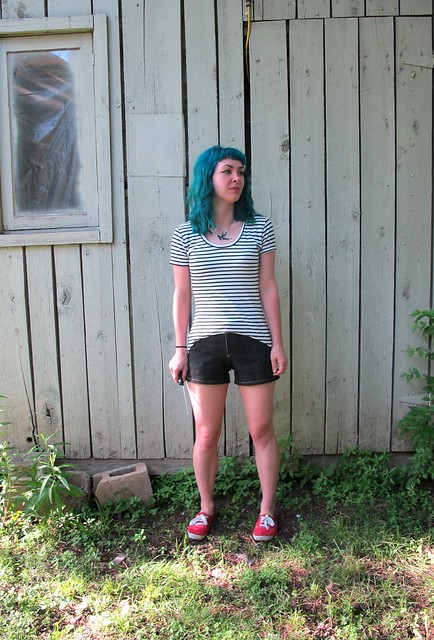
Top: Refashioned from a men’s Hawaiian shirt
Shorts: Rite of Spring shorts
Shoes: Keds

After spending all afternoon at the beach (no, really, I laid up on a float and bobbed around in the ocean for hours and it was glorious), I reluctantly put on clothes and walked around the shops with Landon. I didn’t buy stuff, but I did buy liquor. Priorities, y’all.

Also, that shirt. This is the third vacation I’ve dragged it to (and no shit, I literally wore that same outfit last May HAHAAHAHA whatever, it’s good, I’m not apologizing for shit), so it’s basically my official vacation shirt at this point. Unfortunately, it’s also way too big now. My alterations were pretty shoddy (it was a very last-minute job), and I’m thinking I may just need to send it to the nice Goodwill Bin in the sky at this point.
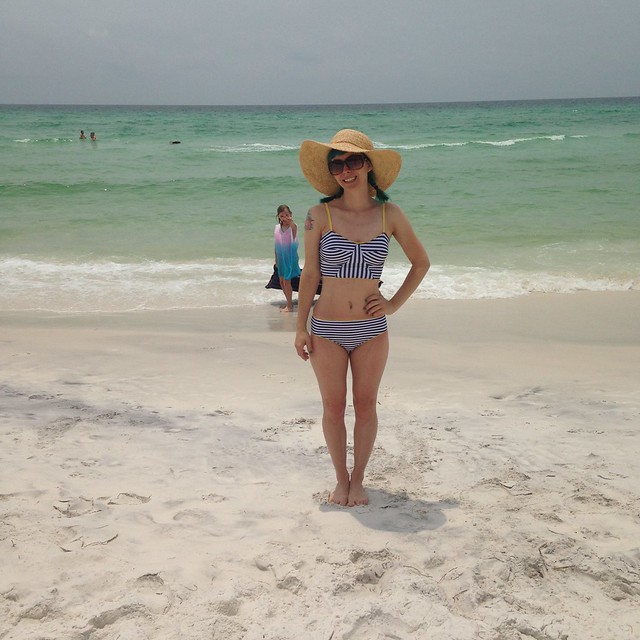
5/26, pt. 1- my other @papercutpatterns Soma bikini + a photo bombing niece  #mmm14 #mmmay14
5/26, Monday I
Swimsuit: Papercut Patterns Soma Swimsuit
Sunglasses: Franco Sarto
Hat: Scarlet Begonia

Exact same get-up as the day before, but check out how different it turned out! This is version 2 of the Soma Swimsuit, and the second one I tested (yeah, I tested both. I wasn’t asked to, but after making the first one I kind of went crazy. I almost made 3, tbh). I used this version to play with stripes and decorative elastic, and I LOVE how it turned out. Seriously, my favorite swimsuit ever! Again, expect a blog post on these bad boys soon 🙂

Oh yeah, and that bratty kid in the background is my niece 🙂 I told her she could photobomb my picture and she sure did me proud.

5/26, pt. 2- dress: Sewaholic Lonsdale; shoes: Fergalicious.  #mmm14 #mmmay14
5/26, Monday II
Dress: Sewaholic Lonsdale
Shoes: Fergalicious

I wore this for a dinner out with my parents+Landon’s parents (the first time they met! It went very well :)), and unfortunately forgot to take a photo until right before bed. Oh well! Also, I love this dress and I should totally make it again.
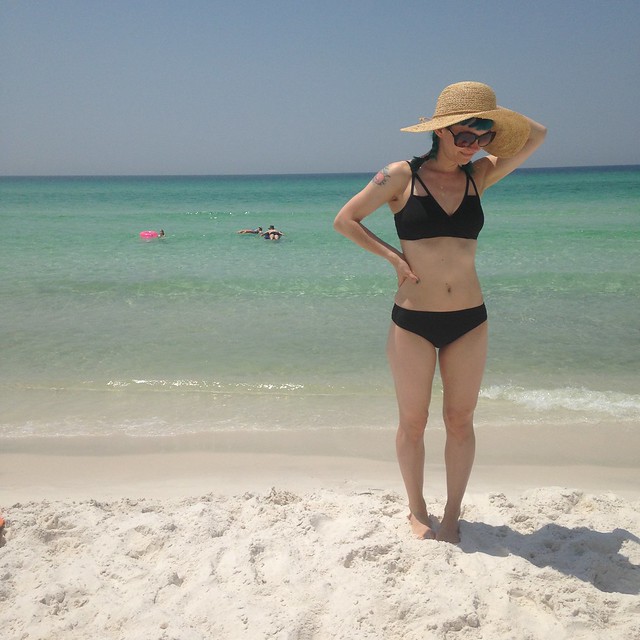
5/27, pt. 1- swimsuit: closet case files bombshell  #mmm14 #mmmay14
5/27, Tuesday I
Swimsuit: Closet Case Files Bombshell
Sunglasses: Franco Sarto
Hat: Scarlet Begonia

Last bathing suit! This is one I made last year, and I still love it 🙂 Especially good for those days when I realized I’ve just been drinking beer and eating key lime pie all weekend and oh god it’s time for the beach. Hahahaha!!
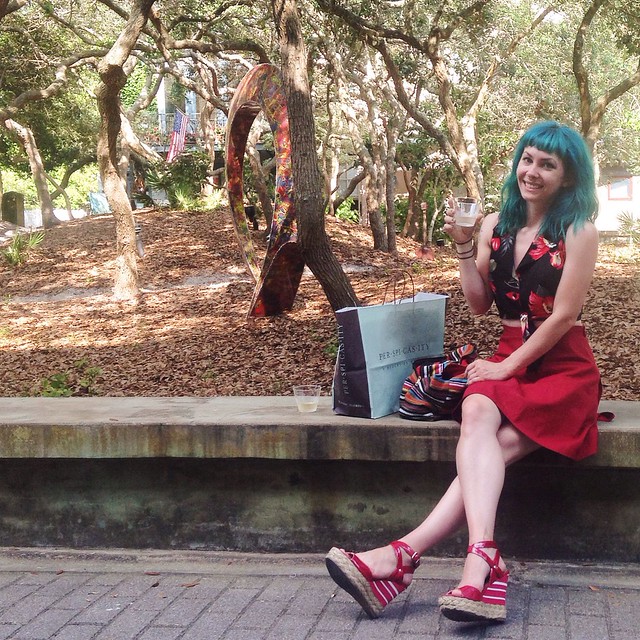
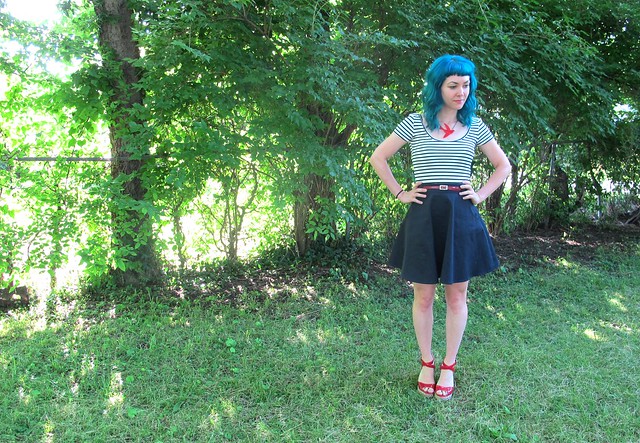
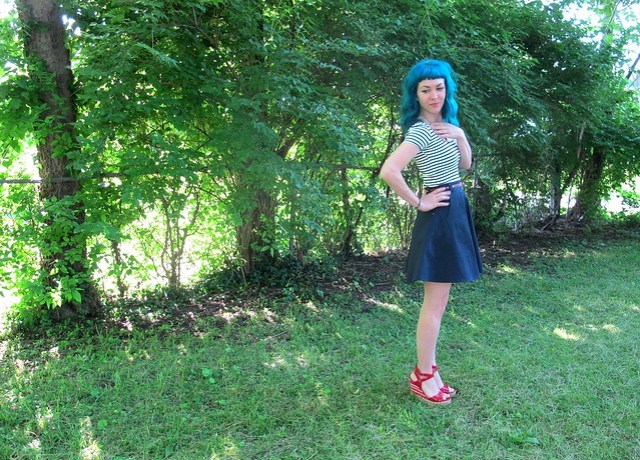
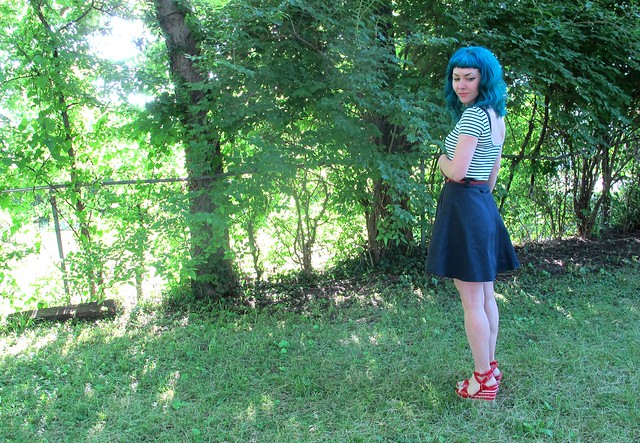
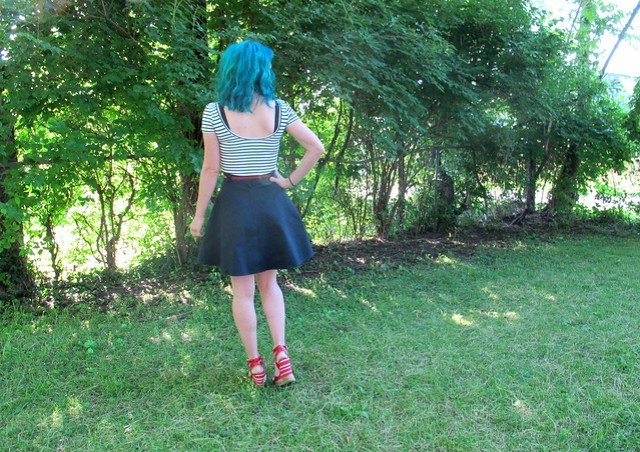
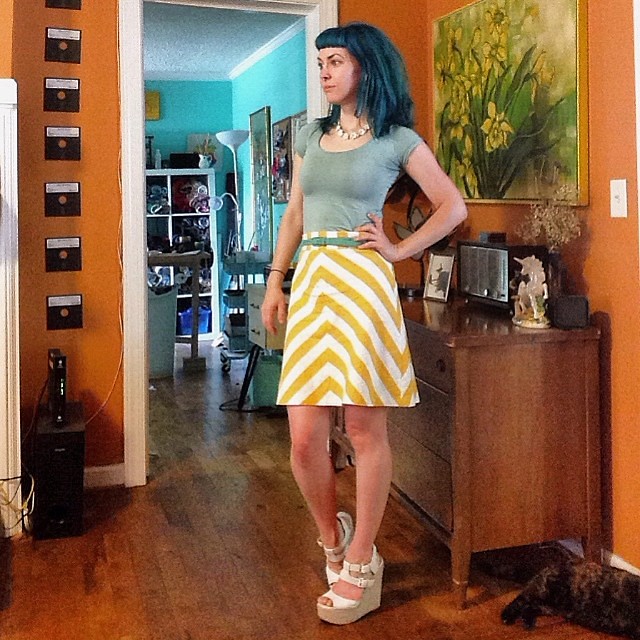
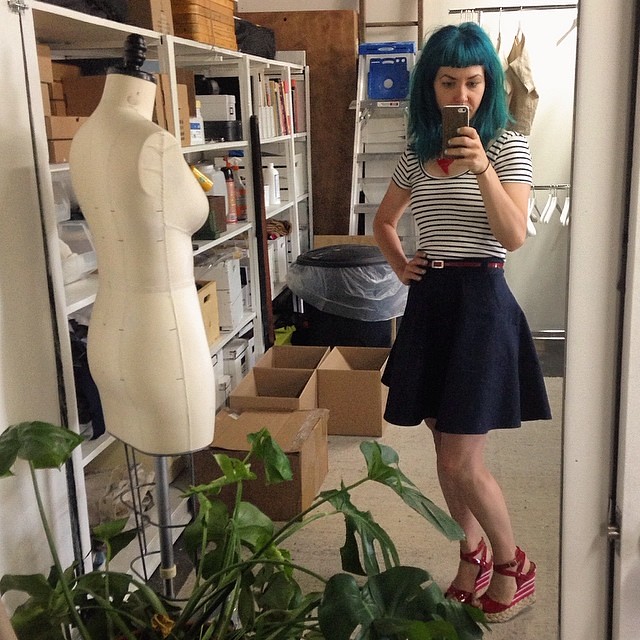
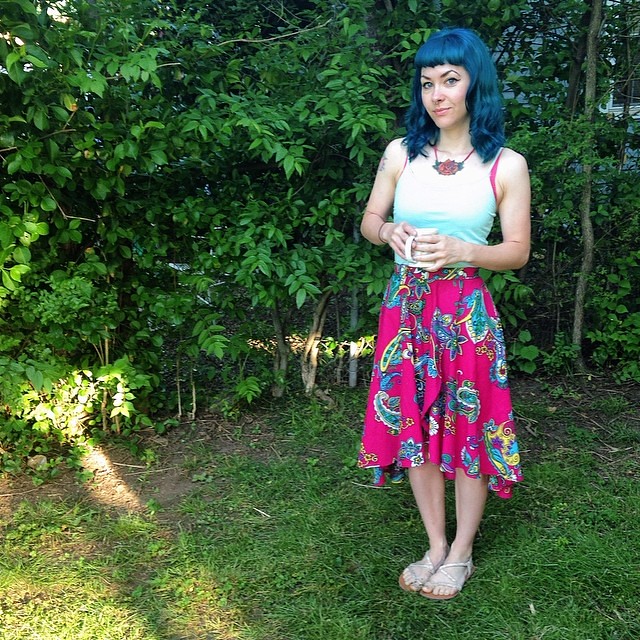
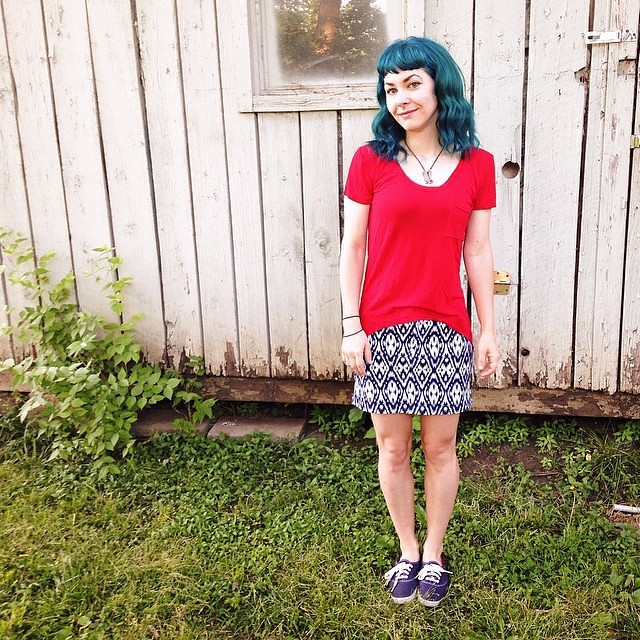
5/27 forgot to upload this yesterday! Drinking wine in Seaside, FL :) top: thrifted; skirt: Tilly's Miette (tie-less); shoes: Fergalicious #mmm14 #mmmay14
5/27, Tuesday II
Shirt: Thrifted
Skirt: Tilly’s Miette
Shoes: Fergalicious

Post beach, Landon and I spent the afternoon in Seaside, checking out the cute houses, the shops, and drinking free wine (the best part!). Again, with the top – that’s another unofficial vacation top (that I bought… 3 years ago, at the Goodwill on Santa Rosa Beach, ha!) that’s about to get the Goodwill shaft. It’s just too big 😦
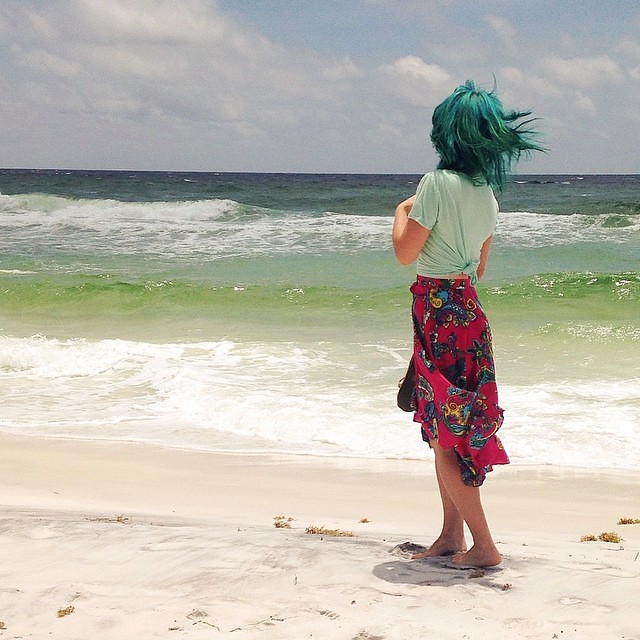
5/28 channeling my inner mermaid before heading back to Tennessee ☀️ top: Megan Nielsen cropped briar; skirt: Megan Nielsen cascade.  #mmm14 #mmmay14
5/28, Wednesday
Top: Cropped Briar
Skirt: Cascade

Last day on the beach! I thought it would be fun to take the photos of my Cascade by the cascading waves (you can’t even tell in this picture but they were AMAZING that day!). The wind was blowing like crazy, and I think it makes for a really cool picture 🙂 This picture also vaguely reminds me of <a href="this picture from the Little Prince, which makes me happy 🙂
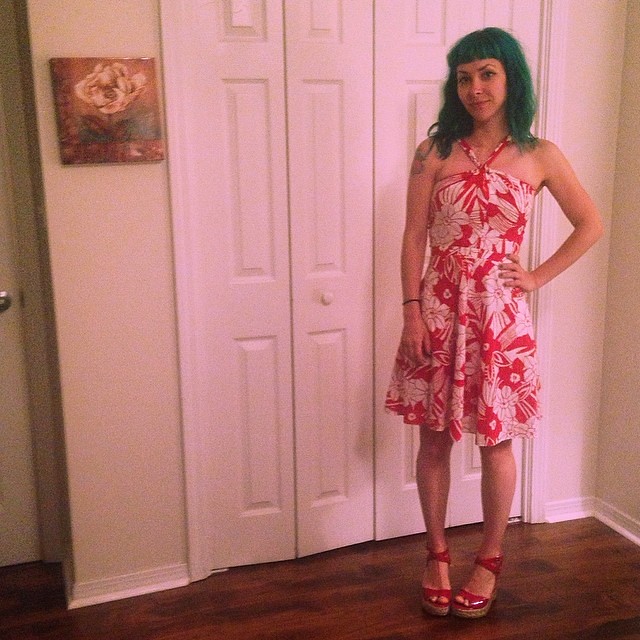
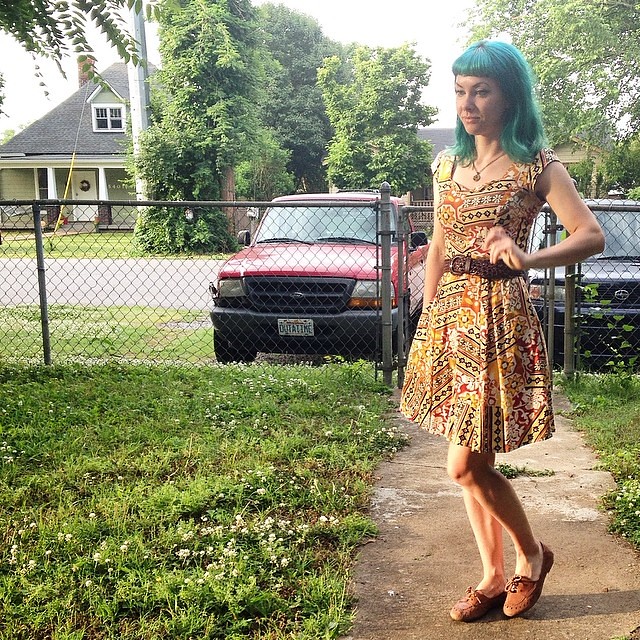
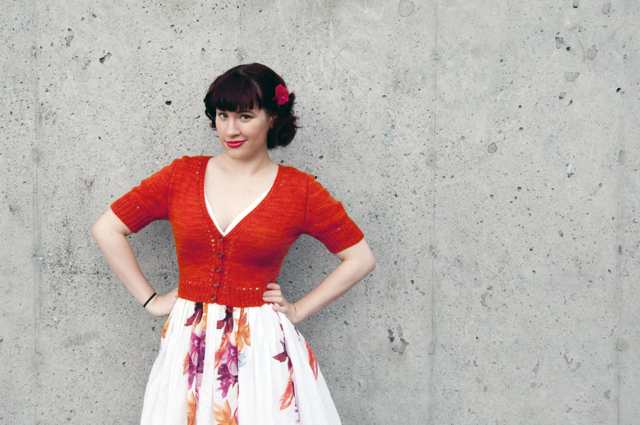
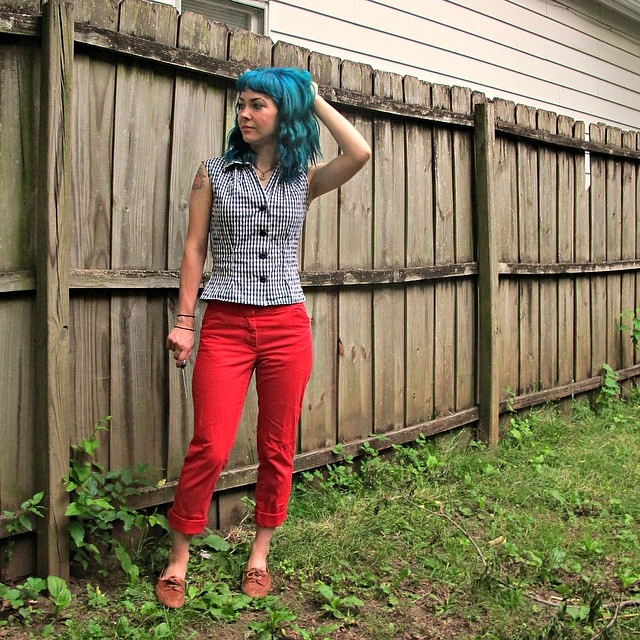
5/29 dress: deer & doe Belladone; shoes: Sam Edelman; necklace: Fabu #mmm14 #mmmay14
5/29, Thursday
Dress: Belladone
Shoes: Sam Edelman
Necklace: Fabu

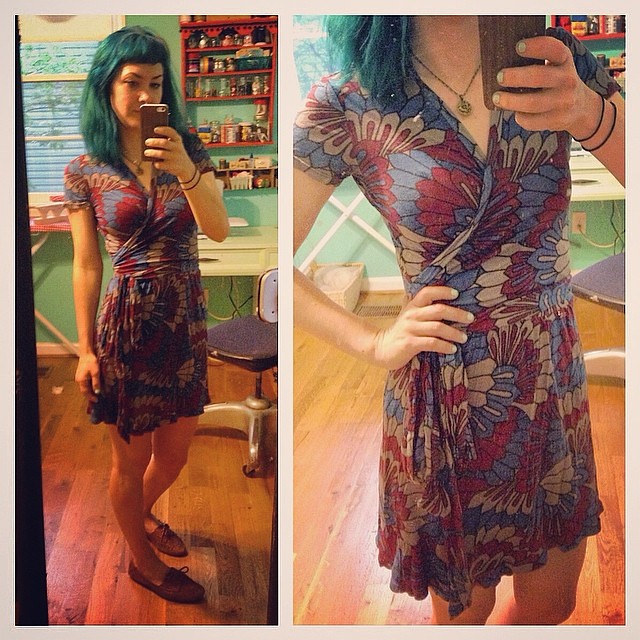
Back to Nashville! It was at this point that I realized we were almost at the end of May – and I haven’t worn some of my favorite stuff! So out comes the Belladone 🙂 I tried to style this a little differently than usual – I generally wear it with brown or yellow, but I do like the red 🙂

5/30
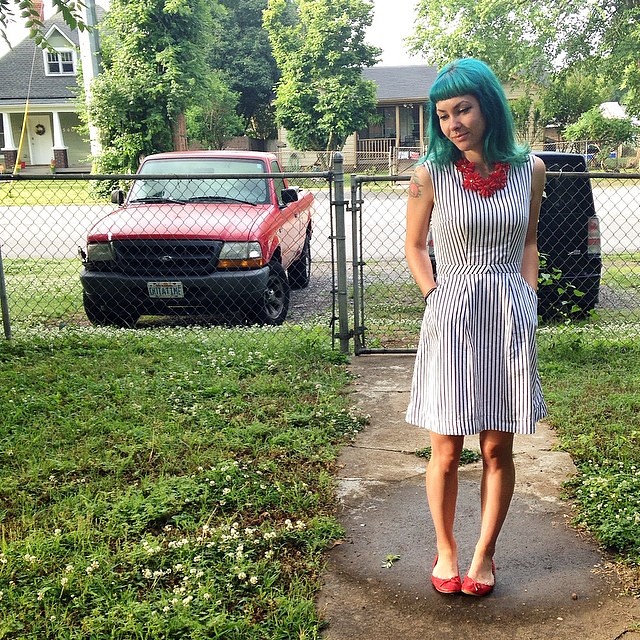
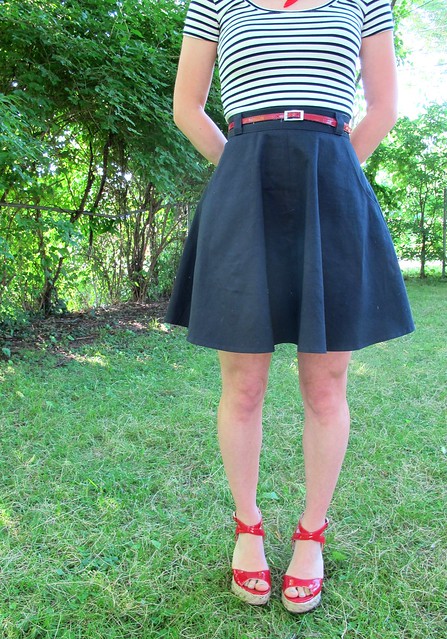
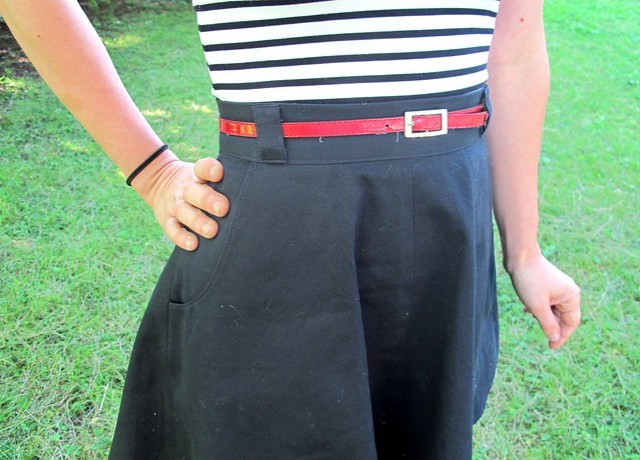
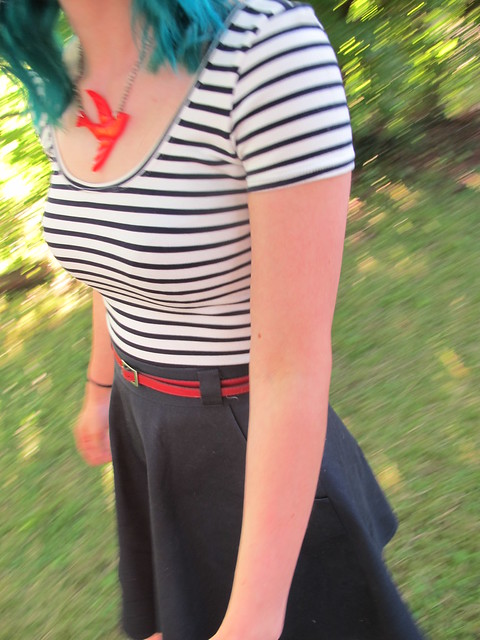
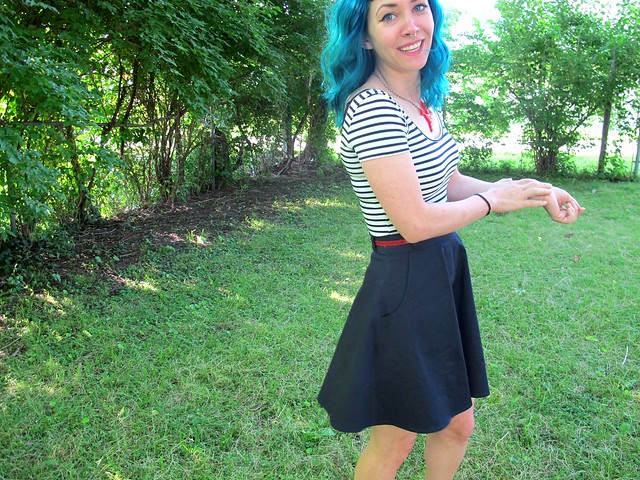
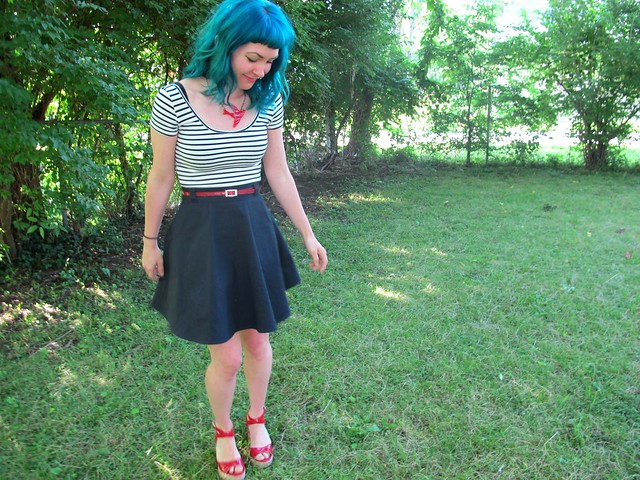
5/30, Friday (today!)
Dress: Simplicity 1803
Belt: Thrifted
Necklace: Chatterblossom
Shoes: Born

My other favorite dress – and our star pattern for the OAL. I love this pattern and I’m glad I finally have a reason to buckle down and make another! Which reminds me – the sewalong starts on Monday! Eep! 🙂

Speaking of which – those of you who are participating, do you feel like you need a post that covers fabric selection? I was planning on skipping straight ahead to cutting and marking, since I figured most everyone’s already chosen their fabric (and thus makes a post on fabric selection a moot point) – not to mention a lot of y’all are sewing different patterns (which means different fabric requirements) – but you tell me!

Sooo I guess that’s almost it for Me Made May! We do have one more day of the month (and you bet I’ll be wearing me-mades and begrudgingly taking a photo, ha), but I’m not going to include it in this round-up because it doesn’t fit with my ~schedule~. Sorry! If you want to view the rest of the weeks, here they are:
Me-Made May: Week 1
Me-Made-May: Week 2
Me-Made-May: Week 3
Me-Made-May: Week 4
I also have a Flickr Album of all my MMM photos, if that’s more your jam.
If you’re sick of looking at me, that’s ok too – I’m sick of looking at myself at this point :B

I am glad I participated this year, because I definitely learned a lot about what’s lurking in my closet – namely, that there is WAY more than I think there is! Seriously, so many pieces didn’t even make it out this month, and that’s kind of sad considering I only repeated one skirt and a couple of tshirts. I’ve had some size fluctuations over the past couple of years, which means a lot of my summer wear doesn’t fit anymore (and while I altered some of it – such as the Simplicity dress I’m wearing today – a whole bunch of it got sold/donated instead). After that giant purge, I was under the impression that I didn’t have a lot left to wear in warm weather – which is clearly not the case! With that being said, despite my overabundance of clothing, there are still tons of pieces that my wardrobe is lacking. I’ve got plans to make more separates, including shorts (gah, I can’t believe I didn’t wear shorts once this month, wtf?) and tshirts, as well as workout wear, loungewear, and more bathing suits! Serious question… how many bathing suits is too many? They are REALLY fun to make, ok.

How did your Me-Made-May turn out (if you participated)? Did you learn anything life-changing about your closet? Are you SO sick of taking photos? 🙂

Ohh, I almost forgot – I promised y’all outtakes! Let’s revel in the unflattery together:

MMM'14- Outtakes
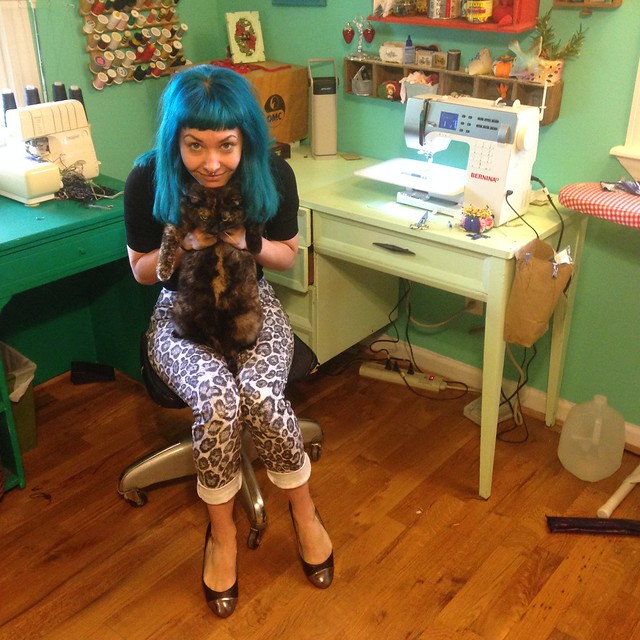
Most of my photos end up looking like this haha. I dunno why, but I always close my eyes when the picture is being taken (not to mention… whatever my mouth is doing. I guess I was in the middle of talking haha. OK FINE I BASICALLY NEVER SHUT UP)

MMM'14- Outtakes
If anyone happens to see where I left my arm, I’d appreciate your help.

MMM'14- Outtakes
Original photobomb did it better

MMM'14- Outtakes
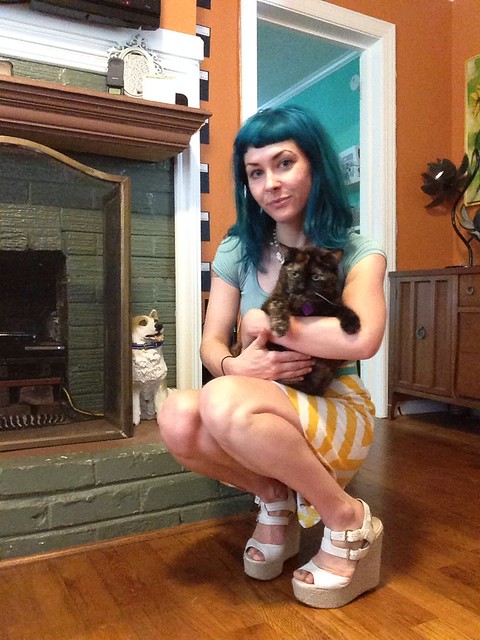
Look at the fear in Amelia’s eyes hahahahahaha

MMM'14- Outtakes
I just think this is cute. Amelia doesn’t care much for being held (despite my consistent grabby hands at her), but she loooves having her butt scratched.

MMM'14- Outtakes
Hey, that’s almost a good picture! Until you zoom in a bit…

MMM'14- Outtakes
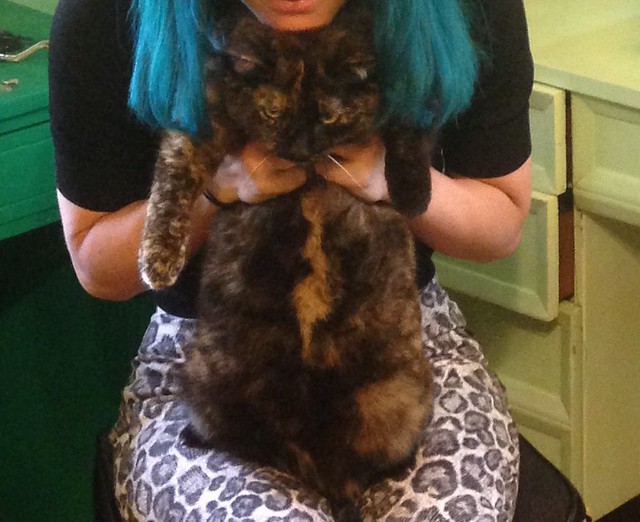
That, my friends, is the face of a cat who’s completely given up on life.

MMM'14- Outtakes
Ok, this is my favorite outtake and the one that made me laugh the hardest. This is a really unflattering picture of both of us – I’m pulling some kind of weird face (again, seriously, probably in the middle of talking) and Amelia just looks PISSED.

MMM'14- Outtakes
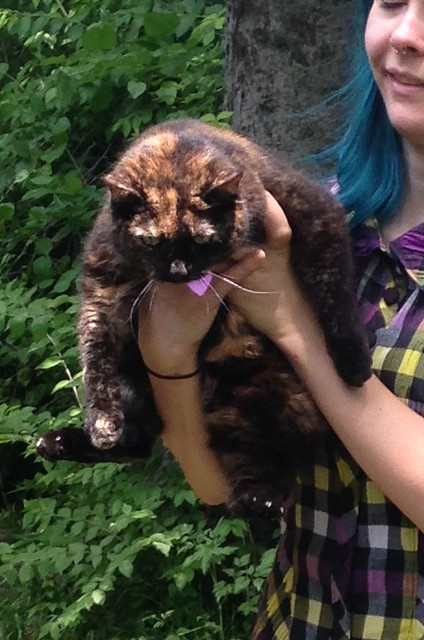
If that doesn’t look like the devil incarnate, I don’t know what does.

Have a great weekend, everyone!

Completed: Jorts Fail

28 May

Jean shorts (or jorts, as I like to call them – because it’s ridiculous and hipster and sounds completely stupid) are something that have been on my to-sew list for a looong time. Super long. In fact, my jort supply has long run dry – I used to get those the old-fashioned way, by waiting until summer to hack the legs off my jeans so they’d be warm weather appropriate (and later realizing my huge mistake come fall – argh! Whyyyy!!). Jean shorts are an American thing – and I haven’t worn a proper pair in years. No wonder I always see pictures of bald eagles crying:

zWCcW

Anyway. Back to jorts. I knew I wasn’t going to get them by way of cut-offs (I love my jeans too much to do that to them!), so I figured I’d make a pair from scratch and call it a day.

Jorts

My denim is a bit special – I actually bought it during Imogene + Willie‘s big yard sale. I went because I knew they’d have markdowns on jeans (although, when I finally got there, they’d put all the pants away due to threat of rain, wah), but I didn’t realize they’d also have leftover yardage of fabric! For cheap! I got 4 yards of this ridiculously amazing denim for $5 – yes, it’s super narrow (it is selvedge denim, after all), but still. That’s cheap as shit.

Jorts

The denim was really nice to work with. I always complain that good-quality denim is really difficult to find for the home sewer – either it’s too lightweight, it has too much stretch, it has awful stretch recovery, it feels cheap, the color is awful, etc etc. And while I have found some really great denims that make fabulous skirts and dresses, I’m not so convinced when it comes to pants. This fabric, though, is really good. It’s very sturdy and luxurious, with absolutely no stretch.

Jorts

Jorts

Honestly, I think the lack of stretch is what did me in. These jorts are, unfortunately, a fail for me. Wah!

Jorts

They look WAY better in these pictures than they look in real life – so much, I’m almost second-guessing my fail label. But, no, they’re pretty bad.

Jorts

Jorts

I had a somewhat traumatizing experience while making these. Things were going along great – I’d unearthed my Featherweight to do the topstitching (which is BEAUTIFUL, btw! Well. Beautiful where it’s not crooked lolz), I was having a lovely time stitching that denim, I was confident in my TNT shorts pattern, Grainline Maritime shorts. I love my Thurlows, but these are a fab casual shorts pattern if you don’t want all the fuss of the lining and welt pockets! I’ve made them a couple of times before, and while I’m not going to discuss the sizing and construction in detail on this post, you can read all my thoughts on the pattern here and here.

Anyway, I decided to try them on before attaching the waistband, and the zipper immediately popped in half.

“Well, that was probably a shitty zipper. It looked kind of old, probably just gave up on life right as I was pulling them on. I’ll put in another zipper, should be fine.”

So I unpicked the zipper, inserted a new one (have you tried to insert a zipper into a front fly that’s already been assembled? It’s… weird. Not a fan.), attached the waistband, and was getting ready to stitch down the waistband facing when I decided to try the shorts on again.

Oh, right. I popped that fucking zipper too. DAMMIT!

This is when I took an emergency trip to the fabric store (guys, I never do this – but desperate times call for desperate measures and I am DESPERATE for some jorts ok) and bought the strongest denim zipper I could find. I figured the shorts were probably straining against the bottom of the zipper because there was no give in the fabric, so I decided to let out as many seams as I could. I gave myself as much extra room as I could squeeze out, and then reinserted the (third!!!) zipper and finished the waistband.

Then I tried them on. Meh.

Jorts

Jorts

The fit is just… weird. I’m guessing my emergency unpick didn’t work as well as I had anticipated, so now I’ve got some weird lumps in seams that shouldn’t have weird lumps. They also just feel vaguely uncomfortable – I get that selvedge denim is pretty tough, and needs to be worn in a bit before it’s actually comfortable, but I don’t like it. Not in shorts, anyway. I know it looks like they are painted on, but they are honestly not that tight (except I guess somewhere around the base of the zipper, where it strains when I pull them on). Then there’s that whole issue with me being terrified that I’m going to snap this zipper every time I pull them off.

Jorts

Jorts

Jorts

Here’s a closer photo of the shorts and the way they fit. You can see they’re kind of off – it’s not horrible, but it’s enough to bother me. Actually, I think the thing that bothers me the most is the fact that the damn waistband isn’t lined up. I have NO idea how that happened – it matched up perfectly the first time I attached it (right before I popped the second zipper), but it looks terrible. Oh well.

Jorts

Aside from the fit – and the laughingly terrible waistband assembly, seam pucker and all (fyi, that’s where I gave up) – the construction is something I’m moderately proud of. While I didn’t go as far as doing flat-felled seams (and thank GOD for that, since I ended up unpicking them. Well, it didn’t help in the end. But, you know), I did topstitch them with proper denim thread. It looks so good!

Jorts

Well, I guess it would look better if the topstitching were straight, haha! Oh well! Like I said, I used my Featherweight to do all the topstitching – I figured it would be better than unthreading my Bernina every couple of seams. I’m really glad I did, because being able to switch machines made things go a lot faster. Plus, the Featherweight just produces some of the prettiest topstitching! Now I understand why people flip their shits over these machines. They’re pretty fun!

Jorts

Of course, that machine handles entirely differently than the Bernina I’m so used to, so I definitely went through a bit of a curve with this project. My topstitching isn’t straight, but that’s ok. It was a good practice and I’m over these shorts anyway 🙂

I’m totally ashamed to admit that I’ve barely used that Featherweight since I bought it, btw. I used it to make a failed Amy Butler bag right after purchase, and after that it just sat on my cabinet as decoration… until I pulled it out to make these failed shorts. And now I’m wondering if this is a jinxed machine ohgod.

Jorts

Anyway, here’s that damn fly that gave me so much trouble. At least I have lots of practice sewing flys now! Haha!!

Jorts

Sorry for all the unclipped threads and general messy inside. I think I just mentally gave up on this project after the first zipper broke.

Jorts

So, overall – these jorts are definitely a fail for me. Not entirely happy with the fit, I think the topstitching looks sloppy, the back pockets are weirdly in the wrong place, they’re uncomfortable, the stupid waistband looks stupid, but most importantly… I will always always be afraid I’m going to break that zip when I’m taking the shorts off. Not worth the stress. Also, as a side note, that’s my Briar I’m wearing and I’m thinking it looks too big and droopy on me now 😦 Sad.

I’m not entirely bummed with this project, because I had a good time making them (despite the multiple zipper incidents) and I definitely learned a lot during the process. This probably makes me look bad now, considering I just announced my pants making extravaganza, but you know what? Mistakes happen. None of us are immune to the occasional sewing fail, and even if I don’t get a completed outfit out of it, I at least come away with the knowledge to improve on future makes and not repeat those mistakes. I’m also really happy that I reunited with my Featherweight! Maybe I’ll get around to actually fulfilling my sewlution of using that machine to make an entire garment. Sure, it was set for 2013, but… better late than never, right? 🙂

Completed: Sewaholic Robson, Jr.

21 May

Ever since I made my first trench coat last year (you know… the one in the amazing lace), I’ve been thinking of how to improve on it. Not that the lace coat needed a lot of improving – I mean, not to toot my own horn or anything (toot toot), but it’s pretty brilliant on it’s own. However, I knew there were a few things on the original that could use some updating.

Polkadot Robson made with reversible cotton/poly  from Mood Fabrics

For one, I needed a coat that was a lighter weight. In these transitional spring days (specifically – when I wake up and it’s 50 degrees outside, then suddenly turns 80 by afternoon… I mean, what the fuck, weather?), a lightweight coat is a nice thing to have around. My lace Robson was a little tooo heavy, my Minoru a little too fall-esque (don’t get me wrong, though, I LOVE THAT COAT and I wear it all the time… in the fall) and obviously I can’t wear my big awesome plaid coat right now. Cardigans do work, but I wanted something that would also protect me from the rain (because, let’s be real, wet wool smells like shit).

Polkadot Robson made with reversible cotton/poly  from Mood Fabrics

I knew I wanted to make another Robson – I’ve wanted to make another since, well, right after I finished the first one. It’s just a fun pattern to put together – it’s very detailed, there is a lot of fiddly work involved (with all the bias binding and topstitching), but it comes together sooo well. Plus, it looks super polished and who says I can’t have two trench coats amirite?

Polkadot Robson made with reversible cotton/poly  from Mood Fabrics

I spent several months looking for a good fabric – and to be honest, I initially had my heart set on making a classic tan trench. I’ve always loved the way those look – talk about polished! However, I couldn’t find a good twill fabric – either it had stretch (a personal no-no when it comes to coatmaking), or it was the wrong weight, or the color was off.

This cotton/poly reversible polka dot fabric ended up linked to me via one of Mood Fabric’s sale emails – y’all ever sign up for those? They are, in one word, dangerous. Fabrics for half off! Aiee!! As soon as I saw the fabric and the price ($7 a yard YESSSS), I knew it was meant to be. I bought 3 yards and it ended up on my doorstep a few days later.

Polkadot Robson made with reversible cotton/poly  from Mood Fabrics

Guys. This is basically my DREAM coat. The polka dots make it sooo much more fun than if it had just been a borin ol’ tan coat. I’m so glad I came across this fabric, and that I snapped it up when I did. I admit I was initially afraid it would be a little too lightweight for the structure of a trench – and it is pretty lightweight, it’s not super warm or anything (but, like I said, I don’t need super warmth right now so that’s fine with me!) – but once I got in the facings and the hem, it holds it’s shape pretty well. It has a nice crisp drape and the poly content in the fabric gives it a subtle sheen that I think looks really nice for this sort of garment.

Polkadot Robson made with reversible cotton/poly  from Mood Fabrics

Polkadot Robson made with reversible cotton/poly  from Mood Fabrics

Plus, it’s reversible! Meaning the inside still looks cool as shit, but I didn’t have to line it to make it that way 😀 Yay!

Polkadot Robson made with reversible cotton/poly  from Mood Fabrics

Since I’ve already once talked at length into the making of this coat (well, the lace version… you can see the posts here and here, if you’re curious!), I’ll just go over what I changed for this coat.

Polkadot Robson made with reversible cotton/poly  from Mood Fabrics

I think the biggest/most noticeable change is that it’s much shorter than the pattern is designed to be. I always felt like the lace one was a liiiittle too long on me – and not always the most flattering. The shorter length on the polka dot one is definitely more casual, which I like! To get this one hip length, I actually just put on the lace coat and measured how much to take off to get it where I wanted it, and then added my hem allowance and cut off the bottom of the pattern pieces. I usually use the lengthen/shorten lines (cos, duh, that’s what they’re there for), but I wanted my coat to be slightly more flared and I also felt that the waist length was fine… I just wanted to shorten the length below the waist. I think it worked out pretty well!

Polkadot Robson made with reversible cotton/poly  from Mood Fabrics

I also raised the pockets on my trench – the pockets on the lace one are WAY too low, and I never use them (like, I can barely get my hands in them ahaha). Again, I just put the trench on and measured where I wanted the pockets to hit – I think I raised them close to 2″. They’re about 1″ below the belt looks, which for me was the perfect spot. Now I can actually use my pockets!

Polkadot Robson made with reversible cotton/poly  from Mood Fabrics

One last thing I did was narrow the width of the front storm flaps on this trench – on my lace one, they have a tendency to stick out, and it’s pretty annoying! I wasn’t sure how to fix that, so ultimately I ended up putting on the lace trench (gah, most expensive muslin ever hahaha) and pinning out where there seemed to be excess flap, which I then measured and shaved off the pattern pieces. I think it was something like 1/2″, reduced to nothing – basically, if you look at the pattern piece, it’s where the bottom of the flap curves out by the armhole. After I cut that off, the flaps stay flat like they should.

Polkadot Robson made with reversible cotton/poly  from Mood Fabrics

Polkadot Robson made with reversible cotton/poly  from Mood Fabrics

Other than the above changes, I didn’t do anything else to the pattern. I did size this one down to the 0, so it’s smaller than the lace one (which I’ve lately felt like is a liiiiitle big). Other than that, I made no sizing adjustments and I did not stray from the directions!

Polkadot Robson made with reversible cotton/poly  from Mood Fabrics

I agonized for waaaay longer than I should have over what buttons to use for this coat. Initially, I had picked plain navy buttons – boring! Then I chose some cool cream buttons with a gold ring around the edge, but once they came in, they just looked all sorts of wrong with the coat. Of course, at this point we were pushing deadline, so I didn’t have time to reorder (and THANK GOD Mood returns buttons, because that was like $30 right there haha! More than I spent on the fabric! Whyyy are buttons so expensive?), so I turned to my stash for a solution.

Polkadot Robson made with reversible cotton/poly  from Mood Fabrics

Polkadot Robson made with reversible cotton/poly  from Mood Fabrics

Aren’t they cool, though? I got them from my Mamaw a few years ago – she used to work for a garment factory, and when they ultimately closed down, she came bearing loads of sewing notions. Mostly buttons and huge spools of thread, which my mom and I split. I have several jars of these gold buttons (with two different crests), silver buttons, and leather-wrapped buttons (in brown and black). I think she said they were used on Tommy Hilfiger coats? HA! Thanks for the buttons, I guess, Tommy!

Polkadot Robson made with reversible cotton/poly  from Mood Fabrics

Working with this fabric was pretty easy. I used a Microtex 90/10 needle and tried to be mindful of my pins (since it does like to show pin marks and where you’ve ripped out stitches – although getting it good with the steam iron makes most of the holes disappear). I was a little afraid that the polyester content would make this hard to press, but it played nice with the iron, so that’s good! The only thing that sucked is that it doesn’t ease terribly well, so I have a little bit of puckering at the sleeve caps, oh well!

Polkadot Robson made with reversible cotton/poly  from Mood Fabrics

Polkadot Robson made with reversible cotton/poly  from Mood Fabrics

Since the fabric isn’t too thick (despite being double-faced) and it pressed well, I chose to use the remaining yardage to make bias binding for all the insides. I used the same side I used for the exterior of the coat – I think it gives a nice contrast the wrong side!

Polkadot Robson made with reversible cotton/poly  from Mood Fabrics

Finally (yes, I’m wrapping up here, sorry y’all!), I swapped the tie belt with a gold buckle, to match the buttons. I think it gives the coat a nice final touch, plus, I just love buckles! I shortened the tie drastically and interfaced it for some extra stability.

Polkadot Robson made with reversible cotton/poly  from Mood Fabrics

One thing I want to mention is that I actually waterproofed this bad boy! I used Scotch Gard and, well, just sprayed the everloving shit out of it and left it to dry overnight. I actually finished this coat a couple of weeks ago (the photos were taken the Saturday before Mother’s day), and I’ve been wearing it ever since, due to a random cold snap. I’ve managed to wear it in light drizzle *and* for Bike to Work Day (where there was also a light drizzle), and it’s definitely waterproof! Dunno how well the waterproofing works for torrential downpour or anything like that, but it works for the purposes I intended 🙂 This is my first experience using this stuff, so while I can’t vouch for it in the long-term, I’ll be sure to post an update in a few months 🙂

Polkadot Robson made with reversible cotton/poly  from Mood Fabrics

Polkadot Robson made with reversible cotton/poly  from Mood Fabrics

That’s it! Probably way too long of a post for something I’ve made twice (and already discussed at length), but hopefully this helps some of y’all who may have been on the fence about making this pattern or wanted to make the same changes I did.

Polkadot Robson made with reversible cotton/poly  from Mood Fabrics

Also! Landon took these photos for me – aren’t they nice? We actually shot these in my parent’s back yard, right above the creek that I used to play in as a kid 🙂 That big plot of dirt behind me is actually my dad’s former garden (I say former because he moved everything closer to the house and put it in raised beds), although I think he’s going to plant corn there later this summer. If you think the garden looks huge, it is. It’s fucking gigantic and probably bigger than my house and yes, I’m spoiled with fresh vegetables all summer. Omg I can’t wait for tomato season.

Polkadot Robson made with reversible cotton/poly  from Mood Fabrics

Oh, right, and also – it’s my birthday today! Yay!! I’m 29 – and one year closer to 30 🙂 Think I might treat myself to a new Bernina foot soon, cos, well, I love buying myself presents. Ha!

Bye for now!!

Completed: A Solid, Structured Hollyburn

19 May

It’s official. Hollyburn is my new favorite skirt pattern. Also, that post title makes this skirt sound like it can stand up on it’s own. Well, it practically can, I guess.

Navy Twill Hollyburn

After knocking out a drapey rayon version, I was ready to try this pattern in a fabric with a little more body, like you see on the Sewaholic site. I’m a flared skirt girl at heart, but I’m kind of over circle skirts for the time being (I don’t know what happened, but I suddenly feel like I’m in costume every time I try to wear one!), so this marriage of flared-but-not-circle skirt combined with a fabric that has some structure was pretty perfect.

Navy Twill Hollyburn

I used this navy solid organic cotton twill from Mood Fabrics that I bought while I was in NY (but, thankfully, you can also buy it on the website. Which is good, because I’m definitely gonna need to buy more asap!). This stuff is AWESOME. It’s a great, bottom-weight cotton twill with no stretch, and very saturated color. I’ve used this fabric to also make my tie-less Miette and my Red skinny Thurlow pants (albeit in different colors, obviously) and it’s just a joy to both sew and wear. Seriously, those red Thurlows get the HELL worn out of them and the fabric still looks totally pristine. I love them!

Navy Twill Hollyburn

There is not much more to say about this pattern, apart from what I wrote in my previous post. I almost didn’t want to post this skirt because I feel like it’s a little redundant… like, cool, Lauren, you made another flared skirt. YAWN. However, I felt it was important to at least show what a major role fabric choice plays in when it comes to putting together a garment. This skirt is obviously much more structured than my previous Hollyburn – it practically stands out on it’s own. That’s just the fabric, by the way – I didn’t add anything to the hem, nor am I wearing anything under it. I like it though!

Navy Twill Hollyburn

The only change I made from the first skirt (and the pattern itself) was to put in a lapped zipper. I don’t think invisible zippers are strong enough for this sort of fabric, so I like to go lapped in that case. The zipper goes all the way to the top of the skirt, and then the waistband is finished at the top with a hook and eye closure. I should have taken a picture, but, I didn’t (I actually did try, but it was already late and every photo ended up super dark and grainy). You’ll just have to trust me on this one 🙂

Navy Twill Hollyburn

Although I didn’t take these photos on the same day I wore this outfit, I decided to repeat the overall look because I think it works really well – and why mess with a good thing, you know? Seriously, I think this combination of Nettie+Hollyburn is probably going to end up being a sort of summer uniform for me. It’s just sooo good and EXACTLY what I like to wear.

Navy Twill Hollyburn

Speaking of Nettie, I did want to show y’all one downside to the scooped back version – it ain’t bra friendly, at least not on me! Of course, my particular top has a few things going against it that probably keep the scoop back from providing full coverage behind the shoulders. For one, I cut this a size smaller than I should have (this was during testing; the sizing issue has since been fixed). I also used a thick pontie-ish knit that doesn’t have a lot of stretch, which means it doesn’t stretch at key points – such as to cover a bra strap. A prior Nettie in a lighter/stretchier knit (which I’m sure will turn up at some point on this blog, ha) doesn’t have quite as much bra-showing. So, something to keep in mind, again, with fabric playing a huge role in how a finished garment looks!

I also realized after making this that I don’t really like the way the scoop back looks on my body. I’ll continue to wear this Nettie because, dammit, I love this fabric!, but future makes will probably stick with being high back.

Navy Twill Hollyburn

Also, in case you were wondering, those shoes are Fergalicious brand. Yes, I know. lol forever. They’re really cute, though – and surprisingly comfortable (says the girl who hates wearing heels. Flats 4life).

Navy Twill Hollyburn

Landon took these photos, by the way! He’s such a good sport – and I’m 99% sure he offered to do these because I told him we would go for a run after, and my solo ~photoshoots~ (if you can even call them that; I mean, let’s be real – no one comes to this blog to look at pretty photos or whatever) take about 3x as long haha.

Also: outtakes!

Navy Twill Hollyburn

Navy Twill Hollyburn

Ok, so these aren’t that great… but I’ve been saving some of my better outtakes from MMM (as Landon has been taking most of my pictures for that, too, bless him), which I am going to subject all of you to at the end of the month. Well, there’s two of them, and they both involve Amelia being pissed, ha!

Navy Twill Hollyburn

I guess that’s it! What are your thoughts on Hollyburn now? Are you camp swingy or camp structured?

Completed: A Crazy Paisley Hollyburn

12 May

You ever see a sewing pattern and think, “Yeah, that’s too plain… next please!”? This was my thought when I first saw the Hollyburn skirt from Sewaholic Patterns. Cute enough, I thought, but too plain for me to take a second look at. I wanted adventure and excitement in my sewing patterns! I wanted something different.

Paisley Hollyburn

Actually, it appears what I need is to fill some closet gaps. Simple flared skirts and knit tops are one of my favorite casual outfit combinations – you can mix and match them to each other, so they basically do double-duty. My current lifestyle doesn’t allow for much in the way of fitted/pencil skirts – I need to be able to move around and, like, sit on the floor – and I’m kind of over circle skirts at the moment. My skirt experimentation has rekindled my romance for Ginger and Miette, not to mention a fabulously swishy and dreamy Gabriola, but I was ready to try something new.

So I revisited Hollyburn.

Paisley Hollyburn

And we totally fell in loooooooooove ~~~

Paisley Hollyburn

Seriously, guys. There is nothing necessarily ground-breaking about this pattern (although, let’s be real, Tasia’s a drafting genius and I’m like creepy obsessed with her patterns right now), but that doesn’t mean it’s not a good pattern. The beauty is in the simplicity – it’s a simple flared skirt with a simple waistband, a back zip closure, and curved front pockets. Nothing fancy here, but it works and it’s awesome. And I already made two.

Paisley Hollyburn

Hollyburn 1, aka, the Crazy Paisley, is made with this amazing paisley rayon I yanked at the Nashville Flea Market. Forreal, is this shit not insanely awesome?? I saw it out of the corner of my eye, in one of those booths along the walkway between buildings (you know those booths are the best because those people always have the weirdest mismash of shit and they’re always willing to sell it for dirt cheap. Especially if you’re nice to them :)), and I immediately ran over to assess. I don’t remember exactly how much I paid for it, but I do know it was $3 or less. Not sure of the age of this particular fabric, but it’s 42″ wide and definitely rayon. Oh, and it’s awesome. Did I mention that yet?

Paisley Hollyburn

I really really really wanted this fabric to be a Gabriola – wouldn’t it make the most dreamy rayon maxi? Ahh so lush. But, dammit, I had under 3.5 yards of this fabric… and like I said, it was pretty narrow, which ended up being the reason things didn’t pan out (believe me, I tried!). So, I decided to stick with the Sewaholic family and try out this Hollyburn that had been burning a hole in my pattern stash. And not only am I super happy with the result – I think it’s quite a bit more wearable than the original maxi inspiration, yeah? I mean, I can totally wear this while riding a bicycle 🙂

Paisley Hollyburn

Hollyburn is a pattern intended for beginners – just a few pattern pieces, very easy to fit (really, you only have to worry about the waist measurement here), quick to sew up. Besides the agony of cutting that slippery rayon, the actual sewing of this skirt took me under 2 hours. That fast! I briefly considered trying to match the print at all the seamlines – in addition to the side seams, there are also center front and center back seams, plus the curved pockets – but it was giving me a headache and, you know, fuck it. Whatever.

Paisley Hollyburn

For this particular pattern, I was smack between two sizes, so I cut the 0 at the hips/hemline, and graded to right between the 0 and 2 at the waist. I’m pretty happy with the fit – it’s fitted enough to stay put without the aid of the belt (but I like the belt, so belt stays), but it’s not so tight that I need to sneakily unzip anything after a big meal. I went for version 3 – the shortest one – with the added belt loops. I also lopped about 2″ off the length. Short skirts for lifeeeeee!

Paisley Hollyburn

Here it is without the belt. Yay! No belt!

Paisley Hollyburn

And this because, I dunno, my hair looks good here. Also, I probably should not wear that bra with that shirt again, eep (shirt is a Renfrew, btw!).

Paisley Hollyburn

What I love most about this particular skirt (and, I guess, the pattern in general) is how different the shape looks based on what fabric you use. Go look at the pictures on the Sewaholic website – the skirt has a great amount of flare, and it’s pretty structured. Compared to mine, which was sewn in a super drapey rayon, it’s all fluid and flowy and just kind of hangs (but in a good way). Sometimes I get so caught up in wanting to try NEW NEW NEW OMG NEW STUFF that I forget you can easily manipulate the look of a garment just by using a different fabric.

Oh, right, and remember when I said I made two of these? I totally did – the second one is in a much stiffer fabric, and looks totally different. I didn’t get photos in time to cram them into this blog post (which is probably for the best, since I think there are enough pictures of me on here today anyway, lolz), but stay tuned for that! In the meantime, I’ll probably wear it for MMM soon 🙂

Paisley Hollyburn

Obligatory swish post. Lookit dat swish! ♥

Paisley Hollyburn

Paisley Hollyburn

Sorry these pictures are a little blown out 😦 I added some topstitching to the pockets and waistband (as well as the hem) and swapped out the centered zip for an invisible zipper. All the inside seams are serged.

One last thing! We have a winner from last week’s giveaway – who’s it gonna be, eh?

winner1

winner2

YAY! Congratulations, Melanie! I’ll be sending you an email asap 🙂 Hopefully this book will be just the ticket to get you comfortable manhandling the stretch lace 🙂

Thanks to everyone who entered! A HUGE thanks to Colette Patterns for not only writing up this amazing resource, but offering a giveaway copy as well! 🙂 As always, you can get your very own copy of The Colette Guide to Sewing Knits from Amazon or directly from the Colette website.

Paisley Hollyburn

Now, the next question is – should I or should I not use the remaining paisley yardage to make a matching Belcarra blouse? Before you ask – yes, I would totally wear it with the skirt. FAKE DRESS FTW! Don’t you dare judge me.

Me-Made-May ’14: Week 2 Round-Up

9 May

Happy Friday, everyone! One week down into Me-Made-May – and time for another round-up!

5/3
5/3, Saturday
Dress: Fabulous Silk Birds
Slip: Ruby Slip
Shoes: Jessica Simpson

My baby brother graduated college on Saturday! Here I am with all my siblings – of course, I’m the shortest one (and this photo is a little misleading because I’m standing on an incline. I’m actually a good 7″ shorter than my sister, who in turn is shorter than my brothers, ha). I used the graduation as an excuse to pull out my favorite Me-Made to date – the Fabulous Silk Birds dress (I don’t name all my handmades, but I named this one! Because it’s fabulous!). I love love love this dress – I always feel so, well, fabulous in it 🙂 Plus, wearing this dress means I get to wear my equally amazing 4ply silk slip (note to self: sell organs and buy more 4ply silk asap), which is always a plus in my book 🙂

5/4
5/4, Sunday
Dress: Seersucker Anna
Shoes: Born
Belt: Thrifted
Sunglasses: Franco Sarto
Purse: Scarlett Begonia

Wore this to go plant shopping and ice cream eatin’ with Landon. I realize that I have this dress styled the exact same way I did in the original FO post – I guess I’m not very creative when it comes to pink seersucker! Anyway, love it and it’s great for hot weather. Also, if my hair looks brighter than it did the day before – that’s cos we redyed it 🙂 I slept in the dye so it’s SUPER bright now haha.

5/5
5/5, Monday
Tank: Target
Skirt: Cascade
Shoes: Jessica Simpson
Necklace: Handmade by me

Another favorite me-made! I LOVE this skirt, and everyone else seems to love it too – I’ve literally been followed around retail stores over it, multiple times. It’s the perfect marriage of pattern and fabric (and, before you ask – the fabric came aaaaall the way from Macedonia. My BFF picked it up for me while she was living there a few years ago. Wish I had more of it!), and it’s just so fun to wear. I feel like Shakira, and I mean that in the best way.

5/6
5/6, Tuesday
Dress: Emery
Belt: Thrifted
Shoes: Born

Can’t ever be sad when your hair matches your dress 🙂

5/7
5/7, Wednesday
Dress: Lady Skater
Belt: Thrifted
Shoes: xoxo

ESPECIALLY if that dress has tigers printed on it!

5/8
5/8, Thursday
Top: Briar
Skirt: Moss Mini
Necklace: Thrifted
Shoes: Keds

I took some advice on styling this skirt and went with a tshirt that has a looser fit – and I LOVE how it looks with this skirt! Especially the hemline on this Briar – hi-lo hem gives it the look as if it’s tucked in, without it actually being, you know, tucked. The whole outfit is totally comfy and I’m not gonna lie – I felt pretty good about it all day.

5/9
5/9, Friday (that’s today!)
Top: Advance 8511
Pants: Thurlows (but skinny!)
Shoes: Born

I actually had a different outfit planned today – I wanted to wear a skirt. But then I stepped outside, noticed the chill in the air, and decided to wear my red Thurlows instead. No regrets!

All in all, I think I had a pretty successful first (full)week of MMM! The changing weather has been a little tricky, but I’m working on a lightweight trench coat right now that will hopefully get me through the chilly mornings and occasional rain (actually, the trench is done – I’m just waiting on the buttons to be delivered!). How are y’all doing with your pledges? Find any fun outfit combinations or gaping holes in your closet yet?

Oh, just a few more announcements before I sign off for the weekend:
– If you haven’t already done so, don’t forget to enter in the Colette Guide to Sewing Knits Giveaway! I’ll be drawing the lucky winner on Monday morning, so you’ve still got time!
– My girl Elizabeth is looking for part time seamstresses to help her with some sewing work. If you’re in the Nashville area and would like to sew on an amazingly fun industrial machine in a gorgeous studio (I’m not even kidding about either of those – that’s me in her studio on 5/6!) for a lil’ extra cash, send her an email at hello@elizabethsuzann.com. I’m currently doing part time work for her on the side, and it’s super awesome because we listen to 80s music and watch Nicolas Cage movies. I have no intentions of quitting; her business is just growing very fast and she needs more help! All levels of experience are welcome – we’re not handbeading couture or anything here 🙂 – but you must already have a basic understanding of clothing construction and know how to operate a sewing machine. Bonus points if you’re a speedy sewer!
– My class at Watkins, Introduction to Fashion Sewing still has a couple of spots open, if you’ve been on the fence about signing up. DO IT NOW, GO!
– Aaaaaand, Nashville’s newest/cutest fabric store, The Fabric Studio, is finally open and just released the class schedule for June! I’ve got a few gigs there as well – Learn to Sew the Colette Ginger Skirt, All About Zippers Sewing Lab, and Apparel Patterns Demystified (seminar/info session)! I’m really excited about all these classes – excited to share my knowledge, excited to teach, excited to meet other sewers in the area! I think it’s gonna be fun! 🙂 Also, I promise to stop spamming y’all about my classes now 🙂

Have a great weekend!

Review: The Colette Guide to Sewing Knits (+ a giveaway!)

5 May

cover.indd

Y’all know how much I love sewing knits (just to reiterate: I LOVE that shit!). While knits tend to get a bad rap for being “tricky” to sew, I find them to be quite easy to fit and manipulate – not to mention, knits are worn more than any other fabric in my closet (and I’m sure most of y’all are the same way!). They’re just so comfy and easy to wear, you know?

Despite my never-ending campaigning to get people on board the Knits Boat, some of y’all are still a little scared to take the plunge. Whether you don’t know where to start when it comes to choosing a fabric, or if you think your standard machine can’t handle sewing on knits (spoiler: it totally can), or the techniques just seem completely foreign to your woven-trained brain – there is always room for more guidance.

Which is why I’m so excited for Colette’s newest book release – The Colette Guide to Sewing Knits. Written by Alyson Clair (a patternmaker with years of experience working in the knitwear industry) and then put together Colette-style with clear photographs and easy to understand descriptions, this book is a fantastic resource for tackling knits – taking you from the different types of fabrics, to what needles and threads to use, to the difference between sergers and coverstitch machines (and how to use them – from threading to tension to troubleshooting!), to how to sew knits on a regular ol’ sewing machine (for those of y’all who don’t have a serger ;)), to fitting, to different finishes. Whew!

Although I definitely have some experience with sewing knits, I can always use more tips and ideas for branching out and discovering new techniques. This book is pretty fabulous in the sense that it’s both helpful for knit newbies *and* those of us who have a few years under our belts – I even learned a thing or two in the first chapter. The chapter Stitching and Finishing totally blew my mind, though.

Want to take a little sneaky peek? Of course you do! (psst, you can click the photos to enlarge them :))

serger roadmap

When I said there was a full section on your serger (as well as the coverstitch and standard machine), I was not kidding! There are several pages dedicated to showing you the different parts of each machine, and what they do.

threading serger

There’s also a section on threading- for both the serger and coverstitch (ohhh, someday I will have a coverstitch ♥)! Yay! So much easier to read than those little manual diagrams, yeah? 🙂

serging a corner

Here’s a neat little tip on how to serge an inner corner.

elastic types

Like I said, though… the finishing section is my favorite part.

decorative elastic

Inserting decorative elastic – gah, I wish I’d had this resource when I was experimenting with making my own underwear a couple of months ago. I found the elastic really difficult to sew in, which is why I stopped after one pair 🙂 Turns out I was sewing it in the hard way, doh!

lace neckline

Stretch lace – isn’t this so pretty? I’d love to try this with the new Moneta pattern.

buying fabric

There’s also an entire section devoted to knit fabrics – how they’re made, what the different types are, what needles to use, what to look for while shopping.

Pretty cool, huh? I’m so glad I picked up this book – I’ve learned a lot just from flipping through the pages, and I can’t wait to try some of these new techniques with my next knit project.

GIVEAWAY IS NOW CLOSED
If you’ve made it all the way to the end- yay! Prize time! Sarai has generously offered a copy of the book to one lucky reader – it could be you! To enter the giveaway, just leave a comment on this post and tell me what you’d love to sew up in a knit – a dress? A swimsuit? Boring white tshirts? What’s your knit end goal? I’m curious 🙂 This giveaway is open WORLDWIDE and I will close the comments a week from today, Monday, 12 May 2014 at 7:00AM CST.
GIVEAWAY IS NOW CLOSED

For those of you who simply can’t wait and must have this book NOW, you can order The Colette Guide to Sewing Knits from Amazon or directly from the Colette website.

Good luck!

Me-Made-May ’14: Week 1 Round-Up (+ Nettie!)

2 May

We’re only two days into May, so this is gonna be the shortest round-up ever.

5/1 #mmmay14 #mmm14
5/1, Thursday
Hoodie: Traced off a favorite RTW hoodie
Tshirt: Briar (unblogged)
Tank top: So ‘Zo free pattern (unblogged)
Jeans: Imogene + Willie
Shoes: Keds
Undies (no, you can’t see them but I promise they are there :P): So ‘Zo free pattern (also unblogged… geez)

The first day went off with a slight hitch… I had originally planned to wear something different, but it ended up being too cold outside. I’ve been housesitting all week, so while I can get back to my stuff in the afternoon… in the AM, I’m kind of stuck with what I brought. So I ransacked my pile of clothes and ended up with a pretty good pile of Me-Mades that all sort of went together. You can’t see the tank and undies (and I swear, one of these days, I’ll blog about them), but they’re there 🙂

Oh yeah, and I’m totally in my friend Elizabeth‘s studio here. Isn’t it GORGEOUS?

5/2 #mmm14 #mmmay14
5/2, Friday
Top: Nettie tshirt
Skirt: Gabriola Maxi
Shoes: Jessica Simpson

This is what I had planned to wear Thursday 🙂 I LOVE wearing this maxi! It’s so swishy and fun and I feel so elegant. Gonna be hard not wearing this every day, ha!

So that’s it for week 1! Like I said, pretty short 🙂 We’ll get it really cranking next week, I imagine.

Just so this post isn’t all super short, let’s talk about my tshirt I’m wearing today! This is the Nettie pattern. If you hadn’t heard of it yet, that’s cos it was just recently released so it’s brand spankin’ new!

Nettie tshirt

Nettie is actually designed to be a bodysuit… you know, one piece, snaps at the crotch, that sort of thing. I was asked to be a pattern tester, and I agreed under the premise that I could make mine into tshirts. Bodysuits and I just don’t get along (although, after reading what Heather wrote… I’m wondering if I might like them in winter, for that no-cold-creeping-on-my-midriff factor. Hm.), plus, it’s always nice to see if the pattern has additional options, yeah? So here are a couple of the Netties I made – I actually made 4, but I won’t bore you with all of them (I’m sure they’ll pop up at some point this month).

Nettie tshirt

I love pretty much everything about this pattern. I love that it comes with multiple options – high neck, scoop neck, high back, scoop back, REAL LOW scoop back, short sleeves, long sleeve, elbow-length sleeves.. not to mention, bodysuit/tshirt/dress. Whew! I also love how fitted it is. No positive ease here!

Nettie tshirt

You do have to be mindful of the fabric you’re using, because of the negative ease factor. This mint Nettie is made using a rayon knit (it’s the same stuff I used to make my MCall’s 4488, I’ve been hoarding the remainder in my stash for quite a while now!), and while it’s nice and stretchy, it’s also very lightweight. Meaning you can pretty much see every bump underneath. That’s fine with me, but it’s something to keep in mind if you’re not keen on people seeing all your bra hardware.

Nettie tshirt

Here’s another Nettie I made using a thicker stretch knit I bought at Mood Fabrics while I was in NYC (sadly, it’s not on the website… and probably not in the store anymore, either, since I bought like 8 yards of it and made everyone else buy some too HA HA HA). It’s almost like a thin ponte – and very very soft, with quite a bit of stretch. I LOVE this fabric!

I made the size 4, which I fit pretty squarely in, measurement-wise. If you’re looking for something a little less tight, just go up a size or two 🙂 Both of these versions are the scoop front with a high back neckline. I did make a couple with a scoop back neckline, but I’ve learned that I really don’t like the way they look on me, so I’m sticking with high back for now.

Nettie tshirt

As you can see, the thicker fabric results in a smoother look.

To make my Nettie into a tshirt, I just cut the pattern piece about 1″ above the hipline (where the leotard-ness starts). I also added 1.5″ length at the waist, so the shirt would be long enough to cover my waistband. In case you were wondering why I cut length and then re-added it, well, the bottom of the pattern flares out quite a bit to accommodate hips – which I don’t need in a tshirt. So I added length at the waist instead.

Nettie tshirt

And that’s it! Pretty happy with this new pattern, and while I’m not much of a bodysuit-lover, I DO love me a good tshirt! Especially when it’s super tight with a low neckline. Go ahead, judge me 😛

Have a great weekend, everyone!