Tag Archives: tailoring

All About My New Workshop: Alter + Repair Your Garments!

11 Oct
Teaching my new workshop, Alter + Repair Your Garments, at Camp Workroom Social in 2021!

Hey all! Long time no chat 🙂

Don’t expect a return of regular blog posts (sorry! Real talk; this shit took me multiple days to write and I am exhausted lol), but I did want to pop in and talk about my new workshop that I’ve been offering this year. That’s right – I went away for a full 12 months, just to come back around and try to sell y’all some of my crap! HA HA! Wait, come back, I promise this is some interesting quality shit!

As you [probably] already know, I’ve been a sewing teacher for many years – almost a decade, actually (crazy!). I’ve been teaching my Sew Your Own Jeans workshop now for years, and it’s awesome and fun and you should totally believe all the good hype you hear about it. As much as I love making jeans, though, a new sewing skill has entered my repertoire that I just cannot get enough of and I’m dying to share it with everyone! So I created a new one-day workshop, Alter + Repair Your Garments. And today, I’m dusting off this old blog to tell you more about it! And even if you don’t care about my new workshop, I hope that you will at least enjoy the absolute avalanche of photos in this post.

Alterations are a really sensitive subject in the sewing community. We love to say things like “Yes I sew – no I won’t hem your pants.” I’ve seen sewers literally make an entirely new garment, rather than address fit issues in a current garment. Things like seam ripping and making adjustments get a really bad rap in this inner circle. Why is that? I don’t know, but I had a similar attitude up until a few years ago. I would happily upcycle clothes – that’s how I really learned how to sew, by taking weird things from the thrift store and turning them into something even weirder (what can I say? I love weird shit). But I, like many other home sewists, didn’t touch alterations. Until recently, anyway.

I’ve touched on this a little on my blog – and a lot more on Instagram – but I actually do alterations for a living now. I started out as a freelance tailor, which I still do, and I also work part time in a tailor shop that is connected to a high-end clothing store. The tailor shop is stable and occasionally a bit redundant (which I honesty like), and the freelance work is… sometimes redundant, and sometimes just absolutely wild. As a freelance tailor who also lives in Nashville, the majority of my clients are musicians, mainly country and gospel artists. I work closely with my clients and their stylist to get their clothes to do whatever they want them to do. Sometimes that means proper fittings and alterations for things like red carpet events and tour outfits. Sometimes it means I’m sitting in a parking lot with my sewing machine powered by a generator, while I furiously take in something in the absolute shittiest and fastest way possible so they can film a music video. I also do a lot of adjustments to clothing in ways that aren’t traditional alterations – changing the style and fit of a garment (in a way that was not originally intended by the designer), adding or removing elements to make it wearable for performing, or to work with a stylist’s ~vision~. It’s all different and it’s all fun and I love it so much!

My new 1 day workshop, Alter + Repair Your Garments, allows students to dip their toes into the world of alterations and garment changes, with the support of someone who has quite a bit of experience under her belt (that would be me!). This class is a little different than what you might imagine when you think of doing alterations, though. Yes, we can (and we will) cover the basic stuff – hemming pants, taking up sleeves, adjusting waistlines, etc. The not as exciting bits that we like to tell people we don’t do as sewists. It’s totally valid and useful sewing and can be very handy if you think you might want to pursue a career as a tailor, or if you just want to handle your own alterations and save some cash, or in the case of some of my students – to show you the involvement in alterations, and release some of that sewist’s guilt when you realize you’d rather just continue to pay someone else to do it so you can keep your free sewing time entirely selfish and fun!

A big part of alterations, though, is a lot more exciting – the creative problem solving! This is where we take our garment sewing to the next level by changing things that might not be so obvious on the first go. Sometimes it’s a simple fix – shortening a hem, taking in excess. Sometimes it’s more involved, like replacing a zipper or a shredded panel of fabric. Sometimes it’s something really wacky, like making a new neckline or turning a dress into a top. The beautiful thing about sewing is that *most* things can be changed – I mean, it’s all sewn, after all. So go ahead and put pockets in that dress! Chop 6” off the bottom of your jeans and keep that original ratty hem! Dye your favorite sweater to a color that better suits your complexion (ok, no dyeing in this class but we can talk! We can talk!)!

Every class is different, and the curriculum is based on whatever students choose to bring into class. This means you aren’t signing up for a class that teaches you shit you don’t care about – you’re going to bring in your own garments (ready to wear or handmade, vintage or modern, yours or someone else’s! Whatever you want to work on!), and we are going to address those pieces specifically. Some students love the opportunity to watch what everyone else is doing – it’s like extra little bonus lessons! Some students like to bring in an entire pile of clothing and try them all on, chat their way through all the changes and how to do them, and save the actual sewing for home. Some students will just bring a couple big projects, and let their class session focus on finishing them. Some students use class time as an excuse to finally tackle the pile of clothing alterations they’ve been avoiding dealing with. However you decide to treat the class is up to YOU!

This is not a “fitting” class per se – although, most alterations do involve fit. We fit for style, for comfort, for wearability. We are not worried about getting “perfect fit” because that does not exist (and any photos you see without wrinkles? That’s due to the magic of Photoshop and standing completely still in a garment that probably isn’t very comfortable!). A fun bonus effect of this class is that this sort of fitting – on completed, wearable garments – can actually increase your understanding of fit and it’s adjustments on the future garments that you make. Fit adjustments are much more obvious on a finished garment, rather slogging through a book and trying to figure out the strange name that is supposed to describe the wrinkles you see.

As a tailor who works in the entertainment industry, I bring a unique point of view that you might not necessarily find in other classes. I’m not afraid to do something wild to a garment if I think it will improve it in some way. I love using elastic to sneakily take things in, and I’m a huge fan of turning mistakes into design elements. My goal for this class is to teach students how to approach this in a systematic way that makes sense and can be replicated with any garment, not just the pile you worked on in class. Of course, I want you to leave with a pile of pieces that you definitely will wear now – but I also want you to leave equipped with the knowledge and confidence to do this on your own, too!

Alter + Repair Your Garments is perfect for any sewist who wants to improve their sewing, as well as learn a whole new range of skills. Do you have a pile of clothes in your closet that you don’t wear, but you also can’t quite figure out why? You need this class. Do you want to be able to smugly tell those acquaintances who ask you to sew for them “Actually, yes I do know how to do that type of hem – but sorry, I don’t sew for other people :]”? This is your class, baby! Have you taken my jeans class and you just really want to hang out with me again but you are good with all things denim? COME ON DOWN AND SEE ME, MY FRIEND!

You do *not* need to be a sewing super star to take this class! I wouldn’t recommend this class to an absolute beginner – you should have a little experience under your belt, a general understanding of the basics of clothing construction, and be comfortable using a machine. But you know what the other beauty about alterations is? There’s the easy way, and there’s the “proper” way. And you get to choose the method you want to use (because those are your damn clothes and there aren’t any sewing police!)! From adventurous beginners to seasoned pros – I truly believe this is a class for everyone!

Here are some things you can expect to learn in this one day workshop:

  • Effective seam ripping techniques for a variety of stitches, including straight stitches, serged finishes, and chainstitches
  • How to assess a garment’s fit and style, and how to determine what changes need to be made
  • How to pin fit a garment and transfer the adjustments in preparation for sewing
  • How to take apart a garment, look inside, and determine the best method for executing whatever adjustment needs to be made based on the construction of the original garment
  • Basic garment repair
  • How to determine whether a garment can successfully be altered or repaired,
  • Best practices for using trial-and-error to approach for alterations on existing garments, and how to troubleshoot any problems that may arise
Maybe you just need help getting the right hem length on your long dresses? I got you!

A couple notes on what *not* to expect in this class – we are working on finished garments only, so no muslins and we will not cover flat pattern adjustments (that’s an entirely different class, one that your local sewing shop likely already offers!). We cannot work on specialty (or messy) materials, such as leather, sequins, or fur. Pls leave that shit at home!

Altering your clothes to better suit your body, style, and comfort needs is truly the most sustainable way to sew. In this class, I hope to show you how to see flaws in garments as exciting opportunities for improvement. Whether you are buying used or new clothes that need a little tweaking, or perfecting the fit + style finish on your own handmade goods (side note: *most* of my handmade clothes go through at least one round of alterations after they are finished! This is totally normal – even with a preliminary muslin fitting, clothes are going to fit different when you wear them out and around vs standing in front of a mirror with a shell made of a stiff fabric), the possibilities are endless and exciting!

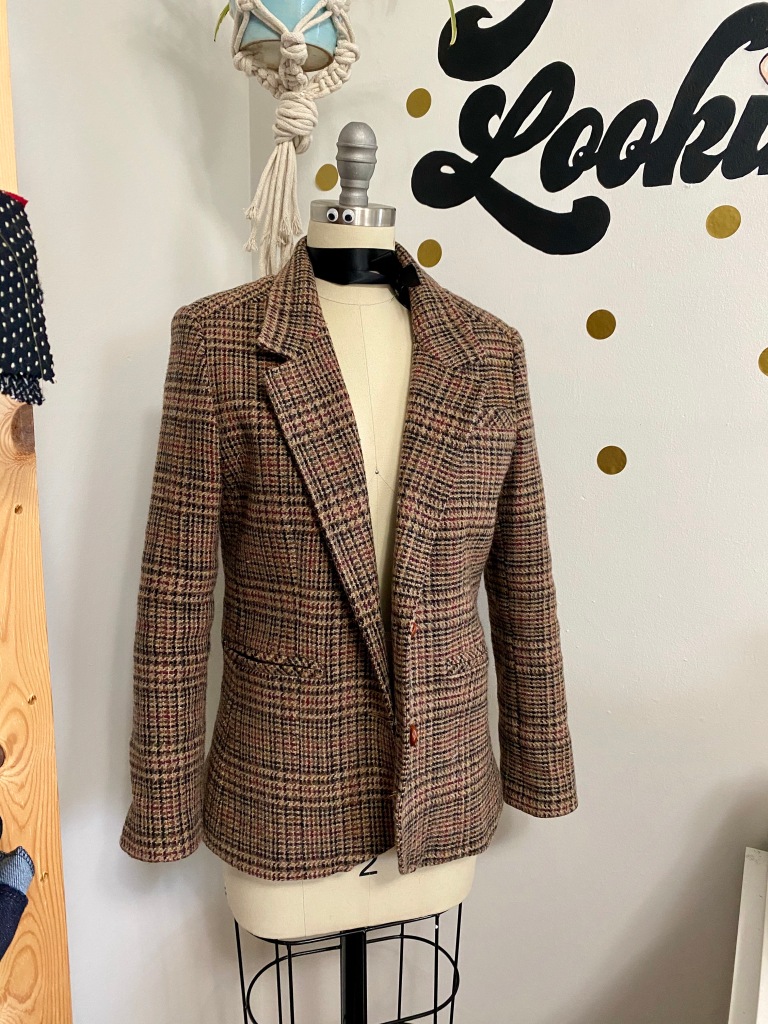
Does this count as an alteration? Old RTW jacket that I thrifted and painted on the back! Full Instagram post here.

Don’t worry – I’m still teaching my Sew Your Own Jeans workshops (got a lot more butts I need to touch!). I will be offering Alter + Repair Your Garments in tandem with the weekend dates of my Sew Your Own Jeans workshops. I’m finalizing my 2023 workshop dates right now and will be announcing them soon – stay tuned! Can’t wait until 2023? There are still a couple seats left at Domesticity (Baltimore, MD) and Papermaple Studio (New Orleans, LA)!

For more information on my Alter + Repair Your Garments workshop, check out this interview I did with Workroom Social earlier this year.

For a list of all my upcoming workshops – check out my WORKSHOPS page.

Completed: Crazy Aztec Waver Jacket

28 Oct

Well, my winter jacket is ready for this year! Guess I can cross that one off the list!

Papercut Waver Jacket

Before we get too deep into this post, I have to warn you – I took a LOT of photos of this jacket. It’s a big project and one that I’m especially proud of. I am not even sorry that you’ll have to look at like 40 pictures of it now. Yep.

Papercut Waver Jacket

As I mentioned in my Fall/Winter sewing plans, I’ve been collecting all the bits and pieces to make this jacket for a couple of months now (PROTIP: Making a coat can get expensive when you start buying all the crap that goes into it, but you can make the cost hurt a lot less by buying everything in phases 🙂 HAHA). I’m pretty set on the heavy winter coat front – my Vogue coat is still serving me well nearly 2 years later, and the Ralph Rucci knock-off is a wonderful piece to wear when I’m dressed up. My wardrobe does have a small gap in lightweight jackets – my black and gold bomber jacket, while awesome, is a bit short to really be cozy, and my orange Minoru jacket is really better suited for the super mild spring temperatures as it’s really not that warm (it’s just cotton with a poly lining, after all)! What I needed was a longer jacket, preferably one with a hood. I always miss having a hood.

Papercut Waver Jacket

Papercut Waver Jacket

The Papercut Patterns Waver Jacket was my pattern choice – it’s a really cool, casual style and I liked that it included a hood, as well as the waist-cinching drawstring. This pattern is pretty similar to the Sewaholic Minoru, although without all the additional gathering nor the hood-stashing wide collar. I think the style of the Minoru looks pretty good on me, so I knew the Waver would as well. I also found an eerily similar replica (with set-in sleeves rather than raglan) at the GAP a few months ago, so I was able to try it on and see what I thought before I started making muslins. I love it when things work out that way!

I cut the size XS, which is my usual size with Papercut. I like that the jacket has some shape, but there’s still enough room in there for me to pile a sweater on underneath (which is about the max layer of clothing I’d have on if the weather was appropriate for a jacket like this!). My muslin revealed that I didn’t need to make any fitting changes, other than shorten the sleeves about 1cm (ooh, look at me, sounding all international and shit).

Papercut Waver Jacket

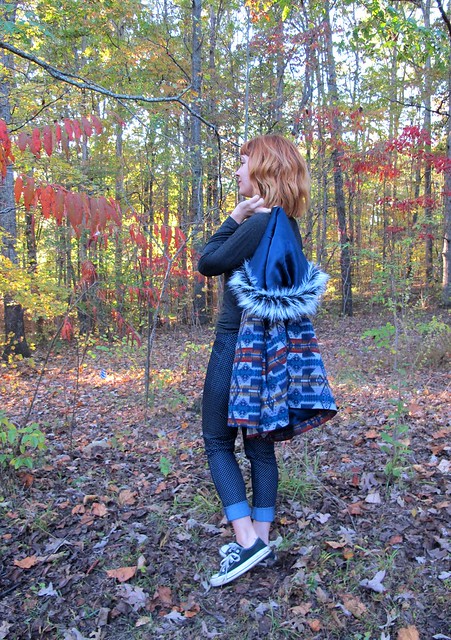
Of course, the fabric really makes the jacket! This cool navy Aztec virgin wool is from Mood Fabrics, and I’ve had a big piece squirreled away in my stash for months. It’s a pretty lightweight wool, which is perfect for my needs, and suitable for this pattern. I love all the colors in the print! Trying to cut those pattern pieces to match all the bold, colorful lines was a little bit of a struggle, but I made it work. I lined the jacket with English blue silk charmeuse (the exact one that I used appears to be sold out at this point, sorry!). I really did agonize for a long time over what color lining to include – the fun side of me loves contrast linings, but the boring side of me thinks it makes things look a little cheap (except that red lining in my plaid Vogue coat; I have no regrets about that one!). I actually like a more subdued lining, and prefer the contrast in the form of texture, not color. So I went with English blue, which perfectly matches the navy in the wool.

I didn’t do a lot of crazy tailoring with this coat – it was actually a fairly simple project. I did add a back stay (made of medium-weight muslin and using this tutorial from Sewaholic) to the back to keep it from stretching out, and I catch-stitched all the wool seam allowances down so that they’d stay flat with wear (similar to this, but without any of that horsehair interfacing. This is a casual coat that doesn’t need heavy tailoring!). There’s no padstitching in this project, or bound button holes. While I LOVE big projects with lots of interior details, not every project has to be couture-worthy. Especially if it’s a simple jacket.

Papercut Waver Jacket

ha! Bet you didn’t notice those big patch pockets, did you? I cut those so they are hidden in plain sight right on the front of the coat. Good thing I have radar fingers, otherwise I’d never be able to find them when my hands get cold.

Papercut Waver Jacket

I also added inseam pockets (not included in the pattern, but as easy as stealing a pocket piece from another pattern and popping it into the side seams as you are sewing it up!), sewn in silk charmeuse, along the side seams. The wind blowing in my hair for this photo is an added bonus, and you are welcome for that.

Papercut Waver Jacket

Papercut Waver Jacket

Papercut Waver Jacket

The hood was a big selling point for this pattern! I love jackets with hoods, but I never really come across jacket patterns with hoods that I actually like. It’s nice to have a hood for rain and light snow, so I’m glad this pattern has a hood! It’s a nice 3 piece hood, too, so it stays on your head without squishing it, and stays put (and it’s big enough to cover my head even when my hair is pulled up in a bun!). The pattern calls for lining the hood with self lining (aka the jacket fabric), but I was afraid that wool would give me weird hat head, so I lined the hood with more silk charmeuse instead. I figured, they make pillowcases out of silk, so hood lining can’t be too far off… right?

As you can see, I also added faux fur around the hood. Yeehaw! I love this detail in coats, and I was keen to add it to this coat as well. This black and white faux fur from Mood is really nice stuff – it’s super soft and almost feels like real fur. It’s certainly way better quality than any other faux fur I’ve sewn. This doesn’t necessarily make it any easier to sew – I still had fur flying everywhere as I cut it, etc etc – but the payoff is worth it!

What you can’t see in these photos is that the fur is actually removable – just in case I change my mind and want it off, it won’t be difficult to remove it (I doubt that will happen, but I like having options!). I sewed the fur trim the same way you’d make a fur collar, loosely following this tutorial from Casey, although I did not add any interfacing as my fur has a pretty heavy backing as-is.

Papercut Waver Jacket

I sewed black twill tape around the edges and then folded it to the inside, catch-stitching everything down securely.

Papercut Waver Jacket

Then I laid my silk charmeuse lining on top, covering all the insides and attaching the folded edge of the lining to the twill tape on the fur, using teeny hand stitches. The fur trim was then attached to the perimeter of the hood, using invisible hand stitches. I briefly considered using snaps or buttons+loops, but decided that I didn’t want anything to show when the fur was removed. The stitches will be easy to pull out if I need to take the fur off, but you can’t see them when the fur is on, either. You can see what the jacket looks like without the fur here, if you’re interested!

Papercut Waver Jacket

Here’s that blue lining! You can see another change I made to the jacket – instead of using a drawstring to cinch the waist, I added wide elastic. This was mostly due to comfort – elastic isn’t constricting like a rigid draw string is – plus I think it looks better on me. I did have to change up the order of construction a bit to get this to work. First I bagged the lining as usual (per the pattern instructions). I left off the drawstring channel pattern piece and instead sewed through all the layers of the wool and lining to make a channel (similar to the construction of the Minoru), then fed the elastic through that and tacked down the ends.

Papercut Waver Jacket

I also added a little leather tab to the back of the neck, so I can hang the coat more easily (or from my finger haha).

Papercut Waver Jacket

I actually like this way this coat looks unbuttoned, which is a first for me!

Papercut Waver Jacket

Papercut Waver Jacket

Papercut Waver Jacket

I do wish that I had paid more attention to my pattern-matching on the front of the coat, so that the design would continue uninterrupted. Oh well! It still turned out pretty cool despite that mishap, and there are triangles down the center front instead. I’m ok with that!

Now for a buttload of dressform and flat pictures:

Papercut Waver Jacket

Papercut Waver Jacket

Papercut Waver Jacket

Papercut Waver Jacket

Papercut Waver Jacket

Papercut Waver Jacket

Papercut Waver Jacket

Papercut Waver Jacket

The buttons are antique glass buttons that I bought at the flea market earlier this summer. Love them so much! That guy has the best buttons.

Papercut Waver Jacket

Papercut Waver Jacket

Papercut Waver Jacket

Papercut Waver Jacket

My favorite part!! The leather tab was an idea I took from an old American Eagle coat – I just cut a strip of heavy leather, rounded the ends, and punched holes so I could run stitches through it. And the woven label is from Wunderlabel – isn’t that the best finishing touch? I had a hard time deciding what mine should say – I wanted it to say Made in Nashville, but I don’t really live in Nashville anymore (I mean, we are close enough but I’m a huge weirdo/stickler about that sort of thing!), so The South works 😉 Anyway, this was my first experience with Wunderlabel – I’ll have more of a review up in the future after I’ve used more of the labels. But in the meantime, I’m sewing them on everything!

Papercut Waver Jacket

While I certainly did not push myself to hurry and finish this project, I did wrap things up pretty quickly! I think it took about a week to get everything sewn up, after making the muslin and cutting the fabric. I’m glad I finished it, too, because I think it’ll come in handy when I’m in NYC in a couple of weeks. Hell, it’s already starting to get cold here – I will probably be able to wear it later this week! 🙂

Papercut Waver JacketNote: The fabric for this jacket was purchased with my allowance for the Mood Sewing Network (over a period of months, I might add! 🙂 ). Pattern was given to me as a gift. All comments on this blog post 100% mine, however!

Completed: The Vogue Coat

9 Jan

Ahhh, it’s finished! A little past all my self-imposed deadlines, but whatever – I have a new coat! Finally!

Vogue Coat - Done!

Of course, now I wish I’d given it a catchier name than “the Vogue coat,” but ehhh, too late now. Let’s just look at how nice my coat looks, yeah? 🙂

Vogue Coat - Done!

I guess there’s not much else to say about the making of this coat- I’ve outlined it pretty heavily here and here. Once I finished with all the pad stitching and steaming and general tailoring funsies, the rest of the coat came together quite quickly – especially since I’d already sewn up my lining and had it waiting for me.

Actually, let’s talk about inserting the lining real quick because I thought it was interesting how the pattern had me do it – I sewed the entire coat to completion – finished the backs of the bound button holes, sewed on the buttons, hemmed the bottom and the sleeves, stitched down the facings with long running stitches – and then inserted the lining by hand with slip stitches. At first, I tried to think up ways to not have to do this so I could just bag the lining like in RTW (one thing I learned how to do at Muna’s, man, we sewed sooo many coats there haha), but I eventually decided to just go with the instructions because I liked the way the finished coat felt with everything securely sewn down (bagging a lining, at least the way I learned, means that the facing and hem are left open and then you have to go back in and thread tack everything, which I sort of hated). Plus, the lining will be easy to remove and re-attach should I ever need to replace it. Considering that I plan on keeping this coat for a long time – or, at least, as long as I continue to fit into it 🙂 – I’ll probably end up shredding the lining long before the coat needs to be repaired.

Vogue Coat - Done!

Oh, you wanted to see the lining? Sure thing!

Vogue Coat - Done!

It’s red! Shiny shiny red!!

Vogue Coat - Done!

I can’t even tell you how happy I am that I decided to go with the silk charmeuse instead of the Bemberg Rayon or China Silk that I was originally considering. This stuff is LUSH. It’s so heavy and wonderful, which makes it easy to sew and press, and it’s so shiny and gorgeous! I can’t get enough of it! Totally takes that coat game up a notch, don’t you think?

Vogue Coat - Done!

I am just really happy with this coat. It’s surprisingly warm, considering how light the wool is and the fact that I only underlined it with silk organza – when I took these pictures, it was like 25* outside, and I felt fine. It’s also pretty lightweight, making it easy to carry around (after I took these pictures, I spent the day at the mall with my BFF and the coat fit easily in my purse strap while I walked around. So nice!).

Vogue Coat - Done!

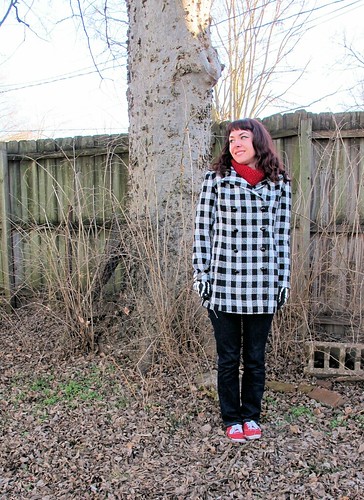
Not to mention, it’s just awesome. I’ve always wanted a plaid coat. And now I have one!

Vogue Coat - Done!
Vogue Coat - Done!

And unlike mall coats, my plaid actually matches 😉

Vogue Coat - Done!

I love the topstitching on this coat. I used proper topstitching thread so you can really see it, and my machine had no trouble plowing through all the layers of coating and hair canvas.

Vogue Coat - Done!

Here’s a dorky fact about me – I love setting in coat sleeves! Really! Instead of using gathering stitches and all that nonsense, I use this cool little trick that uses a bias strip of fabric (for this coat, it was pajama flannel, ha!) to ease the sleeve head before you attach it to the armhole. Lolita patterns has a great tutorial on exactly how to do this, and even some tips of on what kind of fabric to use. I’ve used this technique for all my coats and I pretty much always get perfect results.

Vogue Coat - Done!

Here’s the coat without my distracting cowl. I ended up going with these black glass buttons as I like how they are simple enough to not distract from all the plaid going on with the coat fabric.

Vogue Coat - Done!

One thing that really upped my game with the coat this year was that I had a new iron to steam the shit out of things with! I ended up getting a gravity feed iron for Christmas (yay! Thank you, mom!!) and I can’t even tell you how delighted I am with the pressing output from that thing. It gets SO HOT, doesn’t auto shut-off (!!!) and I also got a shoe with it so there’s no shine or melting. It’s SO awesome. My coat really benefited, too, as you can tell – see how sharp the creases are at the hems and lapels? Love. Love love love!

Vogue Coat - Done!

Y’all probably already guessed this, but I also made my little knitted cowl to go with my new coat. It seemed appropriate, especially since I had a ball of Cascade 128 in the perfect shade of red just waiting to be used. I used the Blue Streak pattern, which was easy enough to memorize so I just carried the project around in my purse and knitted a row or two during downtime. Which was all the time – Christmas morning, knitting a cowl. Sitting in the movie theater waiting for the previews to end before The Wolf of Wall Street started, knitting a cowl. Waiting in line at emissions testing, knitting a cowl. Whatever, I love how portable knitting is! Ha!

Vogue Coat - Done!

No need to knit new gloves, as it goes perfectly with my childish skeleton gloves 😉

Vogue Coat - Done!
Vogue Coat - Done!

In other cool coat-making news, I finally found a home for my Fabiani coat – my mom! It fits her perfectly, so she’s been wearing it for the past month. Yay!

Vogue Coat - Done!

Anyway, I guess that’s it! Yay for coat-making, and yay for this giant project to finally be over! 🙂

Tailoring the Vogue Coat, pt 2

23 Dec

Man. Tailoring. It is always (always!) worth the extra cost and effort, but lord I always forget how much extra effort is actually involved. I’ve been plugging along on my coat since I last posted my progress, so here’s what I’ve been up to in the meantime!

I finally got the padstitching on the lapels done. That alone took the longest – not because padstitching takes forever, necessarily (well, I guess it depends on the size of the lapels), but because I kept putting it off for as long as possible. I was not looking forward to how long it would take. Guys – when I finally sat down and made myself do it, I finished both lapels in like 45 minutes. I’m such a baby, haha! Fortunately, while I was putting off the padstitching, I was not sitting idle – I skipped ahead of the instructions, and assembled the coat back (minus the tailoring) and lining, so that should save me some time now.

Now, I totally could have skipped the padstitching – it’s not 100% necessary, although it will 100% of the time make your coat look sooo much nicer. RTW coats do NOT have this sort of tailoring in them, and they obviously get away with it because people still buy them. But look at what a difference it makes:

Vogue Coat - Tailoring

If you can’t tell, the padstitched lapel is on the left (the side that overlaps), and the one that hasn’t been padstitched is on the right (the underlap). Do you see how flat the non is in comparison to the one with stitching? It’s pretty incredible!

Vogue Coat - Tailoring

LOOK AT THAT ROLL LINE, JUST LOOK AT IT.

Padstitching, in a nutshell, is basically just sewing diagonal stitches in straight lines (eventually forming a bunch of chevrons) using silk thread, so the hair canvas adheres to the coating fabric. You don’t sew all the way through the fabric – just pick up a little nip here and there to keep things connected. You hold the fabric+canvas over your fingers so it is encouraged to roll while you sew, and then when you’re finished, you steam the shit outta that sucker so it is hold it’s shape. Again, time consuming and not totally necessary, but it really is the difference between “Hey, I made a coat” and “~*Hey I tailored a fucking coat are you so impressed*~”. I mean, I’m impressed with myself and I haven’t even finished the thing yet!

After I finished the Dreaded Lapels, I focused my attention on the collar.

Vogue Coat - Tailoring

First, I sewed the two under collar pieces together. These are cut on the bias, so they will stretch and sit correctly underneath the upper collar. They are also cut slightly smaller than the upper collar, so the seam will roll to the underside and you won’t see it. That’s the plan, anyway.

Vogue Coat - Tailoring

To sew the interfacing pieces together (remember, they need to be on the bias so I can’t cut them on the fold), I removed all seam allowances and zig-zagged the pieces together at the center, secured with a piece of seam binding. I then marked my roll line and, I know, it looks really shitty. Sorry about that.

Vogue Coat - Tailoring

As with the lapels, I marked the padstitching lines with my trusty Sharpie. Above the roll line gets heavy padstitching (1/4″ tall, spaced 1/4″ apart) and below the roll line is more lightly padstitched (1/2″ tall, spaced 1/2″ apart). This will help the collar to stand so it looks nice and full and not sad and flat.

Vogue Coat - Tailoring

After I finished padstitching, I wrapped the collar around my tailor’s ham and, again, steamed the shit out of it. So qt, so pro.

Vogue Coat - Tailoring

I drafted a back stay, although my pattern doesn’t call for it. It’s always a good thing to include, though – it’ll reduce the strain on the coat back from moving your arms around/hugging people, and thus give your coat a longer lifespan. Plus, you can use cheapie muslin and I love me some cheaping out.

By the way, I use the term “draft” veryyyy loosely. I pinned my back and side back pieces together (so they would be one continuous piece with no seams) and marked 8″ below the neckline and 3″ below the armhole, then used my curved ruler to connect the two lines.

Vogue Coat - Tailoring

The resulting piece (cut on the fold, because, again, no seamlines) is the back stay. I pinked the bottom edge so there wouldn’t be a sharp line on the outside of my coat. Real talk: this is the only reason why I own pinking shears at all. For tailoring. I’m not even kidding about that a little bit.

Vogue Coat - Tailoring

The back stay then lays on top of the coat back and is basted to the arm holes, side seams, neckline, and shoulder edges. The bottom just kind of flaps free in the breeze. And that’s all there is to it!

Vogue Coat - Tailoring

I also stabilized my shoulder seams with twill tape – no real reason, except that my Tailoring book (lol why the fuck is that listed at $65 what is this madness) said it was a good idea so I just went along with it. It should reduce the strain at the shoulders, which is good because this coat is starting to get a little heavy!

Vogue Coat - Tailoring

Finally, I catch-stitched down all my seams on the coating fabric, catching only the underlining. Honestly, I should have done this as I sewed each piece – I really had to reach up under the back stay to get some of those seams sewn down – but I wasn’t thinking about it at the time. Catch-stitching down the seam allowances is one of those weird optional steps that isn’t necessarily bad if you skip it (like I was planning to), but it does help keep everything in place on the inside, thus prolonging the life of your coat. And, I mean, it’s sort of relaxing. I really love to catch stitch, what can I say?

So there’s that! I’m mostly done with the fiddly tailoring at this point – I still have the sleeves to deal with, but they shouldn’t be too bad. Since I’ve already assembled the lining, it’s really now just a matter of putting everything together.

My original plan was to have this finished by Christmas, but I’m now shifting that to a (hopeful) NYE completion date. Construction hasn’t necessarily been dragging- I just haven’t been home at all to work on it! My dad ended up in the hospital last Monday, where they discovered that his colon was completely blocked due to cancer, so they wheeled him into emergency surgery on Tuesday and cut out 30% of that shit (pun intended). They also removed a bunch of lymph nodes and tested those – turns out that stuff is cancer-free, which is AWESOME – but he does have spots on his liver that will require him to go through chemo. Scary, scary shit, man. Fortunately, my dad has been a total trooper and by Wednesday morning he was walking up and down the halls like a champion. Things are good now – he finally passed gas yesterday (lol @ us being excited about my dad farting, considering he regularly likes to stink us out), and we’re hoping he can be home in time for Christmas. Fingers crossed! Although, to be honest, I’ll totally spend Christmas in that tiny hospital room if I have to!

I don’t like to discuss my personal life here much, this being a sewing blog and all, but my dad is a pretty inspiring/amazing dude. He regularly runs ultra marathons – 50-100+ miles at a time, up a mountain, sleeping in the bushes, that’s all normal for him. I laugh when someone corrects me for saying 500k (“Oh, you mean 5k, silly.” “No, dipshit, I meant 500k. He ran 314 miles.”) when I brag about his racing. And dude is fast – he regularly smokes out all the little 25 year olds who run the same races. Not bad for a 54 year old who looks like Santa! Not to be a total sap, but getting to spend the last week with my family (despite the less-than-ideal circumstances) and knowing that my dad is going to be a-ok is literally the best Christmas present I could have ever asked for. I’m just so thankful.
❤️❤️

Anyway, I hope everyone has a Merry Christmas! I’m hoping to get in some much-needed sewing time – my machine has been idle for way too long 🙂

Tailoring the Vogue Coat

5 Dec

When I originally posted my Vogue coat muslin posts, there was quite a bit of interest about what goes in the process of making a coat from start to finish. I’m not one to tease, so here’s a glimpse into what I’ve been up to, coat-wise, for the past couple of weeks.

The first thing I should mention is that coat-making isn’t hard. It is time consuming, for sure, but anyone with a few projects under their belt could easily tackle this. It might take you a couple of months, and you may have some hair-pulling moments (either with deciphering instructions or actually trying follow them), but it’s doable. I don’t know who started this whole thing of ~omg coat-making is so hard~ (probably the same person who said that sewing with knits was also difficult. Nope! It sure ain’t!), but, ugh, just ignore them. It’s not hard. It’s time consuming, it’s expensive, and you definitely need to muslin the shit out of your pattern before you even think about cutting into your coating… but in reality, it’s not terribly different from making a lined skirt or dress. You just need to follow a few more steps. You can also totally omit the whole tailoring part, with the special interfacing and padstitching and bound button holes and all that – and then shit gets super easy (well, as super easy as sewing a lined garment can get :)). Personally, I don’t see the point in spending all that money on a garment if you’re not going to go all out and do the whole nine yards, but then again, I think tailoring is fun. So do what you will.

My first task, post-muslin, was to start cutting the plaid coating. I won’t go into detail on that process – basically the same steps as the tutorial I posted on matching plaid – and it took foreverrrr. Seriously, I think I spent close to three hours just cutting the outside fabric! WOOF. I also had to cut interfacing (I am using hair canvas, which is a hefty interfacing commonly used for tailoring purposes, such as coats!), lining, and silk organza. The silk organza was a last-minute addition – I originally wasn’t planning on underlining, although the pattern calls for it, since I don’t need my coating to be super warm in our mild winters. However, my pattern is a fairly structured peacoat, and the coating has a bit of a loose weave, so I decided to underline with silk organza to give it that nice crisp hand without adding a lot of bulk or unneeded warmth.

Vogue Coat WIP

Silk organza can be expensive, and some people like to use poly if it’s not touching the skin… but personally, if I’m going to dump all this time and money into a coat, the couple dollars in price difference doesn’t really effect my final budget. So I went with silk, since it presses nicely along with the wool.

The bonus part of using an organza underlining (or really, any underlining at all) is that you can mark directly on the underlining and you don’t have to worry about it showing through the coat fabric. I totally use a sharpie. Go ahead, judge me.

I underlined my pieces flat on my tabletop (see this tutorial if you need more info on underlining!), using silk basting thread and going alllll the way around each piece. Every piece is underlined except the facing – only because I ran out of silk organza :). I will be interfacing that piece with a fusible. This process took a long time, but it’s pretty relaxing work – perfect for grabbing the computer and watching shitty documentaries. That’s my excuse, and I’m sticking to it.

After underlining, it was time to put in the bound button holes!

Vogue Coat WIP

I was actually a little scared of this part! I don’t know why – I’ve sewn plenty of successful bound button holes in my day, and used a different technique each time. Maybe I’m out of practice, but for whatever reason, I was not looking forward to this part and I definitely put it off for like, a week. Which is shitty because bound button holes are the kind of thing that get done before you do any other work on the coat, so that meant the project was put on hold until I got my ass in gear and put those damn button holes in the front piece!

To make my button holes, I wanted to try yet another technique, so I downloaded Karen’s e-book on bound button holes and followed her instructions. Folks, these are the prettiest, most perfect button holes I’ve ever made on the first try. Seriously! If you have any concerns about doing these, or have fucked them up in the past, you should definitely check out her book. I think I paid about $3.50 for it after the rate conversion. For $3.50, you really have no excuses.

Vogue Coat WIP

I mean – look at them! I even managed to match up the plaid on that particular one, ha!

Vogue Coat WIP

As I mentioned previously, the instructions include all the steps needed for a fully tailored coat, so fortunately I don’t need to compile a list of steps and modify the pattern to suit my needs. They are a little different from the previous coats I’ve made, in that some of the pieces are sewn together before you start with the interfacing and pad stitching. Personally, I like to do all that before I assemble the rest of the coat because it makes it easier to handle, but I’m also a stickler for following instructions. So, I attached the pocket, the front and side pieces (being careful to match up the plaid, which for some reason took me like an HOUR. Shifty plaid, go die.). I attached the interfacing using long basting stitches with my silk thread. This took a while, but I also recently rediscovered all my favorite awful pop-punk and ska bands from my youth, so I may or may not have had a personal dance party in the process.

Vogue Coat WIP

Here you can see some of the details – the hair canvas, the uneven permanent basting with the silk thread, my underlining, the pressed open seams. It’s coming along, that’s for sure!

Vogue Coat WIP

Next, I sewed my twill tape to the roll line of the collar. This will help the collar keep it’s shape as a wear it, since the twill tape will dictate how it falls at the fold line. You measure your twill tape to the length of the roll line, then subtract 1/4″ from the length and ease the coating to the tape and catch stitch it down. Pretty simple, but it makes a huge difference in the finished coat.

I also marked my pad stitching lines on the collar, but I forgot to take a photo. I totally used that sharpie, too. Ha!

Vogue Coat WIP

So that’s where we are now! The coat fronts have been mostly assembled – I just need to pad stitch the collar, and it’ll be ready to attach to the back and side back pieces. Obviously, it’s not anywhere near completion, but that doesn’t stop me from pinning it to my dress form and pretending it’s a coat. Call it inspiration, or call it a kick in the pants, or whatever. Either way, I’d love to finish this by Christmas, but we’ll see!

I know the plaid looks like it doesn’t match in those pictures, but the fronts are not properly overlapped. Trust me. Three hours of cutting means all the plaid fucking matches, dammit.

What’s on your sewing table this week?

Coat: The Final Countdown

23 Jan


Yep. I’ve had this song stuck in my head all week.

Guys! I’m almost done with my coat! 😀 😀 😀 We are entering FINAL COUNTDOWN phase – all the pattern pieces have been removed from their respective fabrics, folded & replaced back in the envelope, and my cutting table is (mostly)clean. I just have a bit more hand-sewing to do and then it’s time for a coat fashion show! Yay!

Here are some in progress pictures to get you pumped & ready…
steaming the undercollar
Steaming the undercollar – I wrapped it around my seam roll & propped it up against my clapper. Doesn’t it look so smug & satisfied in that picture? How can a seam roll look smug, anyway?

catch-stitch at the seams
Part of what has taken me so long with this coat is all the hand-sewing involved – there is a LOT. I pressed every seam open and catch-stitched down both sides. This really helps eliminate bulk, which is really necessary with fabric as thick as mine. I also beat the shit out of every seam with my clapper. That was fun.

Ever wondered what the inside of a tailored coat looks like?
tailored inside of coat
Here ya go! I already sewed on the facing pieces, so no pretty padstitching pictures for youuu – but you can see how the front is interfaced with hair canvas. I told you – lots of handstitching! And look at my cute sleeve heads 🙂 I used Gertie’s tutorial for setting in tailored sleeves – I have done this before with my Lady Grey (and much success!). It is my favorite method for setting in sleeves and it makes everything easy easy! Got it right the first time, yeah!

back stay
Here’s the coat back – not much to see here, just a back stay. Boring!

collar - no topstitching
Collar is looking good, thanks to all that padstitching.

coat with topstitching
And then topstitching. I was a little apprehensive about doing this – I think topstitching can really make or break the look of a garment. Usually the latter – sometimes it looks kind of cheap. But I like the way it looks on the coat, which is good! Don’t wanna rip all those stitches out, el oh el.

So that’s where we are as of today! I actually dropped the lining in the coat yesterday afternoon, although you can’t see it from the pictures – all I have left is more hand-stitching. And sewing on the buttons. And then I’m going to throw a hissy fit because this whole week is going to be a balmy 60*. Lovely, but coat-wearing weather it is not.

One last thing…
featherweight!
Look who is coming home with me today 🙂

she's coming home with me today :)
WE ARE IN LOVE.

A Knitted Lacy Collar

20 Jan

I swear this is a sewing blog… I’ve just been bitten by the Love Bug. I can’t stop knitting! We’re still in the honeymoon phase, where everything is fresh & new & super sweet. So forgive me while I gush about another knitting project (or two)!

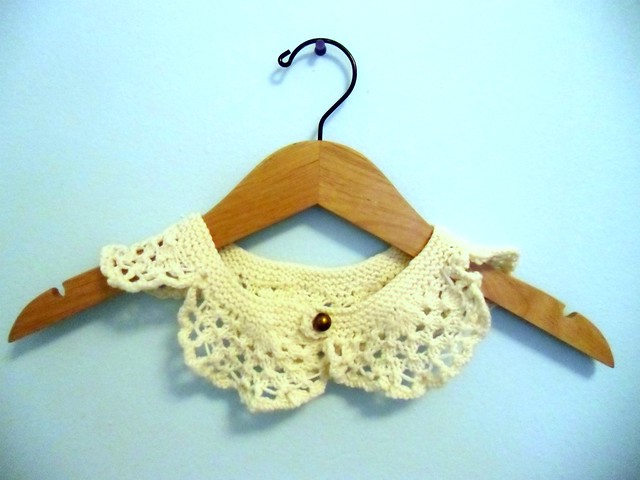
knitted lace collar
This is the Lacy Collar – it’s from the book Knitting Vintage, which I swiped from my library last week (Sidenote: our local library RULES. Not only do they have practically anything I could want, but you can use their website to request books that are shelved at any of the branches and have them delivered to your local branch. Awesome awesome awesome!). I used yarn left over from my Bunny Slippers, and a button from my stash. Basically – free lace collar! Woohoo! I was inspired by these little autum collars from Casey – I love the idea of a removable peter pan collar, but I didn’t want to spend my precious sewing time making one. Instead I spent a WEEK of precious knitting time on one! No, I don’t get it either.

I only made one change to the pattern, and it was unintentional – I left out a couple of rows by the bottom lace edge. So my collar is a little smaller than the one modeled. Oh well! I learned how to pick up knit stitches with this project, and the lacework is a little more advanced than what I had previously done. I wish it had blocked a little flatter, but whatever – it’s lace, I’ll deal. Isn’t it pretty, though?

lace collar front

lace collar back

knitted lace collar
I am really pleased with how the lace work turned out! And it was such an easy project!

knitted lace collar

Ok, here’s a question for all you knitters – I need some swatch hand-holding!
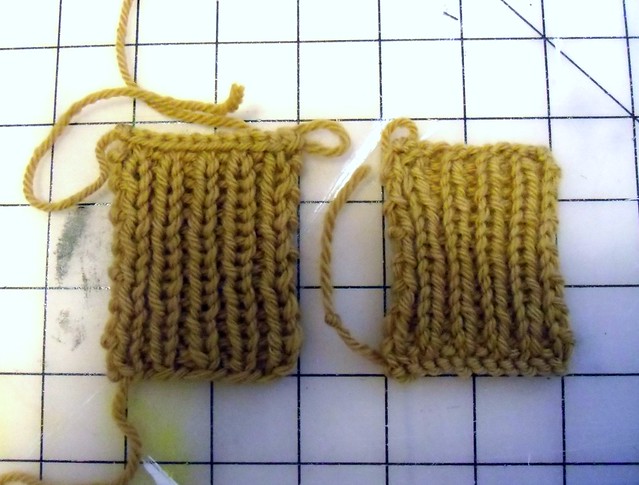
I had to make two swatches for my knitted cardigan – ribbing and a lace panel. I actually made 4 because it looks like my gauge is a little loose. In both pictures, the left was knitted with size 7 needles (as per the pattern’s suggestion), and the right was knitted with size 6 needles. All swatches have been blocked & dried.
ribbing swatches
The ribbing swatches should measure 2″x2″. As you can see, thanks to my handy-dandy 1″ gridded cutting mat, one measures 2″x3″ and the other is 2″x2.5″. So they are both still a little big! Does it really matter if they are long, though? Or is the width the only thing I should worry about?

lace swatches
Here are the lace swatches. These should be 2″x3″, and the size 6 looks like it baaarely sticks outside of the 2″ margin. 7 is more like 2.5″, so obviously that’s too big!

So I guess my question is, I should use the size 6 needles, yes? Or do I need to go down another size & make another swatch (eeep!)? Help meeeeee!

For your patience, here are some pictures of the current coat progress:
padstitching the undercollar
I started padstitching the undercollar last night, but as you can see I got a little antsy in my pantsy & decided to stop after one row. The undercollar is lightly padstitched (1/2″ stiches spaced 1/2″ apart); there is no need for a fall since the coat has a collar band. At least, I hope that’s the case lol.

coat as of 1/20 - i'm a slacker :(
And here’s where I am so far! Kinda looks like a (sleeveless)coat, eh?

A randumnb news story to brighten your Friday – Dolly Parton & Gaylord just annouced that they will be opening an amusement park in Nashville. Nashville has been mourning the loss of our beloved Opryland for over 10 years now (they replaced it with a shitty mall. Ew!), but it looks like we’re gonna get it back! Yay! Just another reason to love Dolly 🙂

Using A Croquis

13 Jan

I’ll admit, I initially made a digital croquis of myself for no reason other than to see what I could come up with. I didn’t really plan on using it – that is, until I finished drawing the figure. I printed out a couple in different sizes, took them home, and started eyeballing my pattern stash.

And now I CAN’T STOP DRAWING. It is so much fun! I’m no artist, but I am pretty good at copying stuff. The patterns are so easy to draw from because they have little line-drawings, so you can just copy directly onto your figure, making any necessary design changes (such as making the vintage wasp-waists more like your own waist). If you really wanted to, I’m sure you could print the croquis out to the exact dimensions of the line drawings, and then just trace everything over – I don’t have that kind of patience, though.

After I printed my croquis to the correct size (mine are approximately 5.5″ tall), I simply laid a sheet of paper over the print-out and traced lightly with a pencil. I drew the clothing on the croquis and erased whatever needed to be erased, then traced over everything again with a fine-tip sharpie. And I think they look pretty good! Not perfect, but good enough for me!

Then I stuck them all over my fabric board:
fabric & pattern planning board
You can see I got a little crazy & drew several!

croquis
I pinned fabric swatches to each one, and wrote the pattern number on the bottom.

croqui for coat :)
I even made one for my coat!
Silly croquis – couldn’t bother to put on pants or anything 😉

Speaking of my coat, progress is plodding along! I haven’t posted any updates because I’m at the boring tailoring stage – fun for me, boring for pictures. Here, have some pictures anyway.

bound button hole & covered button!
One of two bound button holes – and a fabric-covered button to boot! Covering that button was a PAIN IN MY ASS. I dread covering the other 3. But it looks good, no?

yes
I started pad stitching the other day, and it has gone by really fast. Much faster than pad stitching my Lady Grey coat. I’m not sure if it’s because I actually know what I’m doing this time ’round, or if it’s the fabric I’m using. Probably both. PROTIP: if you plan on tailoring a coat, do yourself a favor and pick some wool coating that has a lot of texture. The stitches don’t show at all. I wish I’d figured this out on my last coat, it would have saved me hours of time.
See my new toy? I bought myself a Kindle Fire for Christmas 🙂 (right before I discovered the Featherweight, actually – hence why it’s being paid off via layaway and not livin’ the good life in my sewing room. Wah!) It’s great for my crafty time – I can keep it in my sewing room & listen to music/watch sewing videos while I work, and it holds all my PDFs for knitting patterns so I’m not carrying around a bunch of ratty pieces of paper.
And yes, I listen to 80s pop when I sew. Or the Rhythm is a Dancer station. I love shitty 90s dance club music, lol.

I finished pad stitching the lapels last night while watching The House of Yes (which is my favorite movie – it’s really messed up but but but Parker Posey! Dressed as Jackie-O!). Like I literally pulled the last stitch through as the credits started rolling. I told you pad stitching is going faster!

Then I put the lapels out for a little steam session:
steaming the lapels

finished padstitching!
And here they are as of this morning! Beautifully rolled!

Next up – actually putting the jacket together! Yay!

bound buttonholes and… knitting.

30 Nov

look, guys, i’m a featured member on pattern review!
feature
i don’t actually know what that means, but it’s kinda cool nonetheless! my picture! on the front page! wheee!!

leopard & teal jacket
remember when i said i was going to make a leopard print jacket?

i decided to practice my bound buttonholes last night. here is my first attempt:
bound buttonholes

i figured that was good enough & forged ahead with putting them on the jacket front:
bound buttonholes
they are actually fairly camouflaged (hurr durr because of the print, get it?), so it wouldn’t even matter if they were imperfect. actually, i think they turned out pretty good!

bound buttonhole

bound buttonhole

ok ok, that’s enough bound buttonholes for one day!

unfortunately, my progress with the jacket comes to a stop now because i can’t decide if i want to fully tailor the thing & interface the whole front, or if i just want to do some “light tailoring” and only padstitch the back collar & put in a back stay. what would you do?
either way, i’m out of hair canvas so i have to order more. BOO!

in other news…

knitting swatch
i finished my first knitting swatch! bound off and everything! this will be a… dish cloth.

close-up
i started my first real knitting project – it’s a scrunchable scarf! the yarn is some soft alpaca i frogged from a scarf i (very poorly!)crocheted a couple of years ago. aha knitting is so thrifty! anyway, i’m really excited! my first knitted scarf!

also, i celebrated black friday by staying home and painting my living room blue.
living room
with special thanks to my patient boyfriend (who did the rolling) and all the hit songs of the 90s – i couldn’t have done it without y’all.

completed: the lady grey!

17 Jan

well, it’s done and ready to wear! i actually finished this coat on thanksgiving day (really – i was sitting at the table, furiously tacking down the red lace hem while my mom was reheating the honeybaked ham :)), but wasn’t able to get any pictures until this past weekend. my pictures are terrible but they are better than not having any pictures!

a couple teasers to remind you of what we’re dealing with:
Photobucket
lady grey pattern

Photobucket
bound buttonhole & sparkly button
this is the true color of the coat – my other pictures are a bit off.

more after the cut!
Continue reading