Tag Archives: croqui

Using A Croquis

13 Jan

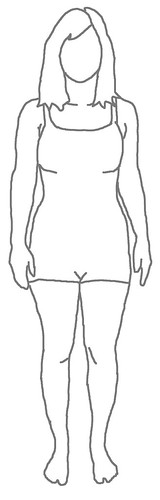
I’ll admit, I initially made a digital croquis of myself for no reason other than to see what I could come up with. I didn’t really plan on using it – that is, until I finished drawing the figure. I printed out a couple in different sizes, took them home, and started eyeballing my pattern stash.

And now I CAN’T STOP DRAWING. It is so much fun! I’m no artist, but I am pretty good at copying stuff. The patterns are so easy to draw from because they have little line-drawings, so you can just copy directly onto your figure, making any necessary design changes (such as making the vintage wasp-waists more like your own waist). If you really wanted to, I’m sure you could print the croquis out to the exact dimensions of the line drawings, and then just trace everything over – I don’t have that kind of patience, though.

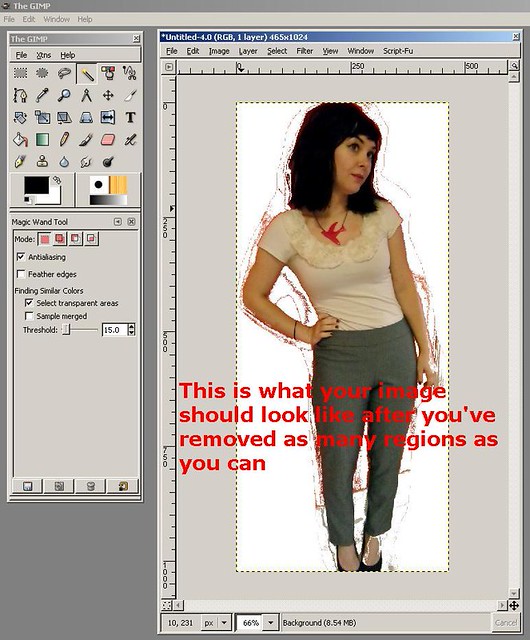
After I printed my croquis to the correct size (mine are approximately 5.5″ tall), I simply laid a sheet of paper over the print-out and traced lightly with a pencil. I drew the clothing on the croquis and erased whatever needed to be erased, then traced over everything again with a fine-tip sharpie. And I think they look pretty good! Not perfect, but good enough for me!

Then I stuck them all over my fabric board:
fabric & pattern planning board
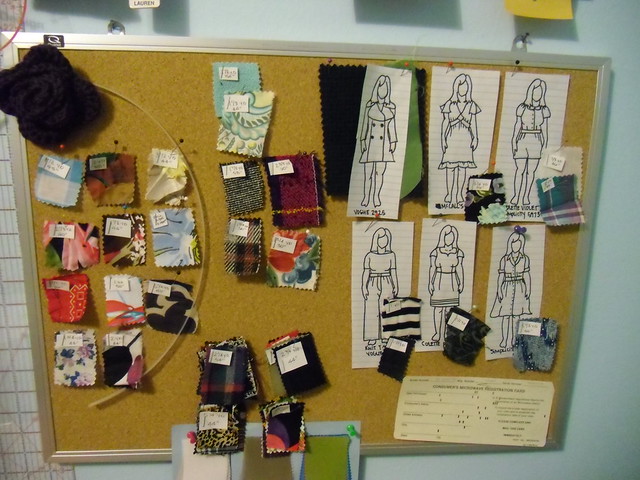
You can see I got a little crazy & drew several!

croquis
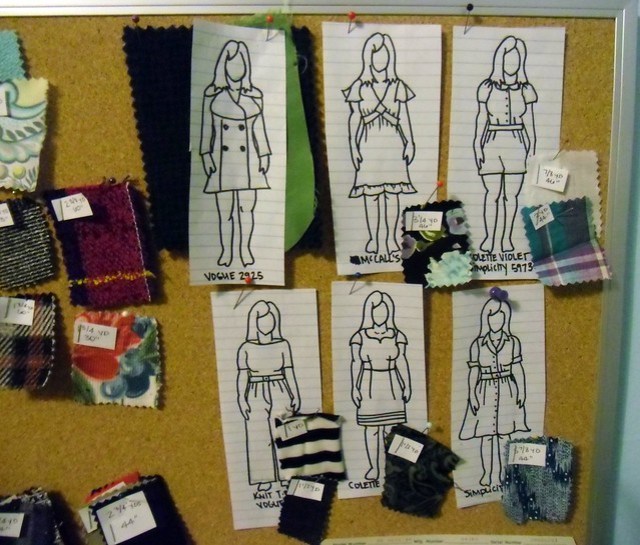
I pinned fabric swatches to each one, and wrote the pattern number on the bottom.

croqui for coat :)
I even made one for my coat!
Silly croquis – couldn’t bother to put on pants or anything 😉

Speaking of my coat, progress is plodding along! I haven’t posted any updates because I’m at the boring tailoring stage – fun for me, boring for pictures. Here, have some pictures anyway.

bound button hole & covered button!
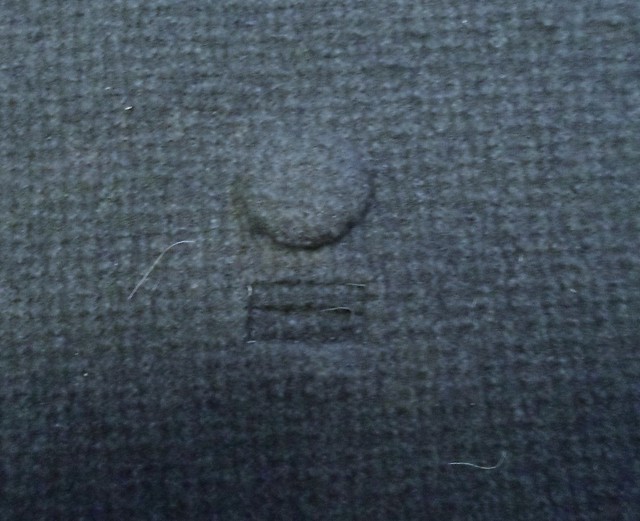
One of two bound button holes – and a fabric-covered button to boot! Covering that button was a PAIN IN MY ASS. I dread covering the other 3. But it looks good, no?

yes
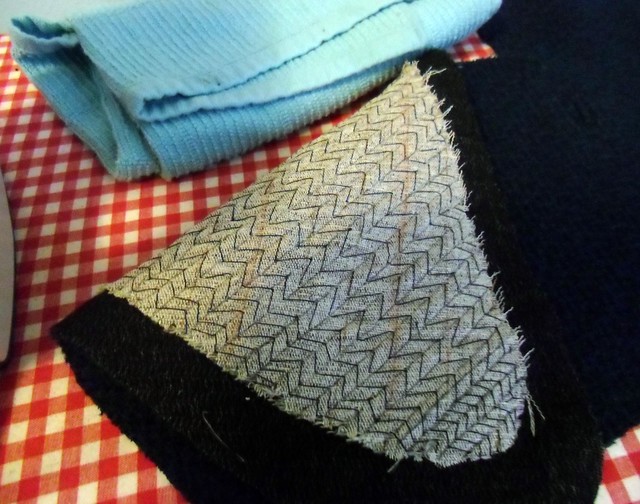
I started pad stitching the other day, and it has gone by really fast. Much faster than pad stitching my Lady Grey coat. I’m not sure if it’s because I actually know what I’m doing this time ’round, or if it’s the fabric I’m using. Probably both. PROTIP: if you plan on tailoring a coat, do yourself a favor and pick some wool coating that has a lot of texture. The stitches don’t show at all. I wish I’d figured this out on my last coat, it would have saved me hours of time.
See my new toy? I bought myself a Kindle Fire for Christmas 🙂 (right before I discovered the Featherweight, actually – hence why it’s being paid off via layaway and not livin’ the good life in my sewing room. Wah!) It’s great for my crafty time – I can keep it in my sewing room & listen to music/watch sewing videos while I work, and it holds all my PDFs for knitting patterns so I’m not carrying around a bunch of ratty pieces of paper.
And yes, I listen to 80s pop when I sew. Or the Rhythm is a Dancer station. I love shitty 90s dance club music, lol.

I finished pad stitching the lapels last night while watching The House of Yes (which is my favorite movie – it’s really messed up but but but Parker Posey! Dressed as Jackie-O!). Like I literally pulled the last stitch through as the credits started rolling. I told you pad stitching is going faster!

Then I put the lapels out for a little steam session:
steaming the lapels

finished padstitching!
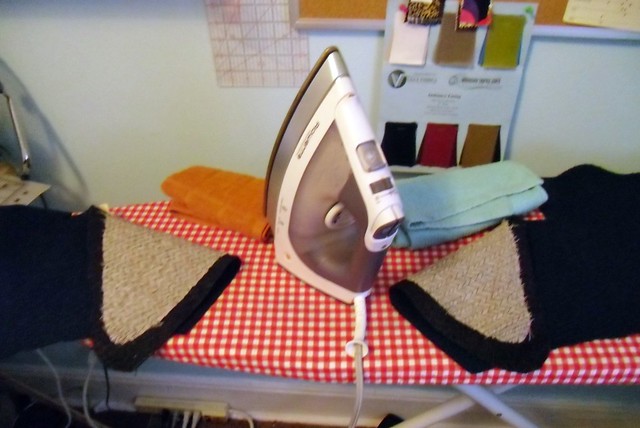
And here they are as of this morning! Beautifully rolled!

Next up – actually putting the jacket together! Yay!

Look! A Mini-LT! (and a tutorial to make your own)

10 Jan

Look! I made a creepy line-drawing of myself!
mini LT!
Isn’t it just the cutest thing you ever did see? Ok, maybe not… it’s kind of creepy lol.

I was inspired to make one of these after reading chapter 2 of the Colette Sewing Handbook, A Thoughtful Plan. It is suggested that you make your own croquis to aid with planning out future sewing projects.

This is not normally something I would use – garments look sooo different on a bunch of stylized croquis than they do on normal ol’ bodies, plus, I’m pretty ~aware~ of how my body looks – so I didn’t see much of a point. But now little mini-me’s are popping up all over the internet, and I’m a sheep at heart so I took some pictures and drew out my own. Mine has a little outfit (bathing suit?) because I feel a little creeped out at the idea of a nakey me floating around the internet.

The book suggests printing your picture & tracing around the lines to create the croquis – which is fabulous, but I don’t have a printer at home and I was a little skeeved at the idea of printing out a picture of my undie-clad body on the office printer (or at Kinko’s! Oh God!). Hence, the all-digital LT.

And guess what? The process was pretty easy, so I made a bunch of screen shots so I could share the tutorial with you 🙂 And the best part is, you don’t have to have Photoshop 🙂 I used GIMPshop, which is a FREE software that is very similar to Photoshop (except free). Yay!

First, you are going to want to take a picture of yourself – in something very form-fitting (like leggings or a tank) or just undies. My actual picture was taken in a tank top and undies, hence why I picked a different picture for the tutorial 🙂 But you – you are going to want to wear something that shows your shape!

Some photo tips that I wish someone had pointed out to me:
– Stand in front of a plain (preferably light) backdrop. The less noise you need to edit out of the background, the better! This also makes it easier to see where you figure ends & where the wall (or whatever is behind you) begins.
– Make sure the camera is pointed straight at you, and not at an angle. My first croquis did not heed this warning, and as a result, she hashad very short legs (Had. I deleted her lol). Apparently I take my pictures at slightly MySpace-esque angle, which is great for outfit photos but not so great for croquis.
– Ensure that there is plenty of light & use a flash if necessary! It doesn’t matter if the picture is “blown out” or you are making a derp face – we are just dealing with the lines here, anyway.

Ok, so you’ve got your picture – tutorial time! These pictures are also located on my Flickr in their own set if you feel so inclined. Click through any picture to make it bigger if you need to!

I decided to use this clover picture as an example, saving y’all the pain of viewing an undies shot. You are all welcome. And again, I’m using GIMPshop. It’s free! And please note that I am by no means a professional when it comes to digital image manipulation – I just kind of hacked my way through until I came up with something suitable 🙂

Step 1
Step 2
Step 3
Step 4
Step 5
Step 6
Step 7
Step 8
Step 9
Step 10
Step 11
Step 12
Step 13
Step 14
Step 15
Step 16
Step 17
Step 18
(I know, it should be “Croqui” not “Croquis,” my bad. I did not realize until it was TOO LATE!

I made myself wear the Pastille dress:
mini LT pastille
In the future, I will be drawing the actual clothes with a pencil & a piece of paper. It is hard to adjust the lines of the garment in GIMP to correspond with the lines of my body.

At any rate, I’m excited about my new little friend 🙂

Now – go print out a million little images of yourself & draw up a new wardrobe! Yay!