Well, my winter jacket is ready for this year! Guess I can cross that one off the list!
Before we get too deep into this post, I have to warn you – I took a LOT of photos of this jacket. It’s a big project and one that I’m especially proud of. I am not even sorry that you’ll have to look at like 40 pictures of it now. Yep.
As I mentioned in my Fall/Winter sewing plans, I’ve been collecting all the bits and pieces to make this jacket for a couple of months now (PROTIP: Making a coat can get expensive when you start buying all the crap that goes into it, but you can make the cost hurt a lot less by buying everything in phases 🙂 HAHA). I’m pretty set on the heavy winter coat front – my Vogue coat is still serving me well nearly 2 years later, and the Ralph Rucci knock-off is a wonderful piece to wear when I’m dressed up. My wardrobe does have a small gap in lightweight jackets – my black and gold bomber jacket, while awesome, is a bit short to really be cozy, and my orange Minoru jacket is really better suited for the super mild spring temperatures as it’s really not that warm (it’s just cotton with a poly lining, after all)! What I needed was a longer jacket, preferably one with a hood. I always miss having a hood.
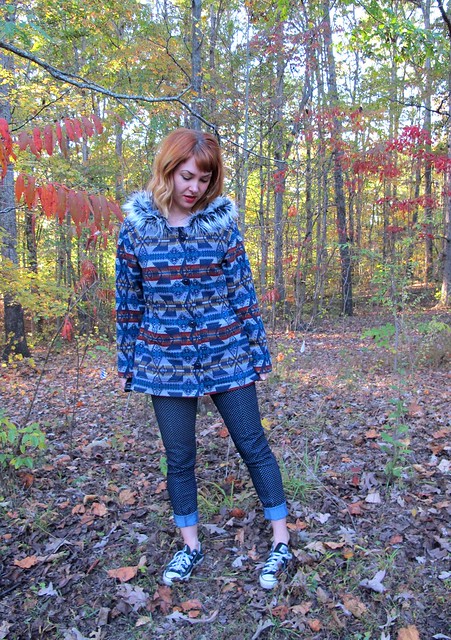
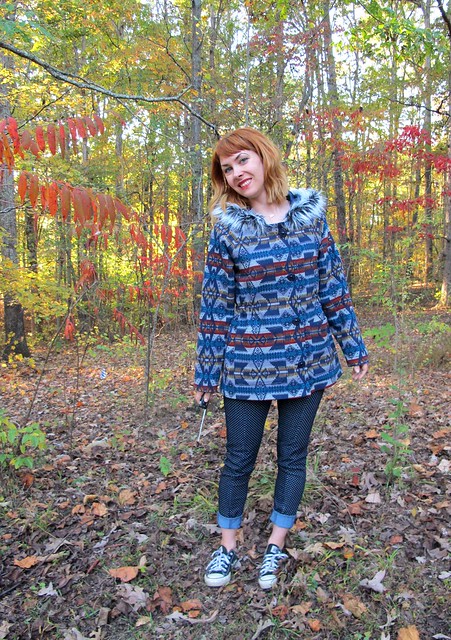
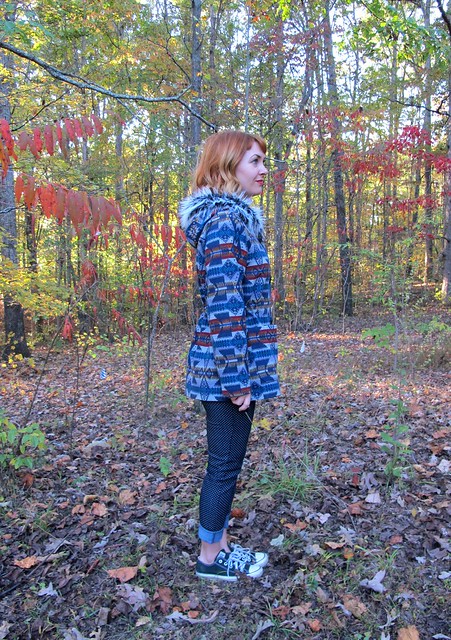
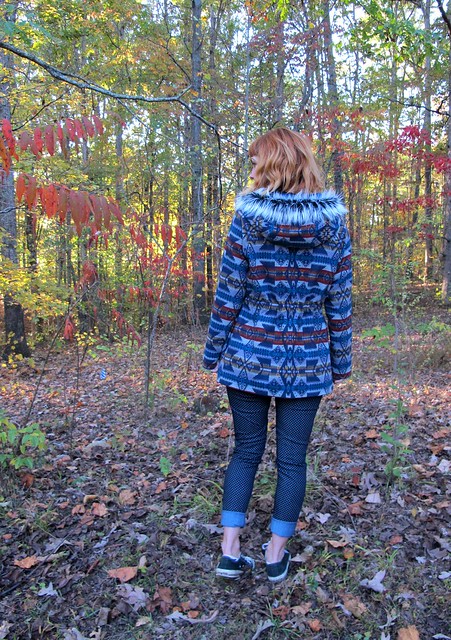
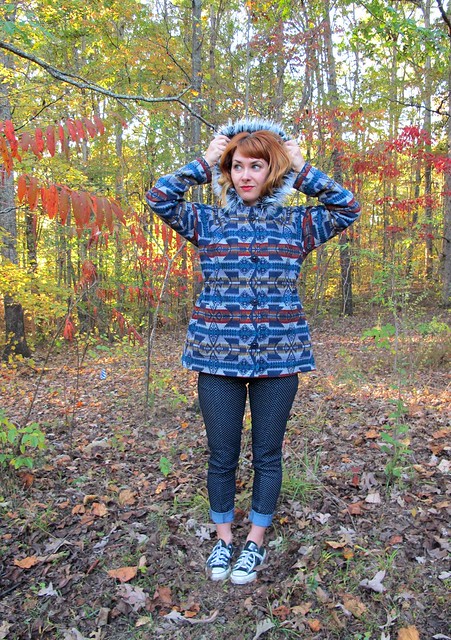
The Papercut Patterns Waver Jacket was my pattern choice – it’s a really cool, casual style and I liked that it included a hood, as well as the waist-cinching drawstring. This pattern is pretty similar to the Sewaholic Minoru, although without all the additional gathering nor the hood-stashing wide collar. I think the style of the Minoru looks pretty good on me, so I knew the Waver would as well. I also found an eerily similar replica (with set-in sleeves rather than raglan) at the GAP a few months ago, so I was able to try it on and see what I thought before I started making muslins. I love it when things work out that way!
I cut the size XS, which is my usual size with Papercut. I like that the jacket has some shape, but there’s still enough room in there for me to pile a sweater on underneath (which is about the max layer of clothing I’d have on if the weather was appropriate for a jacket like this!). My muslin revealed that I didn’t need to make any fitting changes, other than shorten the sleeves about 1cm (ooh, look at me, sounding all international and shit).
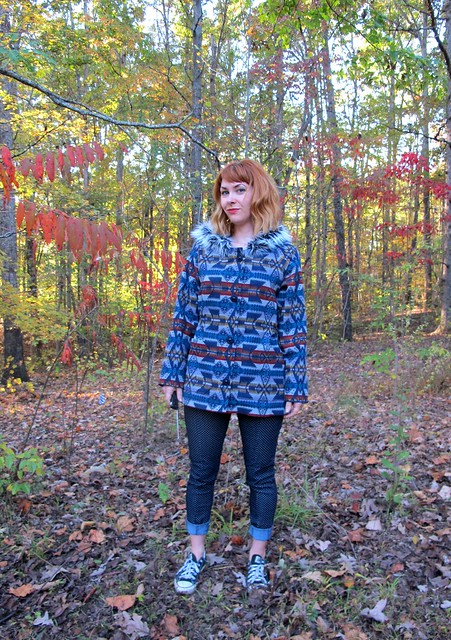
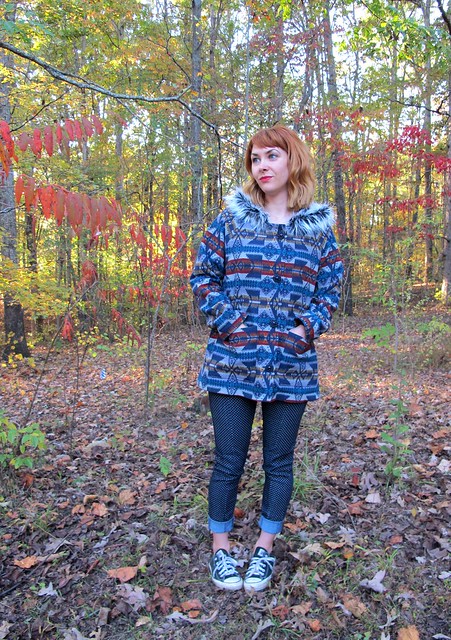
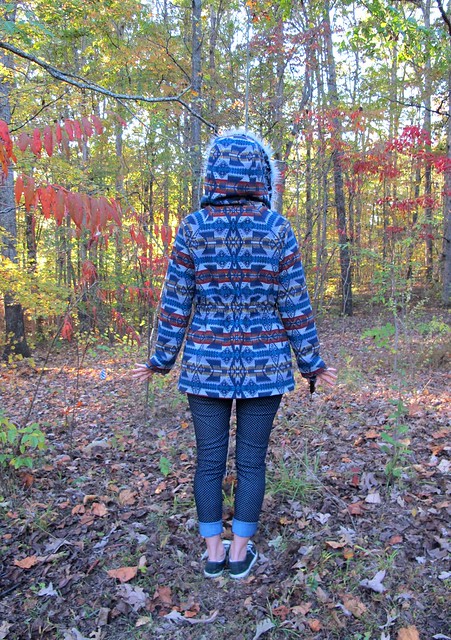
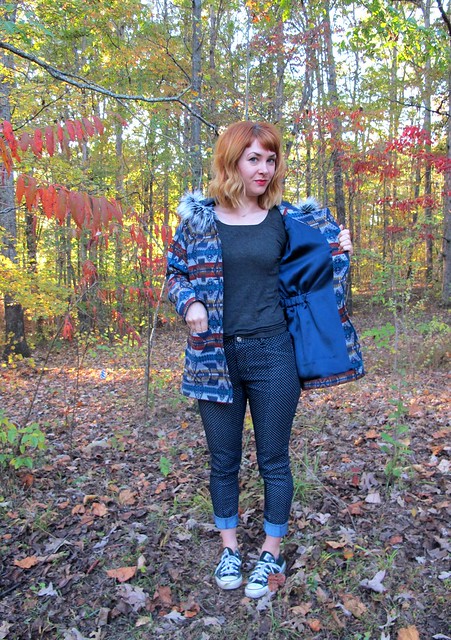
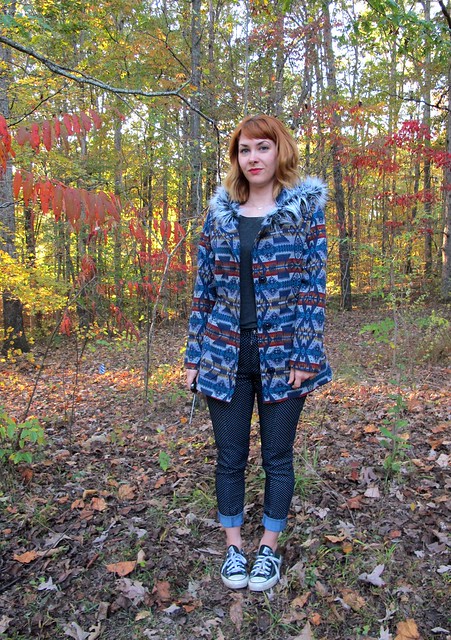
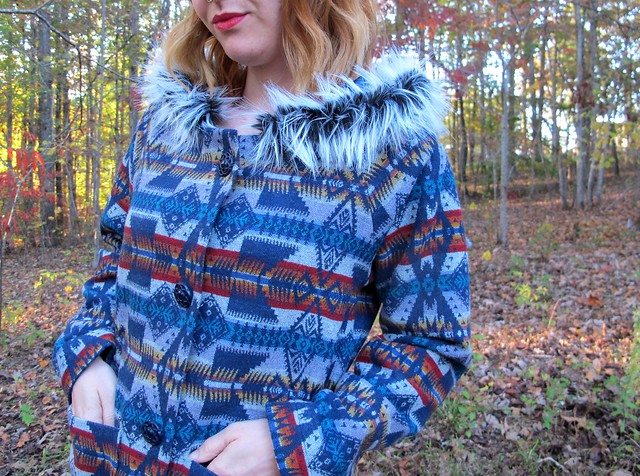
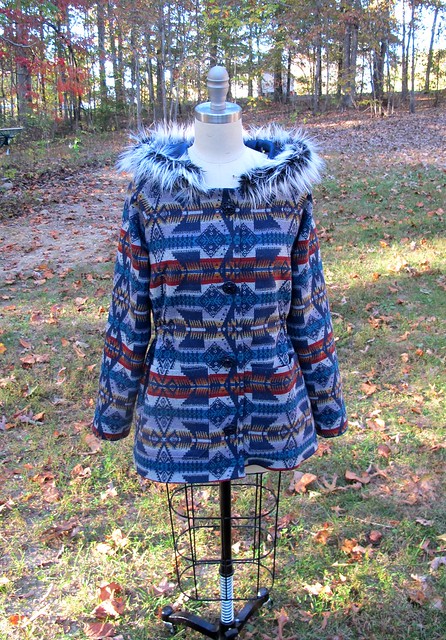
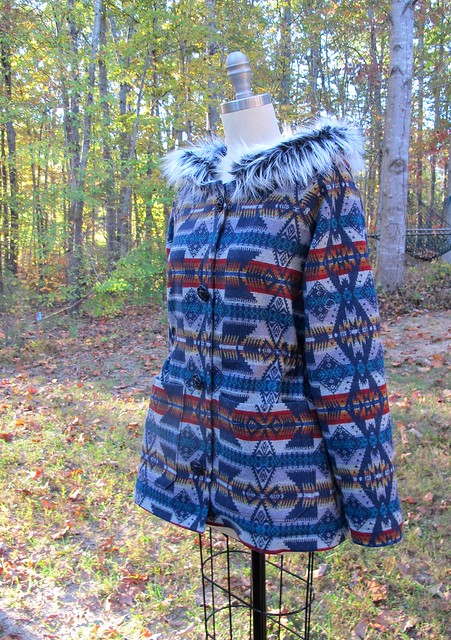
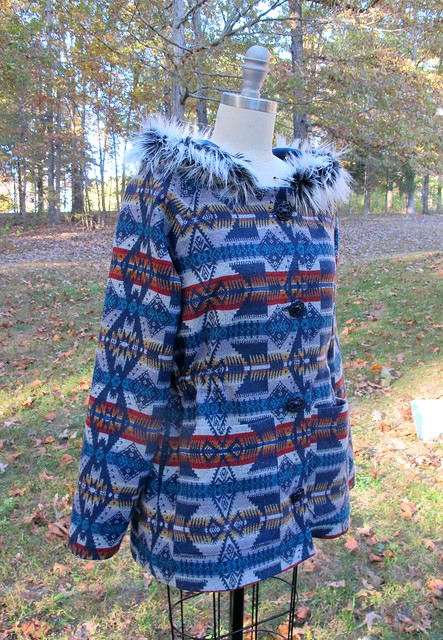
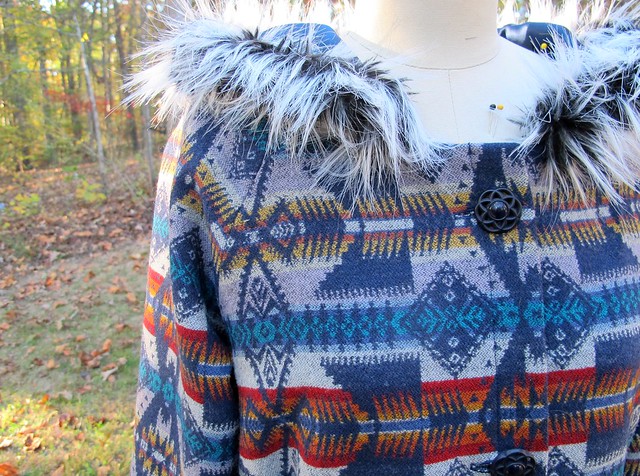
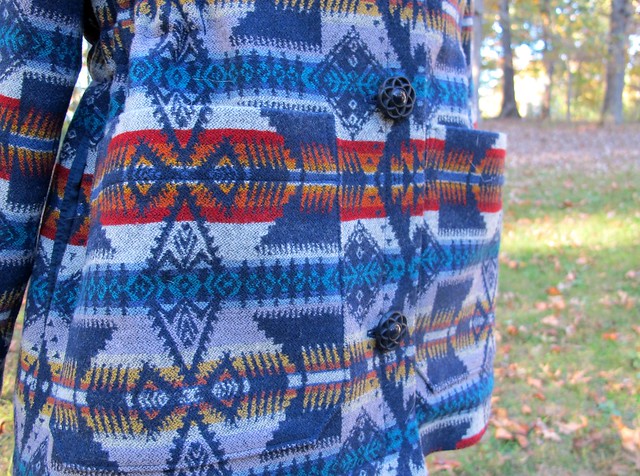
Of course, the fabric really makes the jacket! This cool navy Aztec virgin wool is from Mood Fabrics, and I’ve had a big piece squirreled away in my stash for months. It’s a pretty lightweight wool, which is perfect for my needs, and suitable for this pattern. I love all the colors in the print! Trying to cut those pattern pieces to match all the bold, colorful lines was a little bit of a struggle, but I made it work. I lined the jacket with English blue silk charmeuse (the exact one that I used appears to be sold out at this point, sorry!). I really did agonize for a long time over what color lining to include – the fun side of me loves contrast linings, but the boring side of me thinks it makes things look a little cheap (except that red lining in my plaid Vogue coat; I have no regrets about that one!). I actually like a more subdued lining, and prefer the contrast in the form of texture, not color. So I went with English blue, which perfectly matches the navy in the wool.
I didn’t do a lot of crazy tailoring with this coat – it was actually a fairly simple project. I did add a back stay (made of medium-weight muslin and using this tutorial from Sewaholic) to the back to keep it from stretching out, and I catch-stitched all the wool seam allowances down so that they’d stay flat with wear (similar to this, but without any of that horsehair interfacing. This is a casual coat that doesn’t need heavy tailoring!). There’s no padstitching in this project, or bound button holes. While I LOVE big projects with lots of interior details, not every project has to be couture-worthy. Especially if it’s a simple jacket.
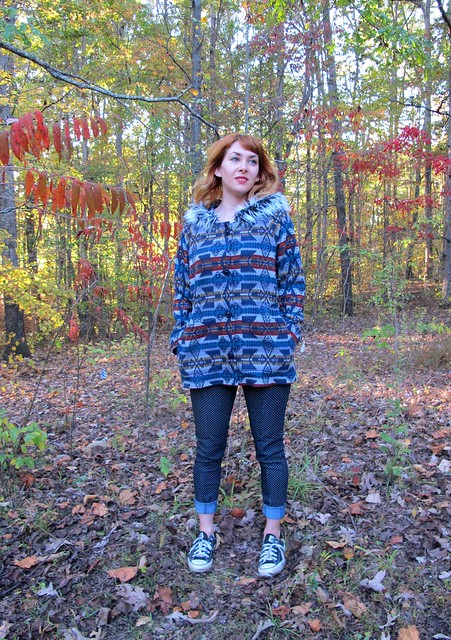
ha! Bet you didn’t notice those big patch pockets, did you? I cut those so they are hidden in plain sight right on the front of the coat. Good thing I have radar fingers, otherwise I’d never be able to find them when my hands get cold.
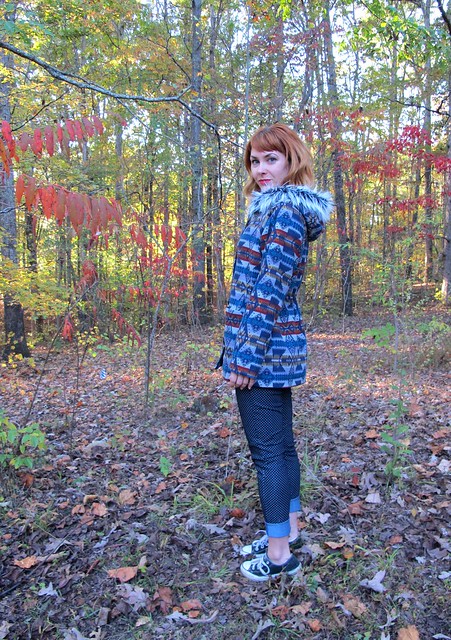
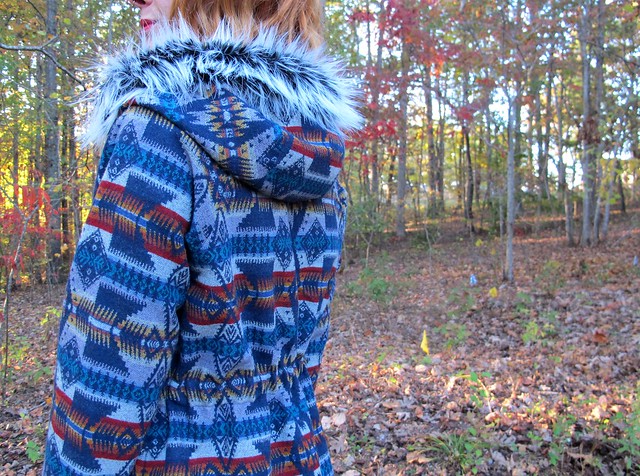
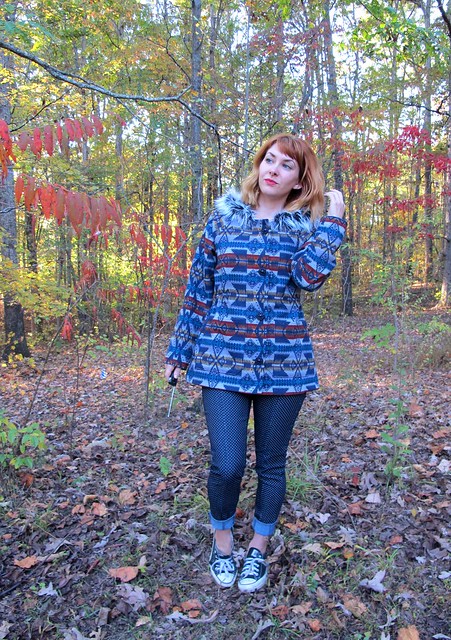
I also added inseam pockets (not included in the pattern, but as easy as stealing a pocket piece from another pattern and popping it into the side seams as you are sewing it up!), sewn in silk charmeuse, along the side seams. The wind blowing in my hair for this photo is an added bonus, and you are welcome for that.
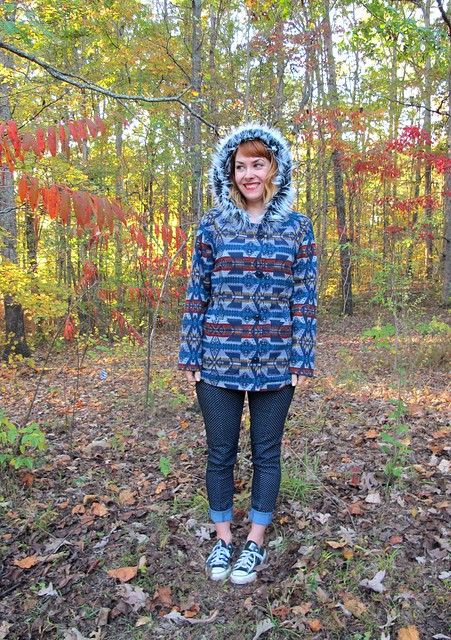
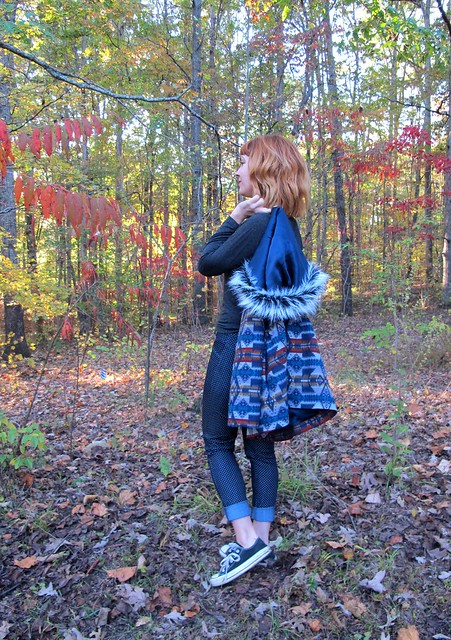
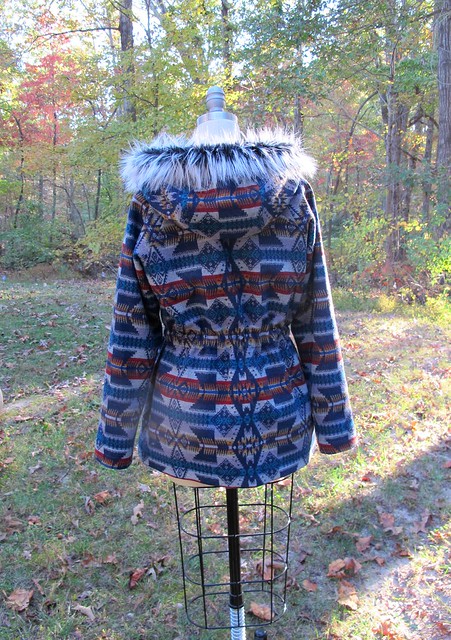
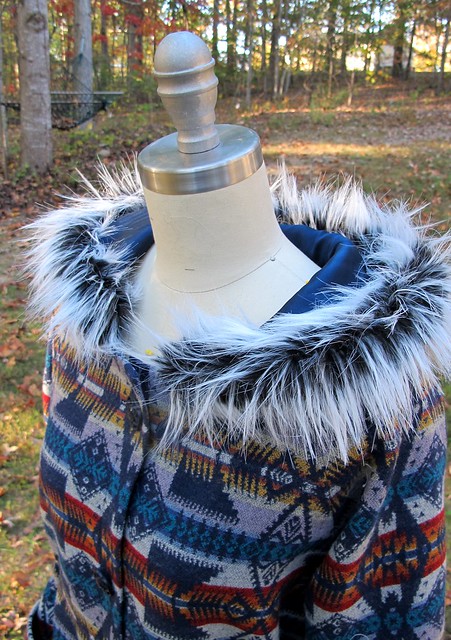
The hood was a big selling point for this pattern! I love jackets with hoods, but I never really come across jacket patterns with hoods that I actually like. It’s nice to have a hood for rain and light snow, so I’m glad this pattern has a hood! It’s a nice 3 piece hood, too, so it stays on your head without squishing it, and stays put (and it’s big enough to cover my head even when my hair is pulled up in a bun!). The pattern calls for lining the hood with self lining (aka the jacket fabric), but I was afraid that wool would give me weird hat head, so I lined the hood with more silk charmeuse instead. I figured, they make pillowcases out of silk, so hood lining can’t be too far off… right?
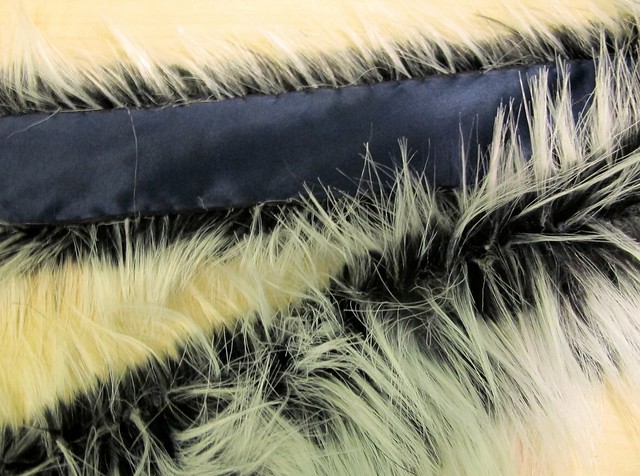
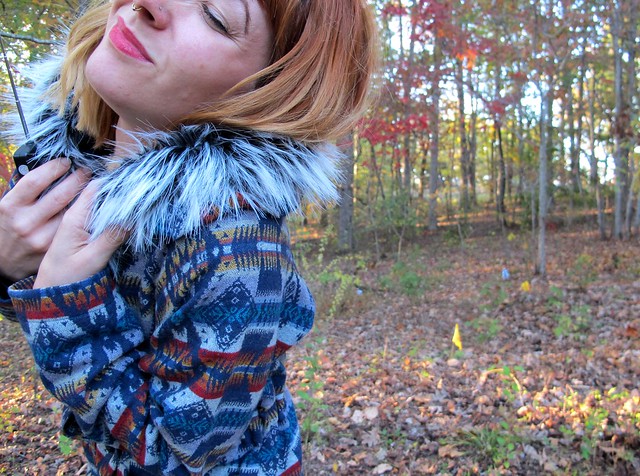
As you can see, I also added faux fur around the hood. Yeehaw! I love this detail in coats, and I was keen to add it to this coat as well. This black and white faux fur from Mood is really nice stuff – it’s super soft and almost feels like real fur. It’s certainly way better quality than any other faux fur I’ve sewn. This doesn’t necessarily make it any easier to sew – I still had fur flying everywhere as I cut it, etc etc – but the payoff is worth it!
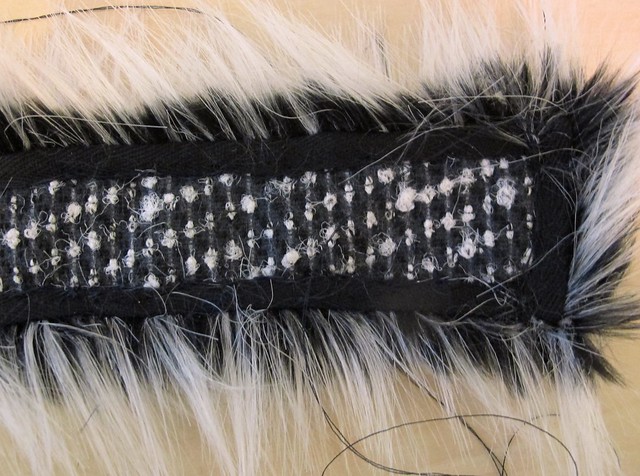
What you can’t see in these photos is that the fur is actually removable – just in case I change my mind and want it off, it won’t be difficult to remove it (I doubt that will happen, but I like having options!). I sewed the fur trim the same way you’d make a fur collar, loosely following this tutorial from Casey, although I did not add any interfacing as my fur has a pretty heavy backing as-is.
I sewed black twill tape around the edges and then folded it to the inside, catch-stitching everything down securely.
Then I laid my silk charmeuse lining on top, covering all the insides and attaching the folded edge of the lining to the twill tape on the fur, using teeny hand stitches. The fur trim was then attached to the perimeter of the hood, using invisible hand stitches. I briefly considered using snaps or buttons+loops, but decided that I didn’t want anything to show when the fur was removed. The stitches will be easy to pull out if I need to take the fur off, but you can’t see them when the fur is on, either. You can see what the jacket looks like without the fur here, if you’re interested!
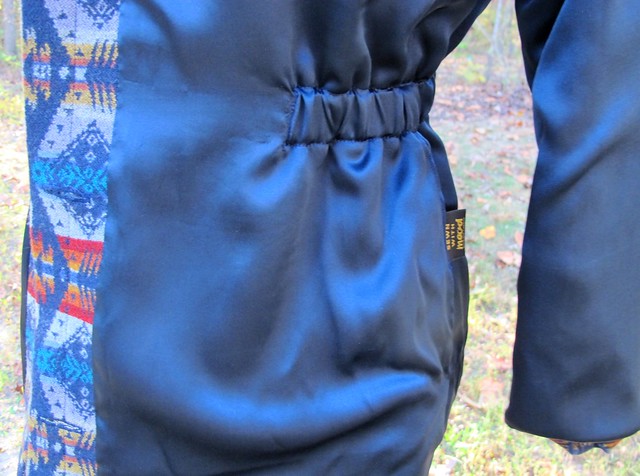
Here’s that blue lining! You can see another change I made to the jacket – instead of using a drawstring to cinch the waist, I added wide elastic. This was mostly due to comfort – elastic isn’t constricting like a rigid draw string is – plus I think it looks better on me. I did have to change up the order of construction a bit to get this to work. First I bagged the lining as usual (per the pattern instructions). I left off the drawstring channel pattern piece and instead sewed through all the layers of the wool and lining to make a channel (similar to the construction of the Minoru), then fed the elastic through that and tacked down the ends.
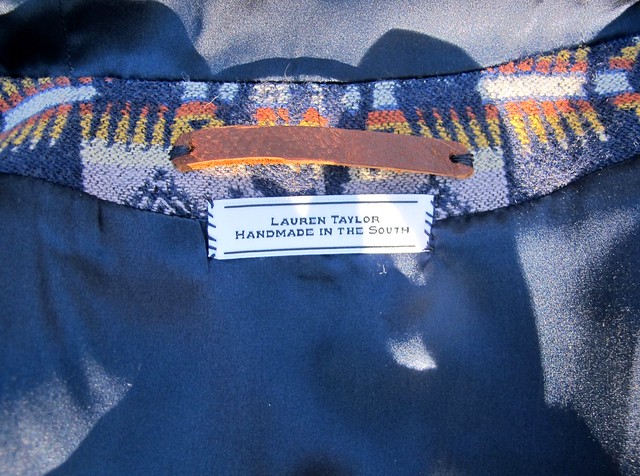
I also added a little leather tab to the back of the neck, so I can hang the coat more easily (or from my finger haha).
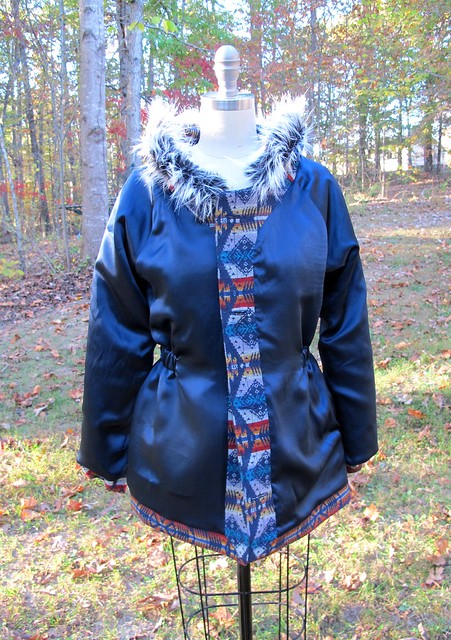
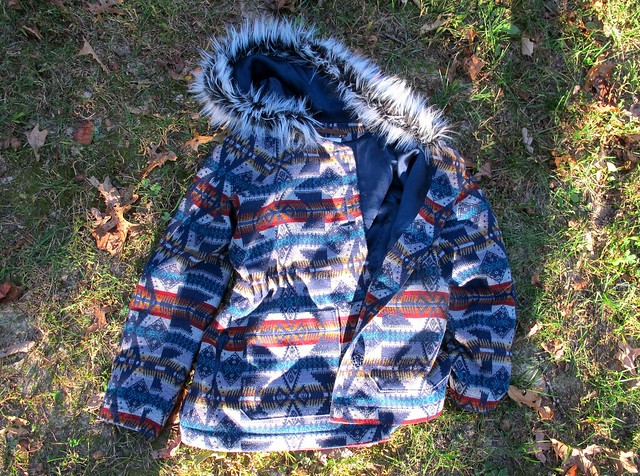
I actually like this way this coat looks unbuttoned, which is a first for me!
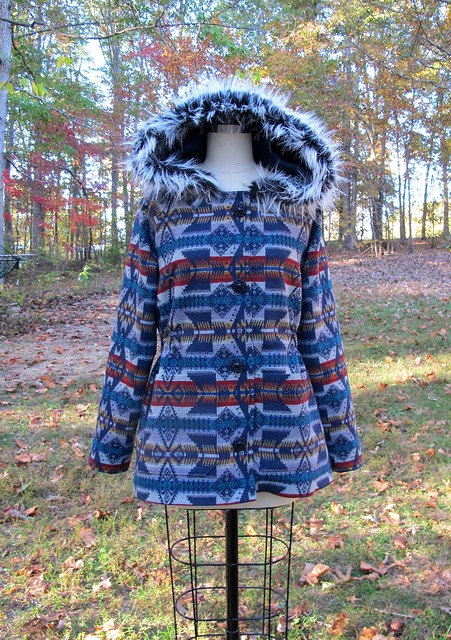
I do wish that I had paid more attention to my pattern-matching on the front of the coat, so that the design would continue uninterrupted. Oh well! It still turned out pretty cool despite that mishap, and there are triangles down the center front instead. I’m ok with that!
Now for a buttload of dressform and flat pictures:
The buttons are antique glass buttons that I bought at the flea market earlier this summer. Love them so much! That guy has the best buttons.
My favorite part!! The leather tab was an idea I took from an old American Eagle coat – I just cut a strip of heavy leather, rounded the ends, and punched holes so I could run stitches through it. And the woven label is from Wunderlabel – isn’t that the best finishing touch? I had a hard time deciding what mine should say – I wanted it to say Made in Nashville, but I don’t really live in Nashville anymore (I mean, we are close enough but I’m a huge weirdo/stickler about that sort of thing!), so The South works 😉 Anyway, this was my first experience with Wunderlabel – I’ll have more of a review up in the future after I’ve used more of the labels. But in the meantime, I’m sewing them on everything!
While I certainly did not push myself to hurry and finish this project, I did wrap things up pretty quickly! I think it took about a week to get everything sewn up, after making the muslin and cutting the fabric. I’m glad I finished it, too, because I think it’ll come in handy when I’m in NYC in a couple of weeks. Hell, it’s already starting to get cold here – I will probably be able to wear it later this week! 🙂
 Note: The fabric for this jacket was purchased with my allowance for the Mood Sewing Network (over a period of months, I might add! 🙂 ). Pattern was given to me as a gift. All comments on this blog post 100% mine, however!



What a super fun coat! I love having a choice of coats to wear and with the many I’ve made….I need an entirely separate freakin closet (which I DON’T have!!) Even so that hasn’t stopped me, thanks to you….I am adding this pattern to my sewing line-up. I’ll definitely add fur on the hood too…love that detail, it really makes this coat.
G xo
Oh man, I would be the same way if I had more time during the year to actually wear the coats! I love making coats and having a choice to choose from, but our coat season is so short, I rarely get tired of the few I have 🙂 Probably a good thing I don’t live in a colder climate, haha!
Yet another fabulous make, what gorgeous fabric matching and that lining – yum! – and thanks for the elastic inspiration…. I was actually looking at this pattern today and thinking “now, if I could get those toggle bits easily, I would get this” – but I too prefer elastic to drawstrings and always sub it in dresses (to be covered with a belt in wear) – and I never thought of doing it here. Your surname suits you:). And so does your hair – I love the autumn-y colour you have going right now.
Oh yeah, the elastic in place of the drawstring is so much more comfortable! I am not opposed to a good drawstring, but I can’t imagine where I’d find those toggle pieces – not to mention, I doubt I’d ever expand the drawstring out. So elastic was a good choice for this jacket 🙂
Fabulous jacket Lauren!! I love the fur, the leather tab and the personalised label too. We’re heading into summer down here in Australia so this jacket might have to wait a while for me, but I’ll definitely keep it in mind for next winter.
Summer is when I start planning my winter jackets 🙂 Then I can start collecting supplies so the total cost doesn’t hurt as bad haha 🙂
I was gonna ask if you plan on bringing it with you to NYC next week! Did you install a GPS tracker in it too? I feel like there’s a chance the jacket might not make it back with you 😛
I want to bring it to NYC, but I have been checking the weather and it’s supposed to be pretty warm all weekend! Blech! I might just carry it anyway haha. it’s like, my security blanket now 😀
That’s probably a good idea, since the sun goes down at like, 4, and before you know it it’s absolutely FREEZING.
This. Is. Awesome!
Thank you!
Big fan of the elastic instead of a drawstring, that’s inspired.
It’s certainly more comfortable 😀
Really gorgeous, I love that lining and the fur is a great addition. I want a fur hood!
Everyone needs a fur hood!
this turned out amazing!!! i think my favorite waver so far!
Thank you!
What a beautiful, fun jacket! Love it!
Thank you so much!
That wool is gorgeous! And, I have serious button envy. I’ve seen a few versions of this jacket that have me tempted to try making it myself. Our window for fall weather is short. We basically jump from sweater temps to down parka temps overnight. But, I think I might still like a mid weight coat for those few occasions I need one.
Haha yeah, that is one thing about Chicago that I am not jealous of! I don’t think I’d be able to handle puffy coat weather 🙂
Absolutely love it! As a lover of d’hood myself, I’m putting this make in the queue. You challenge me to a slick label line.
Woohoo!
That’s the cutest coat ever! Love what you did with the fur.The fact that it’s removable is very clever. I’ve been wanting to incorporate fur into a ‘make’ for awhile, but have been nervous. Perhaps you’ve given me courage? Great job with the lining too. Love it!
It’s pretty easy! It’s just really messy – but worth the mess. And if you make it removeable, then you can always throw it away if it doesn’t work out (and keep the rest of the coat hahaha) 😛 lol
Really lusciously comfortable looking, makes one hope for cold weather. Beautiful workmanship.
I can almost hope for cold weather now that I have this jacket 🙂
The cost turned out lovely. I love the fur, it’s a great touch.
Thank you!
The jacket looks great! I didn’t even realize it had patch pockets until I clicked over to the Papercut link. You say you goofed in cutting the front, but I never noticed, I just figured that you had the diamonds line up like that on purpose. I really like it that way – it looks like a mirror imaged front. In any case, I love all the details & the jacket’s just fantastic!
Gorgeous jacket and great choice of fabric. Love your new hair color too!
Thank you so much! I was a little bummed at first that the front doesn’t mirror, but I do like the effect that it ended up with so it’s all good I guess 🙂
LOVE it! The fur collar really makes it 🙂
Thank you!!
What a great coat! I love the fabric and the fur collar is the perfect finishing touch.
Thank you!
This is SUPERB!!! You are totally talented, I’m sorry to ask, but I follow you only for a short time, did you learn to sew, or do you work as a seamstress? Because your clothes look so professional! I hope I’ll be this good one day ^^
I am mostly self-taught 🙂 I have done some professional seamstress work (including currently, as a production seamstress for a clothing line), but almost everything I know, I taught myself as a home seamstress 🙂
stunning, i adore the fur trim, it looks so cosy
Thank you!
Gorgeous!!! I love every single detail of this coat. I’m also glad that you included so many pics. I need lots of pics!
Yay!
Wow! This looks amazing! I think the pattern matching on the front looks great. What a lot of work–high quality work! Your coat rocks. 🙂
Thank you so much!
WOW!!! Looks amazing!!!!!!
😀 😀 😀
Damn you Lauren. I was all smug “I will just thrift my transitional/autumn coats,” and then I saw this and #@%((&^# now I need that pattern like you wouldn’t believe. Love that you swapped in the wide elastic, and that lining was the perfect choice. Whole look is great.
But but but making transitional/autumn coats means you can buy all the coatings that are too light for deep winter coats! I mean, COME ON 😛 hahaha
Well, this is gosh darn adorable! I LOVE it on you. So, so cute! Making the faux fur removable was a good idea- if you ever need to dry clean the coat, you’ll be glad you did! Faux fur usually looks awful after a dry cleaning!
That’s what I figured! I didn’t want to deal with the mess of trying to clean the fur, so that was one of my reasons for making it removable. Glad I was on the right track with that 😀
I LOVE your coat, especially the added fur trim on the hood. I have an old Freepeople coat that I absolutely love that is missing buttons and the zipper is broken. Maybe this pattern can be made up to be it’s successor. Hmmmm……
Ooh, I think it could!!
Gorgeous! I am eyeing a lighter fabric with a similar pattern for an indoor jacket myself… I hope it turns out half as good as this!
I bet it will!!
Oh this is fantastic. I love everything about it!
I just made my first winter coat. It was much easier than i anticipated and its awesome to have a garment you can wear pretty much every day!! I love your fabric, I’m inspired to be a little braver next time! http://natsewing.blogspot.co.uk/
I love your jacket! I’m planning to make the Waver jacket– my first jacket– and was wondering if you could give me some advice (you seem like a jacket pro!). For the body, I’m planning to use a 6 oz. brushed twill, with liberty lawn for the body lining and bemberg rayon for the sleeve linings. The twill feels a bit light, and i want this jacket to be warmer, so I was thinking of interlining it with cotton flannel. Does that all sound like it would work for this jacket? And how should I do the interlining, is it like underlining the main body fabric, or underlining the lining? Everything I read about interlining seems to say something different. Would love any tips you could give, your jackets and coats are so beautifully done!
Interlining with cotton flannel will definitely make the jacket warmer (and give the twill a little more heft and body) 🙂 Interlining is like underlining – whether you choose to underline the twill or the lining is a matter of preference and if it’s being use to stabilize anything. I have done both in the past – underlined my lining with cotton flannel to make the coat warmer (Lady Grey coat) and underlined my actual coat fabric with silk organza because the coating needed some extra stability and structure (Plaid Vogue coat). In your case, you’d probably want to underline the lining, not the coating, especially since cotton flannel can be a bit bulky. Hope that helps!
Thanks, that really is very helpful!!!