Archive | Mood Sewing Network RSS feed for this section

Completed: French Terry Stella Hoodie Dress

1 May

Here we have a tale of fabric bought wrong, then made right. Gather round, my children.

French Terry Stella Hoodie Dress

I bought this french terry from Mood Fabrics on a whim back in September. I usually swatch fabrics before ordering online – even with my knowledge of fabric and fibers, you can still be surprised by texture, hand, and color – but sometimes I get a little wild and order shit blindly. It usually works out fine, but every now and then it can backfire. Guess what happened here.

So, the french terry – it’s a glazed french terry from Helmut Lang (since sold out, yo’re welcome), which I figured would be great because 1. Helmut Lang is always expensive; and 2. It’s fucking french terry, how could you go wrong?

This, this is how you go wrong. This is one of the weirdest fabrics I’ve ever received from Mood. It was stiff and kind of scratchy, remarkably similar to how your bath towel feels when you dry it on a clothesline. I’m not going to sugarcoat this – I was really disappointed that I wasted part of my allowance buying it, because I absolutely hated it. The color was nice, but color doesn’t mean anything if the fabric itself scratches you when you touch it.

French Terry Stella Hoodie Dress

I did try washing the fabric multiple times to see if perhaps there was a sizing on it (or if the glaze has something to do with it?) that would be removed and thus soften it – but no matter what I did (hot water, cold water, different detergents, high dryer heat, etc), it didn’t change the hand of the fabric. I stuck it on my shelf and tried to figure out if there was something I could do with it. I don’t back down from a challenge, but sometimes I have to roll a problem around in my head for a minute before I come up with a solution.

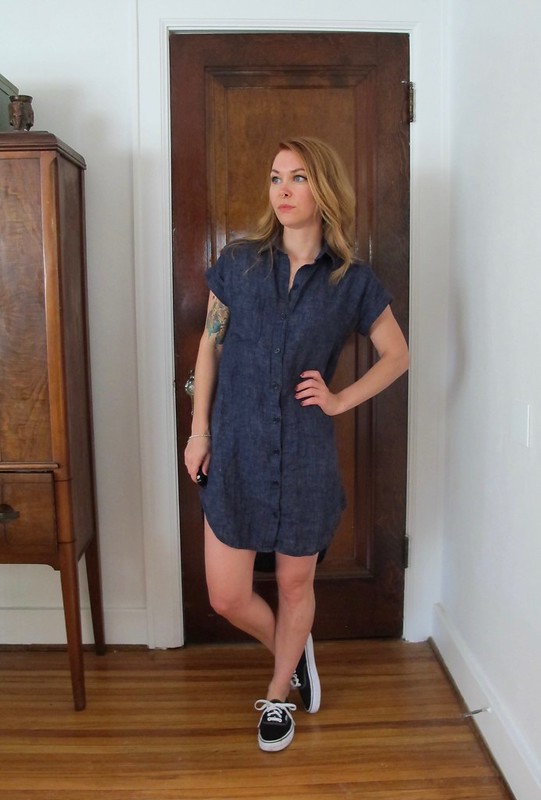
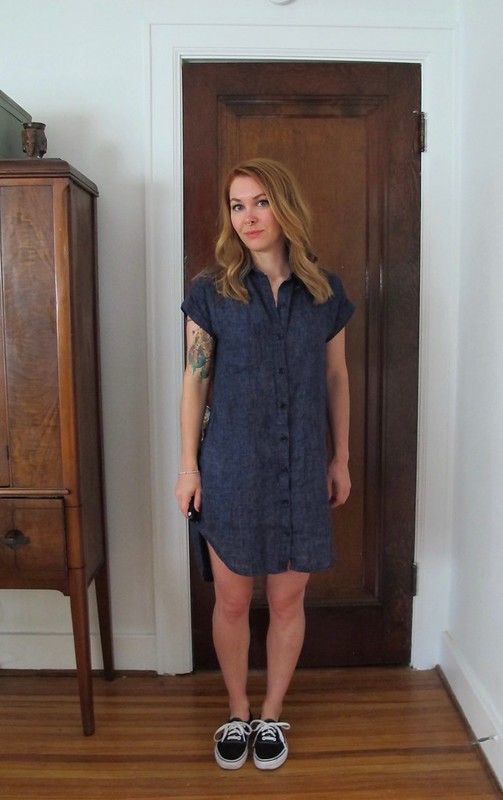
During this time, I was sent an advance copy of Tilly’s newest book, Stretch! (hello, hi, that’s an affiliate link). I love most of the patterns and projects in that book, and the one that really stuck out the most to me was the Stella Hoodie pattern. I am not a huge fan of the athleisure trend, so the joggers were a bit lost on me (it’s fine if you wear them, but those are PJs are far as I’m concerned, and I don’t wear PJs in public), but I looooooved the pictures of the hoodie lengthened into a dress! I thought my weird french terry might work with that pattern – and, at the very least, it would probably function great as a swimsuit coverup.

French Terry Stella Hoodie Dress

French Terry Stella Hoodie Dress

French Terry Stella Hoodie Dress

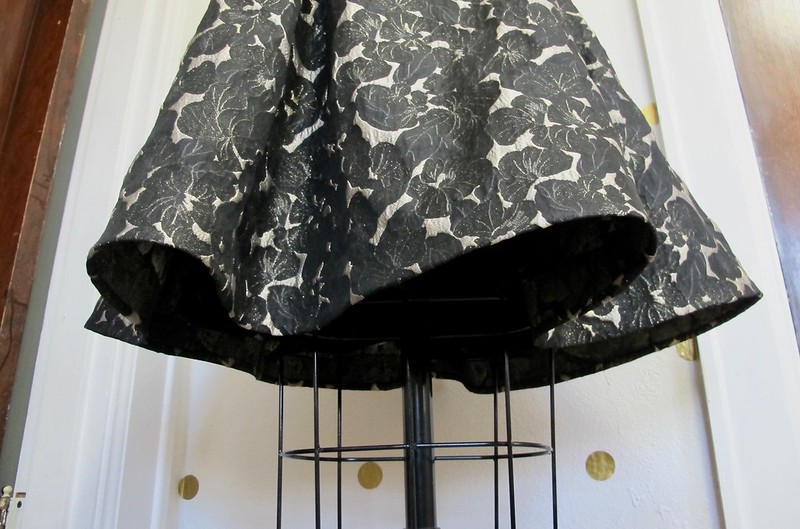
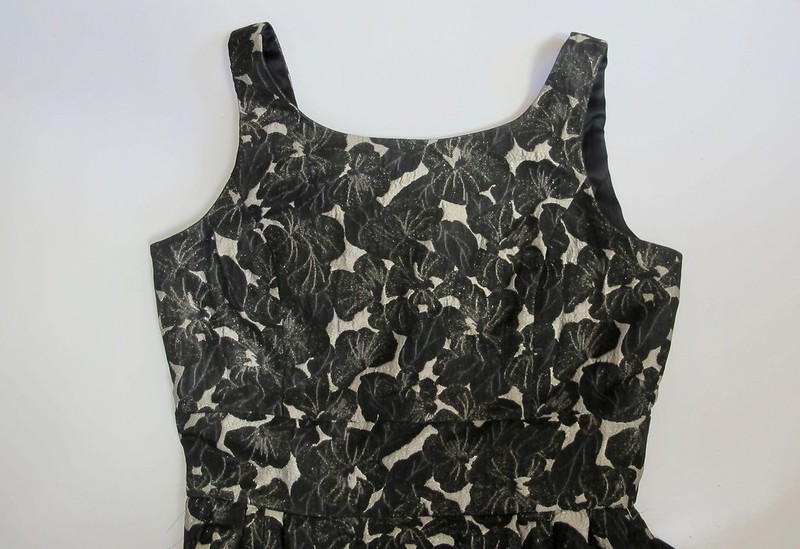
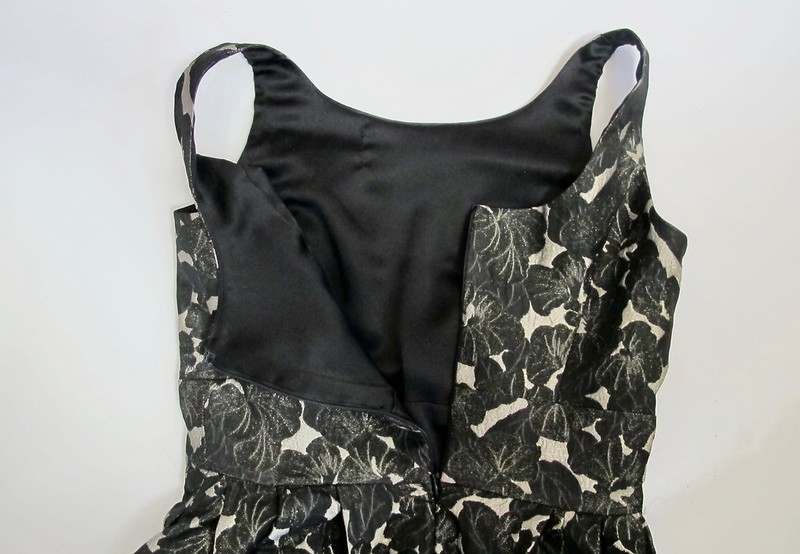
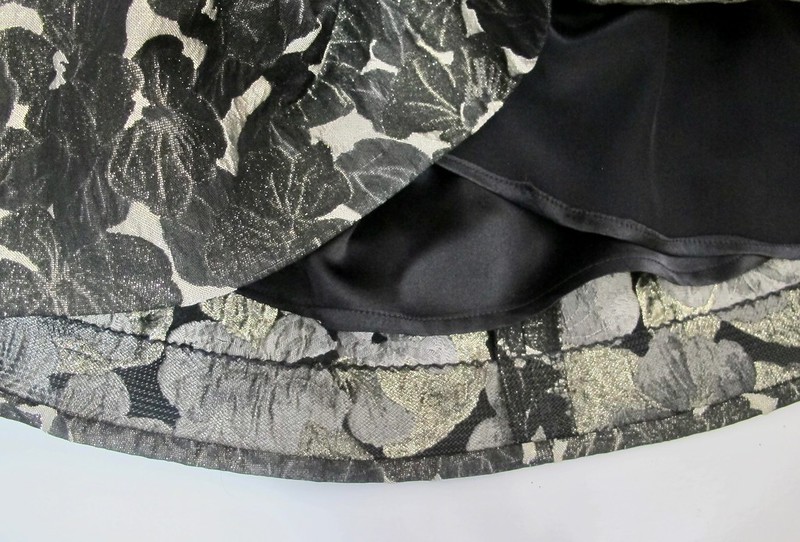
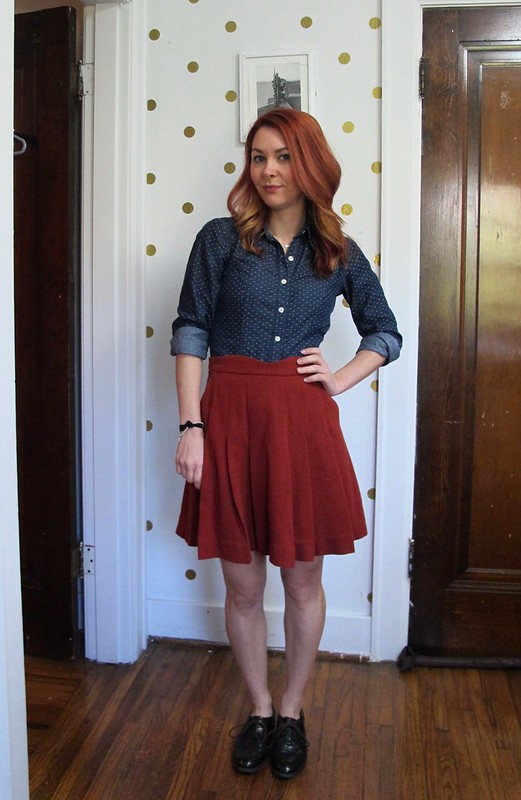
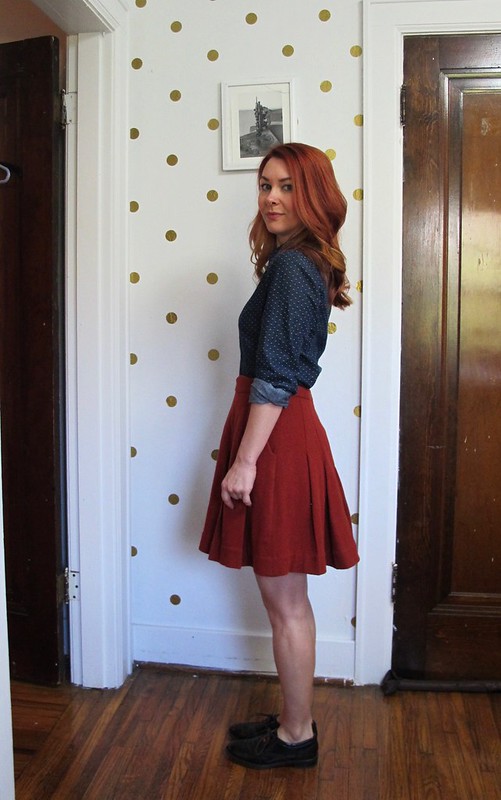
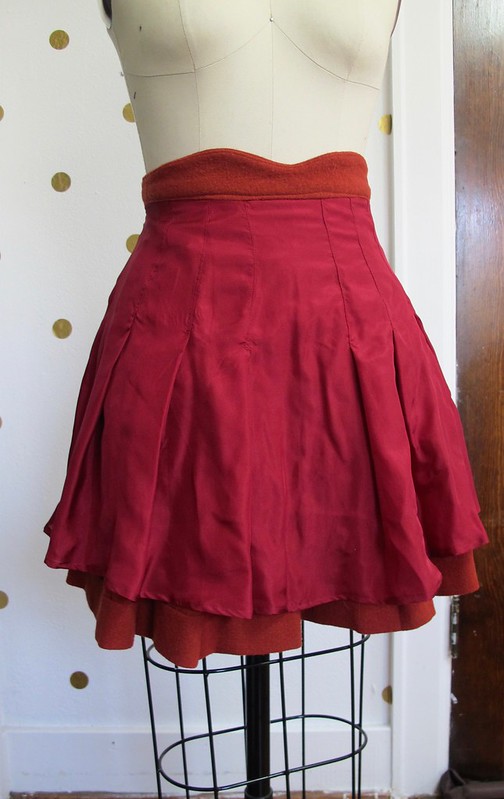
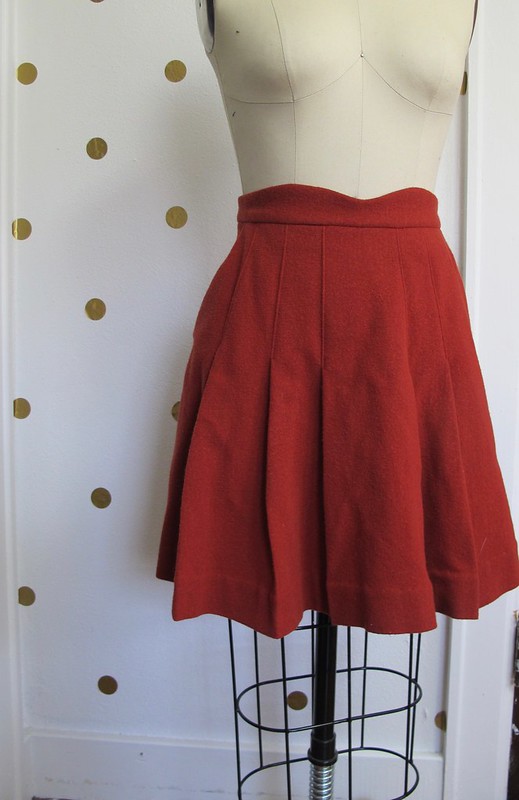
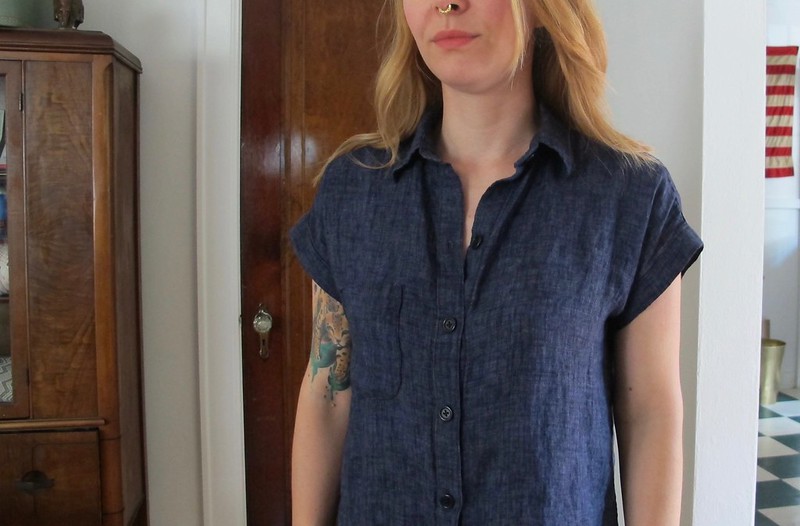
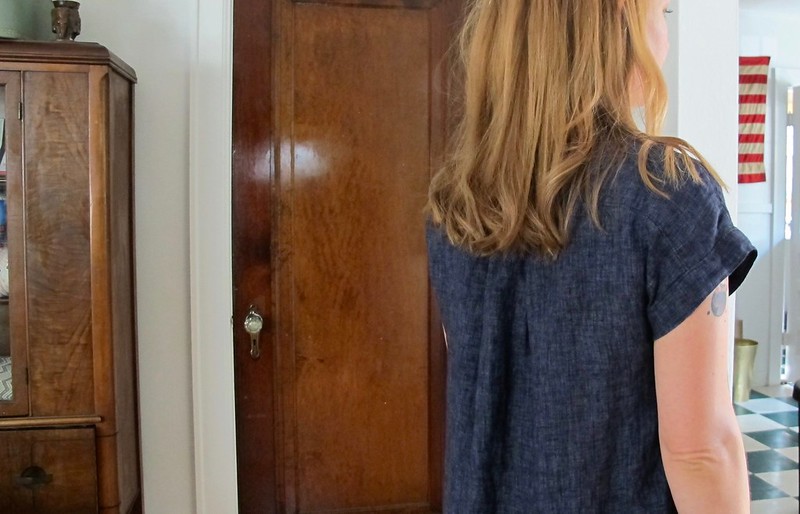
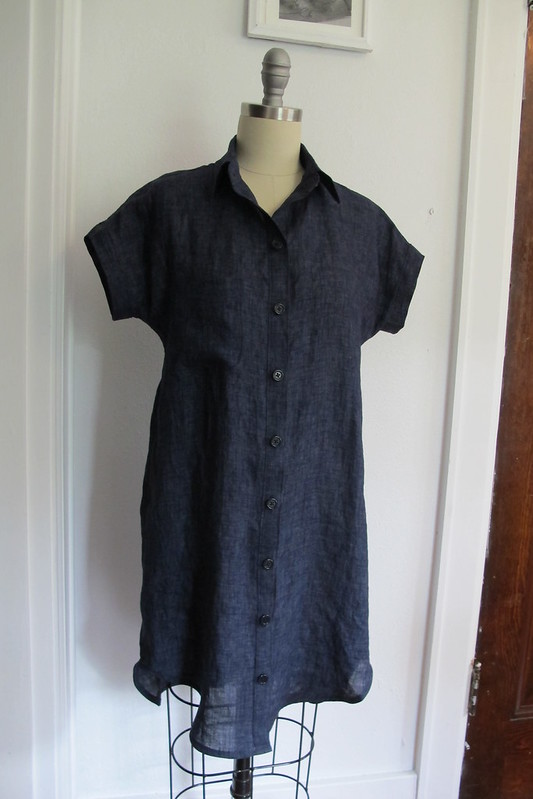
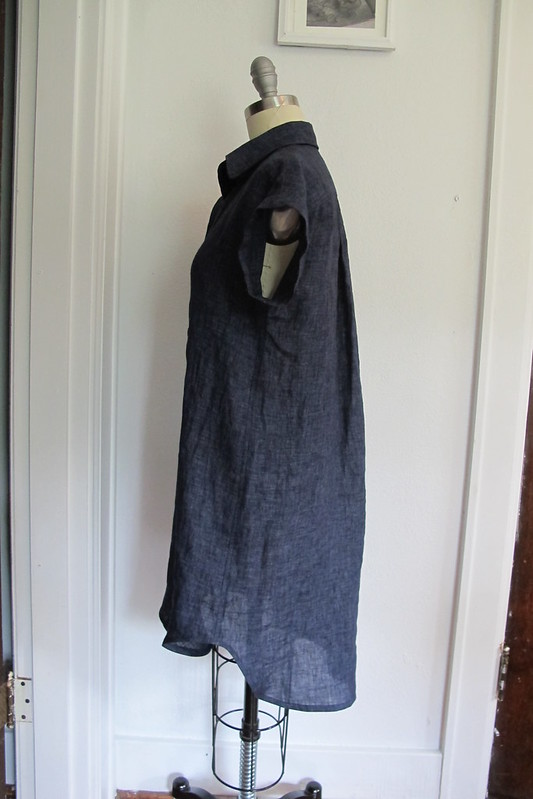
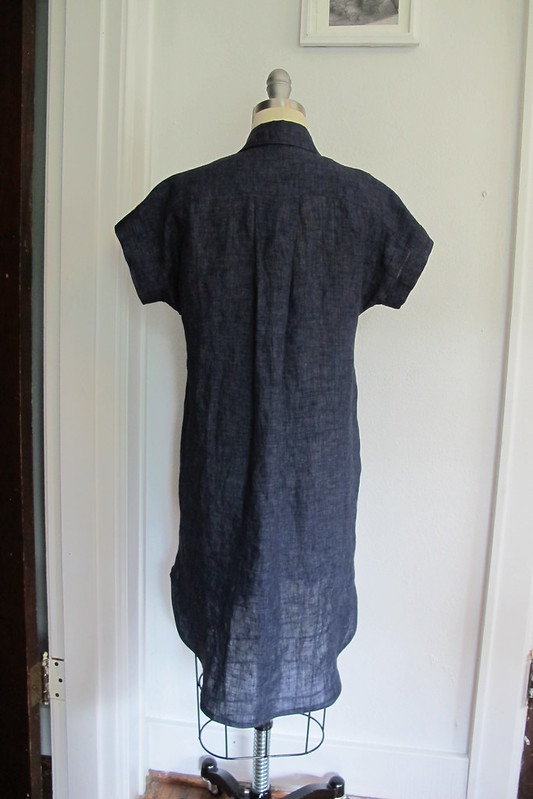
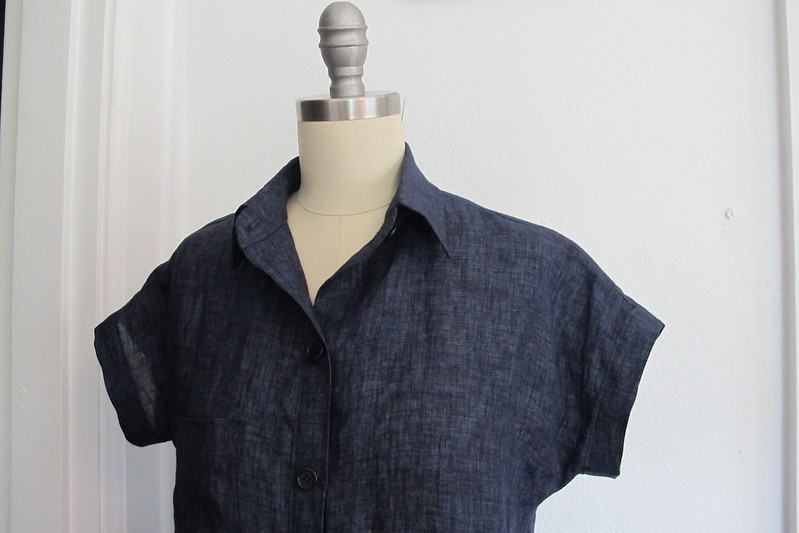
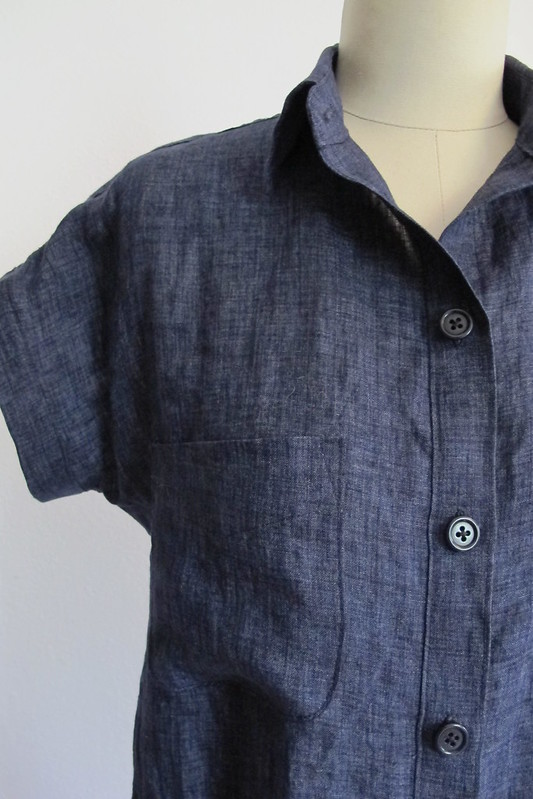
I made the size 2 of this, based on my measurements and the suggested size from the book. I don’t remember how much length I added, whatever the book suggested (probably 8″ or 10″ – and then I cut some of it off when it came time for hemming). I did simplify mine a bit from the book – rather than line the hood and the pocket, I just turned under the seam allowances and stitched them down. The whole thing was sewn on my serger, other than the button holes (which my machine had no problem sewing, although I did back them with a little piece of fusible interfacing first), and the hems were done on my coverstitch machine. This fabric was very, very, very easy to work with – stable, not at all shifty of curly, and only shed a little bit when cut. It pressed nicely, which was great for getting those sharp hems.

French Terry Stella Hoodie Dress

I originally envisioned a black drawstring for the hood, but red was all I had on hand. I actually like it! It’s a nice little sporty pop of color. God, I sound annoying.

French Terry Stella Hoodie Dress

French Terry Stella Hoodie Dress

French Terry Stella Hoodie Dress

French Terry Stella Hoodie Dress

French Terry Stella Hoodie Dress

French Terry Stella Hoodie Dress

If you’re curious about my leggings – they are the Virginia leggings, made ages ago (in 2015, I think). My fabric is a wool knit from Paron in NYC. And those white lines are mock flatlocking done with my serger (where you sew the two layers together and pull them apart, or whatever it says to do in the instruction book I honestly I don’t remember haha) – which I 100% did because I didn’t have enough yardage to cut full length legs, so they had to be pieced. I added additional piecing so it would look intentional. It actually, in retrospect, looks kind of stupid, but honestly I usually wear these as long underwear so whatever I don’t care.

French Terry Stella Hoodie Dress

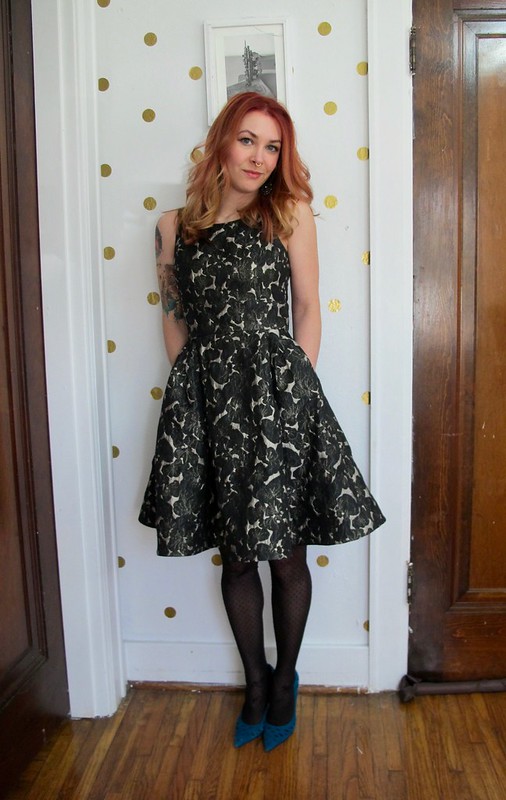
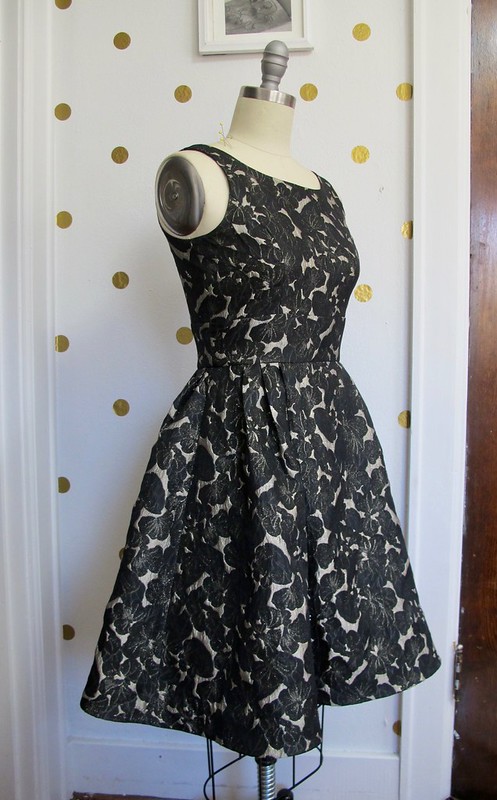
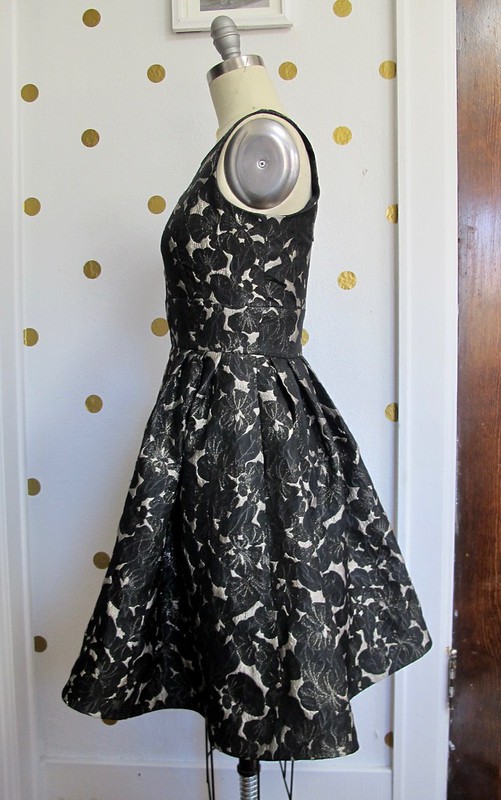
So that’s about it for this little dress! I actually quite like how it turned out – despite being apprehensive up until the very last minute of hemming. It’s cute and sporty and I feel cute in it. I think it will make for a good swimsuit coverup – but it also works as a cute little dress. As much as I didn’t like the fabric when receiving it, it works really well for this garment since it hold its structured shape. And since the garment is not close-fitting, the fabric isn’t scratchy or uncomfortable to wear. A very pleasant surprise!

In other news, if you’re still holding out for a good french terry, may I recommend this french terry from Mood Fabrics. I got a few yards of this and it is GREAT – super soft, super stretchy, super drapey, super bamboo (yas bamboo). Plus it comes in tons of colors!

**Note: The fabric used in this post was provided to me by Mood Fabrics, in exchange for my participation in the Mood Sewing Network. I also received the Stretch! book from Tilly & the Buttons as a gift, but was under no obligation to post a project from it (I just really like the book!). All opinions, as always, are my own!

Completed: The Hampton Jean Jacket

27 Mar

I actually finished this project months ago – like, as in, 2017. Took the photos in mid-November, and then started this blog draft at the end of that month. I have no idea why I never finished writing it up, but… better late than never, I suppose?

Hampto Jean Jacket

At any rate, despite my apparent reluctance to post this project, I am actually pretty happy and excited about it! I love me a good denim jacket, and have always considered it a wardrobe staple for the way I dress. My style has changed a lot over the years – in my teens I was ~punk rock~ (insert hysterical laughter in hindsight yere), in my 20s I was really into vintage, and now I tend to dress just pretty boring overall (I like to think I look “classic,” but let’s be real – it’s boring AF, whatever, don’t care). With all those style changes, the humble denim jacket has always held a special place in my heart and a leading role in my wardrobe.

Hampto Jean Jacket

Hampto Jean Jacket

Hampto Jean Jacket

I think it’s safe to say that there are lots of people who feel the same way as I do about the versatility of a denim jacket, however, it’s been hard to find a sewing pattern that includes all the features you see in one (such as the welt pockets, or a sleeve placket). I have made the Staci Jean jacket in the past, but it wasn’t quite up to par – the fit was more generous than what I prefer, and it really bothered me that it didn’t have actual pockets. I ended up not getting a lot of wear out of that jacket and later donating it.

The Hampton Jean Jacket is a great pattern that includes all the features I like in a jean jacket – those welt pockets, functional in-panel pockets with a top flap, a two-piece sleeve with a placket and cuff, and front and back yokes. Sewn up in a denim fabric with contrast topstitching and metal jeans buttons, it’s almost indistinguishable from the RTW versions you see in stores (almost, but just a little bit better – because it’s handmade by meeeee 🙂 haha). I love that someone took the time to create this pattern, and y’all, it’s a good one. Not that the Style Arc Staci jacket is a bad one, but it’s very basic and lacking compared to this one. This was exactly the type of pattern I have been looking for to fill this hole in my wardrobe.

I bought my denim at Mood Fabrics when I was in NYC last year – specifically for this jacket (sometimes I buy for specific projects, sometimes I just stash… but in this case, it was indeed for this pattern). I wanted something that was a good weight for a jacket, although not too heavy, and with little to no stretch. I found this piece in the denim section of Mood (on the bottom floor) and I just love the dark indigo wash. I originally thought about distressing and bleaching the fabric, but ended up just sticking with what you see here (apparently you are supposed to distress before topstitching… so yeah, that wasn’t happening). As with all denims, this fabric should soften and fade as it is washed and worn, which I’m looking forward to seeing. In the meantime, I do like the way it looks now, too!

The pattern looks complicated, but it’s pretty easy to follow. Sewing a jean jacket is pretty similar to sewing jeans – minus the obvious difference between the two articles of clothing (like, you don’t sew a fly front in the jacket and you don’t set a sleeve in jeans.. or maybe you do, I ain’t here to judge your life), just a lot of flat felled seams and topstitching. Y’all know I fucking LOVE making jeans, but I also have way too many pairs as it is, so this was a nice way to get that jeans-making experience without adding yet another pair to my wardrobe. Instead, I managed to fill a gap at the same time! I love it when that happens!

Hampto Jean Jacket

Hampto Jean Jacket

I waffled for a bit on what size to cut – my measurements are closer to a 2, but I ended up making the size 0 after comparing the finished measurements to an existing RTW denim jacket I own and like the fit of. I wanted this one to be a slim fit that looks great both opened and closed (I rarely ever wear my denim jacket buttoned unless I’m like, actually cold or something, however, I needed to make sure there was enough space to close it if it came down to it!). My only complaint about the sizing is how the sleeve length is measured – for whatever reason, it’s measured from the top of the shoulder to the bottom, instead of at the underarm. This led me to originally believe that the sleeve was something crazy like 5″ too long, and I actually altered the pattern and nearly cut it before I thought to actually compare the pattern piece to a different sleeve pattern piece. I was under the impression that the standard is to measure from the underarm to wrist (like what is basically your arm inseam), but now I’m second-guessing myself and thinking maybe I’m the nutty one? Thoughts?

Anyway, like I said – this pattern is really easy to follow. It’s obvious that a lot of thought when into the instructions; they are clear, easy to understand and follow, and the diagrams are beautifully done. There is also a sewalong on the blog if you do happen to get stuck, although it seems like it’s basically a photographed copy of the instructions (i.e., no additional information or tips, just the exact same instructions except with photographs to guide you). I found the sizing to be accurate and the pieces fit well together. I don’t know much about Alina Design Company, however, this was a very pleasant first experience so I am happy about that!

Hampto Jean Jacket

Hampto Jean Jacket

Hampto Jean Jacket

For sewing, not much different than sewing jeans. I used a 90/14 denim needle, navy all purpose polyester thread to construct, and a lightweight topstitching thread for all the topstitching – Mara 70 from Wawak, which Jennifer introduced me to a couple years ago during one of our jeans workshops. It’s heavier than regular all-purpose thread – which is 100wt – but not as heavy as traditional topstitching thread – which is typically around 30wt. It still looks nice and thick so your stitches really stand out, but it’s not so thick that it causes your machine to jam or nest, and it is very easy to thread through a standard needle. If you’ve been having issues with topstitching thread, I really recommend trying this weight!

I tried to finish most of my seams with flat-felled seams, but a few (such as the front yoke seam and the armscye seam) had to be serged and topstitched for a mock flat-fell. My RTW denim jacket is like this – a combination of flat-felled and mock flat-felled, and this is all explained in the instructions as well. I washed and dried the denim on the hottest setting a few times before cutting, and have washed it more than necessary since finishing to get it to soften up a little bit more. I know it’ll fade with time, I just want to speed that time up 🙂

Hampto Jean Jacket

Hampto Jean Jacket

Hampto Jean Jacket

Hampto Jean Jacket

Hampto Jean Jacket

My only complaint with the pattern is that I think it is lacking some necessary interfacing. There is interfacing at the button placket, sleeve cuff, and bottom band – and that’s it. No interfacing at the in-panel pockets or flaps (which have buttons and button holes, so they *should* be interfaced – at least with a little square where the aforementioned buttons and button holes are), or on the back tabs where, again, there are button holes. I was able to add these in before closing up those areas, but I am a little surprised that they were included with the instructions, especially considering how in-depth the entire pattern is as a whole. One thing I did like was that the collar is not interfaced – you might need to do that if you are using a lighter weight fabric, but for this denim, the weight of the 2 layers of fabric was plenty. I love the way the collar sits!

Hampto Jean Jacket
Anyway, the jacket turned out pretty fucking awesome – if I do say so myself. I think the sleeves could stand to be shortened about 1″, but I usually wear my jacket sleeves rolled up anyway so I’m not terribly concerned about it. The length is perfect for wearing with pants, not so much dresses and skirts (perhaps with something that has a lower waist, but I think the long length paired with a high waist looks unbalanced and a little sloppy – at least on me!). That being said, I already made a second version that is cropped – specifically to wear with dresses and skirts – so watch this space for that!

*Note: The fabrics used in this project were provided to me by Mood Fabrics, in exchange for my participation in the Mood Sewing Network. 

Completed: Fleecy Fraser Sweatshirt

2 Mar

Ok, so, apologies in advance for posting a really boring sweatshirt today, but, I feel like this post is warranted for two reasons – really awesome fabric, and a previously overlooked version of a pattern.

Honestly, this might be my new favorite fabric at Mood (up there in the ranks with their Bamboo Jersey and Organic Cotton twill). AND they have plenty of colors still in stock (although as of this posting, currently sold out of this particular green – sorry!)! It’s a Christmas Miracle!

Sewaholic Fraser Sweatshirt made with stretch fleece from Mood Fabrics

In all seriousness, though, I wanted to really focus on the fabric for this post. I promise it’s a really good one and worth the praise! I found this Moss Bamboo and Cotton Stretch Fleece on the Mood Fabric’s website a few months ago, via swatch (I always take advantage of my free swatches and usually end up throwing random stuff in my cart before I place my order! I have discovered some REALLY cool fabrics that way that I might have otherwise overlooked). I’m not even kidding when I say it’s one of my new favorite fabrics – they have loads of colorways and it’s nice and wide (60″) so you need less yardage.

Sewaholic Fraser Sweatshirt made with stretch fleece from Mood Fabrics

Sewaholic Fraser Sweatshirt made with stretch fleece from Mood Fabrics

Sewaholic Fraser Sweatshirt made with stretch fleece from Mood Fabrics

Sewaholic Fraser Sweatshirt made with stretch fleece from Mood Fabrics

The fabric is comprised of 66% bamboo, 28% cotton, and 6% spandex. That little bit of spandex is essential for giving the fabric a great stretch with a fabulous recovery. Plus, I really love bamboo fabrics – they are soft, easy to wash and wear, and they are antimicrobial so they have fantastic stink-reducing properties!

This fabric is considered a sweatshirt fleece, meaning it is has one side that is nice and smooth and the opposite side is soft and brushed. Unlike your typical sweatshirt fleece, it’s a slightly lighter weight with a softer drape. It is also a 4 way stretch, which, WEIRDLY (don’t ask me why, I couldn’t tell you) has more stretch along the grain rather than the crossgrain (if I recall, 40% at the cross grain and something like 80% along the grain). It’s soft (did I mention that it’s soft? Because it is FUCKING SOFT), it snaps back into shape, and it comes in a nice array of colors – what isn’t there to love?

Sewaholic Fraser Sweatshirt made with stretch fleece from Mood Fabrics

Sewaholic Fraser Sweatshirt made with stretch fleece from Mood Fabrics

This sweatshirt is actually the second garment I made using this fleece – my first garment was a pair of black Virginia leggings. I don’t have any photos of those – let’s be real, they are black leggings and basically impossible to photograph – but I wear them ALL THE TIME (here is a photo on my Instagram – I’d already been wearing them for 3 days at that point haha). Think of your favorite fleece leggings or tights – and then just imagine them in bamboo instead of poly (so no stink and no pilling). Because of the spandex, the fabric doesn’t bag out – meaning no baggy knees or butts. Also, in retrospect – they look pretty much the same as the pants I am wearing (the Cecilia Pant from Elizabeth Suzann – aka my MAGIC PANTS seriously you guys these pants are magical), so maybe I should have just worn the leggings for this photo!

So anyway, about this project! After my success with the leggings, I bought 2 more yards of this hunter green colorway without a real idea of what I wanted to make with it. I knew I wanted a sweatshirt, but a plain sweatshirt seemed like such a cop-out. So I went with the Sewaholic Fraser Sweatshirt.

I will be completely honest – I did NOT like this particular view of the Fraser when I first saw it (or, to be even more honest – any subsequent versions that I’ve seen since). I dunno, the super contrast yoke just looks unflatteringly Western to me (and I typically love me some Western wear) – very costume-y, very Wonder Woman. I had no intentions of ever sewing up that version (I do like the other versions – you can see the one I made with a collar here), but weirdly, I thought of it when I was trying to decide what to do with this fleece. I thought it might look good with the contrast just being the wrong fuzzy side of the fabric, so the color still matched but there would be some subtle texture differences (again, just like my version with the collar).  I’m actually pretty pleased with the end result – it’s still a nice sweatshirt but with a little more interest… and it doesn’t look costume-y. And I have worn it every day this week, no lie, so obviously it’s a massive success in my book haha.

Sewaholic Fraser Sweatshirt made with stretch fleece from Mood Fabrics

Sewaholic Fraser Sweatshirt made with stretch fleece from Mood Fabrics

I made a size 0 and slimmed down the hips (Sewaholic Patterns are designed for pear-shaped women, and I’ve found I don’t need the extra room down there). I also cut this on the lengthwise grain, instead of the crossgrain – remember when I said the fabric had more stretch on the lengthwise grain? I think it would work either way, but I wanted a reeeeeally stretchy, comfy sweatshirt! Shortened the sleeves about 1″… they are still slightly long, but in my experience it’s better to keep them long and allow for a little more shrinkage, then re-hem if necessary. I have waaaay too much bracelet-length sleeves as a result of not being aware of this for the first half of my sewing career haha.

I did have to pay careful attention to the stitching at the center front V, as well as matching the sleeve contrast seam to the bodice contrast seam – for those, I based first on my sewing machine (much easier to take the stitches out if you mess it up) before using my serger. I used the single needle chainstitch on my coverstitch machine to topstitch the contrast, to give it a little more dimension. Other than that, a very quick and easy sew! I did notice the the fleece flattens when you press it, but it’s easy to fluff back up with your fingers.

Sewaholic Fraser Sweatshirt made with stretch fleece from Mood Fabrics

Anyway, that’s all for this one! A simple project, but also a big gushy heart-eyes love song about some amazing fabric! Now, quick, y’all need to buy it before I snap up the rest of this stuff! 🙂

** Note: The fabric used for this post was provided to me by Mood Fabrics, in exchange for my participation in the Mood Sewing Network. All opinions are my own!

Completed: New Workout Wear for 2018

6 Feb

I know. It’s a new year and my first finished project is workout wear. I actually meant to post this in January but I’ve fallen out of habit with blogging. And on that note… taking blog photos, apparently. Because, yikes. I’m sorry these are so bad, but not sorry enough to reshoot them haha.

In addition to being predictable and basic (lol workout gear in January amirite), making workout clothes isn’t necessarily my favorite thing to sew – but it sure beats buying them! I’ve found that I prefer my gear to be neutrals like grey and black (but really, anything but pink. ANYTHING. Why are all women’s workout clothes pink, anyway??) and I love having a zippered pocket to hold my phone while I run. Both of these can be difficult to find – and if you do find them, they can be quite expensive! I don’t think sewing necessarily saves you money, however, exercise gear can definitely be the exception to this.  Each of these pieces cost a fraction of what you would pay in a shop! And I had complete control of the fabric and fit – meaning, yes, I can wear all grey while I exercise mwahahaa

This post contains 3 pieces – a long sleeved, a tank with a built-in sports bra, and leggings for running and yoga.

Surf to Summit Top made with Mood Fabrics

Surf to Summit Top made with Mood Fabrics<

I’ll start with the long sleeved pullover! This was a desperate need in my closet – I have very few workout tops to begin with (I prefer to exercise in just bottoms + a sports bra, as I generally am either doing hot yoga or running in the heat!), and absolutely none with any sleeves! While I do have a fleece hoodie, I wanted something lightweight that would be good for exercising when it is too cold for sleeveless but too warm for the hoodie.

Surf to Summit Top made with Mood Fabrics

Surf to Summit Top made with Mood Fabrics

Surf to Summit Top made with Mood Fabrics

Surf to Summit Top made with Mood Fabrics

I fucking LOVE this fabric and I was so happy to find it (and buy the last of it… ha! Sorry, not sorry). This cool star print is a polyester/bamboo wicking fabric from Moodfabrics.com. The wrong side is white, and the whole thing has a texture that is really similar to a pique. It’s lightweight and breathable, and the perfect light layering piece.

The pattern I used is the Surf to Summit Top from Fehr Trade. I wanted something raglan with a half zip (so, like a cross between a tshirt and a hoodie), so this pattern was perfect! I made a size XXS based on my measurements, but I think I could have stood to go up a size as it is quite tight and there are a bunch of drag lines. Not sure if this was a sizing error on my part, or something I messed up with the construction – or perhaps my fabric wasn’t stretchy enough? The shirt is definitely still wearable but, yeah, notes for next time!

Construction-wise – I sewed this on my serger (save for the parts with the zipper, which were done on a regular sewing machine), and used my new coverstitch machine to mock flatlock all the seams and hems for a sporty look. Protip – don’t make the mistake I did and try to flatlock the underarm seams. Giant PITA and it doesn’t look great. On the flip, you can’t really see it and I’ve learned my lesson haha. This was one of the first projects I made with my coverstitch so there are sections where the tension is super wonky – I was learning as I went!

The teal zipper was unintentional – basically all I had in my stash – but I actually quite like the contrast! I still have a bit of this fabric left so I might make it into a tank. I fuckin love me some star prints, can you tell? ha!

Pneuma Tank made with Mood Fabrics

Pneuma Tank made with Mood Fabrics

Pneuma Tank made with Mood Fabrics

The second piece I made is the Pneuma Tank from Papercut Patterns, which is a sports bra with an attached tank top and cool strapping detail. I’ve made the bra version before, but not the tank. I used this heathered wicking and anti microbial performance jersey for the outer, and black max-dri anti microbial performance jersey for the sports bra. I also lined my sports bra with black power mesh, for additional support (I should note, I don’t require much support and tend to be fine with lightweight, single layer sports bras like this. If you need more support, this probably isn’t the pattern for you. At least not for something like running or jumping around). The elastic edges and black bra strapping were sourced from my stash.

I love this tank, but again, I have noted improvements for my next version. For one – I think I got a little overzealous with shortening the straps and now they are too short, making the neckline a bit too high. I am probably going to cut those off and replace them because the shortness makes them borderline uncomfortable. I also think my main fabric (the grey) has a little too much body for this design. The sides flare out at the bottom, which I’m not crazy about. According to the product photo on the website, they definitely used a softer, more drapey fabric so I will try that next time. I do like the design for yoga – there’s a lot of opportunity for airflow, and the shirt stays in place when you bend over. I also think it would be really awesome to wear as a regular tank top, but I might make the bra a little less flattening 😛

Pneuma Tank made with Mood Fabrics

Pneuma Tank made with Mood Fabrics

Again, I made this with my serger and hemmed with my coverstitch. I used my regular sewing machine to apply the elastic.

Pacific Leggings made with Mood Fabrics

Pacific Leggings made with Mood Fabrics

Pacific Leggings made with Mood Fabrics

Finally, I made some new leggings for running and yoga! These are my favorite; I love everything about them and have worn them for nearly every workout since I finished this (except when they are still in the wash haha). I used another max-dri performance fabric from Mood Fabrics for this – I bought several colorways for my stash, and I love it! I ESPECIALLY love that it’s not see-through when you stretch it. I added a zipper to the back so I can carry my phone when I’m running. The pattern is the Pacific Leggings from Sewaholic Patterns. I’ve made this pattern a few times before – both the full length leggings and shorts (only blogged about the shorts, though)- and they are so great for exercising. The zippered pocket is big enough to hold my phone, the fit is spot on, and I love the seaming details. There are options in this pattern for doing some cool colorblocking, but, in case you haven’t noticed – I am plain, plain, plain these days! (I like to say that my plain clothes provide a neutral backdrop for my ~colorful personality~ haha).

To highlight the seaming, I mock flatlocked the seams with my coverstitch (and, again, sewed the leggings on my serger except for the fiddly bits like inserting the zipper and elastic, which I did on my sewing machine). It took some trial and error with the tension and needle size – lots of imperfect parts to the stitching – so don’t look too close! They are totally wearable, though, and I love them! The mock flatlock adds a nice layer of strength without compromising stretchiness, and it keeps the seams really flat so you don’t get chafed (lol jk I definitely don’t run long/far enough for chafing to be an issue :P).

Surf to Summit Top made with Mood Fabrics

Anyway, that’s it for these pieces! Standard, basic pieces in boring-ass colors THAT MAKE MY HEART SING. Look! Even my running shoes are grey (do you have any idea how hard those were to find?? Ugh, seriously haha). Sometimes, making your own stuff doesn’t necessarily mean including all the colors and prints – and that’s ok!

For more activewear inspo, check out Cashmerette’s new plus-sized activewear, and the new book Sew Your Own Activewear from Fehr Trade!

*Note: The fabrics used in this post were provided to me by Mood Fabrics, in exchange for my participation in the Mood Sewing Network. All opinions are my own!

Completed: A Very Festive Brocade V8998

26 Dec

After many years of saying I was gonna do it and then never actually doing it… I made a Christmas party dress!

Vogue 8998

I wanted something sparkly and festive to wear to Christmas parties (before you think I go to fancy parties… I don’t. I have consistently been the most overdressed person at every party this year, not that I’m complaining!), but every year I put it off until it’s too late. This year, I was determined to use my Mood allowance to make something fabulous, so I forced myself to start early. I’m so happy it paid off!

Vogue 8998

With this make, I chose fabric before the pattern. I had an idea that I’d like to make my dress out of a sparkly brocade – a fabric that I don’t have a lot of experience with. I generally prefer a fabric that has less body, plus, my lifestyle doesn’t really warrant a need for fancy dress. This seemed like a good opportunity to jump out of my comfort zone a little, so I waited until I was back in NYC for another workshop and used that change to stop by Mood Fabrics store to pick my brocade.

I’m not going to lie – I spent over 2 hours in that shop trying to decide. There are sooo many options, it’s a bit overwhelming! I had a couple of things in mind to narrow it down – I wanted a fabric that was primarily black, gold or silver (so I could wear it with my turquoise heels), and I was budgeting $50/yard or less (you’d be surprised how expensive brocade can get! I only needed 2 yards, which helped a lot). I wanted something that was more floral than abstract, and nothing that was super dimensional (I don’t like puffy brocade, I’ve learned). Even with those terms narrowing it down, there was a LOT of fabric to wade through. God bless all the people at Mood who helped me pull bolts and kept their grumbles to themselves every time I changed my mind. I’m sure it helped that I was there on a slow weekday morning, but still! I must have been annoying. Those people are saints haha.

Anyway, I found this fabric and eventually settled on it (someone else was considering it for their wedding party, and decided against it – so she was happy to see me buy it instead!). What you see in my photos is actually the wrong side of the fabric – the right side is more dimensional with silver + gold, as you can see here. I had a hard time deciding what size to use – and even asked IG for opinions – but ultimately decided that the wrong side really made my heart sing. Plus, it looked better with my turquoise shoes (and also, someone on IG pointed out that it looked mature and tbh I just couldn’t see past that after that fact haha). Wrong side it was, then! I did consider adding in a bit with the right side for contrast (such as at the waistband), but upon pinning the pieces to my dressform, it definitely did not work. Rather than look cool, it looked like I made a mistake. So I scrapped that idea and just went with the wrong side all over.

Vogue 8998


Vogue 8998

For my pattern, I used Vogue 8998. I cut a size 6 at the shoulders and bust, grading out to an 8 at the waist and hips. I made view E, but changed the skirt gathers to soft pleats. A quick muslin of the bodice showed that I needed to remove about 1″ from the shoulder to make it fit better, and I also removed 2″ from the skirt length before cutting. I made no other fitting changes.

Construction-wise, I mostly followed the pattern but changed a few things to suit me + my fabric. I did not interface the entire bodice – I get why they have you do it, but I felt like my brocade had enough body where it wasn’t needed. I did interface the midriff with silk organza, just to give it some extra stability. I also changed out the lapped zipper for an invisible zipper.

The whole dress is lined in black silk charmeuse, which gives the garment a bit of weight and makes it feel SUPER luxurious when I’m wearing it. There is 2″ wide horsehair braid at the hem to give the dress a bit of extra volume. This is one area that I totally deviated from the instructions. They have you attach the horsehair to the lining and then sew that to the outer fabric, so everything is encased… but I wanted my layers to be separate (mainly so I could show people the “right” side of the fabric haha). So I sewed the horsehair to the outer, and rolled the hem of the lining.

Vogue 8998

After a little bit of internal debate, I also added pockets (also out of silk charmeuse). I figured it would be nice to have a place to hold my phone (or stolen snacks), and I’m glad I did!

Vogue 8998

Oh, right – AND I made a matching clutch, using all leftover fabrics + my new Cricut Maker! More details on that in the next post 😛 But doesn’t it look great with my dress? haha!

Vogue 8998

Vogue 8998

Vogue 8998

Despite this being a fairly fancy, pretty $$$$ dress made with fine materials… it was really easy to sew. It’s just a basic dress (I mean, style-wise it’s technically a sundress, you know?) that is fully lined with a center back zipper. There aren’t a ton of pieces, and while I can’t say that the silk was the easiest thing I have ever cut… the brocade was super easy to work with. It doesn’t shift around, it pressed fine with high heat + a press cloth (sorry, I’m terrible but I use high heat for everything haha), and all my hand stitches disappeared which made hand sewing the hem very satisfactory! The only downside to brocade is that it sheds like CRAZY… so I just serged all my seams (even the ones that are completely covered by lining) to prevent them from fraying more. I am still finding sparkly bits of brocade in my studio. It’s kind of great.

Vogue 8998

Vogue 8998

I love the shape of the bodice, and the wide waistband.

Vogue 8998

Vogue 8998

Vogue 8998

Vogue 8998

Vogue 8998

Vogue 8998

Here you can see the “right” side of the fabric! 🙂

Whew! All right, sorry, that was a load of photos. I am so excited about this dress, though, it’s been a while since I worked on such a big, fancy project!

Vogue 8998

I’m happy to report that I have now worn this dress 4 times – 3 parties, and one night out with my coworkers for fancy drinks! It’s super comfortable to wear, and the silk lining makes it a touch more warm than I expected. A couple of the parties I went to were waaaay more low-key than this dress would require, but it actually looks super cute with my cropped Chuck sweater worn over it with a belt.

Anyway, that’s all for this dress! I’ll be back later this week to talk more about the clutch I made to go with it 🙂

**Note: The fabrics used in this post were provided to me by Mood Fabrics, in exchange for my monthly contribution to the Mood Sewing Network. All opinions are my own!

Completed: Wool Crepe Mirambell Skirt

30 Nov

Look – it’s two of my favorite things, rolled into one! Wool crepe + rust orange. YES!

Mirambell Skirt

I haven’t sewn with wool crepe in ages, which is weird because I consider it one of my favorite fabrics. Since my life is so… casual now, I really just wear a lot of pants, tshirts, and button ups. Dresses only happen if they are knit, and anything remotely resembling a suit hasn’t graced my body in about 5 years. Lol, remember when I worked in an office and had to dress up for work? Yeah. That was a long time ago.

Anyway, wool crepe! I love it! I love how squishy and soft it is, I love how it drapes and hangs off the body, I love the rich color. I love working with it – it’s easy to cut, easy to sew, rarely frays, and responds to pressing like a fucking dream. I love wearing it because it’s warm and comfortable, but also looks polished. Wool crepe, where have you been? Why did I forsake you? I’m so sorry.

Mirambell Skirt

This wool crepe is from Mood Fabrics, which I found in the store when I was in NYC a few months ago. There is a nice selection of wool crepes online if you aren’t local, but I love the opportunity of being able to go to the store and actually see/feel the fabrics before committing to one. This particular fabric is the result of a rare instance where I went to Mood with a specific fabric I was looking for (my lists are usually pretty vague – x amount of knit for a tshirt, for example) and amazingly, somehow managed to find (despite the selection in that store, I feel like they rarely have the specific things I want haha. Which is why I usually end up with vague lists!). But, no – for this skirt, I wanted wool crepe in either rust orange or saffron yellow. And I actually found it! Amazing!

Mirambell Skirt

Mirambell Skirt

The pattern I used is the Mirambell Skirt from Pauline Alice. It’s actually the second version I made – my first one was a sheer navy cotton/silk blend. It’s beautiful; maybe someday I’ll get around to blogging about it lol. Anyway, I originally bought the pattern specifically for that fabric – I was envisioning something similar, and then the pattern appeared on my radar a few days later. The pattern features a high waist with a curved waistband, topstitched pleats, and shaped pockets. There are two versions – one that closes with an invisible zipper, and one with buttons down the front. It is, admittedly, pretty similar to the Colette Zinnia, which I have made twice before (see: one, two). Between the two, I absolutely prefer the Mirambell. I always felt like the shape of the Zinnia was a little off – it tends to flare right about the hips, which is weird. Even topstitching the pleats further down did nothing to rectify this. Also, the inseam pockets on the Zinnia contribute to that flare – which isn’t an issue with the Mirambell, since the shape of the pockets makes them life more flat. The Mirambell does have a shaped waistband, but that can easily be straightened if you hate it. Anyway, my two cents!

I made a size 36, with no further fitting adjustments. The waist is just perfect on me – it’s fitted, but not uncomfortably tight. I love the length, although I’ll tell ya I was tempted to make it incredibly short.

One thing I did change was to add a lining, because I tend to wear wool crepe during tights season and it’s just easier to add a lining than deal with a slip. This is not included in the instructions, but it was easy to figure out (I’d already done this for my aforementioned prior version anyway, so I knew what I was getting into). I used china silk (originally from Mood, and languishing in my stash for the past year or so) and cut a second skirt out of it (I taped the pocket piece to the skirt front since there’s a slash where the pocket goes on the outside… man I hope that makes sense haha), 2″ shorter than the skirt I cut out of my crepe. I assembled each skirt individually as instructed (omitting the pockets on the lining), and then attached the lining to the waist seam of the outer skirt before attaching the waistband. Easy and effective! China silk is not my favorite fabric to work with as it’s INCREDIBLY shifty, but occasionally I’ll take one for the team if I feel like the end result will be worth it. This was one of those instances. The entire making of this skirt was just really fun and satisfying.

Mirambell Skirt

Here is the inside with the lining. Sorry about the wrinkles, that’s just the nature of silk.

What else? I finished all my seams with pinking shears, since the wool doesn’t fray and it was also going to be lined. I love using pinking shears, they feel so quaint and sweet haha.

Mirambell Skirt

Mirambell Skirt

Mirambell Skirt

Mirambell Skirt

Mirambell Skirt

Mirambell Skirt

Overall, a very happy skirt that combines my favorite color *and* my favorite fabric! Double bonus in that it looks so good with my polka dot chambray button up I made back in 2014. I’ve been trying to stick with a general color palette so that my pieces coordinate (and I don’t have any weird closet orphans), and this skirt is a great addition to that.

*Note: The fabrics used for this project (skirt) were provided to me by Mood Fabrics, in exchange for my participation in the Mood Sewing Network.

Completed: Black + Grey Flannel Archer

3 Nov

IT’S FLANNEL SEASON AGAIN, Y’ALL.

Plaid Cotton Flannel Archer

I don’t like the cold – like, at all – but I do love the clothes that are associated with this season. Layers, textured fabrics, WOOL, dark colors and jewel tones… gimmie all of it. Flannel button-ups are at the top of my list. I love that they can be worn solo and buttoned up, layered under a sweater, or layered over a tank or tshirt and left to swing free in the breeze. Snaps at the cuffs make it easy to roll the sleeves up, snaps at the button band make it possible to Hulk out at the end of the day (don’t pretend like you don’t do this with snap-up shirts, you liar).

Plaid Cotton Flannel Archer

I have a few handmade plaid flannel shirts, all of which I love to wear, so I put a short hold on adding to that stash. I finally allowed myself this year to make 2 more – both out of plaid cotton flannel from Mood Fabrics. This is the first of the two. I haven’t taken photos of the second one yet, but rest assured – it’s almost the exact same as this one, just a different colorway. Because if I am anything, I am consistent haha.

As I said, this is the Archer button up from Grainline Studio. I’ve made this shirt a lot, so there’s not a lot to elaborate on here, just a few small changes. I sewed view A with the angled cuffs, swapped out the included placket for a tower placket (I use the placket from the Negroni pattern, but this placket download from Threads is basically the same thing).

Sizing-wise, I cut a size 0 (which is the size I pretty much always sew with Grainline). One thing I did change with this pattern was to increase the seam allowances at the side and sleeve seams to 5/8″ – the included seam allowances are 1/2″, and I actually sew them at 5/8″ since I like to flat-fell those seams. I’ve noticed that my shirts are pulling ever-so-slightly at the bust now (told ya I’ve gained some weight. And also an entire cup size, ughhhhh), so I added in that extra 1/8″ and the fit is much better now!

Plaid Cotton Flannel Archer

Plaid Cotton Flannel Archer

Plaid Cotton Flannel Archer

I cut my fabric on the single layer to get the plaid all matched up (see here for my plaid-matching tips!), and cut the outer yoke and pockets on the bias. I originally had the pockets cut to match the plaid at the front, but they matched so well they basically disappeared, and I wasn’t crazy about that look. So I re-cut them and I think they look much better!

As I mentioned, all seams are flat-felled so there is a nice clean finish on the inside. I used a super lightweight interfacing so that everything would stay nice and soft – I didn’t want a stiff button placket in contrast to the otherwise floppy fabric. Everything is topstitched in black, and I used black snaps for closures.

My cotton flannel was found at the Mood Fabrics store in NYC, back in August. I had a hankering for a new flannel, and I wanted one that was soft and lightweight, like it had already been worn to death. I found this and another similar flannel in a different colorway, both of which work perfectly with the color palette that my closet has ended up morphing into. Since flannel tends to shrink up quite a bit, I washed and dried my fabric three times before cutting into it. I kept the sleeves slightly on the long side, again, in case they decide to shrink up (my first flannel shirt has quite short sleeves now!).

Plaid Cotton Flannel Archer

Plaid Cotton Flannel Archer

Plaid Cotton Flannel Archer

Plaid Cotton Flannel Archer

Plaid Cotton Flannel Archer

Plaid Cotton Flannel Archer

I think that’s all I can say about this make! I’ve already worn it loads and I look forward to some hardcore layering here in the next few months 😀

A couple other things of note:
1. Yes, I made my jeans! They are Gingers that I made with veeeeery stretchy twill fabric (like, they are almost jeggings haha I love them). Just some basic black pants that don’t necessarily warrant a whole post. However, here’s a shot of the butt (and my new belt) (and this shirt, too, apparently lol)
2. Yes, that’s a new hair color! After a REALLY long time (for me anyway haha) with the same color, I decided I was ready for a change! I love the new color so much!

Plaid Cotton Flannel Archer

** Note: The fabrics used in this post were provided by Mood Fabrics, in exchange for participation in the Mood Sewing Network.

Completed: The Kalle Shirtdress

18 Sep

I’ve still got a few more summer projects that I haven’t shared yet, so bear with me here! Although, to be fair – we should be well within the throes of summer heat for at least the next month here (yes, it did warm up again!).

Chambray Kalle Dress

I made this dress a couple of months ago, so what you are seeing a dress that has been worn, washed, and loved quite a bit before taking photos! As a result, it’s probably not as crisp and perfect as it would have looked fresh off the sewing machine – but on the flip, it’s definitely something that I’ve had time to move around in and really get to know fit-wise in ways that might not have been so apparent immediately after finishing it. Plus, you can really see how this fabric looks after several trips through the laundry. For ages, I was firmly in the camp of photos before I wore anything I made, but I’ve really softened up on that lately. This makes more of a delay in posting (since nothing is stopping me from putting that shit on RIGHT AWAY), but I think it can also create more of an honest post, in the sense of seeing how something feels after it’s been worn around a bit.

Also, about these photos – sorry about the dark door background? I did take my tripod outside, but I had one neighbor chopping tree limbs in one yard creepin on me, and another literally sitting on her front porch just straight-up staring at me and it made me way too anxious hahaha. I may need to get something to hang over that door when I take photos (this is the door that leads to the back half of my house – where the bedrooms are – from my living room), but at least the light is pretty!

Chambray Kalle Dress

ANYWAY, back to the dress!!!

This is the Kalle Shirtdress, from Closet Case Patterns. I made view C in a size 2, with no alterations. This one is straight out of the envelope! I was so excited when this pattern came out and my finished dress did not disappoint – I wear it as much as I think I can feasibly get away with! The good thing about dressing kind of bland (simple shapes, solid colors, etc) means that people are less likely to realize you’re repeating an outfit. Or maybe they do and they are too polite to say anything, I dunno and I also kind of don’t care.

Chambray Kalle Dress

Chambray Kalle Dress

I made my dress up in a beautiful, lightweight linen from Mood Fabrics (which apparently is sold out now, sorry!). This fabric is great – it’s light and airy, and almost translucent. It is perfect for those hot summer days when you don’t want anything touching your body. The deep indigo color means that it will also transition nicely into fall – it still looks a bit autumnal, but I won’t be sweating to death in it. Plus, it layers really nicely for those chilly mornings and evenings – it looks great with a cardigan and boots.

I washed my linen three times before cutting it, as I wanted to make sure that it wasn’t going to shrink at all post-sewing. I believe this also helps keep the linen from wrinkling so much – Carolyn, was it you who told me this? – and I think that may be accurate since this fabric doesn’t really wrinkle much at all now! I’ve worn this dress on all my travels since finishing and it looks great going from suitcase to hanger. I have found that I do need to lightly press the sleeve bands after washing, because they get slightly bunched (probably because the bands aren’t interfaced), but the rest of the dress is fine without any ironing. In these photos, that’s exactly what I did not do. Un-ironed linen dress, y’all!

I finished the insides of my dress with French seams, and topstitched with navy thread. For interfacing, I used this super lightweight fusible interfacing, and then only sparingly – on the button band, upper collar, and outer collar stand – to keep the fabric supported but still soft. The hem is finished with a bias facing, which is an easy way to work with that exaggerated curve. The navy shirt buttons are from Textile Fabrics – and in the true spirit of Textile Fabrics, they are fancy and imported from Italy and cost over $1 each. Ugh. Who knew it was so hard to find navy shirt buttons? Anyway, they look good!

Chambray Kalle Dress

One thing you should know about this dress – it’s not a short dress, but the upper curve of the hem is quite high. And the arm holes are quite low, which means that the dress moves upwards if you need to raise your arms. See how high the dress goes when I reach the sky? Ok, granted – I rarely need to raise my arms *that* high, but it is something to keep in mind! For comparison’s sake, I wear my shorts very very short and only the bottom rose of my leg tattoo sticks out of the hem. If the dress hiked up any higher, you would literally see my underwear. FYI!

Chambray Kalle Dress

Chambray Kalle Dress

Chambray Kalle Dress

Chambray Kalle Dress

See how sheer the fabric is? It’s not noticeable when I’m wearing the dress, and also, I wear nude undergarments (nothing patterned).

Chambray Kalle Dress

Chambray Kalle Dress

Chambray Kalle Dress

Chambray Kalle Dress

I think that’s about all I have to say about this dress! I really love this pattern and I am excited to try the other versions in different fabrics. I also realize that this is like, my fourth chambray/denim shirtdress – but you know what? I don’t care. At least I’ve figured out what I like, I guess 😛

Chambray Kalle Dress

** Note: The linen fabric used for this dress was provided to me by Mood Fabrics, in exchange for my participation with the Mood Sewing Network. As always, all opinions are my own!

OAL2017: My Completed Kim Dress

31 Jul

Good morning, everyone! It’s the last day of July, which means the deadline to finish + share your OAL garments! Today, I’m going to show y’all my finished dress – because my sweater actually isn’t done yet! LOL for being the worst host ever. Whatever! It’s been a crazy last few months, I’m not even going to apologize. Instead, I am going to celebrate actually FINISHING something! Yay!

OAL2017: Finished Kim Dress

Another thing worth celebrating – actually going outside to take photos!  Another yay! Now that I’m in a house with a semi-private yard (I share the space with my upstairs neighbor, and we are on the corner of a somewhat busy street. Also, there is no privacy fence!), I feel more comfortable going outside to take my photos. The lighting is certainly better, and the background a bit prettier than a white wall 🙂 I still go outside really early so that it limits the amount of people rubbernecking as they drive by, but, you know… baby steps. haha. For someone who doesn’t give a fuck about a lot of things, I DO give a fuck about my neighbors watching me take ~fashun photos~ with a fucking tripod in my backyard hahahaha.

OAL2017: Finished Kim Dress

OAL2017: Finished Kim Dress

OAL2017: Finished Kim Dress

Not too much to say about this one, since I covered all the construction in previous OAL posts. To summarize – the pattern is By Hand London‘s Kim Dress, modified to include tie straps and a facing (no lining). I used polka dot rayon challis from Mood Fabrics – both for the outer and the facing – and added an invisible zipper and pleats at the hem. All seams except the gathered waist are finished with French seams (you can totally French seam a gathered waist seam, FYI, but I just didn’t feel like unnecessarily torturing myself haha).

Here are all the tutorials from the OAL, in case you missed them!

OAL2017: Finished Kim Dress

OAL2017: Finished Kim Dress

This is a great dress for summer – it’s a bit more loose fitting than what I would wear in the past, and the rayon is nice and breathable. So it’s super cool in this humid heat we’re going through right now, and the navy + white polka dots is the perfect print + color combination! Black bra straps aren’t necessarily the best choice for this look, but I’m hoping to make a strapless (currently creeping SO HARD on the Esplanade bra pattern! Soon!) before summer ends! Navy bra straps would also work, which I need to get on making. I have several tops that would benefit from a bra with navy straps!

OAL2017: Finished Kim Dress

OAL2017: Finished Kim Dress

OAL2017: Finished Kim Dress

OAL2017: Finished Kim Dress

OAL2017: Finished Kim Dress

Considering I talked a LOT about this dress during the OAL, there’s not much else to say! One thing I will point out is that this particular project was going on while I was in a big funk earlier this summer – I completely, 100% lost my sewing mojo and pretty much all creative energy (I continued knitting, but mostly because it was something to do with my hands while I watched tv -so that I didn’t feel like a complete lazy loaf). Knowing that I had to finish this dress due to my commitment to the OAL was the only reason why I even started it – and it’s also what eventually reignited my creative energy. I may talk about that more in detail in a future post, but basically – I’m back! I feel good and I’m sewing up a storm again! It’s pretty amazing!

OAL2017: Finished Kim Dress

How is your summer sewing going? Did you participate in the OAL this year? LET ME SEE YOUR PROJECTS please and thank you!

* Note: The fabrics used in this post were provided to me by Mood Fabrics, in exchange for my participation in the Mood Sewing Network.

Completed: Jedediah Pants

7 Jun

Hi everyone! It’s been a wild two weeks over here… I turned 32, my mom got a hip replacement (she’s doing great!), and then I moved to a new house (which means NEW CRAFT ROOM coming soon!)! Lots of stuff going on, which meant less time for pretty much anything except packing and then unpacking. But I’m finally set up and settled in, and ready to get back to a more normal routine. This project is from last month’s Mood Sewing Network post, and I’m only just now getting around to having time to properly write about it – finally!

Thread Theory Jedidiah Pants for Matt

The most mind-boggling part about this post, I reckon, is that I MADE SOMETHING FOR SOMEONE ELSE. Clearly, that’s not me in these pictures! Although it’s my baby brother, so it’s bascially me with a beard haha. That being said, I rarely make anything for ANYONEEEE else, so this is a bit of a departure from my usual sewing. It’s been a long time since I’ve made something for a dude! Or anyone else for that matter haha.

Thread Theory Jedidiah Pants for Matt

My reasoning behind this project is pretty solid. Back around the holidays, I was wearing a reasonably new pair of Ginger jeans that I’d made for myself out of some really fabulous, really really really stretchy olive green twill. I love those pants and I’d still be wearing them right now if it wasn’t so damn hot outside! But I digress. Matt (little brother) noticed them and mentioned that he’s been looking for pants exactly like that for ages and he wished he had a pair, too. Now, Matt actually knows better than to ask me to make anything for him – he’s asked me millions of times and pretty much always gotten shot down – but I know he’s always wanted something handmade by me, his sister. His timing was good this time, though, as I’d just recently had the realization that while I loveeeeee sewing pants, I was kind of reaching a limit with what one person could reasonably wear during a season (I know I counted them, but I’m too scared to remember the exact number in my drawer. I think it was 19 D:). It was a good compromise, and I was in a good mood – so I agreed to make him his own pair.Thread Theory Jedidiah Pants for Matt

Based on the style of pants he wanted, we decided on the Jedediah Pants from Thread Theory. I’ve never sewn with a pattern from this company – it’s primarily menswear, and remember, I don’t sew shit for no one else lolz – but I’ve followed them for ages and was excited to give them a spin! Rather than go by the sizing on the envelope, Matt supplied me with a pair of well-loved pants that had his perfect fit, and I used those measurements to choose his size. This ended up being a 32, although I think a 30 would have been better (but he is pleased with the fit, so whatevs! And don’t even get me started on the brain-bending behind making loose-fitting pants out of stretchy fabric. I don’t understand it, either!). I did not make any adjustments to the size or length – this is straight out of the envelope. I know they look short, but they are actually too long – Matt likes to wear weird socks and roll his pants to show them off, and we purposefully kept them long in case he ever wants to wear them to a more normal length. They can easily be re-hemmed!

Thread Theory Jedidiah Pants for Matt

Thread Theory Jedidiah Pants for Matt

Thread Theory Jedidiah Pants for Matt

The fabric is from Mood Fabrics, which I picked up when I was in NYC in March. I found the original olive fabric that I used for my pants there, and I was hoping there would still be some left when I came back. Unfortunately, that was not the case – but this one is fairly similar. It’s the exact same color (I actually wore my pants to the store to try to fabric-match, ha!) with about the same amount of stretch, but the fabric is quite a bit thicker. It’s almost spongey and there’s definitely a good amount of poly in it, as it doesn’t really press too well. Not my favorite fabric to work with, but doable!

As far as sewing the pattern, I only about half followed the instructions. I’ve made so many pairs of pants, I have a preferred order of steps and way of doing things. For example, I sewed the inseam before the side seams – this was for two reasons. One, it allowed me to flat-fell the inseam (Matt skateboards and he wears his clothes HARD, so they need to be as durable as possible), and two, I was able to baste the side seams and have him over for a quick fit before I finished everything and added the waistband. I also went my own way with the waistband insertion; I didn’t do that weird rolled thing that the instructions tell you to do (that shit makes absolutely no sense to me and if you’re confused, I can’t explain it. It’s witchcraft and I hate it haha), but instead just applied the waistband the same way you do for the Ginger jeans. I did opt to finish the facing edge with a length of bias, instead of turning it under, because it looks super cool on the inside now and that makes me happy.

Working with the fabric wasn’t terribly difficult, but like I mentioned, it didn’t really want to respond to pressing. I have found that with poly-rich fabrics – such as this one – it helps to use high heat and lots of steam (I have a shoe on my iron that protects my fabric – but if you don’t have a shoe, you’ll want to use a presscloth, else you gonna melt and/or scorch that shit), and then hold the pressed seam (or seam allowances) in place until they cool completely. One way to do this is with a clapper – or, if you hate waiting, you can do what I do and just pin them down. Easy and fast!

Thread Theory Jedidiah Pants for Matt

Thread Theory Jedidiah Pants for Matt

My favorite thing about making pants is all the fun ways you can customize them with topstitching – thread colors, designs, all that! Of course, Matt is a boring piece of shit and wanted NONE of that on his pants (jk ilu Matt)(but still, boring), boo! So we stuck with dark olive green thread – I used a single spool of all-purpose poly, and a triple stitch to get a nice thick topstitching line – and brown thread for the bartacks. The metal zipper and button are from the Garment District, from Sil Thread and Pacific Trimming, respectively.

Thread Theory Jedidiah Pants for Matt

I *was* able to have some fun with the inside! I used a plaid cotton that was in my stash (I think I got it from my Mamaw’s stash, actually haha) to line the pockets and add that bias trim around the edge of the waistband facing. It’s the same cotton that I used for the pocket bags of my olive pants, actually. Matt was actually pretty excited about how cool the insides look, which pleases me!

Because this is my little brother we are talking about, it was nearly impossible to have a normal photoshoot for these poor pants…

Thread Theory Jedidiah Pants for Matt

“Matt, smile or something.”

Thread Theory Jedidiah Pants for Matt

“Matt, turn around so I can get a photo of your butt.”

Thread Theory Jedidiah Pants for Matt

Anyway, Matt is thrilled with his new pants (in fact, the actual word he used was “stoked) and I’m happy that he’s happy! I hope he wears them until they fall apart – whether or not I make him a replacement pair, that is TBD. I think I’m all selfless-sewing’d out for the time being, ha!

Oh, and ladies, in case you were wondering… Matt is single 😛

**Note: The main fabric used in this project was supplied to me by Mood Fabrics, in exchange for my monthly contribution to the Mood Sewing Network!