
Hey-o! I’m not quite finished with my Bombshell yet (only one video left! ::sob::), but I thought we could discuss some of the inner workings that are going on inside this monster of a dress.

I have the zipper & lining inserted & I’m pleased to report that everything still fits exactly as it should! Yay! I don’t know about y’all, but when I’m fiddling with a dress this snug, I end up trying it on a LOT. Lots of pinning & basting & walking around my sewing room in my underwear. I’m sure my neighbors just love me, ha.
Here is my lining – completely boned (lol)
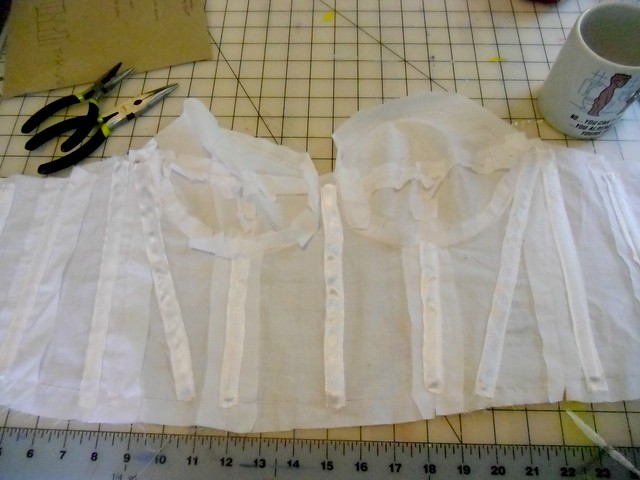
The lining is 100% cotton batiste (and it is quite sheer, as you can see all my little red markings, oh well) and the boning casing is double-sided satin ribbon that I sewed into little tubes.
Putting the boning (lol) in was a BITCH. OH MY GOD I HATE CUTTING SPIRAL STEEL BONING. There are 11 pieces inserted here, all different lengths, all tipped with their little metal tips… it took me an entire episode of LOST to cut & tip those little suckers. Putting on the tip was easy – Karen has a good picture showing exactly what this entails – but the cutting was so so awful. I was using Landon’s wire cutters, and when I complained that they weren’t cutting the boning (lol), he gave me the side-eye until I made him try it himself:
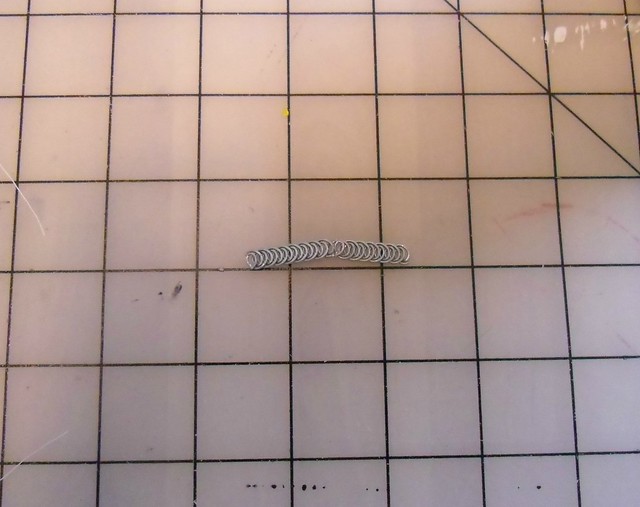
This is how far he got.
Anyway, I got them all cut (obviously). And I’ve heard lots of people say to cut the side spirals & it will just pop apart – well, good luck with that, I basically just manhandled mine until they gave up & fell apart in sheer agony lol.
Everything else has been smooth sailing, though!
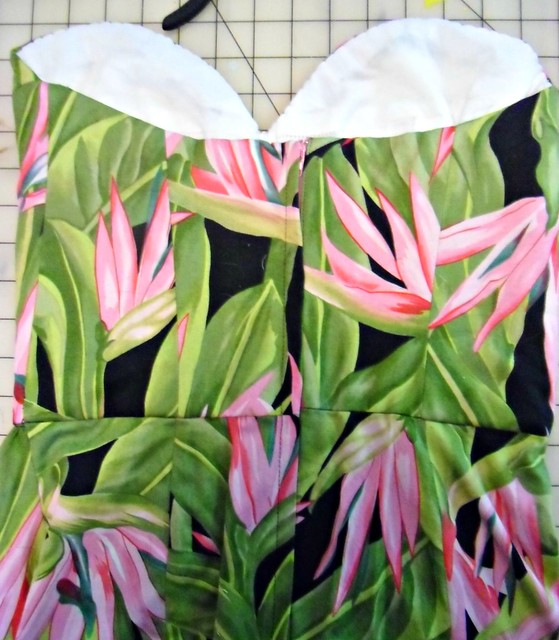
The lapped zipper turned out gorgeous.
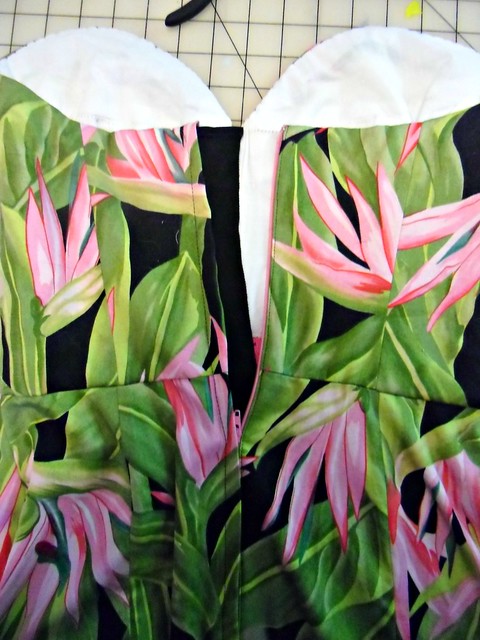
There is a black petersham zipper guard (1.5″ wide, if yr curious!)
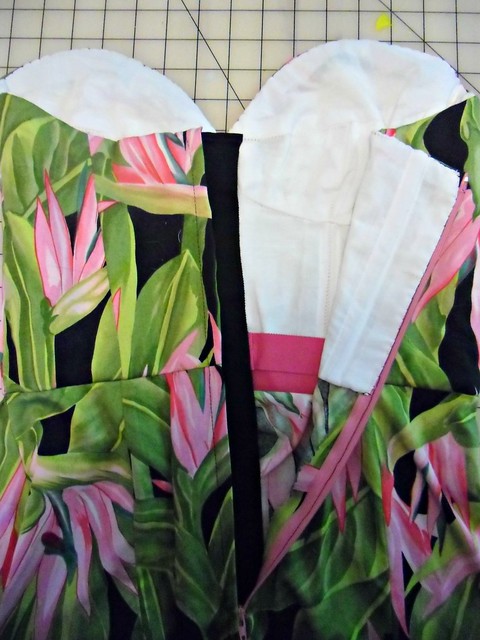
Oh, right, the zipper is hot pink!
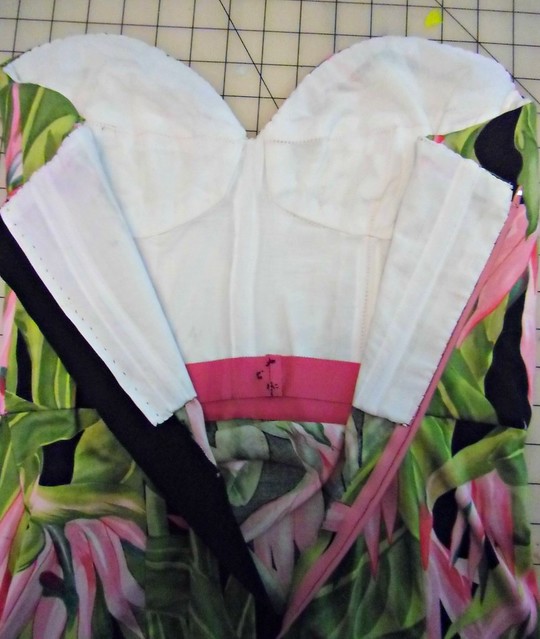
As is the petersham waist stay 🙂
I just love fun/colorful surprises in my clothing 🙂
I still need to have this dress finished by Saturday afternoon… all that’s left is the vent, hem, and halter strap. The dress fits fine without the strap, but I really don’t like how I look in strapless stuff. Right now I’m debating how wide to make the strap – WWYD?
As a side note, Me-Made-May is going splendidly (you know, the whole 2 days it’s been May), and I have made an executive decision to not post daily outfit photos on this blog. Instead, I’m going to compile them weekly & dump them all that way. I am posting daily in the Flickr Pool if you feel like lurking everyone’s progress, though!
Also, this has nothing to do with the Bombshell dress, but look at the chicken I painted last night!
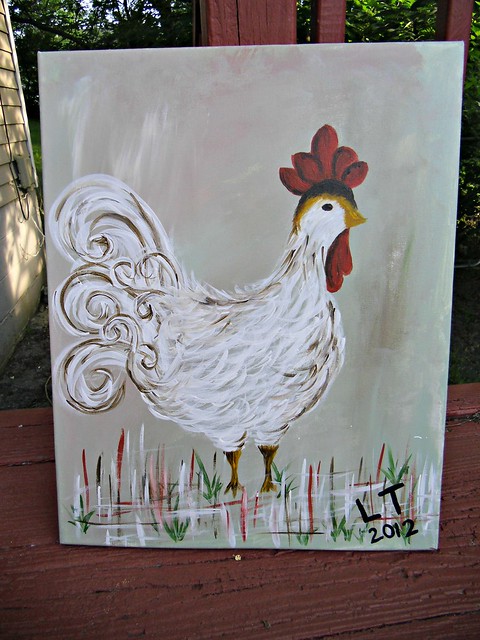
I went to a painting class with my friend Carla. So much fun! The chicken’s name is Bud, by the way 😀 This will go nicely with the poppies I painted with my mom. Yessss.


Can you hear the drip, drip as I salivate over this make? I just can’t wait to see it on! I love your fabric choice and the contrast ribbon and zip are inspired. I just know you are going to look all sorts of lovely in this dress. It will be worth the hard work. I made my straps pretty wide, simply because I didn’t want thin strips of fabric cutting into the flesh of my shoulders. But you’re much slimmer than me – you could get away with anything.
The dress is looking amazing!!! I’m so excited to see your dress innards, because the time is coming fast when it’s gonna be my turn! Having studied corsetry, I’m well prepared for the trials and tribulations of cutting boning – I may invest in some bolt cutters for that purpose LOL.
I love the hot pink waist stay, and zipper – nice touch! 🙂 Personal preference – I like a wider strap for two reasons: support and visual balance – for those of us who are well endowed LOL 🙂 I’ll probably do mine about 1.5″ finished width.
I LOOOVE chickens!! Bud is totally awesome!!! 😀 Have you decided where he’s gonna live yet? 🙂
Yeah, I was thinking a wider strap just for the visual balance. Good to know I’m not alone in this thought train haha.
I don’t know where to put Bud! My house is painted in fairly bright colors, so he doesn’t match. Not that matching has ever put me off before hahaha.
If he doesn’t match… all the better for him to stand out, loud and proud! 😀
I was thinking a wider strap, too– 2″ or so? That would give it such a sweet ’50’s look in keeping with the silhouette. This is going to look AMAZING!
I love watching your progress on the Bombshell. I ordered the craftsy course and it is next on my “to sew” list. I’m totally intimidated by the whole bodice fitting thing and have never made a muslin before. I just learned to sew this year in an 8 week course. I guess you could say I’m maybe an advanced beginner? I wanted to take my skills to the next level and I’m hoping this will do it. I hope I don’t die of frustration. I don’t have a dress form and I have no idea how I’m going to do the fitting!
I think you can do it! My advice is to not set a deadline until AFTER you fit the muslin, though – you don’t want to rush it 🙂 It can be frustrating at times, but it’s not necessarily hard, per se. And you can fit on yourself! It’s not the easiest way but it’s totally doable 🙂
FYI, I DID end up sewing this. Thanks for the inspiration and support! Yes, there were definitely times of frustration (2 separate muslins…) But I learned SO much. I did end up getting an adjustable dress form for $80 (brand new singer!!!!) so that was helpful as I have a tendency to stab myself otherwise. I did the linda skirt and all I have left is the strap and the hem. I’m so excited. It’s by FAR the most ornate thing I’ve made, and to have it work out was amazing.
You totally inspired me (as you do often. Seriously, the amount of pics of dresses you made on my pinterest board is crazy – https://pinterest.com/smartycoulottes/) So yay! Thanks again. I hope you rock that dress all summer!
Oh, this comment makes me so happy! I’m glad you were able to tackle the Bombshell; it sounds totally gorgeous! I would love to see it if you have pictures! 🙂
Your dress looks sooooo good! Like, it’s perfect. I can’t wait to see it finished!
Also… that’s a real nice chicken you have there. lolz. For real though! I’d totally hang that in my kitchen!
I love that chicken! It’s nice getting to see what other art forms that sewing bloggers are into besides sewing. I love the contrast of the pink waist stay and zipper…it goes nicely with your print. Here’s to hoping you finish in time. Also, do you ever have trouble getting the top of the lapper zipper to stay closed?
I haven’t tested it with a proper wear out (other than preening in front of the mirror in my sewing room haha!), but the lapped fold+zipper guard seem to do a good enough job of keeping everything around the zipper intact. We’ll see!
I love all the beautiful little details – I can’t wait to see the final outfit! Love your chicken too 🙂
I love Bud–you need to paint more chickens. 😉 lol.
The dress is looking gorgeous and I love the inside details with the pop of color! Also: about the strap, you know you can always cut a wide-ish strap and pleat it at the attachment points so it graduates in width (which I think 9 times out of 10 is more flattering. But that’s just my opinion… ;). Just an idea!
Can’t wait to see the finished pics of you modeling it!
OHHHH I like that idea! I was trying to think of a way to include some sort of gathering on the strap, to mimic the gathering on the faux sarong. I love the idea of pleating it! Eee I can’t wait to go home & play around with the possibilities now 😀
The last video doesn’t take long at all. You’ll be finished before you know it! And, I’m inspired by how well your fitting on your dress form went. I am happy with the way my bombshell dress fits, but if (hopefully, when) I ever make another, I’m going to fit it with a padded out dress form, like you did. Good luck finishing your dress!
Ooh that fabric is beautiful! Love the secret pink bits inside!
I saw someone recently with a tattoo of the bird of paradise flower winding down their arm – it was really beautiful – and would look amazing with your dress!
Your dress is coming along quite well! Kudos to you for sticking through the boning process! It can count as your weight training for the month lol. And the print of the dress is fabulous! I’m really loving tropical prints that under any other circumstance, would be considered bad tourist wear.
Looking awesome. I think the print plays in perfectly with the style too 🙂 Also… boning (lol)
Bud is too cool! I have a soft spot for chickens, and your painting is just great.
LOVE this dress – it’s going to be amazing!!
I saw a tutorial for how to cut boning the easy way. Not sure where it is but it basically says you ONLY need to cut the two little steel ‘rings’ at the edges – one snip on one side and on the other…
Found it too!
http://marmaladekiss.blogspot.com.au/2012/04/spiral-steel-boning-for-dressmaking-and.html
I tried that, but isolating the side rings is a lot harder than one would think. I ended up butchering the poor thing lol.
But the picture showing how to put on the tips is spot on – that is the ONLY way to get them to stay put!
I love everything you make but this looks like it is going to top the scale 🙂
I have so much respect for you, I think I would have given up by now…
What a beaut! But I didn’t expect anything less doll 🙂 Your chick art is also fantastico and your level of creativity across all the crafts as always is very inspiring xxx
I looove your chicken! His curly tailfeathers look awesome.
I love seeing all the inner details of your bombshell, it shows the course is really worth it to have it all done properly.
I want that chicken on my wall too! It’s frikken’ awesome. I love chicken art. If you ever want to sell it or do a trade of some sort or if you make another one, let me know!
Aw, I would totally do a swap with you but I actually don’t have any art supplies to make something with (both of my paintings are courtesy of one of those painting classes where they supply everything & you bring the wine haha). I need to get a set of paints!
Hey Lauren! Where did you end up buying your spiral steel boning and petersham for the dress? I’m starting to compile all of my supplies and was wondering who you went with. I was thinking A Fashionable Stitch for the petersham…
I bought my spiral steel boning from CheringtonMetalcraft on Etsy; they had the best prices as far as product+shipping. I bought a continuous roll, but they will also cut to whatever length you prefer 🙂 I actually bought my petersham at my local fabric store, but the stuff at A Fashionable Stitch is pretty good if you don’t have local options!