Tag Archives: Mood Fabrics

Completed: Plaid Flannel Archer (+ Draping winner!)

10 Oct

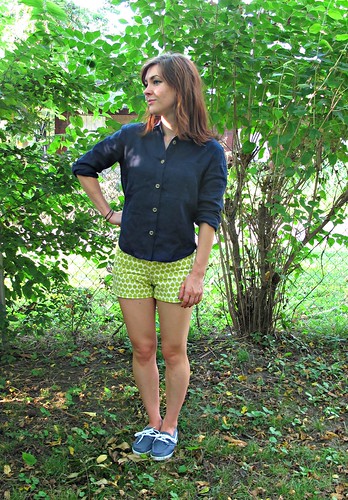
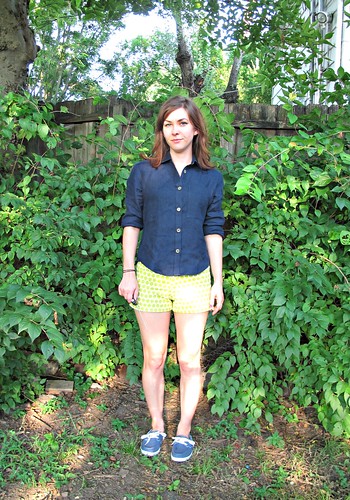
Finally, a successful Archer button-up – in my dream plaid flannel, no less (seriously, I keep eyeballing all the other colors… do I take the plunge and buy them all?? Because I want to!)

Lumberjack Archer; Ponte Leggings

I am pretty proud of this shirt, so let’s be honest – there are lots of pictures in this post.

Lumberjack Archer; Ponte Leggings

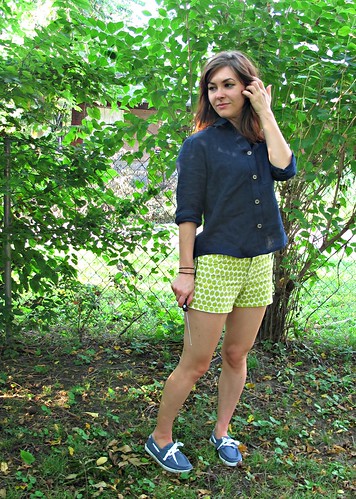
Although the more I look at these pictures, the more they appear to just be the same picture at a slightly different angle or pose. Oops 😦

Lumberjack Archer; Ponte Leggings

ALSO, please forgive my awful editing and how the color changes in every picture. I bought a new photo editing software with my new laptop (Corel Paintshop Pro, if you’re curious!) and I’m still trying to get used to it 🙂 BUT HEY, I can edit out zits and stuff now, so that’s pretty freaking awesome!

Lumberjack Archer; Ponte Leggings

Anyway, ok, let’s talk about this Archer I made! Using my failed linen Archer as a wearable muslin, I shortened the sleeves by about 1″ and left the body length intact (you’ll recall that the linen one I ended up cutting too short. Or maybe you don’t recall, see if I care). I think my sleeves are still a little long, but I also anticipate this shrinking more in the dryer (I only washed the flannel once before cutting, sorry, I was just excited!) so hopefully they won’t end up too short!

Lumberjack Archer; Ponte Leggings

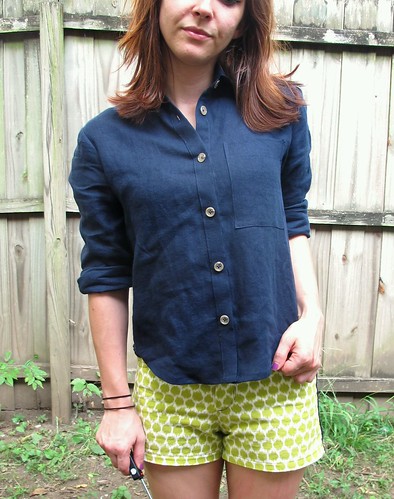
I also made the pocket smaller! No rhyme or reason to how I did it, I just eyeballed until it looked “right.”

Lumberjack Archer; Ponte Leggings

Making this shirt was super fun, from cutting (what can I say… I love matching up plaids haha) all the way through sewing. I forgot how much I love sewing really precise things like button-down shirts. Makes me want to sew another shirt for Landon, maybe. What’s funny is I actually caught myself starting to rush through the construction of this – not because I was on a deadline, but because it’s starting to get cold and I wanted to wear this shit nooooooow – and I decided to force myself to slow down by sewing flat-felled seams instead of just serging the seam allowances off. Even the arms are flat-felled. I’m so glad I did, because the end result turned out pretty fabulous if I do say so myself.

Lumberjack Archer; Ponte Leggings

I cut the back yoke, pocket, and front button band on the bias. Everything else is straight and painstakingly matched. The only boo-boo I made was that I put the button band on the wrong side – oops! I originally chose the opposite side of the flannel as the right side, then changed my mind when I started sewing. Since the front pieces are not mirrored, this meant I had to compromise my button band side. Oh well, I am just pretending that it’s actually a men’s shirt, haha!

Lumberjack Archer; Ponte Leggings

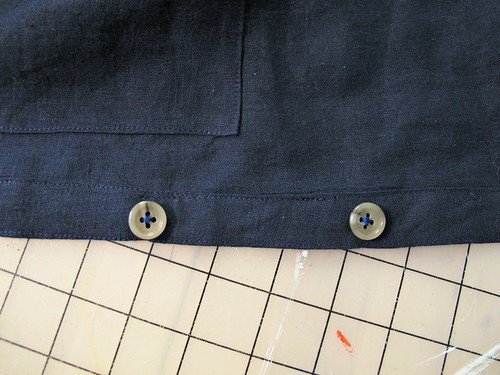
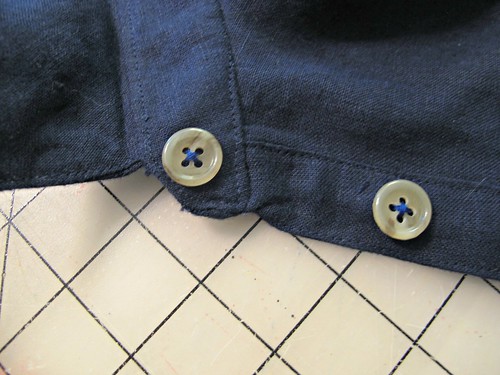
At any rate, the side seams match up beautifully. Look at that shit!

Lumberjack Archer; Ponte Leggings

I changed out the buttons for pearl snaps, so I can hulk my way out of this shirt when the urge strikes. Funny thing about those pearl snaps – they actually started out white, and while it looked ooookay, it also just looked like I bought the wrong color pearl snap. I can’t get black snaps locally (and DAMMIT that I SAW them in Chicago and was like “nah I don’t need that” lol oh Lauren, hindsight is 20/20 or some shit) and I couldn’t wait sooo… I painted these with black nail polish. Black glitter nail polish, to be precise. Hey, it works!

Lumberjack Archer; Ponte Leggings

Lumberjack Archer; Ponte Leggings

I sewed the size 0, as I did last time, except the side seams are sewn at 5/8″ instead of the pattern’s 1/2″. This makes for a slightly (very slightly) smaller fit.

Lumberjack Archer; Ponte Leggings

The collar stand turned out fucking perfect, which I’m VERY proud of! I followed Andrea’s tutorial and I had no unpicking with that method. I’m sold, and Andrea, I owe ya a beer for that. Thanks bb♥

Lumberjack Archer; Ponte Leggings

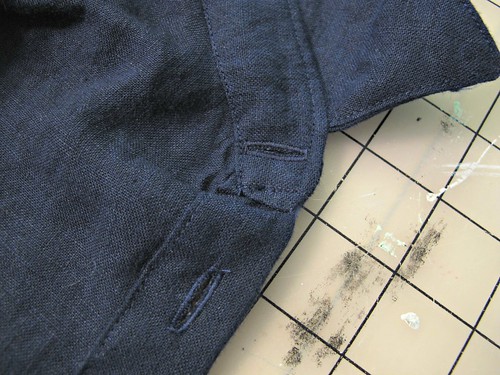
I also changed out the sleeve plackets and used the ones from the Negroni pattern. I just think these look so much better with the flannel check, plus they are more conductive for rolling up sleeves. I also find this type of placket easier to sew. Man, I love sewing plackets.

Lumberjack Archer; Ponte Leggings

Oh, I also made my leggings! You can’t really see any detail because they are black, wah, but I did make them! I used the Ooh La Leggings pattern and a black ponte knit from Mood Fabrics. My take on ponte leggings – AWESOME. So so awesome!! I actually wore these when I traveled to/from Chicago (so, 18+ hours total) and they were SO comfortable – and they actually look like pants! Guys, I am so sold on these.

I don’t have much else to say, so have some pictures –

Lumberjack Archer; Ponte Leggings

Glitter buttons, yeah? 🙂

Lumberjack Archer; Ponte Leggings

Collar stand pride~

Lumberjack Archer; Ponte Leggings

Lumberjack Archer; Ponte Leggings

Placketz

Lumberjack Archer; Ponte Leggings

Flat-felled seam, curved hem

Lumberjack Archer; Ponte Leggings

Proof that these are actually leggings and not some black blob.

Lumberjack Archer; Ponte Leggings

This outfit has basically become my fall uniform. Seriously! The flannel is so warm and cozy – and easy to throw on if I’m chilly (which is always. Yes, I have worn this shirt every day since I finished it, don’t judge me). I am really happy with how both turned out, and definitely plan on making more. Question – is it really dorky to make me & Landon matching plaid flannel shirts? Because I’m totally about to go there.

One last thing – We have a winner for the Draping book! Random number generator, who do you choose?

random

yaywinner

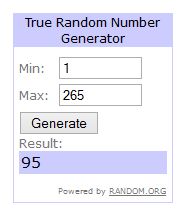
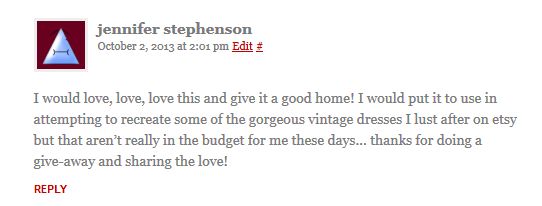
Congratulations, Jennifer Stephenson! I can’t wait to see what vintage recreations you end up making!

Completed: Polka Dot Peter and The Wolf Pants

26 Sep

Remember when I was trying to hunt down the perfect polka dot fabric for these Peter & The Wolf pants? And then I couldn’t find it and I was sad but I made them anyway? Well! Look what I found!

Peter & The Wolf - Polka Dots

My dream stretch polka dots pants fabric – a polyester wool suiting with flocked polka dots (right?! right?!)!

Peter & The Wolf - Polka Dots

I got a fistful of swatches from Mood about a month ago, this swatch being one of them. I immediately zeroed in on those flocked polka dots and called the store to get a couple yards sent to me. I should also mention this was like day #2 post-surgery, and I was laying on the couch totally hopped up on painkillers and I’m fairly certain that the dude on the other end of the line thought I was a crazypants. Whatever! Joke’s on him, now I HAVE the crazypants!

Peter & The Wolf - Polka Dots

Then I got my fabric and I rolled around in it for a couple of weeks because that is what you do when you are in love.

Peter & The Wolf - Polka Dots

Again, I used the Peter & The Wolf pants from Papercut Patterns, with just a couple modifications from the last time I made them. I already had the pattern pieces modified to reflect the changes I made – sizing, crotch length, crotch curve, all that good stuff – but I went ahead and made a quickie muslin just to be SURE before cutting into this precious stuff. I added another 1/2″ of length to the legs and swapped out the waistband for a curved waistband – specifically, I used the waistband from my Clovers. I definitely prefer the way this fits over the straight band – and it’s a good height, too. It just barely covers my bellybutton, which I like.

Peter & The Wolf - Polka Dots

I lined my pockets with a little scrap of Bemberg rayon lining and it’s kind of amazing. I feel so posh whenever I stick my hands in my pockets now, ha!

Peter & The Wolf - Polka Dots

Also, I’m very happy to report that the grainlines are totally straight on these pants (since I didn’t have to do emergency pants-weightloss surgery while sewing them), and as a result the hem scallops are straight as well. Yay!

Peter & The Wolf - Polka Dots

The only part about all this that I was NOT digging was when it came time to actually press my seams. Lord, that polyester refused to do anything that involved heat. I solved most of the issue by doing a lot of top stitching – front and back leg center seams, the yokes, the pockets, the waistband. Basically everything I could get my needle into.

Peter & The Wolf - Polka Dots

I think it worked out quite well in the end, though! And yay, all my seams match up!

Peter & The Wolf - Polka Dots

Next time I make these, I will stabilize the zipper opening. It’s just a little too wavy – which, I mean, I could fix, but I also got those seams matched up fucking PERFECT and I’ll be dammed if I’m ripping that shit out again. Nope.

Peter & The Wolf - Polka Dots

To get the bottom scallops to have a nice sharp edge (remember, the polyester wanted nothing to do with that iron), I had to improvise and figure things out as I went along. I did include the facing, which I under stitched and then top stitched (I find under stitching is VERY helpful when you are sewing something that is difficult to press, as it forces facings to roll to the inside). To press the edges, I used my sleeve board and a silk organza press cloth and steamed the shit out of each section. After it got nice and hot, I used my clapper to hold down the fabric until it was completely cool. This is probably the closest I’ll get to a good press on this fabric, and hey – no shine! Woohoo!

Peter & The Wolf - Polka Dots

God, I love these pants.

Peter & The Wolf - Polka Dots

I also really love these labels. They speak the truth, at least as far as these pants are concerned.

Peter & The Wolf - Polka Dots

Sorry ’bout the creeper hand.

Peter & The Wolf - Polka Dots

Peter & The Wolf - Polka Dots

Peter & The Wolf - Polka Dots

I added arrowhead tacks to the bottom pocket opening, because why not? I used embroidery floss and followed this tutorial on the Coletterie (I also see that I commented about a western shirt I was going to make. Obviously that never happened, but it SHOULD. Ooh!)

Peter & The Wolf - Polka Dots

Really thinking about making a wool version for the cold weather – maybe lengthen the legs to full-length, omit the pocket detailing and scallops? What do you think?

(psst! If you were wondering – my wrap top is handmade, and my shoes are from Clark’s ;))

Completed: An Emerald Green Wool Jersey Lady Skater

13 Sep

Before I start, two things:

1. I know. Another Lady Skater. Y’all are probably getting sick of looking at this, but uhhh sorry not sorry! Honestly, I wanted to put both of these dresses in the same post, but I hadn’t managed to get pictures of the green one and I wanted to post the floral one RIGHT THAT SECOND and, well, you know how it goes.

2. Much more important, but thank you thank you thank you for all of your lovely comments on my last post! Again, I wasn’t posting that bit to fish for compliments, or anything like that… it has just been on my mind for a long time. I wholeheartedly believe that sewing + the blogging community (not to mention taking pictures of oneself and posting them on the internet, eep) is so wonderful for helping us maintain a healthy body image, and I would be lying if I said the outpouring of support and consolation stories didn’t make me feel a trillion times better about my insecurities and why they shouldn’t even matter in the first place. Y’all are just lovely, and I love you 🙂

Now, back to the matter at hand…

Emerald Wool Jersey Lady Skater

I made another Lady Skater! This one comes with bonus surprise Duck Lips!

Emerald Wool Jersey Lady Skater

I know I don’t have to justify myself when it comes to things I sew, but just in case you were looking for justification – I made this twice in a row because it’s an awesome pattern and I wanted to try out every sleeve version. I have made short sleeves, I have made 3/4 sleeves, and today we have long sleeves!

Emerald Wool Jersey Lady Skater

I really love seeing how a pattern can look totally different depending on the fabric that is used to make it up, and this one is no exception. My last Lady Skater was a thin, drapey, VERY stretchy cotton knit. For this version, I used wool jersey that is fairly stable, and look at what a difference it makes!

Emerald Wool Jersey Lady Skater

My green wool jersey is from – where else? – Mood Fabrics. Having tried Merino Wool and now Wool Jersey, I am now going to give you my opinion on them and how they are different.
Merino Wool – due to the chemicals in the wool, this stuff can be washed and dried as normal in your machine without felting. It also tends to be less scratchy, in my experience. Elasticity and stretch recovery are excellent. Fabric can be a bit sheer, at least based on the pieces I’ve personally handled.
Wool Jersey – ok, I’m going to be real gross and weird here and admit that I didn’t pre-wash my Wool Jersey. I plan on washing it the same way I wash my sweaters – which is a lukewarm sink bath with no agitation, and laying flat to dry. The stretch recovery on this is good, however, it doesn’t have as much elasticity (see the difference in fit vs my previous dress? Wool Jersey is a bit more stable than cotton jersey). It is also pretty scratchy! It’s not unbearably scratchy by any means, but it does feel like I’m wearing a wool sweater… which, I kind of am! It is much more opaque than the Merino. I am wearing neon undies under this dress and you can’t even tell, ha.

Emerald Wool Jersey Lady Skater

It is also REALLY warm. Which will be good, when it eventually gets cold here 😛

Emerald Wool Jersey Lady Skater

Emerald Wool Jersey Lady Skater

I kind of feel like a Girl Scout in this dress, what’s with the bright green and slightly scratchy fabric. I know the green looks sort of muted in these pictures, but trust me and not my inexperience with my camera. This shit is BRIGHT FUCKING KELLY GREEN. It is amazing.

Emerald Wool Jersey Lady Skater

See what I mean about the fabric not being as elastic? You can totally see bra straps and back fat here. Which doesn’t bother me, personally, but if you don’t like looking like you were poured into your clothing that morning, you maaaay consider sizing up if you choose to make this pattern with a more stable knit 🙂

Emerald Wool Jersey Lady Skater

I should also point out that the stability of this fabric makes it really easy to sew. Just like Merino Wool – it doesn’t curl up, doesn’t slide around (actually, it’s slightly lofty so the pieces kind of stick together and that’s MAGICAL), stitches and presses like a dream. I really enjoyed the sound my scissors made when they cut into it, strangely enough. It’s the little things.

Emerald Wool Jersey Lady Skater

Ok, so who’s jumping on the Wool Jersey bandwagon with me? ALL ABOARD, LET’S GOOOO!!

Completed: A Transitional Lady Skater

11 Sep

I know, I know. Fall is just around the corner – the temperatures are dropping, the leaves are changing, everyone is flipping their shit over pumpkin spice everything. September is such a magical month… unless you live in Tennessee. It was 95* yesterday and the humidity was so thick, going outside felt like walking through a pot of soup. Gross.

If I sound butthurt, it’s because I totally am. I love fall and I love September, but honestly – it ain’t fall weather here. And as much as I want to start busting out the wool crepes and snuggly flannels, I know in my heart of hearts that I likely won’t have a chance to wear them until closer to Halloween… possibly even later. I have memories of wearing shorts on Thanksgiving. It happens.

So, what do you do when you want to change for the season but the season won’t change for you?

Fall Floral Lady Skater

Concentrate on seasonal colors and prints, not fabric weights.

Fall Floral Lady Skater

I know, this is basically the biggest “No Shit, Sherlock” statement I’ve probably ever made, but it has seriously taken me years to come to terms with this. I do it in the spring, too – try to start pulling out the lightweight voile dresses while there’s still slush on the ground, hate myself, rinse repeat. Something about the seasonal changes makes me want to overhaul every single color in my wardrobe, I dunno.

Fall Floral Lady Skater

Since I live in an area where the temperature tends to hover around “Hell,” except for a couple of months out of the year, I need more layering/lightweight/transitional pieces than I do big cozy wool garments (don’t get me wrong – my wool is ready and waiting for me the second I think the temps are gonna start dropping. Just need more patience, ahhh!). You know, so I can wear them now instead of sticking them back in the closet for a few weeks 🙂 Bonus – once we do get cool weather, this will layer up nicely with tights, boots, and a scarf. Win!

Fall Floral Lady Skater

This fabulous cotton jersey is from Mood Fabrics (they have another colorway if the mustard is *too* retro for ya, but I like it! Mustard for life!). It’s a little bit on the sheer side – like, not indecently so, but enough where I gotta watch the color of my undies when I wear this.

I was pleasantly surprised with the stretch recovery for this fabric, by the way. Cotton tends to stretch and sag over the course of the day, making everything baggy and off-the-shoulder, but this stood up pretty well after a full day of wear. I think I can get an extra day out of it before needing to throw it in the dryer for a little shrinkage. Win!

Fall Floral Lady Skater

I used the Lady Skater pattern to make this dress. I have made this dress before, so this is basically round 2 (there’s also a round 3, you just wait. It’s finished; I just haven’t taken photos yet :3). The only change I made was to stretch the neckband ribbing a little tighter, to keep it from getting floppy, which meant for a shorter neckband piece (since the band is applied flat, it’s REALLY easy to do this – you just stretch, sew, and cut off the excess. Yay, no maths!).

Fall Floral Lady Skater

I will urge you to pay close attention to the elastic at the waist seam, and make sure not to skip it when using a cotton knit! I think a good part of the reason why this stuff didn’t stretch out all haywire by the end of the day was because the waist seam is nice and snug and fully stabilized.

Fall Floral Lady Skater

Fall Floral Lady Skater

Fall Floral Lady Skater

Next, I want to make this pattern in pumpkin colored knit. Wouldn’t that be DELICIOUS?

Fall Floral Lady Skater

I also want to give a shout-out to my hair in these pictures. I think this might be the first time I’ve ever posted pictures of myself on this blog with my hair up? There’s a reason for that – I’m actually really really self-conscious about my ears. I hate how much they stick out and I rarely take any pictures with my hair up. Which is funny, because whenever I see people with a similar feature, I think it’s super cute… just not on me. I’ve never liked it and it’s been something I’ve always wanted to change.

I’m not saying this to fish for compliments, so please don’t take it that way. I guess I’m just realizing now how stupid it is to spend so much energy hating something about myself that I CAN’T change (ok, yes, I know otoplasty is a thing… but it’s not a realistic option for me). It’s part of me, what makes me unique, and is just as much a family trait as the shape of my nose or the color of my eyes. There is no point in wishing change on something that won’t change, so my next move is to learn how to love and embrace it. Starting with posting pictures of myself with my hair up. I know, my head is turned to the side in all these pictures, but… baby steps, y’all.

Fall Floral Lady Skater

Sorry to get all deep on such a lighthearted post, just been thinkin! Anyone else struggle with this? What has helped you?

Completed: My First Archer, A Linen Disaster

5 Sep

Remember that Monet of an Archer I posted with my lime green Maritime shorts the other day (which turned out totally awesome, and yes, that’s me tooting my own horn, toot toot)? Remember when I said I was too traumatized to talk about it any further? Well, I think I feel like dishing today. Let’s dish!

Archer Shirt
(I took these pictures at the same time as my last batch – hence the exact same outfit – but I moved to a different side of the yard so they’d look a little different. That’s how much I love y’all. Also, this is pre-skeeter attack, fyi).

Ok! This is the Archer from Grainline Studio. I cut the smallest size and shortened the hem (too much, it looks). I think my relationship with this pattern has definitely gotten off to a rocky start, but I’m willing to give her a second chance. Funny, I thought this style looked horrible on me when I checked myself out in the mirror, but it’s not so bad in pictures!

Archer Shirt

I made this using some scrumptious Ralph Lauren linen from Mood Fabrics – doesn’t the idea of a floaty linen button-up in September sound so luxe? Nice and airy for the AM, but you can roll the sleeves down with the sun sets. Also, I just really love navy and I needed a shirt to go with my new aforementioned shorts, so I was feeling pretty confident about myself. So confident, I sliced directly into the linen without the benefit of a muslin or even reading the directions carefully. Oops.

Archer Shirt

Now, don’t get me wrong here – I don’t think a shirt like this necessarily requires a muslin, so to speak. It’s fairly loose-fitting and very forgiving in that sense. However, I do think a shirt like this requires the correct length when it comes to the body and the sleeves, and I think it is kind of a bad idea to dive into something so precise as shirtmaking without giving yourself a few test runs before you get into the good stuff. These were my mistakes. Had I made a little mock-up, I might have had the chance to try out that collar deal before I done goofed it up, ripped it out, realized that the linen was fraying at an alarming rate and oh god what have I done.

Also, the sleeves are way too long and the body is a bit on the short side (the latter isn’t the pattern’s fault, I just got a little too slash-happy with the scissors).

Archer Shirt

With all that being said, I actually really enjoyed sewing this pattern – it’s very precise, with all the top-stitching and perfect pressing, the kind of thing that I find SO relaxing to sew. Rather than get bummed that I made a shirt that isn’t up to my personal sewing standards, I consider this a muslin and I can’t wait to start my ~real~ version. The instructions are clear, albeit brief (if you get stuck, there is an entire sew-along with plenty of words and pictures), and every piece fits together nicely.

I know. The shirt looks fine in the pictures.

Which is why I took close-ups of the bad parts. You know you wanna see!

Archer Shirt

My first fuck-up was the top stitching on the button band. True, it’s not tooooo bad, but it’s definitely crooked. I’m not even sure how I managed to get that seam so crooked, but a crooked seam means crooked top stitching which means sad button band.

If you zoom in, you can even see an errant line of stitching running straight into a button. What is this I don’t even.

Then I tried to attach the collar stand.

Archer Shirt

And this is what happened. The fuck is that bump sticking out there? What the hell is going on?

Archer Shirt

And here is the crowning glory, which I obviously saved for last. This is what happens when you sew the collar stand wrong, then try to unpick it, then realize that the fabric is unraveling and now you have no seam allowances so you just sew haphazardly across a few points and hope for the best. It’s wonky and terrible and I can’t even button the top button. OOPS.

Speaking of buttons, the button holes *do* look nice. Thanks, Bernina!

If you were wondering, here is what I plan on changing for my next version:
– Shorten the length (although maybe not quite as much as this one!)
– Shorten the sleeves – they are WAY too long on me, like, the cuff starts below my wrist. I actually did not even bother sewing the buttons on the cuff here because they are so laughably long, I figured I’d just roll these up 4evs. But for my next version, I need to get the sleeves the proper length.
– Change the placket to a more traditional sleeve placket (such as the ones on the Negroni pattern). The ones on this shirt are much more simple – just a little binding, which isn’t bad, but I like the fancier look of the Negroni.
– I think I need to take out some of the width of the back, it’s super blousey on me.
– Draft smaller pockets; these are a little overwhelming on my frame.
– Get that god-forsaken collar stand under control, I mean, WOOF.

If you were also wondering, here are my suggestions should you decide to tackle this pattern yourself:
– MUSLIN IT. If you feel confident in your fitting skills, you may skip this, but I strongly encourage you to at least make a mock collar/collar stand so you can get an idea of how this shirt gets put together. You may also want to consider measuring the sleeves against some sleeves that fit you, unless you prefer the perma-roll.
– Don’t make your first version in linen. Just… don’t.

Archer Shirt

Despite an iffy start with this pattern (which I’m chalking up to user error), I think it’s a keeper and I will be making this shirt again. It’s a lovely design and a fun pattern, and I’ve already sourced my dream plaid flannel. I have an entire outfit planned around this pattern in that fabric, ain’t no one gonna stop me.

Completed: A Luscious Silk Anna

28 Aug

Hey guys. I would like to introduce you to Anna, my newest piece for the Mood Sewing Network.

Anna Maxi

So, Oona and Sonja originally planned this silk challenge, in which they both would make Anna dresses with a notoriously difficult fabric. Once I got wind of what was going on, I walked straight into that party and invited myself to be the third wheel. I can’t help it; I love being part of a Mood Fabrics sandwich. Especially when it involves Thakoon Crepe de Chine. I mean, COME ON.

Anna Maxi

So, as we all know at this point – this is the Anna dress, the newest offering from By Hand London. For mine, I decided to try my hand at the maxi version with the slash neckline, after getting good results with my wearable muslin shorter version. Since the dress itself is very simple, it was the perfect excuse for getting my hands on the aforementioned silk Crepe de Chine.

Anna Maxi

Anna Maxi

I’ve never sewn with this type of fabric before, so I was admittedly a little nervous. Would I regret my decision?

Anna Maxi

Anna Maxi

Really, though, it wasn’t so bad! The crepe texture of this fabric actually made everything a LOT easier – it gave the pieces something to “grab” onto (as opposed to being all slinky and slippery all over the place). For cutting, I did pin my selvedges together to keep everything intact, and I used a lot of pins on the actual pattern pieces as well. One protip – make sure you use silk pins; this stuff is very delicate and normal pins may leave holes! I also used a microtex/sharp needle on my machine. The fabric fed through very smoothly (again, thanks crepe, for your grabby lil hands!) and it pressed with very little fuss. I like this stuff!

Anna Maxi

Anna Maxi

Construction was very straightforward. I finished every seam with a french seam, and tackled miles of blind stitching by hand along the thigh split, sleeves, and bottom hem (I just want y’all to know that I watched the Great British Sewing Bee while doing this, and as a result I am celebrity-in-love with Patrick. Don’t tell Landon.). The facing and zipper edges are finished with pinking – I actually deliberated on this a lot, pinking isn’t necessarily my favorite seam finish, but I felt it was important that the edges were not detectable from the outside of the dress as this silk is very thin. Fortunately, it doesn’t want to unravel much so I’m not concerned about that.

Anna Maxi

I also stabilized the slash neckline with scraps of selvedge from the silk – just pinned them within a bit of the seam allowance and staystitched them down with a tiny stitch. Keeps things nice and gape-free!

“Hold the phone, Lauren – did you say thigh high split???”

Anna Maxi

Uh huh, I sure did.

Anna Maxi

Truth, I normally don’t have much of a reason in my life to wear something like a floaty silk maxi dress with a thigh split. However, it was a fun project and I am totally fine with scheming up date ideas as an excuse to give this silk lady the exposure she deserves! Do you think eating pizza in this dress would be the worst idea ever? 😉

Anna Maxi

Anna Maxi

Now, I leave you with some walking photos. What would this post be worth without a couple action shots, amirite?

Anna Maxi
Anna Maxi

WOULD YOU JUST LOOK AT HOW THAT SILK FLOATS AND FLOWS.

Finally, here I am giving my best Angelina Jolie impression:
Anna Maxi

What do you think? Silk Anna yeah, or Silk Anna fuck yeah?

Psst! Mood Fabrics is running a one day flash sale for 20% off fabrics sitewide! If there was ever a good time to dip your toes into the world of silk, that would be now.

Completed: A Stripey Belladone

29 Jul

Oh noes, you guys – I’m running out of fabric from the huge haul I bought at Mood in NYC. Can you believe it? I only have two pieces left! What happened! WHEN DO I GET TO RESTOCK?

Belladone Dress

I am happy to say that the striped cotton I bought finally found a home in a new dress. Yay!

Belladone Dress

I actually had different plans for this fabric, but then Eléonore sent me the Belladone dress pattern and my plans immediately changed. Stripes are PERFECT for this dress – you have so many fun stripey placement options! And y’all know how much I love playing with stripe direction 😉

Belladone Dress

I can’t even begin to tell you how happy I am with how this dress turned out. Sometimes when I’m going crazy with my stripe (or plaid, for that matter) directions, I start to wonder if I’m going to end up with a giant clusterfuck in the end. Fortunately, I think this one turned out pretty perfect – there’s plenty of interest, but it won’t make you dizzy if you stare at it too long!

Belladone Dress

My Belladone is a size 34, with no alterations except a few tucks at the back to get it to lie flat (I’ll talk more about that in a minute). I went with the invisible bias trim – which is topstitched in white – as I didn’t want a bunch of contrast competing with the stripes. The upper back pieces are cut on the cross grain because I liked that stripe placement better, and the waistband is cut in four pieces on the bias, and then pieced together. I also interfaced the waistband because I was afraid the bias would distort over time – it’s pretty fitted. Otherwise, the dress is basically sewn straight out of the envelope -length and all!

Belladone Dress

I love this dress! Look, it has pockets!

Belladone Dress

And a cool back cut-out!

Belladone Dress

Belladone Dress

The stripes made some cool chevrons down the sides, ha.

Belladone Dress

This is a fairly simple pattern to make, but be warned that the back may take a little finessing to get a perfect fit. You want it to lie perfectly flat – no gaping! I’ve noticed that most reviews tend to not need any adjusting, so I think I may be a bit of a rarity in needing it – I also have a pretty small back (I wear a 30 band, fyi), so most stuff is big on me anyway.

Belladone Dress - Adjustments

I made a muslin of the bodice – zipper and all – and pinned out the excess at the upper back when I tried it on. Obviously, this is kind of difficult to do without assistance – but it’s totally doable, I mean, I did it. I just kind of eyeballed it, took the top off, pinned at my guesstimate, and tried it on. Over and over (ok, it was like twice, haha). A dressform would be helpful for this, but mine has a bigger back than I do sooo I had to do it the hard way. Anyway, once I pinned out my excess (and then sewed up tiny darts and tried it on a final time), I measured the amount I needed to take out.
(Also, I just realized I was drinking out of an American Pride coffee mug while working on a French pattern. lolz.)

Belladone Dress - Adjustments

To make the adjustment to your pattern (since you don’t want darts in that piece, you want it nice and smooth), just slash right up the middle of the piece and leave a little hinge. Overlap the edges by however much you need to take out (I think mine was 1/4″, not much) and then tape it down. Make sure the line is smooth and straight, and you’re done!

I also ended up overlapping the upper back pieces an additional 1/2″, as well as taking about 1/4″ out of the center back seam (along the zipper).

Belladone Dress

The back looks pretty good, though, yeah?
Ignore the lump at the waist of the zipper, I had a lot of bulk there, so the zipper doesn’t want to lie flat! Wah!

Belladone Dress

Stripessss!! 😀

Belladone Dress - Necklace from Chatter Blossom :)

Oh, and check out my new necklace! This is from ChatterBlossom, my newest sponsor! Jamie has some of the prettiest reclaimed vintage pieces I’ve come across (and enviable hair to boot, I mean, ugh, that’s EXACTLY what I wanted mine to do when I cut it short!!), and I love that she gives each of them a story. I picked a couple of pieces from her shop – and that was hard, there are soo many things in there that I need – and I am so happy with what I got. This necklace is Egyptian, circa 1880-1918. I’ve really gotten sucked into Egyptian history lately (the pyramids! Nefertiti! The Spinx! Aliens!! lol just kidding on that last one :P), so I’m really excited about this little treasure. Fair warning: I’ve worn this every day since I received it, and I don’t plan on taking it off. You’ll be seeing this necklace a lot, jsyk.

Anyway, back to Belladone…

Belladone Dress
Belladone Dress

Even though my bias tape is invisible from the outside, I still wanted it to be pretty – so I used polka dot bias tape 🙂 I used the bias tape left over from my Blue Lace Robson (and I still have more of this stuff, it’s like the gift that keeps on giving haha). I also faced the waistband with a piece of navy cotton sateen (also from that same lace coat, gah), since I didn’t want the interfacing all up in my biz. Unfortunately, the sateen is a bit heavy, which is why the zipper is lumpy at the waistline. Oh well, live and learn!
Oh god, ignore that rogue navy thread on the upper back btw.

Belladone Dress

I’m pretty happy with how this dress turned out – it’s fabulous on it’s own, and I think the navy stripes will also look good with different colors, such as yellow and kelly green. The dress is perfect for bike riding, even if it does give me a funny tan line 😉 Ha! Worth it 🙂

Completed: The Simone Dress

19 Jul

Can we talk about Victory Patterns today?

Simone Dress

Specifically, let’s talk about the Simone.

Simone Dress

This is new for me in two ways – a new pattern company (well, new to me) and a new shape. Seriously, guys, I do NOT wear these loose-fitting dresses… I feel like my body gets swallowed up in the fabric and I lose my waistline, which just isn’t a good look for me. But I’ve been wanting to try this pattern since it was first released… I’m not even ashamed to admit that 100% of the reason was because the girl modeling this shit is a fucking BABE. For real. Go have a look and try to tell me otherwise. I’ll wait for you to come back.

Simone Dress

I don’t think this dress pulls me quite that far into babe-ville, personally – it’s still not totally the best shape for me – but I’m surprised at just how much I like it!

Simone Dress

For my Simone, I cut the size 2 and decided to add piping and a couple pops of contrast. Originally, I had the whole front yoke purple (like the racerback), but after I finished sewing the piping on, I pinned everything together, stood in front of the mirror… and realized how weird it looked. Like I was wearing a big, purple bib. I think the contrast yoke is a good look (the version of the top has a contrast yoke), but not with my particular fabric choices. So I ripped that shit out and made my yoke in the same fabric as my main fabric, with a contrast placket, racerback, neck binding and piping.

Simone Dress

I did have to make a couple of modifications to the pattern – namely, the original length of the shoulder straps and racerback was much too long, making the armholes sit too low (like exposing a good 1″ or more of of bra too low). Since I’d already sewn on the armhole binding at that point and I didn’t feel like ripping it out (so sorry, so lazy), I pinched out about 5/8″ at the shoulder seam and another 5/8″ out of the center of the racerback. Honestly, I should have considered these adjustments BEFORE I cut my fabric – I’m petite and I generally have to shorten those areas – but my quick fixes worked just fine, I think.

Simone Dress

The only drawback was that I now had a weird seam right across the middle of the racerback. I covered it with a little tube of my main fabric. Done and done!

Simone Dress

I also shortened the back of the hi-lo hem – it was a little too long on me, almost hitting my ankles. I did not shorten the front of the dress; that is the original length.

Simone Dress

I will admit, I didn’t care much for this dress while I was sewing it. I think it’s mostly my fabric choice, but this reeeeally looks like pajamas to me. And something about the shape of the tab reminded me too much of a tiny tie, which was throwing me off. It wasn’t until I completely finished the dress and put it on that I decided I liked it. Actually, scratch that – I LOVE it. I don’t even care if it makes me look sorta preggers from the side. This shit is COMFY and it feels amazing to wear during this heat wave.

Simone Dress

I do think the instructions on this pattern were a bit lacking, and definitely earn it that “intermediate” mark. The diagrams were mostly helpful, but there were a few that made absolutely no sense to me at all. Some of the wording was a little off, and there were a couple steps that were completely missing (such as sewing the button on the tab to anchor it down. At least… I think you’re supposed to sew a button there, or at least invisibly tack it down??). The hardest part was deciphering the pleating instructions – the diagrams showed them sewn in one direction, but the photos showed the opposite.

Simone Dress

Still, with that being said… this dress took a couple afternoons to sew. It’s not hard and you can always hit up another resource if you get stuck.

Simone Dress

Shoulda topstitched that armhole binding in purple, but I didn’t. Oh well.

Simone Dress

Isn’t this fabric fun, though? It’s another design from my new favorite new-heard-of-’em-before-Mood designer, Thakoon. Just like my previous piece of Thakoon loveliness, this stuff is super soft, super drapey, and feels like pure love on my skin. It is a little bit on the translucent side, but as long as I wear nude colored underthings, it doesn’t seem to be too noticeable.

Simone Dress

I used a gorgeous purple sateen to sew all the contrast. This one is soft and lightweight with a rich color and no stretch. I used the wrong (aka non-shiny) side to sew the tab, the neck binding and the racerback, and the shiny side to make the piping. Looking at the fabric as one piece, the two sides are quite different… but when looking at the dress as a whole, you can’t really distinguish much between sides. Oh well!

Simone Dress

This is just a random button from my stash. I thought it looked good!

Also, JUST IN CASE YOU WERE WONDERING…

Simone Dress

This dress looks awesome belted!

Simone Dress

I know so many of y’all are probably groaning so hard at my love affair with belts on everything (sorry, not sorry), but I’m actually really surprised at how well the shape looks with a cinched belt. It totally changes up the look!

Simone Dress

Personally, I plan on embracing the dress as-is, in all it’s flowy goodness… but for those of you who have been hesitant to try this pattern due to the volume at the waist, perhaps you can consider this as a solution!

Simone Dress

I can’t wait to try more patterns from this company! I already have the Lola (which, sadly, is going to have to wait until the weather cools down a bit!), but I’m also loving the Nicola too.

Who else loves Victory Patterns? Let’s fawn over them together!

Completed: Some Fabulous Silk Birds

17 Jul

I am just going to preface this post with a warning: This is my VERY favorite thing I’ve ever made. Forget everything else up to this point. This here, this is the winner.

Also, I tried REALLY hard to cull down the number of pictures, but there are still a lot. Sorry, not sorry.

Marc Jacobs Birds

I initially saw this fabric on the Mood Fabrics Instagram (which, if you’re not lurking that – WHY NOT, THEY POST THE BEST FABRICS!!). Isn’t it fabulous? I immediately called the store and had them set aside 4 yards for me. When I finally had it shipped all the way to Nashville, I was amazed at just how wonderful it was in person. The designer is Marc Jacobs, and it’s a soft silk Georgette with a gorgeous drape and some incredibly saturated color.

Of course, I had no idea what I was going to do with 4 yards of bird silk Georgette. I hoarded it for about 2 months, while plotting and planning.

Marc Jacobs Birds

I had a Sewing Epiphany while on the way to work one morning (does anyone else have those? Aren’t they so awesome?) and realized that the print would work perfectly with a 40s style dress – and the drapiness of the silk would be a 100% match for McCall’s 6113. Yes, the same pattern I used for last month’s Mood dress. What can I say – I love this pattern, and I want to make a million of it’s babies.

Marc Jacobs Birds

Since this was my first time sewing with silk Georgette, I spent a few weeks devising a game plan and learning all I could about this fabric before slicing into my yardage. Georgette – or, at least, this Georgette – is on the sheer side, so it was going to need some sort of underlayer to keep things opaque. I didn’t want to underline the dress and compromise the flow of the fabric, so I decided to make a slip to wear underneath. Bonus: this is quite handy on a windy day! Already tested that theory 😛

Marc Jacobs Birds

I used french seams to construct the entire dress, except at a few sections where it was impossible to sew them – such as the curved yokes. For those parts, I pinked the seams to keep them from fraying. I also stabilized the fabric underneath the yokes with a piece of black silk organza. Since the Georgette is so lightweight and that area gets so much stress, I wanted to give it as much support as possible. I also found the use of my walking foot quite helpful while assembling the dress – it kept the layers from shifting (and me from crying tears of frustration).

Marc Jacobs Birds

Despite having made this dress twice already (my red wool crepe version, plus a boring ol’ muslin), I still encountered some construction challenges unrelated to the fabric. For one, the sleeves gave me HELL when I was trying to set them in. I don’t even understand how it happened – they eased in perfectly with the crepe, but for some reason, it just didn’t work with the Georgette without including a lot of unwanted puckers. I was stumped and let the dress simmer for a few days on my dressform. I even considered leaving it sleeveless, no lie.

Marc Jacobs Birds

Fortunately, I remembered that Casey posted a tutorial on excess sleeve ease on her blog a couple years ago, so I followed the instructions for redrawing the sleeve cap and crossed my fingers.

Marc Jacobs Birds

I am happy to say that it worked! I’m so glad I was able to figure it out – the sleeves really make the dress!!

Marc Jacobs Birds

Marc Jacobs Birds

Marc Jacobs Birds

I just think this pattern is SO PERFECT for such a bright print! Isn’t it beautiful?

Marc Jacobs Birds

I even got super fancy and put a (non-functional) fancy button where the front of the dress fastens.

Marc Jacobs Birds

Marc Jacobs Birds

Marc Jacobs Birds

Marc Jacobs Birds

Now, let’s talk about my slip! I am going to post pictures which I realize is essentially me in my underwear, so bear with me here.

Silk Slip

I’m not going to lie – like 99.9% of the reason why I decided to go with the matching slip was so I’d have a chance to get my hands on some 4-ply Silk Crepe. I’ve heard some amazing stories about the stuff, but never had a chance to try it for myself. It tends to run on the expensive side (truth, this silk crepe cost more than the silk Georgette!), but a slip doesn’t require a whoooole lot of yardage, so I sucked it up and put in my order. I didn’t know what to expect when the package arrived at my door.

Silk Slip

People. This stuff is INCREDIBLE. Throw out any mean thoughts you had about silk and focus on the 4-ply. It’s not at all slippery – even when I was cutting bias pieces, the fabric stayed put. It’s nice and robust and opaque, and it feels amazing against the skin. It presses beautifully and sews like a dream. I was extremely skeptical before I properly introduced myself, but I really think it deserves the hype.

Silk Slip

To make the slip, I used the free Ruby Slip pattern. I spent a lot of time redrafting shit to get it to fit right, and it was kind of a nightmare and I kind of almost gave up (no hate on the pattern itself – I’m just VERY particular about how my slips fit!). I started with the size 8, made a lot a lot a lot of changes, and I’m just going to list them here:
– The original bodice was very small, so I added a 1/2″ FBA using the sew-along tutorial. Truth, I tried to get away with not doing this (I wear a DD cup, but let’s be real here – the only thing “big” about my boobs is the proportion, not the actual size, kwim? I could totally fit into like a C cup if the band was small enough), but my first muslin informed me otherwise.
– I then redrafted the bodice to include a center front seam and underbust gathers, following this tutorial.
– My second muslin showed that now the bodice was too big at the center front, and the gathers were sitting in such a weird place… I looked like I had puffy nipples. So awesome, except not. I wish I could tell y’all I did some mathematical pattern drafting magic and fixed it, but honestly I pinned that fucker to my dress form and manipulated it until I had a decent fit. I pinned out a chunk of the center front seam, redistributed the gathers, and chopped about 1″ width off the back midriff. I readjusted the side seams of the skirt (that shit fit almost perfect with no adjustments, thank god) and crossed my fingers.
– Since the new back midriff was slightly (I’m talking 1/2″ or less) smaller than the skirt, I cut that piece on the bias and carefully eased the two pieces together. I think the result is pretty good – it fits my small back, and the bias makes it easy to pull on and off!
– I also cut about 5 1/2″ off the hem of the skirt. It was long, and I need this slip to be shorter than my skirts!

Silk Slip

Silk Slip

Finally, I added some beautiful lace around the top and the hem, and a little self-made bow in the middle of the bodice. The straps are just satin ribbon outfitted with strap adjusters and rings – very easy to put together.

Marc Jacobs Birds

Now, here’s the real question: I still have like a yard (maybe more) of this bird fabric left. WHAT SHOULD I DO WITH IT?

Completed: Birthday Tania Culottes

24 Jun

I never thought I would say this… but… YAY CULOTTES!!!

Tania Culottes

These culottes come courtesy of not one, but TWO awesome birthday gifts I got back in May.

Tania Culottes

I used Megan Nielsen’s Tania Culottes pattern to make these bad boys up. The pattern was a gift from reader Carla (she doesn’t have a blog yet, but there’s her Instagram!). I had to wait first because this pattern is wildly popular – it was sold out, and it appears to be sold out again, ha! – but I like to think it was worth the wait. This is such a fabulous little pattern, it’s very easy, but it sure doesn’t look it!

Tania Culottes

I cut the size XS, keeping the length also on the XS. The length should really look more like a mini, but on my short lil’ legs it’s *almost* appropriate for work (I say almost, but not quite :P). This pattern was seriously fast to make – I breezed through it in a couple of hours.

Tania Culottes

The engineering on this pattern is SO COOL. It actually looks like I’m wearing a floaty little circle skirt…

Tania Culottes

… but they are indeed culottes! With a crotch seam and everything!

Tania Culottes

One thing I will mention that was not written in the instructions is that you reeeeeally need to let this sucker hang for 24 hours before you hem. Since the skirt is a circle (or half circle, or whatever, I can never tell with these things!), the bias along the hem leads for some crazy settling. I had to cut quite a bit off to get it even, and still it’s not exactly perfect. Better, but not perfect.

Tania Culottes

I think the fabric is what really makes these, though. Isn’t it lovely? THAT was a gift from Kristi, a giftcard to Mood, which I immediately used to buy me some of that Thakoon cotton everyone is raving over. And, you know, after handling this fabric during the making (and wearing!) of my culottes, I gotta say… the rave reviews are there for a reason. This stuff is AWESOME. It is the silkiest, softest cotton (my mom was shocked when I told her it was just 100% cotton… and she’s a seamstress, too! She knows her fabrics!), but it’s not slinky to handle at all. It presses well and while it’s lightweight/sheer-ish, it’s opaque enough to not need a lining. I kind of wish I’d bought several yards of the stuff. I may anyway, when I get my next Mood allowance.

Tania Culottes

Srsly, I wish I could cut a little swatch to send to each of you! It is THAT amazing!

Tania Culottes

I didn’t bother to match the stripes on the CF or CB seams, but I don’t think it’s really noticeable? The folds in the circle skirt do a good job of hiding that, ha.

Tania Culottes

Anyway, I looove my new culottes! I cannot wait to try these out while riding my bike. Gonna feel like a floaty cycling goddess, y’all. Again, thank you SO SO SO MUCH, Carla and Kristi, for making my culotte dreamz come true~~

Now, on a totally unrelated note, let’s have a cat story!!

Untitled
(I know, the side of my house looks SUPER white trash, bear with me here…)
On Friday, I hear this awful/scared mewing from outside the house. I looked out the back door and there was a tiny kitten on the porch! He ran when he saw me. All that night, I could hear him but I couldn’t figure out where he was hiding, until I realized there was a tiny hole in the crawl space under the house (this picture was taken after I pulled out all the bricks in the crawl space, fyi!).

Untitled

I eventually caught him when I brought Amelia outside. He just ran straight to her! (Amelia, on the other hand, wants NOTHING to do with him. Bitch.) We brought him inside, gave him 3 baths (he was covered in fleas, poor thing!) and he seems pretty happy now. He gets really scared if you leave the room and he can’t see you, but I try to carry him around with me because I don’t want him interacting with Amelia until I know for sure whether or not he has any kitty-diseases. She’s vaccinated and on flea/tick/worm meds, but still. You never know!

Untitled
Untitled
Untitled

So now I have this kitten. I have no idea how old he is – he seems really young, though. We’ve been calling him Theodore.

Untitled
Untitled

I wish I could keep him, but I can’t afford the bills & additional pet deposit that he would cost me – not to mention, Amelia is REALLY unhappy about sharing her space with another animal. Fortunately, I think my brother & sister-in-law are going to adopt him 🙂 She’s taking him to the vet right now to make sure everything checks out, and I may hang onto him for a week or so until they move into their new house. Fingers crossed that everything works out! He’s super sweet and cuddly.

Untitled

Here we are trying to take a picture this morning. As you can see, Theodore wasn’t feelin’ it 😉