Tag Archives: button-up

Completed: McCall’s 5803

21 Jul

For the past couple of weeks, I’ve been slowing reorganizing my pattern stash. You guys, I had no idea how much shit I had stuffed in those boxes until I really started culling through them. Let’s just say I’ve made 3 trips to my local comic book store to buy more packs of 100 backing boards and clear sleeves. It’s kind of disgusting when I think about how many patterns I have (although, to be fair, most of them are old vintage ones I picked up at our flea market for next to nothing because they would have gotten thrown away otherwise oh god), and even more so when I realize I have so many that I haven’t even thought about since I took them home. On the flip side, I’ve been rediscovering a lot of cool ones!

McCall 5803 - Liberty

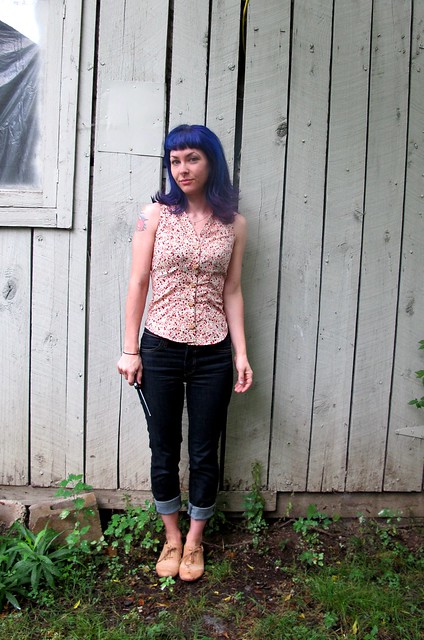
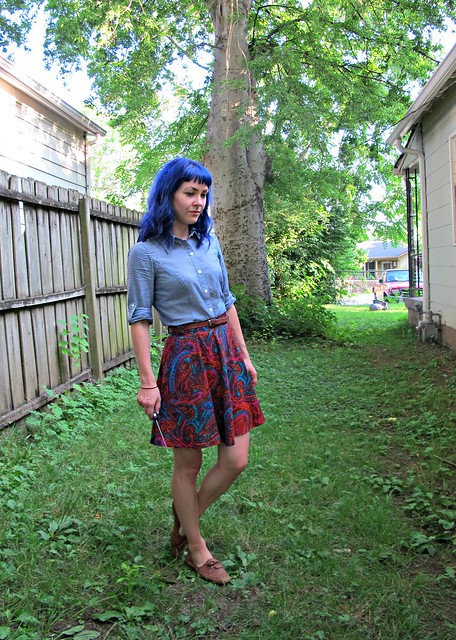
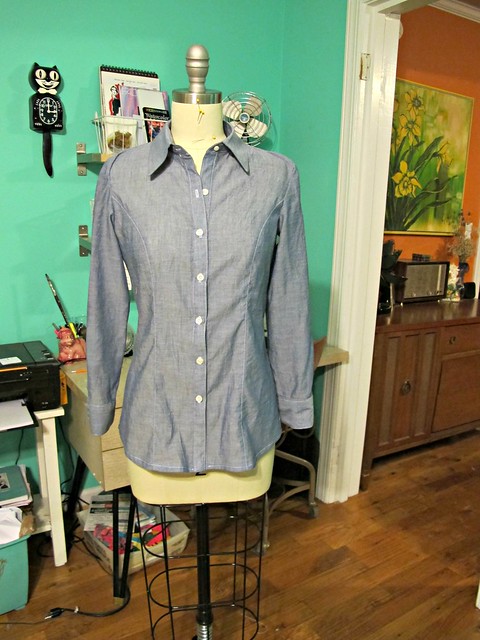
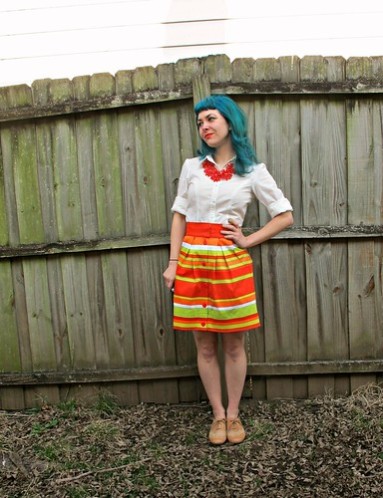
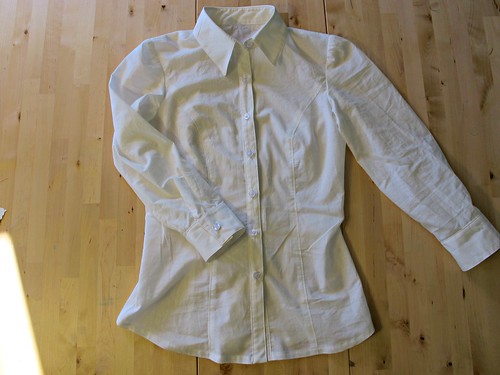
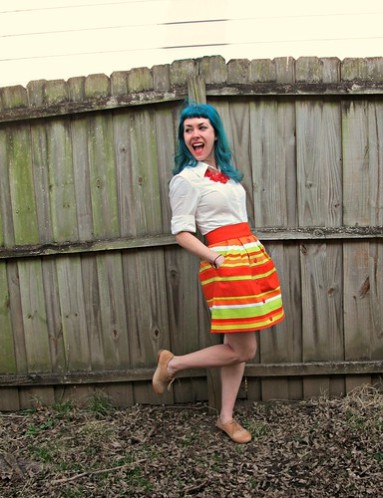
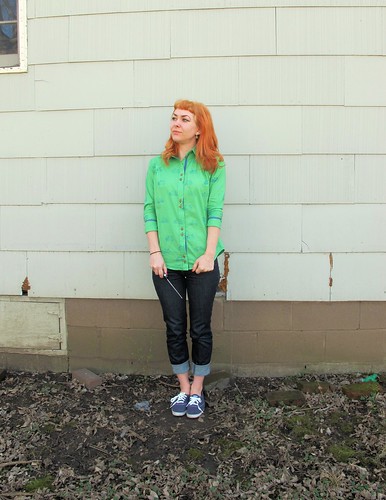
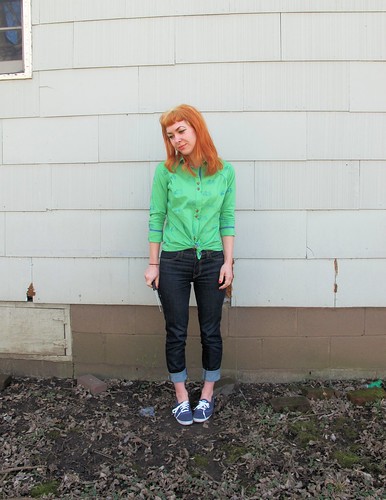
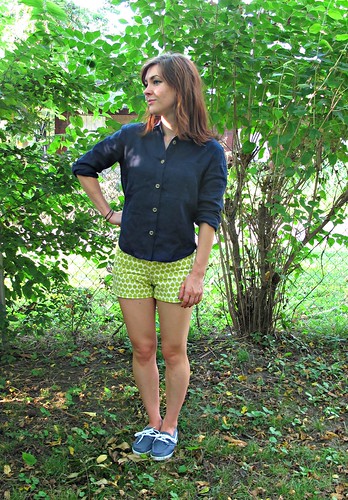
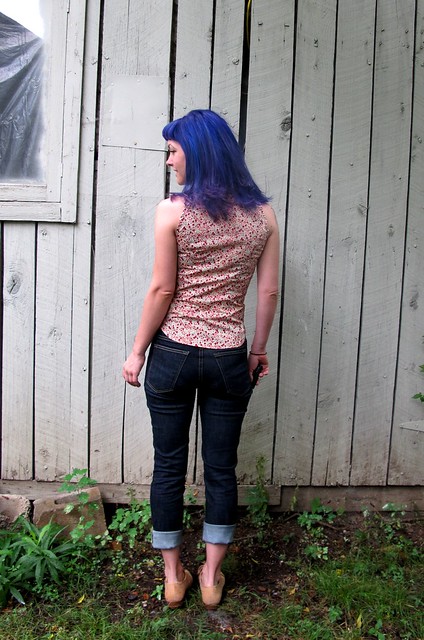
This is McCall’s 5803 – it’s an old OOP Lizzy McGuire (lol yep) pattern that I’ve had for god knows how long. I’ve actually made this one before – in the form of a Plaid Clusterfuck – and I’ve always (well, when I remembered about it hahahahaha) wanted to made a more demure version, since I love the shape of the arm holes and button placket (and I’d love one with a proper collar and not just the stand). I swear, every time I wore that Plaid shit, I would think, “Man, I wish this didn’t have the ruffles.” So as soon as I rediscovered it, I knew I could make it happen.

McCall 5803 - Liberty

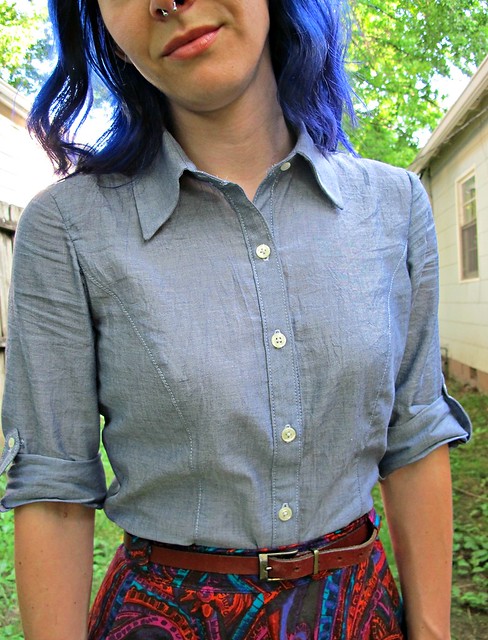
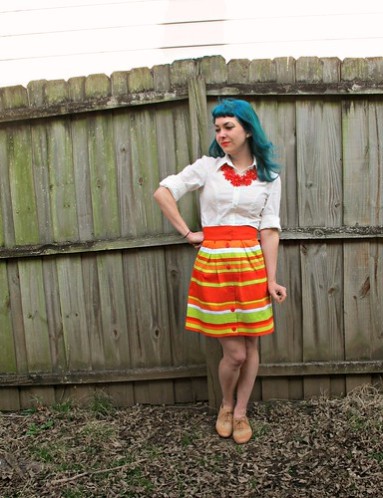
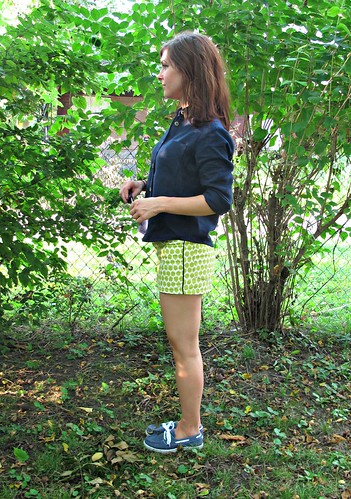
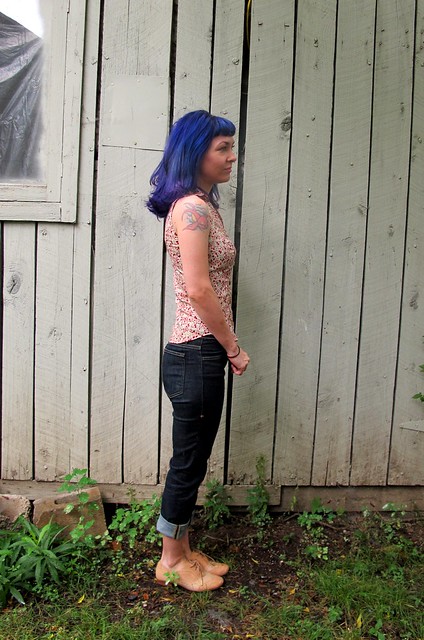
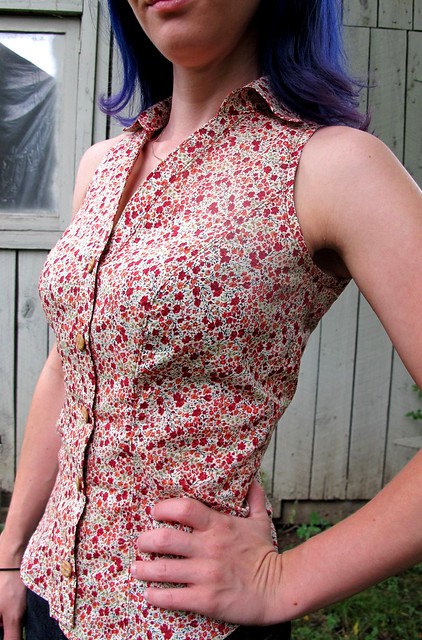
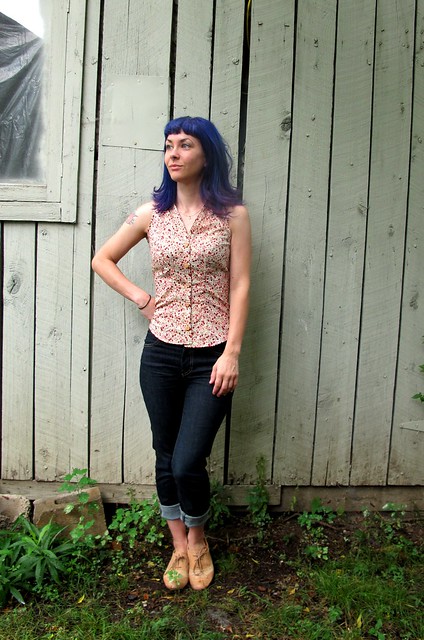
My original version of this top included a big ol’ 1.5″ FBA, which was no longer needed to get a good fit (I don’t even have the original one; I sold it last year when I realized it didn’t fit me at all anymore). Since I’m too much of a stubborn ass to trace my patterns and preserve the original, that meant I had to remove the FBA by carefully peeling up tape and carefully repiecing tissue together. It worked, for the most part I guess, but something tragic happened at the waist because this baby is apparently painted on. Despite a tissue fit (and my stubborn ass thinking, “noooooo I don’t need a muslin, I’ve made this before lololol) and everything. Argh.

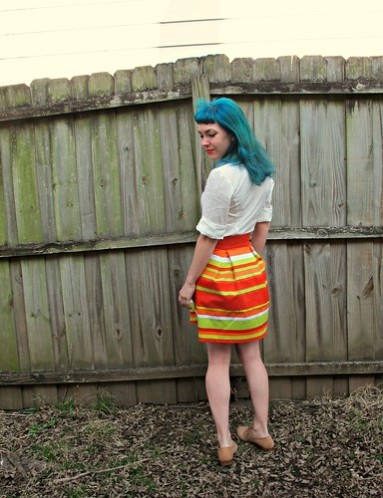
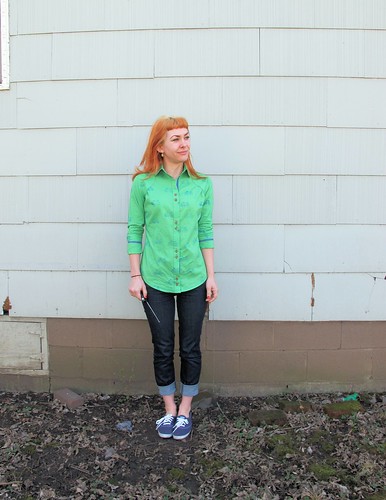
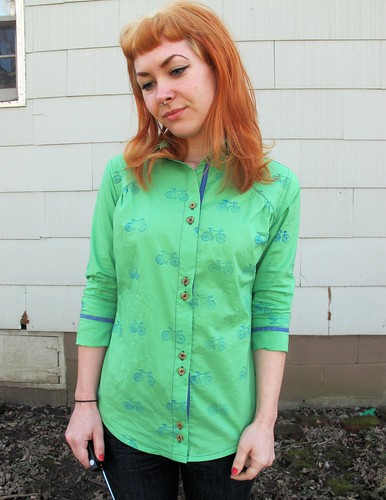
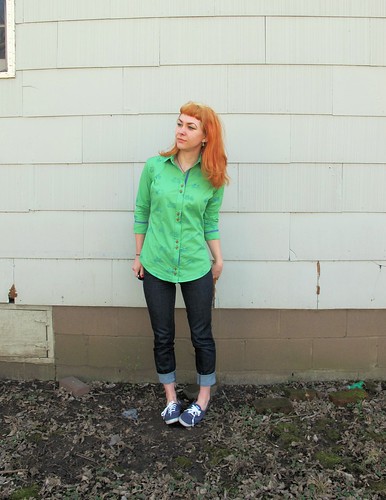
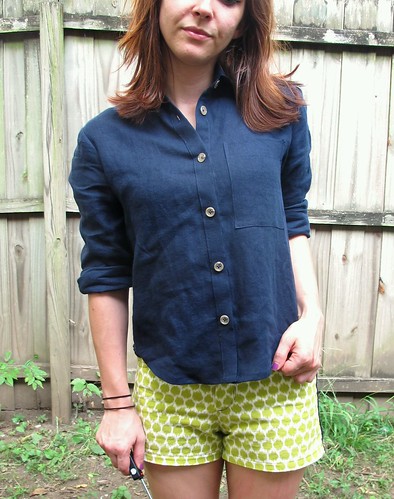
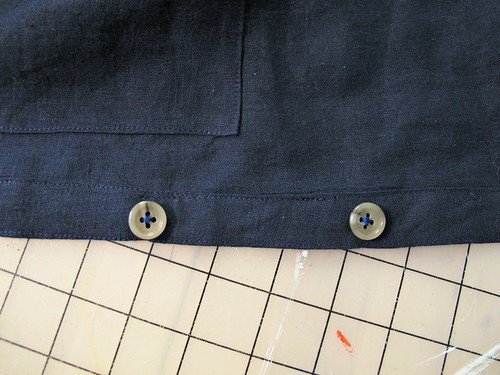
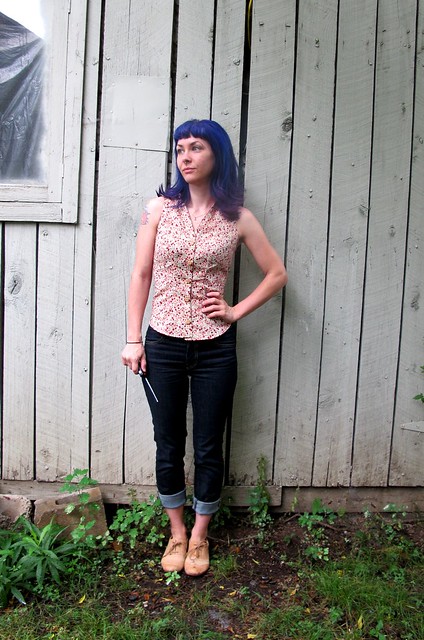
I also didn’t bother to staystitch the neckline (whyyy), so it stretched out a little on one side. To remedy this, I pulled that side lower while marking the button spacing, which is why it’s not even at the bottom (you probably didn’t even notice that until I said something, oh well). These types of shirts are generally hemmed during the beginning of construction, so I couldn’t fix the unevenness when I was doing the buttons, if that makes sense. I should probably unpick the hem and fix it now, but eh. It doesn’t bother me as much as it should.

McCall 5803 - Liberty

McCall 5803 - Liberty

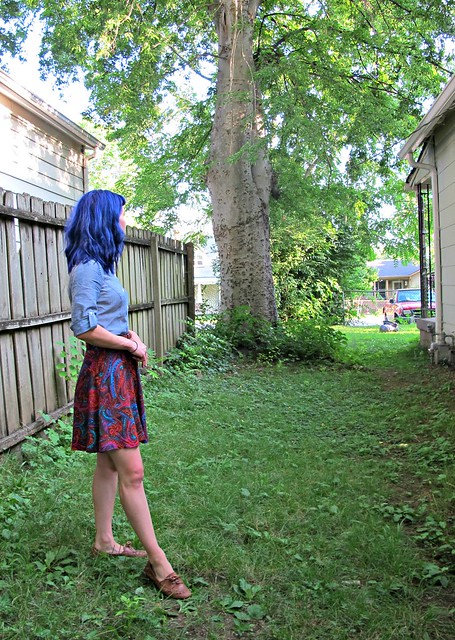
I know these pictures make it hard to see what’s going on. I’m sorry 😦 You can click on them to make them bigger through Flickr, if that helps.

McCall 5803 - Liberty

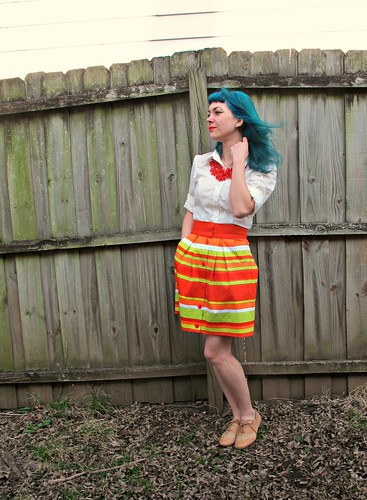
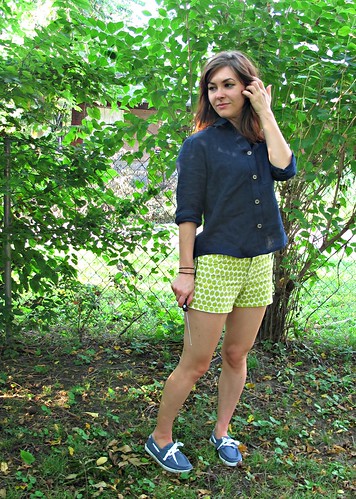
I let out some of the side seams to try to add a little more tummy room, and that helped a little. I’ve also just recovered from a couple weekends of eating some of the worst shit for me ever – I don’t necessarily diet, but I try to maintain regular exercise and eat things that are beneficial to my health/body and that seems to work well enough for me. After a couple of weekends of eating cupcakes and cookies and fried deliciousness in a to-go box, though, I was feeling tired and bloated and definitely like a stuffed sausage when I put this damn shirt on. I put the shirt aside for a week (wadded up in the corner, because that’s how I roll), I think it looks a bit better now that my body is back to normal. It’s definitely still pretty tight, but at least the busy print hides most of the wrinkles! Ha!

McCall 5803 - Liberty

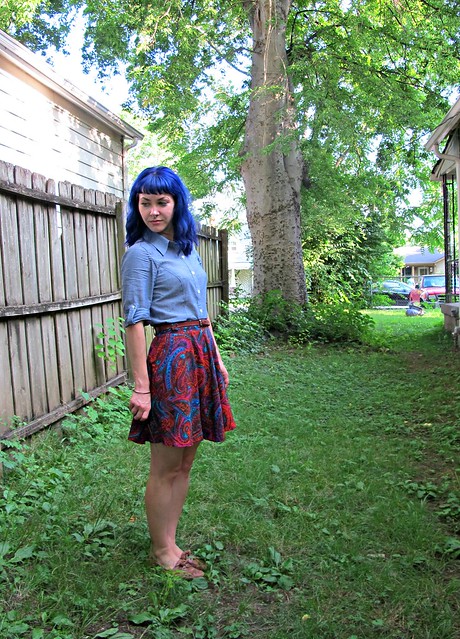
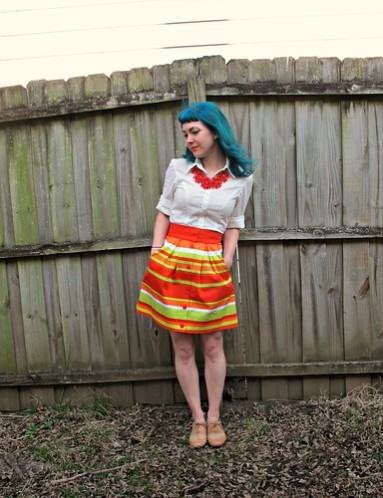
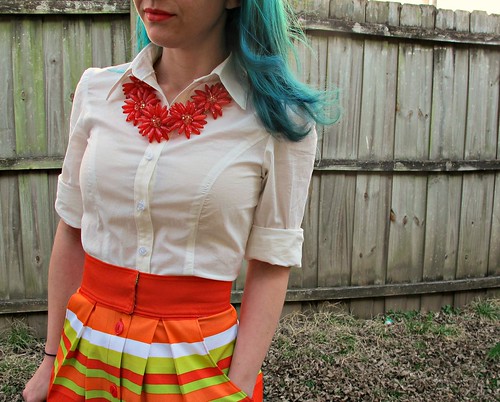
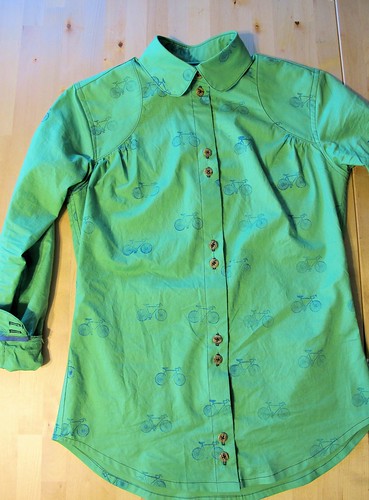
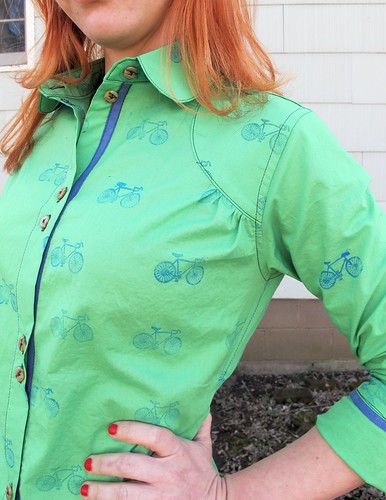
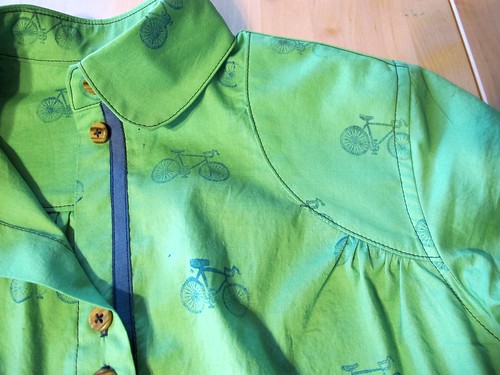
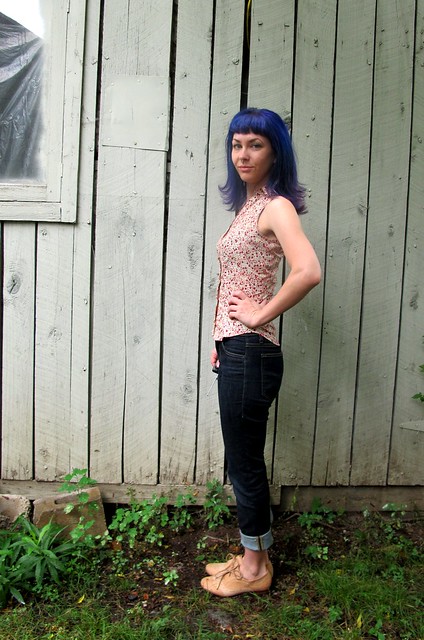
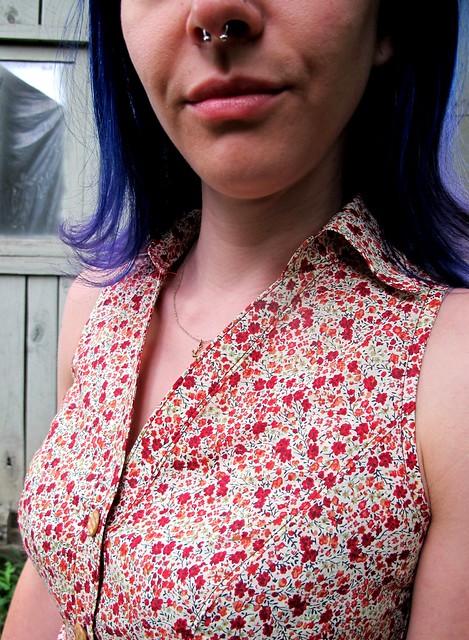
Speaking of this busy print – isn’t it beeeeeautiful!? Ahh!! It was a gift from Sunni, who sent me a box of some of the most lovely fabrics earlier this year. I guess I never blogged about that, but we decided during Project Sewn that we both deserved a little treat and decided to have a fabric trade! She sent me all kinds of amazing shit – stuff that I’m now just sitting on because it’s almost too good to cut (and I’m waiting for divine inspiration)! That woman has some fabulous taste – and this is the first piece I actually made something with.

McCall 5803 - Liberty
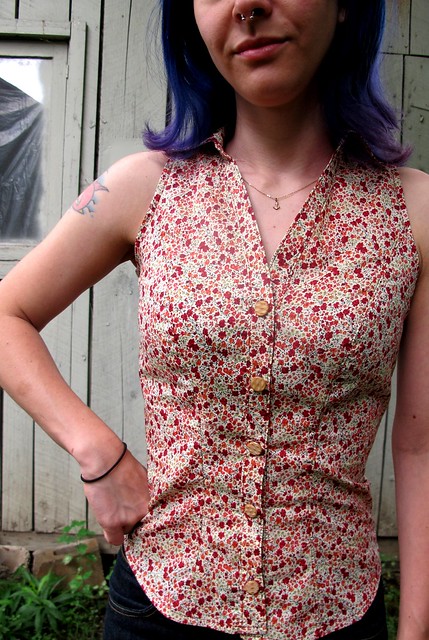
The goodness you are looking at right now is actually Liberty of London shirting cotton (I told you, that woman has some fabulous taste!) from Sunni’s personal stash. Ahh!!! I’ll admit – and y’all can chase me with pitchforks if you’d like – but I’ve never really cared much for Liberty fabrics. Sorry! I think the prints are lovely, but they also remind me way too much of my Laura Ashley bedroom from my childhood. Too girly and floraly and, well, y’all look pretty in them but I’d rather not. I’d rather be clothed in NEON! But anyway, I’ve always been curious to try it because sewists don’t only rave about the prints – they rave about the quality of the cotton as well. You know I love trying new things for science, so I was pretty excited to have my own piece to play with when I got Sunni’s package. And I do think this print is super beautiful – it’s floral, sure, but it’s not all ditzy and super pastel girly like the Liberty I always see. It’s much more along the lines of my style, and I knew it would make a fabulous top.

McCall 5803 - Liberty

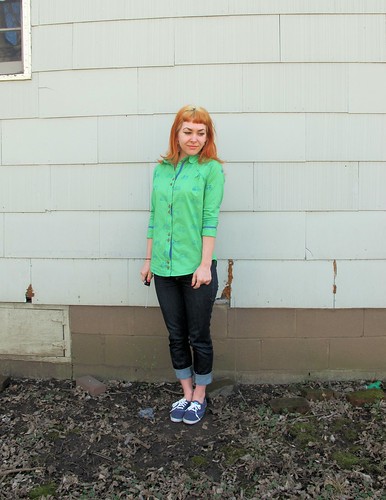
I’m so glad I made this work, because I would have been really really angry at myself if it had ended up being a wadder! I could probably stand to let out a couple more seams, but everything is topstitched, so it’s really a matter of me getting the energy to go through all that unpicking and retopstitching. Argh! Anyway, at least I left off the ruffles this time 😉

McCall 5803 - Liberty

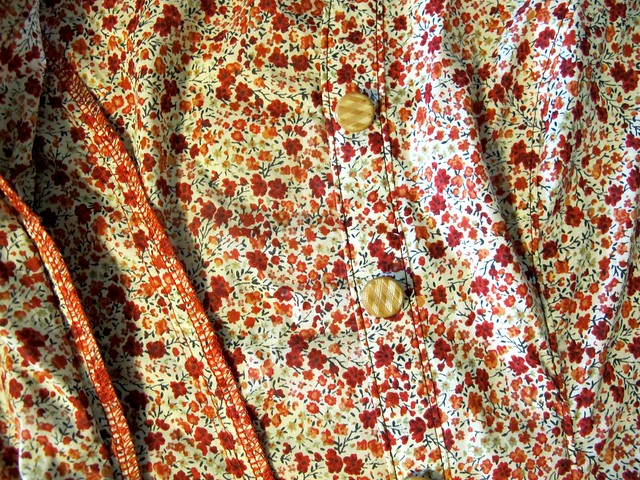
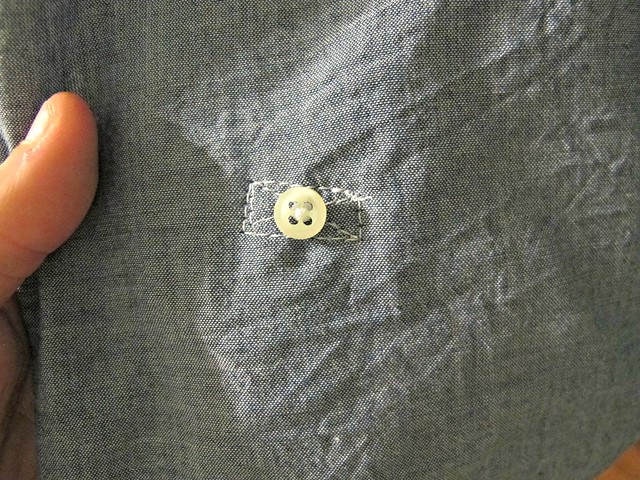
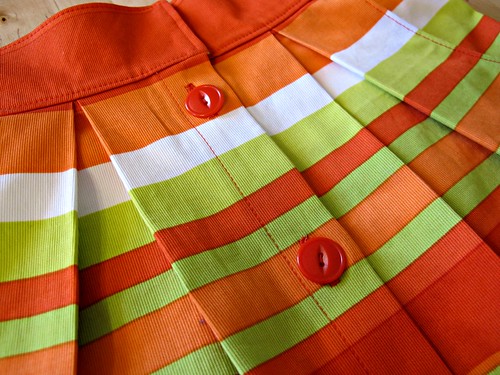
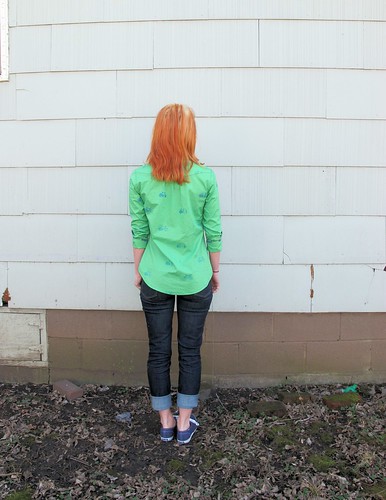
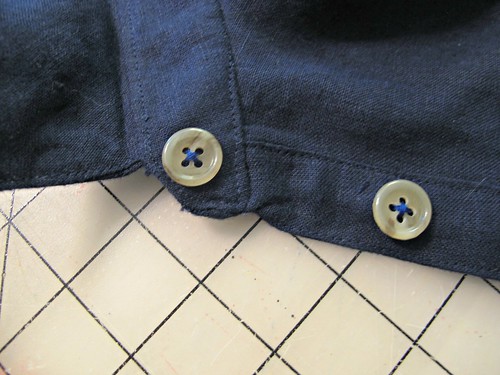
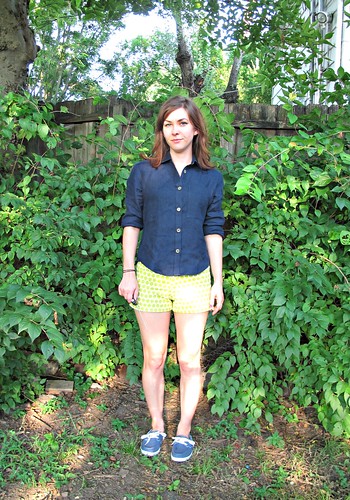
Anyway, here she is in all her glory! Beautiful print, topstitching (that will be the end of me), and those gorgeous buttons. If those look familiar, it’s because I used them on my Audrey in Unst cardigan. Not the same ones – my cardigan still has buttons – but from the same batch. My sister-in-law helped me pick them out for the cardigan, and I bought them from a vendor at our flea market. He had all kinds of cool vintage buttons – I think he said these are vegetable protein from the 20s? – and she actually went back afterwards and bought up the rest for me for Christmas. So awesome 🙂 So obviously, they were perfect for this shirt – both in specialness and general matchy-ness 🙂

McCall 5803 - Liberty

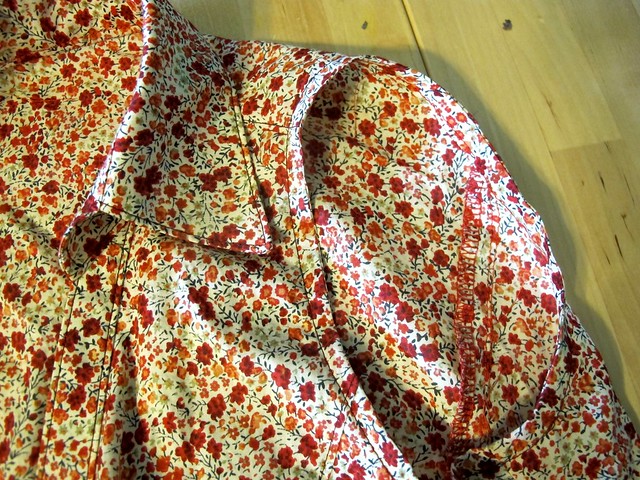
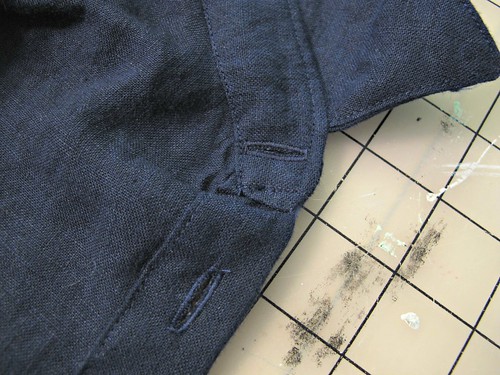
Construction-wise, nothing new to report here. I finished the arm holes with self bias facing and topstitched with a slightly longer stitch length so the stitches would be more defined.

McCall 5803 - Liberty

So, what’s the verdict on Liberty of London? Well – y’all sewists are right, this shit is a JOY to sew up! It presses well, it doesn’t show pin holes, it’s easy to cut, and the fraying is minimum. It also just feels absolutely luscious. I totally understand the rabid fangirling over this shit. I don’t know if there is much Liberty in my future – after all, it’s still hideously expensive – but considering this shirt barely took any yardage, I could probably squeeze out a special piece for another special top 🙂

So, THANK YOU, Sunni, for the amazing gift of this gorgeous fabric (not to mention the chance to get to sew on it!)! Have any of y’all ever sewn with Liberty? Are there any cool non-floral prints that I’m blindly overlooking?

Completed: Butterick 5526, in Chambray

18 Jul

Good morning, everyone!

Sooo, anyway… remember when I said I was going to use that other chambray to make Butterick 5526 but ended up coaxing it into a Hawthorn instead? Well, I still wanted that damn chambray shirt – lucky for me, I had more in my stash! Check it out!

Chambray Buterick 5526

GOD, I JUST LOVE CHAMBRAY.

Chambray Buterick 5526

Seriously, tho, if you follow my Instagram, you probably noticed a couple weeks ago that it was Unofficial Chambray Week in my sewing room. Part of the reason for that is because I have been experimenting with starting multiple projects at once, then working through them all in succession. That probably makes no sense. What I mean is, I’ll prep 2-3 projects at once (cutting, interfacing, marking), pile them at the end of my table, and then complete each project by itself. I’m still working on one project at a time – but I’ve prepped multiples in the queue, so I don’t have to stop and cut the next one, thus losing my steam (oh, who the fuck am I kidding, I never lose steam. Not when it concerns sewing, anyway :P). This particular week, I was trying to stick with projects that use the same color thread/serger thread, because I dunno. Changing thread isn’t exactly difficult, as we all know.

But anyway, that shit’s fun – to get all the cutting out of the way at once, and then you have a glorious week to focus on dressmaking (or whatevermaking). I’ve blabbed on and on about taking advantage of short time chunks, and I’ve found it’s much easier to do that when you don’t have to set aside time and space every time you want to cut a new pattern (I don’t know about y’all, but I like to do it all in one fell swoop. So when it’s time to get my cut on, I need a long uninterrupted stretch of time to take care of business).

Chambray Buterick 5526

So anyway, I cut a Hawthorn AND a button down, and they were both chambray because they both used the same thread (and dammit, I want both of those chambray goodies in my closet by the end of the week, DAMMIT!) and there’s that.

Chambray Buterick 5526

Also, you probably noticed, but I’m wearing my Crazy Paisley Hollyburn AGAIN. That skirt with this top is just too good.

Chambray Buterick 5526

Chambray Buterick 5526

I’m still tweaking this pattern every time I sew it. Isn’t that what makes something TNT – you’ve used it enough to where you’ve ironed out every little kink in the fit and construction, so you just know it’ll work when you make it up? Butterick 5526 isn’t quite a TNT for me, yet, but it’s on it’s way! I’ve made it 3 times now (see versions one and two), and each version just gets a little better than the previous.

Chambray Buterick 5526

I tried to make the sleeves the correct length on this version. My first one – the white button down – used the 3/4 sleeves that were really more like 7/8 sleeves. Like, wtf, those things looked like they were just a couple inches too short! So, with that in mind, I knew I wanted long sleeves for this shirt (not for now, but maybe in the future, or when I complain about the cold if/when the night temperatures drop to 75 lolz), so I checked against a couple other long sleeved shirts in my closet and transferred that measurement (minus the cuff, of course) to my pattern piece. I double-checked every measurement, but still ended up with something slightly too short! DERP. So the sleeves on this shirt will just be perma-rolled up. And that’s ok! It’s all a trial and error at this point anyway 🙂

Chambray Buterick 5526

Chambray Buterick 5526

They do look good rolled up though, huh? I can’t even tell you how pleased I am with those sleeve tabs. BEYOND pleased!

Chambray Buterick 5526

Chambray Buterick 5526

This chambray is pretty freaking amazing. It’s from The Fabric Studio here in Nashville. Where my Hawthorn chambray has a crisp drape and loads of body, this one is so lightweight and soft that it’s a little bit see through. Which is why I thought it would make a great button down – even with the sleeves – since it’s like I’m wearing chambray colored air. The looseness of the shirt really compliments the drape of the fabric, and the color almost has a sheen. It also doesn’t wrinkle as much as you would think – I took these photos after a full day of wearing the shirt, and while it has some “wearing” wrinkles, they just look comfy and relaxed, you know? I. LOVE. IT.

Chambray Buterick 5526

It’s also, like, $8 a yard. So it’s affordable chambray perfection! (and before you ask – yes, The Fabric Studio will ship! Contact Nancy here!)

Chambray Buterick 5526

For a fabric as light as this stuff, it didn’t take a lot of extra effort when it came to sewing everything together (or cutting, for that matter). It is on the delicate side, so be aware of pin holes (or use fine silk pins, if you got ’em!) and be careful ripping out stitching because you will totally rip the fabric (ask me how I know about that…). But, just like the heavier chambray – it sews and presses like a dream. I enjoyed every single minute of working on this shirt, and it totally shows!

Chambray Buterick 5526

Look at that beautiful topstitched cuff! I only interfaced one side of the cuff (the pattern has you interface the entire cuff piece, so when it’s folded you will have two layers of interfacing), so the fabric would maintain it’s pretty lightweight drape. Too bad no one will ever seen the cuff since the sleeve is too short! Ha!

Chambray Buterick 5526

There’s another one of those sleeve tabs that I’m just stupidly proud of. I think they really make the shirt.

Chambray Buterick 5526

Oh yeah! The buttons are also from Fashion Sewing Supply – just classic white shirt buttons. Very simple, but they look so polished and clean with this chambray.

Chambray Buterick 5526

So, yeah. Another basic closet staple that should be boring (and y’all might be yawning, but oh well, my blog->my rules, aka sorry not sorry), but it’s pretty exciting to me! Chambray goes with everythingggg, so this is a great top to have to pair with all my skirts and pants. I would almost say this is the kind of shirt one could wear for a week straight without anyone noticing, except, I definitely did that as a preteen and someone definitely noticed*. Then again, do I really care? Naw.

Couple more things-
– Damn, y’all went crazy over my recent Vogue pattern review. There are a lot of good comments on that post – some defending some of the patterns (even comparing them to runway version, which is all kinds of awesome to see), some making their own hilarious jokes, oh, and some from The McCall Pattern Company themselves. Forreal! If you haven’t had a chance to read through the comments on that post, you should definitely give them a lurk – McCall’s (who owns the Vogue Patterns line) has proven themselves to have an amazing sense of humor, as well as a really graceful way of handling some not-so-nice feedback. They have been very active in the comments – not in a butthurt way, so sorry if you’re looking for dramz 😉 – and answering questions from readers. I, for one, had no idea that the designers actually choose the fabric that is used for the designer patterns. Vogue has nothing to do with that (although they do choose fabric for all other pattern categories, just not designer). So some of those awful fabric choices should have their blame shifted to the designer. The things you learn!
more u
– Omgg you guys – my Weekend Pants-Making Intensive class at Workroom Social has officially sold out! Cannot WAIT to meet, hang, and of course, sew with y’all who all signed up! It is going to be a fabulous weekend! Didn’t make the class and are regretting that decision? You can sign up for the wait list here and cross your fingers 🙂 Everyone else – I’ve got a free afternoon/evening on Friday, where I plan to destroy my bank account with fabric purchases. Anyone want to join me in the Garment District and/or possibly for drinks afterward (I hear there is an outdoor bar at Bryant Park nearby, which sounds amazing!)? Shoot me an email! lladybirdlauren at gmail dot com 🙂
– Lastly (and I know this has NOTHING to do with sewing but it’s my blog and duh I do what I want), have y’all ever heard of the ride service Lyft? It’s like a taxi service, except the drivers use their own cars and the costs are much much cheaper. Everything is run through the app, including payment – so you don’t have to deal with cash or credit cards, and you can pay up to 24 hours after the ride has ended. It’s really fun and a great way to get around if you don’t have a car/plan on drinking/hate driving. Anyway, the reason why I’m telling you this is because my best friend recently signed on to be a driver, and that means free Lyft rides for everyone! Really! If you’ve never used Lyft before, download the app and use the code MORGAN1407 for a free ride up to $25. No strings attached (unless you go over the $25 credit, but that would be a looong ride. One person I know here managed to hit $30 once, and that was for a 20+ mile ride), just free ride goodness! It does have to be active in your city, but the company is growing fast so definitely check! Just remember to input the code into your app (in the payment section) BEFORE you take your first ride, so you can actually use the credit. And, sorry babes, but this is first-time riders only (I know!!). But yeah! Go forth and get you some free rides!

*ok, it was a shiny blue polyester button down from Rave, and it was totally my favorite shirt. Also, when it was pointed out that I’d worn the same shirt for multiple weeks in a row (so not technically days in a row, but every Sunday to church. For at least a couple of months, haha), I was so mortified that I never wore it again. RIP, shiny blue shirt.

Completed: The Striped Button-Down

14 Apr

A couple of weeks ago, Landon and I went to the mall – specifically, Gap – to find him a new pair of jeans. While we were browsing around (well, he was browsing – I just kind of lurking and judging the shit out of everything SORRY), I came across this stripey button-down goodness. I was mostly enamored with the horizontal stripes – loose fitting shirts aren’t so much my bag, and besides, those long sleeves would get worn for about two weeks in this climate – so I thought I’d make my own with a few modifications.

Butterick 5526 - stripes!

And make it I did! Woohoo!

Butterick 5526 - stripes!

This was definitely a waffling sort of project – I waffled on what style of shirt to cut, I waffled on stripe direction, I waffled on sleeve length, and I waffled on buttons. Fortunately, everything came together quite well and I’m super pleased with the end result!

Butterick 5526 - stripes!

I started out with my base pattern, Butterick 5526, since I knew this little dude already fit me pretty well. I knew I’d be using this pattern from the start, but what I waffled on was which view to cut – straight lines or princess seams? Obviously the straight, less fitted view would be more true to the original inspiration – not to mention easier to cut and match up those stripes. However, I don’t really like weight loose-fitting clothing – and when I do, it either better be something super drapey (which this shirting fabric is not) or, like, the dead of winter. Princess seams were the next option, which seemed like a good idea until I realized that the stripes would start staggering over the bust and not match up properly as a result. I considered cutting the stripes vertically, until I realized THAT would even be a hotter mess – plus, the horizontal stripes are what drew me to the shirt in the first place.

Butterick 5526 - stripes!

I took a sewing break to watch some infomericals, and thus realized the answer to my problem:

Butterick 5526 - stripes!

POCKETS!

Hell yeah Imma slap a pocket right over those broken stripes and NO ONE WILL BE THE WISER.

Butterick 5526 - stripes!

So. Let’s talk about horizontal stripes across princess seams. As you can see here – it *can* be done. Obviously the stripes won’t match all the way to the top of the seam, but you can cover the worst parts with a pocket, or just pretend they’re not there. I cut all my fabric on the single layer and I’m pretty happy with how my stripe-matching turned out – if you stand back and squint, you can’t even tell that there are seams down the front of my shirt! Yeah!!

Butterick 5526 - stripes!

I used this Marc Jacobs red striped cotton shirting from Mood Fabrics to make my stripey shirt. You’ll probably notice that the stripes in the picture are vertical – I had to cut the pattern on the cross grain to get those horizontal stripes. Doing so sacrificed the tiny (like, super super miniscule at best) amount of stretch on the grain, but I think the shirt fits fine as it is. Fair warning if you are working with a more fitted pattern – take the lack of stretch into account if you’re cutting on the crossgrain.

Butterick 5526 - stripes!

Butterick 5526 - stripes!

To match up the stripes, I just sewed reeeeally really carefully (after accurate cutting, I should add!). I really love sewing plaids and stripes – I find the challenge refreshing, and the end result is SO freaking gratifying!

Butterick 5526 - stripes!

If you’re at all familiar with this Butterick pattern, you’ll know that it doesn’t come with an option for short sleeves – just long, and 3/4 length (or, rather, on me – almost-but-not-quite-full-length, wtf). Also, the sleeves in this pattern kiiiinda suck – they’re really huge and wide, and the sleeve cap has waaay too much ease, at least for the princess seamed version (the plain version has a lower armsyce, since it’s more loose-fitting. My guess is that Butterick didn’t feel it was necessary to redraft the sleeves to fit the princess version, which is lame and shitty and boo on you, Butterick).

Butterick 5526 - stripes!

Reducing the sleeve cap ease was easy – I just followed Casey’s method. Figuring out how to get my beloved fitted, short sleeve started another bout of waffling. I waffled on sleeve length, I waffled on fit, I waffled on whether or not to add a cuff. In the end, I took about 1/2″ off each side of the sleeve seam, and put the sleeve on and marked where I wanted it to hit. I finished it with a 5/8″ narrow hem. It’s pretty simple, but sometimes simple is the best option, yeah?

Butterick 5526 - stripes!

The only thing I would change for the next round is to lower the pockets – I went with the markings on the pattern, but I think they are a little too high and should be about 1″ lower.

Butterick 5526 - stripes!

Butterick 5526 - stripes!

The pockets were REALLY fun to sew, by the way! Lots of ironing little creases, and turning sharp points, and precise topstitching (my favorite!). I just love how they look, especially with the little pleat in the middle.

Butterick 5526 - stripes!

As with my previous shirt, the seams are finished with a simple serge (I generally prefer flat-felled seams on this style of shirt, but flat-felling princess seams is NOT something I want to try to attempt right now!) and topstitched with a slightly longer stitch length. Besides the trauma of cutting and matching all those pieces, the actual construction of this shirt came together pretty quickly.

Also, I should note that I totally boringed-out on the buttons for this guy, and went with plain off-white shirt buttons. I like the way they look, though! 🙂

Butterick 5526 - stripes!

And I just love how it turned out! Simple, summery, and a little nautical – without looking costume-y. A win in my book!

As a side note – I mentioned this on Twitter and Instagram last week, but in case you haven’t heard – I’m teaching Introduction to Fashion Sewing this summer at Watkins College of Art, Design & Film! The 9 week class runs all the way through June and July, and I’m so excited about it! Nashvillians, if you’re interested – you can see the summer course catalog here (I’m aaaall the way toward the end, on page 13). Yeeeah summer crafty time! 😀

Completed: Chevron’d Ginger Skirt

4 Apr

Here’s another piece that I have seriously been planning for a couple of years – the chevron’d Ginger skirt!

Ginger Skirt - chevrons

Another stupendous idea delayed by lack of fabric – why why whyyyy is it so hard to find a good, 1″ stripe, non-stretch fabric, apparel-weight? Whyyy? I find lots of striped shirting fabrics (too lightweight, stripes too narrow), striped stretch twill (holding out for the lycra-less, pls), striped knit (ok, yes please, but not for this particular project!), or stripes in some kind of weird array of colors. Not to mention the overabundance of home decor striped fabric – but I’ve found I just don’t like all the structure that comes with home decor weight. My ass is not meant for curtains to hang off of it.

Ginger Skirt - chevrons

I was PRETTY FREAKING EXCITED when I found this fabric at last month’s flea. Hiding under a pile of vintage fabrics (all good, I bought nearly all of them lolz) were 4 yards of my dream yellow-and-white-1″-striped-cotton. In a rare unselfish move on my part, I ripped the yardage in half and sent 2 yards to Sunni (who I was doing a great fabric swap with earlier this month and holyyyy shit you guys I cannot wait to start digging into the lovely stuff she sent me!), keeping the other 2 yards for myself and this skirt. And here she is – finally, the striped/chevron’d skirt of my dreams!

Ginger Skirt - chevrons

As I mentioned before, this is the Ginger from Colette Patterns. I made view 3, which gave my striped fabric a nice chevron. I know chevrons are REALLY hip right now (and every time I pass something chevron’d at Target, I groan. A lot.), like to the point of already looking super trendy and dated, but I do like them for clothing. I’d say something like I hope they never go out of style, but I pretty much wear whatever I want regardless, so let’s just say I hope I can continue finding good striped fabric to make my own! Hopefully more frequent than once every couple of years 🙂

Ginger Skirt - chevrons

I’ve made this skirt a few times before, so this definitely ain’t my first rodeo, but I did have to size down since my previous versions don’t fit me anymore (well, maybe the Gazer does. I haven’t pulled that one out of summer storage yet to check). I cut the pieces on a single layer so I could be really accurate with lining up those stripes, and it (mostly)paid off.

Ginger Skirt - chevrons

I even went as far as to center the yellow vertical stripe in the middle of the waistband, so everything would be nice and balanced.

Now that you’ve seen the gorgeous, time to share my shame…

Ginger Skirt - chevrons

Kind of bummed that the chevrons on the side seams don’t match up 😦 I actually think it looks much much better in these photos vs real life (and since I took these photos, I have worn the skirt and been totally ok with the barely-matched-up side seams). Like I said. I did a very careful job of cutting everything out on the single layer, but the way this skirt is shaped means that you either get the fabric on-grain, or the side seams match all the way up to the waistband. One or the other, make your choice! I decided the grain was more important – plus, they kinda sorta match, right? 🙂

The other shame is that dammed invisible zipper! Guysss, inserting an invisible zip into a bias-cut garment isn’t the easiest thing you’ll ever do. I stabilized my seam allowances with 1 1/4″ wide stripes of silk organza cut on the straight grain, and the zipper is ALMOST perfect, but there is a tiny bubble at the bottom. I’m trying to decide if it bothers me enough to rip it out and fix it. Eh. It looks pretty bad in that picture!

Ginger Skirt - chevrons

But, you know, issues aside – it’s a fun skirt! And it’s fun to wear, although I do feel like I’m exposing myself every time I bend over to pick something up. Bias cut rides up all kind weird.

Ginger Skirt - chevrons

Ginger Skirt - chevrons

This fabric was also kind of weird, amazing as it is. When I first grabbed it, it felt like a great bottom weight – slightly stiff, a bit of body, a subtle sheen. After the prewash, however, the fabric majorly softened up and weight-wise, it felt a lot more like quilting cotton. I was hesitant at first, as I wanted a stiffer shape to my skirt, but I’m pretty happy with how the drape of the fabric looks with the bis cut. The only drawback was that those bias sides stretched a loooooot. Like, so much. That’s probably a good part of the reason why the side seams don’t match up so nicely.

Ginger Skirt - chevrons

Ginger Skirt - chevrons

To give the waistband some structure, I interfaced the outside with my normal fusible interfacing, and sewed hair canvas to the facing. While this particular waistband isn’t quite as high as the other views on the pattern – and it’s not shaped, either – I still didn’t want it to crumble when I bent over. Not a good look!

Ginger Skirt - chevrons

Ginger Skirt - chevrons

Oh yeah, I used the bicycle fabric left over from this dress to face the inside of the waistband. It’s a cute little surprise!

Ginger Skirt - chevrons

I also used the last of my yellow lace hem binding for the hem. Side note – the packaging for this stuff (it’s from the 70s) boasts that it’s “Like Pretty Underwear!” which makes me laugh every time.

Ginger Skirt - chevrons

So that’s it! Simple skirt, simple fabric – but I love the results! I guess I’m on a major skirt kick right now; I’ve got anther one cut out waiting for assembly as I type this.

As a side note – the shirt I’m wearing is my button down from this outfit. I LOVE this shit and I’ve worn it soo many times since completing it! The reason why I’m pointing it out, though, is because this is what the shirt looks like after a wash with no ironing – I just shook it out and hung it to dry. It has some subtle wrinkles, but nothing crazy – it kind of reminds me of linen with how the wrinkles just look relaxed and natural. Except it’s cotton! Pretty cool; I love getting away with not ironing my clothes 😉

Completed: Runway-Inspired Separates

25 Mar

So, everyone at the Mood Sewing Network decided a couple of months ago that we would challenge ourselves to make pieces that were inspired by the Spring 2014 runway. Real talk: this shit sent me into a panic. Runway? I can honestly say I have never even so much as glanced at a series of runway photos, let alone determined an outfit based on what I saw (I’m not saying this in an ~ooh, I’m so cool I just don’t even pay attention to fashion~ way, more like, yo clueless!). Furthermore, it’s difficult for me to grab “inspiration” from something without just blatantly copying it. I spent an entire month agonizing over designers, pouring over runway sets at style.com (holy crap, there are a lot of them) and wringing my hands over what to make.

Butterick 5526 & Kelly skirt, made with Mood Fabrics

Then I discovered Alberta Ferretti.

Alberta Ferretti Spring 2014

I still don’t know who this designer is, exactly, but the entire runway show is magical. Bright, saturated colors! Crisp white accents! Flowers! Stripes! This is the kind of inspiration I can get behind! I decided to make myself a *wearable* (emphasis on wearable ;)) version of my favorite look.

Butterick 5526 & Kelly skirt, made with Mood Fabrics

Figuring out the fabric and patterns I would use was almost as difficult as picking a designer! I knew I wanted to make a striped skirt with pleats similar to the runway version, because I just really love how that turned out (plus, who doesn’t love a good striped skirt?), but finding a good striped fabric on the Mood Fabrics website was haaard. I mean, they have all sorts of good stripes to choose from – but very little in that specific combination of wide, irregular stripes in bright saturated colors. I know, I know – this is supposed to be an inspiration, not a literal interpretation. But dangit, I wanted those irregular stripes!

Butterick 5526 & Kelly skirt, made with Mood Fabrics

I’m not going to tell you how long I spent picking through the Mood website with a fine-tooth comb; let’s just say I probably know every apparel fabric they sell now. I did finally find my big prize, though – this amazingly bright orange stripe cotton sateen is the clear winner. Woohoo! Of course, it clashes with my hair like big time crazy bad, but whatever, I picked all this shit out pre-blue LT. Anyway, I just love love LOVE the bright colors of the stripes – it’s not quite the same colors as the inspiration skirt – it’s way more happy springy! Yay spring colors!

Butterick 5526 & Kelly skirt, made with Mood Fabrics

I was originally going to make the fabric in a skirt that is more similar to the runway inspiration – no button front + pleats all the way around – but at the very last minute (like, right before I cut into the fabric, lolz), I changed my mind and decided to go with a pattern I knew I would actually wear and love. Enter the Kelly skirt! Cutting that shit took forever, btw. I agonized for a long time on how to cut the stripes – where each color and wide stripe should hit. I used the inspiration photo to help me decide how to cut the waistband (it was originally going to be a mess of stripes on it’s own, but I like it as one solid, thick stripe!), and was careful to match up the stripes along the side seams, the button front, and the pockets. Like I said, it took forever, but once I got the pieces cut, the actual assembly took no time at all.

Butterick 5526 & Kelly skirt, made with Mood Fabrics

The fabric is described as a lightweight cotton sateen, but it’s weighty enough to work as a bottom weight. There is definitely some texture in the weave, and it stretches quite a bit. I made sure to stabilize the waistband and button placket so the fabric would keep it’s shape in those areas, and used a long stitch on my machine for all the topstitching. It presses very well – really easy to get a sharp crease in there, yeah! – but it also tends to leave pin holes. For areas that needed to be pinned together and topstitched (such as the button band and inside of the waistband), I fused the pieces with a long strip of stitch witchery instead of pinning; this keeps everything in place and makes topstitching SO much easier! Especially if you tend to miss spots and only discover them after you’ve finished topstitching the seam, which means they gotta be ripped out and restitched so you catch the entire fold (er… not that I would know anything about that…). That shit’s not a problem at all when you’ve got Stitch Witchery on your side. Yay, Stitch Witchery!

Butterick 5526 & Kelly skirt, made with Mood Fabrics

Since my skirt is so bright and colorful, I went the boring route with my top and made a classic button-down shirt. I seriously considered adding embellishment – or even making it into a crop top, because, why the fuck not? – but in the end, I stuck with the classic tried and true. Mainly because my wardrobe is sorely lacking a solid white button down with sleeves, so I know this shirt will get quite a bit of wear with other pieces to mix and match. I used this Theory lightweight cotton shirting – which, if you were wondering, took almost as much agonizing as find the perfect stripe. There are SO MANY WHITE SHIRTING FABRICS available at moodfabrics.com! SO FUCKING MANY. Like, how do you even choose? I figured that I’ve had really good experiences with all the Theory denims I’ve bought, so the shirting fabric must be just as excellent. Which ended up being true – this shit is soft as angel’s wings, presses and stitches beautifully, and it’s right along that line of being *almost* sheer because it’s so lightweight. A skin-colored bra is a must with this fabric. The only drawback is that since it’s 100% cotton, it does wrinkle like crazy. Like, when I pulled it out of the dryer, it was a hot mess of wadded wrinkled ball I don’t even know what. Good thing it presses well! 🙂

Butterick 5526 & Kelly skirt, made with Mood Fabrics

For my pattern, I used Butterick 5526. Like I said, I knew I wanted a classic button-down shirt but nothing in my stash was exactly what I wanted – everything was either a relaxed fit, or had something twee like a peter pan collar or an abundance of ruffles cascading down the front. Which is fine – clearly I like these patterns enough to even have them in my stash – but I wanted something super basic. Butterick 5526 perfectly fit the bill – I went with the princess-seamed version with 3/4 sleeves, and I’m actually a little surprised at how much I like it. I made the size 6 with no muslin, with the hopes that the princess seams would give me enough room to play around with the fitting. It actually came out perfect straight out of the envelope – I KNOW, RIGHT? – although next time, I will shorten the sleeves because they are stupid long. They’re supposed to be 3/4 and they come to right above my wrists – in that weird spot that’s not quite long sleeve, but rather looks like I measured my arms wrong. Wah wah! I’ll just wear these rolled up, I guess. I also may reduce some of the ease out of the sleeve cap in the next version; these were pretty hard to ease in smoothly and there are still tons of wrinkles. But, for the most part – it ain’t bad!

Butterick 5526 & Kelly skirt, made with Mood Fabrics

I did try to jazz up the shirt a little bit by adding topstitching, but for the most part – it’s just a plain jane backdrop to an awesomely loud skirt. I love it!

Butterick 5526 & Kelly skirt, made with Mood Fabrics

Ok, now I have to tell you my secret – I didn’t start sewing this until Saturday morning! On top of that, it had to be finished and photographed before dark on Sunday – and I had a wedding to attend on Saturday night. I spent so long agonizing over my designer inspiration, then the fabric, then the pattern – that by the time I had everything (mostly)figured out, it was time for me to get on a plane and head to NY. When I got home on Monday, I had another more urgent deadline that needed to be taken care of asap (more on that later), which put this project on the backburner for a few days. Needless to say – I was pretty stressed come Saturday morning! I like to think I’m pretty efficient when it comes to making things quickly, but even that’s a stretch for me, especially two garments. I’ll be honest – I was tempted to half ass this one, just for the sake of time, but I decided early on that it wasn’t even worth my while if I didn’t end up making something that would be wearable past this photoshoot. Which means I forced myself to slow down – I made time for fitting, for the details like topstitching, for fixing mistakes (oh yeah, I totally sewed that collar stand on backwards the first time NO BIG DEAL), for eating lunch. But hey, look – not only did I actually get it done, but I actually made something nice without cutting corners.

Butterick 5526, made with Mood Fabrics

Butterick 5526, made with Mood Fabrics
I mean, check out that topstitching!

Butterick 5526, made with Mood Fabrics

Kelly skirt, made with Mood Fabrics
Lots of topstitching on the skirt too, woohoo 🙂

Kelly skirt, made with Mood Fabrics

Kelly skirt, made with Mood Fabrics

I know my outfit isn’t quite as fashion forward as what I could have done, but I am elated with how both pieces turned out and I can’t wait to give them some proper wear to welcome spring in with loving arms. Come on, spring! I know you’re lurking back there somewhere, time to come out of hiding!

Butterick 5526 & Kelly skirt, made with Mood Fabrics

One last thing – most of y’all are probably aware by now, but just in case you weren’t… By Hand London is going to start printing fabrics on-demand! How freaking awesome is that?? They need some help with costs to get production started, so they’ve got a Kickstarter going to raise funds. You can get some pretty sweet loot in exchange for your money – from tote bags, to coffee mugs, to free patterns, to private sewing lessons – but even $5 helps. Every little bit adds up! I am so so excited for this new venture that the BHL ladies are seeking out, and I really hope they meet their goal so it can become a reality (especially if it means I can start printing wildly tacky fabric to my heart’s desire). You can check out the Kickstarter here – watch the super cute video, and I dare you not to fall in love. I dare you.

Completed: the Meissa Blouse

28 Feb

I think every sewist has a dream fabric that they’ve spent years searching for in vain. It’s not necessarily a weird combination of prints and colors on a totally inappropriate weave, but whatever the specific end result is, it’s nowhere to be found. I have two – a wide (like 3″ or more) white and navy striped twill, and a bicycle print that is NOT quilting cotton.

Meissa Blouse

I gave up on the stripes, but the bicycle print really haunts me. I’ve seen some cute little stylized bikies (see my Bicycley Belladone for an example), but I was holding out for that literal printed-bike-on-some-lightweight-cotton-in-a-nice-color-combination that didn’t seem to exist. And NO pennyfarthings! I want real bikes, not some super hipster twiddly mustache crap.

Meissa Blouse

I had this particular fabric in mind when I was contacted by Organic Cotton Plus with offers to try out some of their yardage. I’d just been back from snooping at Brooks Brothers, specifically zeroing in on this Bicycle print button-up. Isn’t that shit amazing? Argh! So I thought to myself, “Cool, well I’ll just get a stamp and make my own, yeah? Oh, they don’t have any batiste in good colors… but they do have dye…”

And this, my friends, is how I ended up with two yards of white cotton batiste, emerald green Procion dye and some weird little bag of soda ash. Have I gotten in over my head? Probably.

Meissa Blouse

My first couple of days were preparing the fabric – first, I dyed it in a bucket (for real; I stood at the kitchen sink with a my Kindle on Netflix and squished it around the water while wearing gloves, ha!). I wish I would have used a bit more dye in my mix; the end result color is pretty, but it is lighter than the emerald green I was anticipating. On the flip side, though, the dye took evenly all the way across the fabric, so yay!

After I finished the dye bath and let the fabric dry, I took to stamping the entire yardage with a rubber stamp and fabric paint (I blobbed my paint into a dried-up ink pad to make it easier to use). I thought this part was gonna take forever, but it wasn’t too bad! Since stamping tends to look pretty, well, stamped (i.e., it’s not exact and you won’t get a perfect image transfer every single time), I didn’t follow any straight lines and just kind of stamped around haphazardly. After I cut the pieces, I re-stamped a few that had big gaps. This particular ink is great because you don’t have to heat-set it to keep it from washing out (which is good bc I’d spent long enough prepping the fabric, so one less end task is good in my book!), and the ink itself absorbs into the fabric and is not stiff.

Meissa Blouse

Other than the dye reaction it had (which is I think my fault for not making a strong enough dye bath, oops. Live and learn!), I really enjoyed working with this fabric. The batiste is one of those good ones that feels like there’s silk or something smooth and luscious blended in the fabric, but it is truly 100% cotton (and organic, no less!). Because it is cotton, it presses well, which makes it perfect for shirtmaking. It’s also not super sheer like some batistes – even the virgin white would be fine for a shirt. Always a plus in my book!

Meissa Blouse

The pattern I used is the Meissa Blouse from my beloved Papercut Patterns. I love this pattern because it’s a casual button-up without being an Archer (which I obviously LOOOVE, but hey yo, a girl’s gotta branch out!), ha. The little feminine details – the rounded collar, the shoulder yokes with the little gathers, the double buttons – seemed like a good match for this fabric, and a nice nod to my original inspiration without being a blatant copy.

Meissa Blouse

The pattern instructions make this thing really, really easy. Katie has had lots of praise around the webs for how good they are, and it’s all try! Really basic, really straightforward, and beautiful results. I did change a few things just because I’ve hit my personal shirtmaking stride – I flat-felled every seam (the way the shirt is made, only the side and underarm seams are not enclosed, so it’s not like you have a flat fell a million seams to do this) and I pulled in the waist an additional 1/2″ or so. I also shortened the sleeves by about 1″.

Meissa Blouse

Meissa Blouse

Whatever I did to the sleeve seams now means that I cannot button the cuffs around my wrist – they are WAY too small! Whoops! Oh well, this is totally a summer shirt, and I’ll never wear those sleeves rolled down anyway. Ha!

Meissa Blouse

Meissa Blouse

To keep the shirt from being overwhelmingly green, I added some cotton braid to the inside of the button band (butted up right against the stitching line) and inside the sleeve cuffs.

Meissa Blouse

Meissa Blouse

The sleeve cuff treatment is something I saw on the Brook’s Brothers shirt (seriously… if you have a Brooks Brothers in your area, you should snoop it. Some of the finishing inside the clothes there was pretty awesome!). There was a little piece of petersham ribbon tucked in the seam at the top of the cuff, which shows when you flip up the cuffs. Using that inspiration, I tried to do the same thing with my shirt. It’s a liiiiiittle sloppy because I was experimenting, but I like how it turned out! It even makes me ok with the fact that I can’t use the cuffs 🙂

Meissa Blouse

I’m super happy with all the detailing on the shirt. I used lots of topstitching so it would really stand out.

Meissa Blouse

And hey, check it out – the shirt is long enough to where I can tie the bottom in a knot, like a fashion blogger or some shit.

Meissa Blouse

Meissa Blouse

~So fashun.

Meissa Blouse

I still have quite a bit of the dye & soda ash left over. I’m thinking I may buy a load of silk and sandwash the shit out of it. My friend Elizabeth uses soda ash to prewash her silks into this amazing textured wonderland, so I can’t wait to try that! I will definitely report back with results. First, I gotta find a washing machine, though 😉

Ok, ONE last thing – and I promise this is a good one! Remember The Great British Sewing Bee and how we (we as in Americans, ha) bitched about not having a US version of the show? Well, I was contacted by a Love Productions, who is in the process of producing and casting a pilot for – you guessed it – an American version, called The Sewing Bee! They are currently on the hunt for amateur sewists in the NY, CT & NJ area (although if they get picked up, they will expand to nationwide). I actually ended up talking to one of the producers on the phone and I’m really excited to hear about the plans they have in the works – such as, the show will differ slightly from the UK version in that there will be a different set of contestants and winners every week. One thing that is similar is how they plan on editing – as far as I know, it will be as drama-free as the UK version, which is what I like most about it!

img-227171148-0001
Click here for a bigger version of the flyer

If you’re in the area (or don’t mind traveling and camping out for a couple of weeks, I guess), you should definitely try out for the show! And then report back to me, because I want to see y’all on the teeeveeee!

Completed: My First Archer, A Linen Disaster

5 Sep

Remember that Monet of an Archer I posted with my lime green Maritime shorts the other day (which turned out totally awesome, and yes, that’s me tooting my own horn, toot toot)? Remember when I said I was too traumatized to talk about it any further? Well, I think I feel like dishing today. Let’s dish!

Archer Shirt
(I took these pictures at the same time as my last batch – hence the exact same outfit – but I moved to a different side of the yard so they’d look a little different. That’s how much I love y’all. Also, this is pre-skeeter attack, fyi).

Ok! This is the Archer from Grainline Studio. I cut the smallest size and shortened the hem (too much, it looks). I think my relationship with this pattern has definitely gotten off to a rocky start, but I’m willing to give her a second chance. Funny, I thought this style looked horrible on me when I checked myself out in the mirror, but it’s not so bad in pictures!

Archer Shirt

I made this using some scrumptious Ralph Lauren linen from Mood Fabrics – doesn’t the idea of a floaty linen button-up in September sound so luxe? Nice and airy for the AM, but you can roll the sleeves down with the sun sets. Also, I just really love navy and I needed a shirt to go with my new aforementioned shorts, so I was feeling pretty confident about myself. So confident, I sliced directly into the linen without the benefit of a muslin or even reading the directions carefully. Oops.

Archer Shirt

Now, don’t get me wrong here – I don’t think a shirt like this necessarily requires a muslin, so to speak. It’s fairly loose-fitting and very forgiving in that sense. However, I do think a shirt like this requires the correct length when it comes to the body and the sleeves, and I think it is kind of a bad idea to dive into something so precise as shirtmaking without giving yourself a few test runs before you get into the good stuff. These were my mistakes. Had I made a little mock-up, I might have had the chance to try out that collar deal before I done goofed it up, ripped it out, realized that the linen was fraying at an alarming rate and oh god what have I done.

Also, the sleeves are way too long and the body is a bit on the short side (the latter isn’t the pattern’s fault, I just got a little too slash-happy with the scissors).

Archer Shirt

With all that being said, I actually really enjoyed sewing this pattern – it’s very precise, with all the top-stitching and perfect pressing, the kind of thing that I find SO relaxing to sew. Rather than get bummed that I made a shirt that isn’t up to my personal sewing standards, I consider this a muslin and I can’t wait to start my ~real~ version. The instructions are clear, albeit brief (if you get stuck, there is an entire sew-along with plenty of words and pictures), and every piece fits together nicely.

I know. The shirt looks fine in the pictures.

Which is why I took close-ups of the bad parts. You know you wanna see!

Archer Shirt

My first fuck-up was the top stitching on the button band. True, it’s not tooooo bad, but it’s definitely crooked. I’m not even sure how I managed to get that seam so crooked, but a crooked seam means crooked top stitching which means sad button band.

If you zoom in, you can even see an errant line of stitching running straight into a button. What is this I don’t even.

Then I tried to attach the collar stand.

Archer Shirt

And this is what happened. The fuck is that bump sticking out there? What the hell is going on?

Archer Shirt

And here is the crowning glory, which I obviously saved for last. This is what happens when you sew the collar stand wrong, then try to unpick it, then realize that the fabric is unraveling and now you have no seam allowances so you just sew haphazardly across a few points and hope for the best. It’s wonky and terrible and I can’t even button the top button. OOPS.

Speaking of buttons, the button holes *do* look nice. Thanks, Bernina!

If you were wondering, here is what I plan on changing for my next version:
– Shorten the length (although maybe not quite as much as this one!)
– Shorten the sleeves – they are WAY too long on me, like, the cuff starts below my wrist. I actually did not even bother sewing the buttons on the cuff here because they are so laughably long, I figured I’d just roll these up 4evs. But for my next version, I need to get the sleeves the proper length.
– Change the placket to a more traditional sleeve placket (such as the ones on the Negroni pattern). The ones on this shirt are much more simple – just a little binding, which isn’t bad, but I like the fancier look of the Negroni.
– I think I need to take out some of the width of the back, it’s super blousey on me.
– Draft smaller pockets; these are a little overwhelming on my frame.
– Get that god-forsaken collar stand under control, I mean, WOOF.

If you were also wondering, here are my suggestions should you decide to tackle this pattern yourself:
– MUSLIN IT. If you feel confident in your fitting skills, you may skip this, but I strongly encourage you to at least make a mock collar/collar stand so you can get an idea of how this shirt gets put together. You may also want to consider measuring the sleeves against some sleeves that fit you, unless you prefer the perma-roll.
– Don’t make your first version in linen. Just… don’t.

Archer Shirt

Despite an iffy start with this pattern (which I’m chalking up to user error), I think it’s a keeper and I will be making this shirt again. It’s a lovely design and a fun pattern, and I’ve already sourced my dream plaid flannel. I have an entire outfit planned around this pattern in that fabric, ain’t no one gonna stop me.