Completed: Coppélia in Merino

18 Sep

Just a head’s up – this is another kind of boring, repeat pattern post. Sometimes I feel like I’m a bit of a snooze for making the same things over and over, but honestly – I enjoy tweaking my patterns with each make, until I have something that is as close to perfect as humanly possible. It’s a process, to be sure. It’s also the only way I can bring myself to cut into precious fabrics. Don’t wanna goof it up!

Merino Wool Coppelia

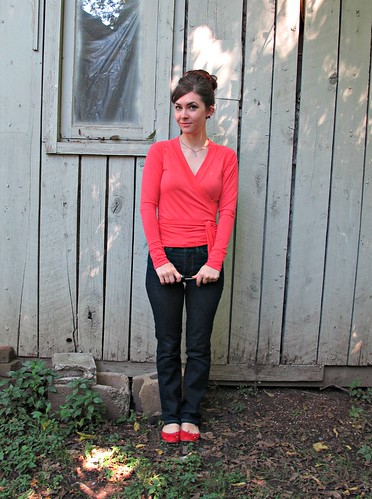
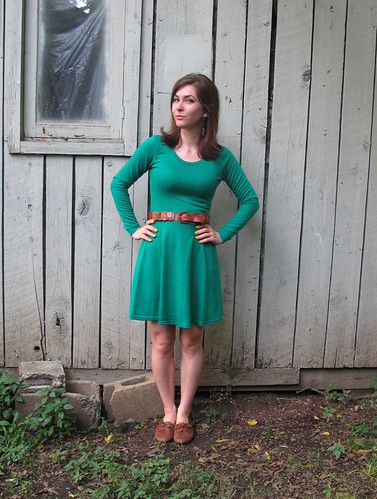
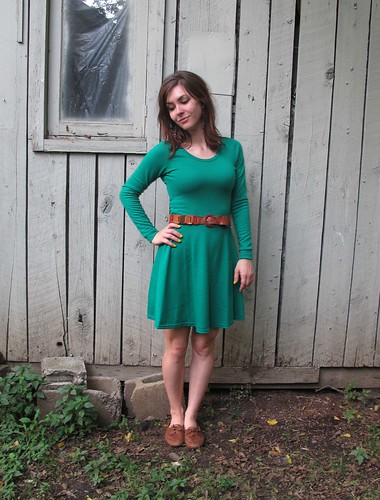
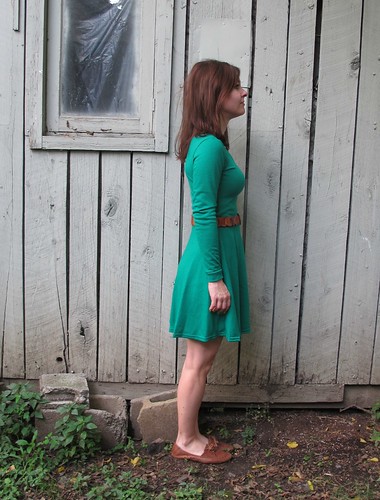
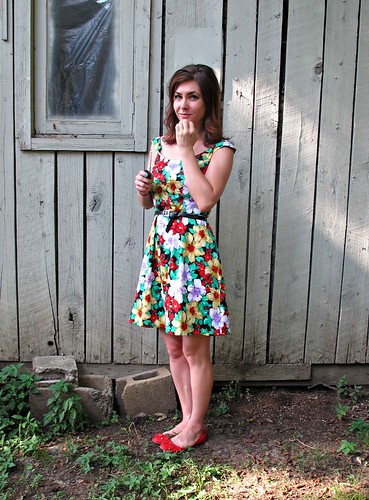
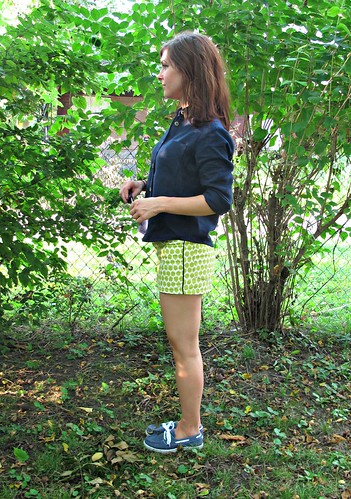
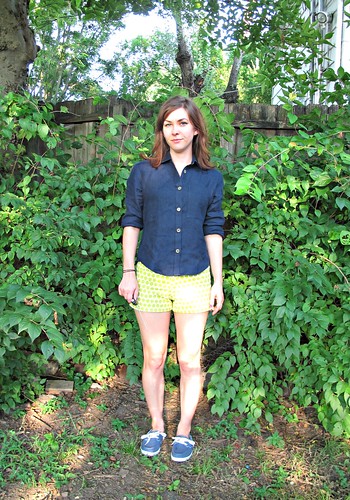
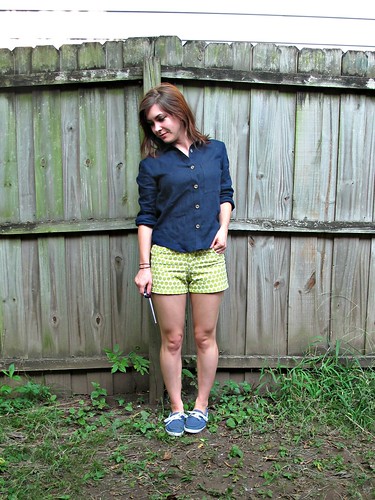
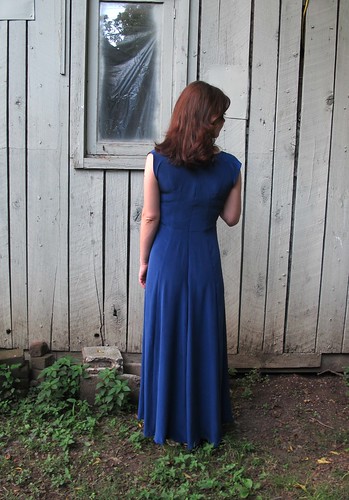
So, with that being said – I made another Coppélia cardy! (for previous versions – see one two three). This one in another piece of my prized Merino stash, hence why I needed to perfect this fit.

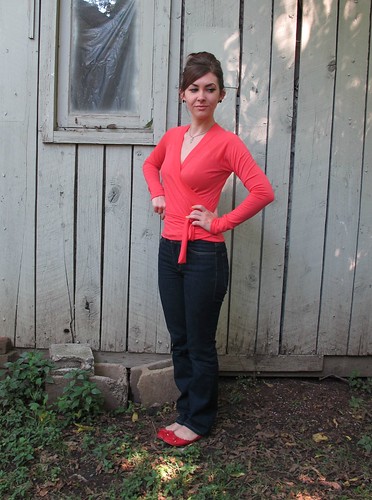
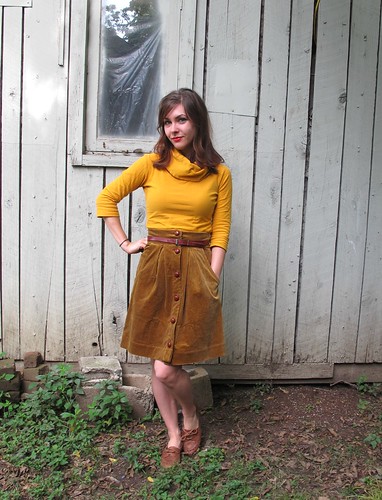
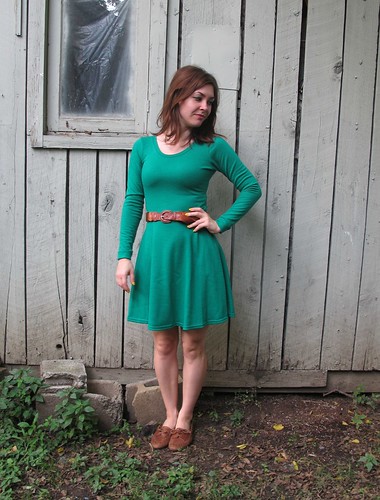
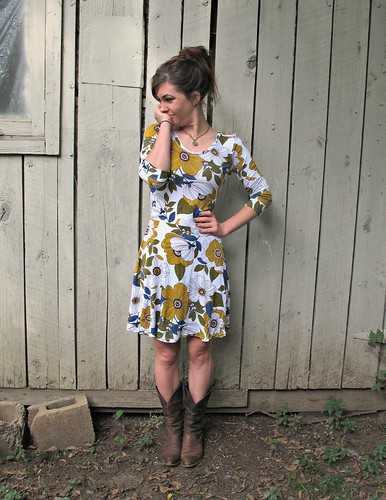
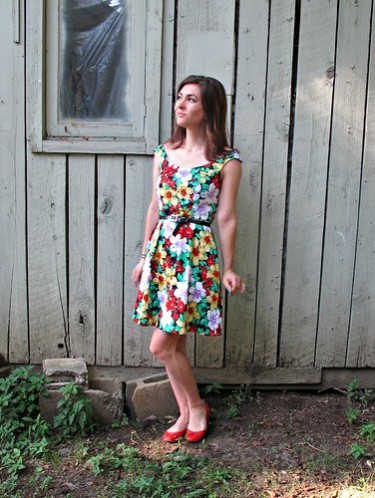
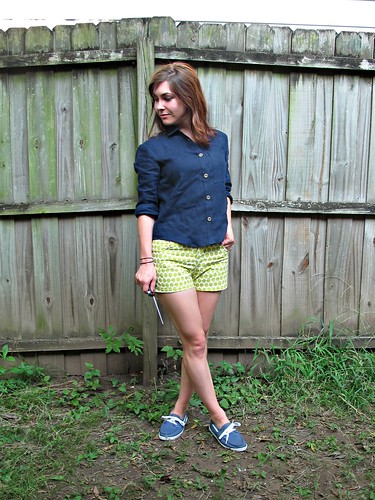
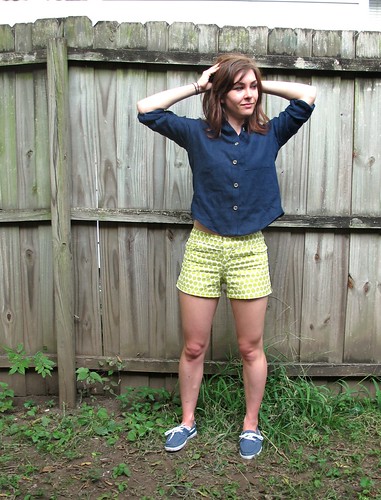
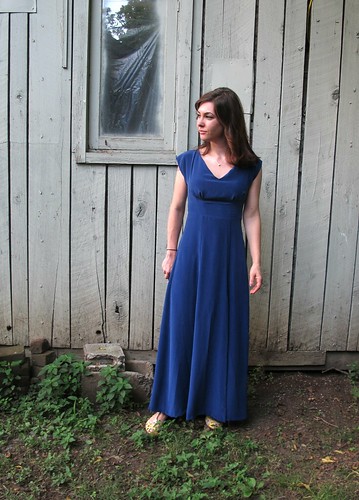
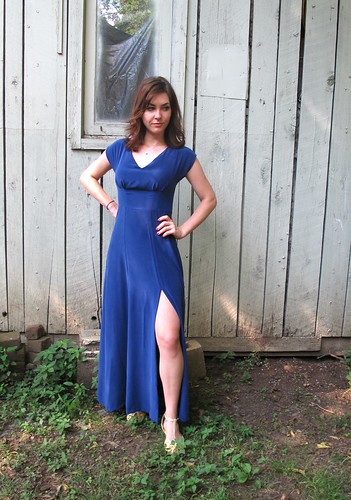
I also wore my hair up for you guysss! Look at me, branchin’ out and shit 🙂

Merino Wool Coppelia

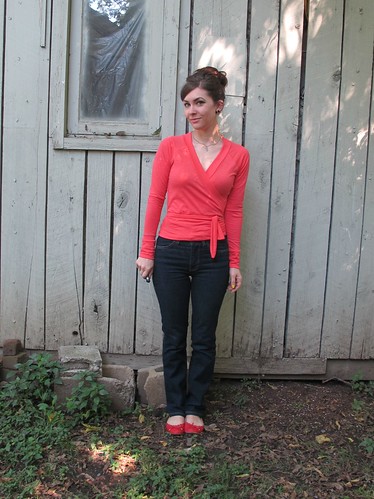
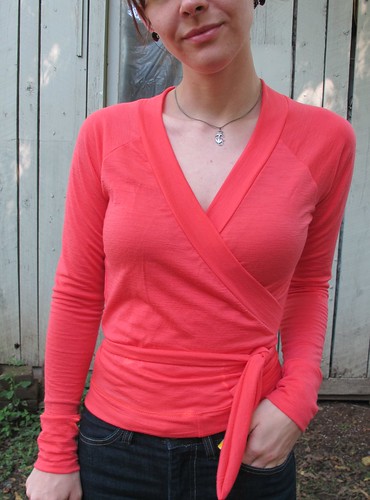
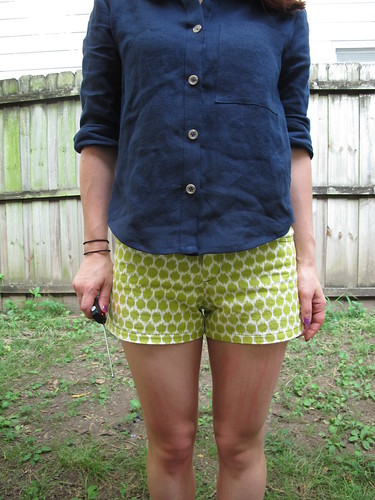
This Merino wool is different than the first piece I sewed up (see Coppélia three; the leggings are the Merino!). It is MUCH stretchier, a bit more sheer, and much much softer. Due to the stretch, I did have to take down the pattern size a little to accomodate, but it all came out fine in the end! I was also initially concerned that the color would look bad on me… and maybe it does, but ehhh I don’t care. I love it, it’s so bright and happy!

Merino Wool Coppelia

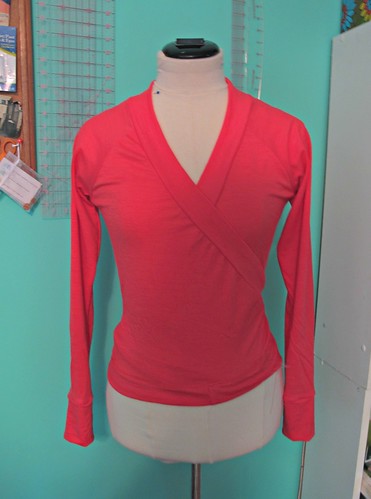
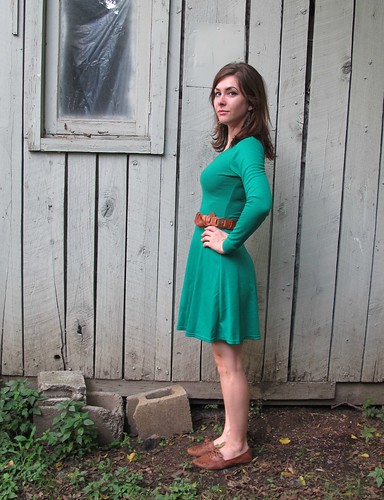
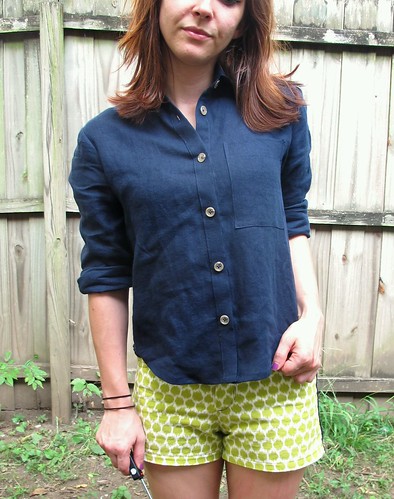
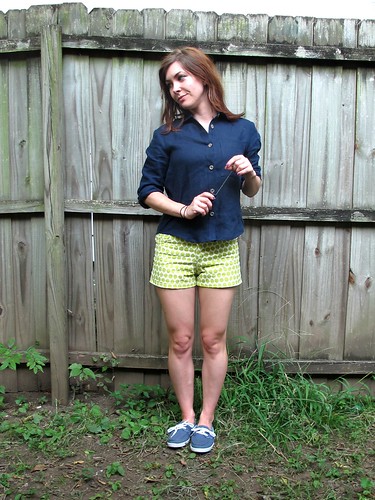
Let’s see, pattern changes. I started out with my base Coppélia, this time sized down to XXS with 1″ taken out of the center back. I took an extra chunk out of the side seams (maybe 1/2″? I dunno, I just serged it off haha) and about 5/8″ off the under arm and sleeve seam, for a much closer fit. The biggest change I made was to lengthen the top, so it would be wearable with my jeans. I slashed through the pattern about 1″ from the bottom and then added 2″, making sure to true up the lines and everything when I was done. This pulls the cardi down long enough to cover my waistband, which hits right below my navel. Perfect!

Merino Wool Coppelia

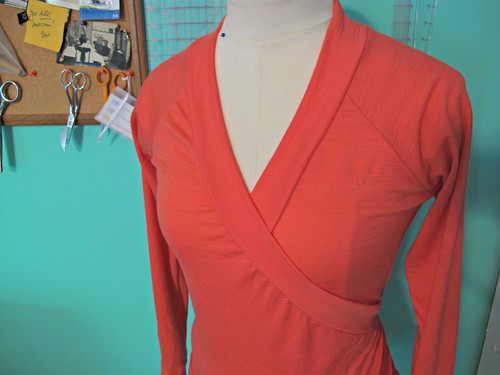
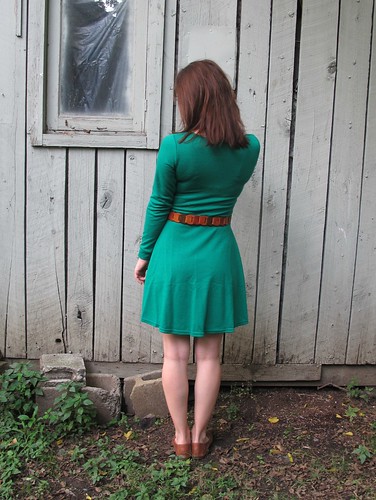
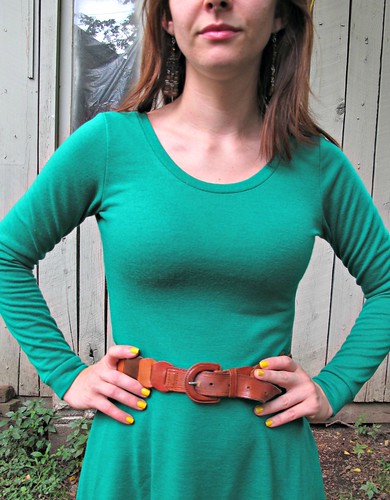
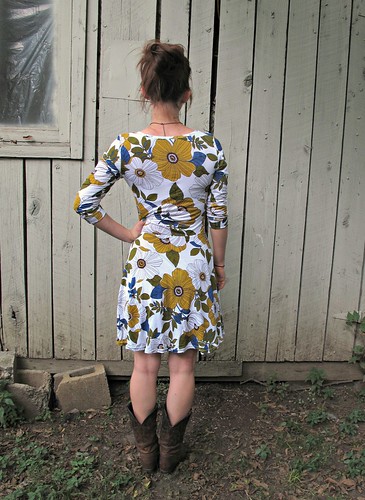
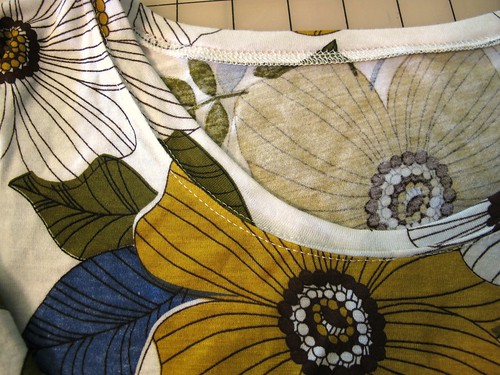
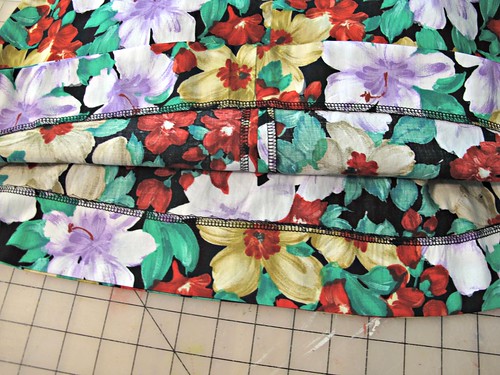
Another change I made was to tighten the neck band for a closer fit. I just kind of wing’d (wung?) it up as I went – tacked it down at the center back, then starting at the CB on one side, I pulled the band while I serged it to the neckline. Once I reached the end, I went back to the CB and attached the band from the opposite side. I think I ended up pulling about 2″-3″ off the neckband at each end. The result looks a little gathered when it’s laying flat, but once on it gives a nice snug fit – which is important with a low wrap top like this.

Merino Wool Coppelia

Merino Wool Coppelia

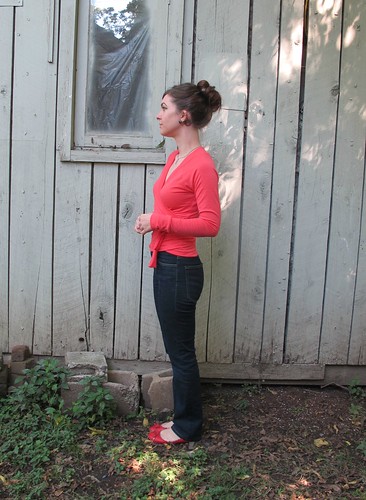
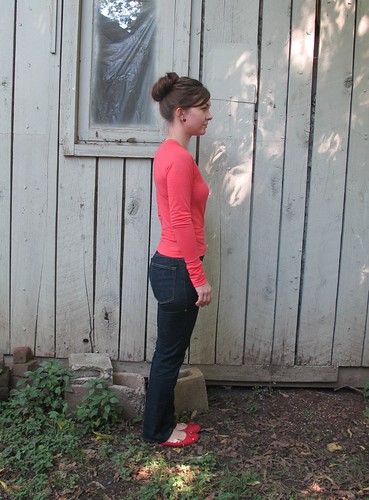
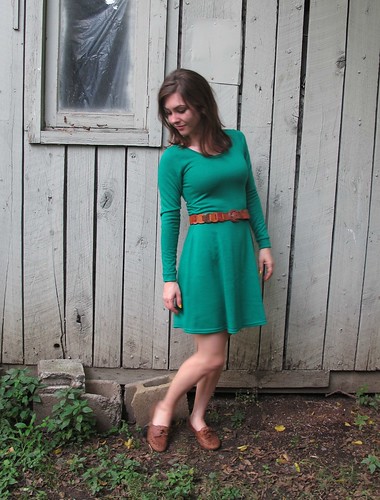
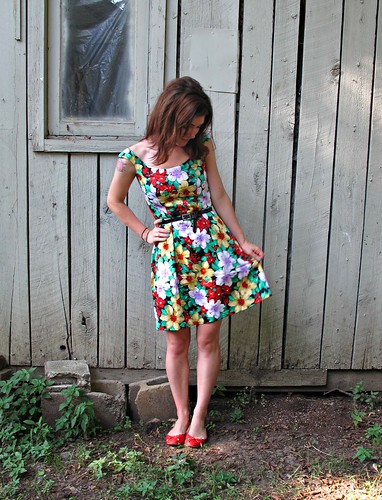
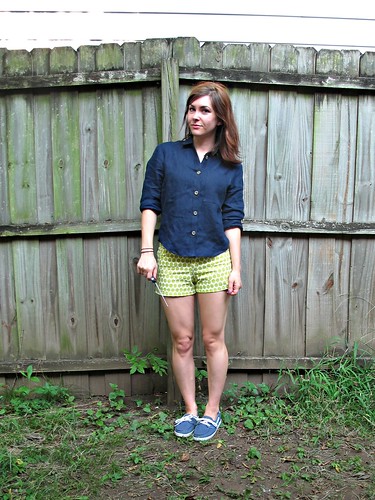
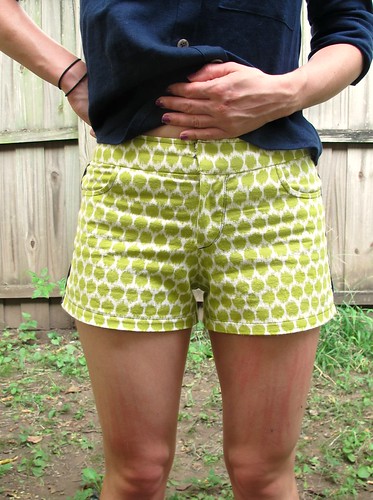
I like the ties wrapped in the front, but after taking these pictures I ended up tying them in the back like the pattern envelope.

Merino Wool Coppelia

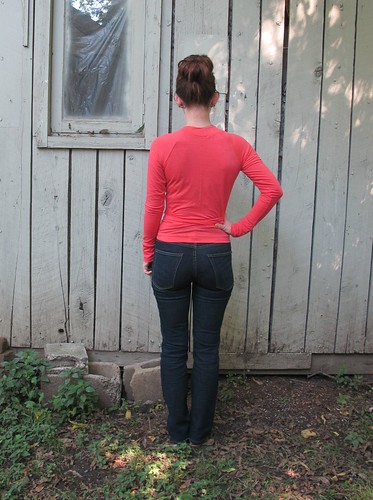
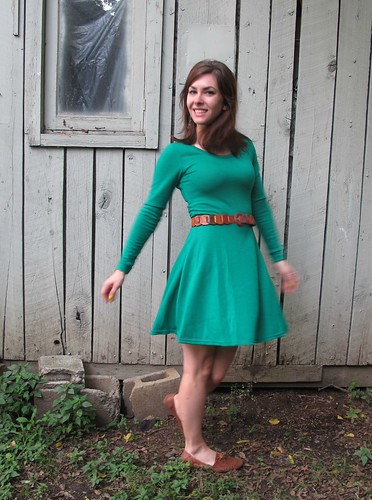
And this top looks great with my jeans! Win! 🙂

Merino Wool Coppelia

So, speaking of Papercut Patterns – I know a lot of people have voiced concerns in the past about the prices of the patterns. So, with that in mind, two things: 1. Make sure you change the currency (it’s at the top right-hand corner) to USD, or whatever works for your country. NZD is the default, and their shit’s a little more expensive! 2. Consider that the price also includes free shipping, if that helps sway ya 🙂 This top is $20.48 USD, which includes the shipping – a top from other indie companies usually runs, what, $14-$18, plus the shipping, which can easily be $5 extra. Just something to keep in mind! 🙂

Merino Wool Coppelia

Now that I’ve perfected the fit on this, I can’t wait to make a million more and then post them and force y’all to look at multiples of the same shirt.

Merino Wool Coppelia

Merino Wool Coppelia

Ha! Just kidding, I wouldn’t do that to you.

Merino Wool Coppelia

Probably not, anyway.

Completed: A Cozy Kelly Skirt

16 Sep

Look at me, I’m like a 1970s Sherwin Williams swatch book all up in hurr.

Corduroy Kelly Skirt

I know I haven’t talked about her much since the denim version came out to play, but OMG I LOVE KELLY. I seriously can’t get enough of this pattern – it’s very simple, but delivers maximum effect!

Corduroy Kelly Skirt

This is my second corduroy Kelly, same difference as the first, although this cord is a much thicker wale with a softer hand. I snatched it up during my trip to NYC – it was part of a swap, although I am a terrible swapper and I don’t remember who it came from 😦 Sonja? I know the majority of the goods came from your stash haha 🙂

Corduroy Kelly Skirt

Anyway, origin aside, this fabric is pretty fabulous! It’s super soft with a fair amount of body, and the color is one of those great browns that goes with everyyyyything (except the new top I made, apparently, which is not the same top I’m wearing in these pictures btw. Oh well haha!). I love corduroys, but sometimes finding a good one that’s pure cotton with no stretch and a nice color can be surprisingly difficult!

Corduroy Kelly Skirt

I can’t speak much on this pattern because obviously I’ve already made/discussed it, but I will tell you what I did differently this time ’round. For one, I used sew-in interfacing instead of my regular fusible… corduroy can be kind of finicky when you press it (specifically – you risk squishing the wales flat and ruining your fabric and WAH), and a quick test of the fusible proved that I would be making a huge mistake. I used muslin as my sew-in – just cut the pieces, basted them to the waistband and button hole placket, and then proceeded as usual.

Corduroy Kelly Skirt

I did topstitch my skirt as directed, but it’s not really noticeable due to the thickness of the fabric. It doesn’t bother me – I like the subtle look – but if you’re planning on making this with a similar fabric and want the topstitching to be visible, you will need to use top stitching thread and the accompanying needle.

Corduroy Kelly Skirt

Obviously, you want to be careful when pressing corduroy – but some stuff does need a good sharp crease, like these pleats and the hem. To do this, I laid a scrap piece of corduroy on my ironing board, right side up, and put my skirt on top of the scrap right down down (this keeps the nap from getting crushed, as the fabric on the bottom provides some support). I used my silk organza press cloth and steamed the beejeezus out of everything, and then used my clapper to hold everything down until it cooled off.

I love that clapper. I always feel like such a fancy-pants when I use it, ha.

Corduroy Kelly Skirt

I also omitted the second button on the waistband – I want to wear this skirt with belts, which I can’t do if there’s a giant button in the way. I put in the top button and added a hook and eye where the second button should be.

Corduroy Kelly Skirt

Here you can see my hook and eye. The skirt in unlined, but it works fine with a slip underneath in the winter, for wearing with tights. Well, the other corduroy one does, anyway, haha.

Corduroy Kelly Skirt

Oh yeah, my buttons were free too! They’re some faux-leather suiting buttons that my Mamaw gave me. She gave me HUNDREDS of them (and my mom took half… but still… that’s a lot of buttons) and I rarely find a change to use them since they’re just really big. But I think they work here! The color looks great with the color of the fabric.

Corduroy Kelly Skirt

I almost forgot – look at this cute pocket lining! It’s a tiny little scrap I got at the flea market. The seller threw it in for free (lord, can I say “free” enough in this post??? FREE FREE FREEEEEEEE) with a few other scraps, after I made a purchase pile. It was just big enough to use to line the pockets. I love those colors, wish I could find a big yardage that looked like it!

Corduroy Kelly Skirt

I guess that it’s! Kind of a boring staple to make, but these kinds of basic pieces get a lot of wear in my life 🙂 Plus, it looks sooo good with my mustard Renfrew, which is always a plus in my book.

Completed: An Emerald Green Wool Jersey Lady Skater

13 Sep

Before I start, two things:

1. I know. Another Lady Skater. Y’all are probably getting sick of looking at this, but uhhh sorry not sorry! Honestly, I wanted to put both of these dresses in the same post, but I hadn’t managed to get pictures of the green one and I wanted to post the floral one RIGHT THAT SECOND and, well, you know how it goes.

2. Much more important, but thank you thank you thank you for all of your lovely comments on my last post! Again, I wasn’t posting that bit to fish for compliments, or anything like that… it has just been on my mind for a long time. I wholeheartedly believe that sewing + the blogging community (not to mention taking pictures of oneself and posting them on the internet, eep) is so wonderful for helping us maintain a healthy body image, and I would be lying if I said the outpouring of support and consolation stories didn’t make me feel a trillion times better about my insecurities and why they shouldn’t even matter in the first place. Y’all are just lovely, and I love you 🙂

Now, back to the matter at hand…

Emerald Wool Jersey Lady Skater

I made another Lady Skater! This one comes with bonus surprise Duck Lips!

Emerald Wool Jersey Lady Skater

I know I don’t have to justify myself when it comes to things I sew, but just in case you were looking for justification – I made this twice in a row because it’s an awesome pattern and I wanted to try out every sleeve version. I have made short sleeves, I have made 3/4 sleeves, and today we have long sleeves!

Emerald Wool Jersey Lady Skater

I really love seeing how a pattern can look totally different depending on the fabric that is used to make it up, and this one is no exception. My last Lady Skater was a thin, drapey, VERY stretchy cotton knit. For this version, I used wool jersey that is fairly stable, and look at what a difference it makes!

Emerald Wool Jersey Lady Skater

My green wool jersey is from – where else? – Mood Fabrics. Having tried Merino Wool and now Wool Jersey, I am now going to give you my opinion on them and how they are different.
Merino Wool – due to the chemicals in the wool, this stuff can be washed and dried as normal in your machine without felting. It also tends to be less scratchy, in my experience. Elasticity and stretch recovery are excellent. Fabric can be a bit sheer, at least based on the pieces I’ve personally handled.
Wool Jersey – ok, I’m going to be real gross and weird here and admit that I didn’t pre-wash my Wool Jersey. I plan on washing it the same way I wash my sweaters – which is a lukewarm sink bath with no agitation, and laying flat to dry. The stretch recovery on this is good, however, it doesn’t have as much elasticity (see the difference in fit vs my previous dress? Wool Jersey is a bit more stable than cotton jersey). It is also pretty scratchy! It’s not unbearably scratchy by any means, but it does feel like I’m wearing a wool sweater… which, I kind of am! It is much more opaque than the Merino. I am wearing neon undies under this dress and you can’t even tell, ha.

Emerald Wool Jersey Lady Skater

It is also REALLY warm. Which will be good, when it eventually gets cold here 😛

Emerald Wool Jersey Lady Skater

Emerald Wool Jersey Lady Skater

I kind of feel like a Girl Scout in this dress, what’s with the bright green and slightly scratchy fabric. I know the green looks sort of muted in these pictures, but trust me and not my inexperience with my camera. This shit is BRIGHT FUCKING KELLY GREEN. It is amazing.

Emerald Wool Jersey Lady Skater

See what I mean about the fabric not being as elastic? You can totally see bra straps and back fat here. Which doesn’t bother me, personally, but if you don’t like looking like you were poured into your clothing that morning, you maaaay consider sizing up if you choose to make this pattern with a more stable knit 🙂

Emerald Wool Jersey Lady Skater

I should also point out that the stability of this fabric makes it really easy to sew. Just like Merino Wool – it doesn’t curl up, doesn’t slide around (actually, it’s slightly lofty so the pieces kind of stick together and that’s MAGICAL), stitches and presses like a dream. I really enjoyed the sound my scissors made when they cut into it, strangely enough. It’s the little things.

Emerald Wool Jersey Lady Skater

Ok, so who’s jumping on the Wool Jersey bandwagon with me? ALL ABOARD, LET’S GOOOO!!

Completed: A Transitional Lady Skater

11 Sep

I know, I know. Fall is just around the corner – the temperatures are dropping, the leaves are changing, everyone is flipping their shit over pumpkin spice everything. September is such a magical month… unless you live in Tennessee. It was 95* yesterday and the humidity was so thick, going outside felt like walking through a pot of soup. Gross.

If I sound butthurt, it’s because I totally am. I love fall and I love September, but honestly – it ain’t fall weather here. And as much as I want to start busting out the wool crepes and snuggly flannels, I know in my heart of hearts that I likely won’t have a chance to wear them until closer to Halloween… possibly even later. I have memories of wearing shorts on Thanksgiving. It happens.

So, what do you do when you want to change for the season but the season won’t change for you?

Fall Floral Lady Skater

Concentrate on seasonal colors and prints, not fabric weights.

Fall Floral Lady Skater

I know, this is basically the biggest “No Shit, Sherlock” statement I’ve probably ever made, but it has seriously taken me years to come to terms with this. I do it in the spring, too – try to start pulling out the lightweight voile dresses while there’s still slush on the ground, hate myself, rinse repeat. Something about the seasonal changes makes me want to overhaul every single color in my wardrobe, I dunno.

Fall Floral Lady Skater

Since I live in an area where the temperature tends to hover around “Hell,” except for a couple of months out of the year, I need more layering/lightweight/transitional pieces than I do big cozy wool garments (don’t get me wrong – my wool is ready and waiting for me the second I think the temps are gonna start dropping. Just need more patience, ahhh!). You know, so I can wear them now instead of sticking them back in the closet for a few weeks 🙂 Bonus – once we do get cool weather, this will layer up nicely with tights, boots, and a scarf. Win!

Fall Floral Lady Skater

This fabulous cotton jersey is from Mood Fabrics (they have another colorway if the mustard is *too* retro for ya, but I like it! Mustard for life!). It’s a little bit on the sheer side – like, not indecently so, but enough where I gotta watch the color of my undies when I wear this.

I was pleasantly surprised with the stretch recovery for this fabric, by the way. Cotton tends to stretch and sag over the course of the day, making everything baggy and off-the-shoulder, but this stood up pretty well after a full day of wear. I think I can get an extra day out of it before needing to throw it in the dryer for a little shrinkage. Win!

Fall Floral Lady Skater

I used the Lady Skater pattern to make this dress. I have made this dress before, so this is basically round 2 (there’s also a round 3, you just wait. It’s finished; I just haven’t taken photos yet :3). The only change I made was to stretch the neckband ribbing a little tighter, to keep it from getting floppy, which meant for a shorter neckband piece (since the band is applied flat, it’s REALLY easy to do this – you just stretch, sew, and cut off the excess. Yay, no maths!).

Fall Floral Lady Skater

I will urge you to pay close attention to the elastic at the waist seam, and make sure not to skip it when using a cotton knit! I think a good part of the reason why this stuff didn’t stretch out all haywire by the end of the day was because the waist seam is nice and snug and fully stabilized.

Fall Floral Lady Skater

Fall Floral Lady Skater

Fall Floral Lady Skater

Next, I want to make this pattern in pumpkin colored knit. Wouldn’t that be DELICIOUS?

Fall Floral Lady Skater

I also want to give a shout-out to my hair in these pictures. I think this might be the first time I’ve ever posted pictures of myself on this blog with my hair up? There’s a reason for that – I’m actually really really self-conscious about my ears. I hate how much they stick out and I rarely take any pictures with my hair up. Which is funny, because whenever I see people with a similar feature, I think it’s super cute… just not on me. I’ve never liked it and it’s been something I’ve always wanted to change.

I’m not saying this to fish for compliments, so please don’t take it that way. I guess I’m just realizing now how stupid it is to spend so much energy hating something about myself that I CAN’T change (ok, yes, I know otoplasty is a thing… but it’s not a realistic option for me). It’s part of me, what makes me unique, and is just as much a family trait as the shape of my nose or the color of my eyes. There is no point in wishing change on something that won’t change, so my next move is to learn how to love and embrace it. Starting with posting pictures of myself with my hair up. I know, my head is turned to the side in all these pictures, but… baby steps, y’all.

Fall Floral Lady Skater

Sorry to get all deep on such a lighthearted post, just been thinkin! Anyone else struggle with this? What has helped you?

Completed: A Belladone for Bicycling

9 Sep

Ok, time to confess something really dorky: I’ve been looking for the perfect bicycle-print fabric for years now. It’s actually become something of an obsessive manhunt – trying to avoid the quilting cottons, the cruisers and penny farthings, the hideous color combinations. You’d think with bicycles being these super cutesy Pinterest-approved photo prop (forreal, I’m sick of looking at pictures of people using their bikes as props! Ride that shit already!), there would be a bigger selection of this type of print. You’d think. I never found it, though.

UNTIL RECENTLY.

bicycle fabric

Isn’t this biciclette fabric adorable?? It’s from Bubiknits‘ shop on Spoonflower. I’ve always wanted to try my hand with a piece of Spoonflower fabric – but honestly, every time I try to browse the choices, I get overwhelmed with so many options. And I’m not gonna try to design my own because, ha, no. Let’s just not even discuss. So when Giusy emailed me and asked if I would like a couple of yards of any fabric from her shop as a gift, I immediately zeroed in on that bicycle print in organic cotton sateen. I had no idea what I was going to do with it, except that it would be a dress.

Bicycly Belladone

A Belladone, to be exact!

Bicycly Belladone

I should apologize in advance for how bad these pictures ended up. Turns out white doesn’t photograph too well in bright sunlight. Who woulda thought? Just imagine the bicycles and we will get to the close-ups soon enough.

Bicycly Belladone

Obviously, this ain’t my first Belladone rodeo. That stripey dress is actually 100% the reason why I decided to make my bicycle dress with the same pattern – it is my favorite dress to cycle in! It’s very comfortable, the skirt is the perfect width needed for riding (but not so floofy that it causes wardrobe malfunctions) and I like to think that it’s pretty enough that it makes the Mary Poppins Effect a reality on my commute. Plus, the dress is finished with bias tape – visible or invisible – which I thought would provide a nice contrast against the white/yellow of the main fabric. As much as I love the colorway, it unfortunately washes me out, so I needed something a little darker to sit next to my face.

Bicycly Belladone

I can’t really say I started this dress with any real direction in mind. Originally, I wanted the contrast to be turquoise, but when I actually got the fabrics side-by-side, I didn’t like the look of the two colors together… too light for my tastes. Navy seemed like the perfect choice (and yes – that’s navy. I know it looks black, but it’s navy.). I used leftover navy cotton sateen from my lace trench (I swear, that fabric… it’s like the gift that keeps on giving. I STILL HAVE MORE OF IT, TOO) and made a few yards of bias tape to enclose all the edges along the top of the dress. I actually applied all this bias tape by hand, so the stitches would be invisible. I think it adds a bit of polish to the overall effect, even if it did mean making this dress took twice as long. I also applied a strip of interfacing to each diagonal edge, as well as staystitching, to make sure the edges don’t get distorted over time.

Bicycly Belladone

Of course, taking a light dress and adding dark trim to the bodice meant that the thing ended up looking top-heavy. I added more dark contrast to the waistband, as well as a couple of inches above the hem, which I think ties the dress together. To finish, I added 2 self-covered buttons at the center front.

Bicycly Belladone

It’s so perfect, I could marry it.

Bicycly Belladone

And the back! Don’t you love the back!?

Bicycly Belladone

One more picture, sorry 🙂

Bicycly Belladone

Here you can see the bicycles! Aren’t they sweet 🙂

Bicycly Belladone

Since I’d already made this pattern before, I didn’t need to make any major modifications (other than the aforementioned contrast additions). I did sew the side seams at the waist with a 1/2″ seam allowance (instead of the pattern’s 5/8″); I noticed that my stripey dress can get a little tight if I’ve eaten a lot of food, so an extra bit of wiggle room is appreciated 🙂

Bicycly Belladone

I also pressed the pleats so they were centered over the stitching lines (instead of pressed to one side). This gives them more of a box-pleat look, as opposed to a soft tuck.

Bicycly Belladone

Can you see the stitching on the outside, huh, can you? NEITHER CAN I!

Bicycly Belladone

Bicycly Belladone

The inside waistband is faced with more bicycles 🙂 And yay, yellow zipper!

Bicycly Belladone

Sewing that strip of navy around the bottom was super easy. I sewed on my hem facing as usual, then centered the seam binding over the stitching and stitched it down on both sides.

Bicycly Belladone

Working with this fabric was an absolute dream – and wearing it is even better 🙂 I know Spoonflower’s fabrics tend to skew toward the pricey side, but this is some good stuff – organic cotton sateen with the subtlest sheen, the colors are rich and saturated, and it’s very easy to sew and press. Plus, the design choices! Gah!

Bicycly Belladone

Thank you again, Giusy, for the amazing fabric! If anyone was wondering… yes, I have taken this dress for a bike ride, and yes, it was a little magical 😉

One last thing – and I swear, it’s important – I just heard through the grapevine that Colette Patterns is running in second place in the Martha Stewart American Made Competition. The #1 spot is currently being held by a scrapbooking company, boo! If you’ve got a minute to spare, go vote for them (you can login with your Facebook if you’re lazy like me, and you do not have to be a US resident to cast a vote!). Colette Patterns will be dumping the entire $10k prize back into their employees as bonuses, which is pretty fucking amazing and I think totally deserving of winning. Plus, do we really want to see them get beat out by a scrapbooking company? NOPE!

Go forth and vote! Every little checkmark counts 😉

Completed: The Bella-Jean Dress

6 Sep

A couple of months ago (gah, has it been that long??), Abby from Bluegingerdoll Patterns hollered at me and asked if I wanted to try and review her maiden pattern, the Billie Jean dress.

Well, y’all know how I feel about reviewing patterns – especially when they are pretty, vintage-inspired silhouettes!

Bella-Jean

So obviously, I said yes.

Bella-Jean

The style lines on this dress are a little difficult to see since I used such a busy print (but isn’t that print amazing?) to make it up, but it’s a very fitted, princess-seamed bodice that falls off the shoulders. The pattern actually has two skirt variations – one, a sexy wiggle skirt with a kick pleat; and two, a full, gathered skirt with in-seam pockets.

Bella-Jean

I ended up swapping the skirt out for an entirely different option, as you can see. While I love both of the skirts included in the pattern, I know that wiggle skirts are not in any way appropriate for my daily life (I need something that I can really move around in – from cycling, to sitting on the floor, to jumping in the bed of my truck to retrieve the coat hanger I keep back there since I seem to lock myself out of the fucking cab EVERY WEEK THESE DAYS, sorry, pls don’t break in my truck. There’s nothing worth stealing in there; seriously, I don’t even have a tape deck. Where was I going with this? Oh.), and gathered skirts just are not very flattering on me. When I don’t find a dress comfortable, I basically just never wear it – and I wanted to wear this dress!

Bella-Jean

Can you guess where that pattern came from? Hint: It’s in the name.

Bella-Jean

If you guessed Belladone, you’d be correct! If you think “Bella-Jean” is the most hilarious, redneck sounding name, let me just assure you that I feel very clever right now.

Bella-Jean

Attaching the skirt to the bodice took a little bit of extra thought, but not much. First, I knew I wanted to leave the pockets off (as I type this, I can hear the collective gasp of sewers around the world sucking in their breath and clutching their pearls as I dared to remove the blessed pocket but forreal, there would have been way way way too much going on with an already busy dress, yeah?), so I just taped the pocket pieces to the front skirt pattern piece to fill the pocket-shaped hole, then cut the pieces out of my fabric. I moved the pleats slightly to get them to match up with the front princess seams, which was as easy as pushing the fold down a few fractions of an inch. Getting the back darts to match the back princess seams was also necessary, although I didn’t realize it until I’d already sewn the skirt to the bodice. Doh! I almost said fuck it and let it be, but it looked reeeally bad, so I unpicked and redistributed. Miraculously, the skirt fits the bodice almost exactly – and by sewing the side seams of the skirt with 1/2″ seam allowance (which is the same seam allowance for the bodice), it was a perfect fit. All the seams match up. Yay!

Bella-Jean

As much as I like to try and make my garments as true as to what the pattern was designed as, sometimes I think ya just gotta make some ~design changes~ so the finished piece fits your lifestyle. And, you know, you actually wear it 😉

Bella-Jean

Now that I’ve gone off on a few tangents, let’s get back to Billie Jean The Bodice!

Bella-Jean

Putting this shit together was DELIGHTFUL. I mean it! I made a little quickie muslin-top (always good to check the fit when you’re trying a new-to-you pattern company – you don’t want to discover far too late that the body type they base their pattern block off is the exact opposite of your body!), but I ended up not needing any changes as it was a perfect fit straight out of the envelope. This is a size 4, and I gotta warn ya – make sure you check those finished measurements before you cut! There is basically NO ease in this pattern, which means a very close fit. Obviously, this is exactly how I like to wear my dresses, so I was pretty chuffed to be able to actually cut the pattern that matched my measurements, without sizing down. But if you need more ease, consider sizing up 🙂

Bella-Jean

Construction-wise, I did not make any changes to the bodice. The instructions are a bit brief, but there are clear diagrams (as well as a full sewalong on Abby’s blog, should you need it!) and the pattern itself is very simple to put together. My only advice is to make sure you stay-stitch that neckline so it doesn’t stretch all crazy out of shape, and don’t be afraid to be aggressive with your clipping and notching on the princess seams to get them to lie flat.

Bella-Jean

The pattern has you insert a lapped zipper, instead of the usual invisible. Y’all know I like me some lapped zips 😉

Bella-Jean

One thing I should point out is that the straps are NOT bra-friendly without a little bit of tweaking. Personally, I just go strapless – I found one that fits my ribcage, so I think it is quite comfortable. However, I know most people don’t feel the same way I do about strapless bras – and that’s ok! But you will need to make some changes to get the straps to work with a bra if that’s the case. Abby has written a tutorial on redrafting the straps so they are cover your bra; alternately, Anna added bra strap carriers to her Billie Jean.

Bella-Jean

It’s hard to tell in the pictures, but the shoulder straps have the cutest little detail where they widen a bit at the top of your shoulder. I think that’s my favorite thing about this dress!

Bella-Jean

I’m a little bummed that I couldn’t get the waist seam to match up perfectly at the zipper – must’ve fudged something up, somewhere. But hey, look at how good those darts match up with the princess seams, yeah? ~Like MAGIC.

Bella-Jean

Isn’t this fabric just gorgeous? I bought it earlier this year from Muna Couture (who also sells lots of amazing fabrics, drool). It is the softest Italian cotton, and the colors are so saturated. I actually bought a SHIT load of this stuff… so this won’t be the last time you see it 😉 My bodice is lined with black cotton batiste and I used a lilac zipper, because.

Bella-Jean

Since the Belladone skirt hits perfect LT-length as is, I added the facing at the bottom. I never really sewed skirt facings before I started dabbling into Deer & Doe, but I really love the way they look!

Bella-Jean

If you love Billie Jean as much as I do, you are gonna shit yourselves when you see Abby’s newest pattern, Mae. Just warning you.

Also, if you were wondering where the remote went for these pictures, the battery died right at the beginning of my shoot. Notice how confused I look in that last picture (which was actually the first picture I took), ha!

Completed: My First Archer, A Linen Disaster

5 Sep

Remember that Monet of an Archer I posted with my lime green Maritime shorts the other day (which turned out totally awesome, and yes, that’s me tooting my own horn, toot toot)? Remember when I said I was too traumatized to talk about it any further? Well, I think I feel like dishing today. Let’s dish!

Archer Shirt
(I took these pictures at the same time as my last batch – hence the exact same outfit – but I moved to a different side of the yard so they’d look a little different. That’s how much I love y’all. Also, this is pre-skeeter attack, fyi).

Ok! This is the Archer from Grainline Studio. I cut the smallest size and shortened the hem (too much, it looks). I think my relationship with this pattern has definitely gotten off to a rocky start, but I’m willing to give her a second chance. Funny, I thought this style looked horrible on me when I checked myself out in the mirror, but it’s not so bad in pictures!

Archer Shirt

I made this using some scrumptious Ralph Lauren linen from Mood Fabrics – doesn’t the idea of a floaty linen button-up in September sound so luxe? Nice and airy for the AM, but you can roll the sleeves down with the sun sets. Also, I just really love navy and I needed a shirt to go with my new aforementioned shorts, so I was feeling pretty confident about myself. So confident, I sliced directly into the linen without the benefit of a muslin or even reading the directions carefully. Oops.

Archer Shirt

Now, don’t get me wrong here – I don’t think a shirt like this necessarily requires a muslin, so to speak. It’s fairly loose-fitting and very forgiving in that sense. However, I do think a shirt like this requires the correct length when it comes to the body and the sleeves, and I think it is kind of a bad idea to dive into something so precise as shirtmaking without giving yourself a few test runs before you get into the good stuff. These were my mistakes. Had I made a little mock-up, I might have had the chance to try out that collar deal before I done goofed it up, ripped it out, realized that the linen was fraying at an alarming rate and oh god what have I done.

Also, the sleeves are way too long and the body is a bit on the short side (the latter isn’t the pattern’s fault, I just got a little too slash-happy with the scissors).

Archer Shirt

With all that being said, I actually really enjoyed sewing this pattern – it’s very precise, with all the top-stitching and perfect pressing, the kind of thing that I find SO relaxing to sew. Rather than get bummed that I made a shirt that isn’t up to my personal sewing standards, I consider this a muslin and I can’t wait to start my ~real~ version. The instructions are clear, albeit brief (if you get stuck, there is an entire sew-along with plenty of words and pictures), and every piece fits together nicely.

I know. The shirt looks fine in the pictures.

Which is why I took close-ups of the bad parts. You know you wanna see!

Archer Shirt

My first fuck-up was the top stitching on the button band. True, it’s not tooooo bad, but it’s definitely crooked. I’m not even sure how I managed to get that seam so crooked, but a crooked seam means crooked top stitching which means sad button band.

If you zoom in, you can even see an errant line of stitching running straight into a button. What is this I don’t even.

Then I tried to attach the collar stand.

Archer Shirt

And this is what happened. The fuck is that bump sticking out there? What the hell is going on?

Archer Shirt

And here is the crowning glory, which I obviously saved for last. This is what happens when you sew the collar stand wrong, then try to unpick it, then realize that the fabric is unraveling and now you have no seam allowances so you just sew haphazardly across a few points and hope for the best. It’s wonky and terrible and I can’t even button the top button. OOPS.

Speaking of buttons, the button holes *do* look nice. Thanks, Bernina!

If you were wondering, here is what I plan on changing for my next version:
– Shorten the length (although maybe not quite as much as this one!)
– Shorten the sleeves – they are WAY too long on me, like, the cuff starts below my wrist. I actually did not even bother sewing the buttons on the cuff here because they are so laughably long, I figured I’d just roll these up 4evs. But for my next version, I need to get the sleeves the proper length.
– Change the placket to a more traditional sleeve placket (such as the ones on the Negroni pattern). The ones on this shirt are much more simple – just a little binding, which isn’t bad, but I like the fancier look of the Negroni.
– I think I need to take out some of the width of the back, it’s super blousey on me.
– Draft smaller pockets; these are a little overwhelming on my frame.
– Get that god-forsaken collar stand under control, I mean, WOOF.

If you were also wondering, here are my suggestions should you decide to tackle this pattern yourself:
– MUSLIN IT. If you feel confident in your fitting skills, you may skip this, but I strongly encourage you to at least make a mock collar/collar stand so you can get an idea of how this shirt gets put together. You may also want to consider measuring the sleeves against some sleeves that fit you, unless you prefer the perma-roll.
– Don’t make your first version in linen. Just… don’t.

Archer Shirt

Despite an iffy start with this pattern (which I’m chalking up to user error), I think it’s a keeper and I will be making this shirt again. It’s a lovely design and a fun pattern, and I’ve already sourced my dream plaid flannel. I have an entire outfit planned around this pattern in that fabric, ain’t no one gonna stop me.

Waverize It! Maritime Shorts

3 Sep

Ok, this is a liiiittle bit different than a normal post, but there’s still a totally rad finished product being shared, so I hope y’all can get excited about this with me 🙂 A couple of months ago, I was asked if I wanted to participate in the Waverize It! campaign, courtesy of Waverly Fabrics and Joann. I was given a piece of fabric, my only guideline being: Waverize It!

Archer Shirt & Maritime Shorts

I should tell you right now, that fabric they sent me was a total surprise. Upon receiving the package, this was me:

20121202-210149

Haha! Just kidding – I actually really like the fabric, although it’s definitely not a color that I wear or decorate with AT ALL. Coupled with the fact that it’s home decor weight, well, that narrowed my options even more. That being said, I am not one to admit defeat, so I racked my brain for a few days. I realized a couple of things:
1. Home decor weight means ~*~BOTTOM WEIGHT~*~
2. Any color can be improved by adding ~*~MORE COLOR~*~

And that was how I ended up with this amazing pair of shorts.

Archer Shirt & Maritime Shorts

I used the Maritime pattern to make these shorts. I have already discussed making this pattern, so I’m not going to repeat myself – but this pattern is a pretty freaking perfect backdrop for jazz up some otherwise basic shorts.

Archer Shirt & Maritime Shorts

Oh lord, did I actually use “jazzed” to describe these?

Archer Shirt & Maritime Shorts

I know they look pretty plain from the front, but then you turn to the side and…

Archer Shirt & Maritime Shorts

Piping! 🙂

Archer Shirt & Maritime Shorts

PIPING ON BOTH SIDES, Y’ALL!

Archer Shirt & Maritime Shorts

To be honest, I didn’t have much of a plan in mind when I started these up. I knew the base fabric, and I knew the pattern I would be using, and that was about it. I decided to pair the green with a solid navy (the same solid navy sateen I used in my lace trench coat) for the pocket lining, and upon realizing just how freakin’good those two fabrics look together, I thought I would add some navy love on the outside as well. I had a lot of ideas floating around while working on these shorts – piping around the pocket edging? Piping at the top of the back pockets? Piping at the waistline? Adding a navy sateen cuff? In the end, I chose to keep things simple with a single line of piping down the side seams, and a little bit of navy top stitching.

Maritime Shorts

I could not be more pleased with the finished piece!
(ps do me a favor and don’t look at my legs in these pictures… I was in the midst of a mosquito attack, hence the furious scratch marks everywhere. I know they look disgusting. Ain’t nothin’ I can do about it now!)

Maritime Shorts

In case you were wondering – I did make my navy shirt, too! Unfortunately, it’s kind of a Monet, though it looks fine in these photos. I will go more into that whole saga later this week with a proper post, but right now I’m still a little bit traumatized.

Maritime Shorts

Maritime Shorts

It’s difficult to see all the topstitching in the pictures, thanks to the lighting, but I used navy around the front and back pocket edges, the front fly, the top of the waistband, along the piping at the side seams, and around the bottom hem.

Maritime Shorts

While figuring out exactly what I would do with my fabric was a little challenging, actually working with it was a total breeze! Waverly makes a nice substantial cotton that sews up like a mid-weight denim – which means it presses well, it doesn’t crazy unravel, and it doesn’t require any special handling to get it to do what you want. I didn’t even have to beef up my machine needle – a universal works fine here.

Maritime Shorts

The fabric selvedge suggested that I dry clean my piece, but honestly? I don’t dry clean anything, like, ever. I can see how dry cleaning may be beneficial if you’re making curtains or whatever, but I wear my clothes hard and I don’t have time to schlep to the dry cleaner every time I inevitably spill something on myself (which is a daily occurrence, ok). Nor do I hand-wash, well, anything. Sooo needless to say, I tossed this bad boy in the washer AND the dryer, pre-cut, and I’m totally thrilled with how it softened up.

Maritime Shorts

I even had a lime green zipper lurking in my stash, how perfect is that?!

Maritime Shorts

The topstitching on the back pockets is my favorite part, too bad you can’t really see it in the photos! Oh well!

Archer Shirt & Maritime Shorts

If you made it through this post, yay! Now here’s the fun part – to celebrate National Sewing Month and Waverly’s 90th anniversary, Waverly and Jo-Ann Fabrics are hosting a Waverize It! Facebook contest through 9/22. You definitely will want to enter this one – winner takes home a $250 Jo-Ann Fabrics gift card and $1000 in Waverly Fabrics! For more info, you can check it out here (or click below, do what you want!). Good luck, my friends!

Waverly_JoAnn_Animation

I really enjoyed the challenge of making something with a fabric I would not have otherwise chosen – and I’m super happy with how the shorts turned out. I still have a bit left over, so tell me – what would you have done with this Waverly fabric?

~~Disclaimer: I was not financially compensated for this post. I did receive 2 yards of Waverly Fabric to review and keep. All opinions are my own.

Completed: A Luscious Silk Anna

28 Aug

Hey guys. I would like to introduce you to Anna, my newest piece for the Mood Sewing Network.

Anna Maxi

So, Oona and Sonja originally planned this silk challenge, in which they both would make Anna dresses with a notoriously difficult fabric. Once I got wind of what was going on, I walked straight into that party and invited myself to be the third wheel. I can’t help it; I love being part of a Mood Fabrics sandwich. Especially when it involves Thakoon Crepe de Chine. I mean, COME ON.

Anna Maxi

So, as we all know at this point – this is the Anna dress, the newest offering from By Hand London. For mine, I decided to try my hand at the maxi version with the slash neckline, after getting good results with my wearable muslin shorter version. Since the dress itself is very simple, it was the perfect excuse for getting my hands on the aforementioned silk Crepe de Chine.

Anna Maxi

Anna Maxi

I’ve never sewn with this type of fabric before, so I was admittedly a little nervous. Would I regret my decision?

Anna Maxi

Anna Maxi

Really, though, it wasn’t so bad! The crepe texture of this fabric actually made everything a LOT easier – it gave the pieces something to “grab” onto (as opposed to being all slinky and slippery all over the place). For cutting, I did pin my selvedges together to keep everything intact, and I used a lot of pins on the actual pattern pieces as well. One protip – make sure you use silk pins; this stuff is very delicate and normal pins may leave holes! I also used a microtex/sharp needle on my machine. The fabric fed through very smoothly (again, thanks crepe, for your grabby lil hands!) and it pressed with very little fuss. I like this stuff!

Anna Maxi

Anna Maxi

Construction was very straightforward. I finished every seam with a french seam, and tackled miles of blind stitching by hand along the thigh split, sleeves, and bottom hem (I just want y’all to know that I watched the Great British Sewing Bee while doing this, and as a result I am celebrity-in-love with Patrick. Don’t tell Landon.). The facing and zipper edges are finished with pinking – I actually deliberated on this a lot, pinking isn’t necessarily my favorite seam finish, but I felt it was important that the edges were not detectable from the outside of the dress as this silk is very thin. Fortunately, it doesn’t want to unravel much so I’m not concerned about that.

Anna Maxi

I also stabilized the slash neckline with scraps of selvedge from the silk – just pinned them within a bit of the seam allowance and staystitched them down with a tiny stitch. Keeps things nice and gape-free!

“Hold the phone, Lauren – did you say thigh high split???”

Anna Maxi

Uh huh, I sure did.

Anna Maxi

Truth, I normally don’t have much of a reason in my life to wear something like a floaty silk maxi dress with a thigh split. However, it was a fun project and I am totally fine with scheming up date ideas as an excuse to give this silk lady the exposure she deserves! Do you think eating pizza in this dress would be the worst idea ever? 😉

Anna Maxi

Anna Maxi

Now, I leave you with some walking photos. What would this post be worth without a couple action shots, amirite?

Anna Maxi
Anna Maxi

WOULD YOU JUST LOOK AT HOW THAT SILK FLOATS AND FLOWS.

Finally, here I am giving my best Angelina Jolie impression:
Anna Maxi

What do you think? Silk Anna yeah, or Silk Anna fuck yeah?

Psst! Mood Fabrics is running a one day flash sale for 20% off fabrics sitewide! If there was ever a good time to dip your toes into the world of silk, that would be now.

Completed: Audrey in Unst

26 Aug

My knitting has been OFF THE CHAIN lately with regards to how productive I am. I don’t feel like I’m knitting any faster or even more frequently than usual, but I’m averaging a finished piece every month and a half or so. My ultimate goal is to replace all my cheap/pilled acrylic RTW sweaters with beautiful wool handknits, so I like to think I’m making good progress here 🙂

Audrey in Unst

And here’s my newest one! Isn’t it pretty?
(I know these pictures are awful and washed out; I tried using my camera on “auto” for this photo set. Um. NEVER AGAIN, holy shit).

Audrey in Unst

This pattern is Audrey in Unst. It’s been in my queue forever – I actually started swatching it with the purple yarn that eventually became Peggy Sue. The pattern calls for DK weight yarn, but I could NOT get gauge with such a heavy yarn (I’m a loose knitter), so I set the pattern aside and made, well, Peggy Sue.

Audrey in Unst

Two sweaters later, I was ready to try again. I’ve been very good about stash-busting for the last few projects, so I treated myself to a new fancy yarn from my local yarn store. This is Malabrigo sock yarn – a merino wool in a light fingering weight. Again, I know the pattern calls for DK weight but since my gauge was all crazy (and when I did get the stitches small enough, they were so tight that the fabric felt stiff), I took a leap of faith and sized down in both yarn and needles.

Audrey in Unst

Spoiler alert: it worked!

Audrey in Unst

I still consider myself a relatively new-ish knitter, so please don’t take my word for gospel, but I assume you can go up or down a yarn weight as long as your gauge swatch matches that in the pattern. I had the same number of stitches per inch, even though my yarn was lighter and I was using size 2 needles, and my cardigan fits perfectly. Which is even more impressive to me, since this sucker is knit bottom-up – which means I couldn’t try it on as I went. I’m so daring, y’all.

Audrey in Unst

This pattern was very straightforward and easy to follow, although I gotta say – I don’t like how she wrote some parts of it. When doing repeat rows, she doesn’t give you an exact number of rows to do, or a finished measurement, so at first I was kind of guessing and hoping I was following along correctly. Think like: “repeat decrease row every 4th row one time, then every 7th row five times.” Usually a pattern will follow up with: “… for a total of 39 rows.” I like to follow patterns that hold my hand through the process, so I didn’t like that. But, you know, minor complaint.

Audrey in Unst

I knit the size 32.5 for everything except the waist and the sleeves, which I did in the size 30.5. This was pretty easy – the pattern gives you stitch counts, so once I got to the waist shaping, I just continued decreasing until I got to the stitch count for 30.5. When it came time to increase, again, I followed the stitch count until I had the same stitches for the 32.5. I wanted my sweater to be very fitted and it is exactly that!

Audrey in Unst

I love how it looks open.

Audrey in Unst

Fingering weight might be my new favorite yarn weight. It feels so dainty to knit up on tiny needles, and it feels SO NICE to wear in this heat! Not bulky or hot at all! Well, ask me again come winter, but for now – fingering weight FTW!

Audrey in Unst
Audrey in Unst

It does feel drapey and stretchy, which makes me slightly anxious and gives me flashbacks of cotton yarn stretching out, but I took these pictures after wearing the sweater for an entire day and the shape is still nice. That’s wool yarn for ya!

Audrey in Unst

Isn’t the yarn such a pretty color? It’s slightly variegated – enough for visual interest, but not so much to take away from the design of the sweater.

Audrey in Unst

Audrey in Unst

Audrey in Unst

I love the lacework at the yoke! So much fun to knit!

Audrey in Unst

Audrey in Unst

The twisted rib too foreeeever, but it does look nice.

Audrey in Unst

I tried to get a good picture of the buttons, but it was difficult. They have an argyle design etched into them. I bought these specifically for the sweater at last month’s flea market – they were kind of expensive (they’re from the 20s-30s and the guy tells me they are vegetable protein), but they are perfect so I had to.

Audrey in Unst

I guess that it’s! Full Ravelry notes are here!