Hey hey everybody! I’m finally back from my 2 weeks of traveling Peru with my best friend, and it was amazing. I spent a week in Lima (first half in the Miraflores District, which is absolutely beautiful, and the second half in the San Borja District), where we stayed with the family of a friend and basically ate our weight in ceviche. The second week, we flew up to Iquitos and spent a couple of days in the city, as well as a week deep in the jungle off the Amazon (and before you ask, yes, I was there for the ayahuasca). We did not visit Machu Picchu (I guess this is the main reason why people visit Peru, because EVERYONE asked us if we were planning on going!) – we considered it, but it was too expensive and we had to choose because Cusco and Iquitos… Iquitos won out, and I’ve no regrets 😛 It was an incredible 2 weeks, although I’m pretty happy to be home where I can throw my TP in the toilet and drink straight from the faucet 😉 hahaha
Anyway, it’s back to the real world for me! Which means it’s time to jump straight into business mode and kick this OAL off once and for all! Yay!
Today, we’ll be assembling the bodice of our dresses. This part is pretty easy and straightforward (well, honestly, the whole dress is pretty easy and straightforward!), although this post is quite a bit picture-heavy. Sorry in advance, ha. This method of bias facing is for those of y’all who are making their dress without a lining. If you plan on adding a lining, ignore these sewalong posts and use the instructions included in the pattern 🙂
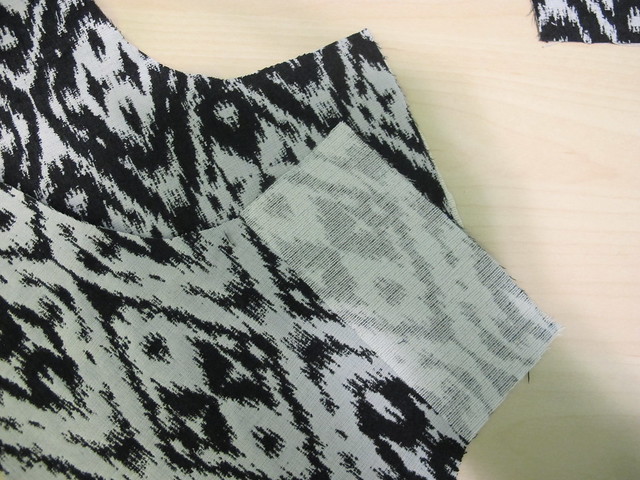
First things first – if you haven’t already done so, go ahead and fuse your little rectangles of interfacing to the back bodice where indicated. This will give that area a bit of stability for adding buttons later (or, if you’re like me – mock buttons. Either way, don’t skip the interfacing!).
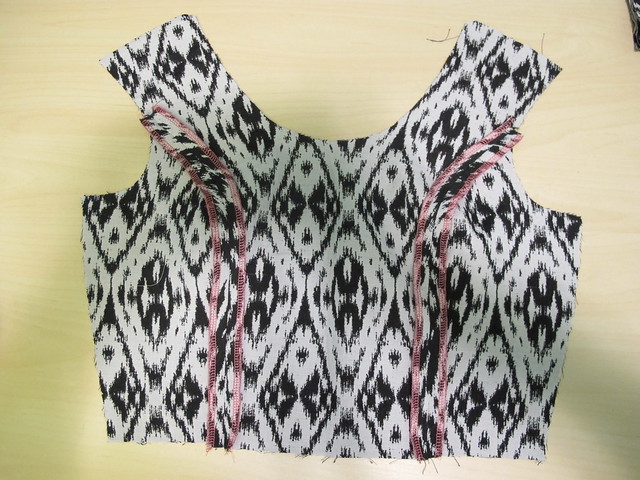
Sew the bodice front to the bodice side front princess seams (need a refresher on sewing princess seams? I got ya!) and finish the seams as desired. Since my fabric is a bit bulky, I chose to serge mine separately (with hot pink serger thread because, obvs) and press them open. You can certainly finish the seams as one and press them to one side, though.
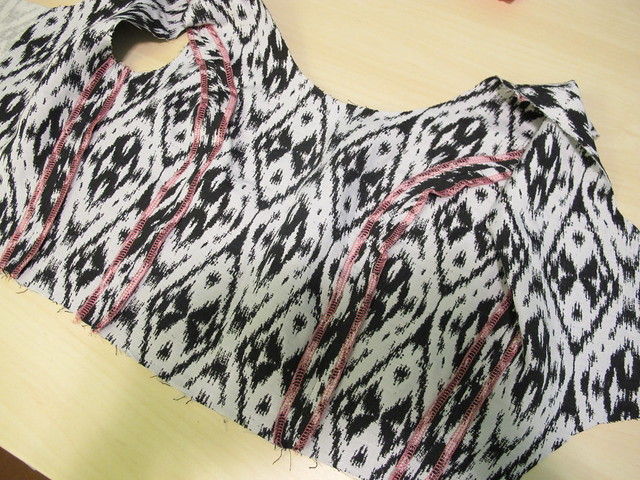
Next, attach the front bodice to the back bodice pieces, at both the shoulders and the side seams. Again, finish the seams as desired and press.
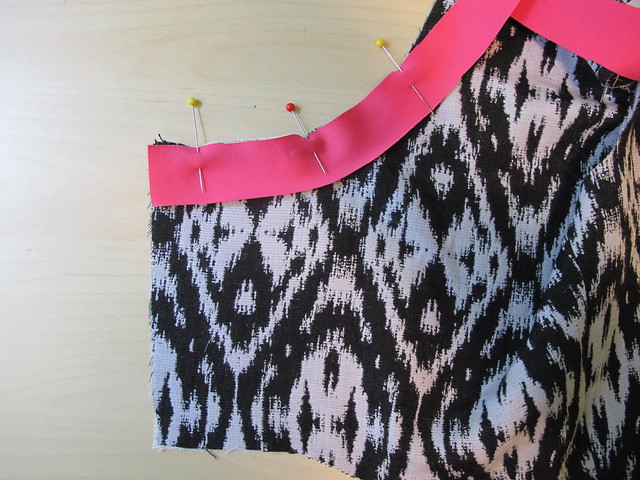
Next, we are going to finish the entire neckline (all the way around) with a bias facing. Measure your neckline, starting at the interfacing of one of the back pieces and continuing all the way around the front to the opposite back piece. There are a few ways to do this – you can use a flexible measuring tape, you can measure with the bias tape itself, or you can use a Curve Runner (am I the last person on earth to find out about this little tool? HOLY SHIT that thing is so cool!). Cut your bias tape the length of your measurement and pin around the neckline, right sides facing.
Note: For this particular method of finishing, you will want bias strips that are 1″ wide. You can certainly buy the pre-made packages if you’d like, but I personally like to make my own – it handles and sits better than the pre-made stuff, plus, you have a much better selection of colors and prints (and it’s a GREAT way to use little scraps that are too awesome to throw away). If you haven’t made your own bias strips, it’s super easy! There are tons of methods all over the internet on how to do it; the one I personally use is the continuous bias method since it means you don’t get stuck doing a lot of piecing.
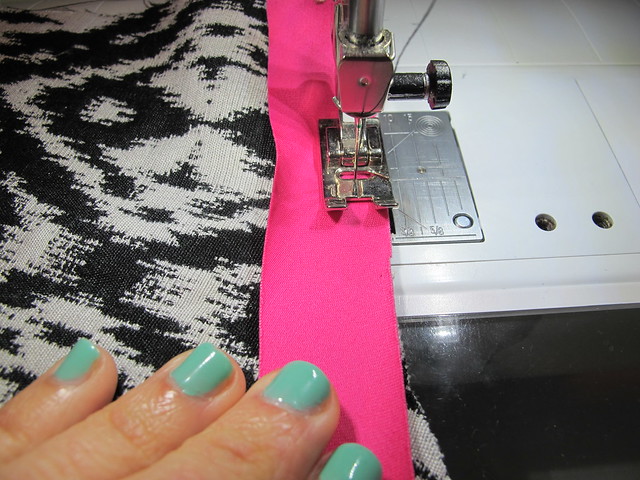
Sew the bias all the way around the neckline – again, starting at one back and continuing across the front all the way around to the opposite back – right sides together, with a 1/4″ seam allowance. Stretch the bias tape *slightly* as you sew, which will help snug up the neckline so it doesn’t gape open.
Note: The pattern is drafted with 5/8″ seam allowances, so you may want to trim 3/8″ off all around the neckline before adding your bias facing. I did not do this and the fit is fine. Just an fyi, though!
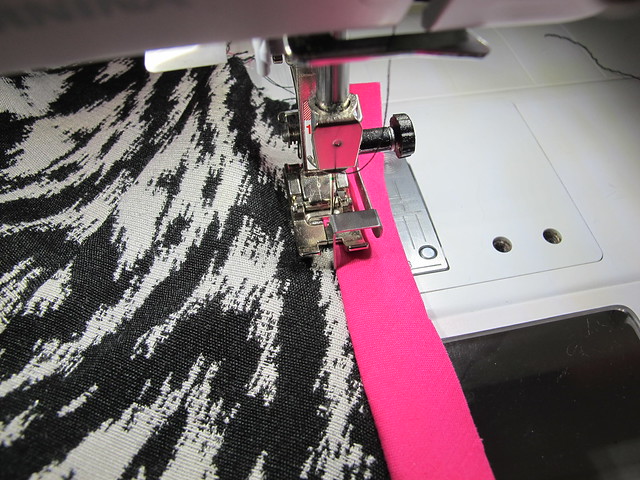
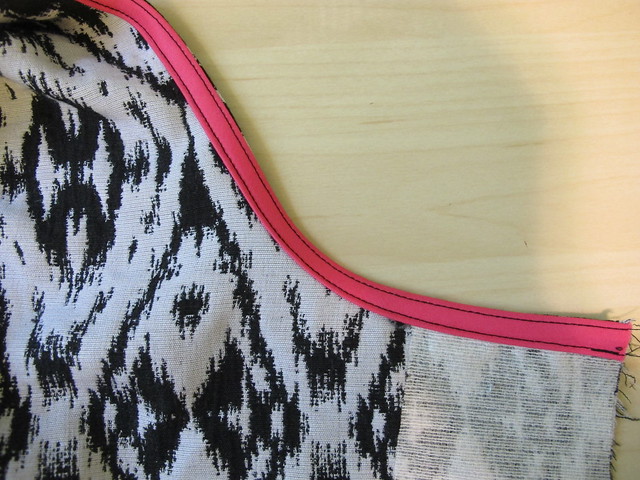
If your fabric is on the bulky side, or your bias is a crazy contrast (like my hot pink), you may want to understitch the facing so it stays in place and doesn’t peek out from the right side. Push all the seam allowances toward the bias and stitch through all the layers 1/8″ from the seamline. I use an edgestitch foot for accuracy, but you can also eyeball it. If your fabric is lightweight and responds well to pressing, you can skip this step.
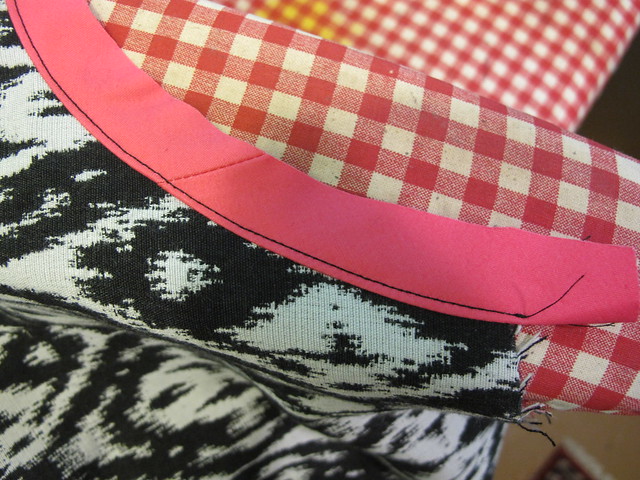
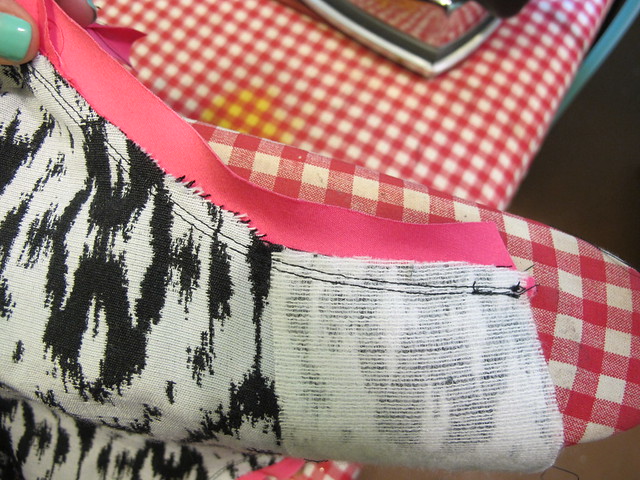
Here is the bias attached and understitched. Take it over to the ironing board; we’re going to press the hell out of this shit now.
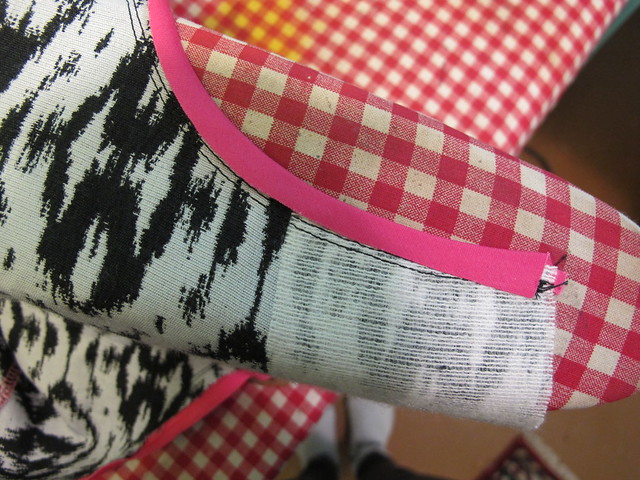
Fold the bias over to the wrong side of the bodice, so that the edge meets the stitching line where it is attached. (yes, it should actually line up with the stitching – my fabric is a little bulky, so the turn of the cloth means that it doesn’t quite meet up. That’s ok, though!
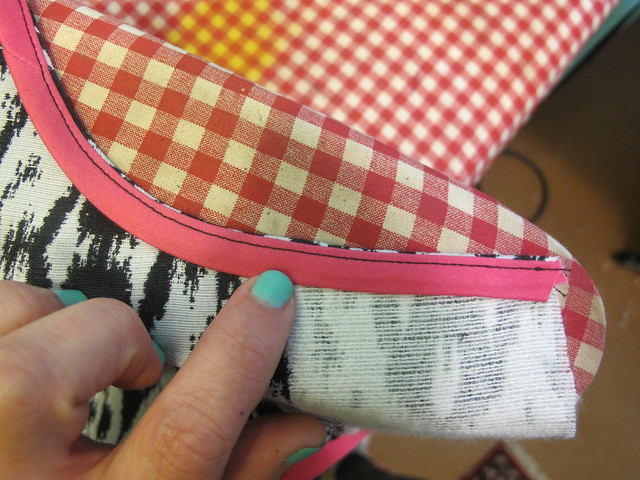
Now fold the entire thing one more time to the inside, so all of the bias is on the inside of the bodice. Press.
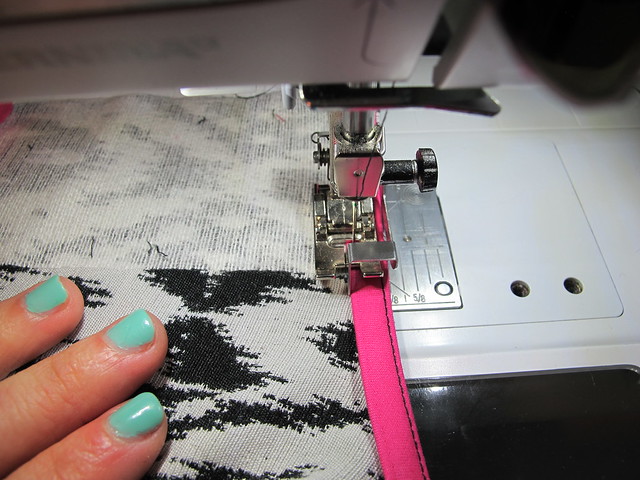
Topstitch 1/8″ away from the folded edge.
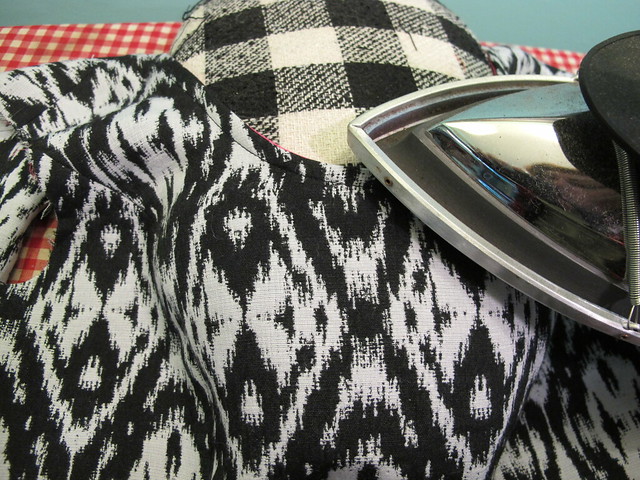
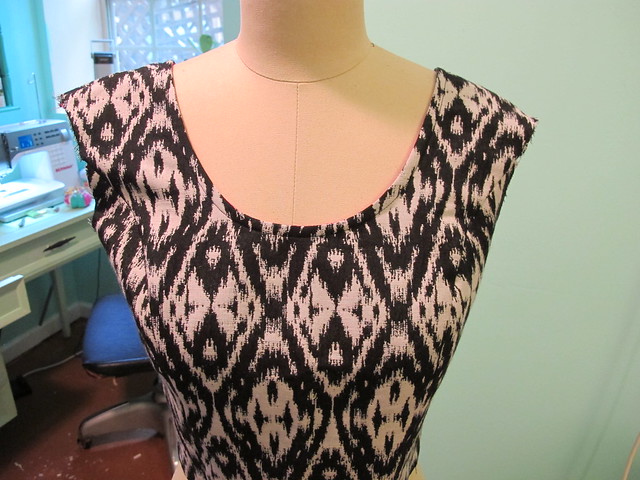
Take the bodice back to the ironing board and give the neckline a good press, preferably over a tailor’s ham if you have one (and if you don’t have one, might I suggest this lovely tutorial for making your own? har har), to smooth out the curves and make sure that all the bias is pressed to the inside of the garment.
Et voilà!
Next, you are gonna want to tackle those arm holes. For those of you leaving your dress sleeveless, you will want to finish the arm holes the same way that you finished your neckline – i.e., with the bias facing (here’s a tutorial on adding bias facing to armholes if ya need it!). For those of you who are adding the standard short sleeves (view B), you will want to follow the instructions to set in the sleeves (or you can follow this tutorial on setting in sleeves, which I find a bit more clear). Don’t forget to finish the seam and press. For the cute little cap sleeves (view D), you will not only set in the sleeve but also need to deal with the underarm finishing (since the sleeve doesn’t go all the way around the arm hole). Normally this is finished with the lining, but since we are little rebels who aren’t playing by the rules, we are gonna finish that with bias facing.
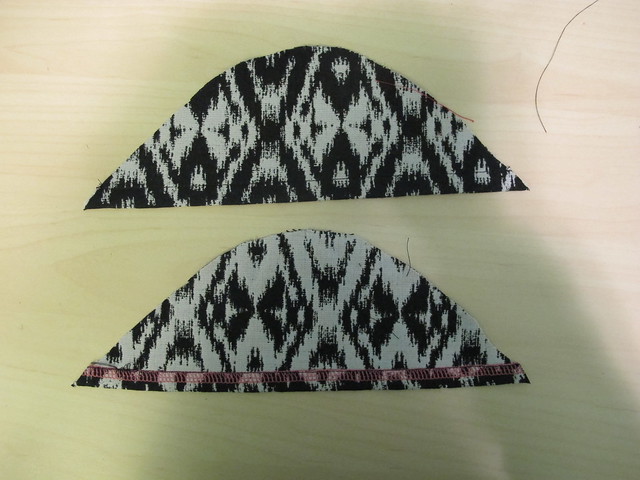
Start by finishing/hemming the bottom of your cap sleeves, in whatever way you prefer. I just serged, turned the hem to the wrong side, and topstitched.
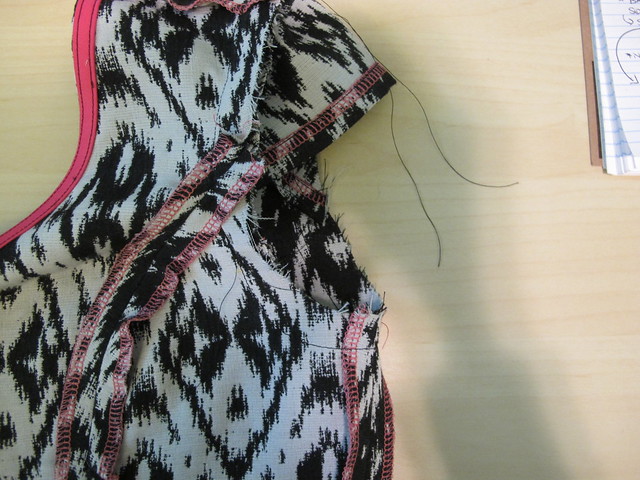
Attach the sleeve to the armscye the same way you set in a standard sleeve – sew a line of basting stitching at 5/8″ all around the curve of the sleeve cap (in a standard sleeve, there are dots to indicate where the basting goes – but for this little cap sleeve, you’ll baste from tip to tip), pin the sleeve into the armscye and pull the gathers so that it fits smoothly inside with no puckers. Sew at 5/8″. (if you need more tutorial help with setting in a sleeve, see the link above 🙂 ). I continued my stitching line all the way around the entire armscye to help with trimming in the next step, although this is not necessary and you can totally eyeball it.
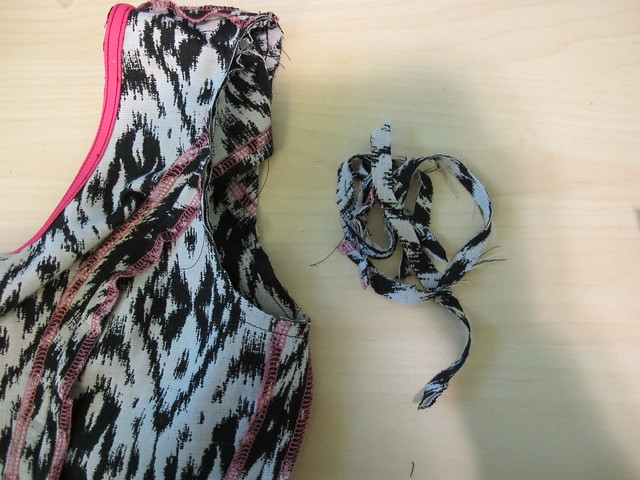
Trim all your seam allowances down – all the way around the entire armscye, including the bottom part that hasn’t been attached to anything yet – to 1/4″. Measure the armscye (this is where one of those Curve Runners would come in super handy, argh. Or you can measure the trimmings that you cut off, ha) and cut your bias strips to length, minus 1″ (to account for stretching the bis as you sew it on). Sew the ends of the bias together to make a circle, and attach to the entire seam/unfinished edge of the arm hole at 1″, again, stretching *slightly* as you sew. Understitch and press as previously directed.
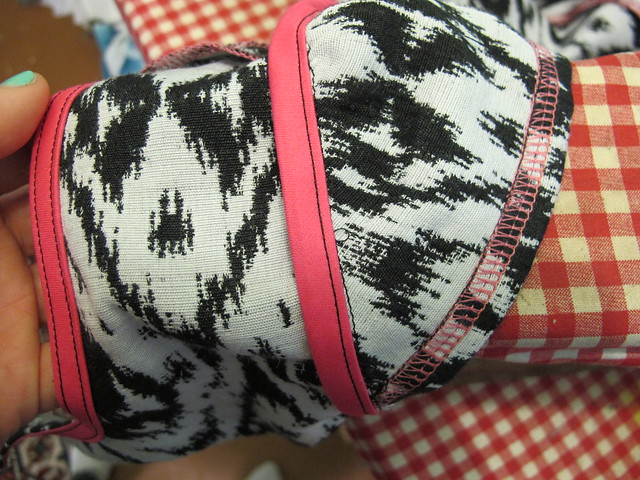
Before you make the final press to pull the facing all the way to the inside of the arm hole, be sure to pull the sleeve out so that you don’t accidentally tack the sleeve to the bodice. Been there, done that, and it sucks.
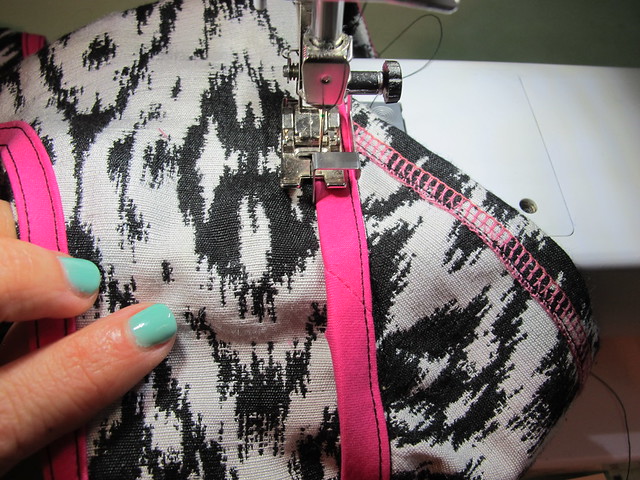
Stitch the bias facing all the way around the arm hole 1/8″ from the edge, being sure that the sleeve is out of the way and you are *only* sewing through the bodice and the bias facing. Press over a tailor’s ham, to set the curves and get everything to lay nicely.
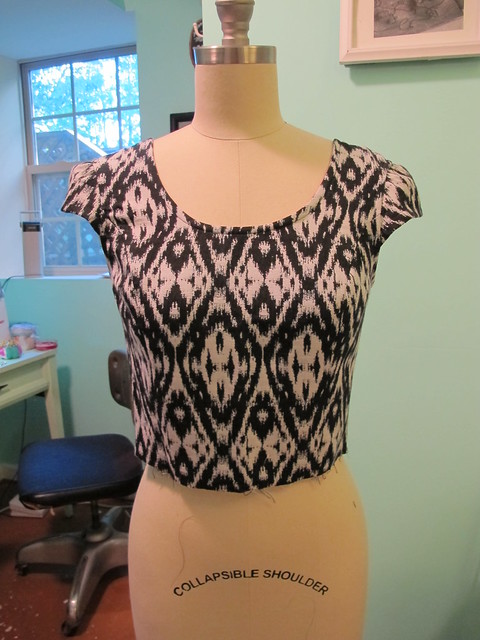
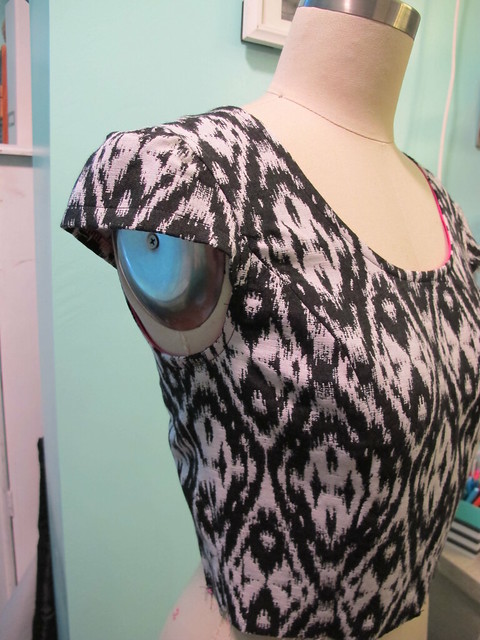
Finished cap sleeves! I really like this method because the extra stitching really strengthens where the sleeve attaches to the arm hole – since it doesn’t go all the way around, sometimes they can start to tear off if there’s too much strain on them (I had a dress like that in my early days of sewing that would NOT keep the cap sleeves attached. Every time I moved, they would rip out. I eventually dumped the dress, too bad I didn’t know how to fix that problem!). And by “strain,” that usually happens from hugging people. Shitty way to ruin a dress if you ask me hahaha. Anyway, once I started sewing them in this way, my cap sleeves tend to be a lot stronger and I don’t have problems with busted seams. You do have to be ok with visible topstitching – but in a dress like this, there’s already a bunch of topstitching, so it works.
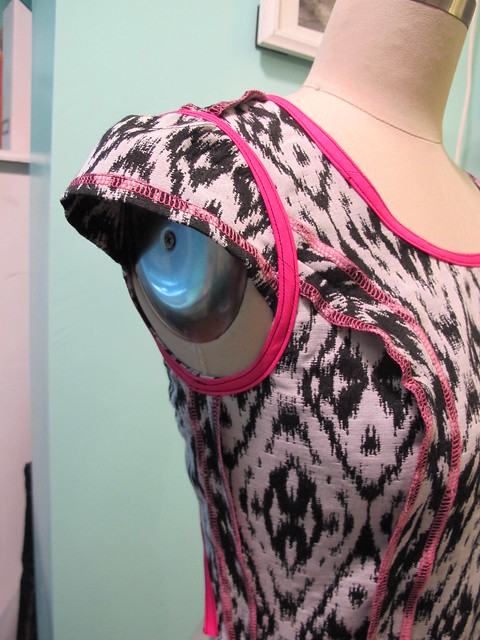
Here’s the inside of the bodice 🙂 Fun!
Ok, whew, I think that’s enough for today! Do let me know if you have any questions about any of these steps 🙂
How’s your sewing coming along for the OAL?




Peru! It must have been a magical time. No, I am not in the OAL … but watching it with many others. Yours was the first sewing blog I followed (new to blogging). You are so knowledgeable and helpful, but mostly you remind me of my daughters who are on the opposite coast! And I saw that Curve Runner on another post, and wondered if it is as fabulous as it looks. Apparently it is! Hoping I’ll be ready to join the next OAL you sponsor, my goal is a fabulous wool coat.
It was definitely magical – and definitely a BIG change from what I’m used to here in the States! A really awesome trip and I’m so thankful that I had the opportunity to go 😀
I am DYING to try that Curve Runner! Everyone else seems to be talking about it (well, at least all the blogs I follow, ha) and I’m really interested in it as if looks to be super handy. Measuring curves has always been a pain, and I can’t believe that no one has found a viable solution up until now.
Hopefully we’ll see ya in the next OAL 🙂 Funny you mention a fabulous wool coat – while I was in Peru, all I could think about was my coat project for this winter! It’s wayyyy too hot to really even be thinking about that, but man, I love coat-making. I want to make something in a ridiculously bright/happy color 😀
Color is the first thing I think of about Peru. Hope you brought back some lovely textiles. (My coat will be crafted of Welsh wool….) Loved your coat sew-along last year.
I actually only brought back one piece of fabric 🙂 I was trying to be VERY restrained (traveling carry-on only helps, ha!). It’s super beautiful, though, so at least I made it a good one! And ooh, Welsh wool sounds lovely for a coat!
Great photos! Very interesting that you stretch the bias on! I did a bias facing on my OAL dress (still a WIP!) I even put a photo of the bias facing on instagram, I was so proud, lol. But I didn’t stretch mine at all, I made it the exact length of the seamline! Seems like everyone has their own way! Yours is looking very cute. Oh and jealous of your awesome trip 😉
Oh, I remember that photo! It looked great 🙂 Yay for bias facing! And yeah, I always stretch my bias facing – that was a tip I learned from Elizabeth Suzann. By slightly stretching the bias, it helps it curve better and also shrinks it so that the neckline (or armhole, or whatever) sits a little closer to your body. When I don’t stretch, I always get gaping 🙂
I hope you have some pics of Peru that you post. Right now, I only travel vicariously. For the print, I saw that you have a post about matching plaids and there’s another from Sewaholic that looks really good, but is there a difference in fabric matching with a print instead? Thanks for the tutorial.
Also, I always see bloggers apologizing for too many pictures. Is this actually a thing? I love all of the pics, especially for tutorial.
Ha, well I guess I hate dealing with a mass of photos so I always feel bad posting a lot! I also still have flashbacks from when internet speeds were slower (my parents live in the country, so we had dial-up LONG after everyone switched to faster internets), so a bunch of photos meant that the page wouldn’t load. Obviously that’s not an issue for me these days, but the apology still runs strong haha. I’m glad you find it useful, though!! 😀
This trip was 100% personal (and not one bit related to my sewing blog), so I’m not planning on posting travel photos or doing a recap. Not to mention, I think I only took about a dozen photos in the 2 weeks I was there (I’d rather spend my time enjoying the trip instead of trying to get good photos, haha). Sorry :[ I was periodically posting on Instagram, so you can see the photos I took there! Like I said, not very many.
There’s definitely a difference between fabric matching with a print vs a plaid! With a plaid, you really only need to focus on matching the lines – not the specific motif (i.e., as long as the strong horizontal lines are unbroken, it should look fine. Focus on the parallel lines only if there’s a seam that runs on the bias). With a print match, the whole print has to be matched, so it requires a bit more finesse with cutting. That being said, I rarely print match – but I always match my plaids.
Did you get any Peruvian made fabrics?
I only bought one piece of fabric while I was there, and I’m not sure of the origins (neither of us in the store spoke the same language, ha), but it’s a beautiful silk/acrylic print. I didn’t see any traditional Peruivan fabrics – other than tapestries and blankets, both of which I’d feel awful cutting into!
I must say- I just looooooove this pattern. I actually just made the sleeveless view (with a lining) but I’m inspired to do this view with the cap sleeves because they are simply the daintiest sleeves ever, aren’t they? Love your blog posts btw!
They are really adorable! Love little cap sleeves! 🙂 And thank you! 🙂
The great tutorial , perfect finishes, the wonderful dress !! I love
Thank you! I’m glad you like it 🙂
Wow – I almost went to Peru this year too. There was an organized trip with a hike to Machu Picchu, but what I was really interested in was some of the cultural aspects and there was also a stop at a women’s weaving co-op. I couldn’t get it together this year to make it happen – maybe some day in the future. Anyways, great tutorial and I love the cap sleeves.
Oh, that sounds like it would have been awesome! Definitely try to go in the future if the opportunity presents itself – it’s an amazing country and you will just fall in love with it 🙂
I don’t have a lot of experience using interfacing. Do you have any helpful guidelines? As for how my OAL sewing is going, I am making the Sylvie dress pattern by Christine Haynes. Made a muslin, lengthened the bodice, and have cut out the dress. I need to interface that wide waistband now…would it be trouble to skip the interfacing on such a piece? I am using a quilting weight cotton.
Your interfacing should have come with instructions for application, so definitely take a look at those first. Generally, you will put the interfacing on the fabric glue-side down, dampen it with a bit of water (I just use a spray bottle; you don’t want to necessarily soak it) and hold the iron on as high as your fabric can handle it + steam for about 15-30 sections. Do this for the entire piece, section by section, and then flip it over and repeat on the other side of the fabric. If your fabric doesn’t like a high heat or is showing shine, use a press cloth and that will keep the damage to a minimum. And yes, I would definitely interface the waistband of your dress! That will keep it from being crushed when you move around 🙂
Thanks for the help. I hope a medium weight interfacing is the right one to use, because that’s what I have. I haven’t sewn garments in quite a while, and I am learning so much from reading your blog archives! Thanks again 🙂
I made a muslin of the bodice and it looks like a crop top. This is my first dress, so I’m not sure if that’s the way they’re made or if I should lengthen it. Is it just a matter of personal preference?
The waistline of the dress is designed to sit at the natural waist, so the bodice will be a little short 🙂 It should hit right at the smallest part of your waist, above the belly button. If it’s shorter than that, or if you aren’t feeling that length, you can absolutely lengthen it. If you’re not sure how the waistline will look on the finished dress, you can hold up a length of fabric at the waist to mimic a skirt (or just wear a skirt that sits at the point) to get a better idea. Remember that there is a 5/8″ seam allowance at the bottom of the bodice, so it will be slightly shorter than the muslin as-is. Does that make sense?
Oh wow, even shorter huh? Ok. Thanks!
I like your way of finishing the sleeves. How do you manage to keep your edge stitiching parallel from the front? Though I use the same technique as you do I often get wonky seams at the right side….and if I stitch from the right side…I always manage to skip some parts of the bias at the back and need to hand-stitch them down…Sorry for venting!
No worries! 🙂 As long as you fold+press relatively evenly with those 1/4″s, you should get a pretty consistent width of bias binding. I always sew from the inside, too – topstitching is prettier on the side where the needle hits, but you’re right that sometimes it means you miss part of the binding! So I just make sure my folding is even, and I topstitch from the wrong side. The lines stay fairly parallel – there are slight discrepancies, of course, but it’s not really noticeable for the most part 🙂