Tag Archives: completed

Completed: Another Alma Blouse

28 Sep

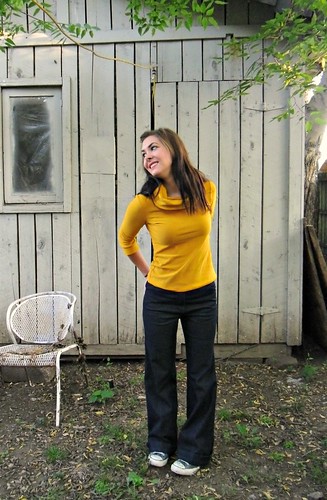
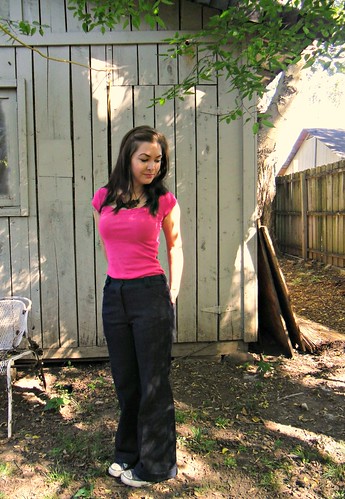
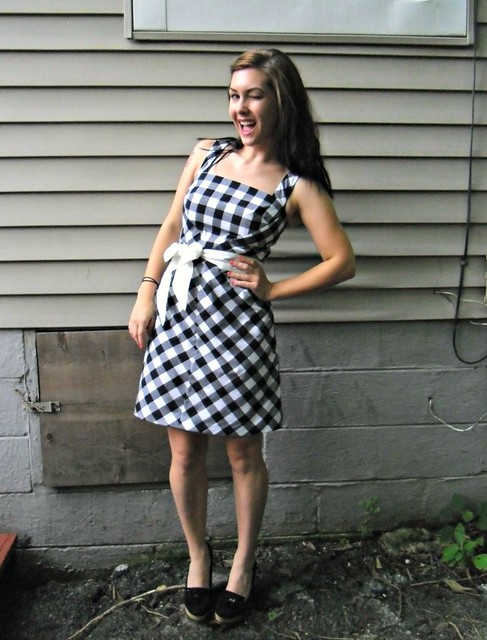
I’m still wearing those damn Thurlow jeans, btw. SORRY FOR NOT BEING SORRY.

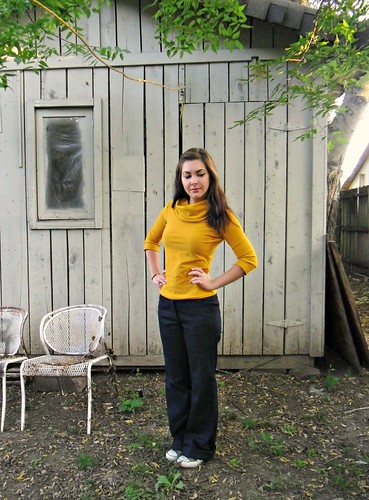
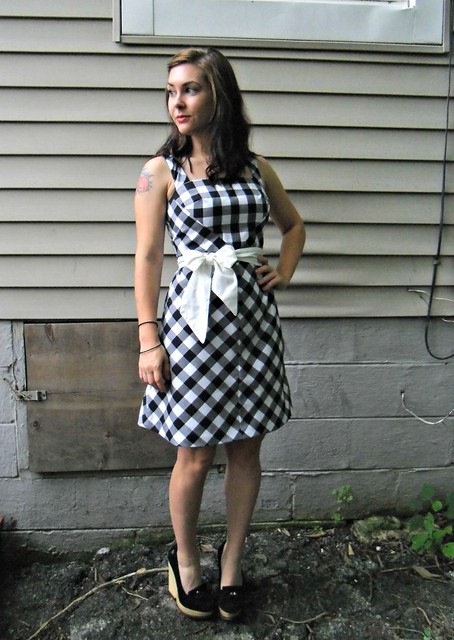
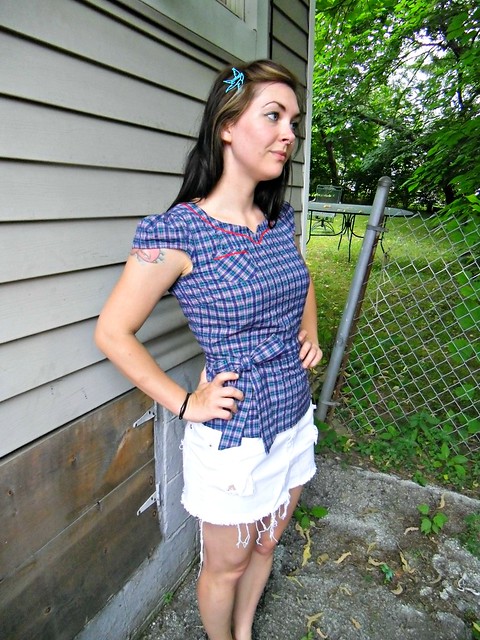
But, hey, look, new blouse!

Alma blouse

This blouse is extra-special to me because the fabric actually came from Liz – can you believe she dumped this in the swap pile!? I certainly couldn’t! I snatched it up with visions of an Alma floating in my head. I almost felt like I needed to save the fabric for something more, I dunno, substantial – like a dress. But I’m pretty happy with the end result & I think it will get a lot more wear in it’s blouse-form. So there!

Alma blouse
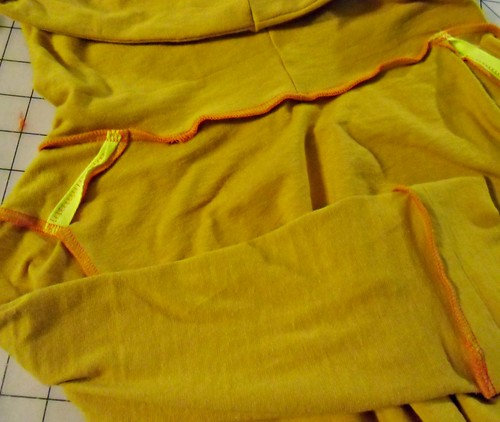
This fabric is pretty amazing, at any rate. It’s actually a double fabric (I’m guessing double-gauze? Maybe? Help me out here.), fused together. Which mean it’s super warm and actually kind of heavy when sewn up into a blouse. Almost like a lil’ non-knit sweater! So obviously, long sleeves were in order. And a peter pan collar because, c’mon.

Alma blouse
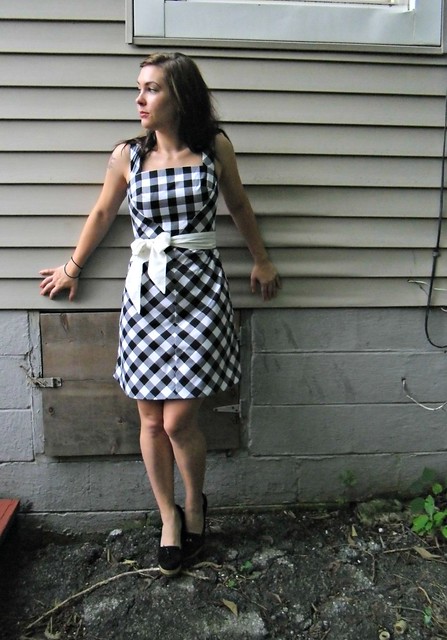
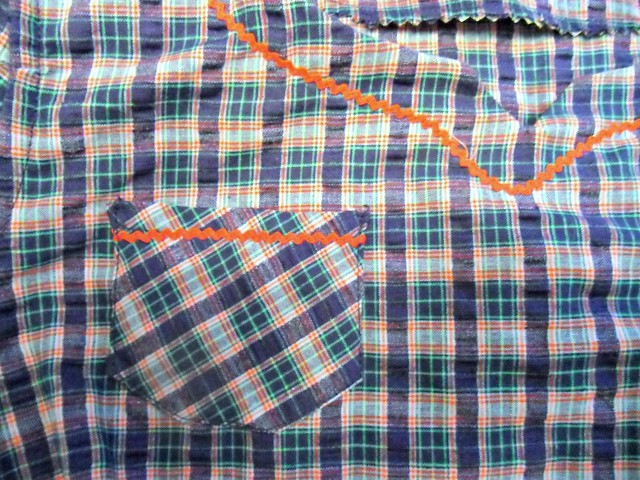
I knew I wanted the collar & cuffs to contrast (although I love the look of a solid print on everything, I think this fabric was just a little too much!), but I couldn’t find a suitable match in my stash and I REALLY didn’t want to tromp back to the fabric store after spending so much at Vogue while I was in Chicago. Then I had a no-shit-Sherlock moment when I realized I could just flip the fabric over for the perfect orangy contrast! That’s right – all the orange accents you see here are actually the wrong side of the fabric. I’m so brilliant, durrp.

Alma blouse
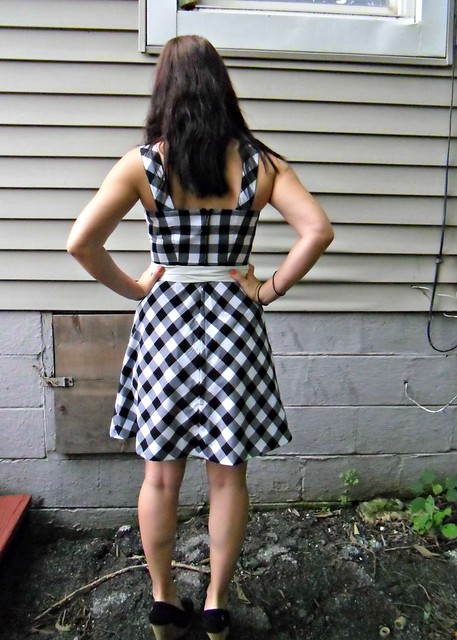
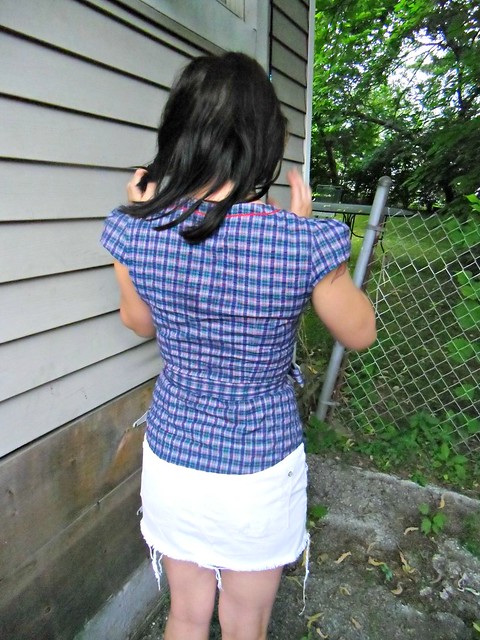
There is totally an invisible zipper right in that side seam. Oh, you can’t see it? Neither can I!

Alma blouse
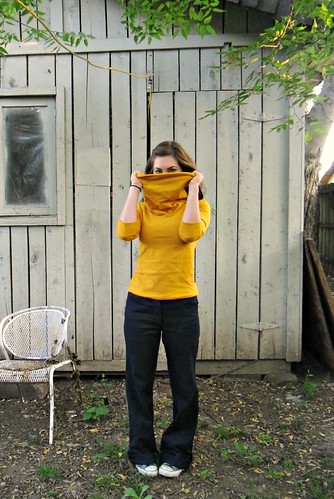
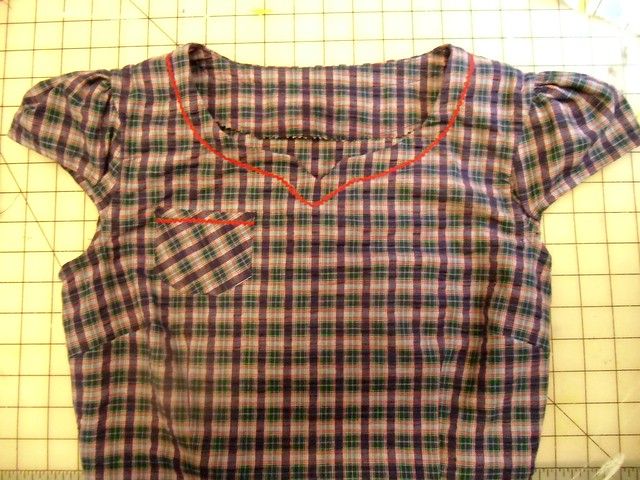
I just think this pattern is drafted so beautifully. The collar pieces include separate under collar pieces, so there is no fug seam ruining my beautiful collar line.

Alma blouse
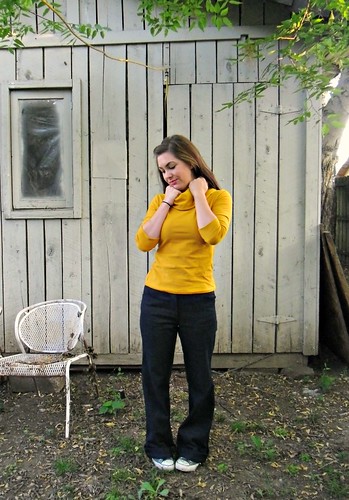
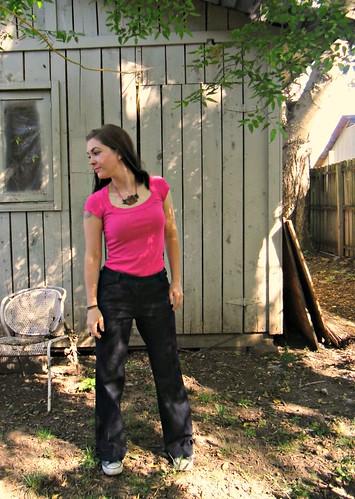
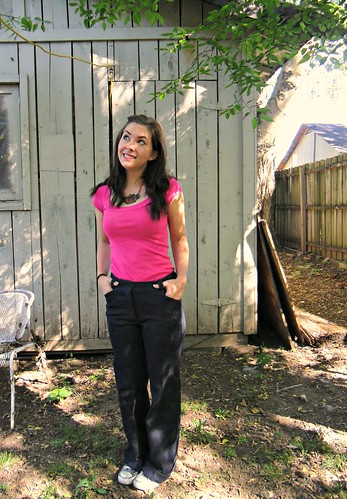
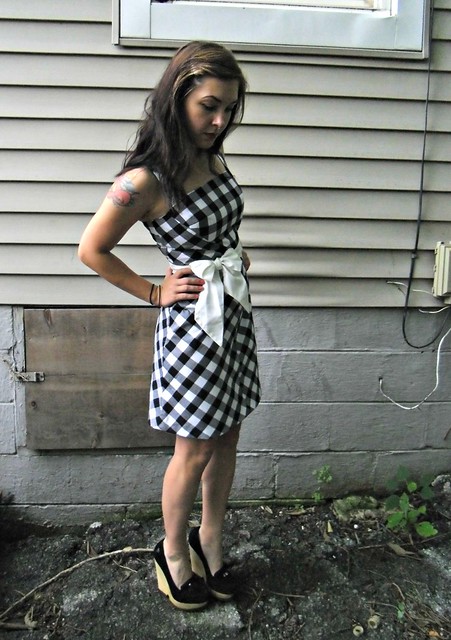
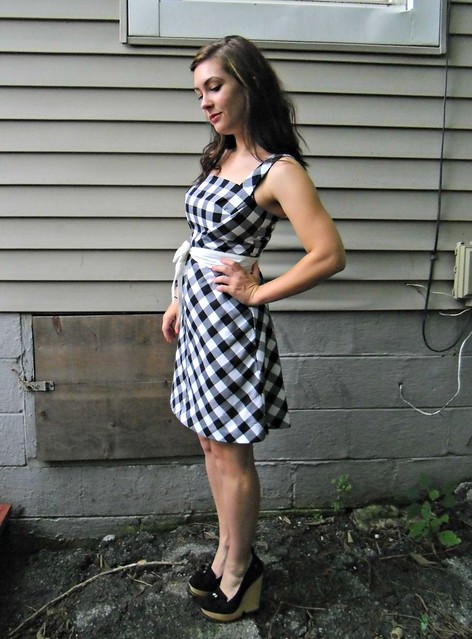
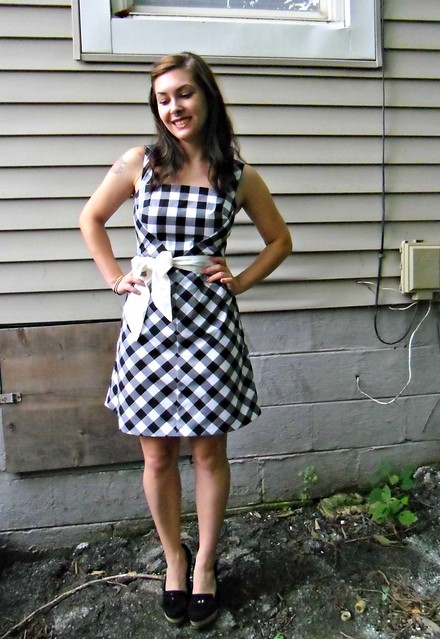
Really sorry these pictures are so cruddy, by the way. It’s overcast today and I guess my camera is on strike or some shit.

Alma blouse
Since this fabric is so thick, I separated the two pieces for the collar & facing, then interfaced the single layers.

Alma blouse
I actually ran out of interfacing while I was cutting out the pattern, and rather than wait for more to arrive in the post, I kept the cuffs at their double-layer status & just sewed as normal without interfacing. I’m not sure if I’m totally thrilled with the end result, they don’t exactly sit right. Oh well – they have leaf buttons! LEAVES, you guys!

Alma blouse
The fit on this guy is a little different than my previous Alma blouse – I wanted it to be a little more loose-fitting, like a cozy sweater. I did have to shorten the sleeves about an inch, and take about 1/4″ out of the sleeve seams.

Alma blouse
I love the little leaf buttons, as impractical as they are.

Alma blouse

Alma blouse
Thought I’d have a little fun with the different fabrics – surprise undercollar!

Alma blouse
The inside of the shirt is actually quite orange, just the facing matches the outside fabric 🙂 Since this is a double-layer, I was able to catch-stitch the facing down so it doesn’t pop out.

Alma blouse
And here is proof that there actually is an invisible zipper in that side seam. Haha! I’m quite proud of this zipper insertion – it’s a metal invisible zipper, which is probably one of the most wtf sewing notions ever. Seriously, these things suck! They don’t fit in my invisible zipper foot, so I have to use a regular zipper foot & push the needle waaaay over. The teeth don’t press down, so sewing it in is a matter of pushing the teeth down with your fingers & praying that the needle doesn’t sew through something it shouldn’t. And apparently there’s a really fine line between “invisible” and “this shit won’t zip up.” I bought these stupid things at the flea market, and I can’t say I’m surprised that they don’t appear to be manufactured anymore.

The end result is pretty good, though, and yes I’m tootin’ my own horn 😉 Deal with it.

Alma blouse

Completed: The Mustard Renfrew (plus some announcements!)

26 Sep

Let’s get down to business, shall we?

First of all, you guys definitely want a sew-along. And I aim to please! So let me introduce my first sew-along (ahhh!!), for the Thurlow trousers:


Feel free to snag this button for your blog, so everyone will know how cool you are BECAUSE YOU ARE MAKING PANTS.

As it is, I am a bit swamped right now, and I know a lot of you guys are working on jackets & coats with other sew-alongs, so we won’t actually start sewing until the end of October. I am aiming for a start date of Monday 10/29, so there will be plenty of time for everyone to work on their muslins, choose fabric (but maybe hold up a week or two, I’ve got a fabric post cooking right now :)) and of course finish your coat if you’re working on one!

I also opened a Thurlow Sew-Along Flickr Group, so please join so we can all share pictures 😀 We will be posting our muslins for advice on fit, and since I’m not a muslin-master, I’m really hoping y’all can pitch in and help when you see something you know the answer to. Open discussion!

A few people asked if they could join with a different trouser pattern – and the answer is OF COURSE! We will be focusing on the Thurlow pattern specifically, but these techniques should work with any ol’ pants pattern, including the gorgeous new Juniper. However, you may need to draft pieces if your pattern doesn’t have all the cool welts & fly facings & shit.

Also, this specific pattern includes an option for shorts, so if you’d rather make shorts… make shorts! All the construction techniques will still be the same 🙂

Ok, for those of you who dgaf about a sew-along… I have something for you too. But you still have to look at my Thurlows. HEH HEH HEH.

Renfrew & Thurlows
Thought I’d whip up a little tshirt last night 🙂

Renfrew & Thurlows
This is the Renfrew top by Sewaholic patterns. I know what you’re thinking – and I promise I’m not getting paid to wax poetic about Tasia’s patterns every day lol. I just really love them and I want everyone to get excited about them too!

Renfrew & Thurlows
Anyway, I wanted to try the cowl in view C, but I was holding off for the right fabric (and weather conditions). This fabric actually came from the flea market last week – this lady was trying to dump off the remainder of her late mother’s fabric stash and this was in it. It was actually really scratchy & smelled awful, like a moldy basement in the 60s, but I took a chance. Especially since I got a big stack of fabrics for $1 lolz. Anyway, it softened up quite nicely with a wash – and the smell is gone. I just think the color is so perfect!

Renfrew & Thurlows
Here’s a back view. BACK FAT ALERT, BRO.

Renfrew & Thurlows
I feel like it also bears mentioning that this is a perfect every day wardrobe ensemble. Sure, it’s a boring concept – jeans & a tshirt. Who the fuck makes jeans & a tshirt? Actually – I think that’s the beauty of it. Instead of focusing all my sewing power on stuff that rarely gets worn, this is some straight-up cake. I am going to snuggle into this outfit all the time – I would be wearing it right now, if I didn’t work in an office with a dress code 🙂 – and it just tickles me that the entire thing is handmade by meeeee.

Oh, speaking of cake – StephC of 3hourspast just kicked off a presale for her new pattern line, Cake! And it’s a casual knit dress – designed to be worn as every day wear, or, the aforementioned cake. Mmmm, cake.

One thing I hear people mention when they discuss not wanting to sew “every day” items is that they are boring to sew. Boring fabrics (not as many pretty prints!), boring patterns, boring boring. And I get that – I really love digging my teeth into something deliciously challenging. But there are ways to make your plain garments more fun – like making the inside a party:
Renfrew - HAPPY SHIRT
GOD, what a happy shirt!

At any rate, stick around for Thurlow Extravaganza! I’ll be back next week to start muslin’ing, and we also need to talk FABRIC!!

Renfrew & Thurlows

Completed: Thurlow Jeans

24 Sep

Well. I have some good news and I have some bad news.

The good news is that the trouser portion of the Thurlow pattern is just as good as the shorts portion. One would think that goes without saying, but occasionally I do see patterns that focus all their attention on one component and add the second as a “bonus” without properly testing it (see McCall’s 5971 – the cap sleeves are perfect, but the long sleeves were not properly drafted & cause some funky problems when you try to, you know, move your arms & shit). Anyway, that’s not the problem here. These parts are perfect.

Which brings me to the bad news… uhhh… I hope you like looking at pictures of me wearing Thurlows, because you are about to see a LOT of them. I have fabric picked for 2 more pairs of trousers & one more pair of shorts. And I have ideas for more. Lord help us.

At any rate, I guess I found my new TNT, desert-island pattern! Woohoo!

So, without further ado… let me introduce you to my newest pair of jeans (and also a deliciously trashy part of my back yard):

Thurlow Jeans
Don’t you luurve them!? Omgah, so comfy & flattering.

Thurlow Jeans

Thurlow Jeans

Thurlow Jeans
Check out the rear view!

A few fitting notes – these are a size 0, aka the smallest size. FWIW, my waist is 26.5″ & my hips are 37″. These are a PERFECT fit on me. I did pull the back crotch out to a size 4, because I noticed my shorts didn’t have as much butt room as I prefer (and occasionally hovered near the zones of Wedgie City, eeeew). I did not shorten the front crotch of these, there are a few wrinkles but that’s mostly because of the way I’m standing. LOVE the fit of these. LOVE LOVE LOVE.

Oh, they are a little long. What you see in the pictures is the natural length, with a shitty cuff job (sidenote: I have no idea how pants cuffs work, nor do I own any pants with cuffs that I can compare to. I am pretty sure I cuffed these wrong because they fall out often. Help?). I’m 5’3″ sooo take that as you will. Next time I will shorten these before cutting.

Thurlow Jeans
I mean, LOOK AT THEM.

Thurlow Jeans
LOOK AT THOSE WELTS.

Thurlow Jeans
I did minimal topstitching with these (just around the welt pockets, top of the slash pockets, and the zipper – all in navy) as I wanted them to be very sleek and, er, trouser-like. Also, these are one hundred thousand times better than my previous denim trousers, fyi.

Thurlow Jeans
The insides are the best part! I had plans on using a piece of floral cotton I had floating around my stash, but the lining for these pants actually take a fair amount of fabric. So I went to the flea market on Saturday morning in hopes of finding something suitable… and welllll, look what I found! Had exactly enough, too!

Thurlow Jeans
I mean, are these like the happiest jeans or what.

Thurlow Jeans
Another rear view. These are probably my best welt pockets yet.

On a slightly frustrating note, it would seem that I’m not capable of keeping pants hooks & eyes in my possession. I lost my first pack in the move, somehow. So when I found them at Vogue Fabrics while I was in Chicago, I rejoiced & bought the biggest pack they sold. Come Saturday evening (*ahem*, yeah, I sewed these up in a day…), they were nowhere to be found! I KNOW I bought some because they are in my gloat picture of all the goodies I brought home. I’m fairly certain I threw them away with the plastic bags. Along with the sweet marking wax stuff that I also bought… ::sob::. So these hooks & eyes come from Walmart. And they are just as terrible as you would guess, but hey at least they were cheap!

But, whatever, I have new jeans so I guess it all evens out…

Thurlow Jeans

In closing, a few questions for y’all:
1. Since I’m planning on making a few more of these anyway, is anyone interested in a little sew-along? Might be closer to the end of the October before I can start, but I’d be happy to take pictures of the more confusing steps & hand-hold if necessary! C’mon! It’ll be FUN! And the pattern includes both pants & shorts, so those of you in warmer climates don’t have an excuse to back out, nyah nyah nyah.
2. What is your TNT pattern? Is it a Sewaholic pattern? Is this some kind of conspiracy?

Completed: The Blagatha

4 Sep

Hey look, I finished another sweater! That makes 3 sweaters now – not bad for someone who’s only been knitting 9 months, eh? Instead of a baby, I made sweaters trolololol

Blagatha

I still don’t think I look nearly as gorgeous as Andi + her sweater in the Agatha pattern photos, but hey, I’ll take this!

For those of you who are new, this is my second Agatha sweater – I loved it so much, I wanted a second version. I am calling this one the “Blagatha” because, well, it’s black & saying Blagatha is kind of fun (another word I really enjoy saying is “goo.” I’m sure you are just fascinated with this). Anywhoodoo, this is pretty much the same as my first one – I knit the size small, using heathered black Cascade 220 & size 5 needles. My gauge must have loosened quite a bit since the first sweater because this one barely needed any blocking to get it to fit – I mostly just blocked to even out the stitches. On the mustard sweater, I really had to stretch the sleeves because they were soooo tight. Not with this one! With that in mind, it is also a bit longer than the mustard one. The sleeves are super long. Oh well, you win some, you lose some.

Blagatha
I’m sorry these pictures are so crappy. It’s rainy, grey, overcast, and black just does NOT like being photographed! Meh!

Blagatha
This is my back/side porch, by the way. I promise my entire backyard isn’t a mud pit – just that section. Fine with me! I hate mowing haha.

Blagatha

These are really awful. Here are some flash-photos, so you can see the lacy details!

Blagatha

Blagatha

Blagatha

Blagatha

Blagatha

Blagatha
I just love all the side & waist shaping – it really makes the sweater extra-awesome.

Oh, and of course – it looks good unbuttoned too 🙂
Blagatha

Blagatha

Blagatha

Blagatha - buttons
Aren’t the buttons cute? I actually found them at Joann’s, although they definitely have a sweet vintage vibe to them

Blagatha - Buttons & Petersham
The button bands are backed with petersham ribbon for stability. I used my sewing machine to sew the button holes on first, then hand stitched everything to the sweater. It took 3 episodes of Arrested Development, whoop.

And for those of you who want to know how I get all this knitting done – I knit on my lunch break at work 🙂 I get a full hour, so it’s perfect for squeezing in some tv or music & just chilling out for a bit. I don’t really knit much at home, home time is sewing time! Unfortunately for me, my sewing time right now is completely wrapped up in draperies. BORING. At least now I can *see* the light at the end of the tunnel!

Oh, I also embroidered this:
Peacock Embroidery
It’s old-ish – I was working on it during that hellish week when everything was packed but we hadn’t actually moved yet. I’m not sure what I want to do with it, though. Maybe a pillow? Eh.

For my next project, I’m taking it easy with a hat. Well, it has cables.
First attempt at knitting cables!
How exciting! I’ve never worked with cables before 😀

I’ll be starting another sweater as soon as I can afford the yarn 🙂 Buying all that yarn at once is such a debbie downer, btw – yarn stores should have some kind of yarn layaway where you can set aside all the yarn you want in your preferred dye lot, but you can pick it up a ball at a time. Actually, I’m not really sure how that would work. Someone make it happen!!

Blagatha
Now let’s see some cold fronts so I can start parading this new wool baby around!

Completed: Thurlow Shorts (the sequel)

27 Aug

Y’ALL. I am still having trouble getting over these Thurlow Shorts – I wear them all the time. Seriously! I actually worry that my friends are starting to think I only own one pair of shorts :B They are such a great fit, so comfortable, and look fantastic. Could this be love? Could this be TNT??

As a christening to my new sewing room – I made a second pair! Those gingham babes definitely need a break 🙂
Thurlow Shorts

I made these using leftover chambray from my last pair of trousers – at 60″, I only needed about a yard of material. Nice! The gingham insides are from a piece of fabric I found at the Goodwill Outlet. Overall, cheap cheap. And fast – I cannot believe how quickly these basically flew together.

Thurlow Shorts

There’s not much to say about the construction of these, since they are essentially the exact same as my previous pair. There are a couple of things I would like to point out, however.
– I forgot to interface the fly facing. DERP. I am quite sure that normally, this would not be a problem… however, my fabric is very lightweight. Which means there is wrinkling all over the fly since it’s not stablized. By the time I realized my error, I had already sewn on the waistband. Oh well! They’re chambray – they wrinkle everywhere else, so hopefully the fly doesn’t look too bad 🙂
– Instead of shortening the length, I just made the cuffs extra wide. Me likey!
– I couldn’t find a pants hook & eye – and trust me, I ripped my entire sewing room apart looking for them (which bums me out because I KNOW I recently bought some! Where are they!?) So these are closed with regular hooks & eyes. It works for now, although I’m still looking for my lost babies.
– The pockets as drafted are pretty shallow – you can’t really put anything in them. I slashed & taped mine so they would accommodate my phone and/or wallet:
Thurlow Shorts - adjusted pattern piece
Since this piece has to be folded at the line, I slashed both above & below the fold line & added 3″. I can still insert the pocket as instructed – and it will hold all my junk. Win!

Thurlow Shorts
I actually wore these out last night for a bike ride/dinner meet up with these awesome ladies. These definitely pass the cycling test – especially with my new rear pockets 🙂 This will also explain why they are super wrinkly. And also why there is a giant grease stain on my cuff & my leg. lol

Thurlow Shorts

Thurlow Shorts

I forgot to get a picture of the back! I’m sure you can imagine what it looks like.

Thurlow Shorts
Here I am yawning instead. I got up extra early to shoot these photos 🙂

Thurlow Shorts

Thurlow Shorts - fly

Thurlow Shorts - inside

Thurlow Shorts - back

Thurlow Shorts - welt pockets

Oh, and while I have your attention – check out all these crazy patterns I found at the flea market this past weekend! All $1 each!
McCall 1391
McCall’s 1391
I am DYING to make some gloves, but this pattern is Large & I have child-sized hands… so I may be learning how to grade down a glove pattern haha.

Simplicity 1390
Simplicity 1390
Would you guys still be my friend if I started channeling my inner Pilgrim?

Vogue 9993
Vogue 9993
This style of hat would look terrible on me. I couldn’t resist, though – the artwork is beautiful!

Vogue 9992
Vogue 9992
This style of hat, however, has been proven to look awesome on me 🙂

Advance 9046
Advance 9046
Sleeves!

Butterick 7206
Butterick 7206
Because, why not?

Butterick 9945
Butterick 9945
I almost did not buy this one, but changed my mine at the last minute. I love the scallops with the peter pan collar – so sweet!

Vogue ?614
Vogue ?614 (sorry, I forgot to make sure the # was in the picture!)
Another sweet blouse.

Advance 8511
Advance 8511
I really love the neckline darts on this thing.

And one piece of fabric:
Fabric
I have enough to make a simple dress… but what pattern? Hmmmm.

I may be quiet for the next couple of weeks while I knock out some commissioned sewing. It sucks, but mama’s got bills to pay! And by “bills,” I mean “fabric.” Haha!

Thurlow Shorts

Completed: The Gazer – A Ginger/Hazel Hybrid

6 Aug

Ha, remember when I said I was going to be moving soon so there wouldn’t be much sewing coming out of my end? I LIED (or rather, my new landlords lied. Dur!). Move-in date has been tentatively pushed to mid-week. The awesome part is that I thought we were going to be moving on Saturday, so I packed eeeeverything in anticipation & we didn’t move on Saturday and oh wait, that’s not awesome, this shit sucks ass.

Long story short, about a quarter of my sewing room is unpacked (oops) and I have a new dress! Yay!

Gazel
So why is this dress called the Gazer? Well no shit, it’s a hybrid pattern – the top is a Hazel, the bottom is a Ginger. Hence, Gazer lolol (previous name considerations were Gazel & Hinger). Also, if you look at this dress too long you WILL get dizzy so the name could very well be a cautionary tale, if you will.

Anyway, I received this pattern as a birthday gift from reader Tracy. I actually tried to make it up a couple of months ago, but the fabric I chose was super tragic & the result was one of those wadders that lived in the corner of my sewing room until I threw it away, ahem, a couple of days ago when I was packing. Haha! I’ve come to the conclusion that gathered skirts just don’t suit my shape whatsoever. I knew that I wanted to do something with this pattern, though, so I stewed for a few weeks on what to do about the skirt. I had a lot of gingham left over from my Thurlow shorts (seriously, like 2+ yards! The fuck!?)… and then an idea was born.

First, I had to drag out my cardboard cutting mat (what? Doesn’t everyone have two cutting mats?) and somehow clear floor space for all that cutting:
Soooo I packed my whole house... And we're not moving until at least Wednesday. Living room floor is now my new cutting table, ew
My back is STILL angry at me, by the way!

I cut the bodice pieces for the Hazel and the skirt (minus the waistband) is the Ginger, version 3. Due to the gingham being sheer, everything is underlined with white cotton batiste.

Gazel
I was initially unsure whether the multiple check directions were going to result in a Hot Mess, but I think this turned out pretty cute!

Gazel
I mean – LOOK AT THAT CHECK-MATCHING!

Gazer
FORREAL, THO.

Gazer
Not to toot my own horn here (I’m totally tootin’ my own horn), but this shit ain’t half-bad.

Gazer
I do think this pattern is pretty flattering!

Gazer
The original version actually had pockets… but I must have placed them too low, or else they were fighting with the bias… either way, they kept making these weird lumps around my hips & the openings kept bagging out, so I just ripped them out & called it a day. I’m not really a pocket-person, anyway – I never put anything in them haha. So they won’t really be missed!

Gazer
Psst – the white bow isn’t part of the dress, it’s just part of my massive belt collection.

Gazer
I do love the way the skirt looks, but I don’t think I like wearing bias garments. They just feel weird to me.

Gazer
Oh, here’s how it looks without the belt – I wasn’t able to get the checks to match up at the waist 😥 Mostly because I didn’t take that into account when cutting. OOPS. I mean, it’s close enough I suppose – but also just off enough so that it bothers me.

As mentioned before, my cutting table is down for the count (it’s currently holding a lot of boxes!), so have some flat shots on my quilt. Before anyone asks – I did not make the quilt, but my great-Grandmother did 🙂
Gazer - front
The center front at the waistline totally looks like a vortex, fyi.

Gazer - back

Gazer - Insidessss

I guess that’s it! I hope they let us move this week haha. All these boxes are driving me crazy!

Gazel

Pattern Testing: The Alma Blouse

2 Aug

I actually finished this blouse almost 2 months ago ago & I have been DYING to share it with you guys! This is Sewaholic’s newest pattern, the Alma Blouse. I got to be one of the pattern tester’s for this. I LOVE being a pattern tester, by the way – something about being able to not only see a pattern before the rest of the world, but even sew it up?! Count me in! It doesn’t hurt when the pattern in question is something totally awesome that I absolutely would have bought anyway. Double yay!

Alma Blouse
Am I right, though? This blouse is totally cute – and I love that it’s a woven top that is *not* a button-up. Those kinds of options are few & far in between. This is version A, with the cap sleeves & notched neckline.

I did make a few changes to the pattern – you’ll notice that it is much more form-fitting than Tasia’s sample photos. I did originally cut it in a straight size 4, but the muslin was a bit more blousey than what I am comfortable wearing. The final piece is a size 4 at the bust, tapered to a 0 at the waist & a 2 at the shoulders & hips. I did not do any sort of FBA besides grading the pattern sizes. I did take about 1/4″ out of the center back seam, but the end result is a little snug so I’ll probably slap that back in for future Almas (and yes, there will be future Almas). I pinched about 1/4″ out of the sleeves because they originally stuck out too far – I have small shoulders, though, and this is a pretty typical alteration for me.

Alma Blouse
One thing that I love about this pattern is that it closes with a side invisible zipper – which makes it possible to be so form-fitting (yet still be able to get it on).

Alma Blouse
Man, I love those tiny cap sleeves. They are super flattering!

Alma Blouse
Also, I can personally vouch that this pattern is suitable for plaids – everything matched up beautifully! And since there aren’t a lot of pieces involved, the process of cutting/matching isn’t really much of a horror story.

Alma Blouse

Alma Blouse
Look at how much shorter my hair is in these pictures! Haha! I took these about 2 months ago 🙂

Alma Blouse
The only design changes I made were actually post-construction – I felt like the notched collar was getting lost in the plaid, so I added a row of rick-rack 1″ from the edge. I also cut a tiny pocket on the bias, because tiny pockets are adorable.

Alma Blouse
I love the waist tie! I think that might be what sets this blouse over the top – of course, it looks great without the tie, but one of my favorite ways to wear it is tucked in to a high-waisted skirt with the tie as a belt. Of course, it looks great untucked too!

Alma Blouse
Sorry the lighting in this picture is so bad! The fabric is a light cotton/poly plaid seersucker, one of the many that my mom picked up at a yard sale for me a few months ago 🙂 Thanks, mom!

Alma Blouse
The pocket is really simple to make – I sketched until I had a shape that I liked, then traced it onto a cardboard template. When I cut the fabric, I added my seam allowance & used the cardboard template to press the seam allowance back so everything would be crisp & even. I figured out the placement by putting the shirt on & holding the pocket up until I was happy with the way it looked. Easy!

Final words: I’m totally happy with this pattern, and I highly recommend it if you’re looking for a way to make tops with wovens that don’t involve a bunch of button holes front & center. There are several options in the pattern, which is great since that makes it work for all seasons 🙂 Thinking about making a long sleeved version next – with embroidery on the peter pan collar! Ooh la la!

Alma Blouse
Now run – don’t walk – over to the pattern store & pick up your own copy!

Completed: Advance 8295

30 Jul

Hey-o, remember when I got all that awesome swap haul a couple of weeks ago?

Advance 8295
And this pattern was part of the prize?

Advance 8295
Well, look Ma – it’s a real dress now!

This was a pretty easy/fast make – although I caught myself trying to cut corners to get it put together even faster. WTF! I actually considered omitting the buttons & installing an invisible zipper – WTF! The buttons are the cutest part! Thank god I put the pattern aside for an evening & got my senses back.

Advance 8295
But in all honestly – arranging those gathers at the yoke & sewing everything down was a giant pain in the ass. It’s not perfect by any means, but it’s passable and that’ll be ok with me!

Advance 8295
The only change I made to the pattern was a drastic shortening from tea-length and I took about 2″ off the side as the bodice was a bit loose – I just folded the placket over one more time & that worked perfectly! Oh, and the bodice is underlined with batiste – the fabric is a bit sheer. Hope you can’t see my undies lol.

Advance 8295
I sewed the whole thing up without any clue what kind of buttons would make the final cut – I didn’t have anything decent on hand, and I needed at least 9 for this dress! And buttons are expensive, ugh! Thankfully, I found a little card of these yellow guys at the flea market – $1 for 9 🙂 Not too shabby! I wanted blue buttons to tie in the blue yoke, but yellow is good enough 🙂

Advance 8295
Oh, the blue yoke, btw – I don’t look too fine in this shade of yellow (or ANY shade of yellow for that matter!) so the blue yoke was necessary to keep my face from getting too sallow-looking. There is blue in the floral print, but it’s darker (the bright was all I could find). I think it works, Landon thinks it’s too randumb. Thoughts?

Advance 8295

Advance 8295

Advance 8295

Advance 8295

Advance 8295

Advance 8295
Do you see my tiny slip-stitches on the inside? NEITHER DO I. Seriously – the best thing I learned from that Bombshell class was slip stitch. I use it on everything!

Advance 8295
Here are those yellow buttons – I took a tip from Sunni and stitched all the button holes with bright blue thread, to tie in the blue yoke. Unfortunately, you don’t see it too well when it’s buttoned up. Ha, oh well!

Advance 8295
I also made a matching belt – it’s a tiny bit small. I suck at making belts, boo.

As a side note, it might be a little quiet ’round these parts for the next couple of weeks – Landon & I just got approved for a new house (it’s rental, we’re not buying!) so we’ve got a month to move. Which means boring stuff like packing & lifting, but also fun stuff like paint colors & new decor! I’m super pumped, albeit a little stressed (and poor!). Oh, and don’t worry – I still have a sewing room. A bigger, better sewing room – with hardwood floors. Yay!

Advance 8295

Completed: Gingham Thurlow Trouser Shorts

23 Jul

Fair warning: I am way WAY excited about pattern. Words cannot express.

When Tasia announced that she was releasing a Trouser pattern specifically for those of us with a generous lower half, I was already pretty excited. As with, well, *everyone* who sews pants, there are always mounds of alterations that need to be done before you can even cut into your fabric. For me especially, it’s the kind of stuff that requires a muslin & flat pattern adjusting – the adjustments don’t fare well with pinching & letting out seams. So naturally, I’ve kept my eye out for pattern companies that cater to my body shape so I can deal with less alterations. I already knew this pattern was going to be a go, regardless of the style – but wait, have you actually seen these trousers??? OMG WHERE HAVE YOU BEEN ALL MY LIFE.

I think Sewaholic might be my new favorite pattern company. I’ve made up a handful of her patterns, and the more I see/work with, the more I’m just incredibly impressed. This pattern is no exception – it is wonderful. Thanks to the extra ease allowed for curvy hips & full thighs (and a narrow waist!), these fit almost perfectly straight out of the envelope. There are a million little pieces, but everything goes together supremely well & the instructions are clear & straightforward without being dumbed down. These shorts weren’t just sewn – they were practically engineered.

So anyway, let’s talk about my shorts!

Gingham Shorts
This gingham was one of the few pieces I allowed myself to buy during the biannual 50% off sale at my local fabric store (I’m saving my pennies for Chicago, eep!). I REALLY wanted giant gingham shorts, although a few people gave me the side-eye when I showed them the fabric lol. Whatever, I love them! The fabric is quite sheer, so almost every single piece (save for a couple facings) is underlined with cotton batiste. Cutting out all those pieces, plus making sure the gingham matched up, plus underlining – I think I spent close to 3 hours just prepping everything for sewing! Totally worth it, though. And as an encouragement to anyone who fears plaids – cutting it out kinda sucks. A lot. But once it’s cut, everything goes together with very little drama.

Gingham Shorts
Like I said, the muslin fit pretty well straight out of the envelope. I usually have to make a few drastic changes to my pattern (adding room for a full butt, reducing the waistband circumference & shortening the crotch), so this was a relief! I did pinch out the tiniest bit of length from the front crotch – about 1/4″ maybe, tapering to nothing at the side seams. I also added another small wedge extension – again, about 1/4″ – to the back crotch for a tiny bit of extra room. These are a size 0, btw. Haven’t fit into that size in a few years haha 🙂

Gingham Shorts
The only design change I made to the pattern was cutting the waistbands & welt pockets on the bias – I didn’t want to deal with matching those stripes. I do have a little bit of rippling at the waistband, which I also had with my Clover jeans (which, come to think of it, that waistband was also cut on the bias. Hmmmmm). But it’s no big deal – I just pressed the shit outta it. Ironing solves everything!

Gingham Shorts
I also took about 2″ off the hem – the original length is a smidge too long for my frame. And anyway, I like wearing short shorts. Deal with it.

Gingham Shorts
Don’t my welt pockets look gooood? I think those & all the action going on with those fly facings (patience, grasshopper, we’ll be looking at that in a minute!) make these pants look super nice. I may make the pockets a little deeper next time, however – these are only about 2″ deep! No room for the wallet!

Here are some close-ups (I told you! I’ve gone craaaazy!)
Gingham Shorts

Gingham Shorts
(I am very sorry, I have no idea why this is so blurry!)

Gingham Shorts
As you can see, I couldn’t get the pocket area to line up perfectly, gingham-wise. The lines on the leg are straight, though, so I guess it’s ok!

Gingham Shorts

Gingham Shorts - front

Gingham Shorts - fly facing
Isn’t the facing fabric so pretty?! It was a (handmade)pillowcase I found at the Goodwill Outlet. I barely had enough to cut all my facing pieces. I just love the colors against the black & white gingham.

Gingham Shorts - inside
You know, in retrospect, I should have checked that the bobbin thread was white when I was stitching on the waistband – that black thread on the waistband facing looks kinda dumb.

Gingham Shorts - back

Gingham Shorts - welt pockets
Close-up of welt-y goodness 🙂
Oh, and just for the record – I used ONLY the instructions to assemble these. No additional help via books or blog posts for that fly/facing or the welt pockets (these are the first welt pockets I have ever sewn, btw). The instructions were great & I am pleased with the results!

Gingham Shorts - inside welt pocket
Oh, and not only do the pockets have these fun insides, but they are also faced with the gingham so it doesn’t show when you’re just walking around or whatever. I’m telling you – this pattern is legit!

I’m so so thrilled with my first pair of these – I can’t wait to make more! I want to make some corduroy shorts for winter (I’ve never been one for shorts with tights but I think this style of short would actually look really good!), and of course trousers. Trousers in every color, wheee!

Gingham Shorts

Gingham Shorts

Completed: the Miette Cardigan

10 Jul

I have a confession to make: this cardigan has actually been finished for about a week now. All I had left to do was to sew on the buttons. It is pretty uncharacteristic of me to put off the final touches of a project – I want it to be finished so I can actually wear it! – but this sweater stumped me for about a week.

I tried a regular ol’ wet block the day I finished it, and let it sit on the back porch so the sun could do it’s thang. Of course, that day had a 20% chance of rain and OF COURSE it decided to rain while I was at work (while we’re in the middle of a drought, no less). GR. When I got home, it was obviously still wet & that’s when I realized that it was quickly growing several sizes too large. I knew that cotton yarn has a tendency to grow, but I figured the wool blend would stop it… nope. So I tried to throw it in the dryer. It was at that point that I learned our (new-to-us) dryer has a busted heating element. That is also when I decided to let Amelia use the sweater as a cat bed while I went over my remaining options.

I’m happy to report that I did manage to fix it, though!

Miette

So now let’s talk about the pattern, and my issues with cotton yarn.

Miette
This is the Miette pattern by Andi Satterlund. Can I just say that I wish Andi had more sweater patterns, because I would totally knit every single one of them. I love how she lays out her instructions & I think her designs are just so pretty. The sizing is always perfect for my body, too. Anyway, this pattern was pretty awesome – simple, fairly quick (the actual knitting of this sweater only took about a month!), and mostly mindless. I used Cascade Sierra, which is a cotton/wool blend yard (80/20), and I barely pulled into my 4th skein. It feels so soft against my skin! These pictures are kind of deceiving; the navy is much more rich in real life.

Miette
I did make a couple of changes to the pattern – I left out a few rows on the sleeves, because I liked the length (and I actually think they are a smidge too long still, eh). I also knitted the sleeves with DPNs instead of my circular needles, since I didn’t want the cotton to stretch out. The ribbing is supposed to be knitted with a smaller needle size, but I didn’t have a smaller size DPN on hand so I just used my regular 8s (same size I used for the rest of the sweater).

Miette
I love that it is all knit in one piece! Yay for not having to sew it together!

Miette
Sorry that these pictures are so bad – I caught a break in the rain & had to rush! The dress I am wearing is actually lavender, but it looks white here!

Miette
Of course, now I notice that the ribbing doesn’t match up at the bottom band. Huh. I guess I didn’t block it enough the first go-round.

Miette
The button band is stabilized with petersham ribbon, so it doesn’t gape over curves. I really like this method, although it is a bit time-consuming to sew all that ribbon on. This time around, I tried machine-stitching my button holes on the petersham before sewing it to my sweater – it was MUCH easier than handworking button holes. Me gusta!

Miette

So how did I get it to fit, if it apparently stretched all out of shape?

Miette
I STEAM-BLOCKED THAT LITTLE SHIT.

Ha! It was sooo easy (and soooo much better than going to the laundromat lolol)! I just laid it on my table, scrunched up the sides & steamed the shit out of it with my iron. While it was hot, I molded the sweater to be smaller. Then I left it to dry. Easy easy! And it actually worked – yay!

Miette - neckline
The next thing I did was thread some thin elastic (like the kind you use for shirring) through the neckband. I sewed 2 rows of elastic, all the way around, and pulled it very slightly. Hopefully this will keep the neckline from stretching out again.

Miette - detail
The buttons aren’t my favorite but they were the only thing I had on hand that even remotely matched (and that I had enough of!)

Miette - button band

At this point, I got really pissy at how bad my pictures turned out, so I started playing around with effects haha
Miette

Miette

Ha!

Anyway, that’s 2 sweaters completed at this point! I feel so proud of myself 🙂