Tag Archives: completed

Completed: From A to Z Cardigan

2 Dec

I feel like the knitting of this cardigan took forever, but it was really only about 2.5 months. Crazy!

IMG_5547

This particular project is a little special to me because I started it right when I put in my final notice at my old job, then I got a huuuge chunk of it done while I was in Chicago, and now it’s been my saving sanity since.

IMG_5580

The main reason why I haven’t knitted it up as quickly as the others is just TIME. I never feel like I have enough anymore! I guess every adult feels that way, though, huh? 🙂 Once I realized I was not getting back those 1 hour lunch breaks (and let’s be real – working from home means NO LUNCH BREAKS EVER, EAT WHILE YOU WORK !!!! haha), I just let myself manage what I could manage. Which usually meant a full 15 minutes of knitting, at the tail end of my lunch. This equates to about 10 sleeve rounds (oh, don’t look at me like that, there were 30-50 stitches per round. very small!).

IMG_5545

Once I hit that, I finished fairly quickly! Yay for me taking my own advice 🙂

IMG_5540

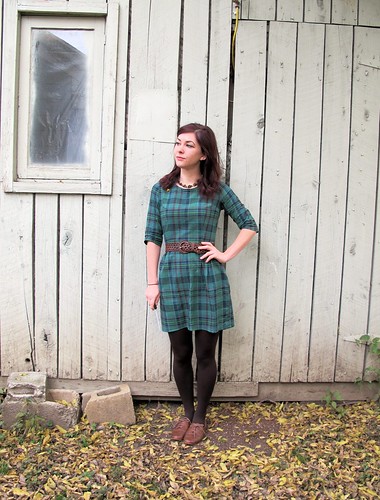
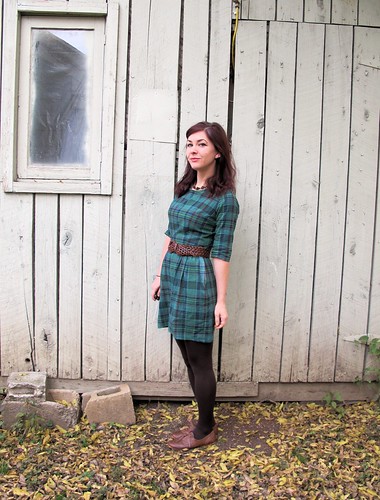
Anyway, pattern talk time! This is From A to Z by Andi Satterlund. A little different from what I usually knit – the construction is bottom up, with knitted-in pockets and a few bits of intarsia for contrast, plus that monogram at the front (it’s duplicate stitch, not intarsia. FYI!). I used Valley Yarns Northamton worsted weight yarn for the main color, and the contrast is leftover bits from my Central Park Hoodie.

IMG_5542

The pockets on this cardigan are SO COOL. They are knit with the body – meaning they aren’t seamed on separately. It was hard for me to wrap my head around first (honestly, I had to email Andi and ask her for help, and she was very prompt in her response!), but once I got going it was pretty easy. The top stripes are intarsia – my first intarsia, ever, and while it’s not terrible, it could use some improvement. I still have problems with holes where the colors join (which you can’t see because, duh, I sewed those shits right up), but it’s a start!

IMG_5549

Part of the reason why this took so long was because it was sooooo repetitive. Stockinette can really take forever, especially at the bottom where it’s the widest! Once I got to separating the tops and then adding the sleeves, I finished this up fairly quickly. In comparison, anyway.

IMG_5553

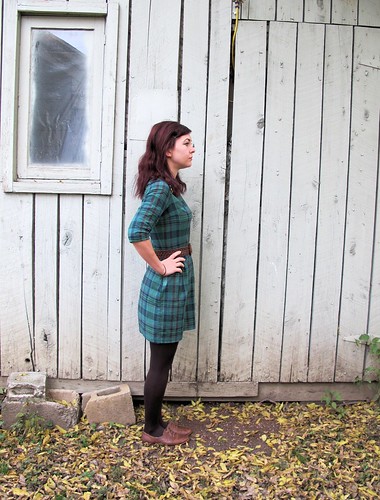
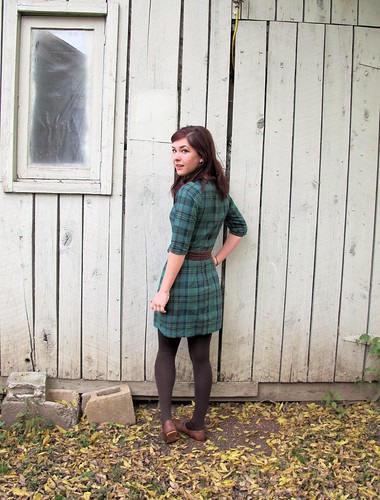
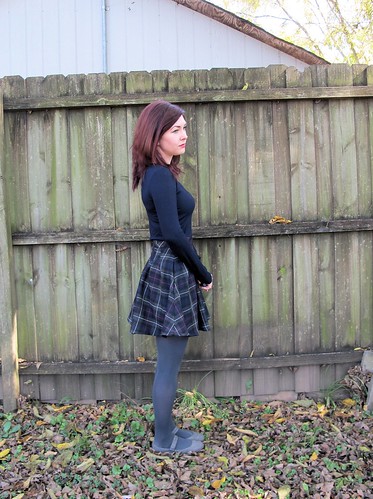
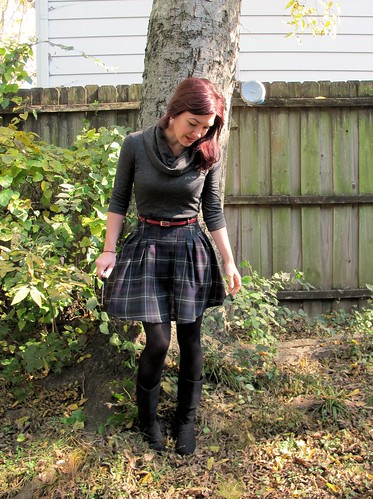
(I was really horrified when I saw this pantyline picture, until I later realized that those lines are caused by the ruffles in my undies. JUST SO WE ARE ALL CLEAR)

IMG_5572
IMG_5573

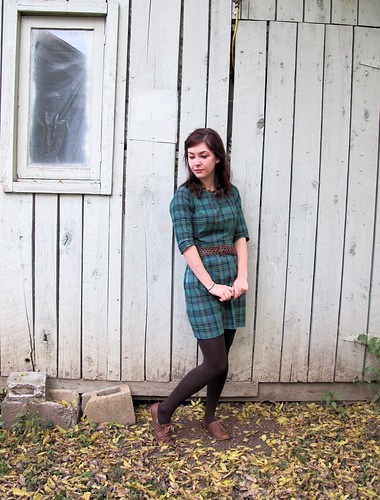
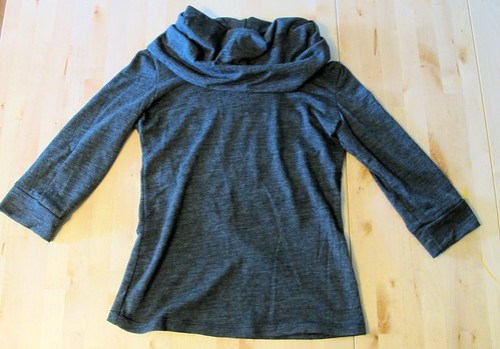
I plan to wear it closed, but it looks good open, too!

IMG_5565

I made the XS and had no pattern alterations. This is what I love about Andi’s patterns – they fit me perfectly as-written! Can’t argue with that 😀

IMG_5566

I LOVE the monogram. As with my intarsia, my duplicate stitch could reeeeally use some work as it’s definitely a Monet. It doesn’t look so great up close! But from far away it’s not so bad.

IMG_5583

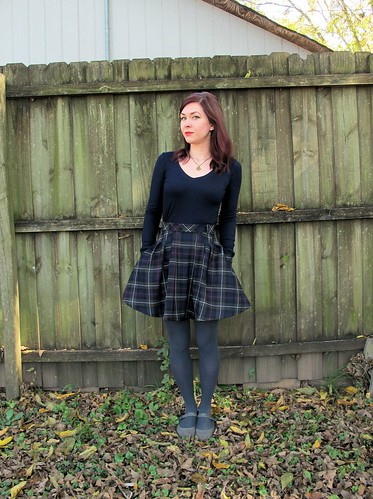
Ugh, sorry for all the pictures. I’m just really proud of how this cardigan turned out!

IMG_5568

Like the varsity sweater of my ~dreamz

IMG_5527

IMG_5530

IMG_5531

Told ya that dupe stitch was lacking. OOPS haha!

IMG_5528

IMG_5529

IMG_5532

Here’s the back of the pocket, in case you were curious about the construction. I created the pocket by making kfbl stitches and pulling the new stitches to a holder, then knitting the pocket lining separately, then picking up each stitch along the side as I knit the bottom of the cardigan. I hope that makes sense! It’s pretty genius, in my opinion, glad I had a chance to try it out!

IMG_5554

I’ve plumb run out of things to say, so I reckon that’s it! Ravelry notes are here. Next knit project – Owls! I have some lovely grey yarn for that and I’ve already started swatching 🙂

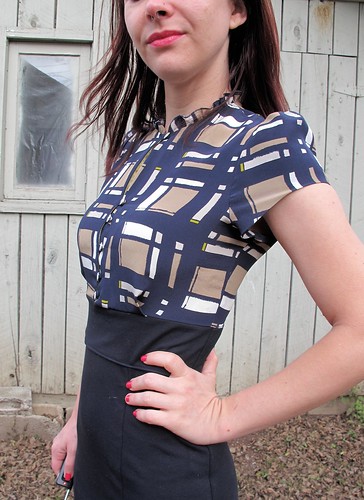
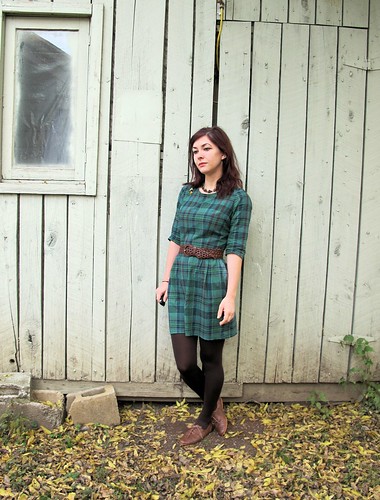
Oh, and just in case you were curious – my shirt says “I Listen To Bands That Don’t Even Exist Yet” (because it’s hilarious, that’s why) and I made my hairbows myself:)

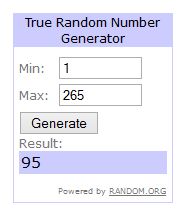
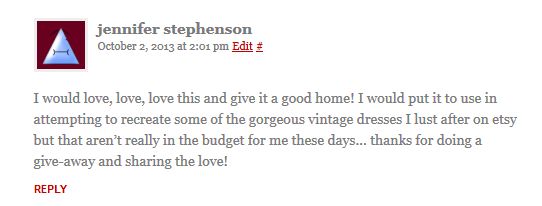
One last thing – the giveaway winner! Let’s see who the random number generator picked today….

winner
winnername

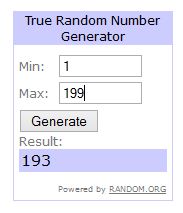
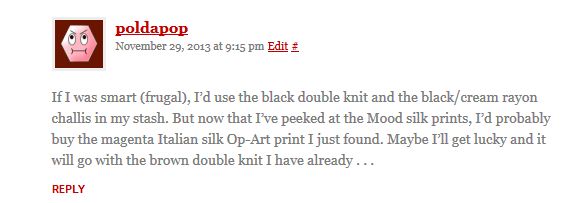
Congratulations PoldaPop! Keep an eye on your mail, you’ve got a Sugar Plum headed your way!

Thanks to everyone who participated!

Completed: The Lola Sweatshirt Dress

27 Nov

I keep complaining about the cold, being the delicate flower that I am, but for some reason I also keep finding myself in dresses on a daily basis. What’s a girl to do?
Lola Sweatshirt Dress

DUH, MAKE THAT SHIT OUT OF SWEATSHIRT FLEECE.

Lola Sweatshirt Dress

Pair it up with some merino leggings and you’ve got yourself a nice stew outfit!

Lola Sweatshirt Dress

This is Lola from Victory Patterns. A dress pattern specifically designed to look like a sweatshirt, who woulda thunk!

Lola Sweatshirt Dress

I don’t feel like I have much to say about this pattern, but I’ll try anyway. I cut the size 2, although I did take in the lower bust seams (toward the empire waist seam) and the upper skirt seams for a slightly closer fit. Actually, I recut the entire skirt because the first time just wasn’t doing it for me – I had shortened it, added the ribbed band at the bottom, and it just looked… weird. Don’t get me wrong, it’s a cute look (lord know I’ve made millions of these types of fitted knit dresses with bands at the bottom, lolz, back when I used to ~sell~), but with this fabric/ribbing/on ME, it didn’t look good. So off it went, and I had to cut a new skirt because my shortened skirt was tooo short for even me. Bummer, because I had been thinking about making Landon a sweatshirt with the remaining fabric, as it’s a color that he really likes. BUT NOT ANYMORE, SORRY LANDY.

Lola Sweatshirt Dress

So, I left off the bottom band. I also left off the pockets, as I felt like they added unnecessary bulk. Of course, now I find myself reaching for said nonexistent pockets – oh well! Perhaps the next version of this dress will include them, I dunno.

Lola Sweatshirt Dress

At any rate, this was super quick to make up, especially since I used my serger for nearly every seam. And it looks pretty cute, if I do say so myself, although I think I prefer to wear this color with burgundy tights instead of brown. My favorite part is the little V at the neckline, it really makes it look like a proper sweatshirt! I debated flipped the fabric to show the wrong side as suggested in the pattern, but it just looked like I had sewn the V on backward and ain’t nobody got time for that.

Lola Sweatshirt Dress

Next time, I will try this in a ponte knit, like my homegirl Sonja already did (you should probably know by now that I spend most of my sewing life trying to emulate her and her makes, it’s tru). With the sweatshirt fleece, it’s pretty casual – which is nice!, but it would also be nice in a not-casual fabric too. I might even try doing the ribbing in a matchy color, instead of the contrast I’ve got going on here.

Lola Sweatshirt Dress

Speaking of which….

Lola Sweatshirt Dress

So, the pattern calls for actual rib knit to finish those edges. Guys, where the fuck do you even find that shit? I saw a giant (like, bigger than me) pile of assorted rib knit odds and ends while I was in Chicago at the Textile Discount Outlet, and obviously I grabbed an armful (eh, they were like a quarter apiece, sue me), but all the greens I got were all wrong. And not all wrong in a cool contrasty way, they were all wrong in a “I tried to match this but I done goofed” way. So much for that! I’m a big fan of finishing knit edges with self-fabric, but this fleece is not terribly stretchy, so what did I do?

Lola Sweatshirt Dress - ribbing

Oh yeah. I went there. RIP American Flag Sweater, hope u enjoy your new life as a pillow!~*~*~*~

Lola Sweatshirt Dress

Basically, I just cut the rib knit off the sweater (including the bottom hem rib knit, but we all know how that did not work out) and treated it like it was the kind you purchase by the yard. It sews in the same way as those knit bands I looove, although I would rly rly recommend using a serger for this particular task, since it likes to shed. A lot! And it looks pretty profesh! Good idea to file away for those huge novelty sweaters you have but don’t ever wear (am I the only one with a stash of those? All right), especially since you can sew the sides up and make it into a pillow :3 lol my couch is so patriotic now.

Lola Sweatshirt Dress

So there’s that! No flat shots because I’m wearing this as I type this post, heh heh heh! Sorry, not sorry! If you were wondering, YES, I did get a hair cut! Got me some bangs, and I think I love them! I also should point out that every time I typed “sweatshirt” in this post, nine times out of ten it came up as “sweatshit.” Where is my mind. I need a vacation.

EDIT Looks like Victory Patterns is running a Black Friday sale woohoo! Take 30% off your entire order with the code “happyanny”! Thanks to everyone who alerted me of this, yay for saving money! haha!

Completed: The Sugar Plum Dress (+ a Giveaway!)

25 Nov

This dress is SO awesome and sneaky. Looks like two pieces, but wait- there’s more! It’s actually one dress! Sugar Plum dress made with Oscar de la Renta silk and ponte knit from Mood Fabrics I LOVE these kinds of dresses! Looks like a silk blouse with a high-waisted pencil skirt, without the bother of keeping a shirt tucked in all day and making sure things match in the morning (because, ew, all I wanna do is sleep right now). Extra bonus – the skirt is a ponte knit, so it’s actually a COMFY pencil skirt. Are y’all feeling my excitement right now?? Sugar Plum dress made with Oscar de la Renta silk and ponte knit from Mood Fabrics This is the Sugar Plum, from Lolita Patterns. Full disclosure: Amity sent me this pattern free to try it out and see how I liked it. I guess you probably gathered at this point my reaction to the finished dress – ummm, amazing! I love how it’s totally appropriate for a professional environment (not that I need clothes like that anymore, but, you know, I still like to dress up ;)), but it’s still beautiful and feminine and unique. The pattern is really fun to put together – lots of tiny pieces, clever seam finishes, the kind of stuff that makes me 😀 Since it doesn’t require a lot of fabric to make up the top half (less than a yard!), I splurged on this amazing Oscar de la Renta silk print from Mood Fabrics. I also bought this navy blue ponte knit for the skirt (omggg so comfy) and lime green china silk for the lining for a bit of a color pop. Sugar Plum dress made with Oscar de la Renta silk and ponte knit from Mood Fabrics This is view B, without the front flounces. I sewed up a size 2. The top fit with no alterations, although I did need to take the skirt in a bit to get it fitted (it’s actually a bit toooo fitted now, whoops. Good thing it’s a knit lol). I did use a much stretchier fabric than suggested by the pattern, so I’m not surprised. The pattern has you use a stretch woven, and pontes tend to be a little more like an actual knit. Based on the way the skirt fits, I suspect you could also use a non-stretch woven and just cut the panels on the bias for the same fitted/comfortable effect. I skipped the pockets and the sleeve gathering detail for a more simple look. Sugar Plum dress made with Oscar de la Renta silk and ponte knit from Mood Fabrics The more I sew with silks, the more I find myself not wanting to make up anything else. The most important thing I’ve learned when it comes to sewing lightweight/slippery/silky fabrics is to make sure that your cutting is super accurate, then the sewing is a piece of cake (or, at least, as much of a piece of cake as it can be!). I always rip my fabric along the cross grain first, to ensure that the edges are perfectly straight, and then pin the selvedges together before I lay down my pattern pieces. This prevents the silk from shifting as I cut it. When it’s time to cut, make sure your scissors are nice and sharp, and try to cut the entire length of the blades (instead of timid little snips). One thing I loove about ordering from Mood Fabrics is that I know the fabric is going to already be on-grain, so I don’t have to worry about straightening the grain before I cut. Just rip the cut edge, pin, and cut those pattern pieces! Sewing with the ponte was much easier than the silk, obviously. I used a serger for all the skirt seams, and my regular sewing machine (treating it like a woven) to attach the silk top to the ponte waistband. I love this ponte because it’s quite a bit more stretchy than other pontes I’ve tried, which means it’s extra extra comfortable. Just be careful when you press it – it definitely gets a shine, so use a press cloth. I keep a big square of silk organza specifically for this purpose. It absorbs the heat of the iron so my fabric underneath doesn’t shine, and it’s sheer so I can actually see what I’m doing 🙂 Sugar Plum dress made with Oscar de la Renta silk and ponte knit from Mood Fabrics Sugar Plum dress made with Oscar de la Renta silk and ponte knit from Mood Fabrics I really enjoyed working on this pattern – lots of tiny details to make me feel challenged as a seamstress, but not so much that I got overwhelmed with the process. A lot of indie patterns run on the easy/beginner side – which is fine, I know there are lots of people who want something simple to make up, and it’s easier to complicate a pattern than simplify it. But sometimes it’s nice to have something that I feel is aimed at a slightly higher level, without me having to run through the steps and find ways to make it harder for myself. Wow, I just made me sound like a total weirdo. What can I say, I like a challenge! Sugar Plum dress made with Oscar de la Renta silk and ponte knit from Mood Fabrics I did make a pretty crappy mistake toward the end of this dress. I was sewing in the invisible zipper and could not get the waistband seams to match up. I was tired, hungry, getting grouchy (you can see where this is going), and I thought, “One more try and then I’m outta here.” While picking out the zip, I somehow managed to detach the teeth from the zipper tape. WHYYYYY. I know I tell y’all that I have millions of zippers in my stash, and I do, but none of them are invisible. I actually have to go out of my way and buy one whenever I need it (because I’m too stubborn to keep those in stock, apparently), which usually ends up with me going to Walmart because they sell invisible zippers and they’re open at 3am when I suddenly need one. So I pretty pissed about destroying this zip, and trying to avoid another trip to Walmart. I ended up cutting the zipper right above where I sliced it open, and just finished the dress with a super duper short zipper – it ends about halfway down the waistband. Since the skirt is so stretchy, this works, kind of. It’s funny to watch me pull it on, ha! And you know the worst part? THE WAISTBAND PIECES STILL DON’T MATCH UP. Whatever, I’m over it! Sugar Plum dress made with Oscar de la Renta silk and ponte knit from Mood Fabrics Sugar Plum dress made with Oscar de la Renta silk and ponte knit from Mood Fabrics I love the little details on this dress that make it so special – the ruffled collar (hemmed using the rolled hem on my serger), the tiny buttons with the tiny button loops, and that BRIGHT LIME GREEN LINING. Really, it’s like a party when I take the dress off! Sugar Plum dress made with Oscar de la Renta silk and ponte knit from Mood Fabrics Sugar Plum dress made with Oscar de la Renta silk and ponte knit from Mood Fabrics Sugar Plum dress made with Oscar de la Renta silk and ponte knit from Mood Fabrics By the way, don’t ever search Oscar de la Renta on the Mood Fabrics site unless you plan on dropping some serious dough on some seriously incredible fabrics. I just fell down the rabbit hole – again! – and discovered violet boucle, boucle with sparkly lurex (!!!), silk floral and some freaking polka dot silk taffeta. I want, I want it all! Sugar Plum dress made with Oscar de la Renta silk and ponte knit from Mood Fabrics

Now time for the fun part – a giveaway! Amity has generously offered a copy of Sugar Plum to one lucky winner, yeeeah!! Still having reservations? Just know that the sizing goes aaaaall the way up to 24 (yes!) and there is an entire sew-along on the blog for anyone who needs some hand-holding. You have no excuses, people! To enter, just leave a comment on this post and let me know what you’d make your Sugar Plum up in (Personally, I’m lurking on a second version with a leopard blouse and a denim skirt, like, ahem, Leila’s. Yes. Exactly like that. Sorry boo!). This giveaway is open to WORLDWIDE and I will close the entries a week from today, Monday, December 2 8:00AM CST. Good luck!

GIVEAWAY IS NOW CLOSED.

Pattern Testing: The Sigma Dress

13 Nov

Umm, have you guys seen the new Constellation Collection from Papercut Patterns? Obviously, I’m biased here, but it’s pretty freaking amazing! Katie has really killed it this time, with the release of six fabulous new patterns – including a bomber jacket (which, duh, totally making that). I was lucky enough to test a pattern in this round, so I ended up making the Sigma Dress. Want to see? 🙂

Sigma Dress

The Sigma is a simple dress that can be made up in a variety of views/fabrics to create a different dress each time. What I love best about this pattern is the pure simplicity of it – it can be embellished however you please. Add a sweet detachable collar, sew it up in a fabulous brocade for the holidays, tough it up with an exposed zipper – it’s super versitale! And, I should point out, it’s a great pattern to sew up in a lovely plaid 😉

Sigma Dress

My Sigma has the skirt from variation 2 (small gathers at the waist; kind of hard to see in this fabric, ah!) and a weird mishmash of sleeves from both variations. I reeeeeally wanted this dress to have long sleeves, but I totally borked up the cutting, like, immediately (I blame it on the kidney stone), so I just made the sleeves as long as my fabric would allow me to. Soo, elbow-length it is!

Sigma Dress

I cut the size XXS, based on my measurements, and it was a near-perfect fit straight out of the envelope. I did have to add two small 1/4″ darts at the back neckline because it gaped a little, but that’s a pretty typical measurement for me. I also sewed in a lapped zipper at at 5/8″ seam allowance (these patterns use a 3/8″ seam allowance), to tighten the waist seam and also because I didn’t want to math.

Sigma Dress

Fair warning, this baby is SHORT! This is the actual length you see on me, and I’m 5’2″. Katie and I discussed the length, well, at length (hee, we’re like a mini-focus group), and she ultimately decided to keep the original short length because it’s cute as hell and add lengthen/shorten lines to the skirt so you can get on with your bad self and make it whatever length you want!

Sigma Dress
Sigma Dress

See that strange lightened area around the pocket? Yeeeah, that was where I applied interfacing to the wrong side of the skirt, sewed up the pocket, stuck it on the dressform and realized my stupid fabric was identical right/wrong side and I had used the wrong side as the right side. Meaning, my unbalanced plaid did not match at ALL at the waistline. After mulling over it for a couple of days, I carefully shredded off the interfacing and tried to wash the glue off, but as you can see – a little still remains. It’s not totally noticeable, but it *is* there. Something to keep in mind if you’re making this up in a plaid – make sure you’re using the correct side of the fabric 😉

Sigma Dress

“Wait, did someone say pockets? In this dress??”

Sigma Dress

Yep! Yay for pockets!

Sigma Dress

If you were wondering about my fabric choice, it’s really not anything special – some lightweight cotton plaid I got from a friend (who I think originally bought it at an estate sale). It’s actually a bit toooo lightweight for this dress, as it loves to wrinkle up whenever it has the opportunity. But, you know, that’s the beauty of this pattern – you can make it in practically anything. Anything!

Sigma Dress
Sigma Dress

I also think the neckline is just perfect for showcasing those little choker-esque necklaces that I can never figure out what to pair with.

This was my first experience testing for Katie (although not my first rodeo with her patterns, yeehaw!), and it was a very pleasant experience! I really liked that she had the patterns printed and shipped directly to us, as opposed to sending out PDFs to be printed and assembled at home. For one, I hate printing PDFs (and I don’t even have access to a printer anymore after quitting my office job, sooo it’s not like I could print even if I wanted to. Ok, I could go to a copy shop but you and I both know that’s not gonna happen), and for two, I’m not really sure how accurate they are when it comes to testing purposes. Seems like an easy way to fuck things up, size-wise, in my opinion.

Sooo, now that I’ve waxed poetic about this pattern for an entire post, who else is excited to get their hands on it? Or anything from the new collection? I think the next sewalong we have on the Papercut blog will be for this dress – just because I reeeeeally want to play around with different looks (which you can’t really do with a tester pattern, I mean, not the slicing and hacking type of playing :)). Speaking of which, we have a La Sylphide sewalong going on right now if anyone is keen to join!

Sigma Dress

Right now, through 11/15, you can get 15% off this pattern (or any pattern in the new collection) with free shipping! This is a great opportunity to try out a Papercut Pattern, if you’ve been on the fence before. Not to mention, Katie added a new size so they go up to XL now 🙂 What are you waiting for??

Completed: the Zinnia Skirt

8 Nov

Who doesn’t love to wear wool in the winter time?

Zinnia Skirt made with plaid wool from Mood Fabrics

I feel like a broken record when I start singing the praises of wool, but foreal you guys – this stuff is awesome. It’s super warm and cozy, breathes very well (so you don’t get overheated in all that warm and cozy-ness), and it’s also antimicrobial, which means it naturally repels odors. Which means now you know why I wear so much wool and still manage to keep up with the laundry – it doesn’t need to be washed very frequently! Airing out is fine for day-to-day. Yay for being lazy!

Zinnia Skirt made with plaid wool from Mood Fabrics

So obviously, I was ready to bust the wool out just as soon as the temperatures started dipping. I’ve had my eyeball on that Zinnia pattern, and I paired it up with this beautiful lightweight wool plaid suiting from Mood.

Zinnia Skirt made with plaid wool from Mood Fabrics

I didn’t take any special precautions when sewing this – it’s wool, it’s just easy! The stitches sink in (bad for unpicking, but great for hemming since you can’t see the top stitching ;)), it presses beautifully, and as weird as this is gonna sound – it was really fun to cut, too. My scissors just sliced right through that yardage. I love the colors and it looks just as good paired with black as it does with navy. Double duty fabric and all that.

Zinnia Skirt made with plaid wool from Mood Fabrics

For the skirt, I cut the size 2 (although I did end up taking in the waist so maybe the 0 would have been better). I left the skirt unlined and shortened the hem by about 3″ so I could have a mini. The waistband is cut on the bias and, despite what you might think you see, I promise that the plaid matches up at the side seams 🙂

Zinnia Skirt made with plaid wool from Mood Fabrics

See?

Zinnia Skirt made with plaid wool from Mood Fabrics

Oh yeah, and I did totally just change shirts. We’ll discuss those in a second.

Zinnia Skirt made with plaid wool from Mood Fabrics

So. About working with this skirt in a plaid fabric. It works – kind of. Matching those side seams was HELL ON EARTH and I’m not really sure why. There are only two pattern pieces, for fuck’s sake! That was also the same day I got my kidney stone (which, if you’re still wondering… it’s still here. Just hangin’ out. Ugh ugh ugh), so I blame it on the pain meds. Anyway, I don’t really think this patterns works very well with a stripe – at least not the stitched-down-pleats version. They just look like a hot mess at the front and back. Might want to save your plaids – or at least your large-scale plaids – for another project.

Zinnia Skirt made with plaid wool from Mood Fabrics

I also had to drastically shorten the hemline – like I said, 3″ and WOO IT’S A MINI – because the longer length just looked dumpy as hell on me. Which means my plans for using a border print probably won’t work with this pattern, at least not the print I had in mind. It’s just too tall for the skirt length.

Zinnia Skirt made with plaid wool from Mood Fabrics

Also, the fabric I chose maaaay be a little too much for this pattern – seeing as how it sticks out like I have a teeny petticoat underneath it, ha – but I actually like the flared look.

Renfrew top made with wool knit from Mood Fabrics

Oh yeah, my tops! This is a Calvin Klein wool jersey, also from Mood Fabrics (attached link isn’t the same color – looks like they’re sold out of the grey, SORRY – but it’s the same fabric type) and it is deeeelicious. So soft and cozy, and not itchy at all! I used the Renfrew pattern and made the cowl version with 3/4 sleeves. I just love the way the fabric drapes at the cowl – it has enough body so it’s not droopy, yet it’s also not huge and standing up on it’s own or anything.

Also, sorry about the rouge leaf. Didn’t see that during the photos, haha!

Renfrew top made with rayon knit from Mood Fabrics

I made the navy v-neck because I felt like my contribution was a little boring, and also because I wanted to see how good navy looks with this skirt (it does! it does!). I used a rayon jersey from Mood Fabrics that’s been in my stash for ages – originally considered for leggings, until I realized that it was a tiny bit too sheer aka I would be baring my bum. I’m so glad I found a use for it, though, because it is some of the most luxurious fabric I have ever handled! It may just be a rayon knit, but it’s silky smooth and amazing. I really wish I had it in every color! I’m also, like, stupid proud of how that V turned out, by the way.

As usual, I took waaay too many pictures, so I’m just going to dump the rest here.

Zinnia Skirt made with plaid wool from Mood Fabrics

Zinnia Skirt made with plaid wool from Mood Fabrics

Zinnia Skirt made with plaid wool from Mood Fabrics

Renfrew top made with wool knit from Mood Fabrics

Renfrew top made with rayon knit from Mood Fabrics

Zinnia Skirt made with plaid wool from Mood Fabrics

Zinnia Skirt made with plaid wool from Mood Fabrics

The tiny belt loops are my favorite part! So tiny and cute!

Zinnia Skirt made with plaid wool from Mood Fabrics

See what I mean about the plaid? It looks like a hot mess at the pleats. Oh well.

Zinnia Skirt made with plaid wool from Mood Fabrics

One last thing – I wanted to thank y’all for all your advice regarding my muslin, as well as my kidney stone. I’ve decided to set the muslin aside for now; I may revisit it in the future but I think my coat for 2013 will have to be a totally different pattern! So I guess I’ve got that to figure out. As far as the kidney stone… well, it’s still there, taking up residence. Y’all will probably be able to hear me scream from the rooftops once it finally emerges haha. A few people urged me to to go the doctor, and I did want to follow up and let y’all know that I went to both a doctor and a specialist last week, got the x-rays as well as a variety of medications. There’s not much else we can do at this point beyond surgery or shooting lasers (which my uninsured ass is reeeeally trying to avoid), which means I gotta shoot it out! For the past couple days I’ve been on an essential oil regimen, and tonight I will be trying some Coke/asparagus concoction that sounds fucking disgusting but is supposed to work. Anyway, sorry for the TMI, keep thinking happy kidney stone thoughts! haha!

Zinnia Skirt made with plaid wool from Mood Fabrics

Completed: Winter Tania Culottes

28 Oct

I wasn’t sure if the Tania Culottes could be winterized, but they can. THEY TOTALLY CAN.

Winter Tania Culottes

And they look really good in the process!

Winter Tania Culottes

I made these using a piece of fabric I’ve had in my stash for a few years… it looks like wool suiting, but it’s actually 85/15 linen and silk. The silk addition is nice because it means the fabric doesn’t wrinkle. I guess it would be more suitable (lolz) for summer wear, but summertime is not suit fabric time, regardless of fiber content, as far as I’m concerned.

Winter Tania Culottes

Anyway, it’s a remnant from my local fabric store. It was pretty funny when I bought it, because the ladies at the register kept exclaiming, “WHAT is that? Where did you find that? Oh, it’s so amazing! And it’s so cheap!” and I’m all, “Back off bitches, I found it first.” I’d totally elbow someone over fabric, let’s just be honest.

Winter Tania Culottes

Making these wasn’t much different than sewing them with cotton. There is no lining – I reckon I could’ve popped one in (there’s a short blurb at the end of the instructions on how to do this), but I didn’t have any lining on hand and this fabric isn’t very grabby like a wool tends to be. I did take in a bit extra at the side seams, since my first Tanias are slightly loose. I nipped in the side seams at 3/4″ and the waistband fit is perfect on these.

Winter Tania Culottes

I was initially hesitant to make these up in this fabric, since it’s sorta drapey but it’s not sooo drapey like a rayon or a cotton voile would be (not to mention the fabric is much thicker), but I’m actually really happy with how the silhouette turned out. It’s so flippy and full!

Winter Tania Culottes

I have a similar miniskirt (from American Eagle, oh lol) that I’ve been meaning to replace as it doesn’t fit right anymore… and this is a perfect replacement! The longer length means I can wear it to work, and the higher waistline means I can wear it with my cropped sweaters.

Winter Tania Culottes

Not to mention, it’s essentially a pair of drapey shorts – so I can also wear this shit on my bike!

Winter Tania Culottes

(O shit, I never realized how cool these tights are!)

Winter Tania Culottes

The only blip I had with sewing these was the hemming… I couldn’t fit the bulk of the fabric under my rolled hem foot, and I will be DAMMED if I am going to sit and blindstitch all that yardage at the bottom. So I serged the edges and folded them under once with a quick topstitch. The fabric is so busy, you can’t really see the serging. And I finished my hem fast! Evening the hem out was also way easier, thanks to the stability of the fabric.

Winter Tania Culottes

Doesn’t they look so good with my cropped Chuck? Ugh, I love this sweater so much, but the length makes it difficult to pair it up with just anything. These two, though – they are a match made in heaven.

Winter Tania Culottes

I’m happy that I finally found a use for this stash fabric, and winterized one of my favorite summer patterns! Tanias year-round for everyone!

Winter Tania Culottes

Oh, and check this out – my little photo companion for the day 🙂

Winter Tania Culottes

This is Nimue, isn’t she the cutest little thing? She’s a corgi puppy – no, we didn’t adopt a pet (I wish! But I want cats. Moreeee catssssss), I was just watching her for the afternoon. She was very good, although she preferred cuddling up on the couch with me most of the time 🙂

Completed: A Totally Sheer Anna Dress

21 Oct

I swear, this is my last Anna dress for now!

Sheer Anna

But I mean, look at that fabric – can you blame me? That shit was meant to be amirite?

Sheer Anna

So, this fabric is pretty amazing. I actually bought it way before the pattern was released, with no real project in mind except that I HAD to have it. I found a lonely yardage stashed away at my new work (obviously this was before I started working there, when I was going on weekly visits and soaking up little sewing tricks and tidbits by osmosis) and took home 3 yards.

Sheer Anna

You can’t really tell in the pictures since I am wearing a slip underneath, but this fabric is quite sheer. I’m not really sure what the content is, but it feels (and sews and presses) like a silk organza, maybe with a tiny bit of poly blended in there. For being a sheer fabric, it has a surprising amount of body (again, like an organza). When I first started sewing it, I wasn’t sure how it would look as this dress -the pleats were sticking straight out over my boobs! Fortunately, they seem to have toned down a little, ha.

Sheer Anna

I just loove the print! Little brown leaves, covered in some kind of flocked something (I say flocked, but it almostttt feels like super duper short fur. They’re like, hairy, haha. Oh man, I’m making this fabric sound disgusting right now) and then outlined in sparkly black flocked something. To sum it up in one word: magical.

Sheer Anna

Speaking of things that are magical, I feel like I’ve been using that word a lot lately. I should probably come up with some new adjectives.

Sheer Anna
Sheer Anna

For the pattern itself, I didn’t make any changes apart from the tweaks that were there from my last two versions. I sewed the entire dress using french seams, except I did serge the seam allowance next to the zipper (hairy fabric means sheddy fabric, ugh).

Sheer Anna

Ah! There’s the slip! 🙂

Sheer Anna

The neckline was a little tricky thanks to the sheer fabric – I didn’t want to use a facing because it would show through, and I didn’t want to line the dress because duhhhh what if I decide to go all undiesonly.com (lol does anyone else remember that website HAHA) and I can’t because the dress has been lined? I decided to bind it with a strip of black silk organza cut on the bias. Boo on me, my silk organza was actually grey, not black (the hell?) so I had to turn it to the inside and that’s where things went a bit… wonky. It’s ok, but it’s not my best work. If you have a hankering to make a sheer Anna, buy matching silk organza and bind the edges like you normally do with bias tape. It makes it easier to miter the V for a nice sharp point. Just a tip!

Sheer Anna

Also, while we’re being honest with one another, I should let y’all know that I put that tiny bow+button on the neckline to cover my less-than-lovely v-point haha. And of course, now I’m noticing that it’s totally not centered at all and it’s making my eye twitch.

Sheer Anna

I guess it’s tacky to show my bra straps, but idgaf.

Sheer Anna
Sheer Anna

All french seamed and shit

Sheer Anna

Here you can really see the texture of the fabric. Also, isn’t that button on the bow so cute?! I got it in a box of tiny deco glass buttons. This was the only one, so I’m happy to have found a use for it 🙂

Sheer Anna

Despite the french seams and fiddly neck binding, this dress came together VERY fast. Which is good, because I needed it for all the weddings I went to this month (three! Seriously, October, what’s up with that?? Don’t worry, tho, I caught 2 out of 3 bouquets… poor Landon HAHA). I mean, yes, duh I have tons of dresses, but I wanted a faaaaall dress. And here she is! And yay!

Sheer Anna

A couple more things before I let y’all off the hook! One, we have a winner for the ChatterBlossom Giveaway! Random number generator says…

cbwinner

uglybeat

Ding ding ding! Congratulations, Uglybeat! Expect an email from me about right… now 🙂

For the rest of you who need consolation for not winning, may I remind you that the coupon code is still good for the next week! Lladybird15 gets ya 15% off your order through 10/28 🙂

And because everyone loves coupon codes, we’ve also got one for my newest newest sponsor, She’ll Make You Flip! Use the code LLADYBIRD20 to get 20% off your entire purchase through the end of 2013. Meaning, someone buy this 1940s dress pattern before it accidentally ends up in my shopping cart, thanks 😉

Happy Monday, everyone!

Completed: Plaid Flannel Archer (+ Draping winner!)

10 Oct

Finally, a successful Archer button-up – in my dream plaid flannel, no less (seriously, I keep eyeballing all the other colors… do I take the plunge and buy them all?? Because I want to!)

Lumberjack Archer; Ponte Leggings

I am pretty proud of this shirt, so let’s be honest – there are lots of pictures in this post.

Lumberjack Archer; Ponte Leggings

Although the more I look at these pictures, the more they appear to just be the same picture at a slightly different angle or pose. Oops 😦

Lumberjack Archer; Ponte Leggings

ALSO, please forgive my awful editing and how the color changes in every picture. I bought a new photo editing software with my new laptop (Corel Paintshop Pro, if you’re curious!) and I’m still trying to get used to it 🙂 BUT HEY, I can edit out zits and stuff now, so that’s pretty freaking awesome!

Lumberjack Archer; Ponte Leggings

Anyway, ok, let’s talk about this Archer I made! Using my failed linen Archer as a wearable muslin, I shortened the sleeves by about 1″ and left the body length intact (you’ll recall that the linen one I ended up cutting too short. Or maybe you don’t recall, see if I care). I think my sleeves are still a little long, but I also anticipate this shrinking more in the dryer (I only washed the flannel once before cutting, sorry, I was just excited!) so hopefully they won’t end up too short!

Lumberjack Archer; Ponte Leggings

I also made the pocket smaller! No rhyme or reason to how I did it, I just eyeballed until it looked “right.”

Lumberjack Archer; Ponte Leggings

Making this shirt was super fun, from cutting (what can I say… I love matching up plaids haha) all the way through sewing. I forgot how much I love sewing really precise things like button-down shirts. Makes me want to sew another shirt for Landon, maybe. What’s funny is I actually caught myself starting to rush through the construction of this – not because I was on a deadline, but because it’s starting to get cold and I wanted to wear this shit nooooooow – and I decided to force myself to slow down by sewing flat-felled seams instead of just serging the seam allowances off. Even the arms are flat-felled. I’m so glad I did, because the end result turned out pretty fabulous if I do say so myself.

Lumberjack Archer; Ponte Leggings

I cut the back yoke, pocket, and front button band on the bias. Everything else is straight and painstakingly matched. The only boo-boo I made was that I put the button band on the wrong side – oops! I originally chose the opposite side of the flannel as the right side, then changed my mind when I started sewing. Since the front pieces are not mirrored, this meant I had to compromise my button band side. Oh well, I am just pretending that it’s actually a men’s shirt, haha!

Lumberjack Archer; Ponte Leggings

At any rate, the side seams match up beautifully. Look at that shit!

Lumberjack Archer; Ponte Leggings

I changed out the buttons for pearl snaps, so I can hulk my way out of this shirt when the urge strikes. Funny thing about those pearl snaps – they actually started out white, and while it looked ooookay, it also just looked like I bought the wrong color pearl snap. I can’t get black snaps locally (and DAMMIT that I SAW them in Chicago and was like “nah I don’t need that” lol oh Lauren, hindsight is 20/20 or some shit) and I couldn’t wait sooo… I painted these with black nail polish. Black glitter nail polish, to be precise. Hey, it works!

Lumberjack Archer; Ponte Leggings

Lumberjack Archer; Ponte Leggings

I sewed the size 0, as I did last time, except the side seams are sewn at 5/8″ instead of the pattern’s 1/2″. This makes for a slightly (very slightly) smaller fit.

Lumberjack Archer; Ponte Leggings

The collar stand turned out fucking perfect, which I’m VERY proud of! I followed Andrea’s tutorial and I had no unpicking with that method. I’m sold, and Andrea, I owe ya a beer for that. Thanks bb♥

Lumberjack Archer; Ponte Leggings

I also changed out the sleeve plackets and used the ones from the Negroni pattern. I just think these look so much better with the flannel check, plus they are more conductive for rolling up sleeves. I also find this type of placket easier to sew. Man, I love sewing plackets.

Lumberjack Archer; Ponte Leggings

Oh, I also made my leggings! You can’t really see any detail because they are black, wah, but I did make them! I used the Ooh La Leggings pattern and a black ponte knit from Mood Fabrics. My take on ponte leggings – AWESOME. So so awesome!! I actually wore these when I traveled to/from Chicago (so, 18+ hours total) and they were SO comfortable – and they actually look like pants! Guys, I am so sold on these.

I don’t have much else to say, so have some pictures –

Lumberjack Archer; Ponte Leggings

Glitter buttons, yeah? 🙂

Lumberjack Archer; Ponte Leggings

Collar stand pride~

Lumberjack Archer; Ponte Leggings

Lumberjack Archer; Ponte Leggings

Placketz

Lumberjack Archer; Ponte Leggings

Flat-felled seam, curved hem

Lumberjack Archer; Ponte Leggings

Proof that these are actually leggings and not some black blob.

Lumberjack Archer; Ponte Leggings

This outfit has basically become my fall uniform. Seriously! The flannel is so warm and cozy – and easy to throw on if I’m chilly (which is always. Yes, I have worn this shirt every day since I finished it, don’t judge me). I am really happy with how both turned out, and definitely plan on making more. Question – is it really dorky to make me & Landon matching plaid flannel shirts? Because I’m totally about to go there.

One last thing – We have a winner for the Draping book! Random number generator, who do you choose?

random

yaywinner

Congratulations, Jennifer Stephenson! I can’t wait to see what vintage recreations you end up making!

Completed: Polka Dot Peter and The Wolf Pants

26 Sep

Remember when I was trying to hunt down the perfect polka dot fabric for these Peter & The Wolf pants? And then I couldn’t find it and I was sad but I made them anyway? Well! Look what I found!

Peter & The Wolf - Polka Dots

My dream stretch polka dots pants fabric – a polyester wool suiting with flocked polka dots (right?! right?!)!

Peter & The Wolf - Polka Dots

I got a fistful of swatches from Mood about a month ago, this swatch being one of them. I immediately zeroed in on those flocked polka dots and called the store to get a couple yards sent to me. I should also mention this was like day #2 post-surgery, and I was laying on the couch totally hopped up on painkillers and I’m fairly certain that the dude on the other end of the line thought I was a crazypants. Whatever! Joke’s on him, now I HAVE the crazypants!

Peter & The Wolf - Polka Dots

Then I got my fabric and I rolled around in it for a couple of weeks because that is what you do when you are in love.

Peter & The Wolf - Polka Dots

Again, I used the Peter & The Wolf pants from Papercut Patterns, with just a couple modifications from the last time I made them. I already had the pattern pieces modified to reflect the changes I made – sizing, crotch length, crotch curve, all that good stuff – but I went ahead and made a quickie muslin just to be SURE before cutting into this precious stuff. I added another 1/2″ of length to the legs and swapped out the waistband for a curved waistband – specifically, I used the waistband from my Clovers. I definitely prefer the way this fits over the straight band – and it’s a good height, too. It just barely covers my bellybutton, which I like.

Peter & The Wolf - Polka Dots

I lined my pockets with a little scrap of Bemberg rayon lining and it’s kind of amazing. I feel so posh whenever I stick my hands in my pockets now, ha!

Peter & The Wolf - Polka Dots

Also, I’m very happy to report that the grainlines are totally straight on these pants (since I didn’t have to do emergency pants-weightloss surgery while sewing them), and as a result the hem scallops are straight as well. Yay!

Peter & The Wolf - Polka Dots

The only part about all this that I was NOT digging was when it came time to actually press my seams. Lord, that polyester refused to do anything that involved heat. I solved most of the issue by doing a lot of top stitching – front and back leg center seams, the yokes, the pockets, the waistband. Basically everything I could get my needle into.

Peter & The Wolf - Polka Dots

I think it worked out quite well in the end, though! And yay, all my seams match up!

Peter & The Wolf - Polka Dots

Next time I make these, I will stabilize the zipper opening. It’s just a little too wavy – which, I mean, I could fix, but I also got those seams matched up fucking PERFECT and I’ll be dammed if I’m ripping that shit out again. Nope.

Peter & The Wolf - Polka Dots

To get the bottom scallops to have a nice sharp edge (remember, the polyester wanted nothing to do with that iron), I had to improvise and figure things out as I went along. I did include the facing, which I under stitched and then top stitched (I find under stitching is VERY helpful when you are sewing something that is difficult to press, as it forces facings to roll to the inside). To press the edges, I used my sleeve board and a silk organza press cloth and steamed the shit out of each section. After it got nice and hot, I used my clapper to hold down the fabric until it was completely cool. This is probably the closest I’ll get to a good press on this fabric, and hey – no shine! Woohoo!

Peter & The Wolf - Polka Dots

God, I love these pants.

Peter & The Wolf - Polka Dots

I also really love these labels. They speak the truth, at least as far as these pants are concerned.

Peter & The Wolf - Polka Dots

Sorry ’bout the creeper hand.

Peter & The Wolf - Polka Dots

Peter & The Wolf - Polka Dots

Peter & The Wolf - Polka Dots

I added arrowhead tacks to the bottom pocket opening, because why not? I used embroidery floss and followed this tutorial on the Coletterie (I also see that I commented about a western shirt I was going to make. Obviously that never happened, but it SHOULD. Ooh!)

Peter & The Wolf - Polka Dots

Really thinking about making a wool version for the cold weather – maybe lengthen the legs to full-length, omit the pocket detailing and scallops? What do you think?

(psst! If you were wondering – my wrap top is handmade, and my shoes are from Clark’s ;))

Completed: The Peacock Eyes Cardigan

23 Sep

Who else out there has a sewing or knitting kindred spirit? You know, someone who is pretty much always on the same wavelength as you when it comes to projects, whose blog or Ravelry queue is prime for lurkin’ because it means you’re totally about to find your new favorite pattern without actually discovering it yourself? For me, that’s Jo. Seriously, her Ravelry favorites are one of my favorite things to look at on the internet because I love basically everything that she loves (also, when I opened that link to embed it in this post, I discovered ANOTHER cardigan pattern that I need. Dammit, Jo!). It seems like every time we chat about what we’re working on, it’s something creepy similar. I love having a knitting twin!!

Jo's Francis sweater
Red Cashmerino Cowl

See? I spied her Francis, Revisited sweater and SHAMELESSLY ripped it off as soon as I got my hands on the yarn. No hate.
Wish I could have ripped off her amazing hair, too, but I guess life doesn’t work that way 😛

So we decided for our next projects, we’d embrace that twinsy-ness and try to channel each other’s wavelength… the wavelength being bright green, obviously, since we had both been independently thinking about buying yarn in this color. We weren’t planning on finishing at the same time (one thing I’ve learned is that you can’t really rush knitting!), but somehow it worked itself out anyway. So here’s mine – in brilliant kelly green, my new favorite color of right this second.

Peack Eyes Cardigan

This is the Peacock Eyes pattern. Lots of my favorites rolled up in this one – top-down, once piece, fingering weight, pretty lacework. Hell yeah!

Peack Eyes Cardigan

I bought the yarn for this sweater back in August, when I knew I would be having surgery and lots of couch-time as a result. I decided to treat myself to something special, and, whooo boy, this stuff is special all right. The brand is Vice and it’s a blend of merino, silk, and cashmere. It feels just as amazing as is sounds, and the color is incredible (don’t let my shitty pictures fool you – it’s bright Kelly green, y’all).

Peack Eyes Cardigan

It was also really really expensive – like $70 for 2 skeins. Ok, I guess that’s not *that* expensive, but it’s the most I’ve paid for sweater yarn to date! Totally worth it, though. I enjoyed knitting every single stitch of this cardigan. It was like angels on my fingertips or some shit.

Peack Eyes Cardigan

If you clicked over to the pattern link, you’ll see that my cardigan is much more cropped than the original pattern, as well as having shorter sleeves. I had to change a couple things up to get my yarn to work with the pattern as I didn’t buy enough – two skeins meant I was about 100-150 yards short of the suggested amount, and I didn’t want to buy a third skein soooo I improvised! I’m not a huge fan of long cardigans, anyway, so this worked out – although in retrospect, I may have cropped it too much. Oops. I’ll still wear it, though 🙂

Peack Eyes Cardigan

I really love this style of cardigan. I think the lace peacock eyes are so pretty!

Peack Eyes Cardigan

It looks good unbuttoned, too – which I’ve already tested this theory, wearing it last week before I sewed the buttons on. Ha! It just looked toooo good with my outfit, is the thing.

Peack Eyes Cardigan

Since the cardi is pretty shrunken with a good amount of negative ease, the button bands really don’t like laying completely flat – see in the picture? I hand sewed seam binding to the undersides so at least the actual button holes aren’t trying to pull open (ugh, I just hate the way that looks, sorry), but there is still a little bit of pulling. I am happy with the way it fits, though.

Peack Eyes Cardigan

I feel like I should point out the new piece of jewelry in my septum – well, I guess it’s not really new, it’s been there for over a month. It’s just a retainer; I got it so it could be removed during surgery, but I kind of like it so I haven’t changed back to the silver horseshoe. My mom hates it. She says it looks like I have a staple in my nose, haha. What do you think?

Peack Eyes Cardigan

One other thing, I wore this dress because 1. It looks awesome with the green; and 2. I wanted to show y’all that I did fit my puckery bust darts. Of course, you can’t see them at all so obviously this is a moot point, but, you know. Just so you know.

Peack Eyes Cardigan

One more back shot, because I can!

Peack Eyes Cardigan

I do have one question for the knitter pros – see how my button band does not align with my bottom ribbing? No matter what I do (and I’m extra careful to pick up the stitch at the VERY edge of the ribbing when I start the band), I can’t get it to make a straight line. Any tips on how to fix that?

Peack Eyes Cardigan

I didn’t have any green petersham ribbon to sew to the button band like I normally do, so I used rayon seam binding. It does not exactly match – it’s teal, the sweater is green – but it complements. I sewed my button holes on as usual (and stuck a piece of silk organza underneath because my machine wanted to eat that rayon) and then stitched it on the sweater by hand. It’s not as solid or pretty as the petersham would be, but it works!

Peack Eyes Cardigan

Peack Eyes Cardigan

The buttons are vintage, a gift from my sister-in-law. They are a perfect match for the yarn color!

Peack Eyes Cardigan

This is a shitty picture, but it shows the true yarn color. Told ya – kelly green 😉

Peack Eyes Cardigan

I guess that’s it! Full Ravelry notes are here. Now hop over to Jo’s blog and check out her green goddness… she went with the same brilliant green, but with different pattern (omg amazing)(yes it’s already in my queue).

Who’s your crafty Kindred Spirit?

EDIT Almost forgot to mention this! I’m taking a quick, last-minute trip to Chicago this weekend and would love to meet up with some sewing friends for fabric shopping and eats! I sent out an inquiry on Twitter and we’re cooking up some plans right now, but if you did not see the tweet and would like to join – just send me an email! We are looking at either Saturday or Sunday (the 28th & 29th).