
Hello everyone! It’s been a minute since I mentioned the OAL, but we are still going strong (and it’s wrapping up in the next couple of weeks, meaning, YOU STILL HAVE TIME TO PARTICIPATE). I wanted to check in and see how everyone is doing, and also offer a little hack-y fitting tip for your Lander waistband (or any straight waistband, for that matter!).
BUT FIRST I wanted to share this – I’m on a podcast!
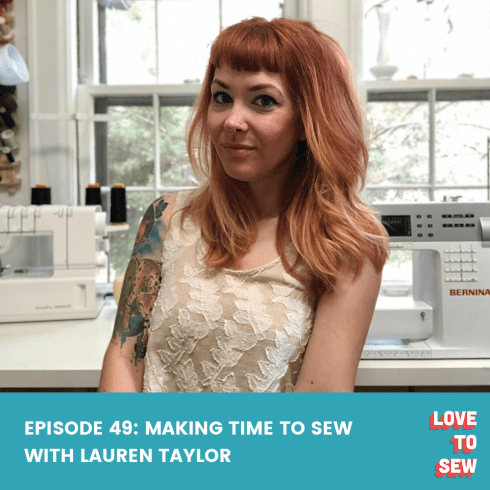
I was super honored to be interviewed for the Love to Sew podcast recently, and my episode just aired! I’ve been a long time fan of this series, so it was pretty flattering to get my own episode! If you are interested in checking it out, you can listen to the episode here. I hope you enjoy it!
Now, onto the rest of the blog post!
You’ll have to forgive me in advance because I don’t have photos of the progress (just the result); I was experimenting and not sure how this would pan out (story of my life). But I think this is a pretty simple and straightforward adjustment, so hopefully my words are enough to convey the information across 🙂
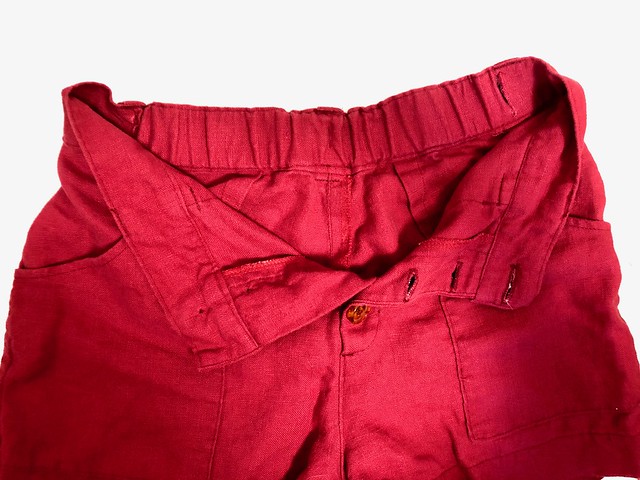
One of the features of the Lander Pants & Shorts is that they include a straight waistband made from a single piece of fabric. This is very simple to sew, but may not result in a perfect fit if you are especially curvy. Some people get excess fabric and gaping at the center back, since the waistband does not curve with their back. This does not indicate a bad pattern – it just indicates a draft that does not correspond with that particular body shape (there are PLENTY of bodies that fit great in a straight waistband, and PLENTY of bodies that can’t do a curved waistband, etc). This is something than can easily be adjusted by changing the waistband to a curved waistband (or, better/lazier yet – stealing a curved waistband from another pattern and using that), but you have to do it before you actually cut your fabric. If you’ve already sewn your waistband on and are experiencing this – read on!
My previous 2 pairs of Lander pants did not gape very much, and I was easily able to fix it by simply wearing a belt. Since these are shorts, and they felt like they were gaping a little more than I was comfortable with, I wanted to try to find a way to eliminate the gape without needing to wear a belt (it’s hot outside, I don’t need a layer of LEATHER around my waist amirite). Of course, one option it to unpick the waistband, pinch out the excess into a dart (creating a curved waistband, but with a seam), and then taking out the excess in the pants either at the center back or the darts (or all). I wanted my waistband to be fitted while also still being comfortable, so I thought I’d try a little bit of elastic at the back instead.
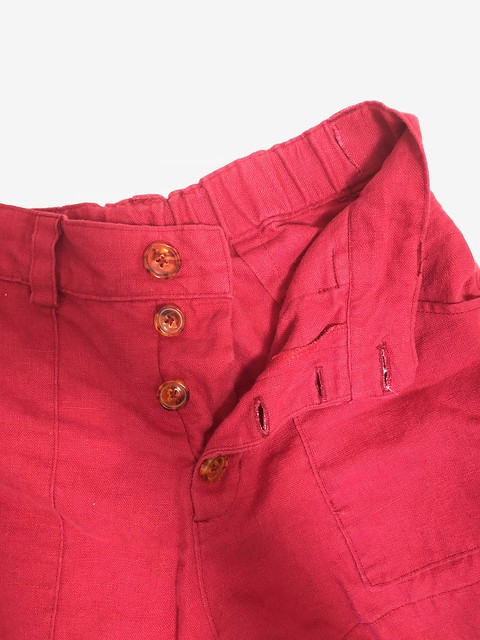
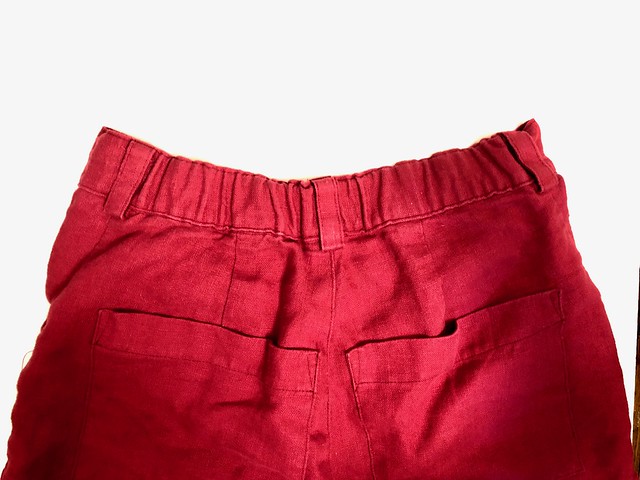
I cut two slits on the inside of the waistband, positioning them as best I could under the side back belt loops (to hide the topstitching I was able to do next). I only needed to take in a little bit – maybe 1/2″ at most – but in my experience it’s good to stretch this amount over a longer length than you need, which will make things less bunchy.
I fed a length of elastic that fit in my waistband (I found that 1.5″ wide elastic fit perfectly in the topstitched waistband), pinned one end down, and tried them on to determine the best length of elastic – i.e., tight enough to pull in the gape, but not so tight it was starting to gather.
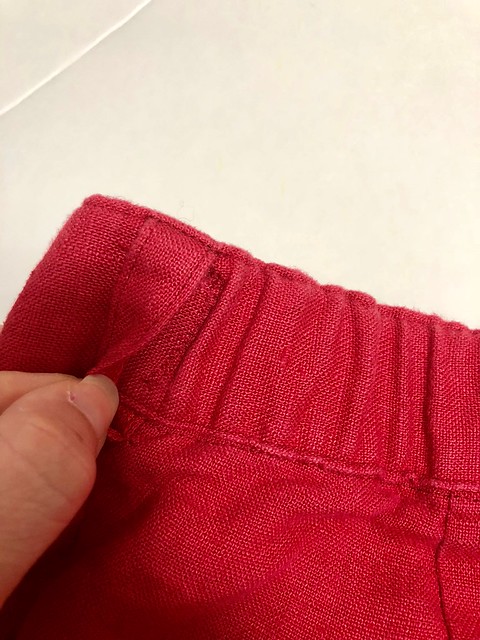
After cutting the elastic, I secured each short end down with a zigzag stitch. Since these are under the belt loops, they aren’t visible from the outside. Then I stitched closed the holes I had made inside the waistband.
Here is how it looks on the inside (oops, I need to re-sew that hole closed I guess haha)
And the outside!
And finally – some gratuitous shots of my butt so you can see what they actually look like on:
(I am really sorry)
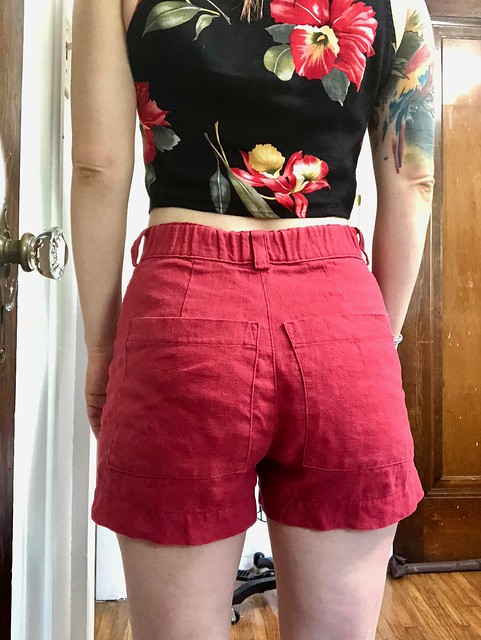
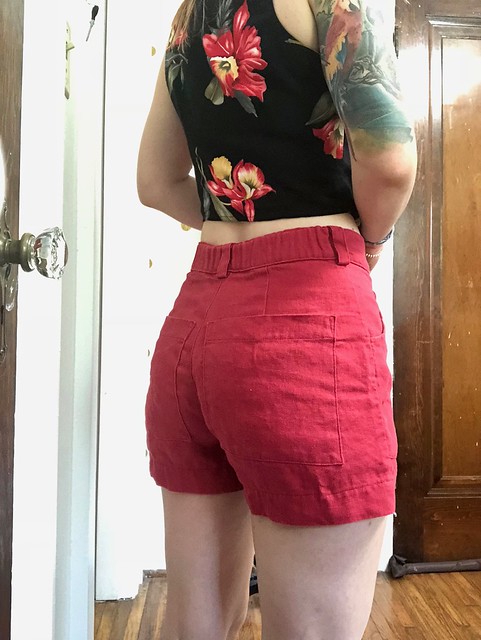
As you can see, it mostly flattens out so it is not super gathered. It snugs up the waistband enough so that it sits flat against my back, but the elastic will stretch if needed (i.e., tacos) so they are still comfortable.
This is a SUPER easy and quick fix if you need a minimal adjustment at the back waist – like I said, mine was no more than 1/2″. It’s also definitely a hack fix – the proper way would be to make a flat pattern adjustment to the waistband so it is curved – but sometimes I think a hack is good enough. If it’s the difference between you wearing the pants and not wearing the pants, I’d say it’s worth a try!
I also realized I never shared my yarn or stripe ideas for my Waters tee! God you guys I am awful.
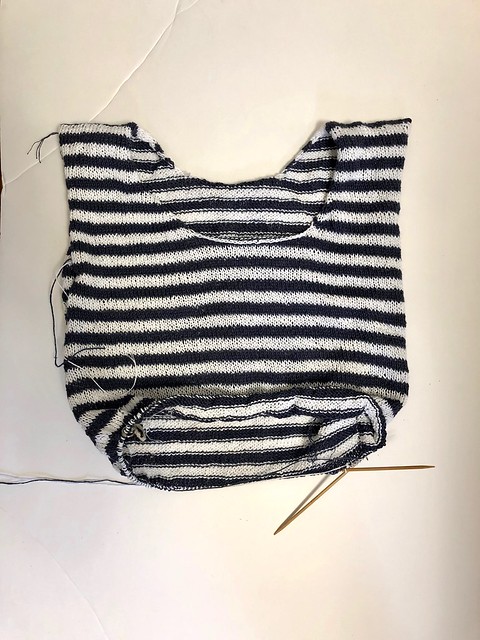
Here is where I’m at as of this posting. Making good progress, which wasn’t evident until I took this photo, if I’m being completely honest! I’m heading to Canada today to teach a couple of jeans workshops at Darrell Thomas Textiles (and I *think* there is still an open seat for the weekday class, ahem), and I’m hoping I can knock the rest out pretty quickly because I am dying to wear this thing!!!
My yarn is Quince & Co. Sparrow, and the colors are pigeon and lunar (I don’t know why it looks black in these photos, pigeon is actually a nice blue-grey. Oh right because I can’t take photos to save my life lololol). I changed my stripes to be a basic 4×4, and the edging will be the darker color. I need to decide which side I want to be the right side, though – because the purl side looks pretty freaking rad, too!
Ok, I think that’s all! How is everyone doing with their OAL projects? Have you finished yet?


