Tag Archives: completed

Completed: Simplicity 3688 Trousers (with bonus crop top)

5 Jul

I just realized I should probably call this ensemble the ’88 or something of that nature, since both pattern numbers end in 88. What are the odds, eh?

Anyway, new outfit! I’m not even going to both separating these into 2 posts since they are pretty simple on their own. Both pieces were SO quick & simple to make – that crop top took maybe 2 hours. Amazing!

Simplicity 3688; McCall's 4488

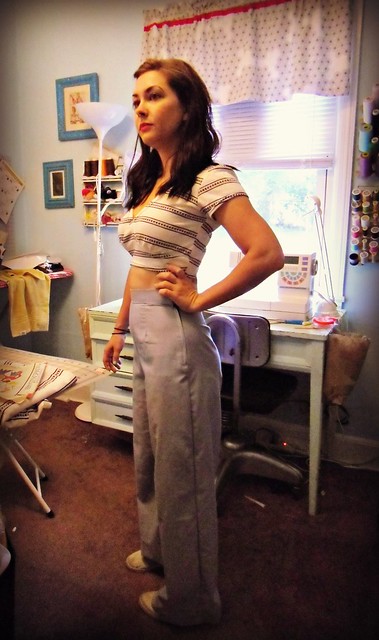
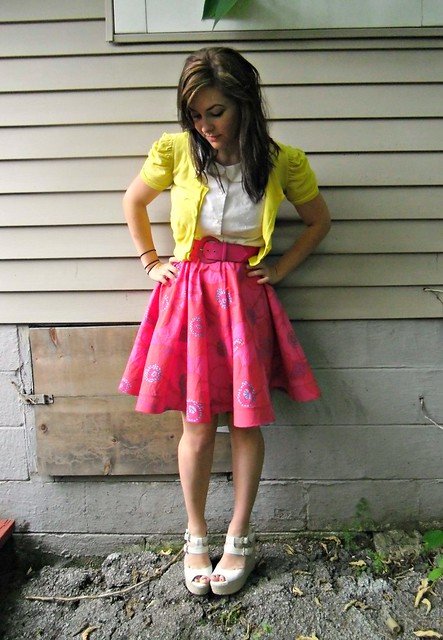
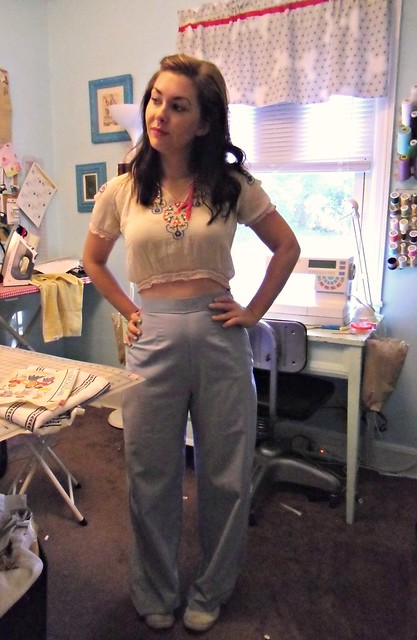
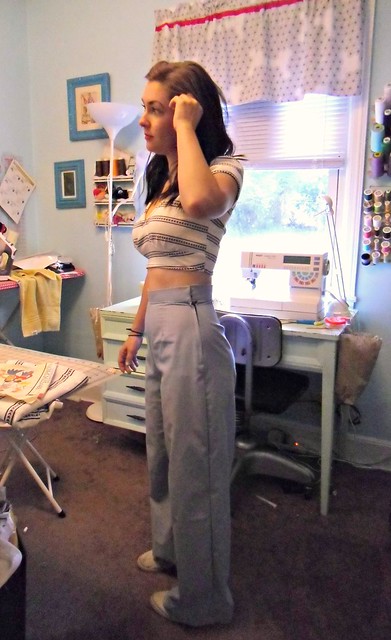
I made the trousers first, so we will start with those. They are Simplicity 3688, you know, the incredibly-famous-incredibly-flattering-incredibly-EASY pattern that everyone has been raving about? I was mildly curious (and also interested in making some high-waisted trousers that didn’t involve a front-fly zip), so I picked it up at the most recent $1.99 sale. This pattern is pretty sweet, I must say! I only made a couple of very simple adjustments – tapered the waist in to fit, and added a little bit of room at the back for teh heiny – and the fit is pretty spot-on. I didn’t even have to adjust the crotch length like I normally do. SWEET. SO SWEET.

Simplicity 3688
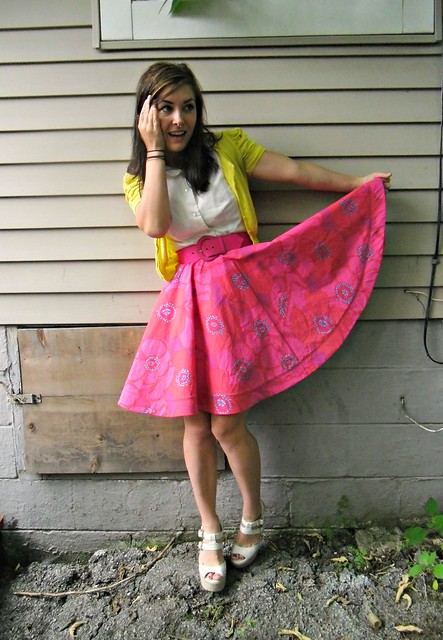
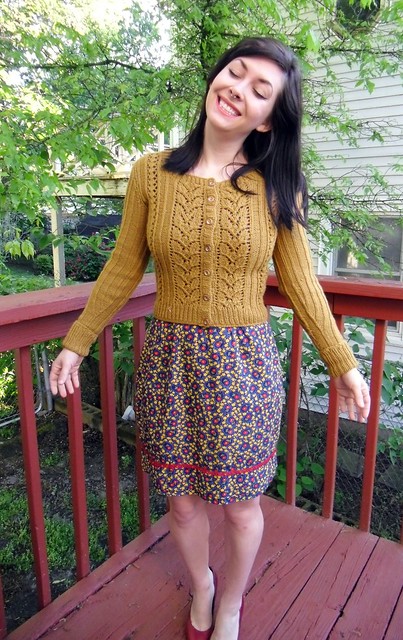
Here they are with my very favorite crop top, a sweet little embroidered Hungarian piece from the 60s. I love this top, but unfortunately it is old as shit & totally falling apart (it’s made out of some class of sheer cheesecloth-type fabric). So I have to be careful with it when I do wear it – otherwise, it is restricted to wall art haha.

My only beef with this pattern is the available sizing – it only goes down to a 10. I really should have graded down the waist to an 8 or maybe a 6, but it doesn’t go any smaller than the 10. Sadly, I don’t think I will be making the blouse or the jacket from this pattern – as darling as they are – because they are simply too big. BOO. Why not offer all sizes, Simplicity? I’ve seen you try to do this with the bigger sizes too. Sneaky sneaky.

Simplicity 3688; McCall's 4488
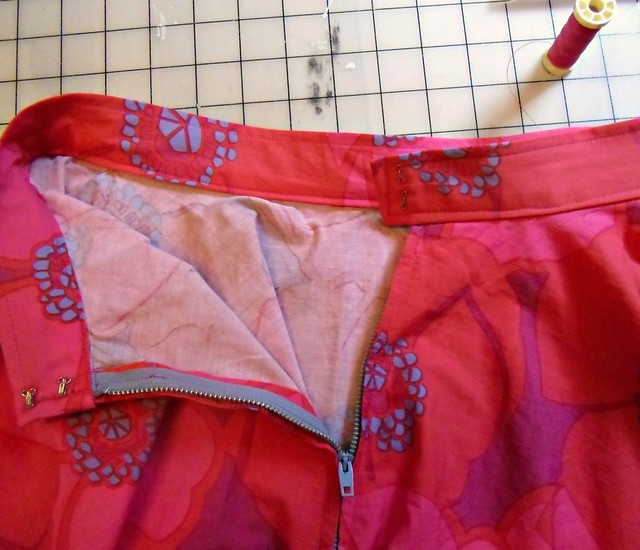
The fabric is a *very* lightweight denim chambray – it might even be too light for pants, these kind of looks like pajamas. Perfect for summer, though 🙂 The waistband has a bit of horsehair interfacing for stability.

Simplicity 3688; McCall's 4488

Simplicity 3688; McCall's 4488

Simplicity 3688
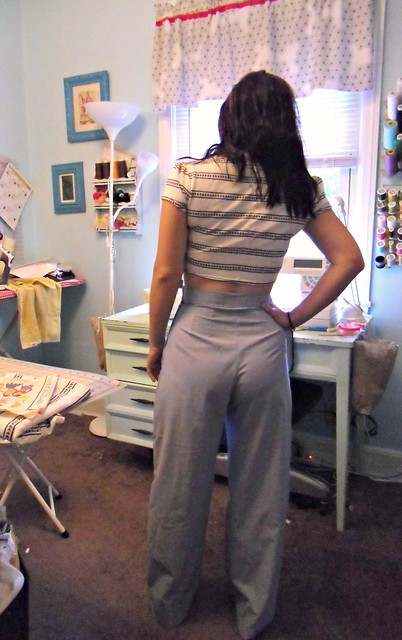
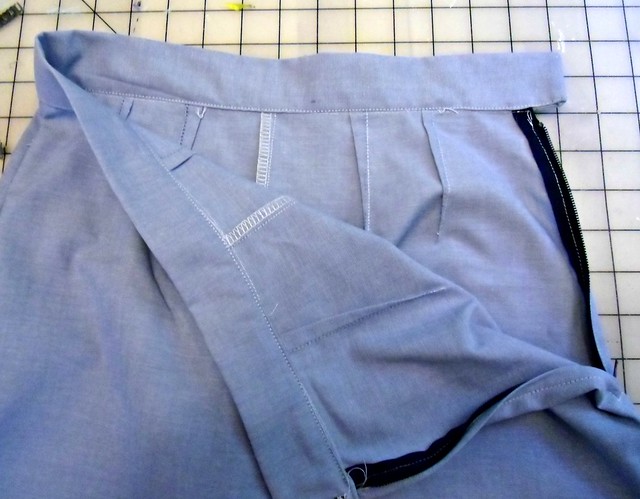
I finished these as simply as possible – serged seams, topstitched waistband, side lapped zipper. They close with 2 hooks & eyes.

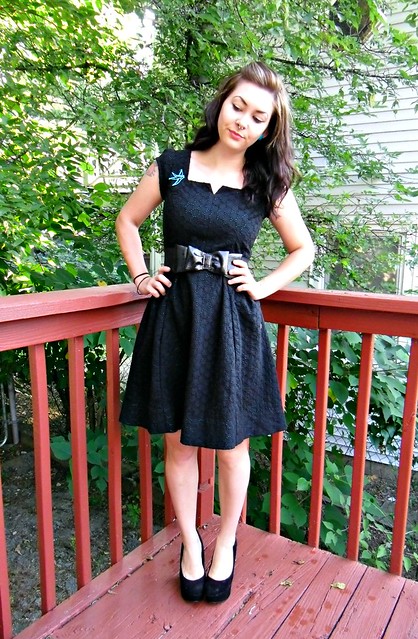
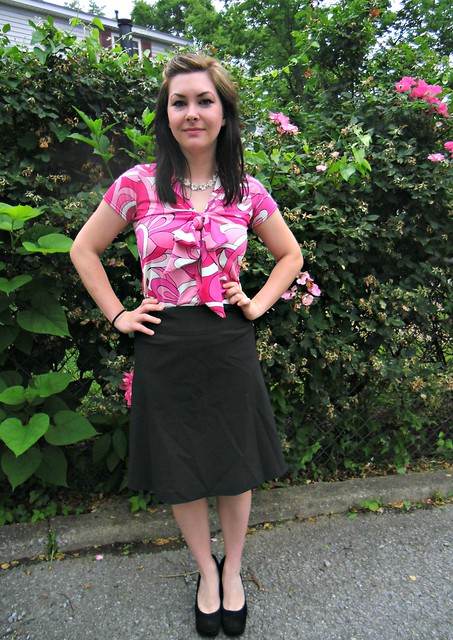
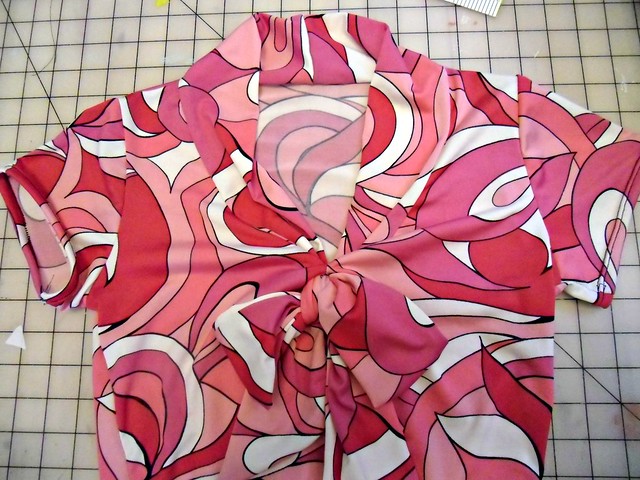
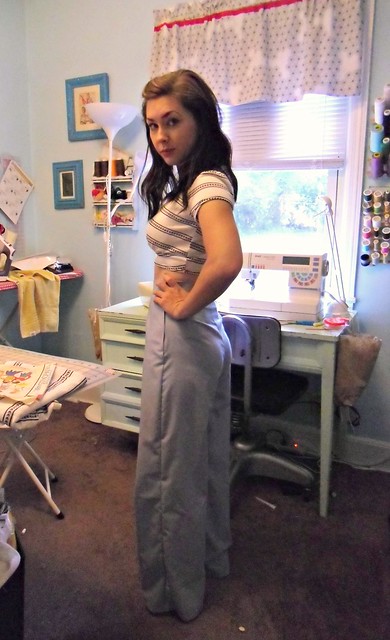
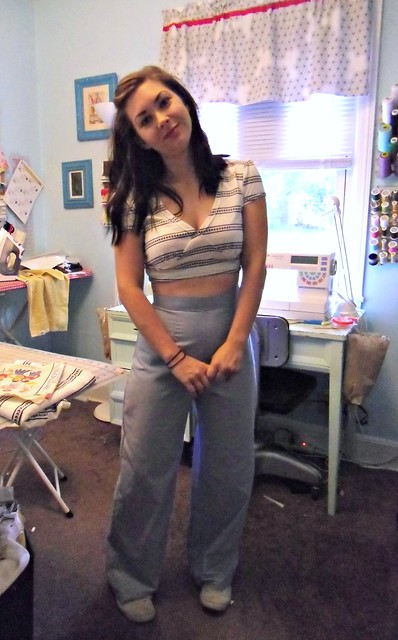
Now for the crop top, McCall’s 4488…
I just love sewing skanky crop tops!
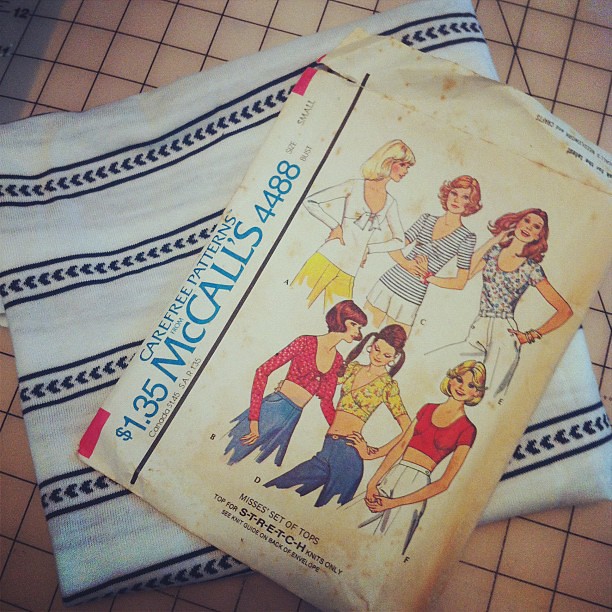
Ahahah, I bought this pattern at the flea market a couple of months ago. It’s so ridiculous! Honestly, I thought the seaming was kind of tacky, but it actually looks a lot better made up. The fabric is some weird stretch knit that I bought at the thrift store for $2.

Simplicity 3688; McCall's 4488
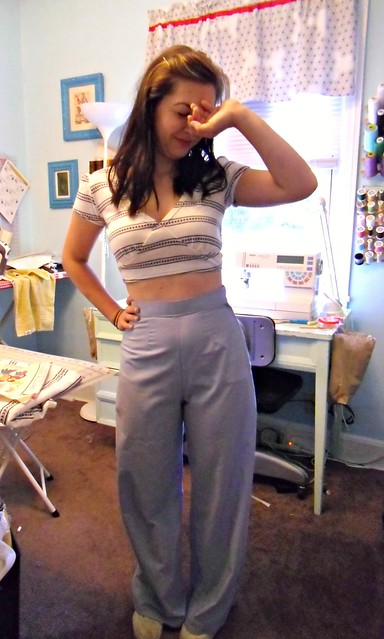
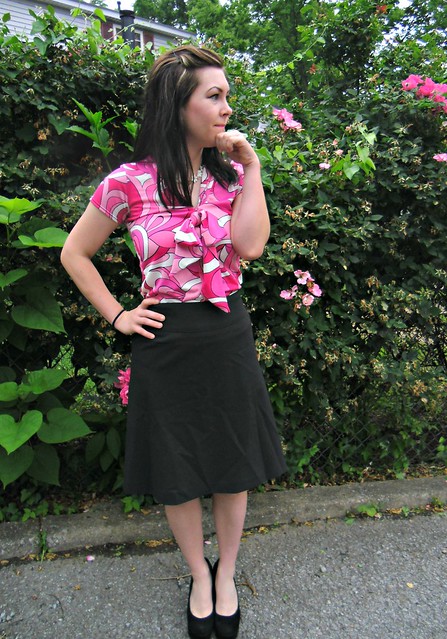
There’s not much to say about this shirt. It’s very simple, and actually kind of flattering. I’d like to make it in a longer version, maybe even with long sleeves for winter.

Simplicity 3688; McCall's 4488
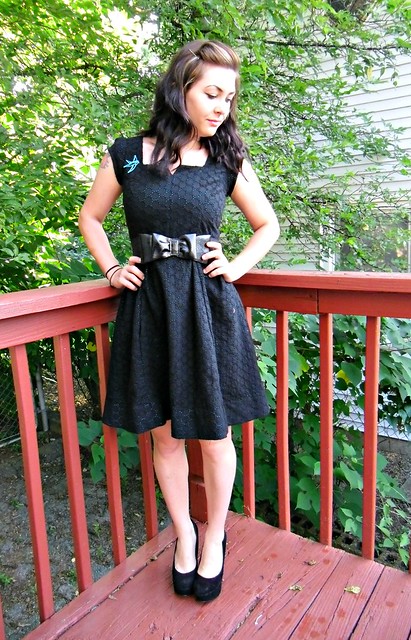
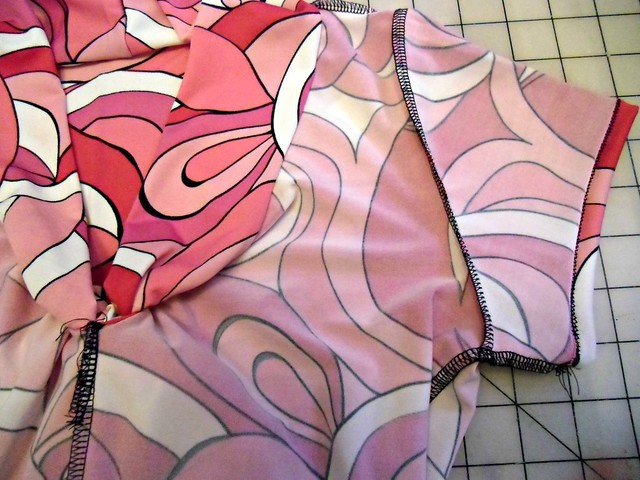
The side stripes did originally match up, but I had to take quite a bit in to get it to fit, so now they don’t match. Wah wah. They actually look quite good, considering that I did not take the stripes into account AT ALL when cutting this.

Simplicity 3688; McCall's 4488

McCalls 4488
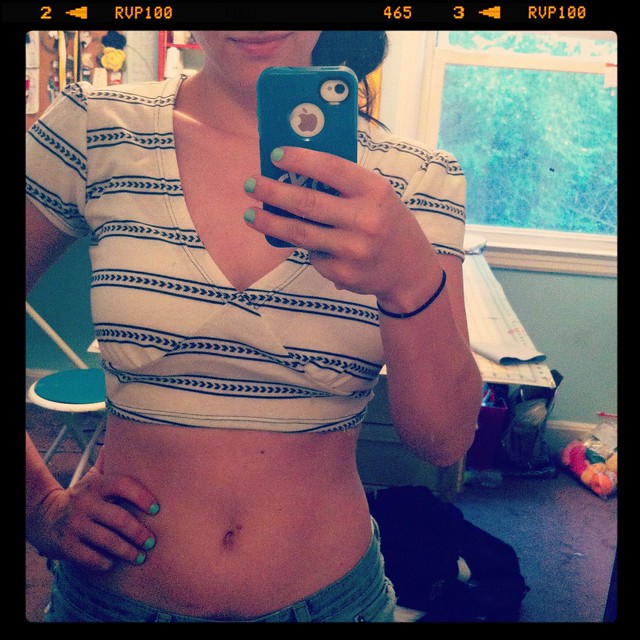
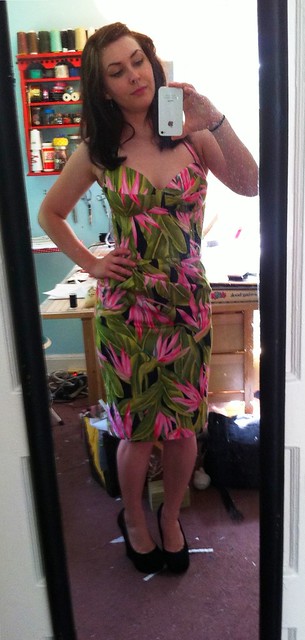
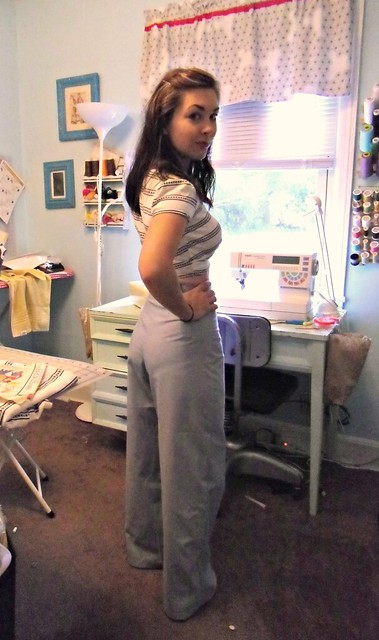
Here’s a scandalous mirror shot of how it looks without the high-waisted – HAHA. Ummmm I don’t think I’ll be wearing it out like this!

McCall's 4488

McCall's 4488
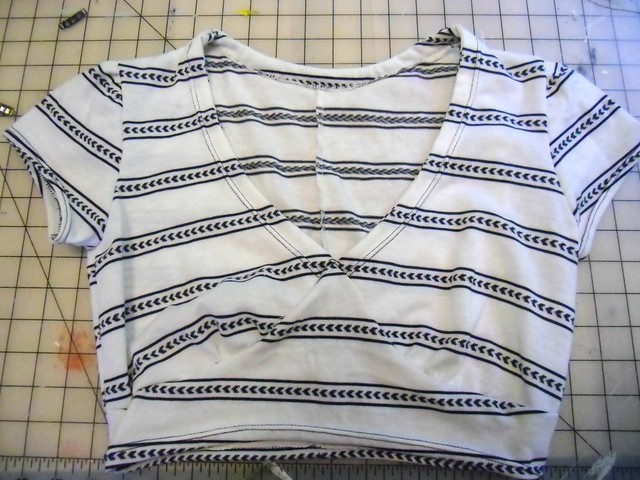
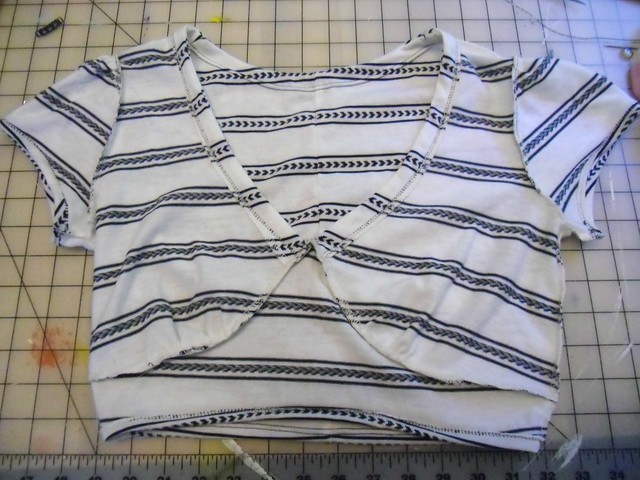
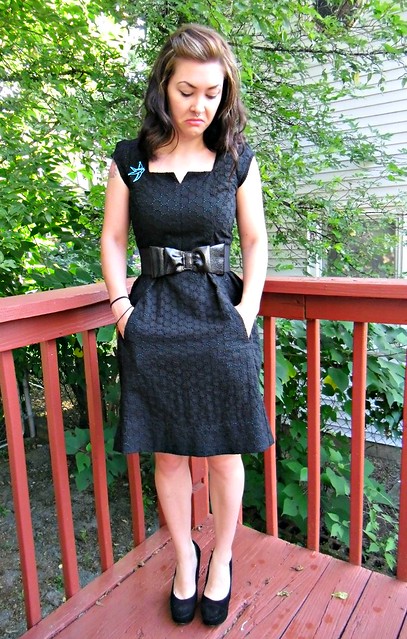
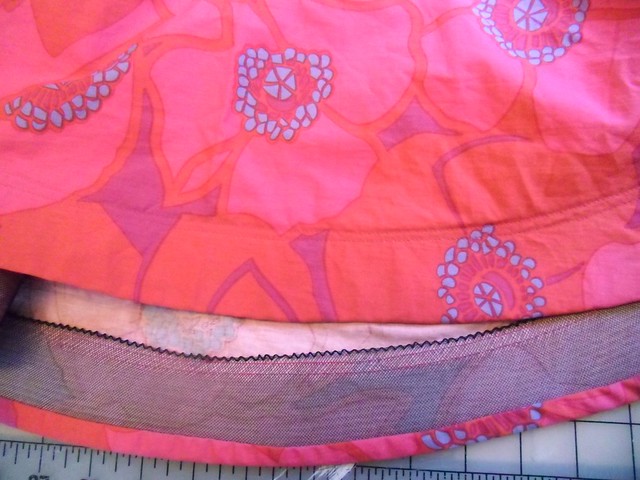
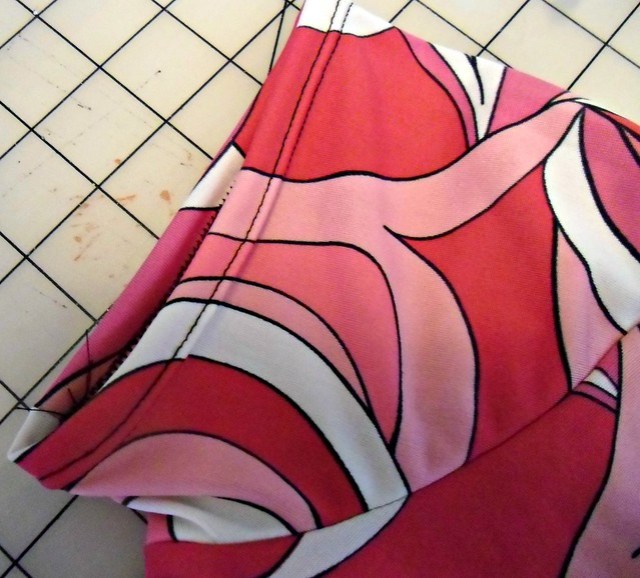
The finishing was pretty interesting for this – there is a very narrow facing at the neckline, which is folded back & then top stitched according to the instructions. It looks very similar to ribbing, actually. The sleeves & hem are just stitched down with a twin needle.

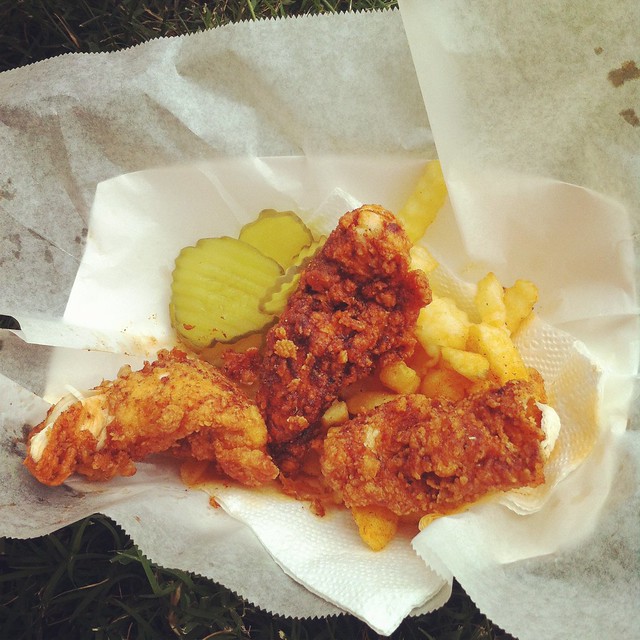
On a side note, yesterday we celebrated America by eating hot chicken. In 100*+ degree heat.

Hot Chicken Festival
At the Music City Hot Chicken Festival – we waited in line for over an hour!

Oh yes, this was painful.
Hurts so good.
If you’ve never had hot chicken… uhhh I don’t exactly know how to properly describe it. It’s not necessarily spicy. It just sets your mouth on fire. Definitely an experience if you like to inflict pain yourself haha.

So there ya go. AMERICUHHHH.

Simplicity 3688; McCall's 4488

Completed: A Totally Tubular Simplicity 1803

27 Jun

“Tubular” is such a weird word. I mean in the sense when people use it as a synonym for awesome or rad. I mean… it’s literal definition is something that is tube-shaped. What is so rad about a tube? English language, you mystify me.

You know what is pretty radtubular, though? This Simplicity 1803 pattern, yeah! Now that we have set aside our differences, a beautiful relationship can be allowed to bloom. With this in mind, I would like to introduce you to my latest incarnation of Simplicity 1803, heading straight up Awesomeville.

Simplicity 1803, v2
This print is pretty loud in comparison to what I normally wear, but I like it!

Simplicity 1803, v2
There’s not much to say about the construction here – it’s pretty much the exact same as my Disaster dress, although a bit more simple (no underlining, machine-stitched hems, etc). I did discover that the fabric has a very subtle stretch, which made the dress a bit too big… so I ended up with some pretty giant seam allowances at the zipper. We’re talking 1.5″ seam allowances. Yeesh! On the fip side, the stretch makes the dress quite comfortable.

Simplicity 1803, v2
I remembered to put the pockets in the correct place this time! No princess-seam pockets for this girl!

Simplicity 1803, v2
This fabric is just fabulous… a nice, drapey rayon with a hint of stretch, and a really busy pattern that hides sweat – which is quite important these days, considering we are gearing up for a high of 108* later this week. I KNOW.

Simplicity 1803, v2
I did make the waist tie this go-round, although it blends in pretty well with the busy print. Oh well, I guess it provides a bit of texture?

It was difficult to get pictures of this dress – most of them ended up totally blown out with light. I kept moving around to different areas of shade.

Simplicity 1803, v2
Then I noticed the awesome neighborhood stray cat in my back yard!

Yay kitty!
This cat is so cool! He’s super friendly and VERY vocal, and he loves having his belly rubbed. I know he’s skinny as shit, but I’ve actually tried feeding him before & he refuses it. He looks pretty healthy and is definitely quite social, which gives me reason to believe he’s probably someone’s pet prowling around the neighborhood. I see him about once a week and we are best friends. I have named him Bobby, fyi.

THIS CAT
Told you he was friendly 😉

:3
Although he never sits still long enough to get a good picture!

Simplicity 1803, v2
This is the dress front. Again, I went with soft pleats instead of thread gathers on the skirt. I’m a big convert of the soft pleat!

Simplicity 1803, v2
Dress back, lapped zipper.

Simplicity 1803, v2
Orange zipper! Also, check out my massive seam allowances lol

Simplicity 1803, v2
I’m trying it with a belt for work today, I think I like it better than the tie… it breaks up the pattern a bit.

As a side note – I’ve got one sleeve on my Miette sweater now!

Miette Progress
My sleeves is a little shorter than the pattern calls for (I skipped a few rows of stockinette), but I still think it’s a little long for my preferences. I guess that means I have T-Rex arms hahaha.

Miette Progress
This sweater has been really fun to knit, but I’m looking forward to finishing it so I can work on something a little less mindless 🙂

Simplicity 1803, v2

Also, don’t forget to enter my Shabby Apple Giveaway if you haven’t done so already – it closes this Friday 😀

One last thing – I just looked up tubular, and according to dictionary.com: excellent. (Surfing and later general youth slang. Having to do with a tube [wave] that is good to surf in.) : That pizza was totally tubular!

Completed: Simplicity 1803, aka, The Disaster Dress

19 Jun

I am calling this The Disaster Dress, but it’s really not that bad. Promise! My main issue could have *easily* been solved in the muslin stage – had I actually been paying attention when I tried it on.

Simplicity 1803

Anyway, this is the ever-popular Simplicity 1803. If my dress looks familiar, it is because I was quite obviously influenced by Gertie’s perfect version. I had to have one for myself!

I guess I should mention exactly why I chose to call this dress a disaster. It doesn’t look much like a disaster now – I worked around all the fitting issues. But hoo boy, getting there was an adventure! This pattern has some wacky shit going on with it, y’all. WACKY, I tell you. First, we have the issue of ease. I know this has been talked to death about all over the sewing blogesphere, but seriously – this dress has a LOT of ease. Let me put it this way: according to Simplicity’s size chart, I fit in the 12-14 range. I cut a 4 in this pattern and it fit perfectly. There is about 4.5″ of ease in this pattern… consider yourself warned. Anyway, I cut my 4 & sewed up the muslin, put it on, glanced in the mirror, and started working on the real dress. I am a fit-as-you-go type sewist – constantly pinning & basting to double-check the fit. Right before I sewed up the shoulder seams, I realized that the curves of the princess seams were nowhere near the fullest part of my bust – how I missed that, I have no idea. The shoulders were WAY too short – which is actually kind of ironic, since I usually have to shorten that stuff quite a bit for my teensy shoulders. Of course, I already had the bodice half-sewn (and underlined!) at this point. Long story short, my shoulder seams are sewn with the scantest of scant seam allowances – like, less than 1/4″. The fit and everything is in it’s proper place – but barely. Also I have no idea exactly where I’m going with this story, except that you should definitely scrutinize your muslin.

Also, another beef I had with this pattern was that they skipped some vital steps in the instructions – such as sewing up the side seams. Wtf, Simplicity? You will give me half a page on ~how to sew a dart~ but then forget to tell me to sew up the side seams? You cray.

This is part 2 of Stuff I Made Using Birthday Gifts – the teal Bemberg rayon lining was sent to me by Alicia of Iron On Maiden (can we also collectively agree that she has the coolest blog name ever? Yes.) for my birthday! Yeah! It is underlining this awesome black eyelet from Mood. I also finally got to test out my new interfacing from Fashion Sewing Supply – I used the light-weight fusible and it is AWESOME. I never thought I would actually like fusible interfacing, but I think I just officially converted.

Simplicity 1803

Other than the above rant on sizing/fit (and lack of side seams), this dress went together pretty quickly. The only other change I made to the pattern was to swap out the gathers for soft pleats – there was a LOT of gathering involved, and my fabric is quite thick so I was afraid it would get too bulky around the waist. To make the pleats, I matched up all the seams/notches as I would if I was gathering, and then just pleated the fabric until everything looked good & matched up. Pretty easy! I think I like this much better than I would have liked the gathers, too!

The pockets are really fucking stupid, though. They are in the right place according to the pattern – but WTF!? Who puts pockets on the princess seams of a full-skirted dress?! I know the Iris Shorts have similar pockets, but they actually contribute to the design… in this dress, they’re hidden in the folds. Of course I didn’t notice this until I actually sewed them in – and of course it is displayed prominently on the envelope. Oh well.

Simplicity 1803
This is how I feel about the pockets.

Simplicity 1803
I do like the scoop back!

Simplicity 1803
Bonus drunk-looking picture of me.

Simplicity 1803

Simplicity 1803 - bodice, belt
Do you like my birdy brooch? 🙂 I tore up an old necklace (well, it was already broken), glued a pin to the back & spray painted it blue.

Simplicity 1803 - no belt
Here it is without the belt!

Simplicity 1803 - Bodice, no belt

Simplicity 1803
I love how bluuuue the inside is. The facing is a simple black broadcloth – again, the eyelet was too bulky for facing. I trimmed it with some matching rayon seam binding (also in the package from Alicia – told you she was awesome :D) and catch-stitched it to the lining.

Simplicity 1803

Simplicity 1803

Simplicity 1803
Lapped zipper & soft pleats (and that red spot is from my camera – I was wondering why it kept leaving a spot of haziness in every picture. Then I noticed that the lens was incredibly dirty. At this point, I am sure you are questioning how much I actually pay attention to things. Not much, I’m afraid).

Simplicity 1803

Anyway, despite all the shit I went through to get this thing put together, I’m absolutely happy with the finished dress! I think it’s quite flattering & can be worn for a number of occasions (and seasons, for that matter!). So yeah! Now that I’ve sorted out my issues, I will probably make another one… I have this awesome/wacky rayon fabric that I picked up at Goodwill recently; I think it’s perfect for this style. What do you think?

Simplicity 1803

Completed: Giant Floral Circle Skirt

11 Jun

I looove giant repeat prints, but I find them difficult to sew – you want something that doesn’t have a lot of seams as to not break up that beautiful print (and thus render it obsolete). Unfortunately, less seams = less form-fitting, and if you’ve learned anything by lurking my closet for even five minutes, you will notice that I don’t do those loose shift-shapes.

I encountered this problem last year, and decided that circle skirts are a foolproof solution. You can’t disagree with me because I’m totally right, btw.

Floral Circle Skirt

This is part 1 of Stuff I Made Using Birthday Gifts – Trice (which I might add – if you haven’t been introduced to her blog you HAVE to check out the mini tailored jacket she recently completed. It is so cute; I died a little) sent me a giftcard to Mood Fabrics & I immediately zeroed in on this Marc Jacobs cotton poplin. Ooh, big repeats! And I need a summer circle skirt… right? Right.

As per my other circle skirts, I followed Casey’s Circle Skirt Sew-along for construction, using the pattern I drafted last year. I kept this one pretty simple/summery – cotton skirt, topstitched waistband & hem, no lining. Easy stuff!

Floral Circle Skirt
And I just so happened to have this hot pink belt that matches the background color perfectly… dontcha love it when that happens? 😀

Floral Circle Skirt
Circle skirts are magical!

And just so you know I’m forreal here –
Circle!
It is -literally- a circle with a smaller circle inside 🙂

Floral Circle Skirt - Matching zipper :)
I also thought it was pretty magical how well the zipper matches the purply-grey bits. Confession: I pulled it out of my stash, and it’s one of those weird colors that I’ve had forever and never used because it was just so weird (and 7″ long). I can’t even tell you how delighted I was when I realized what a great match it ended up being. The little things!

Floral Circle Skirt - Waistband
My slashed zipper insertion went in pretty perfectly, if I do say so myself.

Floral Circle Skirt - Horsehair braid @ hem
The hem is finished with 2″ horsehair braid – a whopping 4 yards, to be precise. Rather than blind stitch 4+ yards of hem by hand, I sewed 2 rows on by machine. It’s not invisible by any means, but I think it looks pretty good as a design detail! And the horsehair braid adds such a nice flounce to the hem – I personally don’t care for circle skirts without some kind of oomph down there (on me, at least, they hang kind of funny & look limp otherwise). I’ve eyeballed Sunni’s petersham ribbon on a curved hem deal, and I love the subtle effect it gives but I haven’t tried it yet – mostly because every time I get hold of petersham ribbon, I just want to rub it all over my face forever. Is that weird? I guess that is kind of weird.

Floral Circle Skirt

Anyway, yeah circle skirts! 😀

Completed: The Taffy Blouse!

21 May

I don’t even know if I can legitimately call this the Taffy blouse. I mean, yeah, I used the pattern pieces for the front & back… and I cut the front on the bias. That’s about where the similarities end & the mad scientist in me started cooking up something entirely different.

Floral rayon
I started out with this fabric. Isn’t it so pretty? Approximately 1 yard of floral rayon, I found this at the Goodwill for a whopping $1.99 YESH. I envisioned it as the Taffy Without Sleeves and promptly cut the front piece out of my fabric.

… and then it was time to cut the back piece, and that’s when I realized I had made a huge mistake. I may be a small person, and I may wear my clothing very fitted, and this may be ~just a top~, but uhhh… it’s still a bias-cut pattern, and it needs more than a yard of fabric! I frantically tried to fix my mistake by moving the back pattern pieces around the sad flap of fabric that remained. I tried cutting the back pieces with a seam (as opposed to on the fold). I tried piecing them. I tried making only the bottom of the back floral with some kind of backwards contrasting yoke. No dice. I half-heatedly checked my stash for a lone piece of black fabric I could cut the back piece out of, thinking I’d do a two-tone look, but I didn’t see anything that even remotely matched. So, I did what any self-respecting seamstress would do – I got pissed off & chucked the top & all the little fabric scraps in the scrap bin. BYE.

In the meantime, I brainstormed until I had an epiphany. Do y’all ever get stumped by something sewing-wise & end up having an epiphany later that perfectly fixes whatever ails you? Or maybe that’s just me. I usually get them right before I fall asleep haha. Whatever, I ain’t complainin’!

Taffy

So anyway, I ended up cutting the back piece in a black knit fabric, figuring the stretch of the knit would complement the stretch of the bias on the woven side (so if you’re wondering – the black knit wasn’t cut on the bias. It was cut on the… stretchy knit grain, or whatever you call it, I dunno). I did cut off a half inch or so of the back side, since it was extra stretchy. It still does not have negative ease, but I think it drapes pretty nicely.

The front (woven) part of the shirt is cut in a 2. I did have to pull up the shoulders quite a bit as the neckline was originally pretty freakin’ gapey, but I think it worked out in the end. It is still gapey & kind of lumpy in the back, but ehh… it’s the back, I don’t have to look at it. Haha!

Taffy - Back

Taffy - Front
So obviously, my Taffy does not have sleeves. It also did not get the bias tape treatment – I decided to use some of my lace stash instead. Pretty black lace around the neckline & arm holes! Looove it.

Taffy - Side
The lace at the bottom was an inspired afterthought – I barely had enough black knit to get the full length out of the back piece (I know, I’m such a mess); it ended up getting cut about 3″ short. So I shortened the front piece to match & sewed this pretty wide lace around the bottom. I love the way it looks!

Taffy
So that’s it! A pretty simple top that almost didn’t happen. I really like the way it turned out and I think this is a great way to use up smaller yardages of woven fabric that you might not have enough to cut both the front+back with – just sub a knit in there! 🙂

In other news – today is my birthday! Yay me, I made it all the way to 27 🙂
And I got some new fabric (and more is on it’s way – I placed an order with Mood this morning ;))

Yard sale score
Sorry this picture is so bad – the plaid in the second bolt is actually really beautiful & colorful. Blame it on the rainbad lighting. Anyway, my mom found this at a yard sale on Saturday – the woman holding it had been an heirloom seamstress, so there was promised to be lots of batiste! I told my mom to let me know what she found. She called me as she was leaving and said, “Yeah, I saw quite a few bolts of the stuff. I didn’t buy anything, though.” WUT. I made her turn around & go back & buy… all of it! Hahahahaa! What you see here is something like 15-20 yards of batiste. She got the entire stack (including about 10 more yards of that blue on top – I took 2.5 yards & let her keep the rest haha) for $15! Which is awesome because I was totally about to buy more batiste, except I was going to spend $16 on 2 yards. Soooo, needless to say, I’m pretty thrilled with this find. And I love that it’s all on bolts; it makes me feel extra fabric-hoardy.

Buttons!
She also bought me all these buttons… I think they were a quarter apiece. Aren’t they sweet? I especially love the lemons & the flies (my mom says they’re bees. Whatever, they will always be flies to me). And if you creep the right corner, you can see some of the wooly nylon she also got. Fifty cents a spool! Uh huh, I love me some yard sales!

And on a final note… Morgan sent me some gorgeous fabric all the way from Skopje, Macedonia.
Fabric from Macedonia :D
It is the most beautiful cotton I think I have ever seen! And she sent me two entire meters – which she purchased speaking only Macedonian! I am so proud of her & totally dying over this fabric. I have no idea what I will make out of it – I’m thinking it needs to be a maxi dress, though. The paisley repeat is just so huge & awesome. What do you think?

Oh, there were also hot dog flavored chips in the bag along with the fabric. I haven’t summoned up the courage yet to sample them (that will be tonight, after I’ve had a couple of birthday drinks hehe), but I’ll let y’all know how that goes down…

Happy Monday!

Completed: An Oddly Psychedelic Jalie 2921

8 May

I’m no stranger to little indie pattern companies – I loveeee Colette & Sewaholic patterns, and I LOVE when I can get away with not buying current Big 4 patterns (yeah! Stickin’ it to the man!). However, I’ve never sewn with a Jalie pattern before – and I honestly wasn’t planning on it, really, until Mikhaela had to show me up in her amazing scarf collar knit top, the top that made me so jealous I actually saw red for about 3 seconds. The pattern was Jalie 2921 and I NEEDED IT. And, so, uhm, I bought it. Pattern ban? What pattern ban? It’s (almost)my birthday, I deserve this.

I’ve actually been sitting on this pattern for about 2 weeks – blame the delay on my Bombshell-frenzy. I was finally able to sit down last night & start cutting… and sewing! I finished this lil number in record time, forreal! And it barely used any fabric. Hey-o, new favorite pattern!

A couple of thoughts on Jalie – while the pattern was easy-easy to put together into a cute finished shirt (and the finishing is sooo coooool, you just wait & see!), the instructions were extremely short & sparse. The pictures were difficult for my pinhead-brain to decipher, although obviously I was able to figure it out eventually. I also do not like the way these patterns are packaged (sorry!) – it came in a shrink-wrapped plastic sleeve, with a large color photo of the pattern front, and the pattern pieces printed on heavy white paper & folded neatly. There was no actual envelope to store the pattern pieces in. Not a huge deal – since I ordered this from fabric.com, I just used the envelope it was shipped in. But it did give me pause, since normally envelopes aren’t something I just happen to have on hand. Also, the sizing/yardage information was difficult to read, since it’s in both French & English, and the sizing varies from baby to big momma. But hey – at least it was easy to cut out! And no, I didn’t trace this sucker AT ALL. No hate for the pattern tracers, I just don’t want to put for the effort and anyway, I don’t mind buying another pattern if I need another size (it’s a small business! I support y’all!). I did save the rest of the sizes that I cut away, so I guess I can tape it back together if I need to. Not that I plan on sewing this for anyone else, heh heh heh.

For sizing, I cut an R & tapered out to a T at the bust & lower armhole, then back down to an R at the shoulder & neckline. I think it fits pretty perfectly with no other alterations! Yeah!

Jalie 2921
Of course, Landon thinks the fabric is too loud. I guess it is kind of hiddy, but I love it anyway!. It’s some super stretch polyester I bought from Walmart like 5 years ago. We are considering this my wearable muslin.

Jalie 2921
I do love the tie-neck, but my fabric is a bit too heavy so the bow droops pretty bad. Next time I make this, I will use something lighter… and probably shorten the ties, as I think they are a bit long.

Jalie 2921

Jalie 2921

Jalie 2921

Jalie 2921
The construction on this top is pretty cool (once I figured it out, I mean). It leaves a nice clean inside at the neckline- no seams! So pretty!

Jalie 2921
I hemmed the sleeves & the bottom with a twin needle on my regular ol’ sewing machine.

Here is your photo-story for the day:
Notice those pretty rosebushes in my background? Weeeeell they belong to my neighbors, and I’ve been eyeballing them pretty hard since they started blooming. They smell AMAZING, btw (and I have lots of honeysuckle on the other side of my house – so, despite living in a shitty neighborhood, it smells delicious right outside my front door lol). The light has always been way too harsh right there, though, which is why you get porch pictures. Today is overcast, so I thought I’d take advantage of those roses!

Jalie 2921
Until I heard a car driving down my (dead-end)street.

Jalie 2921
And then I realized they were not turning around, but actually parking.
Right next to the rose bushes, that they were going to trim.

Jalie 2921
“Well, this is awkward.”

Picture me high-tailing the fuck back into my house (they were STARING at me!).

AWKWARD.

So, sorry about the lack of decent pictures.

Jalie 2921
Here I have photoshopped out the wrinkles in my skirt, I hope that makes up for it.

FINALLY COMPLETE: The Bombshell Dress

7 May

Yay! It’s done, it’s done, it’s done!

5-5
Those of you who follow me on Twitter or lurk the MMM Flickr Pool have already seen this picture… I snapped it right before I left for a lovely Saturday afternoon wedding (spoiler: it was a beautiful wedding and I overindulged and DEFINITELY paid for it the next day, ugh haha).

I did take better pictures, though! And now I will share then with the group 🙂

Fair warning – there’s a lot here, and you can see that I moved locations a couple of times while shooting. I actually took over a hundred pictures – I know that sounds kind of, uh, self-obsessed, but the light was extremely bright and it’s pretty difficult to get a good shot when you have to keep running back and forth to the tripod! I was able to narrow the selection down to WAY below 100, but there are still quite a few. I normally feel a little narcissistic posting a bunch of pictures of myself in the same freakin’ pose, but I’m really proud of my dress so just indulge me this one time. Ok? Ok!

Bombshell Dress
Here is where I started – in my backyard. Isn’t it so lush & green? Lovely backdrop for this dress 🙂 Unfortunately, the light was too harsh here, so only a couple of pictures survived the cut.

Bombshell Dress

Bombshell Dress
On the porch (which appears to be the best light ever; this is why you always see outfit pictures on this porch haha). Not a terribly awesome picture of me, but – my hair! My hair looked so good! Alas, it was almost 90 degrees on Saturday and extremely humid so the curls ended up drooping about 5 minutes later. Ah well.

It got too hot, so I gave up and went inside to the air conditioning.

Bombshell Dress

Bombshell Dress

Bombshell Dress

Bombshell Dress
The strap! I made mine fairly wide, with small gathers where it joins the bodice. There are button holes & buttons, but the strap didn’t sit right buttoned in, so I used tiny fell stitches to anchor it to the top of the bodice as well.

Bombshell Dress

Bombshell Dress

Bombshell Dress

Bombshell Dress

Bombshell Dress

I’m not going to share any more pictures or details of the insides, I think there are plenty enough as it is on this blog!

A few thoughts on the Bombshell:
– It is quite comfortable! Of course, I tend to wear my clothing with little to no ease regardless, but boning is something that I’ve always associated with discomfort. The boning in this dress is great: it kept everything into place but didn’t hinder any movement whatsoever.
– When I first finished the dress, I was worried that the bodice was too long for my torso. Maybe I’m just used to a shorter bodice, because this one absolutely ends right at my waist, so it’s the correct length. Anyway, now that I’m looking at the pictures, I think it looks fine.
– Despite multiple muslins, the middle of the bodice does not actually sit flush against my chest. I guess my cups are a smidge too small as it should fit just like a bra does (and my bras do fit with the middle flush against me. Is that tmi?). Then again, I think any gal who is increasing the cups to fit a chest that is too big for the original pattern size is probably going to struggle with getting that piece to lie flat. The lesson here: no one else noticed, and I only noticed because I have this wonderful angle of looking straight down. I still think the fit looks great. Don’t sweat it if yours doesn’t lie flat either!
– As I mentioned, it was 90* outside and the wedding ceremony was in the middle of a flower garden covered with direct sunlight. It was hot outside! And even though my dress has many layers and is extremely fitted, I didn’t feel any more warm that I would in shorts & a tshirt. Make sure your fabric (and lining) is very breathable if you are planning on wearing this in super hot weather!
– I enjoyed working on this dress, and I loved the process of all the fiddly detail work, but I will confess that toward the end I was just ready to be DONE! I think this is a great dress for a special occasion, but make sure you give yourself a nice long deadline in the distant future so you don’t feel terribly rushed – a dress like this, with all the fitting, and handwork, and special techniques… doesn’t need to be rushed.

I guess that’s it? I am very pleased with my finished dress, and I definitely think the course was worth the $$ – I learned so much, including new favorite hand-stitches and little tips/tricks that never occurred to me otherwise. If you are still on the fence for a class like this, I hope this post & these pictures nudged a little closer to my side 🙂

Bombshell Dress
And I’m still rolling along Me-Made-May! 🙂

Complete: My First Sweater!

18 Apr

Fair warning: There are a lot of pictures in this post. Can you blame me? I’m so proud of my little wool baby!

Agatha

I guess there’s not much more to say, since I’ve documented most of the progress here on the ol’ blog. So just a recap, for anyone who is new –
The pattern is the Agatha Cardigan by Andi Satterlund. I knit a size Small with no alterations – for the record, my bust/waist is 36/26.5 and the negative ease in this sweater fits perfectly. I did have to size down my needles to a 5 to get gauge. The yarn is Cascade 220, a worsted weight, and I used about 3 1/2 skeins.

Agatha

Agatha

This sweater is knit top-down, so there wasn’t any seaming to deal with when I finished. I did have to knit the sleeves in the round, which was an interesting learning experience (just don’t look at all the little mistakes I made hahaha). I blocked the shit out of it (especially the sleeves) and it definitely made a huge difference in the fit. As far as I’m concerned, the fit is perfect! Yay!

Agatha

The only change I made was to stabilize the back of the button bands with petersham ribbon. This wasn’t called for in the pattern, but those bands are stretchy as hell & I didn’t want them to get all stretched out over time (especially since I rarely wear my cardigans un-buttoned). I didn’t follow any specific instructions for this, just hand-sewed the petersham down with teeny tiny stitches & sewed around the button holes to keep it from unraveling. I also used much smaller buttons – the pattern calls for 3/4″, but I could only squeeze 1/2″ buttons in those things.

Agatha

Agatha

I learned a LOT making this sweater! Short rows, fairly intricate lace work, knitting in the round with double-pointed needles, reading a pattern, picking up stitches, different ways to cast on… I can’t even remember all of it ahah. One thing I should mention is that this sweater doesn’t have any cables – it kind of looks like it does, but that’s just lace work & ribbing. I do want to learn how to do cables, though! They look like fun!

Agatha

Agatha

Extra extra special thanks to both Mika (for knitting along with me & answering all my frantic questions!) and Sarah (for teaching me how to knit in the first place!). I couldn’t have done it without these two fine ladies!

Agatha

You know what’s really neat? According to my Ravelry notes (psst! Add me if you wanna!), I started this sweater on 1/17… and ended on 4/17. So it took me exactly 3 months! I don’t think that’s too bad, considering I mostly knitted for an hour a day on my lunch break 🙂

Agatha

Agatha

Agatha

Agatha - front

Agatha - button band
Here’s the petersham! I got a pretty good match, color-wise 🙂 I know traditionally, the ribbon goes on top of the button band, but I liked the way the ribbing looked so I sewed it to the back.

Agatha -  button band
See?

Agatha - button holes
The button holes are kind of terrible looking, sorry, but I did the best I could. They look good from the front, though!

Agatha - buttons!

Agatha - back

Agatha - side decreases
Side decreases

Agatha - lower arm shaping
Lower arm shaping

Whew! I think that’s enough knitting excitement for one day! I wish I could tell y’all that I was gearing up to tackle another big knitting project, but unfortunately I had to spend my knitting budget at the pharmacy this month (that stupid cough! ARGH.) 😦 So maybe next month! I really want to knit the Miette. Andi has the best patterns, srsly. Love her stuff.

Thanks for letting me indulge, you guys!

Agatha

Agatha
😀

Completed: Simplicity 5110 (and a Renfrew!)

12 Apr

See also: Sewing to soften a bad mood.

Khaki Shorts & Green Striped Renfrew

I made these shorts last night (well, cut the pattern & sewed the pockets down on Tuesday evening, if we’re being totally honest here), the Renfrew was thrown together over the weekend. Both of these pieces are significant in the sense that I made them when I was stressed & stewing up a terrible mood. I know lots of us prefer to knit or clean or whatever tv when we’re stressed, but personally I like to sew! I find the strict attention to detail – even on something totally quick’n’dirty like a pair of shorts & a knit tshirt – to be very calming & it definitely puts me in a ~zen~ state. Being able to focus all my energy on something that is completely unrelated to whatever may be stressing me out is really beneficial in getting me to take a step back and drop my bad mood. Always works like a charm, too!

I will point out that sewing when you’re in a bad mood really isn’t a good idea if you’re working on something that tends to stress you out even in the best situations – hence, why my Bombshell dress is still sulkingsitting on my dress form. Actually, the Bombshell dress is a big contributor to my stress (the other big one is that I’m STILL SICK – although now I sound less like a man and more like a boy in the middle of puberty – and still carrying around a hacking cough that sounds suspiciously like the dreaded Smoker’s Cough). I chose to put it aside for a few days & focus on something that I know is going to be easy & fit the way I like it without a lot of fuss. It’s good to have a few TNT patterns just for this reason! And in the meantime – I filled a gap in my summer wardrobe! Double win!

Khaki Shorts & Green Striped Renfrew
These are my TNT patterns – Simplicity 5110 (shorts!) and the Renfrew top. Both are pretty quick to sew up and have already been fitted to my liking. I made the shorts up last year in red and they get a LOT of wear – so comfy, and I think they’re flattering 🙂 I made them in the same manner this time, except in khaki, which is something I’ve been meaning to do for about a year now. The green stripey knit for my Renfrew has been in my knit stash for god knows how long – I think I bought the original yardage at Walmart actually. It’s nice & slinky and feels good against the skin. I decided to keep the stripes on the neck & arm bands, although I did not sew on the hem band because I wanted this shirt to tuck in without a lot of bulk. The hem is stitched with a double needle on my sewing machine, and I did a terrible job & no I’m not going to show you a picture. Sorry.

Khaki Shorts & Green Striped Renfrew
It’s actually not warm enough to even wear this outfit – we got another cold snap, ew!, and I was FREEZING in these pictures. The things I do for y’all!

Khaki Shorts & Green Striped Renfrew

Khaki Shorts & Green Striped Renfrew
The pockets are lined with that mystery polka dot fabric – I love a fun lining!

Khaki Shorts & Green Striped Renfrew

Khaki Shorts
The only thing I’m not happy about is how weird the waistband is sitting – what’s up with that little pucker at the top of my zipper? Also, I need to push the closures over closer to the edge of the waistband, so it doesn’t stick out like that.

Khaki Shorts
Other than that, the zipper went in without a single hitch! I have always had issues with my front-fly zippers going in wonky (or backwards, or sewn completely shut lol), until I sat down & sewed a bunch up & figured out the most efficient way to get them in the pants. Here is my tutorial on front-fly zippers, if you want to benefit as well 🙂

Green Stripey Renfrew
I love how the green stripes look with the khaki. Such a nice color combination!

Khaki Shorts

Khaki Shorts
The zipper is just something I had in my stash… as was the fabric and everything else. Free shorts, yo!

Renfrew

Renfrew - yellow twill tape :)
Here is my favorite part about the Renfrew – the twill tape on the shoulders is yellow! NEON yellow!

I think I’m ready to re-asses that Bombshell dress – just needed a few days to step back & think about something else (something easy!). In the meantime, I have cut out the pieces for my next Renfrew –
next Renfrew - red & grey stripes!
You know, in case I hit another stumbling block 🙂

Khaki Shorts & Green Striped Renfrew

What about you? Do you find it relaxing to sew when you’re stressed, or does it drive you completely mad? What do you like to do to calm yourself when it’s desperately needed?

Completed: Floral Minidress

5 Apr

sundress

I know I have this labeled as a “sundress,” but we’re just gonna go with minidress because… this shit is itty-bitty.

I used McCall’s 2185 to make this up. The fabric is some class of sheer cotton that has the appearance of printed cheesecloth… it’s really interesting. It was actually given to me by the same friend who provided me with that awesome slinky cheetah print – I know you are all totally jealous of this friendship right now (did I mention she is also my Life Partner? Truth.), I’m kind of jealous of myself tbh ;). Anyway, the fabric is super duper see-through so I had to underline the whole thing to keep things (somewhat)modest. I used batiste, and I’m actually kind of pissed right now because I’m not 100% thrilled with the finished dress and woe is me, that was most of what was left of my batiste 😦 BOO.

Floral Minidress

Anyway, the pattern was fairly easy to work with. It’s a size bigger than what I have been using lately (34 bust instead of my usual 32 bust), so I did pull in the seams an extra 1/2″ or so at the waist because the original look was pretty sack-like and extremely unflattering. Interestingly, the seams at the hip were WAY too tight – despite the fact that this is supposed to be an A-line dress! – and I had to skimp by on 1/4″ seams to make room for my legs. So weird. It’s still not flared enough, but ehh can’t do anything about that.

I also ran out of batiste on the length-wise so the hem is pretty fiddly. I had a good 4″ or so of dress fabric that was not underlined and it looked really awful. I ended up putting a facing of sorts at the hem, using bleached muslin (because I’m not wasting anymore batiste on this dress!), and then flipped it up to meet where the underlining ends. I had to hem the dress twice, but it works I guess. I considered adding a line of ribbon around the bottom of the dress to cover the seams, but they’re not terribly noticeable and I honestly don’t care about this dress anymore anyway. It’ll be good for puttering around the house on weekends – nice and cool for summer – but that’s about it. It’s so short!!

Floral Minidress

There was supposed to be a self-fabric belt, which I planned on making, but I was having major problems turning it right-side out – the flimsy fabric kept pulling past the sew-in interfacing & I ended up ripping a giant hole in it, ahem, mostly on purpose because I was angry and I wanted to destroy something. Whatever, belt, no one wanted you anyway! I like this turquoise belt better anyway. Isn’t it awesome? God, this belt is so awesome.

Floral Minidress
You may notice that I did not photoshop my roots in these pictures. Today I just can’t be arsed to care. Any they kind of look like shitty highlights, anyway lol.

Floral Minidress
I did photoshop a piece of trash out of the background though. Photoshop is awesome!

Floral Minidress

Floral Minidress

Floral Minidress
I know the facing isn’t even at the top of the zipper… NO CARE.

Floral Minidress
Underlining! And check out the zipper –

Floral Minidress
Have you ever seen a metal invisible zipper? I hadn’t!
It’s a little too thick for my invisible zipper foot, though, so as you can see, it’s not exactly invisible. Still kinda cool, though 🙂

Oh, here it is without the belt
Floral Minidress
Boooooo

Floral Minidress
I guess I can muster up a smile, though.

Kinda bummed that I’m not OMGWTFBBQ about this dress, but ehh life goes on. I think it looks better in the pictures than it does in real life, to be honest 🙂 I still had a metric shit ton of this fabric (the original length I was given was over 7 yards and I’d be shocked if I used 1.5 yards on this dress), so I definitely want to make something else with it. I’m thinking the Chantilly. Thoughts?

Floral Minidress

I also just realized my birthday is in like a month and a half. Ack! Better get started on my Bombshell Birthday Dress 😀