Review: Drape Drape (plus a giveaway!)

11 Feb

Drape Drape
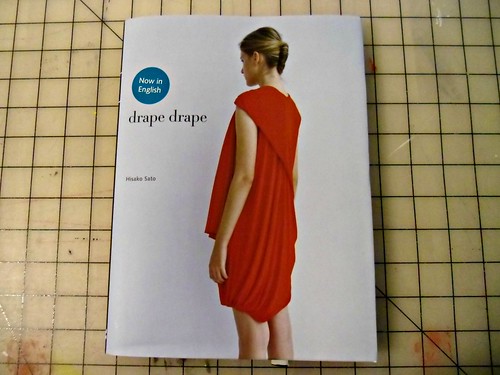
I’ve heard a lot of buzz in the online world about these Japanese pattern books- they appear to have quite the cult following. I’ve always been curious to see what exactly they entail (and I also just really love following the pack, ok), so when the publisher contacted me and asked if I’d like a copy of Drape Drape by Hisako Sato to check out, there was no hesitation on my end between when I received the email and when I replied and said YESSS YES YES. New patterns to try! Yes!!

These books were originally published in Japanese (no duh, Lauren), but they were recently translated into English. The translation struggles a little on some points – right side is referred to as “upside,” interfacing is “interlining,” – but overall, it’s pretty easy to understand. The book starts out with general information on the pattern sizing, an explanation on the various drapes and tucks used in the book, and a small chapter on sewing knit fabrics using a standard sewing machine. Drape Drape is actually a pattern book – there are a few pattern sheets with nested pattern pieces (such as what you see with Burdastyle) in the back of the book- 17 patterns in all. It is not, as some might be led to believe, an instruction book on how to drape.

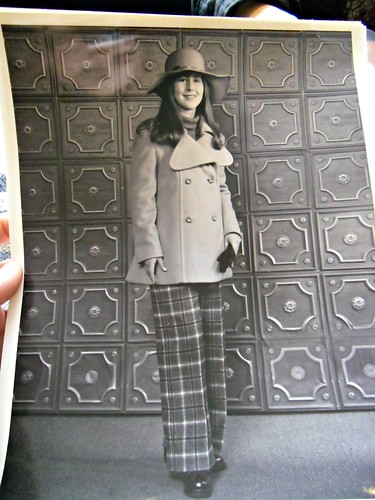
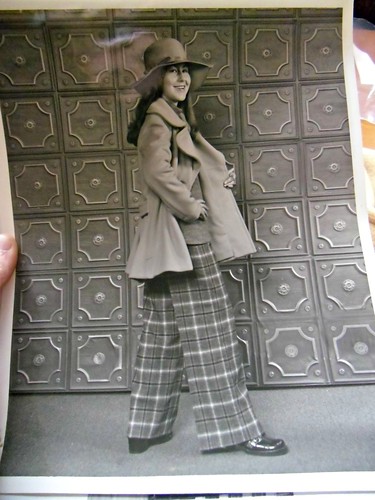
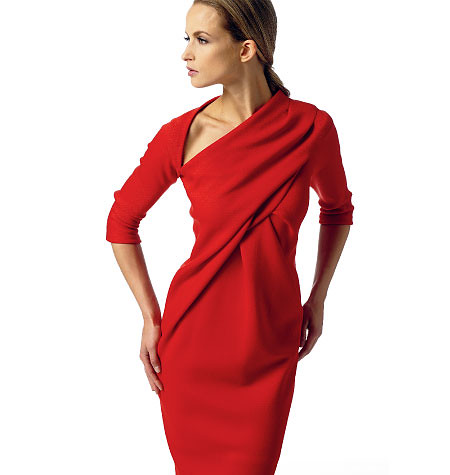
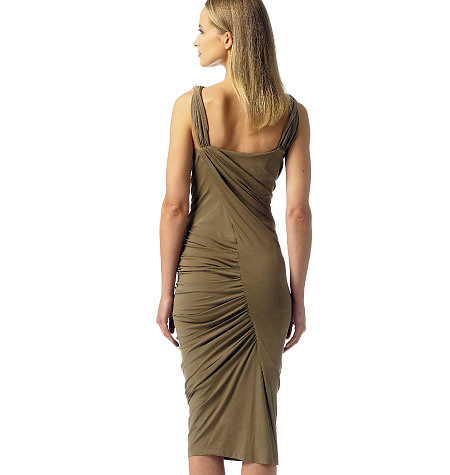
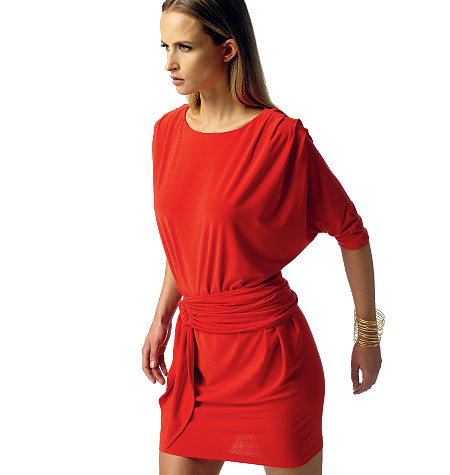
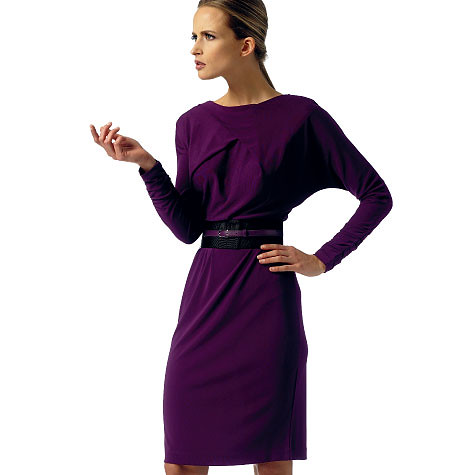
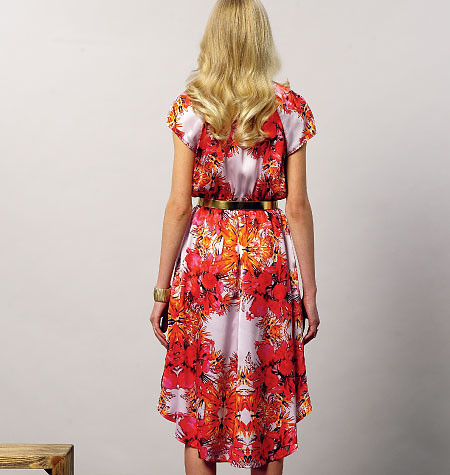
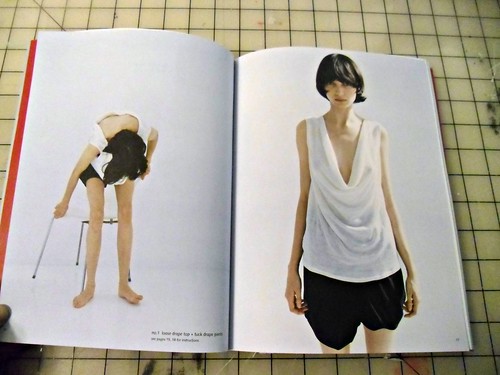
That being said, the pictures in the book are very beautiful – showcasing these gorgeous fluid, drapey designs. The kind of stuff that Vogue wishes their photoshoots would end up looking like:

Drape Drape
Drape Drape
Drape Drape
Drape Drape
Drape Drape

I personally love the line drawings. Like, I want to chop them out of the book and hang them on my wall.
Drape Drape
Drape Drape
Drape Drape
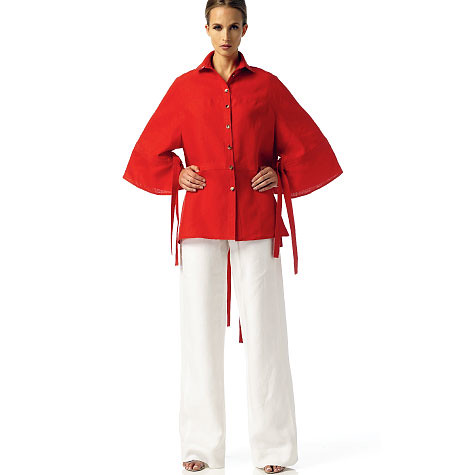
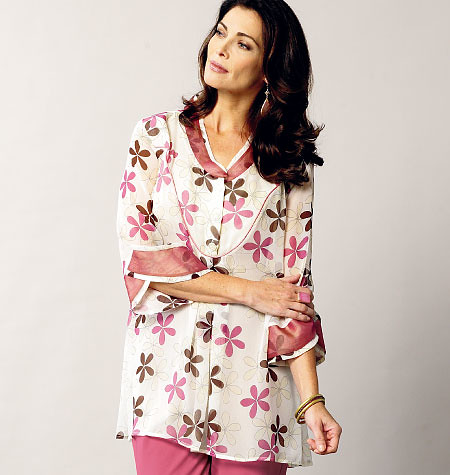
Even Hammer Pants look good as a line drawing.
Drape Drape
~easy breezy~
Drape Drape
Drape Drape
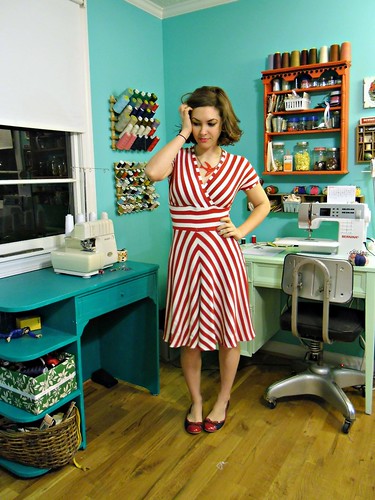
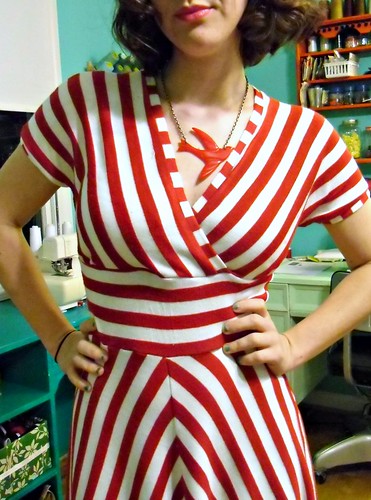
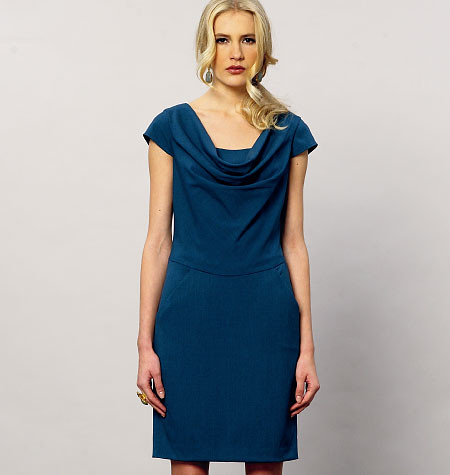
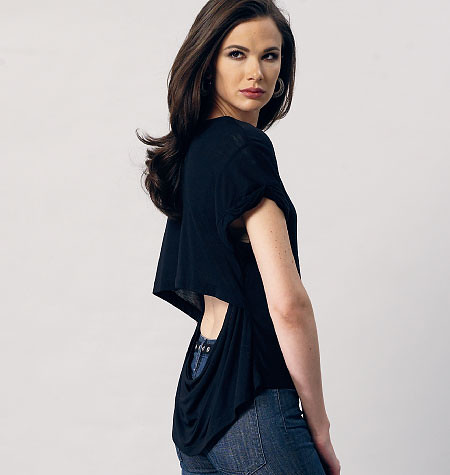
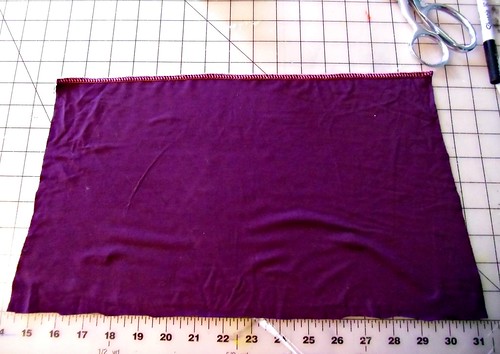
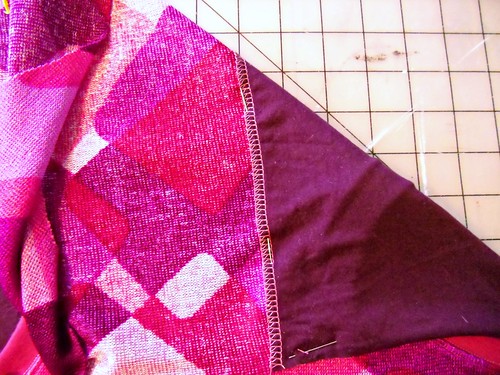
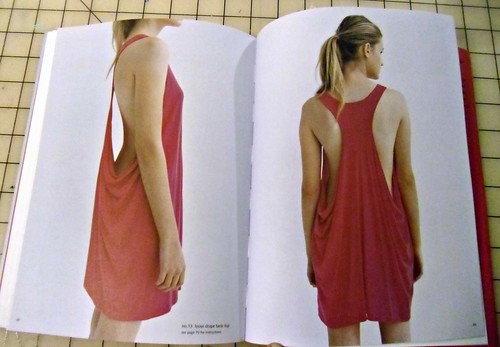
This last one STOLE MY HEART. I was bound and determined to make it up – using a slinky, drapey black rayon knit. Nevermind not having anywhere to wear it – I was gonna make it, and no one was gonna stop me.

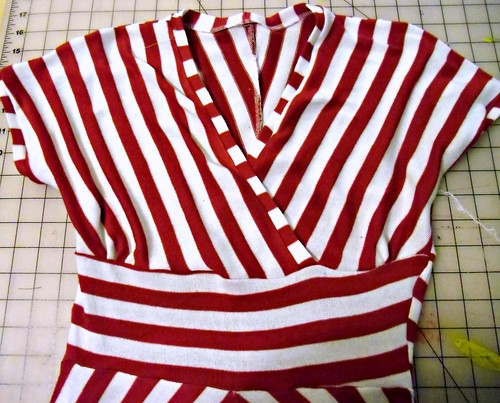
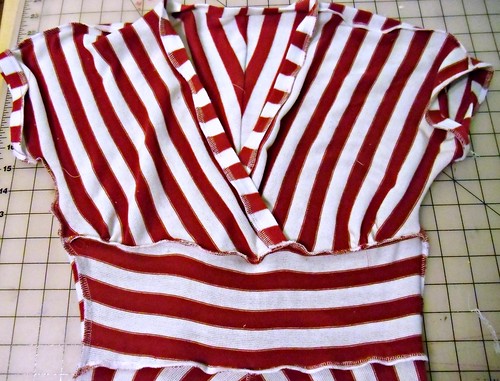
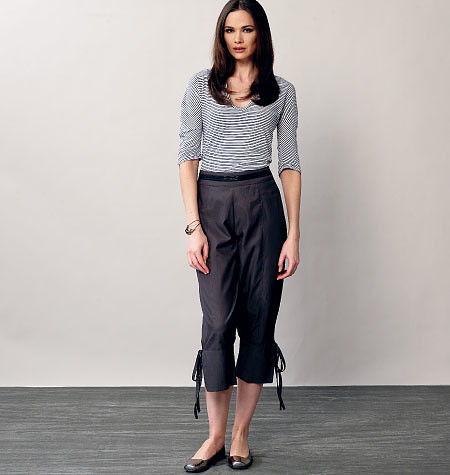
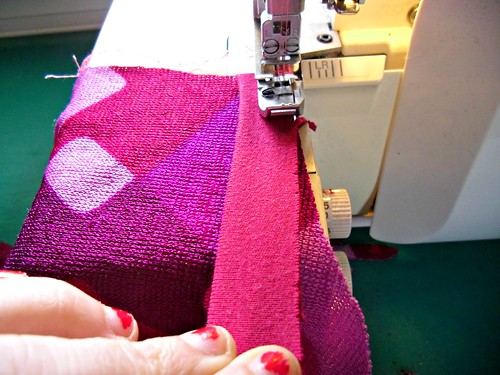
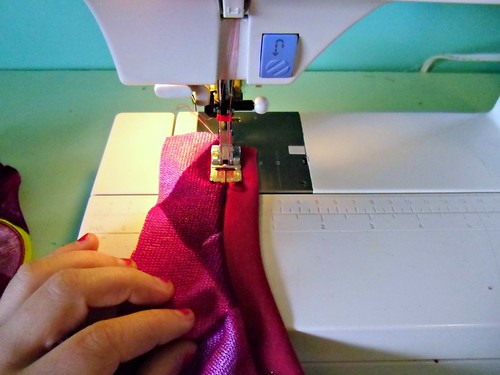
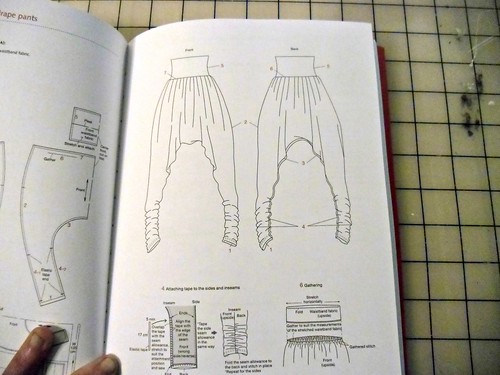
But hold up a minute, because have you seen how these pattern instructions work?
Drape Drape

Drape Drape
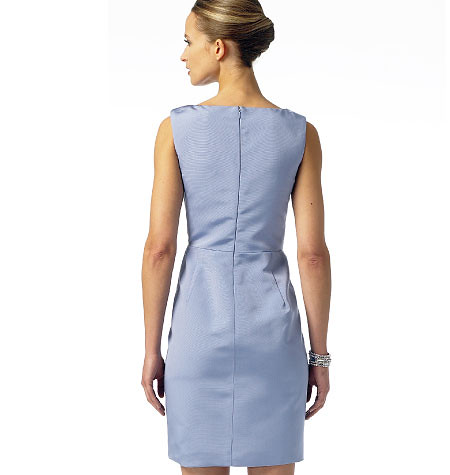
If this looks easy, it is because it is the easiest pattern in the book. The V-neck dress is quite a bit more involved, with interfacing and a zipper. I spent about 2 weeks staring at the instructions and pulling hair out of my head in an attempt to understaaaaaaand, but the instructions were just too sparse for my comfort and those mountain and valley folds got the best of me. Not that I think it was a necessarily hard pattern to complete – I just need hand-holding when it comes to things like this. Lots and lots of hand-holding. I’m actually like that in pretty much every aspect of my life, so this doesn’t come as much of a surprise.

I’m not saying this to scare you – I don’t think this book is too difficult for the average sewer to comprehend. It just doesn’t work for me and the way my brain functions (plus: tracing nested pattern pieces, NOPE.). Rather than have it sit unused on my shelf, I’d much prefer to give it to someone who can use it 🙂 So if you’ve been curious about these pattern books – here’s your chance! One caveat – this is my copy of the book, and I did mark up one of the pattern sheets (the skirt piece for the v-neck dress has been outlined in blue Sharpie. Yes, I write in my books. Sorry.). The book is in otherwise perfect condition – including the dust jacket – and the pattern sheets are still usable despite the markings.

To enter the giveaway, leave a comment (with an email address where I can reach you if you win, please) and tell me your favorite sewing book. This giveaway is open worldwide – if you can receive mail, you can enter the giveaway – and I’ll close the pool a week from today, Monday 2/18/13. Good luck!

GIVEAWAY IS CLOSED.
Thanks to everyone who entered!

Completed: A Stripey Tiramisu

8 Feb

It’s no secret that I love knits – I love sewing them and I love wearing them. Sometimes when life throws you a big shit sack full of bummer, the only way to get back on the horse is with a good ol’ TNT. All knits are TNT as far as I’m concerned (so. freaking. forgiving!), but I especially love my purple Tira, because it goes the extra step of actually looking pulled together. Which is nice, especially when you just wanna feel like you’re wearing comfy pajamas.

As much as I love purple, though, it’s pretty winter and no duh I need a stripey summer Tiramisu now, right? No shame, I totally ripped off both Steph AND Penelope, because I am shameless and awesome and secretly hoping we can be twins(triplets?). Ladies, pls.

Stripey Tiramisu
Anyway, who doesn’t love stripes?! It’s like wearing a circus ON MY BODY.

Stripey Tiramisu
This fabric is from the giant sale at my local fabric store, where I totally cleaned up last month. I actually have this stuff in black/white stripes too (and I think I bought some crazy amount, like 4 yards of it haha). It’s so stripey and soft and awesome. It’s also kind of not really suitable for this kind of dress; it’s VERY stretchy, 4 ways, and super drapey. I had to make a few changes to the pattern to get it to work – which ended up ok in the end, but please heed my warning: you need something more stable for this dress, unless you want to futz with the fit all night like I did.

Stripey Tiramisu
Still, it turned out pretty cute, if I do say so myself! And it looks so good with my new shoes 😀

Stripey Tiramisu
Anyway, let’s talk about the changes I made:
– I reduced the size of the bust to a C on the pattern tissue, but once I basted the top together to test the fit, it was still a bit low (as the fabric was pulling under it’s own weight. And this was before the skirt was attached!). I removed another 3/4″ from the underbust, although looking at these pictures, I could’ve stood to remove a little more.
– I reduced the waist by 3/4″ before sewing; once sewn up I had to take in the side seams another 1/2″ or so. I’m telling you – this fabric is soo stretchy!
– I shortened the neck and arm bands and stretched them to fit when I sewed them on; without stretching, they would have ended up floppy.
– I shortened the hem twice – first hacked about 3.5″ off the pattern tissue, then another 2″ when the dress was sewn up as the skirt had stretched under it’s own weight.
– I left out the pockets – I feel like they add a lot of bulk with fabric like this.

Stripey Tiramisu
I tried to match up the stripes, but I didn’t do the best job. They match up on this side…

Stripey Tiramisu
… but not the other side. This is partially because the fabric was a PAIN IN THE ASS to cut (so shifty!), and partially because I had to keep sucking in the side seams after the dress was finished, to get it to fit. Also, please note that the waistband is not cut straight. Again, shifty fuckin fabric.

Stripey Tiramisu
The shoulder seams also do not completely match up. Oh well!

Despite my problems with the fabric, the gape factor is pretty non-existent:
Stripey Tiramisu
Stripey Tiramisu
I think the key to this is shortening the bands and stretching them to fit the neckline. It kind of sucks everything in, and allows it to curve to your body.

Stripey Tiramisu
If you have your heart set on sewing this pattern with a very drapey fabric, make sure you are vigilant about pressing every seam. It really makes a huge difference, especially on the bands.

Stripey Tiramisu
Stripey Tiramisu
Sorry about all the loose threads; I had literally just finished the dress before I took the pictures 🙂

Stripey Tiramisu
Now then, let’s have a bit of Spring up in here, pls?

Knitting Fail: The Lauriel Cardigan

5 Feb

It was only a matter of time before I knitted something that was completely unwearable. And here it is. Woof. I’m actually surprised it took me this long to get to that point – this is my sixth sweater, ffs!

Lauriel fail
This is the Lauriel pattern by Ysolda Teague. I fell in love with the pattern after lurking Tasia’s golden version. I used Cascade 220 sport (the color in these photos is definitely off; the swatch picture on my Ravelry page is much closer to the true color) and even bought me some of them fancy flexi-cable bamboo needles. I learned two new techniques for this sweater – a super stretchy bind off (my bind offs are always soo tight, no matter how much I go up in needle size. This method is awesome!) and Magic Loop for knitting the sleeves. I actually really enjoyed knitting it, although knitting the button bands almost broke my brain. I have no idea why the instructions were so bad for that part, but they were TERRIBLE. I spent about 3 hours on just one of the bands – I know this because I watched 4 episodes of Breaking Bad during the harrowing process.

Lauriel fail
So what’s the problem? Well, it’s too fucking big! I mean – holy shit, look at that sleeve length! I can’t cuff the sleeves back. I mean, I could, but there is a lace detail right above the cuffs and it would suck to cover that. Actually, the sleeves are the least of my problem. The entire thing is just huge huge huge. It swallows me, I look like a kid playing dress-up in her mom’s clothes. I know it looks semi-ok in these pictures, but trust me on this. This sweater is way too big, and I can’t wear it.

Lauriel fail
So where did I go wrong? I knit it correctly as indicated by the pattern – knitted my little gauge swatch (actually, I knit 3, just so we’re clear here), properly blocked it, checked my gauge frequently as I knit. So my knitting itself isn’t the error.

First of all, I admit that I knit the wrong size. The pattern has you knit by your underbust measurement, so I went with the 30″ since that’s what I measured at. Unfortunately, I must have measured wrong because I was checking that shit the other day and my underbust is actually closer to 28″. FACK. Even then, this thing is too huge.

I also suspect that this pattern simply runs big. Go look at Tasia’s sweater and notice that she said the sweater ended up very loose? Uh huh. Shoulda heeded her advice right there. I’ve actually now discovered, upon actually researching, that a lot of people have reported the thing problem – specifically in the bust/shoulders area. Which, yeah, that’s exactly the issue with mine. The shoulders droop down past my shoulders, the underarms are at least a couple of inches below mine, and the bust just swallows me.

Lauriel fail
Here I am pointing my finger at where my actual underarm is. Look at how low the sweater goes! The arms are huuuge on me – and I don’t have pencil thin arms, y’all!

Lauriel fail
The back is really a shining example of this sweater being too big.

Lauriel fail

Lauriel fail
Yep.

Lauriel fail
Just for the record, this is how it is *supposed* to fit. I originally thought I might be able to just whip up the side seams with a backstitch, but the underarms are so low that I can’t do that. Wah.

Anyway, the knitting itself is really pretty:
Lauriel fail

Lauriel fail
(fuck that button band, forreal tho)

Lauriel fail

So yeah. I’m pretty bummed – I spent a little over 2 months knitting this (not to mention the money I spent on the yarn, pattern, and new needles) and I just can’t wear it. That’s the sucky part about knitting – you never really know the full extent to the fit until it’s finished and blocked. I’m afraid I can’t salvage this one.

That being said, I don’t regret knitting it. It was a fun pattern to work with, and I learned some fun new techniques. I am considering selling it for , I dunno like $50, just to recoup my costs. Anyone interested? The bust is 35″, waist is 31″ (with lots of stretch) and the length from shoulder to hem is 20″. The sleeves are also 20″ (underarm to end of cuff). I didn’t bother to sew the buttons or snaps on as I’m kind of over this sweater; I’m sure y’all understand. It has been finished and blocked, though. The sweater has found a new home! Thank you everyone for your interest 🙂

Lauriel fail
Sooo… what have you failed at lately? Let’s commiserate!

Completed: White Tshirts. Yes, Tshirts.

1 Feb

At the risk of really beating this dead horse to the ground- I like making solid, every day basics. Boring shit like plain pants, tshirts, solid knit dresses, and I’ve got my eye on making underwear as well. I mean, making a bunch of party dresses is super fun, don’t get me wrong – but there are only so many frilly/froofy dresses I can fill my closet with before I start pulling my hair out on Saturday morning whining that I don’t have anything to weeeear. And I, too, have read Overdressed, which basically punched me in the face the same way that Fast Food Nation punched the rest of the world in the stomach. I can’t even walk in the mall anymore now without yelling about polyester and stitch lengths. It’s insane and no one wants to go shopping with me these days… not that I do much “shopping” as it is.

So, I’m ok with sewing my own basics. I like that I make a tshirt for roughly the same cost as something from the mall, except I can control the fit as I like it and I also know the hem stitches aren’t going to fall out the first time I throw it in the wash. Maybe making tshirts is simple and the exact opposite of exciting, but sometimes I’m having a bad day and I just want to make something without thinking to much about it – and for me, that perfect something is the tshirt. Some people bake when they’re in a bad mood. I make tshirts.

A couple of weeks ago, I was contacted by Organic Cotton Plus and asked if I would like to sample some of their organic fabrics. Yeah! I chose the white interlock knit and set to work making some basics. In organic because, yeah, I be fancy.

Organic Renfrew- V-Neck
I used my beloved Renfew pattern and made two tops. Here’s the v-neck -probably could have stood to make that v a little more, uh, v-like, but it ain’t too bad for a first attempt. The secret, I’ve learned, is to sew the neck band on a regular sewing machine first, and then serge the edges after. Otherwise, the blades of the serger will chop a big ol’ hole in the middle of your tshirt when you try to pivot (and disabling the blades just makes a huge mess, oh god). I know this because I actually tried to do the v-neck version several months ago, and it failed. Also, I realize I just lied to y’all about this being a first attempt. I’m sorry, I’ll never lie to you again~.

Organic Renfrew- V-Neck
I made no changes to the pattern (other than my initial fitting changes), except I did not add the hem band. I just hemmed the bottom with a double needle and used my walking foot.

Organic Renfrew- V-Neck

Organic Renfrew- V-Neck

Organic Renfrew - Scoop Neck
I also made a scoop neck!

Organic Renfrew - Scoop Neck
Making tshirts is FUN!

Organic Renfrew - Scoop Neck
I actually really really love this fabric. It is the *perfect* weight for a basic Renfrew – super soft, a bit of stretch (but not all slinky like jersey – which I love, but there is a time and a place for slinky jersey) with a good hefty weight. Even though it’s white, it’s actually quite opaque – the scoop-neck top has neon yellow twill tape on the shoulders. Can you see it? NOPE. I’m pretty sure I could get away with wearing a neon bra under these and on one would be the wiser.

Organic Renfrew
Plus, the fabric is less than $9 a yard. So yes, a teeny bit more expensive than F21 – but it’s also light years nicer, as well as ethically-sourced. Which I’m totally willing to pay extra for.

Organic Renfrew

Organic Renfrew

Organic Renfrew

And while we’re on the subject of paying extra for ethical fashion… didja see my new jeans?

Imogene Stretch
WELL LOOK AT THEM.
Before you get all excited and start freaking out, I didn’t make these. As much as I wish I was a jean-making-master like Taylor Tailor, I can’t make a good pair of jeans to save my life. I don’t even think it’s a matter of fit anymore – I just don’t like the denim that is currently available. As much as I love love love my Thurlow jeans, I rarely wear them because the fabric just sucks. They stretch out so much over the course of the day, they are huge and baggy by the time I take them off – and I’ve sized them down twice now. Ugh. So I give up. Jeans, you win. I will buy you from now on.

Imogene Stretch
So here’s the deal – like, I dunno, every single woman I know, standard jeans just don’t fit me right. They are too big in the waist, too tight in the thighs, and the length is always much too long (and I’m too lazy to hem my own jeans, let’s be real here). I guess I could fix the waist issue by wearing a belt, but I hate wearing belts with pants, not to mention I don’t even own any belts that fit around my hips. Plus, the denim is just shitty. I bought some GAP jeans a couple of years ago and they’re already getting holes – and I barely even wear them! So I recently got rid of all my jeans – I had almost a dozen pairs – and bought one pair. I only own one pair of jeans now, and here they are.

Imogene Stretch
These are made by Imogene and Willie, and they are the Imogene Stretch. I’m not going to sugar coat – they were fucking expensive. Actually, these jeans are the most expensive piece of clothing I have ever owned. This is also the first piece of new/non-sale clothing I’ve bought in several years (and yes, I bought them with my own money. Ha, I WISH I+W would give me free jeans!). So, why would I spend $200+ on one pair of jeans, you might ask?
– They are made here in Nashville, TN, by a small business. I like supporting small businesses. I like knowing my money is going back into my community.
– The materials are amazing. The denim is high-quality and wears beautifully (and it’s woven in the USA! Yeah!). I also get 3 free repairs, should I happen to gouge a hole in them or some shit.
– The fit is better than any pair of pants I’ve ever owned. I dunno about you, but I’d rather own one pair of well-fitting pants than a dozen pairs of ill-fitting pants. I have no waist gap, the legs fit perfectly, and the length was hemmed to my exact measurements when I bought them.
– THEY LOOK DAMN GOOD ON ME.

Also, the workmanship is just beautiful-
Imogene Stretch
The topstitching is three different colors. Can you see it?

Imogene Stretch

Imogene Stretch

Imogene Stretch

I’m not posting this because I secretly want everyone to stop shopping at fast fashion places (ok, I kinda do – in a perfect world. But that’s not really attainable right now, and not everyone has that kind of budget! ;)). I mean, I just bought a pair of Keds the other day. Whatever. But… know when to pick your battles. Know what matters to you, and what you can let slide. And personally for me – I’ll make what I can, and buy local when I can find and afford it, and not feel bad if I occasionally have to buy shoes at Macy’s. Small changes eventually equal big changes.

Organic Renfrew

Organic Renfrew

~*~Disclosure: I was not financially compensated for this post, although I did receive a fabric sample from Organic Cotton Plus to review & keep. All opinions on this product are my own.

Revisiting the Fabiani Coat – and I Hit The Holy Grail

30 Jan

Guys. Remember when I made this coat last year?
Coat front
This is Vogue 2925, which is one of them special designer patterns from the 70s. The pattern is really wonderful – the instructions include light tailoring, with the pad stitching and the fancy interfacing and back stay and all that good stuff. I spent about a month working on the coat, from the muslin to the finishing touches – truly a labor of love. Sadly, I haven’t worn it much this year because I’ve lost weight and it doesn’t fit me as well as it did. But, ugh, whatever about that, that’s not the point of this post.

The point of this post is that I got an email a couple of weeks ago from someone who actually made the coat when the pattern was originally released in the 70s. AND she lives in Nashville. AND she wanted to meet up.

!!!

WOULD I???

Fabiani coat - the original!

Fabiani coat - the original!

How many times have we looked at vintage patterns and thought, “I’d love to know who made that, for what purpose, and what fabric they used.” How excited do we get when we find little scraps of fabric or newspaper clippings in the pattern envelopes, offering a little hint to the pattern’s previous life? I don’t know about y’all, but my favorite part about vintage stuff is learning the history behind the people who previously owned them. So to say that I was excited to get to hash this stuff out in real time is a bit of an understatement.

Karen, the original owner/maker of the pattern, agreed to let me take some pictures of the coat and share some information about making it. We met up at Bread & Company on Sunday afternoon and ended up chatting for over 2 hours – about all kinds of stuff, not just sewing! Although sewing stuff came up too 🙂 We brought our coats and showed them off, compared sewing notes and talked about our fabric and finishing choices. You know, basically sewer’s heaven 🙂 The pictures of Karen above were taken in 1973 – she made the entire outfit (pants and top included) for a sewing contest. Although she didn’t win (which surprised me – but hold up, bc I got pictures of the winners too ahaha), she did win the regionals and got a Singer Genie sewing machine out of it.

Fabiani coat - the original!
The coat really is a thing of beauty – I think it’s waaaay better than mine, for sure! Karen said she spent an entire summer working on it for her tailoring class, and the workmanship is just amazing. So much detail and care went into everything – all the way down to how the buttons are sewn on.

Fabiani coat - the original!
Look at that beautiful top stitching!

Fabiani coat - the original!

Fabiani coat - the original!

Fabiani coat - the original!
I love how she added piping between the lining and the coating – as well as the fabric covered snaps.

Fabiani coat - the original!

Fabiani coat - the original!

Karen also brought the pattern envelopes, as well as swatches for all the garments she made. Sadly, the coat is the only piece that still exists, but between the pattern envelopes, swatches, and those 8×10 photos, you can get a pretty good idea of how the entire outfit turned out.

Fabiani coat - the original!
Here’s the coat – with swatches for coating (which cost $25/yard in 1973! Ouch!), lining, interlining, and the horsehair interfacing.

Fabiani coat - the original!
The turtleneck, and the knit fabric.

Fabiani coat - the original!
And the pantssss!! MAN, I wish these pants still existed!!!

After seeing all this stuff (and rubbing my hands all over the coat, bc SHIT), I was really curious to see who won the contest! It would have to be something amazing to win out over a hand-tailored, wool designer coat, you know?

The winners were separated by age groups – Karen was 17 at the time, so here are the people who beat her out:
Fabiani coat - the original!
WHY OH WHY did they not include the pattern numbers?! I need that Heidi-esque Vogue coat!!

Fabiani coat - the original!
Look at the age bracket for these winners – 13-15??? How…?

CFabiani coat - the original!IMG0021
SHUT THE FRONT DOOR, THERE WAS A 10-12 BRACKET.
How many 10 year olds do you know who can make a suit set? Or a hooded coat?? Mind blown over here.

And here’s the best part-
Fabiani coat - the original!
Karen let me try on the coat!! Ahhhahahaha, so awesome! It actually fits better than mine does, yeah?

Fabiani coat - the original!
Of course, this post wouldn’t be complete without a picture of us both wearing our coats 🙂

So yeah, that was a pretty cool way to spend a Sunday! I just love how sewing and blogging can bring people together like that. I had a wonderful time meeting with Karen and talking shop – and trying on that coat! Oh oh, she even gave me a copy of Seventeen magazine from 1976… I’ve been flipping through it over the past few days, and the advertisements alone are just amazing. I may have some post some pictures of that, too, there are even ones for sewing patterns 🙂 Big thanks to Karen – for emailing me, for meeting up with me, and for letting me post these pictures on my blog so we could all enjoy them!

In other news, I just wanted to give y’all a heads up about a Kickstarter that my best friend, Morgan, is raising money for right now. You may or may not remember my talking about when she joined the Peace Corps and moved to Macedonia – which was hard on all of us (but duh, especially me because I need my bestie 😉 ). She accomplished a lot in the year that she was there – in addition to teaching English, she opened a dance studio and taught dance camp. She is back in the US now, but she wants to return to the ‘donia and teach another dance camp this summer, hence the purpose of raising the funds. You can read more about the cause here, and contribute to the Kickstarter here – backing starts at $1. ONE DOLLAR, PEOPLE.

And in case you were wondering how the hell this relates to this here sewing blog (other than the fact that Morgan is my Life Partner and such as), I have been promised Macedonian fabrics. Here is the piece she bought me last year (it’s still waiting to be sewn; haven’t found the perfect pattern yet!), the softest, most beautiful cotton dream fabric. And obviously I need more. So let’s pull those dollars out and help me get more of that fabric. I mean, shucks. I might even get her to buy two pieces an host an awesome giveaway!

Oh, and Morgan also promised a video teaching us how to curse in Macedonian. So there’s that, too 😉

Completed: More Thurlows, With A Side Of Skinny

28 Jan

Fair warning #1: I almost resorted to calling these the Thinlows, but I refrained. You guys are welcome.
Fair warning #2: These pictures are really really terrible and I am sorry for that. I was saving to buy a new camera because mine sucks, and then I accidentally spent the money on something else that I decided I wanted more. Actually, I’m not sorry about that part.

Skinny Thurlows
Check out my new Thurlows! We are up to six pair at this point, so I understand if you are sick of this pattern now, but y’all gotta understand that I am just in love and we’re still honeymoonin’ strong over here. My TNT! My one true love! The Thurlow!

Skinny Thurlows
You’ll notice these are a bit different, in fact they went on a bit of a diet! As much as I loved those nice flared legs in the original pattern – I’m a skinny girl at heart, at least as far as my pants are concerned 😉 I’ve hemmed and hawwed for a few months now on how to properly execute the slim-down. I probably should have hemmed and hawwed just a little bit more because honestly, these aren’t exactly my best attempt! Blame it on a combination of bad pattern, er, combinations (which I’ll get to in just a second, so put your hands down!), as well as a tricky fabric choice. It was a learning curve, that’s for sure!

Skinny Thurlows
To get the legs skinny, I ended up merging the top of the Thurlow pattern with the legs of the Clover pattern. One issue I noticed right away with my tracing – and you probably notice this right away in these pictures – was that the grainlines for each pattern were TOTALLY different. Just skewing in completely different directions. So which grainline was I supposed to choose? I took a wild guess and stuck with the Thurlow grainline. Also, SPOILER: I picked wrong; look at those crazy wrinkles and folds and off-grain madness going on – the side seams are trying to so hard to wrap around my legs! WAH! First lesson learned here: pay attention to those grainlines. They need to go straight up and down the middle of the legs, which is why each pattern was so different.

Skinny Thurlows
Mistake #2 came from my fabric choice. I really like this fabric – it’s a very soft, wool-blend felt that I picked up at the Vogue store while I was in Chicago last year. It was super cheap, feels great against the skin, and I love the color/fuzzy soft texture. However, it has waaaaay too much stretch for this pattern. I don’t know if that saved the grainline fiasco or made it worse than ever, but the massive amounts of stretch definitely contribute to how these pants hang off my legs. Also, the sizing was horribly off, due to the stretch. I kept basting and taking in the sides – I took over 1″ off each side seam. The welt pockets are now too close together as a result; and the pants are still a little loose. Didn’t think that one through, I’m afraid! Second lesson learned: no stretch on these pants, at least not without sizing down first.

Skinny Thurlows
Here’s a better picture of my fails. Wrinkles all up and down the backs of the legs, and the welt pockets are sitting in a weird spot. Oh well!

Skinny Thurlows
I don’t think they’re all bad, though. They’re quite comfortable, thanks to the stretch and how soft the fabric is. And honestly – is the fit that much worse than RTW? I dunno.

Skinny Thurlows
NOPE, NEVERMIND, THAT’S PRETTY BAD. HAHAHA!

Skinny Thurlows

Skinny Thurlows

Skinny Thurlows

I plan on revisiting these again, as I have not yet satisfied my need for skinny pants. I think I’ve got a better grasp on the grainline issue, but if anyone has words of wisdom they’d like to share – let’s hear it!

Skinny Thurlows

And yes, I still plan on wearing these. In all their wrinkly, off-grain glory.

Oh, Vogue.

24 Jan

Nothing like some Vogue-hate to cheer me up when I’m having a shitty week, amirite. Thanks, Vogue!

V1341
Vogue 1341
I don’t get this. It looks someone tried draping for the first time and failed as hard as they could possibly fail.

V1342
Vogue 1342
True story: I check my Google search terms every day (because they are hilarious and awesome) and my very favorite one was when someone found my blog by searching “buttcrack sundress.” I always wondered what a buttcrack sundress was. Now I will wonder no more.

V1340
V1340 (1)
Vogue 1340
From the puffy darts to the shitty fit to the sad attempt at whatever is going on there with the neckline, this dress makes my heart hurt.

V1337
Vogue 1337
No comment on the dress, I just think the pose is really really funny.
COME AT ME, BRO.

V1338
Vogue 1338
Y U mad, tho?

V1347
Vogue 1347
Vogue, stop trying to make the danglies happen.

V8873
Vogue 8873
The pattern describes this as a “fitted bodice.” I don’t know about you, but nothing about that bodice looked fitted to me.

V8870
Vogue 8870
Well, that pattern placement is just tragic.

V1345
Vogue 1345
NOPE.

V8887
Vogue 8887
I actually don’t mind this get-up too much (except for that pants length… yikes). I just wanted to make fun of her shoes.

V8879
Vogue 8879
The fuck is going on here.

V8883
Vogue 8883
Vogue, what did we just talk about regarding those danglies.

V8891
Vogue 8891
The prettiest beekeeper you ever did see.

I’m noticing a new trend here, in that NOTHING FUCKING FITS ANY OF THESE MODELS. What the hell! I know that most fashion magazines pin back the clothing to make it tight on the models, but ffs Vogue you had these things sewn for you. Could you not size down?? Compare the actual pants to the line drawing here. Those are not supposed to be Hammer pants, contrary to what the photo would have you believe. I’m just… I have no words. No words at all.

Vogue, go sit in the corner and think about what you’ve done.

Completed: The Charlotte Skirt

21 Jan

I always keep an on-going list of wardrobe staples (Cake, if you will) that I would like to get my sew on with. Knit dresses, a lightweight denim skirt, that cycling jacket, red straight-leg trousers (Sunni, I love you but I REALLY love your pants and I’m going to copy you aaand I hope that’s ok!), white tshirts… to name a few. One of the pieces that’s been on the list for the very longest was a red pencil skirt. I dunno why I’ve put this off for so long – red is basically a neutral as far as I’m concerned, and my wardrobe is quite lacking in pencil skirts these days. Sewing boring clothes can be, well, boring – but ain’t nothing boring about a handmade staple that gets the hell worn out of it all the time, amirite.

Charlotte Skirt
I did finally make that red pencil skirt, though.

CIMG0035
This is the Charlotte skirt I was telling y’all about last week. It’s generously sized through the hips, so those of us whose hips don’t lie can still rock our pencil skirts with minimal size futzing and fretting. It’s like, living the dream. Oh yeah.

Charlotte Skirt
I went with the plain jane, no frills view as I really just wanted a plain ol’ red pencil skirt. I based my sizing experience off the Elisalex dress and cut a 6/10, which ended up being quite a bit too big and needed some shaving down the sides. Now that I’m looking at the pictures, I might need to adjust the darts for future skirts are there is definitely some slack chilling at the front. DAMMIT. It really doesn’t look that obvious in real life.

CIMG0044
This is a very simple pattern to construct – there are only 3 pieces! I did make a few changes – shortened the hem by several inches (I think around 4″? Ladies, watch your petite selves – this skirt is long!), added a 4″ slit for walkability, and dropped in a full lining. Adding the lining was SUPER easy, by the way – I just cut out an extra front and back piece from the lining, sewed the darts and side seams as normal, and then dropped it in the shell of the skirt before attaching the waistband. As the skirt is wool (from the flea market, yeah!), it’s limited to winter wear which means tights – which means lining is a necessity.

Charlotte Skirt
I did have a little snafu with the sizing, once I put the waistband in. And by “little snafu,” I mean the skirt was too damn small and it measured out to like 2″ smaller than my actual waist measurement. WTF?! Fortunately, my zipper had giant seam allowances just hiding beneath the lining – as well as the waistband having a nice generous overlap for snaps – so 15 minutes of quality time with my seam ripper meant the skirt was saved. !!!

Charlotte Skirt
It does have a nice rear view.
Shit, I hope I don’t attract the Flickr weirdos with this picture.

Charlotte Skirt
It seems I have run out of things to say. Here is an artsy photograph for your consideration.

What’s on your staples-to-sew list?

I’M GOING TO NEW YORK

19 Jan

Pardon the all-caps explosion here, but I’m freaking EXCITED AS FUCK right now!

I’m going to New York City in March!! YAAAAY!!

I am SO EXCITED to finally get to meet up with my favorite sewing-land babes, Sonja and Oona, as well as *finally* lurk the shit out of Mood… as well as the entire garment district, just, in general. Omg. Omg I can’t wait !!!

I know there are at least a good solid handful of y’all who also reside in and/or travel to New York on a regular basis so here’s my relevant question… anyone interested in a lil meet-up? I’m thinking Saturday March 9th (or we could do Friday the 8th! I just figured more people would be able to do a Saturday 😉 ), meeting up for drinks or food and then checking out some fabric stores! So yeah, let me know if you’re interested – either in the comments, or shoot me an email! I had so much fun at the Chicago meet-up, I want to recreate that day with some New Yorkers! Pleaseeee!! 😉


Here is a hideously bad picture of me the last time I was in New York, in 2008. As you can see, I was very excited about Grand Central Station.

And while I have your attention, I’d like to introduce y’all to my very first sponsor:
sweetlittlechickadee_shopad
Hellooooo, Sweet Little Chickadee! Juli’s shop is full of patterns – both sewing and embroidery – as well as some of the cutest handmade jewelry I’ve ever seen. She just added some new patterns from The Maker’s Journal – a new-to-me company who is based out of Australia and has a LOT of cute undie patterns, omg.

And check this out – she had graciously agreed to give my US readers some free shipping love! Use the code “LLADYBIRDROCKS!” to get free US shipping – US orders under $35 get free first-class mail shipping, and US orders over $35 get free priority mail shipping. Combine that with the amazing pattern sale running right now, and yeah…. you really can’t beat that with a stick. The code is good now until 1/31/13, so hurry and get yo’ shop on 🙂

If you are interested in some sweet sponsor ad love (sewing and vintage related only, pls) of your very own, holler at me via email and we’ll see if we can work something out 😉


Since we love Andrew WK here, I feel like this song is quite appropriate.

Tutorial: The Paulie Pocket Top

18 Jan

stretch yourself header
This post is part of the Stretch Yourself Series hosted by Miriam of Mad Mim and Miranda of One Little Minute. This two week series is ALL ABOUT the love of knits, so go check it out!
I’ll be showing y’all some embellishment twist on a classic, along with Jessica of A Little Gray

Here she is – the Paulie Pocket Top!
Paulie Pocket Top
I KNOW. The name of this top is totally ridiculous & tacky – but what part about my life isn’t? 🙂

Paulie Pocket Top
You will need 3 different kinds of fabric to make this – something for the majority of the shirt (in whatever yardage you need to make your top), something to line the back of the pocket with (half a yard or so should be enough), and scraps for the pocket binding. For the binding, you don’t want to use anything that is too thin/floppy, or it’s not going to sit right – try something with a bit more body, like ribbing or a cotton knit.

Don’t forget your pattern! You can download it here. The edges of the paper are part of the band pieces; the lines just didn’t transfer over during the scan.
Be sure the test square prints out to 4″x4″ (or 10cmx10cm, if you fancy). The stretch guide is there for the binding fabric – you just want to make sure the 4″ piece stretches up to the length provided (or else your binding will not fit in the cut-outs). If it stretches more or less, that is fine, but you will need to adjust your pattern pieces accordingly.

Paulie Pocket Top
Cut all your pattern pieces from the main fabric as normal. For this tutorial, I am using the Renfrew pattern. Sew the shoulder seams as instructed (you don’t *have* to sew the shoulder seams first, but I like to because it helps with pocket placement – you can pull the shirt over your head and double-check in the mirror).

Now push the back of the shirt out of your way. We won’t be touching it for the rest of this tutorial.

Paulie Pocket Top
On the shirt front, measure on both sides the distance from where you want the bottom of your pockets to hit, keeping seam allowance in mind. I usually go with 1 3/4″. Mark this with a pin.

Paulie Pocket Top
Align the bottom of the pocket template with the pin and cut from the front of the shirt only.
(pst! I know my template has different wording – while putting together this tutorial, I hadn’t decided on a ~name~ for my pattern embellishment yet ;))

Paulie Pocket Top
Give the pocket piece to your cat to play with, idk.

Paulie Pocket Top
Cut 2 pieces of pocket ribbing, using the pocket band pattern piece.

Paulie Pocket Top
Fold in half lengthwise, wrong sides together, and press.

Paulie Pocket Top
Pin the pocket band to the pocket opening on the outside of the shirt, matching raw edges, notches, and ends. The pocket band will be smaller than the pocket opening – this is good, we are going to stretch that band to fit and give our pockets a nice curve. Do not overpin this – 3 pins is plenty.

Paulie Pocket Top
Start by anchoring one end of the pocket band to the pocket edge, and stop with the needle in the down position.

Paulie Pocket Top
Sew the band to the edge, stretching the band to fit as you go (don’t stretch the raw edge of the pocket- just the band! It’s much easier if you position it so the band is on top). Sew slowly and take your time. We ain’t in a hurry here.

Paulie Pocket Top
Once the band is sewn down, you can topstitch it on your sewing machine – using a twin needle or a regular ol’ zigzag stitch.

Paulie Pocket Top
You should end up with something like this. Ain’t that fancy! Let’s put a back to those pockets so our sides aren’t hanging out in the glory of the sun – unless you’re into that kinda stuff, eh, no judgement here.

Paulie Pocket Top
Measure from the bottom of the shirt front to about an inch above the pocket band. Mine is 9.5″, which is approximately how tall I need my pocket lining piece to be.

Paulie Pocket Top
Measure that same measurement from the bottom of your shirt front pattern piece and cut that from your pocket back fabric.

Paulie Pocket Top
Finish the top edge of your pocket back fabric – this is optional as we all know jersey doesn’t exactly unravel, but it’ll make the next step a little easier 🙂

Paulie Pocket Top
Lay the shirt front over the pocket lining piece you just cut, matching all raw edges. Pin along the pocket openings and shirt bottom to keep everything in place.

Paulie Pocket Top
Now, using your fingers to feel the edge of the top of the pocket lining underneath, carefully pin across the front of the shirt so both pieces are pinned together.

Paulie Pocket Top
Flip back periodically to make sure you catch both layers.

Paulie Pocket Top
Topstitch (again – you can use a twin needle or a zigzag) along the line you just pinned. Baste the side and bottom edges together.

And that’s it! You can go ahead and sew your shirt together as instructed by your pattern – treat the pocket-ed front as one piece.

Yay for embellished shirts!

Paulie Pocket Top

Paulie Pocket Top

Paulie Pocket Top

Special shout-out to this awkward picture:
Paulie Pocket Top
No idea why I look so emo here haha

Paulie Pocket Top
There! That’s better 😀