Completed: Ooh La Leggings

23 Aug

Leggings are one of those types of clothing that have always mystified me. What is their appeal? Why do people insist on treating them as pants? Don’t they have enough decency to cover their asses, for fuck’s sake?

Ooh La Leggings & Coppelia Cardy

And yet, here I am, posing in leggings-as-pants, with a nice dose of cameltoe to boot. The things I do for you guys.

Ooh La Leggings & Coppelia Cardy

Haha in all seriousness, though, I don’t actually plan on wearing them out in public without my ass being covered – the fabric is too thin, it’s practically transparent as far as I’m concerned. I wasn’t sure how to treat these pictures – since, if I did cover the top of them, it would kind of cover everything and defeat the purpose of even taking the pictures, yeah? – so in the end, I took one for the team and here I am baring my ass on the internet. Don’t judge me.

Ooh La Leggings & Coppelia Cardy

Anyway, back to what I was saying. Leggings! I never got their appeal. Why not just wear… tights? I mean, if you’re gonna wear socks anyway (my feet are always cold, I like the multiple layers). But I gotta say, these Ooh La Leggings from Papercut Patterns were REALLY intriguing to me. They look so cozy and comfortable – and the model just looks super glamorous. Or maybe it’s because she’s gorgeous, I don’t know, either way, it got my attention.

Ooh La Leggings & Coppelia Cardy

The pattern is one of those deceptively simple patterns that offers a bit of a kick with the finished piece with all the interesting seaming – front and back yokes and seams down the front and backs of the legs. It’s very easy to put together – I can get these done in a couple of hours, from cutting to hemming – and it doesn’t require a lot of knit finesse or even fitting to get everything looking good. Only 5 pieces, a self-encased elastic waistband, and a quick pintuck of the front leg seams (or leave it off, see if I care) and you’ve got a pair of leggings that has a little somethin’ somethin’.

This is actually my second pair of Ooh La Leggings… I made another pair a couple of months ago, in red rayon knit. I never bothered to take photos (again, I wasn’t sure how to go about modeling them), but I can assure you that they get worn frequently. They are SUPER comfortable and they’re red!

Ooh La Leggings & Coppelia Cardy

I cut the smallest size – the XXS – and took about 4″ off the hem. I should point out that the waistband hits very high on these – above the belly button.

Ooh La Leggings & Coppelia Cardy

The grey fabric is a lovely merino wool, straight from New Zealand. Katie sent me a big, gorgeous stack of this shit earlier this summer, and I’ve been hesitant to cut into any of it because I didn’t know what to make with something so special! Leggings, I think, are a good choice – I can layer them in the winter when I’m biking, or wear them as loungewear.

Ooh La Leggings & Coppelia Cardy

If you’ve never used merino wool, let me be the first to tell you that this stuff is AWESOME. It’s soo soft and warm, and you can wash and dry it like normal in the machine! It doesn’t slip around while you’re cutting it, nor do the edges roll up when you’re sewing it. There is a good elasticity and stretch recovery as well. The fabric of the gods, basically!

Ooh La Leggings & Coppelia Cardy

The only drawback (which I don’t consider a drawback, since I don’t wear these as pants!) is that this stuff is a little thin. Thin enough where you can see everything under my leggings – including my panty lines (hey, at least you know I’m wearing undies amirite) and all the muscles in my legs. I was a little hesitant to post these pictures because I don’t think they’re terribly flattering – are my thighs really that big?! – but, you know, whatever. Them’s my legs and that’s just what they look like.

Ooh La Leggings & Coppelia Cardy

I also made my top, do you like it? The pattern is the Coppelia, and if you’re keeping track here you’ll know that it’s my third one (others are here and here). For this one, I sized down to the XXS and lengthened the bottom by 2″. I also shortened the neckband because it was gaping a bit, but I think that’s my fabric choice. Speaking of which, this is some type of rayon knit from Mood Fabrics, and it’s really weird. It feels like a cheap polyester, but it’s definitely rayon (I burned it and everything). Also, it’s kind of see through, despite being a bit thick. So weird!

Anyway, whatever, white wrap top/good layering basic.

I just realized you can totally see a mosquito on my chest in this picture. HAHA. Omg I hate mosquitoes.

Ooh La Leggings & Coppelia Cardy

Consider me a leggings convert! I still don’t know if I would willingly leave the house without something covering my ass (I say this as I have posted pictures of myself ON THE INTERNET with my ass out, and everyone knows the internet never forgets), but maybe with a thicker fabric, I could see it happening. I think these would be really wonderful in a ponte knit. You know I’m gonna try it!

Ooh La Leggings & Coppelia Cardy

Did I show you how good my ass looks in these? Because… look at how good my ass looks in these things.

Completed: The Anna Dress, 1

19 Aug

Thank you so much, everyone, for your overwhelming support this past week. My recovery is going well (although I’m still not clear to lift anything that weighs more than 10lbs – that includes my CAT! HAHA! Oh well, I’m sure she’s happy about that, anyway), and I’m back to work and back to… sewing!! Yeah!!! Well, sort of. I promised myself I would take it easy (aka: laying, knitting, snoozing) until Friday, per Doctor’s orders, and only then could I get back in the sewing room. Lucky me, I woke up on Friday morning with a fucking cold! So, needless to say, the past few days have been a haze of cold meds and even more snoozin’. I’m functioning, albeit slower than normal.

But hey, look, I have a make to share with y’all today!

Anna Dress - Seersucker

Ok ok, before you flip your shit on me – I finished this dress before the surgery! Haha! I actually wore it to work the Friday prior; it’s just taken me this long to take photos. Speaking of which – if I look a bit extra happy in these photos… cold meds. That is all.

Anna Dress - Seersucker

This is the Anna Dress, from my friends, the babely babes, over at By Hand London. I’m no stranger to the patterns from this line – I can proudly say that I have sewn every single one of ’em, yeah! – but I gotta say… Anna is my favorite. Based on everyone else’s gushing about this particular pattern (here is where I was planning on linking my favorite Annas, but again, cold meds. If you made it, linky up in the comments pls!), I’m not alone. Anna is a WINNER!

Anna Dress - Seersucker

Am I allowed to tell y’all that I actually saw this dress waaaaay before I was announced to the hoardes of blog readers? Truth! Elisalex showed me a sneaky peeky while she was in Nashville back in May! I have been dying to get my hands on the pattern ever since! I love my short version, but I am SO EXCITED to try out that thigh-high split, peeps.

Anna Dress - Seersucker

I opted for a very simple version for my wearable muslin, in a classic seersucker from Mood. This is one of my last pieces of fabric from the NY stash, btw. I’ve held out on making this up because it’s a stretch cotton, and we don’t play well together. But I think stretch cotton works fine with this type of dress, as long as you’re ok with how the bodice looks in a slightly structured fabric. I like it!

Anna Dress - Seersucker

My Anna is the short version, with the slash neckline. I cut the size 2/6 and shortened the skirt about 5″. I found that the back was rather large on me – I just pinched out the excess along the zipper line. Oh, I also put in a lapped zipper because I didn’t have any invisibles on hand. Sue me!

Anna Dress - Seersucker

Since my fabric is stretchy, I stabilized the neckline facing with a bit of non-stretch cotton. To do this, I just cut a second facing piece from the cotton, sewed it to the seersucker facing (as you would a sew-in interfacing) and applied the facing as normal. This keeps the neckline nice and smooth and secure!

Anna Dress - Seersucker

The pattern itself was an absolute delight to put together. There’s a reason why this pattern has so many fangirls – especially considering how short a time it’s actually been available on the sewing market. There aren’t a lot of pieces, and what is there is super simple to put together. I think this would make a great beginner pattern, whether you’re a beginner at sewing or a beginner with a a certain type of fabric (meaning: yes, you should make this up in silk!)

Anna Dress - Seersucker

I should probably tell you that I already have a couple more versions planned. Better get used to this dress! Ha!

Anna Dress - Seersucker

Oh, one more thing before I tear outta here… our giveaway winner!

wins2

There were 230 entries in all (accounting for duplicates), and you ALL made me hungry (special shoutout goes to Marchelle who linked me to this lemon cookie recipe from Martha Stewart… I will have y’all know, I made this yesterday and they are delicious aaand I’ve already eaten about half of them, ha!). Random Number Generator sayssss-

wins1

Louise is the winner of the Sweet Dress Book! Yay!!

Um, will someone kindly tell me what spotted dick is, though? Here in America, that means something TOTALLY different and I’m afraid to google it…

“How Do You Find The Time To Sew So Much?”

14 Aug

One question I get asked a LOT – in comments, emails, tweets, real-life conversations, you name it – is how I manage to churn out all these garments at a seemingly rapid rate. Apparently, “Uhhh, idk I guess I sew fast lol” isn’t a satisfactory answer, and after one too many gentle nudges from various people, I think it’s time to unleash a discussion post!

happy dayz

Contrary to popular belief, I do not have any of the following:
– A Vampire’s need for sleep, or lack thereof
– A collection of enslaved sewing elves tucked away in my sewing room
– A machine that stops time
– A job that lets me sew all day (but, I mean, if you want to offer me one…)

Guys, I work a full-time, non-sewing related job. I go to bed at like 10pm. I don’t have kids or a particularly needy boyfriend, but I do hang out with my friends, I ride my bike, and sometimes my after-work schedule means I don’t sew at all for an entire week. So where does the time come from?

Well, for one, I do sew fast. I’m sorry, but I just do! I’m very comfortable with my machines and most techniques I use, which means a lot more sewing and a lot less unpicking. I also just tend to do everything fast (people are very amazed when I join them for lunch and inhale my sandwich in less than thirty seconds), so don’t be discouraged if you’re not ol’ Speedy at the machine.

queue

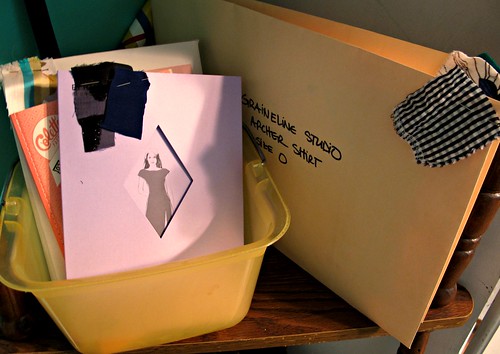
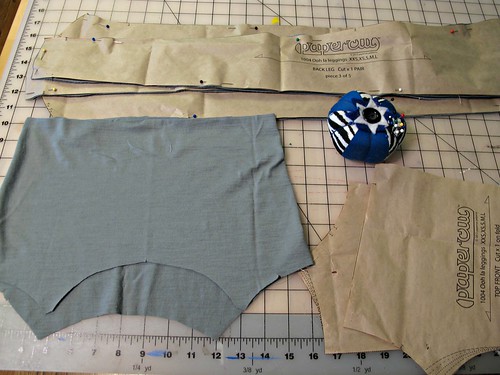
Another big one is that I always have something in the works – once I finish a project, I immediately start the next one in my queue. The queue changes around based on current needs/wants or if I get a shiny new pattern that week… but the point is, I have a queue. Speaking of which, I found the easiest way to keep the queue in check is to pull out the patterns I plan on sewing and store them separately from the rest of my stash. On the front of each envelope, I pin a little swatch of the fabric I plan on using (see above photo). Much easier than yanking off the whole yardage and piling it on the table with the patterns… which was what I was previously doing. Anywaaaay, back to what I was saying – I literally work projects back to back to back. This means that during weekends where I have a couple marathon seshs in a row, I could easily end up finishing 2 or 3 projects – or even more, depending on how simple they are (knit tshirts, I’m looking at you). Obviously, I don’t want to post them all in a row – I think you guys would get real bored of my face real fast – so I try to spread them out a little. This is not always the case when I’m posting like I’ve got a fire under my butt, but a lot of times it is. Sometimes those Finished Objects are kind of old!

I know this is a sewing blog, but I want to point out that I also do this with knitting. What can I say – I really love knitting, I don’t want to *not* have a project in the works (same with sewing)! Not having any creative downtime may make me sound like I’m working some kind of bizarre sweatshop with horrible self-imposed deadlines, but honestly… I just really love making things, and I feel lost if I don’t have a WIP that I can tinker around with at any given time.

So anyway, here are some tips that will [hopefully]help you accelerate your sewing progress.

sewing room

#1: Have a Dedicated Sewing Space

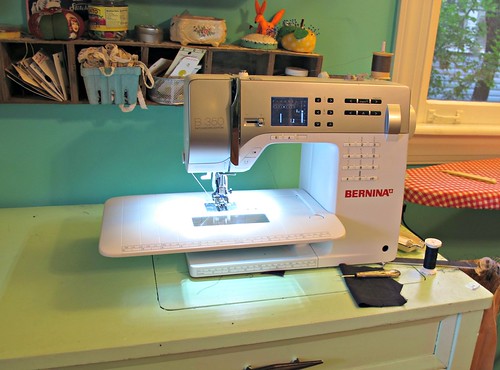
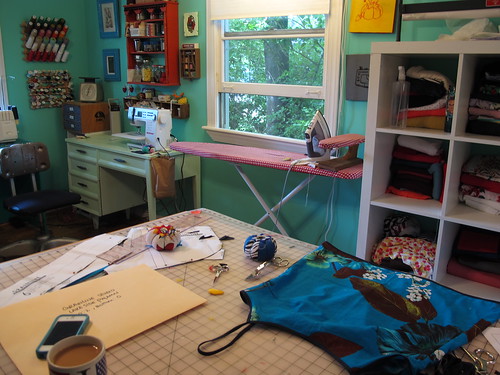
I realize this leaves out a lot of people as not everyone can afford to set aside an entire room – or even an unused corner – dedicated only for sewing. That sucks! I’m lucky that I have the space (and I make enough money/live in an inexpensive enough area where the second bedroom is totally a dealbreaker when looking for places to rent), but I know not all of y’all have that kind of luxury. However, this is single-handedly the #1 reason why I can get so much done – I don’t have to spend half my time setting everything up and then later taking it down. My machines have their own tables and they are always plugged in, my ironing board never gets folded and stored, and my cutting table does not work part-time as a dining room table.

stash

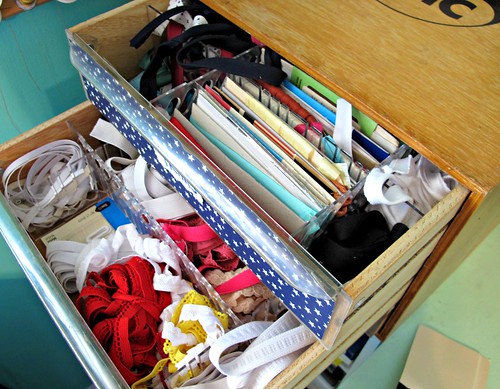
Having a dedicated sewing space means that I can indulge in my favorite part of sewing (other than the sewing itself): STASHING. Wooohooo I love my stash!! Actually, my stash has shrunk considerably this year (this happens when you stop adding to it and start sewing from it!), but, it’s still a stash. My pride and joy when it comes to stashing isn’t actually my fabrics, though – it’s my stash of notions, trims, interfacings, linings, and all those other little sewing goodies that make you stop in the middle of a project because you don’t have one on hand. I won’t say I have enough stuff on hand to open a store, but I do have a lot. You don’t have to break the bank to build up a supply – just buy a little extra something or two when you go to the fabric store. For a few months, I concentrated on serger thread – I bought 4 spools of whatever color every time I stocked up on fabric. Eventually, I had every color of the rainbow – without having to drop mad $$ on it all at once. Most of my trims and zippers come from ~vintage~ stashes – the flea market, thrift stores, yard sales (I have friends and parents of friends who keep an eye out for me, too!) – which, if you’re not shopping on Etsy, old sewing supplies are practically given away. I have so much shit in my stash, I can make entire outfits without leaving the sewing room to stock up on something.

Obviously, pointing this out is not going to magically grant everyone access to their own sewing room (I wish!), but I do want to point out that this does give me quite a sexy leg up on the competition.

happy dayz
#2: UFOs Don’t Exist in My World

Ah, UFO – or, Unfinished Objects (altho if you want to talk about aliens, I’m down for that too), the bane of most sewer’s experiences. How many times have we started something, only to shove it in a box when something with a little more sparkle catches our eye? Guys, I know it is tempting to embrace your magpie tendencies – but it is murder on your productivity! Starting up a project takes precious time – from determining your chosen pattern and fabric, to cutting and marking the pieces, to all the boring pre-work like staystitching and fusing interfacing… and we haven’t even gotten to the actual construction! What is the point of wallowing through all that, just to set it aside and start the process over again? Not to mention, I’ve noticed a lot of people who tend to pile up UFOs rarely stop at just one.

To me, UFOs just contribute to wasting time. It’s one thing to set something aside if it’s frustrating you, but you shouldn’t make a habit of picking up a new project and starting over, because it can quickly get out of control. I made peace with myself a long time ago and decided to eliminate the UFOs in my sewing room and finish every.single.project, even if it killed me. Sometimes it does make me want to destroy things – but I soldier on and finish that fucking garment. Occasionally, it actually speeds me up because I’m so desperate to finish and move on to the next shiny object. So maybe in a way, it’s kind of bad for my productivity since I occasionally will find myself cutting corners in a desperate attempt to just be done. But on the flip side – I don’t have those half-sewn pieces creeping around my sewing room (is it just me, or do they nag at you and make you feel all stressed and sad? Say it’s not just me!), and I have a finished object to show for it! Yay!

muslin
#3: Make a Muslin

I know, it’s like toootally contradictory. When you’re short on time, ain’t nobody got time for a fuckin muslin. This is NOT even true and all of us need to collectively reprogram our brains, like, now.

Besides obviously avoiding the trauma of spending your time on something, only to discover it doesn’t fit – muslin-makin’ is also good for increasing your speed, as it will give you a chance to practice a little on the garment before you start hacking into the good stuff. This means you will spend less time pulling your hair out over the instructions – because, dude, you already did this! – and less time ripping out your seams when you inevitably made a mistake due to sucky instructions. I also feel pretty confident, post-muslin, in that I know the garment will fit (since I basically already tried it on), which means less futzing with the fit during construction-time. Of course, I do fit-check throughout my sewing process (and you should too!), but it’s one thing to put half a bodice up against your chest to ensure things are coming along smoothly, and quite another to suddenly discover you cut the wrong size… halfway through.

One point I do want to make is that muslins do NOT take a lot of time to put together, especially if you speed up the process. Unless the skirt is something that needs to be fitted, I generally only sew the bodice. I do include a sleeve, but only one. I sew all my seams with a long stitch so I can quickly rip them out if I need to (and it pushes through the machine faster). I don’t bother with facings, collars, or buttons, although I do baste in a zipper. Also, this should go without saying, but once you make a muslin and get your fit down, that’s it! You can churn out multiples of the same pattern and skip the muslin.

happy dayz
#4: Sew Whenever You Have A Chance

I’ll admit, this is probably gonna be real rough for those of you who don’t have a dedicated sewing space 😦 But I do think it’s important to maximize your time – so what if you only have 20 minutes to spend cuddling your sewing machine? You could use that 20 minutes to stay stitch some curved seams! Mark your pattern pieces! Thread your machine and decide what buttons you want to use this time! Skip ahead of your pattern and assemble the collar! The point is, there is SO MUCH that you can do in small chunks of time, so don’t waste it by subscribing to the thought that you *only* have x amount of time to do anything – think of it instead like you have enough time to sew your bodice darts, or prepare your sleeves to get set in, or whatever.

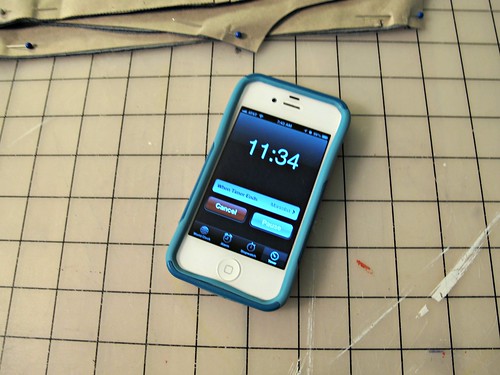
This is pretty dorky – and y’all are totally going to make fun of me for this – but I actually get a lot of my little sewing bursts done in the morning, before I go to work. I don’t necessarily get up any earlier than I need to (although sometimes I do, ok, sorry I’m a dork!), but sometimes getting ready doesn’t take as long as I need, so I try to utilize that time in my sewing room instead of just chasing Amelia around the house for 20 minutes. I set a timer on my phone so I KNOW when I have to drop everything (the timer is important, you don’t want to get carried away and make yourself super late!), and I actually listen to it when it goes off. I don’t try to rush myself – if I only have 10 minutes and I only get some stay stitching done, who cares? That’s one less seam I have to stay stitch when I get home, awesomeee!! Which brings me to my last point…

cat
#5: Enjoy It!

I treat sewing the same way I treat a bicycle ride – I’m doing this because I enjoy it, not because I’m in a hurry (if I was in a hurry, I’d take my car. Or shop at H&M. Whatever!). When I catch myself trying to rush through the process, I force myself to stop and slow down. Sometimes this can be hard because I’ve basically ingrained it in my head that I HAVE to post new stuff every week, and oh god people are going to stop reading my blog and the world will end and ughhh… but, you know. That’s not true. I’m sewing because I love the entire process, not just the finished piece (although that’s a nice bonus, let’s be real). In my experience, rushing only leads to stress, tears, and a lot of fuck-ups. Stop, take a breather, and just slow it down. It’s fine. I promise.

Anyone else have protips to share for increasing your sewing output? I’m still stuck on the couch and I’m bored as hell… let’s have a discussion!!

Review+Giveaway: Sweet Dress Book

12 Aug

Laurence King really has cornered the market on these cute little sewing books, haven’t they?

Sweet Dress Book

Their newest offering, Sweet Dress Book by Yoshiko Tsukiori, is just as saccharine as the title suggests. Beautifully photographed (guys, there is a FLUFFY CAT in like half the pictures omgomg) and illustrated, the book includes 6 patterns and enough variations to make a total of 23 different outfits.

Sweet Dress Book

Each pattern incorporates a different technique – french sleeve, no darts, straight-cut, pants and playsuits, raglan sleeve, and with darts – and has three variations to make a full range of clothing. This being a Japanese pattern book, the instructions are laid out differently than standard sewing patterns – there is a list of steps and a numbered illustration (or two, or three!) to show how everything goes together. I don’t think the patterns in this book are nearly as complicated as the ones in Drape Drape – a confident beginner should be able to navigate their way through these.

Sweet Dress Book

While the patterns in the book aren’t necessarily my cup of tea, style-wise, it’s still really fun to flip through for inspiration. The model is freakin gorgeous and I love the way the letters are illustrated to look like ribbons. Sweet, right? Oh, and the book also includes a recipe for cupcakes. If anything, I will definitely be testing that one out… for science.

Sweet Dress Book

Before you go nuts with the credit card, I should mention this book isn’t available to the public just yet. It will hit the market on 8/20!

Laurence King has generously offered an extra copy for one of you lucky peeps, so let’s have a giveaway! If you’d like to enter to win your very own Sweet Dress Book, simply leave a comment on this post and let me know your favorite sweet. This giveaway is open worldwide and I will close the comments next Monday, 8/19, at 9 AM CST.

Good luck!

GIVEAWAY IS NOW CLOSED

Completed: Lakeside Pajamas

9 Aug

Hey look! I made pajamas!

Lakeside Pajamas

I feel kind of weird posting pictures of myself modeling pajamas, but eh, let’s roll with it. At least I kept my shoes on 😛

Lakeside Pajamas

These are the Lakeside Pajamas, the newest offering from Grainline Studio. The pattern was given as a gift to me from Carla, yes, the same person who have given me multiple patterns. Thank youuu, Carla, you are the best! I never would have thought to make myself sleepwear (other than a slinky slip), but now I want a million sets of these.

Lakeside Pajamas

This is a great little set, and it’s SUPER comfortable. The shorts are loose with an elastic waist, and the top is floaty and cool, with some interesting detailing so you don’t feel like sewing it is a total snoozefest (pun intended, maybe?).

Lakeside Pajamas

Isn’t this fabric beautiful!? I’ve been hoarding it for years, waiting on a ~special~ pattern. Part of what kept me from using it is that I barely had much it – about 7/8 yard – and the print is pretty large. Obviously, I was able to squeeze all my pieces out on that tiny yardage, but I had to make my bias tape with a contrasting fabric. I used the rest of my navy organic cotton sateen and ughhhh shit took forever. The pattern calls for 7 yards of bias tape (!!) and I only had small pieces, so I found myself cutting tiny squares to make continuous bias tape. I ended up using only about 6 yards, but be warned that I also made the smallest size in the shorts and the second smallest size in the top.

Lakeside Pajamas

Anyway, it was worth the effort because I haaate pre-made bias tape. It’s so stiff! This stuff is nice and soft and the color matches beautifully. Plus, it has that cotton sateen luster. Yummy.

Lakeside Pajamas

The pattern was surprisingly easy to follow. I had a small snafu with the shorts, but it was 100% user error (note: the front and back seams are not the side seams, Lauren! I basically made a huge circle of fabric and spent like 10 minutes trying to figure out the crotch seam until I realized I’d done goofed loololol. What was not lol-worthy was all the unpicking I had to do after that, wah!).

Lakeside Pajamas

I LOVEEEEE these shorts, though. They’re pretty low-rise (you can almost see my belly button; it’s right where the tank top hem is hitting). I am totally going to make a couple more pair for running and general house-lounging – they’re like the perfect 70s running shorts, except they’re not knit (although I think these would work beautifully with a stable knit, and that is something I am totally going to try). I really want to make a classic red with white trim.

Lakeside Pajamas

Lakeside Pajamas

I was a little hesitant at first to use my beautiful hoardy fabric on a pair of PAJAMAS, but I’m soo glad I did. I can actually wear these every day (or just one piece at a time), unlike my regular clothes – which means I get to look at the fabric all the time! Seriously, they are so pretty I want to hang them on the wall when I’m not wearing them 😉

Lakeside Pajamas

Lakeside Pajamas

Lakeside Pajamas

A big part of the reason why I decided to make pretty loungewear is because I am scheduled for a minor surgery on Monday. It’s not anything serious – hence the “minor” – but I am going to be in recovery for about a week. Including no work, no biking, no… sewing 😦 (we’ll see how long that lasts lolololol) (seriously, tho, I’m gonna plant my ass on the couch that whole time because I do NOT want to do this twice!). I bought myself the prettiest kelly green yarn and plan on knitting and watching lots of those ancient Egyptian documentaries that Landon hates! Oh god, this means I finally have a chance to watch the Great British Sewing Bee too!

With that being said, thanks to everyone who purchased something from my Etsy shop – combined with some aggressive saving, I think I have enough to pay everything off up front 🙂 SUCH a good feeling!

For those of you who were interested in taking local sewing classes taught by yours truly, obviously that’s on hold for a short time. I will be sending emails when I get my life figured out, ha. For those of you who are interested in taking a sewing class taught by me who are NOT local, I’m working on that too 😉

Lakeside Pajamas

Wish me luck! I’ll be around next week, but apologies in advance if I start talking painkiller-induced nonsense 😉

Completed: the Organic Hawthorn

7 Aug

First of all, thanks to everyone who voted for me in the Colette Hawthorn Contest – I somehow ended winning second place! Such a wonderful surprise, and do check out those other winners – because, guys, I’m not worthy.

With that being said, I love this pattern and I’ve already made a second dress.

Navy Hawthorn

I realized that my wardrobe was severely lacking some basic, work-appropriate, tattoo-covering clothing (we are fairly casual here at my office, but I think it’s good to have a few pieces that err more on the professional side should I need it for meetings or important clients dropping in), and a Hawthorn with sleeves pretty much fits the bill here.

Navy Hawthorn

It’s modest and sleek without being frumpy, vintage-inspired without being costumey. Win!

Navy Hawthorn

I am super happy with how it turned out, however, I am NOT happy with those bust dart points. I promise you they look 1000% worse in the pictures than they do in real life – according to these photos, I have two sets of eyes D: I resewed the dart tips more times than I care to admit – lowering them, raising them, tapering them more subtly – as well as pressing the everloving fuck out of them. No dice. Like I said, they’re not as bad in real life as they look here, but now I can’t stop staring at them oh god I’m sorry.

Navy Hawthorn

Anyway, dart issues aside – we’ve already discussed the pattern, so today we are going to talk about the fabric!

Navy Hawthorn

This is organic cotton sateen, from my pals at Organic Cotton Plus (my second review for this – they liked my my first review so much, they came back for a second round :P). I’ve not had much experience with cotton sateen – most of what I’ve seen has been the sort of fabric I shy away from. Think super shiny (if you like shiny, that’s totally fine, but personally I always feel like I’m wearing a prom dress!), too much stretch, and much too stiff for my liking. This stuff is NOTHING like what I described, though. Don’t let the boobie-eyes deter you; there ain’t much shine on this fabric, other than a spectacular luster that comes from high-quality cotton and a gorgeously deep pigment.

Navy Hawthorn

The fabric has a great drape – it just floats and creates the most lovely folds. It’s pretty lightweight, with no stretch, which makes it ideal for this pattern. And since it’s cotton, it’s super comfortable to wear. It also wrinkles like crazy, because of the aforementioned cotton, but I’m ok with a few wrinkles – I’d rather have wrinkles than pools of sweat from polyester!

Navy Hawthorn]

This is a great basic if you want to make something in a solid color but feel bored with the idea of, well, solid colors.

Navy Hawthorn

Both the buttons and the monogram are from the flea market. I think they both add something special to the dress, while still keeping it office-appropriate.

Navy Hawthorn

I love the monogram! It’s actually metal, and has sharp bars at the back that pierce the fabric and bend to keep it in place. Which means it’s never coming off this dress… except to wash, I guess. I’m not sure how old it is, but it’s pretty sweet! I’ve been hoarding it for a few months now, waiting on the perfect shirtwaist backdrop.

Navy Hawthorn

Soo, as you can see here, I tried splitting the dart on this version, following the tutorial at the Coletterie. I’m not totally happy with how the darts turned out – they are too close together at the top (and I suspect that, while they likely aren’t 100% of my nipple-eye problems, they likely contribute to it, ugh). I didn’t realize how they looked until after I’d put the bodice front together- and cut up all my fabric. Shoulda made a muslin, shoulda woulda coulda.

Navy Hawthorn

Oh well!

Navy Hawthorn

Quick, look at this! Shiny!!

Navy Hawthorn

I trimmed the hem with matching rayon seam binding, and catch-stitched it down for a clean finish (and yeah, that took forrrever haha). I’m mostly including this picture because it really shows the color best. It’s so rich!

Navy Hawthorn
Navy Hawthorn

The dart points aren’t as prominent here – this is much more accurate of how they look in real life. Still… how do I fixxxx thiisssss????

Navy Hawthorn

Navy Hawthorn

I think this dress will end up getting a lot of wear this fall! I can’t wait to pair it with future Kelly Green cardigan – navy and green is one of my favorite color combinations at the moment. I better get knittin’!

Completed: The Marion Cardigan

5 Aug

I should probably first confess that this cardigan has been a finished object for over a month now. Oops! In fact, I’m nearly done with my next knitted project. It’s just hard to bring myself to take photos of a wool, worsted weight cardigan when it’s 95* outside, ya know?

Marion Cardigan

But anyway, here she is – my newest cardi and and Andi Satterlund‘s newest pattern offering, the Marion!

Marion Cardigan

This was SO MUCH FUN to knit, guys!

Marion Cardigan

Marion is a lovely little cropped, 3/4 sleeve cardigan, knitted seamlessly from the top-down in almost entirely stockinette. There is some fun cabling around the v neck to add a bit of interest (both in looks and during the actual knitting, ha!), but it is an easy, fast knit. Well, for me, anyway. I finished it in just under a month!

Marion Cardigan

I think everyone knows about my love affair for Andi’s patterns, but let me just repeat – I LOVE her patterns! I love the construction, I love the fit, and I love the finished pieces! Every time she releases a new pattern, it immediately goes into my queue.

Marion Cardigan

Marion Cardigan

This is a straight size small, with no alterations. I did size down my needle to a 6 (I find that I knit pretty loosely!), but everything else in the pattern was knitted as written. Going forward, though (because I WILL knit this again… maybe in a lovely grey alpaca? Ooh!), I will probably adjust the length of the sleeves. They hit me in a weird spot when they’re not scrunched, I guess I have short arms? Whatever, not a big deal.

Marion Cardigan

The yarn is from Sonja, a little destashing prezzie she gave me while I was in NY. I actually have a LOT of this stuff left over… I think the sweater took maybe 6 skeins, and she gave me 10. I may have to dream up a matching hat and scarf, yeah?

Marion Cardigan

The yarn is Knit Picks Wool of the Andes. I found it very similar to my beloved Cascade 220, but with a little less pilling. I just love this color – it’s the perfect not-quite-cranberry-not-quite-harlot red. It’s also VERY warm. This will be nice in the winter, I guess!

Marion Cardigan

Oh, who am I kidding – it’s fucking freezing in my office these days. I’ve been wearing this a LOT!

Marion Cardigan

The only thing that was a bummer about this pattern is that the cabling looks really weird until it’s actually blocked. That’s why I didn’t show any progress shots – the cables were all lumpy and weird and it just wasn’t pretty enough to photograph! I did give this a proper block – soaking and all – and the cables bloomed out and now it’s basically perfect.

Marion Cardigan

I’m so happy with how they turned out 🙂

Marion Cardigan

There are teeny cables on the sleeve ribbing, too!

Marion Cardigan

Here is how it looks unbuttoned. I don’t think I’ll ever wear it like this – I like to keep my stuff closed – but I thought I’d show y’all anyway. You probably noticed that I didn’t stabilize my button bands with petersham this time. I was planning on it – I even bought some cranberry red petersham ribbon – but the way the buttonband is constructed was going to look really weird with ribbon sewn on half of it. Anyway, I tried the sweater on and the button holes don’t gape at all, so I just sewed my buttons directly on there and called it a day.

Marion Cardigan

Also, here is a picture of Amelia judging me.

Marion Cardigan

And that makes 10 sweaters for me! Fuck yeah, I love knitting 🙂

Pattern Testing: The Saltspring Dress

2 Aug

I looove pattern testing, but what I don’t love is the part where I have to keep my mouth shut about my project until the pattern becomes officially available to the rest of the world.

Well, Tasia just released the Saltspring Dress, so I guess I can talk now! YAY!!!

Saltspring Dress

Here’s another pattern that is quite a bit outside my ~personal style comfort zone~ – that blousey look is not something I normally go for – but I actually like it a lot, surprisingly! It’s very comfortable and cool for summer, while still managing to look pulled-together (or, eh, as pulled-together as one can look in FLORAL ANIMAL PRINT lolz).

Saltspring Dress

This is view A, size 2. I didn’t make any significant changes to the pattern – since I was testing it, I wanted to try it straight out of the envelope. I’m happy to say everything came out great, with no alterations, although I should probably trim down those tie straps a little 🙂

Saltspring Dress

The construction of this dress is very interesting, and Sewaholic’s pattern design chops really shine here. There are actually two layers to this dress- an smooth, semi-fitted underlayer, and the top blousey layer. The underlayer is shorter than the top layer, so that it “blouses” itself without needing to be tucked in. It’s kind of genius! There is elastic at the waistband, so this is the perfect dress to wear while eating a big meal 😉

Saltspring Dress

I’m wearing a belt with this dress because I personally don’t like the look of exposed elastic casing, but it’s not needed to get the bloused look. The dress does that by itself!

Saltspring Dress

Isn’t this fabric so fun? I’ve actually had this in my stash for a few years… Morgan’s grandmother gave it to me after a giant destashing effort on her part. I’m not completely sure of the content – based on a burn test, I believe it is rayon, but it also has a weird crinkly texture and a slight stretch – but what I can say is that woman has some FINE taste in fabric, so I’m fairly certain this is some nice stuff. It sure feels nice, anyway!

In retrospect, I don’t know if this fabric was truly my best choice, because it doesn’t drape as well as it needs to. The top of the dress doesn’t exactly look structured, but it’s not as flowy and drapey as it needs to be. But, you know, I think the print actually makes up for it a bit 🙂 Hard to be mad at the world when you’re wearing this kind of awesome island tiki type shit, yeah? 🙂

Saltspring Dress

The only “drawback” (if you can even call it that) to this pattern is that it does not look flattering AT ALL until you actually put in the zipper and the elastic. I don’t know how many of y’all try stuff on as you sew it (I do – constantly – which is why I mostly sew in my underwear 😉 haha), but I just thought I would point that out. Obviously it works out in the end, but I was a little terrified for a minute there 🙂

Saltspring Dress

Anyway, this is a great pattern – very easy to make up (perfect for beginners!), comfortable to wear in the summer, and I think you can really try a lot of different options with the design. Personally, I’d love to try this up without the overblouse, just a slim-fitting, spaghetti strap top with a flared skirt. Ah, that sounds so perfect right now!

Want a copy of your own? You can buy the Saltspring here!

Vogue Patterns 2013 Fall Collection

30 Jul

Yaaaaay, new Vogue Patterns are in!

This batch wasn’t too bad – the patterns themselves aren’t necessarily terrible (for the most part), but the fabric choices still give us something to giggle over. Which brings me to to my next question – do you think Vogue is onto me? Are they purposefully giving us lols at this point?

Whatever, don’t stop! We like the entertainment!

V1366
Vogue 1366
I don’t have anything to snark about this one, really. Questionable fabric choices aside, I would wear the shit out of those pants.

V1361
Vogue 1361
I like this IN THEORY, but I also keep noticing that the tucks are not evenly spaced and that back seam looks less bias and more crooked and it’s making my eye twitch.
Oh god, I just realized the collar is totally lopsided too. I take back every positive thought I had about this dress.

V1358
Vogue 1358
The style lines on this dress are not half bad (although the drapey poof sleeves need to go), but whyyyy would you sew this up in shiny purple? She looks like she’s melting.

V1362
Vogue 1362
I love the waist pleating on this dress, just not that bullshit going on at the neckline. Wtf is the deal with that, anyway? It looks like Vogue 1340, except deflated.

V8930
Vogue 8930
Vagina coat, take two.

V8934
Vogue 8934
Ok, I know this is a ~Marcy Tilton~ and crazy fabrics are the whole point, but I’m hoping we can all agree that whatever that shiny reflective shit they have going on is a tragedy, and needs to be stopped.

V8919
Vogue 8919
Dolman sleeves with a faux boob-minimizing overalls. Ooook.

V8919a
Oooh, bonus shiny fabric! Gah, where do they find this stuff?

V8918
Vogue 8918
Vogue: Featuring necklines that only a mother could love.

V8921
Vogue 8921
I’m guessing this is supposed to be a replica of Princecess Kate’s Engagement dress, but the fit and shape here are all wrong. They could not have made this look more unflattering if they tried.
On a side note, one of the fabric requirements is Silk Spun Knit!? Whatever that is, I want me some!

V8922
Vogue 8922
This is a really cute dress, but woof at those fabric combinations.

V8927
Vogue 8927
PROTIP: If you’re going to put your model in a shirt that’s too big, don’t make the sleeves sheer lace that we can see through.

V8924
Vogue 8924
The best part of this picture is the shit in the bottom right corner. What is going on over there? Is the building falling down around her? Should we send for help?

V8926
Vogue 8926
I think we need to have a shiny fabric intervention.

V8936
Vogue 8936
This is… ok. It looks striking in the pictures (or is that just the model?), but I don’t know any woman who would wear such an exaggerated and long peplum. The back must be pushing a good 10″ away from her ass.

V8936a
Vogue must have gotten a discount on shitty pleather this season.

V8935
Vogue 8935
Boring.

V8939
Vogue 8939
Sister Wives: The Business Edition.

V8941
Vogue 8941
No Vogue release would be complete without the addition of an Ugly Hat.

Oh, look, I saved the best for last…

V8942c
V8942d
Vogue 8942
I don’t know about you, but it’s high time we had frog and owl purses in our respective wardrobes.

V8942b
That frog is just like, “… nope.”

V8942a
Oh god, I just noticed that there is a nest with eggs in the background of the owl picture. I’M DYING.

Completed: A Stripey Belladone

29 Jul

Oh noes, you guys – I’m running out of fabric from the huge haul I bought at Mood in NYC. Can you believe it? I only have two pieces left! What happened! WHEN DO I GET TO RESTOCK?

Belladone Dress

I am happy to say that the striped cotton I bought finally found a home in a new dress. Yay!

Belladone Dress

I actually had different plans for this fabric, but then Eléonore sent me the Belladone dress pattern and my plans immediately changed. Stripes are PERFECT for this dress – you have so many fun stripey placement options! And y’all know how much I love playing with stripe direction 😉

Belladone Dress

I can’t even begin to tell you how happy I am with how this dress turned out. Sometimes when I’m going crazy with my stripe (or plaid, for that matter) directions, I start to wonder if I’m going to end up with a giant clusterfuck in the end. Fortunately, I think this one turned out pretty perfect – there’s plenty of interest, but it won’t make you dizzy if you stare at it too long!

Belladone Dress

My Belladone is a size 34, with no alterations except a few tucks at the back to get it to lie flat (I’ll talk more about that in a minute). I went with the invisible bias trim – which is topstitched in white – as I didn’t want a bunch of contrast competing with the stripes. The upper back pieces are cut on the cross grain because I liked that stripe placement better, and the waistband is cut in four pieces on the bias, and then pieced together. I also interfaced the waistband because I was afraid the bias would distort over time – it’s pretty fitted. Otherwise, the dress is basically sewn straight out of the envelope -length and all!

Belladone Dress

I love this dress! Look, it has pockets!

Belladone Dress

And a cool back cut-out!

Belladone Dress

Belladone Dress

The stripes made some cool chevrons down the sides, ha.

Belladone Dress

This is a fairly simple pattern to make, but be warned that the back may take a little finessing to get a perfect fit. You want it to lie perfectly flat – no gaping! I’ve noticed that most reviews tend to not need any adjusting, so I think I may be a bit of a rarity in needing it – I also have a pretty small back (I wear a 30 band, fyi), so most stuff is big on me anyway.

Belladone Dress - Adjustments

I made a muslin of the bodice – zipper and all – and pinned out the excess at the upper back when I tried it on. Obviously, this is kind of difficult to do without assistance – but it’s totally doable, I mean, I did it. I just kind of eyeballed it, took the top off, pinned at my guesstimate, and tried it on. Over and over (ok, it was like twice, haha). A dressform would be helpful for this, but mine has a bigger back than I do sooo I had to do it the hard way. Anyway, once I pinned out my excess (and then sewed up tiny darts and tried it on a final time), I measured the amount I needed to take out.
(Also, I just realized I was drinking out of an American Pride coffee mug while working on a French pattern. lolz.)

Belladone Dress - Adjustments

To make the adjustment to your pattern (since you don’t want darts in that piece, you want it nice and smooth), just slash right up the middle of the piece and leave a little hinge. Overlap the edges by however much you need to take out (I think mine was 1/4″, not much) and then tape it down. Make sure the line is smooth and straight, and you’re done!

I also ended up overlapping the upper back pieces an additional 1/2″, as well as taking about 1/4″ out of the center back seam (along the zipper).

Belladone Dress

The back looks pretty good, though, yeah?
Ignore the lump at the waist of the zipper, I had a lot of bulk there, so the zipper doesn’t want to lie flat! Wah!

Belladone Dress

Stripessss!! 😀

Belladone Dress - Necklace from Chatter Blossom :)

Oh, and check out my new necklace! This is from ChatterBlossom, my newest sponsor! Jamie has some of the prettiest reclaimed vintage pieces I’ve come across (and enviable hair to boot, I mean, ugh, that’s EXACTLY what I wanted mine to do when I cut it short!!), and I love that she gives each of them a story. I picked a couple of pieces from her shop – and that was hard, there are soo many things in there that I need – and I am so happy with what I got. This necklace is Egyptian, circa 1880-1918. I’ve really gotten sucked into Egyptian history lately (the pyramids! Nefertiti! The Spinx! Aliens!! lol just kidding on that last one :P), so I’m really excited about this little treasure. Fair warning: I’ve worn this every day since I received it, and I don’t plan on taking it off. You’ll be seeing this necklace a lot, jsyk.

Anyway, back to Belladone…

Belladone Dress
Belladone Dress

Even though my bias tape is invisible from the outside, I still wanted it to be pretty – so I used polka dot bias tape 🙂 I used the bias tape left over from my Blue Lace Robson (and I still have more of this stuff, it’s like the gift that keeps on giving haha). I also faced the waistband with a piece of navy cotton sateen (also from that same lace coat, gah), since I didn’t want the interfacing all up in my biz. Unfortunately, the sateen is a bit heavy, which is why the zipper is lumpy at the waistline. Oh well, live and learn!
Oh god, ignore that rogue navy thread on the upper back btw.

Belladone Dress

I’m pretty happy with how this dress turned out – it’s fabulous on it’s own, and I think the navy stripes will also look good with different colors, such as yellow and kelly green. The dress is perfect for bike riding, even if it does give me a funny tan line 😉 Ha! Worth it 🙂