
Good morning & happy Monday, sewalongers! This week, we’ll be sewing up a large chunk of the coat – finishing the main construction, in fact! By the time you are done with step 50, you will be able to actually try on your coat 😀 Woohoo!! I know a post with 27 steps seems ridiculously long, and it sort of is – but keep in mind that at least a third of those steps are just instructing you how to sew on the bias binding. So it’s really not that bad! Although, I will be the first to warn you – this part can be a little time-consuming. You can do it, though! Just take your time and definitely take a nice break if you feel yourself getting overwhelmed/frustrated 🙂
This week, for my sewalong post, I’ll be doing the same sort of post as from last week and just giving some general tips and cheerleading. I don’t think this part of the sewing really requires step-by-step directions – which, due to the sheer size of the coat, is kind of difficult to do as it is – and the directions on this pattern are insanely good anyway. Seriously, they’ve really restored my faith in Vogue patterns with this coat.
That being said, let’s jump in!
As with last week, you will need to follow the steps outlined in the pattern for constructing the coat. Don’t try to skip a step, or jump ahead – the instructions are written in a way to give you the best result with as little hair-pulling as possible (hair-pulling will still probably happen, though, just fyi). Be sure that you have clearly marked your pattern pieces with all notches and symbols – it is critical with this pattern that everything is marked to give you the very best results. Trust me! Also, pay attention to the side that you are sewing the bias binding (and thus which side you will end up topstitching), as we want our topstitching and everything to be symmetrical on the finished coat.
The sleeve dart will be bound with the bias tape, just as all the seams are. If you are having issues keeping the seam allowance at the bottom (where the tip of the dart just kind of wanders off the edge of the fabric), try sewing with the bias binding on the bottom, with the raw edge at your 5/8″ mark. You can also mark the bias tape at 5/8″ in that area, but I found just using the guidelines on the machine’s throat plate was good enough for me 🙂

Don’t forget to staystitch your sleeve where directed (the blue lines in that photo… hopefully your sewing is straighter than my computer drawing skills 😉 ). This is essential for attaching the sleeve to the coat.

For attaching the coat front and back to the sleeves, here are a few tips I have picked up:
- Use a basting stitch to attach the pieces together first. When you sew the binding, you will use a normal stitch length, so basting is fine for this part. The basting will come in handy if you need to unpick anything (either because you didn’t sew over the basting, or you got a pucker, or whatever).
- Some of this pieces have GIGANTIC curves and require some crazy easing. Feel free to clip as much as you need to get everything to lie flat. I personally didn’t clip at all – I just put the bigger side on the bottom when I sewed and let the feed dogs ease everything. Absolutely make sure you check for puckers before moving on to the next step.
- When attaching the binding, I found it easiest to sew with the binding on the bottom, so I could be sure I was sewing over my basting line (and thus have less to unpick).
- Clip those seam allowances aggressively – like 1/8″. This will not only give you enough room to fold over the binding for topstitching, but it will also allow those curved areas to lie flat without needing to clip (obviously, if you clipped the seam allowances to attach the pieces together, you’ll probably cut most of that off. That’s ok! 🙂 ).
- As I have mentioned before, I found the topstitching much easier if the binding was basted down by hand first. If you baste right along the edge of the binding, you can sew inside the stitching line and be sure that you caught the fold. Further, it means you don’t have to worry about pins 🙂
- Again, do NOT be afraid to beat those seams into submission if they are feeling bulky.

At some point during this section, you will find yourself wrangling a whole lotta coat and you might feel a little overwhelmed. Stay with it! You can do this!
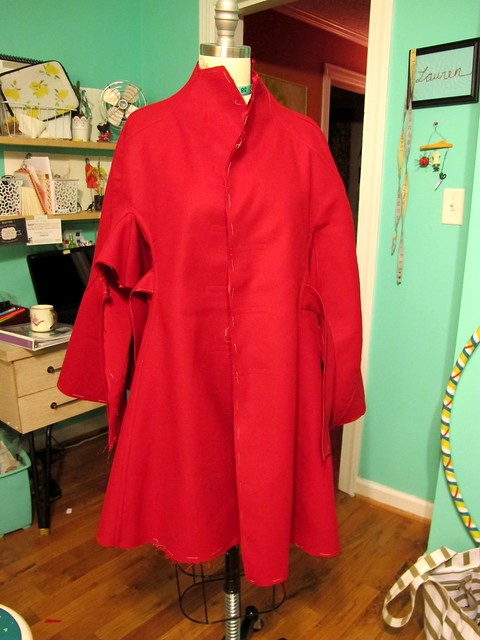
Once you’ve attached the front and back at the top of the sleeve, you will end up with something like this.

Make sure you spread it out on the floor so you can really appreciate how completely ridiculous everything looks.
The next few steps are going to seem REALLY weird, but just roll with it-

First, you will attach your coat front to coat back at the side and skirt seams. Once finished, you will end up with something that resembles a coat with armpit vents. This is actually a great time to try the coat on, BTW – I pin basted a few seams together just to be sure things were rolling smoothly along (what can I say – even with a muslin, I’m paranoid). I ended up sewing this seam at 1/2″ seam allowance instead of 5/8″, just to give myself a tiny bit more waist room.
The next step will have you sew up the section right above the waist and below the gusset, and then apply the binding.

Finally, you get to close up the sleeves! Yay!
Ok, so Laura tweeted me about step 50 being impossible.

It’s definitely not impossible – but is DOES require some finesse! If you’ve ever flat-felled a sleeve seam (while it was attached to the rest of the shirt), you are probably familiar with this kind of sewing wrangling. Basically, you will sew very slowly – like an inch or two at a time – being sure to lower the needle every time you stop to readjust (lowering the needle is pretty important, else your coat may shift which will result in a wonky line), so you can be sure you’re sewing through one layer of coat. It *is* possible to sew this seam, you just need patience 🙂 I basted my binding into place by hand (if you’ve been pinning up to this point, you may want to consider basting for just this one seam – it’ll make things a LOT easier if you don’t have to deal with pins) and sewed from the wrong side, so I could keep an eye on my binding and make sure I was catching it. This doesn’t result in the prettiest topstitching ever, but, you know what? It’s an underarm seam. Ain’t nobody gonna be looking at that anyway.
Anyway, here’s my coat up to this point:
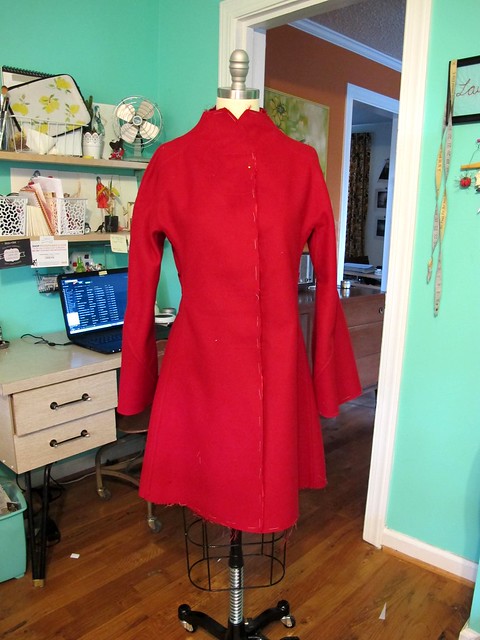

We are getting there!
As a side note, it was brought to my attention last week that I sewed the binding on my belt incorrectly. WHOOPS! The binding should actually all face to the inside – there are photos on the McCall blog for clarification. I decided to leave mine because I like the way it looks, but just fyi if you are going for something that is closer to the original!
How are y’all feeling about your coats this week? Any burning questions about this set of steps? Holler at me in the comments!


I loved the way you sewed the belt (taffeta binding wrapping the edges of the belt, instead of simply finishing the edges on the back side of the belt). It is an ingenious innovation resulting in a beautiful pop of taffeta color on the back of the coat, to balance out the beautiful taffeta buttonholes on the front of the coat. I will be sewing mine exactly the same way–as there is quite a bit of contrast between my coat fabric and my taffeta binding fabric.
Yay! I like the way it looks, too – and I think yours is gonna turn out beautiful! Can’t wait to see it 🙂
I like the binding on the belt on the outside too. It’s a great contrast 🙂
Hey Lauren, just a quick note about topstitching the sleeve seam in step #50: I examined the designer coat (which is now hanging in my office) and it appears the the topstitching stops and restarts about 3 inches from the lower sleeve hem. So the person making it probably started topstitching (or stitching from the wrong side; hard to tell) from the armscye area, got as far as she could sew, stopped and cut threads, then came at it from the other direction at the lower sleeve hem area.
So to heck with killing ourselves trying to achieve one continuous line of stitching! —Meg
That’s a great point, Meg, thanks for chiming in! I always forget that you can stop when the stitching gets too difficult and start at the other end (this is the stubborn Taurus in me insisting that I CAN DO IT, GET OUTTA MY WAY haha). In the same vein as your post last week without not killing ourselves to achieve perfection, I think you’re right on the money with also not killing ourselves to try to do a continuous line of stitching if our projects aren’t having it 🙂
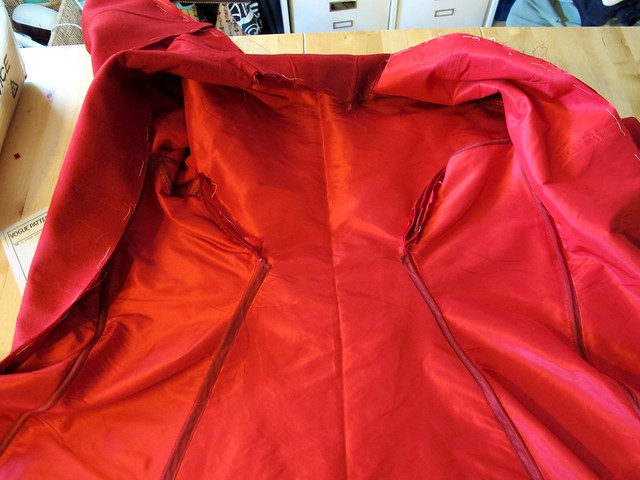
Beautiful! This makes me really wish I would have underlined my coat. It looks luxe. I am done up until those pockets (welts are on and then I froze like a deer in headlights who realizes he has to slash into his completed and beautiful wool coat to provide a place for the hands to get into the pockets) and the bound buttonholes for the same reason. I’ll wait until next week’s blog and practice on random scraps of material before I destroy this coat, as I am deeply in love with it. Pictures are up on the flickr. On that seam binding, I have found it easier to trim the seam before attaching the binding, and then doing the attaching so I have a better idea of where it will all hit when it’s done. I used your hand-basting trick and t hen just did the topstitching. Thanks for that tip! I have always wanted to say how much I love topstitching. Things I hate: understitching lining. Things I love: topstitching. I, too, found it impossible to topstich that entire underarm seam, as my sewing machine can’t bend the laws of space and time and make it PHYSICALLY POSSIBLE to do the whole thing:)
Oh! Some of my bound seams weren’t perfect or as pretty as I wanted, and in a couple of places, because the wool blend I used was so thick and made for really thick bound seams, I missed the binding on the inside when I topstitched the outside. Just here and there… I just curled up on the sofa in front of True Detective and hand-sewed those places. Invisible on the outside and it really cleaned up the inside. It helps that i’m recovering from a hysterectomy this past week so I have nothing but time….
Well, the outside of your coat looks pretty fabulous to me! I totally know what you mean about being afraid of the welts – just practice, practice, practice (all of us need to do this – me especially! ha) until it’s as close to perfect as you can get 🙂
Good tip on trimming before adding the seam binding! I found that I need the seam allowance so I don’t eff things up, but that method will probably work for other people! I also love that you handsewed all the areas that you missed on the topstitching – great idea for those of us who don’t want to kill ourselves being nitpicky 🙂 I can’t believe that you hate understitching, though – I love that part (even though it’s not part of this coat, I guess), it really pulls everything together and makes things look so finished 🙂
Best wishes for a speedy recovery! At least you’ll have a pretty fab coat out of it by the time this is all over 🙂
It’s looking amazing, Lauren!
What size needle and stitch length are you using?
For my coat, just a universal 80/12 needle and the standard stitch length that’s set by my machine (2.5, I believe).
Also, on a coat like this, how would you raise the armhole?
If the armhole is low, that usually indicates that the coat is too big through the shoulders. I’d go down a size or two, which will make it fit better (and also raise the arm hole), then add a FBA if you need the extra space 🙂
I just want to comment I think one should baste everything before machine sewing it. Sewing with only pìns hoolding the different layers together, speacially when there is more that one, or in curved seams, is , in my opinion, a wrong shortcut.
Oh yes, I agree! Pins can end up causing more grief than they are worth when it comes to so many thick layers – better to spend an extra couple minutes basting, than an extra 10-15 minutes unpicking messed up stitches 🙂
Its looking good. I’m not sewing along but lurking with a view to later makes.
Yay! Hopefully you’ll find these useful when you’re ready to make, and we’ll always be around to answer questions – even post sewalong 🙂
Your coat sewing looks amazing Lauren, especially the bound seams. Great job so far! And I like how you’re encouraging everyone through the tough parts. Me? I think sitting this one out was a bright move on my part. Not only are my skills not good enough, but I don’t particularly like the design of the coat. It’s so Star Trek. Sorry!
However your SAL did inspire me to get with the coat program and I enrolled in Craftsy’s Inside Vogue Patterns: Coat Making Techniques using V9040. My first set of fish-eye darts and the underlining are coming along great. I’m making (hopefully) a wearable muslin of fleece and will make the actual coat from a beautiful baby blue wool.
Hahah no worries 🙂 It’s a pretty dramatic shape- definitely not for every day wear (well, not for ME. I’m sure there are some fabulous ladies who would make this design their bitch when it comes to daily wear 😛 ), and I personally HATED the style until I actually tried it on.
I’m so excited for your coat-in-the-making! You are going to love the process – it’s so relaxing, even if it does take forever 🙂 And coats are the one thing you can get away with wearing daily (that won’t get you the stinkeye from your coworkers, ha), so you can flaunt that thing every day of the winter, if you please! 🙂
This looks amazing!!
And because it looks amazing, and because my local fabric shop has a $5 sale on vogue patterns, I went to get this very pattern today so that I could make one of these over the summer in the blazing heat.
They had none. I’m not sure if I should be relieved or disappointed.
BOOO! Maybe all the other shoppers snapped up the remaining copies? BECAUSE THE PATTERN IS AWESOME. 😛
HUZZAH!!!!
I got one 🙂
And I’m just a leeeeeetle bit exited 😀
YAY!! :DDD
I’m very mad you’re making my coat four sizes too small for me. But, imma let it go.
Literally lol’d at this comment 🙂
Lauren, babes, can you have a look at my seocnd muslin on Flikr (I don’t know how to contact you or Meg from there 😦 It feels so much better than the first one, but i want you to have a look at it. Do you think it is all right? do I need a FBA???
many thanks ahead!
Hey! I think you can tag either of us on Flickr, just by using the @ symbol and our usernames 🙂 Regardless, the second muslin looks GREAT! Much much better fit (and obviously you feel much better about it too- love the happy smile on your face 🙂 ). I dont’ think you need any additional adjustments, at least from how it looks. Does it feel comfortable?
I’m so excited to be on track with the sew-along. I completed all these steps yesterday and am ready to start working on the pockets. Hand basting the binding for each seam before top stitching was absolutely KEY to success in constructing this coat.
Awesome! I’m glad to hear the basting helped 🙂 Wait till you start those pockets – they are mega time-consuming ,but ohh so satisfying when you get them done! 🙂
I am also a stubborn perfectionist and can tell you every small error on my coat! And yes, step 50 was a pain!!! I got it, barely. In my head I was like “who planned this?!”
In case you’re still answering questions about this coat. I trim the seam before folding the bias over, but once I fold it over I have extra baggy bias tape, I tried not trimming, but it seemed to big. It doesn’t look as pretty on the inside as I’d hoped. at least the outside looks pretty good.
Are you folding the bias tape in half before sewing it down? If you fold it and sew with a 5/8″ seam allowance, the remaining bias tape should only be about 1/4″-3/8″ wide. It shouldn’t have a chance to be baggy. I ask this because I sewed the bias tape on incorrectly at first as well 🙂 The instructions are a little confusing with that part.