

Today, we are inserting the zipper into our pants and making the fanciest of flys – with a facing and a fly extension! FANCY Y’ALL. This is my personal favorite part of the pants-process – when they actually turn into pants, and not just 4 giant pieces of fabric flapping around the sewing room 🙂
We will be sewing steps 9-13. I know it sounds like a lot of ground to cover, but this should actually go a bit faster than the welt pockets – plus, you only have to sew one zipper, not two!
Here is your background music for this task. It seems fitting, although I’m guessing Danzig’s fly isn’t exactly the same fly we are dealing with today 😛
Steps 7-8 should already be completed at this point, FYI!
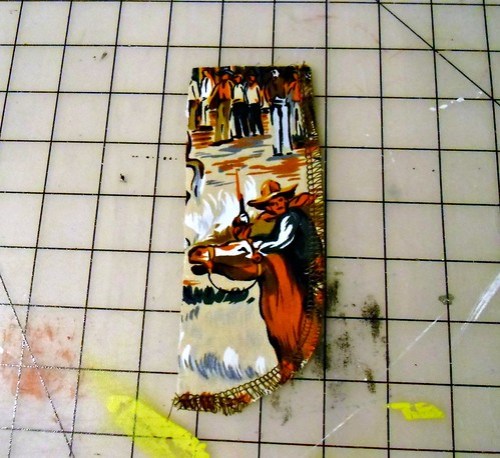
Take your interfaced fly facing (piece 11) and finish the curved edge.
Sidenote: The pattern placement wasn’t intentional when I cut this piece out, but HAHAHAHA dude is totally going to be lurking the inside of my pants!
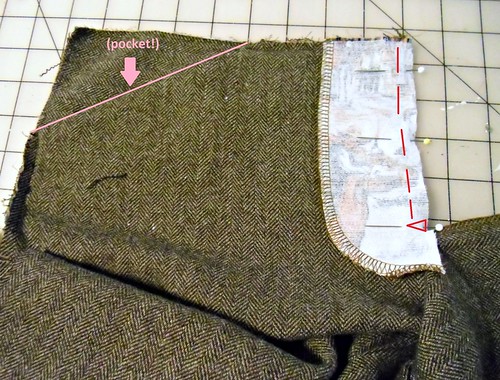
Sew the facing to the right front, right sides together, stopping at the notch.
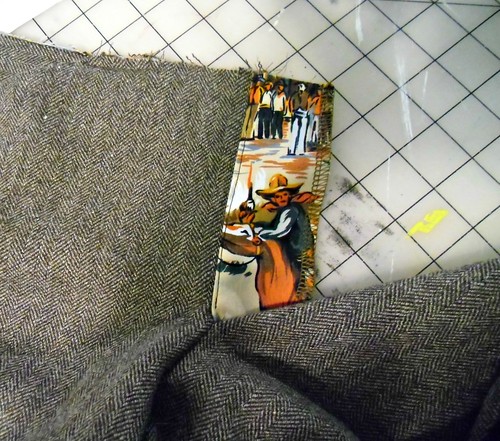
Trim & grade the seam allowances, understitch, and press the facing to the wrong side.
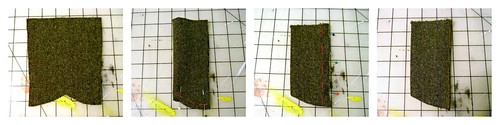
Get your fly extension (piece 10) and fold in half along the fold line, right sides together, and sew along the bottom. Trim seam allowances, turn right side out and press. Sew and finish the long side.
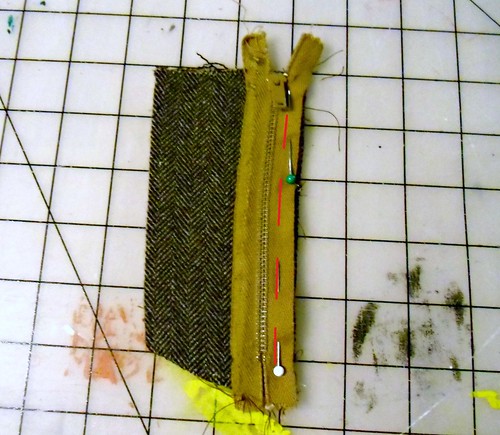
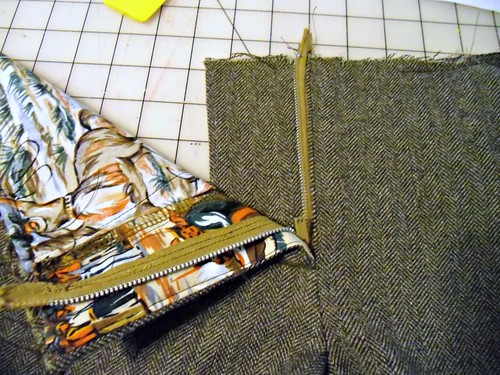
Place your zipper over the long finished edge of the fly extension, face up, with the zipper stop matching the notch. Sew. If your zipper is longer than 4″ (and really – where the hell does one find a 4″ zipper?), go ahead and match up the end with the notch and let the zipper excess hang off the top. We’ll cut it off when we get to the waistband attachment.
Sorry that the left side of my zipper tape looks all chewed up, it is. We got in a fight.
Sew the zipper to the left pants front, face down, stopping at the notch. You can sew directly over your previous stitching line, to make things a little easier!
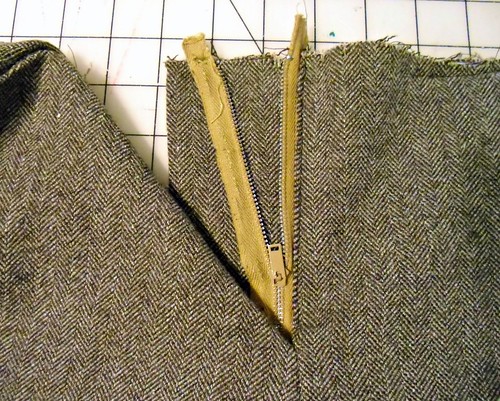
Turn the facing to the back and edgestitch close to the zipper teeth.
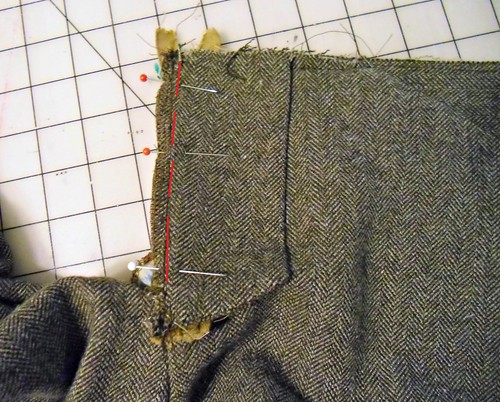
Now this might be a little hard to see, so bear with me here! Zip the whole thing closed, and then pull your right front over to the left from until the fly facing seamline is matched up with the second notch on the left front. At this point, I like to pin the whole thing closed so it doesn’t try to get sneaky when I push everything under the sewing machine.
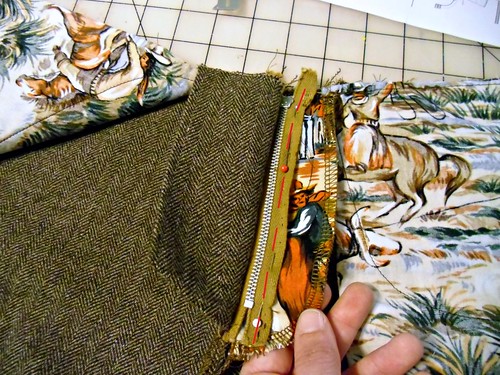
Flip your pants over; the right (un-attached) side of the zipper should be lined up with the fly facing. Pin the two of them together as shown, being careful not to catch anything else in your pins – no pants front, no fly extension. Just the facing and the zipper tape! As you can see, the zipper tape won’t go all the way to the edge – that’s ok! It’ll end up somewhere in the middle.
Go ahead and sew the zipper tape to the fly facing, using two lines of stitching.
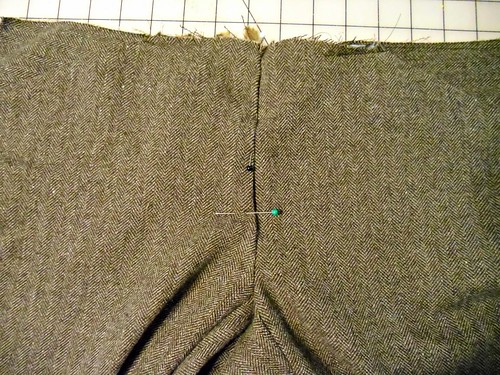
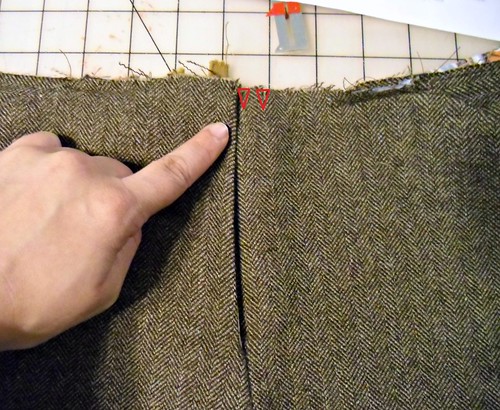
Flip the pants back over – it’s time to draw the stitching line for your fly! Yeeeeahh!!
Keeping the pants pinned close, locate the zipper stop and mark it (I used a pin, but you can also use chalk or whatev). This isn’t totally necessary, but you do want to be careful that you don’t try to sew through the stop – it could break a needle (“Wah” you say) or throw off the timing of your machine (“FUCK” you say). So watch out!
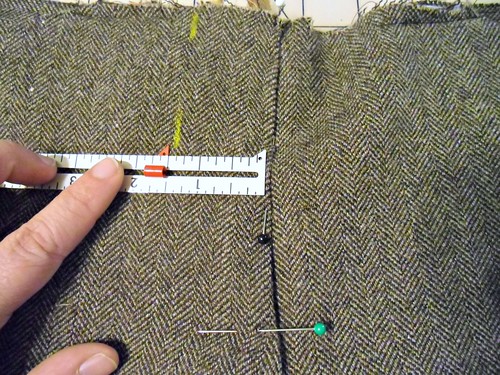
I like to start at the top and work my way down when marking my fly line (I know Tasia’s is the opposite, so do whatever you want, yo!). Measure 1.5″ from the center in a straight line, curving the line as you reach your marking for the zipper stop. Bring the line under the zipper stop to ensure that you don’t sew over it.
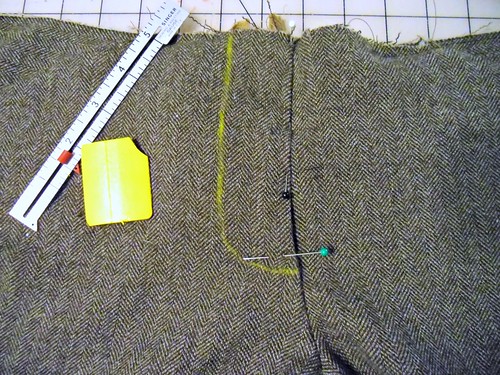
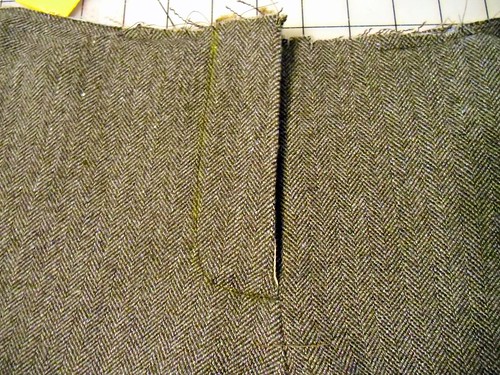
Here is my fly all marked up.
Don’t you love my BRIGHT ASS NEON YELLOW marking!? Liz sent me a couple pieces of this marking wax and a brand new box of hook&eyes, after I lameted about accidentally throwing mine away right after I bought them in Chicago. It was completely unexpected and totally amazing of her to do, but what else do you expect from someone who brings macarons to a sewing meet-up? 🙂 Thank you again, Liz!
ANYWAY, topstitch right over your markings, directly through the pants front and fly facing. Leave the fly extension out of this – you do want the zipper to actually work, no? 🙂
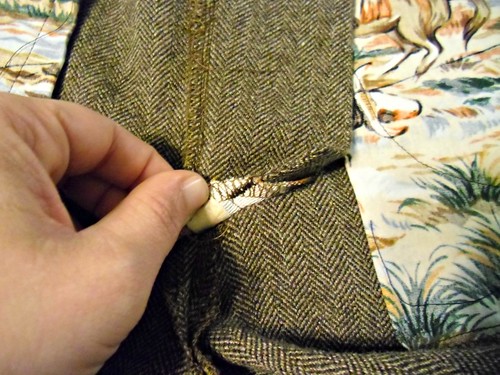
Since the poor extension feels lonely, give her a couple of tacks to the facing so they can still hang out. You can do this by hand, or the lazy way like me – with a tiny zigzag on your machine 🙂 This picture was surprisingly hard to take; look at the diagram in the instructions if you need more elaboration on where to stitch.
And that’s it! You should have a beautiful fly zipper, with a gorgeous fly facing and an outstanding fly extension.
Doesn’t that look professional as fuck?
Go ahead and sew up your side seams as indicated in step 14. We only have a few more steps left!


I’m trying really hard to catch up. My shorts muslin had a slight snafu… After all that measuring and pattern sewing, I calculated for two fronts instead of one front and one back so the front thigh is too tight. Sigh. I need to make a new front set and try again, but I think I may well be close to a perfect fitting back…Yay! (crossing fingers and knocking on wood now.) Then I can get to your instructions. I also am totally confused about the back seam…
The back seam doesn’t get sewn up until the next part when we attach the waistband, so don’t worry about it just yet 🙂 When you sew the front to the back, you stop right before the extension at the double notches.
But for muslining purposes, sew the back seam up along the extension line (or however you need to get the best fit, the line is just there as a starting guide).
Wow, talk about swift! Thanks for the suggestion. I did go ahead and sew it up, but I couldn’t tell if that would affect the fit. Also, does the fly front add any width? I assumed not, but since I’m tweaking the front again, I thought I’d ask 🙂
I don’t think it does (although please don’t take my word as gospel!). I will say that when I was fitting my muslin, I pinned back my 5/8″ SA on the front so I could omit the zipper, and once I sewed my pants up with the zipper the fit was the exact same. So either no, or it’s an insignificant amount.
Awesomeness! Thanks much, lady!
Oh my I’m so behind. I’m just now cutting out my muslin. Hoping to catch up by this weekend. Looove me some Glenn!
As someone who is not currently making a Thurlow, I have to say that I still wouldn’t miss reading your updates for anything! Wonderful tutorial, great music, and a lovely style that makes me laugh right out loud. At least twice!
Lauren. Me gusta el color de la cremallera para estos pantalones, y la tela de contraste con caballos. Yo también hago así los pantalones por dentro y me encanta!
Muy buena explicación de como poner una cremallera con solapa. Lo más difícil para mí es hacer el último pespunte (la aguja se queda bloqueada cuando pasa por encima de la cremallera abajo)
un saludo!
Definitely, absolutely, totally professional as fuck. Love them.
Wow, this is a much better way than how I’ve been doing pants. The fly/zipper is the first thing I do, but what happens is things always get messed up when sewing the middle (crotch) seam when it reaches the fly. It’s never perfectly straight, always will have a little fold over.
Hi! It’s a chilly January day here in the UK but in readiness for the summer I’ve started the muslin for my Thurlow Shorts. Your tutorial has been Soooo useful – especially the zip insertion (I even found myself saying Zipper a few times). Just a quick question though – I’ve sewn up the side seams and tried my shorts on. The fit is great but they are slightly gapey/loose at the front waist and there are no darts to take in. Any suggestions as to how I can take them in a bit? Thank you!
It’s kind of difficult to do it without adjusting the flat pattern, but have you tried just pulling in the front side seams to adjust (and keeping the back side seams at 5/8″)? Another thought would be to baste on your waistband and check the fit that way… I find my waistband is an essential part of the fit (aka, don’t overfit before putting in that waistband; you’ll end up with shorts that are too small! Ha! Ask me how i know all about that ;)), especially when it’s pinned closed. If it’s still gape-y, you can shorten the front waistband and ease the shorts slightly to fit.
I hope this makes sense, it’s hard to give fitting advice without seeing/touching the garment. If you’re still having trouble, shoot me an email and we can try to figure it out together 🙂
Sorry if its been mentioned before, but I can’t seem to find your notes on how to shorten the zipper in the waistband tutorial. Did I miss it or am I going blind :))
Let the top edge of the zipper hang over the top edge of the pants (so you retain the original zipper stop at the noted marking). Keep the zipper unzipped below the waistband while you attach it, and once those stitches are in place you can cut off the excess at the top of the zipper 🙂 Make sense? I didn’t show it in this tutorial because I amazingly had the right length zipper (like, when does that ever happen? ha!), but that’s how you do it for trousers. Shorten from the top!
thanks, do you have to add a stopper to the top once you cut off the excess?
No, once the waistband is attached and sewn across the top teeth of the zipper, it will act as the stopper 🙂
Darling, you are a lifesaver! I was ready to tear my hair out with this whole zipper, fly, facing, extension rigmarole. Thank you so much for explaining it.
Thanks so much for this Lauren! Just finished my first ever practice-welt pockets with your hand-holding (you are right,the instructions are a bit sparse at that point) and they look beautiful.
Just have a short question about the 2 notches at the left front. When the zipper is sewn onto the left front I’m lining up the right front with a notch: is it the one closer to the pocket on the left front? You are pointing to the other one but it really depends from which side you start counting :-). And it’s not clear on the diagram either.
Thanks again and greetings from Vienna!
Best-Johanna
I believe the notch closer to the CF is where you line up, and the one closer to the pocket is a topstitching guide 🙂 (sorry, it’s been a while since I’ve pulled this pattern out so I am working from memory here!)
Glad to hear you are finding the sewalong helpful! Yay! 😀
Yes,you were right: the notch closer to CF is for the zipper line up part,the one closer to the pocket seems to match with a notch on the waistband. At least it did on mine 🙂
Good memory!
Hello Lauren! Thank for the sew along I would definetly not be able to do sew the shorts without it, instructions are kind of not enough here.
Look, after attaching and finishing the zipper part, I cannot really press open the center seam. It can be pressed open at the back, but that front part under the zipper is not in the good position to open up… I don’t know if I explained clearly, but I can take some photos to show what I’m talking about… Do you think I attached zipper wrong? Or maybe the center seam connected wrong? As the two front parts are a little different in the center, I let that extra piece of fabric to the seam, if it makes sense…
I wouldn’t worry about it! Just press the best you can so the seam looks good from the outside, but it’s nearly impossible to get that center seam pressed completely open due to it’s shape/curve. Not a huge deal! 🙂
Aah! Ok! Thank you! It looks good from outside) I think in my case it doesn’t want to open completely not because of the curve, but because of the zipper, or better to say because of the fly extension… Maybe I didn’t connected it far enough…
Loving every thing about your writing!
Thank you so much for this tutorial. It has been so helpful and I have learned so much! Have you tried to line these? I am going to make a pair out of wool and will need to line. Thinking of linking the legs and hand sewing around the fly. Any ideas or suggestions? Thanks again.
I have no idea, I’ve never tried to make lined pants with a front fly zipper. Sorry!