
A promised, here is the much-requested tutorial for adding Petersham ribbon to the button band of your handknits! This is a little trick I’ve done for nearly all my handknits since I started cranking ’em out… it’s not 100% necessary for finishing your knits (so please don’t be freaking out if you’ve never heard of this technique before!), but it is super handy if you wear knits with negative ease and have problems with the button band/button holes gaping open. We are basically going to take a firm woven ribbon and sew it to the inside of the button band, so it will stabilize the knit and prevent it from stretching and thus gaping open.
I know there are a million ways to do this particular technique; this is my personal favorite TNT. It involves hand sewing and machine-worked button holes (although they are not sewn through the sweater as done in (Tasha’s tutorial from a few years ago). I personally like to use Petersham ribbon as my stabilizer – it’s relatively inexpensive, wears well and feels luxurious. You can also use grosgrain ribbon, seam binding, firm lace, satin ribbon, or even fabric selvedge – whatever you want! I ain’t here to judge 🙂
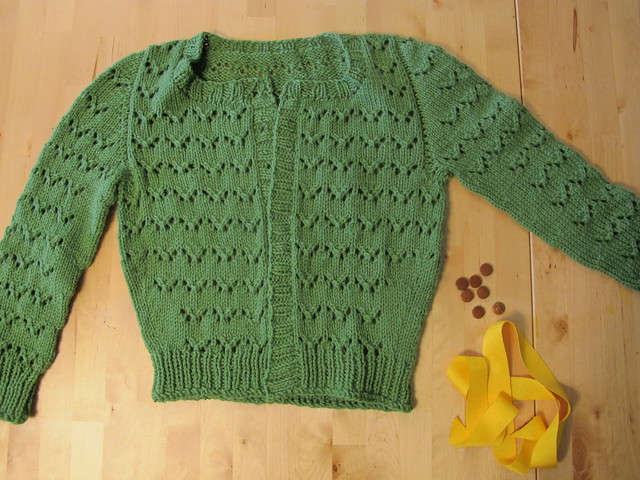
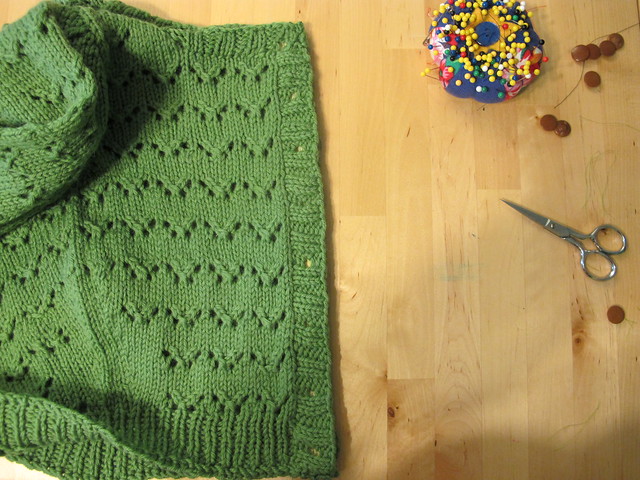
You will need: your finished+blocked cardigan, a length of petersham ribbon (this will vary depending on the length of your sweater, but aim for approximately the length of your button band x2 plus a couple inches to fold under), and your buttons.
NOTE: I am using 1″ wide petersham for this particular sweater. The width of your petersham may vary, depending on how wide your button band is. Always measure to be sure!
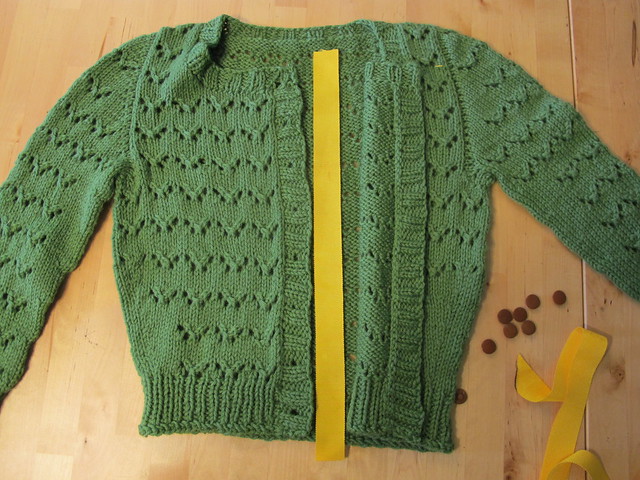
Measure your ribbon to the length of your button bands plus about 1″ extra (for 1/2″ overhang at both the top and bottom of the button band), and cut two pieces to this length.
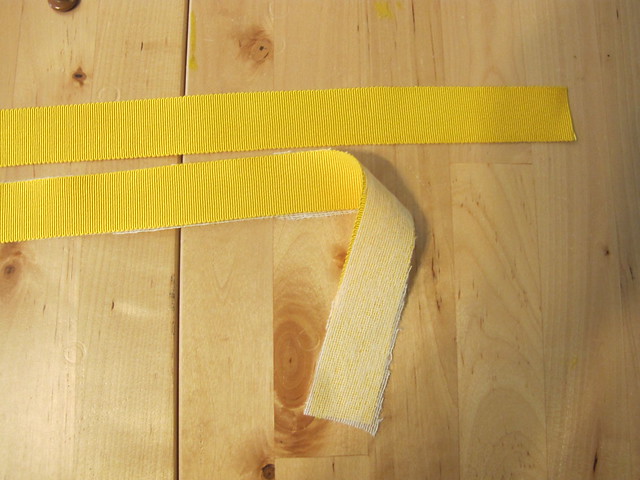
OPTIONAL: You may want to interface one piece of the petersham, so the button holes are reinforced. Just cut a strip of interfacing on the straight grain and fuse it to one side of one piece of ribbon. Set the non-interfaced ribbon aside for now.
** Yes, your interfacing will show slightly on the outside of your sweater, if your gauge is loose enough. If this is a concern (obviously it’s not a concern with this sweater; but I could see how using white interfacing+black sweater miiiight look a little weird!), you might consider making a Petersham sandwich and using two lengths of the ribbon with the interfacing in between. I haven’t personally tried this, but it makes sense in my head. Also, now I want a sandwich. I just ate breakfast. Fuck.
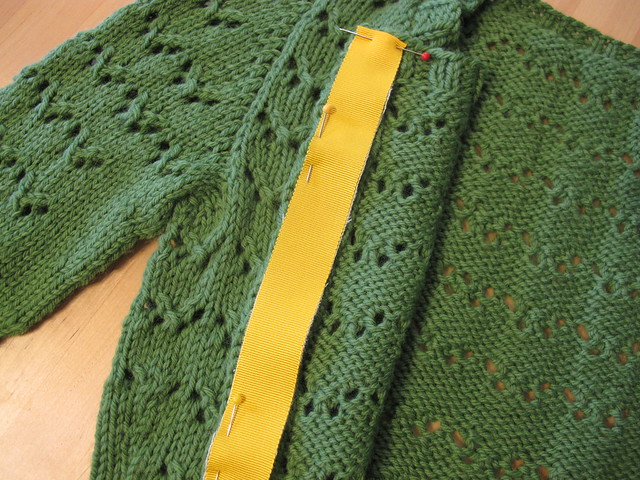
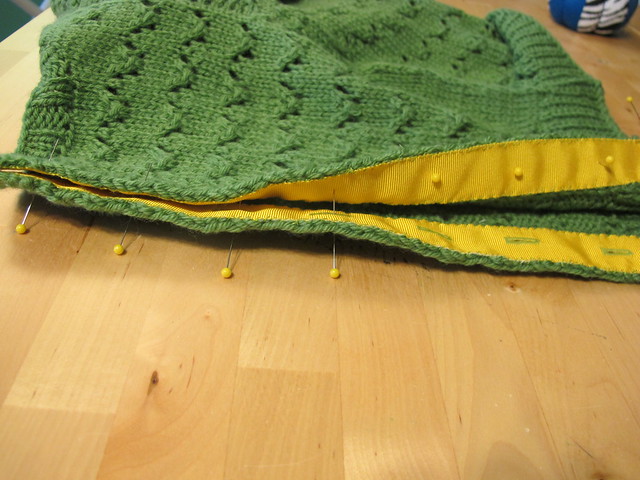
Pin the interfaced ribbon to wrong side of the button band with the button holes, interfacing side on the inside, and fold under the top and bottom edges by 1/2″. Try to center the ribbon so that there is about a stitch’s worth of overhang on the outside edge of the button band.
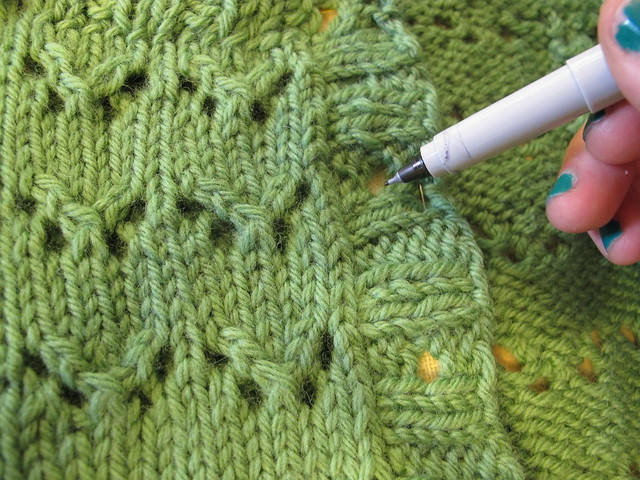
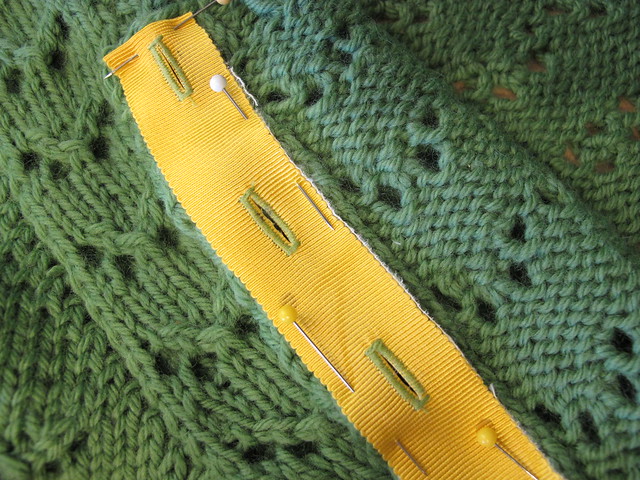
Use a marking tool to mark a small dot in the center of each button hole, on the interfaced side of the petersham. You may want to use chalk or disappearing ink; I used a sharpie because I’m a terrible person with no morals.
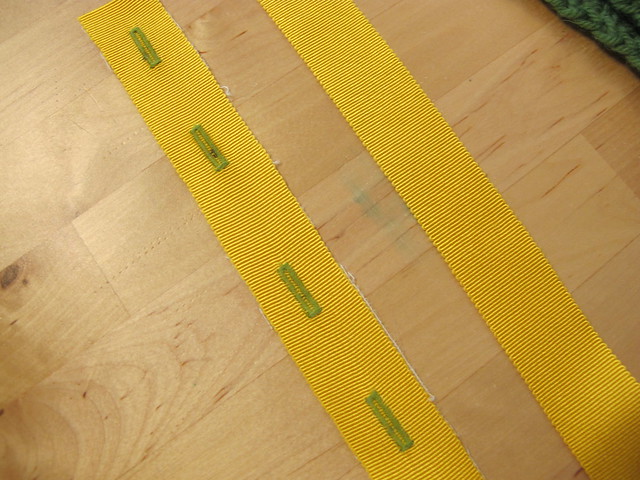
Take the petersham off the button band and, using your sewing machine, stitch button holes at each of the markings you made. Dab each button hole with a drop of Fray Check (this is optional, but I think it makes for a cleaner/non-hairy button hole) and allow to completely dry. Carefully cut all the button holes open.
PROTIP: Test your button hole size first on a scrap of interfaced petersham so you can be sure that your buttons fit the holes! Ain’t nobody got time for wrong size button holes.
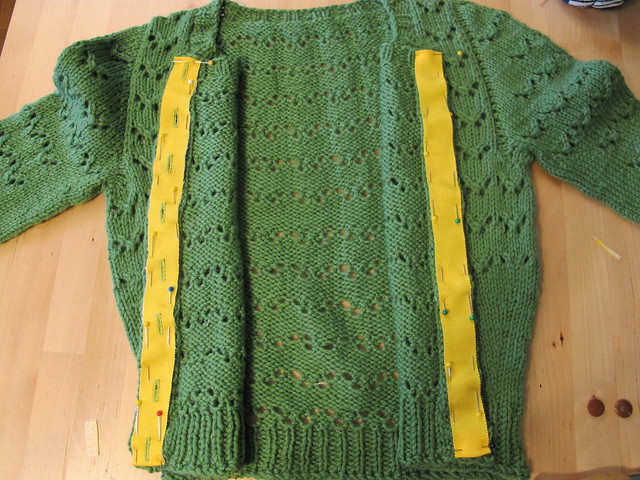
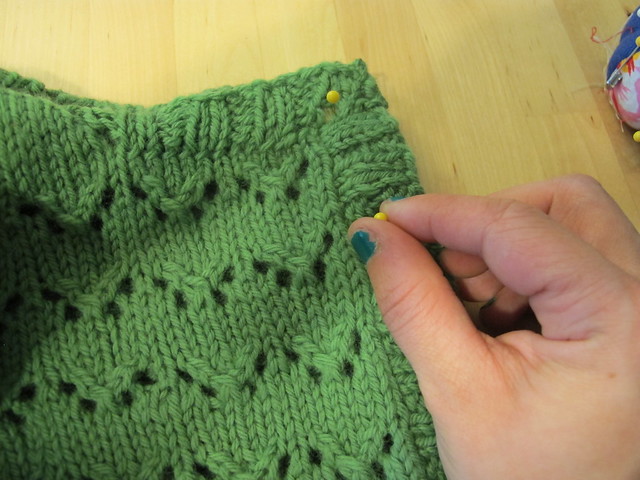
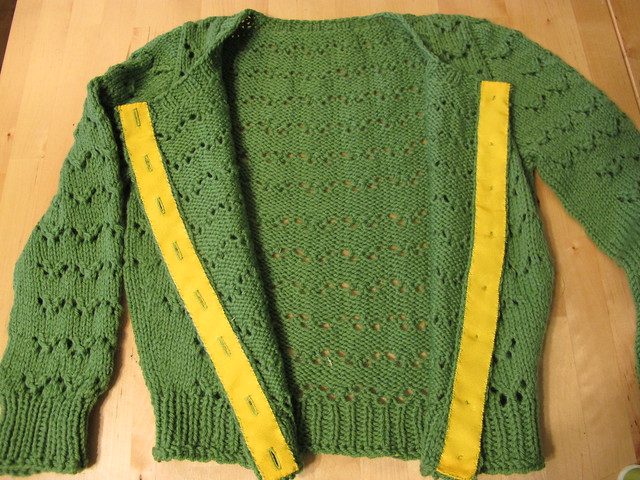
Open your sweater up and pin the petersham to the inside of each button band. Match the petersham with the buttonholes to the button band with the button holes (being careful to make sure that each button hole is aligned so that they can be used!), and match the other petersham on the button side of the button band. On both bands, fold the petersham under 1/2″ at the top and bottom. Again, try to center the ribbon so that there is about a stitch’s worth of over hang on the outside edge of each button band (this is just so it looks nice 🙂 ).
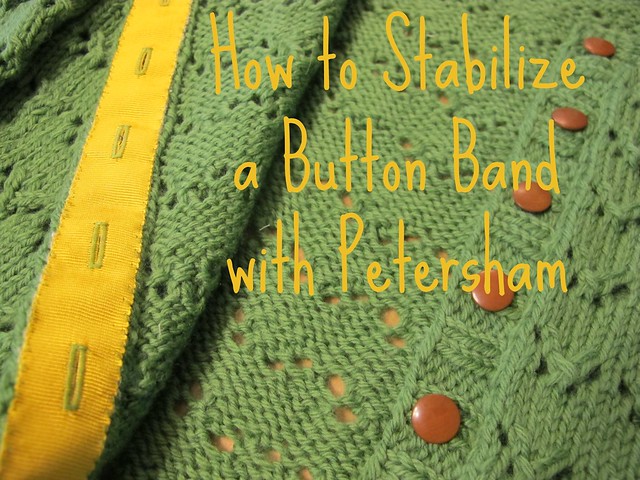
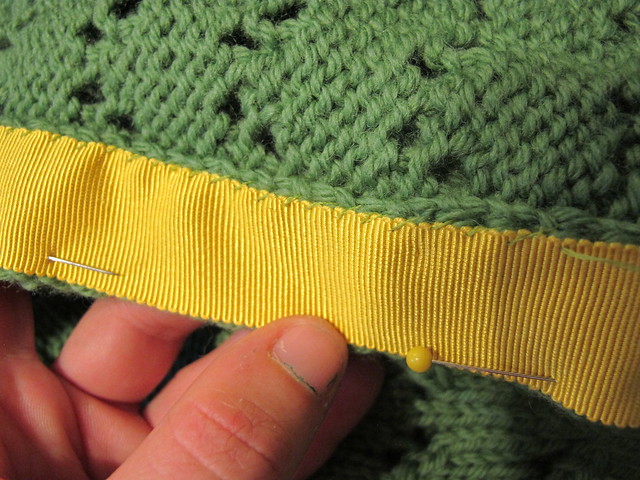
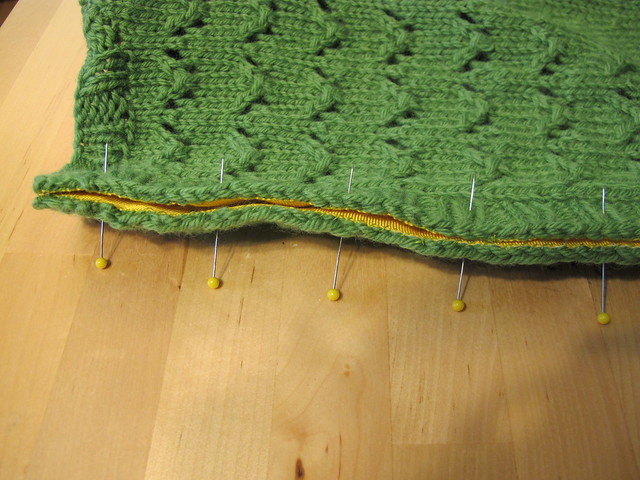
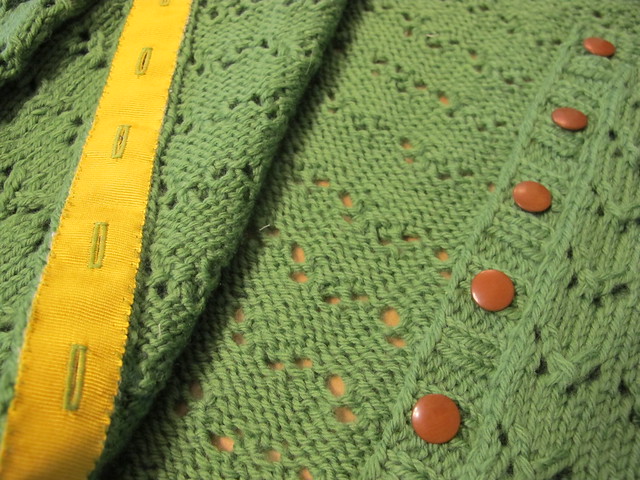
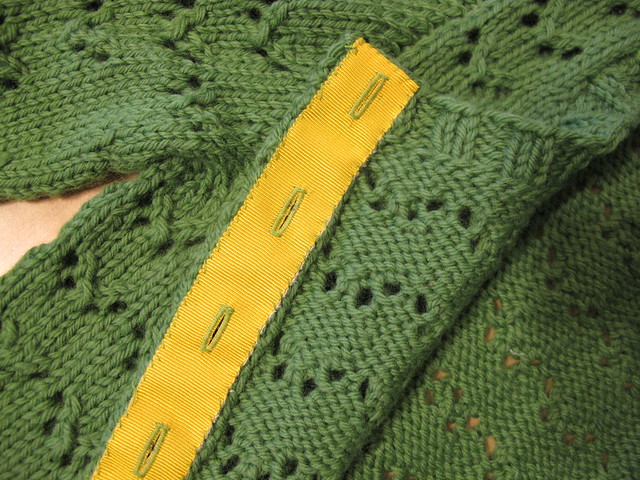
Here’s a close-up of my ribbon pinned to the button band. You can see there is a little bit of button band overhang on either side of the ribbon.
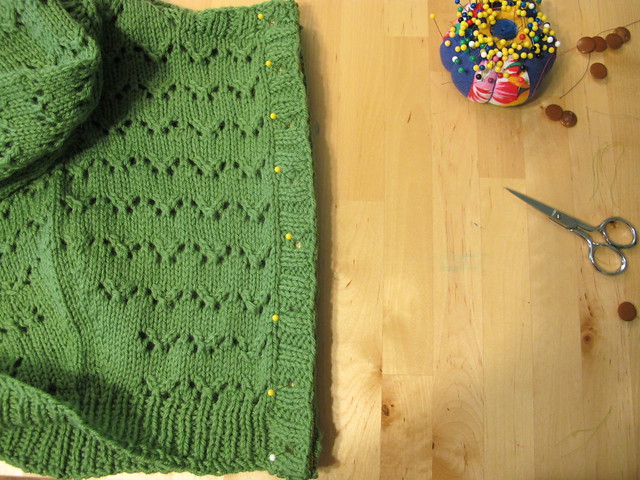
Now is a good time to check and make sure that the button bands are the same length on your sweater. If one is longer than the other (which can totally happen if you stretched the button band while pinning everything down), unpin and readjust until they are the exact same length.
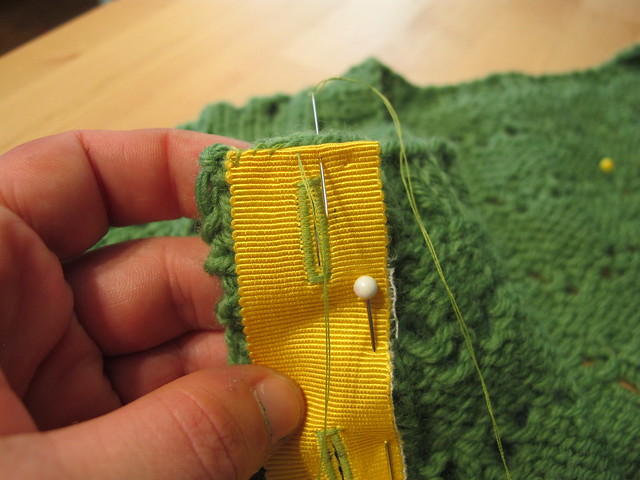
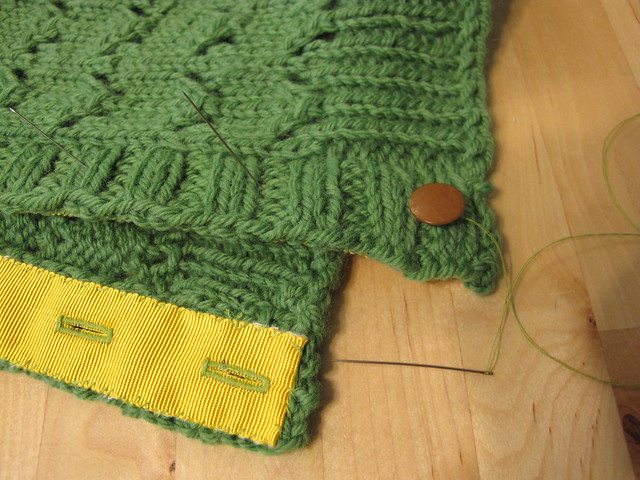
Now time to stitch! Using doubled-up thread, whipstitch all the way around all 4 sides of the petersham, starting at the top and working your way around. Do this to both button bands.
Here’s another photo of the handstitching. Try to keep your stitches evenly spaced (this will give them more strength, in addition to just looking nice!) and try not to gouge a big chunk your sweater yarn with each stitch.
Don’t worry about stitching around the edges of the button holes. I always leave mine loose, and I’ve never had a problem with the buttons getting stuck and/or not being stabilized enough. I imagine if you were using super huge buttons – like, 2″ big buttons – you might want to sew around the edges, but for buttons smaller than 3/4″ it’s fine to leave them unsecured.
Once your button bands are stabilized with ribbon, lay them petersham sides together and raw edges matching.
Stick a pin down the center of each button hole.
Gently pull the button bands apart, pulling the head of the pin through the button hole and leaving it sticking in the button side of the ribbon.
Now you can use the pins as a guideline for where to sew your buttons! This ensures that they are exactly centered in the button band and also aligned with the button holes.
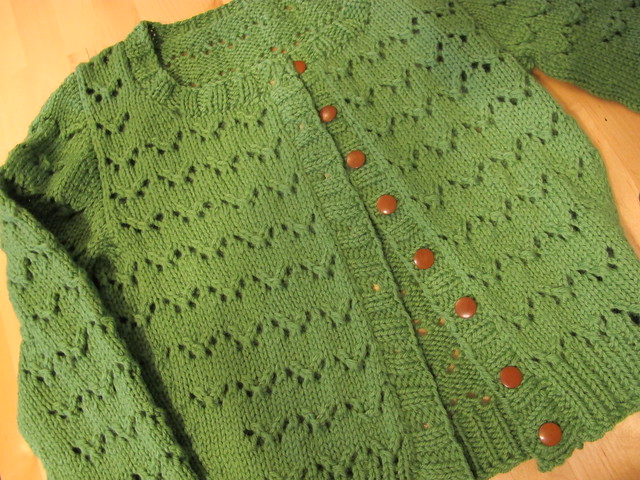
And there you go! Stabilized button bands with NO GAPE!
God, is that just like, the sexiest button band or what.
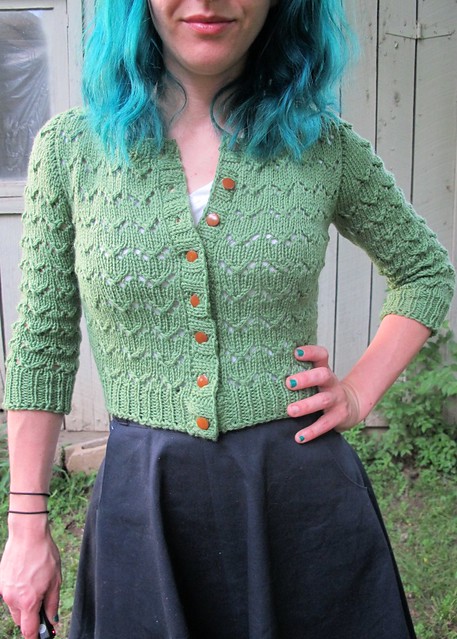
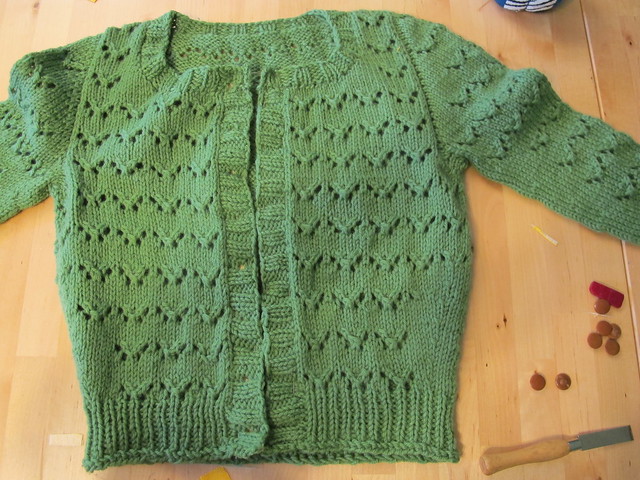
And here’s the sweater on me! (Hetty, in case you missed the post!) Notice that the lacework is nice and open, thanks to the negative ease – but the button band is strong and secure and there is no pulling at the button holes. Oh petersham, how I love you ♥
Aaaaaand, that’s it! Told y’all this was an easy technique 🙂 Now, go forth and conquer that button gape once and for all!


Clever and attractive, Lladybird. Thanks for the tutorial 🙂
Brilliant….!!! Looks good…and for the Dutch among us…try and google Petersham and you get nothing…don’t know how i found it..but here we have to search for ‘grosgrain’, but reading your post i thought that would be a completely different kind of ribbon…still do not know the difference between petersham and grosgrain, it looks similar (on my computerscreen it does)…so i will just go for that, cause i get the feeling Holland is not familiar with Petersham ..hahaha
But …great tutorial and why didn’t i think of that before….it’s so logical to do this.., i am going to try it on my Miette which is in progress..:-)…
Interesting! Petersham and grosgrain are two different kinds of ribbon – Sunni has a great post on the differences between the two. Basically, Grosgrain is stiffer with a straight edge, while Petersham is more soft and pliable with a pretty scalloped edge. Also, Grosgrain (or, at least, the cheap stuff!) tends to show pin holes once it’s been poked, and Petersham does not. I am mystified as to what other countries call it if they don’t call it Petersham, since it’s definitely not Grosgrain. But if you can’t find Petersham, Grosgrain will work fine. Just mind where you stick your pins 🙂
Oh thanks!!! I will check sunni…:-).. Well we don’t live in a hole in the ground so a i am making it a project to find out what petersham is called here..and if it’s available…:-) thanks!!!
Irene: I think the Dutch word for petersham ribbon is “ribsband”.
I thought this would be interesting until I read your “F” word. Please – show a little respect.
I have so much I could say in response to this, but since you don’t even have the decency to sign your name and stand by your own comment – no.
This is amazing. Thanks so much!
You inspired me to do this to my Agatha a few weeks ago after reading your Agatha post! I couldn’t find any suitable ribbon so I used interfacing strips surrounded by larger strips of lining. It has come out really well. And yes I left the buttonhole backing loose as well. I started to stitch it but it was really difficult and it makes no difference being loose. Your Hetty looks great as well.
Very cool! I’ve hand-sewed grosgrain ribbon to the inside of sweater button bands to add snaps under fake buttons, which is OK but means the buttons are purely decorative. Adding machine-sewn buttonholes is a good idea to keep the buttons functional. Thanks for sharing how you did it!
I’m sorry, I was distracted by how GORGEOUS your buttonholes themselves are! Yowza! My machine does NOT make nice buttonholes like that. Swoooooon! 🙂
Love the petersham in the contrasting color. Reallymakes the sweater more fun!
Hahah yeah, that’s the Bernina for ya! 🙂 Prettiest button holes I ever saw!
Super sexy!
Very nice! This is one of those finishing techniques I know I should do but never get around to because I want to wear my new sweater! But having a clear, detailed tutorial to hand makes it far more likely I will take the time to do this. My future sweaters thank you!
Nice! Typically I don’t realize I need petersham ribbon until after I’ve sewn the buttons on. I also have not used a machine to sew the buttonholes. I cut slits for the buttonholes and then finish them with a “buttonhole stitch” by hand. It is time-consuming, but I’m OK with that.
I did that for my first sweater, but the Petersham loooves to unravel and it just made a big time-consuming mess. I guess I just don’t have enough patience for that sort of thing, ha! 🙂
Your work of art would certainly award you a red ribbon. Lovely.
Thanks. You’ve given me more incentive to finish my Myrna so that I can try this finishing technique.
Thanks for the detailed post! I should totally go back and do this to my agatha!
Yes, do it! It makes such a difference!
Thanks for sharing. This is so useful to know 🙂
What a fab post. I absolutely know where I’ll be turning to when I sew the buttons on the next cardigan I knit. So clearly explained with excellent photos to illustrate. Thanks x
A thorough tutorial, and well presented. Thank you!
I have a blocked Hetty and some matching grosgrain ribbon lying around right now..what perfect timing! Thanks for the detailed post. Though I’ll be machine stitching it down because hand sewing isn’t in my vocab! Mwahaha.
Thank you so much! I’ve been knitting for years and one of the saddest things about my cardigans and henleys has always been those darn pulling button bands! I may do this as a long after the fact addition. 🙂
I have been SEARCHING for this forevvaaaa!!!! Thank you x 1 000, 000. You are the limit as x approaches positive infinity of x^2.
Great tutorial! Thank you so much! And for those of us who don’t knit it will be very useful also for sewn cardigans 🙂
This is great! I just sewed petersham on a jumper for the first time, and I had a really hard time finding a tute I liked. In the end I did my own thing, which was a straight stitch and then I hand bound the buttonholes because my machine is VERY unreliable with buttonholes and there was just no way I was putting my handknitting into it. I did think about doing them just on the petersham but couldn’t get my brain to think about how it would work, since I’d not done any of the process before. I will definitely be bookmarking this and referring to it in the future! I always love the way you do tutes – simple, clear, and not at all boring! 🙂
Great tutorial – I’ll definitely have to try this out on my next cardigan. Thank you!
Thanks for this. I have a couple of sweaters that have been unfinished for over a year, just waiting for the ribbon treatment because I was worried the machine button holes wouldn’t match the crocheted button holes.
This is such a great tutorial 🙂 I just used it this weekend and it came out great … until I realized I didn’t use Petersham. Oops! Learn from me others, use no substitutions – your buttonholes can literally slip off the ribbon (ask me how I know). Lesson learned.
I’m curious if anyone has found any good online suppliers that don’t charge $10 to ship 1 yard of ribbon? Everyone I find that sells online has ridiculous shipping for such a small item, and my only local options only have cheap polyester/plastic/crappy ribbon, not petersham. Thanks so much!
I can’t personally vouch as I buy my Petersham locally, but have you looked into getting it from A Fashionable Stitch? Sunni has lots of pretty colors and I think she charges about $2 to ship within the US 🙂
Excellent tutorial which has made me much happier with my finished knitted cardy – and you made me laugh! Thanks for taking the time to post this x
I am so thrilled to have found your site AND your wonderful tutorial on stabilizing button bands! I was a fierce knitter years ago but hadn’t knitted in 16 yrs. I got inspired to knit a baby sweater for the firstborn of a dear student who had been in my kindergarten class 23 years ago! I knew I used to make ribbon bands with machine buttonholes, but couldn’t remember if it was something quirky my mom and dressmaker aunts did, or if everyone made them. Your article not only reminded me but taught me more! I love your writing (and knitting) and am glad to have learned about Petersham. thank you!
Thankks for this blog post