
Some of y’all requested to see my invisible zipper method, so here it is! Just a head’s up – this is a fairly picture-intensive post. Sorry! You have been warned!
Invisible zippers are not necessarily my favorite type of zipper (because only a seamstress would have a favorite type of zipper, amirite), but they definitely have their pros. I like them sewn into the side of slim-leg pants, into the back or side seam of a wiggly dress, and concealed in the seam of a pencil skirt. While I love lapped zippers and I think they are a beautiful touch, sometimes your zipper needs an invisibility cloak. This is where the invisible zipper can rock your world.
Invisible zippers have this reputation for being fiddly, and I totally disagree with everyone who believes that. They really aren’t any more fiddly than a lapped or centered zipper – in fact, in some ways, they are actually easier to sew into a garment. It definitely helps to have an invisible zipper foot, but you can easily sew those suckers in if you have a regular zipper foot and you can move the position of your needle. I think most of what gives invisible zippers so much hate is that it can be difficult to close up the bottom of the zipper after you’ve sewn it in – the seam allowance is off, there’s a little bump under the zipper stop, and dealing with facings is kind of weird.
So, this is where my tutorial comes in! First off – this is not some kind of earth-shattering method I have discovered and patented. I learned this way during my stint at Muna’s, and it’s super similar to the standard method that we are all familiar with (although I find it a lot more foolproof, personally!). Not sure if this is a RTW method or not – I know most of what we did there was based off RTW standards, but I’ve never sewn invisible zippers in a factory so your guess is as good as mine (if you know, speak up, yo!). Try it for yourself and see what you think!

You will start with an invisible zipper and the seam that it is going to be sewn into. For this tutorial, I’m just using scraps, but this method can be used on anything – skirts, pants, dresses, etc.
Press your fabric and interface along the seamlines of each side, if desired, using either fusible interfacing or sewing in interfacing or silk organza. I did not for this tutorial, so be prepared for wrinkles. The zipper seam should be completely open from top to bottom at this point.

Finish both sides of the seam as desired. Mine are serged, but you can also pink or use a zigzag stitch. I’ve also had some luck with encasing these in seam binding, but be warned that it can get bulky!

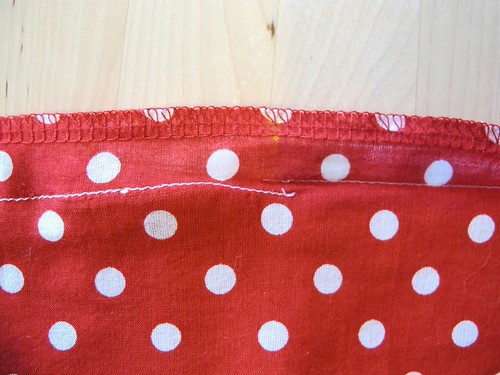
Starting at the bottom, close up the seam, ending about 2″(ish) from the marking where the zipper stop should go, and backstitch.

Starting with one side (I usually do left first), lay your zipper on the fabric with the right sides facing and the zipper teeth pointing away from the raw edge, keeping the top stop about 3/4″ away from the top edge (or your seam allowance + 1/8″, assuming you will be adding a hook and eye at the end). I don’t use a lot of pins here, just one to keep the zip top in place.

Using your handy-dandy invisible zipper foot, start sewing the zipper to the fabric. To keep everything along the correct seam allowance, you can use the markings on your throat plate (the silver doo-dad under the needle that has measurements etched into it) to line up the raw edge of your fabric and the zipper will fall into place exactly along the seam allowance line. So simple, but y’all wouldn’t believe for how many YEARS I sat there trying to mark the seam line on the fabric and sew the zipper on top of it. DUR. Just use the throat plate guide! Argh, Lauren!!
Anyway.
A few words about the mighty invisible zipper foot:
– The are awesome and worth every freaking penny. The Bernina ones get pricey (I think I paid like $40 for mine, ughf), but most other manufacturers are closer to the $15-$25 range. WELL worth the price if you want a gorgeously inserted invisible zipper every time.
– Some shops sell a sort of “universal” invisible zipper foot that is plastic. Don’t buy that shit, it’s a waste of money and you will likely end up throwing it out the window in frustration (join the club!). Save up and get the real thing, or stick with your regular zipper foot.
– You may also use a regular zipper foot to insert your invisible zipper. This works best if you can move the needle position, but you can still do it even without that. We did not have invisible zipper feet at Muna’s, and we inserted zippers just fine. You just push the teeth out of the way and sew as close as you possibly can. Pressing the teeth flat with an iron helps, but it’s not necessary and can sometimes result in you getting toooo close to the teeth, thus meaning you can’t zip the zipper!

Here you can really see that foot in action. It grabs the teeth and pulls them out of the way, which lets the needle get SUPER close without actually impairing how the zipper functions. Also, still on my 5/8″ seamline, hey-o!

Anyway, go on and sew your zipper as far as you can. You’ll get stopped at the pull if you’re using the special foot. That’s fine. If you’re using a regular zipper foot, stop somewhere at the zipper stop, aka, don’t go alllll the way down to the tippy toes of the tape.

Now close your zipper and mark on both sides of the tape where the stitching stopped. If you are matching stripes or plaids, you may also want to use this method to mark where the lines cross so you can match them when you sewn the other side of the zip.


Locate the same point where the stitching stopped on the other side of the zipper seam (the unsewn side); this is where you pin the marking on the tape.

If you did it right (and you probably did, cos you are awesome!), the top of the zipper should match up on both sides.

Starting from the top, sew this side down, same as before. Use your seamline markings on the throat plate – if your machine doesn’t have them marked on the left side, measure it out and mark it with a strip of tape or a Sharpie. Do NOT start from the bottom and sew up – if you want your zipper to be nice and balanced and not have weird wrinkles or pulls, you need to sew both sides in the same direction.

After you’ve sewn both sides, test that zipper out! Make sure it doesn’t show when you close it, and that it slides easily. You’ll have a little open bubble where between the zipper and the closed seam, we’re going to fix that now!

Get out your regular zipper foot and move your needle all the way to one side. If your needle doesn’t change position, you can still do this, but you’ll just have to go reeeeeally slow.
Check your opening and make sure you don’t have one side that is longer than the other! This is where bubbles happen. If you marked everything correctly, it should not be a problem, but things can slip through the cracks from time to time. If one side is longer but only slightly so (as in, you can gently pull the top and bottom and it matches up flat), you will want to sew this next part with the longer side facing DOWN. The feed dogs will help ease that tiny bit of length so you don’t get a bubble.


Starting at the bottom, lower your needle on the stitching line you first created (the one below the zipper) and sew toward the zipper. Remember to backstitch! This can get kind of tricky with zipper bulk, so move the tail end out of the way with your finger if you need to.
Sew all the way to the zipper and try to get as close to the previous stitching line as possible, overlapping by a couple of stitches.
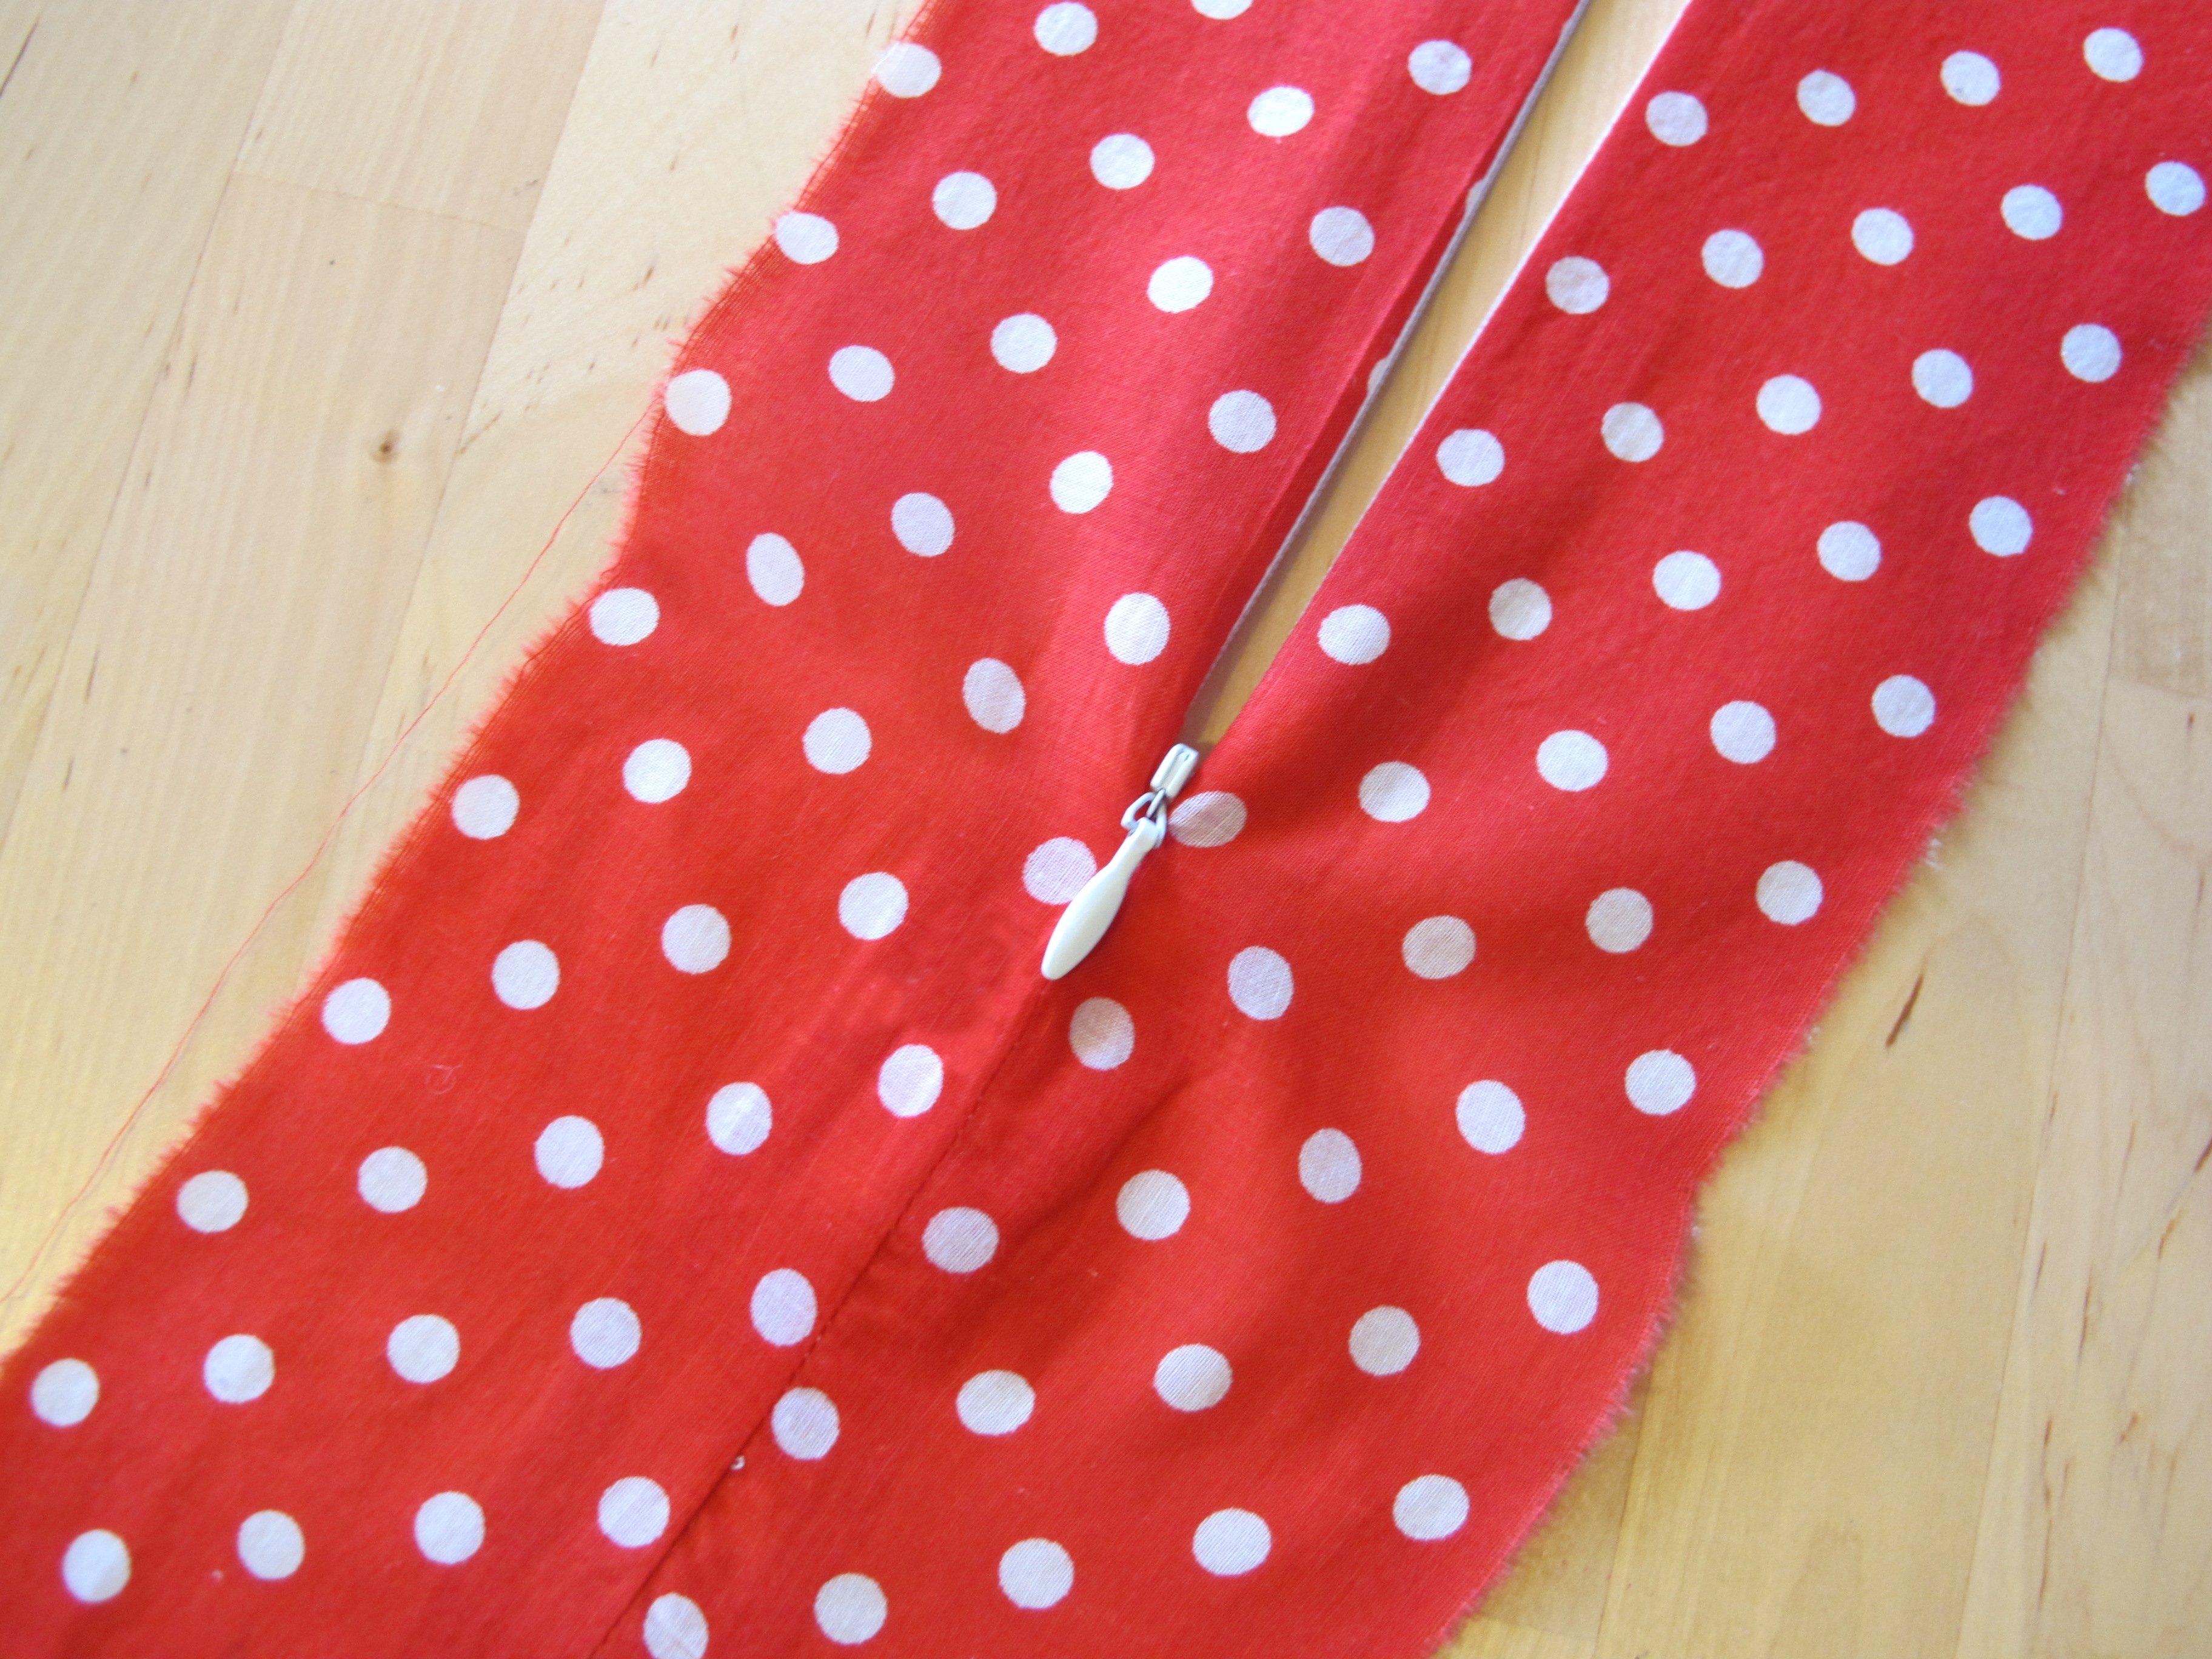
Here’s how mine turned out. The zipper is on the right (the side with the yellow marking), and the remaining seam is on the left. Obviously I didn’t do a super perfect job – there’s definitely a curve in the stitching, whoops! – but as long as you’re within 1/8″ here, it’s close enough.

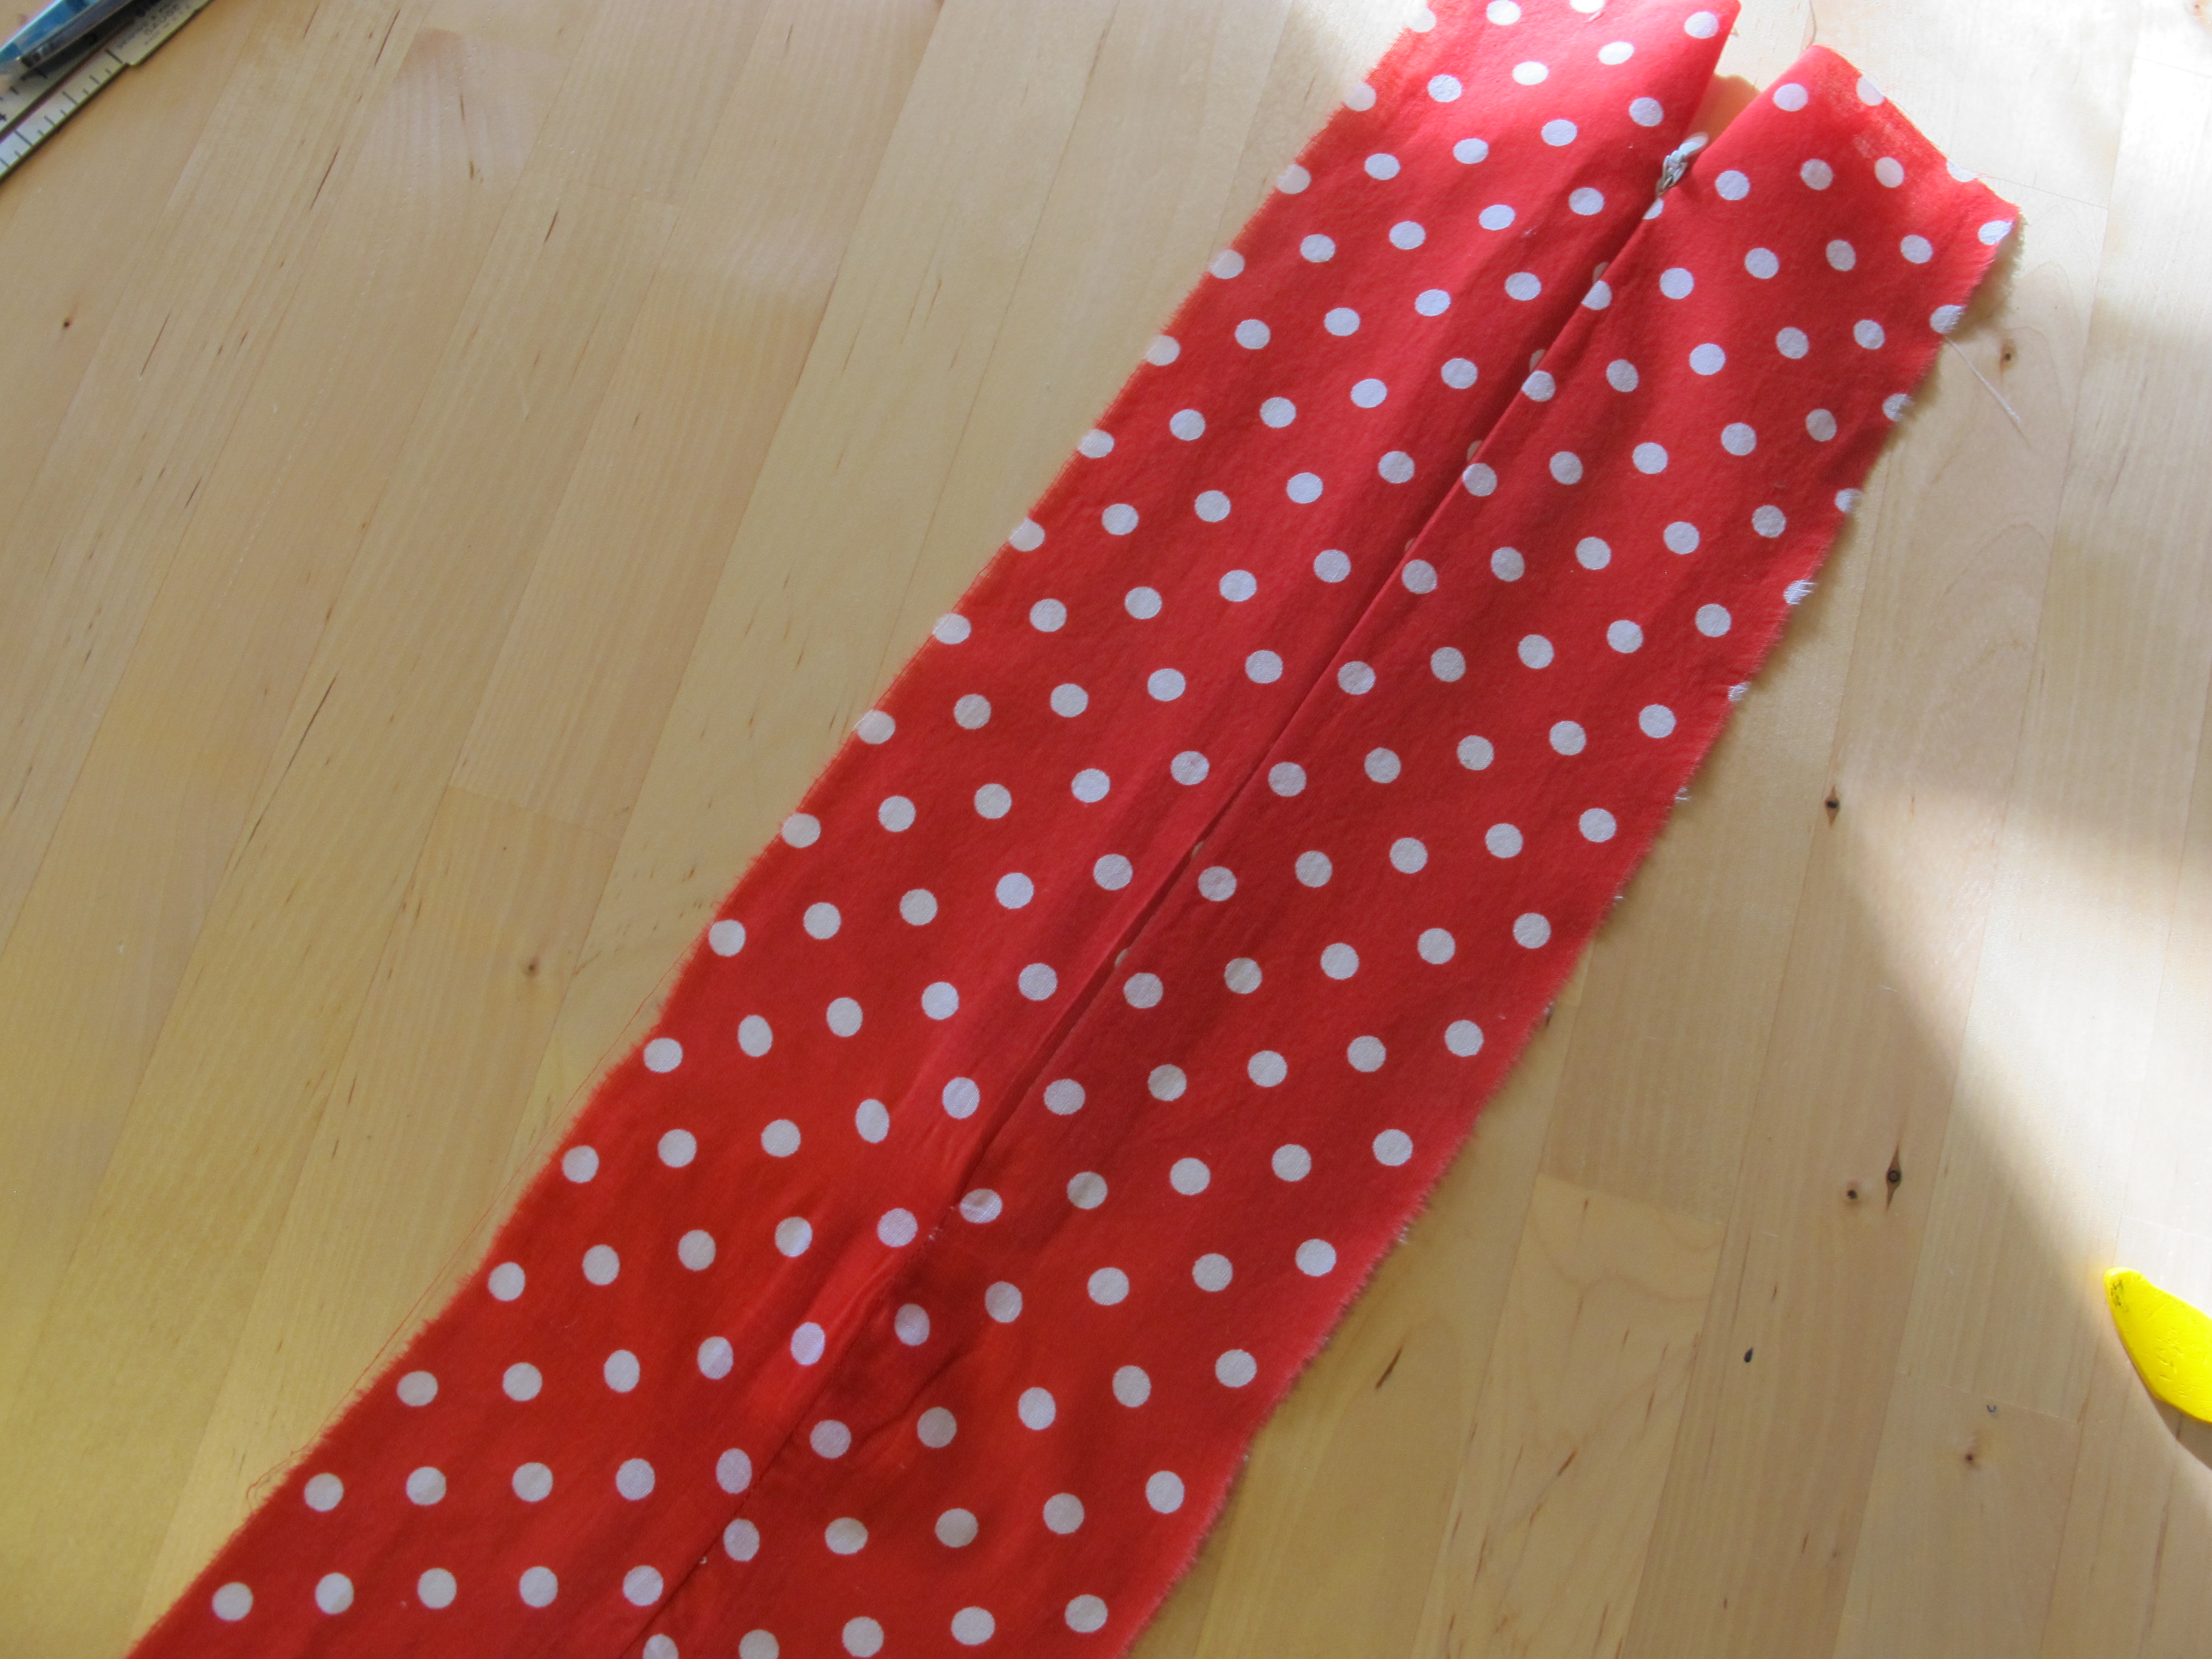
Now give the zipper a good press on both sides, making sure to press open the seam below the zipper.
No bump! Yay!

To give the zipper some strength, we want to attach the tail end to the open seam allowance. I used to do this by hand, but why whipstitch when you can shove it under the machine AMIRITE? Flip the fabric away from the seam allowance and sew each side of the tape down (to ONLY the seam allowance!) with a few short stitches.
And that’s it! Easy invisible zipper, no bump at the bottom, no wonky seam allowance below. Also – see the little wrinkles toward the bottom? That’s from my super-lightweight voile not having some interfaced support. Whomp whomp. Make sure you interface if you are using a lightweight fabric!
Now, what about finishing the top of that zipper with a facing? Hold onto yer hats, I’ve got a tutorial for that!
(also, the sun was starting to set at this point, so whoops, pictures are worse than ever up in hurr)


Open the zipper out so the fabric is flat and lay your facing across the top. Stitch down with your preferred seam allowance.

Open up the facing and understitch all the way across.

Fold the facing back so the right sides are facing. It won’t lay perfectly flat due to the understitching; this is ok!

Grab the facing seam allowance (at the top, the one with two lines of stitching) and turn it so it folds back on itself with both stitching lines facing up, and pin into place. The top stitching line should be about 1/8″ (or less) from the fold. This kind of hard to explain in words, so hopefully the picture makes sense!

Now stitch next to the zipper stitching line, about 1/4″ away (close enough so you catch the zipper; far enough so it doesn’t interfere with zipping abilities), from top to bottom. The fold that you just pinned down with be stitched into place. I like to sew where I can see the stitching line from the zipper, so I can make sure that I’m getting it at the right distance.

Here is what it looks like from the facing side.

Take your zipper seam allowance up at the corner where that weird fold is, and push the whole thing with your finger toward the facing. Turn right side out.

You should end up with a pretty nice lookin’ corner! That’s before pressing – and I didn’t even clip or trim any seam allowances. MAGICAL.
Give everything a good press, sew in a hook and eye, and admire your handiwork.

YEAH GIRL
(I know there are some wrinkles in that facing; it’s because I didn’t make it perfectly square when I was chopping up scraps to use)

WORK IT

SO PRO

SHOW THE CAMERA SOME LUV
So there you go! I think this method is a little more fool-proof, and I love anything that can be accomplished 100% by machine. Hopefully some of you will find this tutorial helpful when it comes to conquering those invisible zippers. Also, isn’t that corner-turning trick AWESOME? You can use that with any corner that needs a sharp point. The extra fabric actually helps keep the corner nice and structured, and is less likely a develop a hole over time (as would be the issue if you trimmed down those seam allowances too aggressively). If you’re experiencing deja-vu, it is very similar to the method Tilly posted about a couple of years ago, except with stitching to keep everything in place.
If you have any questions, holler at me in the comments! Or we can just discuss your thoughts on invisible zippers 😉


Thank you for this. I have feared the zipper on many occasions. I have been using a Youtube video which recommends pressing the zipper flat first but, you’re right, there is a danger you can get just a bit too close to those teeth. I’ll try this next time.
Thank you!! I’ve always pressed the zipper as most tutorials tell you to do, then sewn too close so that you cant zip it up (then unpicked, ripped fabric and ended up making stuff too tight 😦 ).
A most welcome tutorial x
Thanks for the tutorial!!! Sewing at the bottom of the zipper always throws me off! Now I can’t wait to try this method. And damn, I really need that invisible zipper foot; I tend to sew too close to the zipper teeth.
The invisible zipper foot is one of my favorite feet! Worth every penny 🙂 You can also use it for teeny-tiny piping, if that helps sway ya 🙂 haha
Great tutorial. I love all the pics. I guess I am a visual learner.
I’m glad you find them helpful! 🙂 I always wonder if I’m overloading the photos when I write a tutorial haha
That’s one fine tutorial! Pretty much how I do mine apart from the tacking the zip to the allowances bit at the end. Simple but genius!
Great tutorial and if you need more strength like in the bridal gowns I sew, sew the full length of the tape to the serged seam allowance instead of just at the bottom.
Great tip!
Thanks for sharing- I finally got mine looking good after following the tutorial on Fashion Incubator. Now I don’t fear them like I used to!
Thank you! I will have to try this out. I always do lapped zippers but I made a lace dress that I think this would work better for.
Great tutorial! Nothing more satisfying than a well-inserted zipper. I have to admit that I still get a little nervous closing the gap between the bottom of the zipper and the stitching for the rest of the seam. I usually just do the last few inches by hand. It takes a little longer but allows me to be so precise!
I do a lot of sewing by hand, too, if I have trouble wrangling it under the machine. Sometimes it’s just faster to do it right once, instead of trying to speed things up and mess up it up in the process 🙂
You know how you post things you want to learn all over the house so that wherever you look, there the thing be that you need to be knocked in your head EVERY. SINGLE. MINUTE. OF. EVERY. SINGLE. DAY. In the nighttime, in the evening, in the morning. That’s where this is going. Everywhere. I will look at it a hundred times because zippers and me: we freak each other out. Thank you.
Well, freak out no more! Zippers are pretty easy, you just gotta show them who’s boss 🙂
Excellent tutorial! This helps so much. Thank you. And yeah, those plastic zipper feet are terrible.
Thank you for this tutorial! My invisible zips always look wrinkly, but I think it’s more from not stabilizing the seam allowances than stitching carelessness.
Speaking of tips + tricks, I found your dart trick over at the Papercut Collective (from the La Sylphide Sewalong, I think?) VERY helpful — it’s a lil more work but srsly, I don’t get any puckering!! So thanks for that too!
Oh awesome, I’m glad it worked for you 🙂 Although I gotta give all that credit to Katie – she wrote the instructions, I just took photo steps for ’em 🙂
Great tutorial! I really liked the part where you explained how to finish the top of the zipper. I did not know this yet. I love how invisible zippers look and almost always use them (my favourites), unless I want my zipper to stand out haha.
Hai. I’ve been reading with a lot of pleasure here for a while now and I’m often in awe of your sewing knowledge – and dare. But I do know a trick to do your facing a lot simpler.
You just stitch on your facing, but stop at about 5 cm (yep, European) before your zipper on either side. Then you cut 1 cm of the side of your facing (so the part that sewn to the zipper, and not visible). You put that facing along the side of your fabric and stitch it. It will indeed not match at the top.
And then comes the magic: When the side is stitched, you simply turn the zipper to the inside (wrong way) of your fabric. You turn as ahrd or soft as you need tot make the facing and right side match at the top. Then you stitch the top. Clip the corner and turn. Tada! Facing for an unvisible zipper in two steps. And the best part is it doesn’t pull in the corners of the top.
European? Can you by any chance explain this in Dutch?? :-).. I don’t think i quite get it yet..but an idea is forming…just not seeing it in my mind yet… Pictures maybe? If that’s allowed or possible of course……?
If I can get it to work for me, I’ll post a photo tutorial on the blog 🙂 Of course, if Valerie wants to post photos – that’s fine with me too!
thanks :-), invisible zippers are great…i am just sewing about a year now, and the zippers are oke, but then…..at the top of the zipper getting it ‘nice’ …pffff….and your photos help, but as i said i just don’t see it yet…hahaha. i just keep on trying…determined to get it right one day…:-)
It’s actually very easy. And I don’t have a blog, so I can’t post any photo’s…
OOOH thank you for the tip! I am SO going to try this out 🙂
thanks for the tutorial, I love invisible zips since I got myself an invisible zip foot. The tip about the facing and sewing the tail are especially useful, very neat. I also stoped pressing the zip first after sewing too close to the teeth several time.
Great tutorial and glad to escape from the pressing of the zipper…never could figure that one out when I had the darn invisible zipper foot and all…! Love your finishing work, too – I’ve been wanting a way to do that 🙂
I have been sewing invisible zippers (with the plastic foot) for approximately 40 years since they first came out. I have no issues with the plastic foot. However, I don’t understand what the advantage is to sew up the bottom first and then have to worry about a bubble. I sew the seam last – no problems, no bubbles.
Hey, that’s pretty awesome that the foot works for you 🙂 I’ve never had luck with it (nor has anyone I’ve known). But I guess it has to work for some people, else they’d stop selling it 🙂
For me, if I leave the bottom seam open and try to sew it up when the zipper is inserted, I get wonky seam allowances, crooked lines, and a bubble at the bottom of the zip. I don’t know what it is – you’d think it wouldn’t make a difference at all – but I’ve never had much success with it. Leaving just a little bit of the seam open means there’s less room for error when you close it 🙂
Oh wow! This is great! I’ve been trying to figure out how to neatly do finish a zipper top when there’s facings involved, so this is super helpful.
Also, I have a Bernina Bernette 25 and when I went to buy an invisible zipper foot they told me that you can subsitute in a Brother foot and it works just the same. So my invisible zipper foot was about half the price of the Bernina one – and it works perfectly. My inner cheapskate rejoiced. 🙂
Oh man, that is lucky! What I would do with that extra $20 today… haha 🙂
Exactly what I do and teach my students. Great tutorial for beginners ….
Thank you so much for the excellent tutorial! The steps are so nice and clear! Will definitely try one now!
I’m pinning the shit out of this. Invisible zippers have been the bane of my existence for too long. Thanks for doing this!!
This post makes me happy because I’ve been using this same method, but it also makes me regretful because I’ve been wasting many precious hours frigging with that stupid plastic zipper foot. That’s it!! I’m investing in the fancy one. you have proven it will make my life better…
I’ll have to try it next time (but I’m literally at the point where I can’t afford zippers at the moment). 🙂
Thanks a bunch! I am going to try this method this weekend on some leftover pieces of fabric that I have
Whoohoo! Thanks for the info and ton of pics! I’ve liked it for when I want to insert an invisible zipper. Now I always look in my Colette handbook, but I prefer a lot more pictures 🙂 Thanks for going through the trouble for us!
Thanks for the tutorial…i am goingbto have to remember the facing part…i just do not get it…:-(… That’s me, not you…;-).. So with next project i will sew with ipad next to my machine…maybe i get it as i go along…but invisible zippers are my favorites..and indeed go for a metal foot!!!! It’s worth it…:-)
pretty much what i’m doing, ever since i inserted the first invisible zipper into a garment, over a 5 years ago.. exept that i always sew in zipper first, and then finish the seam underneath it (starting from the zipper’s end), that way i don’t have to worry about that bubble you’re talking about
That is pretty cool. My mom loves to sew. I wonder if she knows how to do this. Thanks for sharing from 3girls1apple.com.
Yer awesome! Thanks much!
This has to be the coolest method yet! And thank you for showing the facing finish too. I usually wing it, and although I probably do facings this way, it always takes me too much brain power to work out each time.
I will have to give your way a try. I have always inserted invisible zippers leaving the bottom of the seam open, inserting the zipper, then closing up the bottom of the seam. Excited to try your option. How about doing a lapped & centered zipper tutorial?
I’ve thought about it, but there are soo many tutorials for those, I didn’t want to over saturate the blogs. But, tutorials are fun, so maaaaaybe… 🙂
I used this method today and it turned out pretty good!
YAY!! 😀
OK, I finally gave in and bought a purpose made invisible zipper foot. It cost me over $40, but I just made a fantastic skirt (vintage fabric $3; thrift shop, 10c zipper; thrift shop) with a professional looking invisible zip. Thanks for the prod!
Oh, awesome, I’m glad you found it helpful! And heck yeah, isn’t that invisible zip foot amazing? Worth every penny, I think (even though that is certainly a LOT of pennies!)
And, I used your machine sewing finish for bagging out the lining; usually I finish by hand, but I’m really impressed by the speed of your method. Thanks again.
Why did it never occur to me, in the dozens of invisible zips I’ve put in, to use the throat plate to guide the edge of the fabric and let the foot put the zip in the right distance? I too carefully mark the stitching line and fiddle around to get the zip on top. I am embarrassed.
Thanks for the rest of these tips, I’m looking forward to trying them!
Don’t even feel bad, I did the same thing up until recently 🙂 It’s all a learning experience, ha!
Thanks for this tutorial. I used it to make a skirt, and linked your blog on my blog http://pennynewton.blogspot.com/2014/09/summer-skirt-with-scandinavian-feel.html.
Aw, I love it! Looks great! 😀
Reblogged this on Ikadeepika and commented:
Interesting though.. I like to try this kind of zipper on my dress..
You rule! You rule, you seriously rule. Thank you very much. Finally know what’s happening- not afraid. Feeling massively empowered tonight. I know you know what I mean. Also, have you checked your cat’s horoscope today?
Yay, I’m so glad you found it useful! And no, I didn’t check Amelia’s horoscope – was there something in there I should know about? 😉
Thanks so much for this! I had never put in a zipper before and my first one went in flat and invisible. I did it with a regular zipper foot and didn’t quite get close enough at the bottom on the first run but a second row of stitches (that no one ever has to see) did the trick. It was a magical moment when I did it up.
Awesome! I’m so happy to hear that the tutorial worked for you :DDD
Lauren: I’m late to the party here but I just install my firs sample of an invisible zipper and you are the Bomb! My minor issue is moving the needle position a millimeter or so too far to the outside, fearing I’d obstruct the teeth, which resulted in a wee gap of the fabric. This was solved with some judicious pressing, but I’ll know better next time. Brava!
I’m so glad you found my tutorial useful! Yay! 😀
Thank you for the tutorial! I attempted to insert an invisible zipper that didn’t actually turn out to be invisible! I thought I followed the directions but about 1/8″ of the tape is clearly visible on either side of the zipper. Could this be because I did not stitch close enough to the zipper coils?
Yep, that’s what it sounds like! If you’re using an invisible zipper foot, try finagling the zipper teeth so that they are inside the grooves of the foot (I just lower the needle, raise the presser foot, and start manhandling things around until it settles into place). If you’re just using a standard zipper foot, try moving your needle over a couple mm until it’s right next to the teeth, but not actually sewing over them. It may take a couple of tries,but no worries – the stitches won’t show, so a couple passes are ok and don’t need to be ripped out 🙂
Hope that helps!
Yes very helpful, thank you!
best tutorial explained thoroughly!
Thanks for your help!
Wooo!! this tutorial explained thoroughly! I’ve followed your instructions simple
When I fix an invisible zipper on chiffon fabric with knit lining or knit fabrics the zipper area seams to be folding in gallops, the zip moves to one side in some areas instead of being straight. I have Sought for a possible cause or solution yet can’t find any. Any help pls?
Have you tried applying some interfacing to the seam allowances before inserting the zipper? It sounds like the fabric wants to stretch whereas the zipper can’t, which may be causing the issue.
The stitching on my invisible zipper has come undone at the bottom 4″ on a finished garment. I have an invisible zipper foot, but no idea of how to use it to re-sew areas where stitching has come undone without tearing out entire zipper. Any suggestions?