

i just love bound seams – i think they are so pretty and neat and add a really nice touch to an otherwise simple garment.
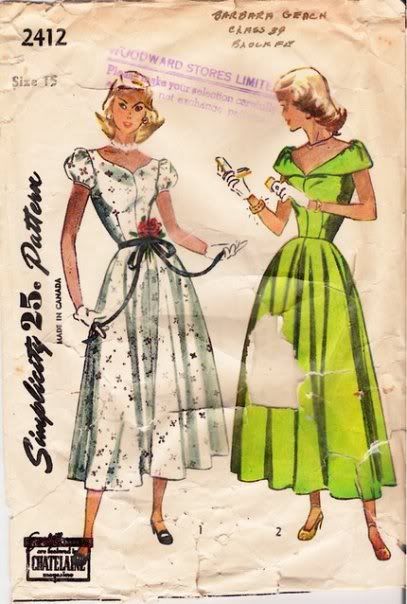
i am currently slogging away at simplicity 2412 and, god, has this pattern been a lesson in patience. from the initial tracing, to decoding all the weird pinholes and perforations (verdict: unprinted patterns really aren’t that scary, but i wouldn’t recommend them to a total beginner), to the multiple pattern adjustments (taking 9″ off the bottom and the dang thing is STILL too long! and omggg so much unnecessary ease!)… at least the actual construction is going together fairly smoothly!
i decided to bind my seams for a few reasons:
– this dress is seersucker. who wants to line a seersucker anything? talk about defeating the purpose!
– out of all the garments i’ll be working on this spring, this one has very few seams and they are all straight – perfect for this kind of finish
– i have the most gorgeous lipstick red rayon seam binding. GORGEOUS. it was crying to be used!
seam binding is actually pretty simple, albeit time-consuming. there are two ways to bind your seams: you can press the seam flat and bind each side separately, or you can bind the two seams together. i chose the flat method, because, well, i like to make everything in my life extra difficult 🙂
you also have multiple options when it comes to *what* kind of seam binding to use! there is bias tape – prepackaged or self-fabric, silk organza, or packaged seam binding. since my seams are all straight and i don’t have to worry about curves, i am using rayon seam binding.

you are going to start out by stitching your seams as normal – right sides together, 5/8″ seam allowance (or whatever your pattern calls for!!).


take that sucker to the ironing board and press it nice and flat, with the seams open

cut 2 pieces of your preferred binding – this is my rayon seam binding, cut to size.

if you are using seam binding and not pre-folded bias tape, you are going to want to press the binding in half lengthwise. be careful if you are using polyester and make sure your iron isn’t too hot!

sandwich the binding on either side of your raw edges, being sure to catch *only* the seam allowance and not the actual garment.

now sew! i repeat, you just want to catch the edge of your seam allowance – don’t stitch this down to the front of your fabric. let it hang free.
on a side note, if i catch any of you sewing over your pins (as opposed to removing each one as you approach it), i will hunt you down and beat you with my clapper. bad bad!
not pictured, but i like to give my seams a good final press to make sure that everything is neat and smooth.
and the finished seams! don’t they look lovely? 😉
and while i have your attention, check out my new ironing board cover:

in true overly obsessive fashion, i even made a new cover for my sleeve press! the fabric is 100% cotton, backed with 100% cotton batting and 100% cotton muslin. that’s a lot of cotton, but it’s necessary for all the high heat/steam i use on a regular basis. and that sucker holds heat like nobody’s business – i’m actually pretty surprised how much better my pressing is going with the simple addition of a better cover.


look at that gingham sleeve press cover!! it’s adorable. this is why I love you.
aw shucks, girl… :3