Tag Archives: stripes

Completed: The Rambo Project

13 Jun

the_rambo_project

As much as I like to make garments that I know will get lots of use and wear and fulfill a gap in my wardrobe, sometimes you just gotta switch it up and make something completely ridiculous just for the fun of it.

Which is where this particular make comes into play today.

A couple months ago, Seamstress Erin hollered at me and a mess of other ladies and asked if we’d be interested in participating in a group project that involved a very unlikely fabric source. See, this particular fabric actually came straight off the set of Rambo III. You can read the whole saga here, but basically, what we have here is a piece of famous fabric.

While I am trying to really limit the group projects I sign up for (my time management is so seriously out of whack right now, y’all have no idea), how could I say no to that?? Never mind that I’ve never actually seen Rambo III (or I, or II, for that matter) – never mind that when I tried to read the movie plot, the overuse of the word “explosion” about made my eyes roll back in my head (also, I still have no idea what that movie is about) – never mind that I actually don’t like action movies one bit… we are talking about a piece of fabric that Sylvester Stallone might have potentially touched, holy shit. You bet your ASS I signed up for that shit!

Simplicity 1426 - The Rambo Project

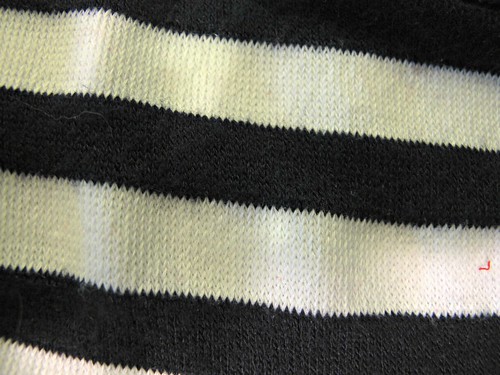
And this is what ended up in my mailbox a few days later. It’s not really the most amazing piece of fabric – and, to be fair, Erin fully disclosed in her initial email that it was a strange scarf size, had a weird bit of stretch to it, and also was a little stained – so it’s not like I was going to make some heirloom-quality piece out of it. For a project like this, naw, I decided to make something SLUTTY!

Simplicity 1426 - The Rambo Project

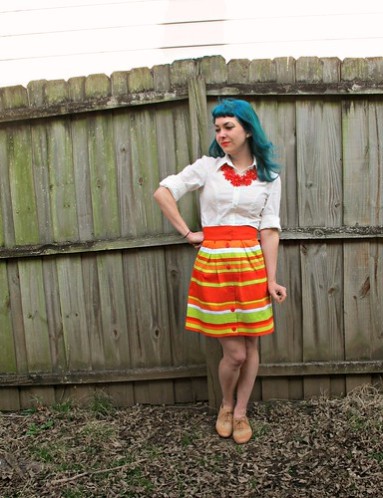
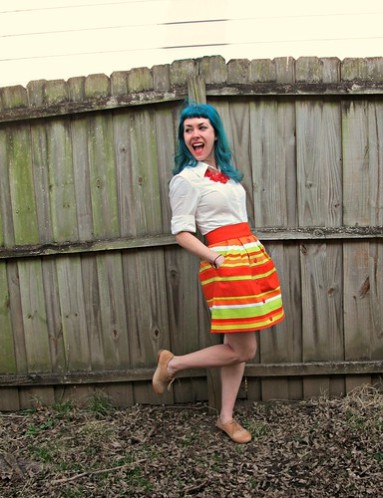
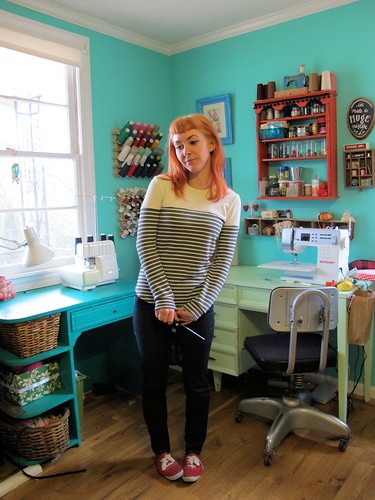
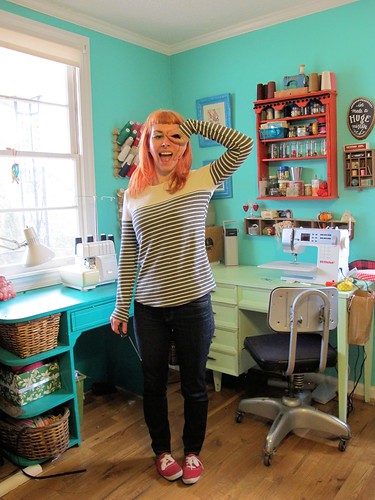
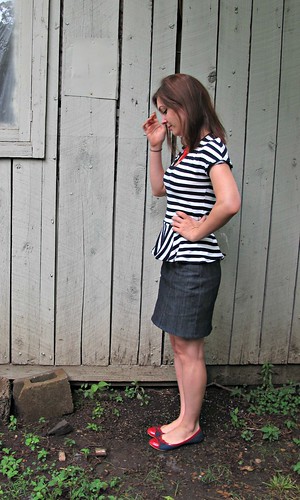
I like to think I did ol’ Rambo proud with this… what do you think?

Simplicity 1426 - The Rambo Project

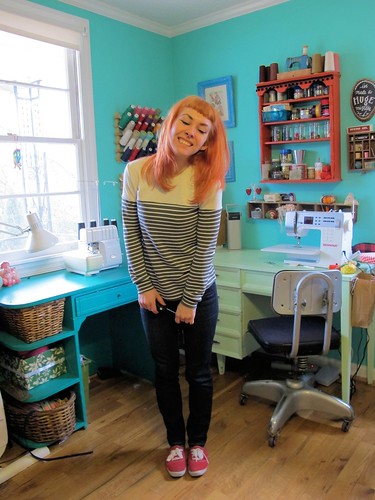
Ok, in all seriousness, I’m really sorry that y’all have to keep looking at my freakin stomach. I swear I don’t normally traipse around the city dressed like this, but something about this project just screamed boobie top. While I did initally plan on wearing this with something high-waisted, when I tried it on with my jorts, it just looked way white trash in the best way, and I decided it was meant to be.

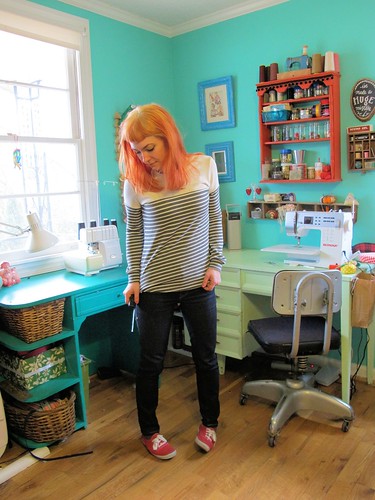
Oh, and also, I figured y’all might want to know that I got my Jorts situation under control. No, I did not make these. I bought them from Goodwill and cut the legs off.

shit

Yep.

Simplicity 1426 - The Rambo Project

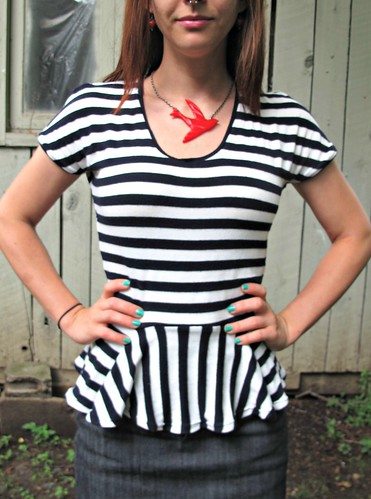
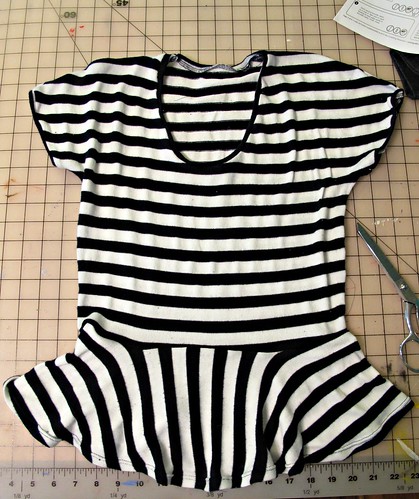
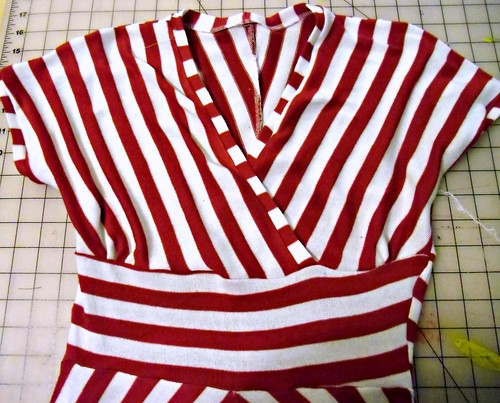
This little bralette top is made using Simplicity 1426, which is a vintage reissue. I was initially drawn to the cover art – the model on the front is freaking gorgeous – and figured it would be a good pattern for making comfy loungewear bralettes. You know, just stuff to hang around the house in when I don’t feel like rocking something with underwire (and, despite what these photos would tell you, I’ll probably wear them underneath a shirt, ha). Thanks to Rambo, I had the perfect opportunity to test out the pattern in a wearable muslin.

Simplicity 1426 - The Rambo Project

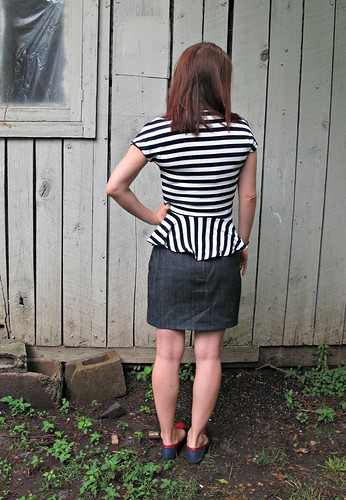
Using the finished measurements to determine my size, I cut the size 6. It fits pretty nicely straight out of the package, although I did have to pull in the back slightly tighter so it would fit my ribcage (again, I’m about 28″ at the ribcage, so most stuff tends to be too big right there!). The instructions were easy to follow, although I never did see how to finish the end of the back band? I just serged the raw edges and folded them down. Nothing fancy here! I did change up the back closure – the pattern calls for buttons, and while I reeeeally wanted to do pearl snaps (because, god, that would be amazing), my fabric was just too thick to even try to hammer those suckers in. I instead opted for flat hooks and eyes – the kind you put on a waistband.

Simplicity 1426 - The Rambo Project

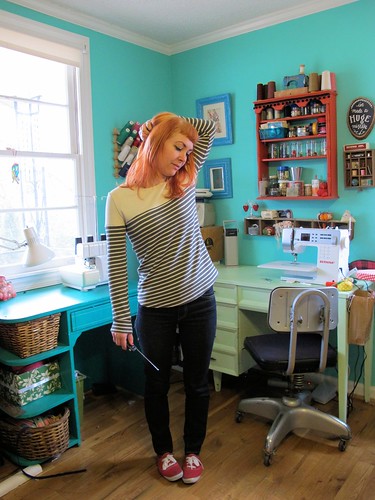
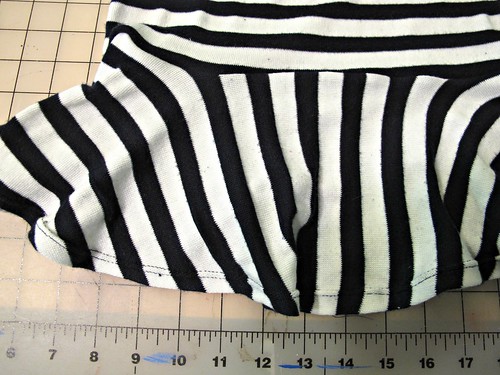
The cups do have a tendency to gape open if you don’t pull the neck straps tight enough (and once you do that, you run the risk of giving yourself a headache!). One thing I would do differently is ease the edge of the cups with a piece of twill tape, similar to how I constructed the bodice of my Flora dress. This would help the cups hug the contours of my body and thus lay more flat along the edge. Something to keep in mind if you plan on making this!

Simplicity 1426 - The Rambo Project

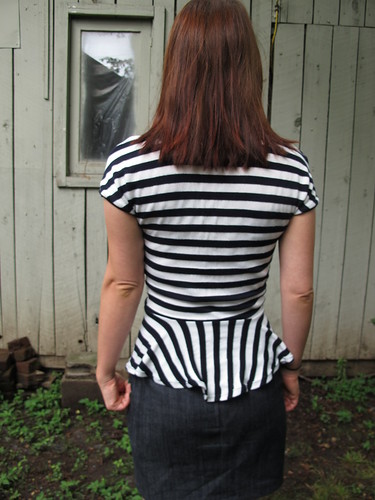
Overall, though, it’s a pretty cute top. Personally, I’m just tickled that I was able to take a rather classy looking pattern and turn it into something that looks this trashy. I am awesome.

Simplicity 1426 - The Rambo Project

Simplicity 1426 - The Rambo Project

Simplicity 1426 - The Rambo Project

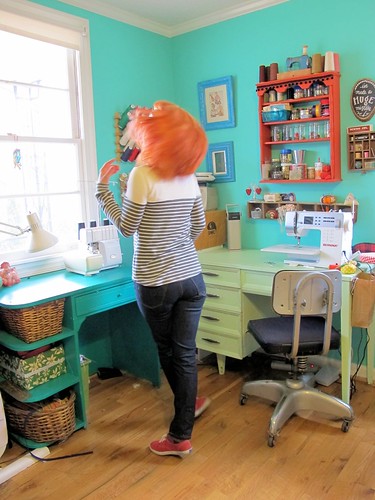
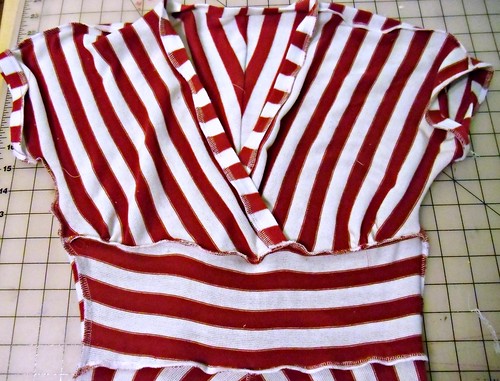
The top is lined (I used self-lining in this case) and the edges are bound (again, I used self-fabric), which makes for a very clean inside. I found the binding was super easy to apply in this case, due to the slight stretch of the fabric.

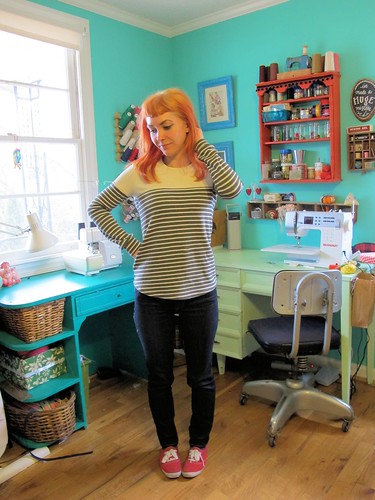
Obviously, this wouldn’t be a true Rambo tribute without the addition of some sort of weapon. I don’t personally own any weapons (can you believe that? Not even a giant stick that I can use to ward off intruders… seriously, Lauren), but I did find this pocket knife on Landon’s dresser. Shhh, don’t tell him!

Simplicity 1426 - The Rambo Project

THAT’S MORE LIKE IT!

Simplicity 1426 - The Rambo Project

Check out The Rambo Project to see what happened to the rest of the turbans! Big thank you to Erin, for letting me participate in the ridiculousness that is The Rambo Project!

Completed: The Striped Button-Down

14 Apr

A couple of weeks ago, Landon and I went to the mall – specifically, Gap – to find him a new pair of jeans. While we were browsing around (well, he was browsing – I just kind of lurking and judging the shit out of everything SORRY), I came across this stripey button-down goodness. I was mostly enamored with the horizontal stripes – loose fitting shirts aren’t so much my bag, and besides, those long sleeves would get worn for about two weeks in this climate – so I thought I’d make my own with a few modifications.

Butterick 5526 - stripes!

And make it I did! Woohoo!

Butterick 5526 - stripes!

This was definitely a waffling sort of project – I waffled on what style of shirt to cut, I waffled on stripe direction, I waffled on sleeve length, and I waffled on buttons. Fortunately, everything came together quite well and I’m super pleased with the end result!

Butterick 5526 - stripes!

I started out with my base pattern, Butterick 5526, since I knew this little dude already fit me pretty well. I knew I’d be using this pattern from the start, but what I waffled on was which view to cut – straight lines or princess seams? Obviously the straight, less fitted view would be more true to the original inspiration – not to mention easier to cut and match up those stripes. However, I don’t really like weight loose-fitting clothing – and when I do, it either better be something super drapey (which this shirting fabric is not) or, like, the dead of winter. Princess seams were the next option, which seemed like a good idea until I realized that the stripes would start staggering over the bust and not match up properly as a result. I considered cutting the stripes vertically, until I realized THAT would even be a hotter mess – plus, the horizontal stripes are what drew me to the shirt in the first place.

Butterick 5526 - stripes!

I took a sewing break to watch some infomericals, and thus realized the answer to my problem:

Butterick 5526 - stripes!

POCKETS!

Hell yeah Imma slap a pocket right over those broken stripes and NO ONE WILL BE THE WISER.

Butterick 5526 - stripes!

So. Let’s talk about horizontal stripes across princess seams. As you can see here – it *can* be done. Obviously the stripes won’t match all the way to the top of the seam, but you can cover the worst parts with a pocket, or just pretend they’re not there. I cut all my fabric on the single layer and I’m pretty happy with how my stripe-matching turned out – if you stand back and squint, you can’t even tell that there are seams down the front of my shirt! Yeah!!

Butterick 5526 - stripes!

I used this Marc Jacobs red striped cotton shirting from Mood Fabrics to make my stripey shirt. You’ll probably notice that the stripes in the picture are vertical – I had to cut the pattern on the cross grain to get those horizontal stripes. Doing so sacrificed the tiny (like, super super miniscule at best) amount of stretch on the grain, but I think the shirt fits fine as it is. Fair warning if you are working with a more fitted pattern – take the lack of stretch into account if you’re cutting on the crossgrain.

Butterick 5526 - stripes!

Butterick 5526 - stripes!

To match up the stripes, I just sewed reeeeally really carefully (after accurate cutting, I should add!). I really love sewing plaids and stripes – I find the challenge refreshing, and the end result is SO freaking gratifying!

Butterick 5526 - stripes!

If you’re at all familiar with this Butterick pattern, you’ll know that it doesn’t come with an option for short sleeves – just long, and 3/4 length (or, rather, on me – almost-but-not-quite-full-length, wtf). Also, the sleeves in this pattern kiiiinda suck – they’re really huge and wide, and the sleeve cap has waaay too much ease, at least for the princess seamed version (the plain version has a lower armsyce, since it’s more loose-fitting. My guess is that Butterick didn’t feel it was necessary to redraft the sleeves to fit the princess version, which is lame and shitty and boo on you, Butterick).

Butterick 5526 - stripes!

Reducing the sleeve cap ease was easy – I just followed Casey’s method. Figuring out how to get my beloved fitted, short sleeve started another bout of waffling. I waffled on sleeve length, I waffled on fit, I waffled on whether or not to add a cuff. In the end, I took about 1/2″ off each side of the sleeve seam, and put the sleeve on and marked where I wanted it to hit. I finished it with a 5/8″ narrow hem. It’s pretty simple, but sometimes simple is the best option, yeah?

Butterick 5526 - stripes!

The only thing I would change for the next round is to lower the pockets – I went with the markings on the pattern, but I think they are a little too high and should be about 1″ lower.

Butterick 5526 - stripes!

Butterick 5526 - stripes!

The pockets were REALLY fun to sew, by the way! Lots of ironing little creases, and turning sharp points, and precise topstitching (my favorite!). I just love how they look, especially with the little pleat in the middle.

Butterick 5526 - stripes!

As with my previous shirt, the seams are finished with a simple serge (I generally prefer flat-felled seams on this style of shirt, but flat-felling princess seams is NOT something I want to try to attempt right now!) and topstitched with a slightly longer stitch length. Besides the trauma of cutting and matching all those pieces, the actual construction of this shirt came together pretty quickly.

Also, I should note that I totally boringed-out on the buttons for this guy, and went with plain off-white shirt buttons. I like the way they look, though! 🙂

Butterick 5526 - stripes!

And I just love how it turned out! Simple, summery, and a little nautical – without looking costume-y. A win in my book!

As a side note – I mentioned this on Twitter and Instagram last week, but in case you haven’t heard – I’m teaching Introduction to Fashion Sewing this summer at Watkins College of Art, Design & Film! The 9 week class runs all the way through June and July, and I’m so excited about it! Nashvillians, if you’re interested – you can see the summer course catalog here (I’m aaaall the way toward the end, on page 13). Yeeeah summer crafty time! 😀

Completed: Chevron’d Ginger Skirt

4 Apr

Here’s another piece that I have seriously been planning for a couple of years – the chevron’d Ginger skirt!

Ginger Skirt - chevrons

Another stupendous idea delayed by lack of fabric – why why whyyyy is it so hard to find a good, 1″ stripe, non-stretch fabric, apparel-weight? Whyyy? I find lots of striped shirting fabrics (too lightweight, stripes too narrow), striped stretch twill (holding out for the lycra-less, pls), striped knit (ok, yes please, but not for this particular project!), or stripes in some kind of weird array of colors. Not to mention the overabundance of home decor striped fabric – but I’ve found I just don’t like all the structure that comes with home decor weight. My ass is not meant for curtains to hang off of it.

Ginger Skirt - chevrons

I was PRETTY FREAKING EXCITED when I found this fabric at last month’s flea. Hiding under a pile of vintage fabrics (all good, I bought nearly all of them lolz) were 4 yards of my dream yellow-and-white-1″-striped-cotton. In a rare unselfish move on my part, I ripped the yardage in half and sent 2 yards to Sunni (who I was doing a great fabric swap with earlier this month and holyyyy shit you guys I cannot wait to start digging into the lovely stuff she sent me!), keeping the other 2 yards for myself and this skirt. And here she is – finally, the striped/chevron’d skirt of my dreams!

Ginger Skirt - chevrons

As I mentioned before, this is the Ginger from Colette Patterns. I made view 3, which gave my striped fabric a nice chevron. I know chevrons are REALLY hip right now (and every time I pass something chevron’d at Target, I groan. A lot.), like to the point of already looking super trendy and dated, but I do like them for clothing. I’d say something like I hope they never go out of style, but I pretty much wear whatever I want regardless, so let’s just say I hope I can continue finding good striped fabric to make my own! Hopefully more frequent than once every couple of years 🙂

Ginger Skirt - chevrons

I’ve made this skirt a few times before, so this definitely ain’t my first rodeo, but I did have to size down since my previous versions don’t fit me anymore (well, maybe the Gazer does. I haven’t pulled that one out of summer storage yet to check). I cut the pieces on a single layer so I could be really accurate with lining up those stripes, and it (mostly)paid off.

Ginger Skirt - chevrons

I even went as far as to center the yellow vertical stripe in the middle of the waistband, so everything would be nice and balanced.

Now that you’ve seen the gorgeous, time to share my shame…

Ginger Skirt - chevrons

Kind of bummed that the chevrons on the side seams don’t match up 😦 I actually think it looks much much better in these photos vs real life (and since I took these photos, I have worn the skirt and been totally ok with the barely-matched-up side seams). Like I said. I did a very careful job of cutting everything out on the single layer, but the way this skirt is shaped means that you either get the fabric on-grain, or the side seams match all the way up to the waistband. One or the other, make your choice! I decided the grain was more important – plus, they kinda sorta match, right? 🙂

The other shame is that dammed invisible zipper! Guysss, inserting an invisible zip into a bias-cut garment isn’t the easiest thing you’ll ever do. I stabilized my seam allowances with 1 1/4″ wide stripes of silk organza cut on the straight grain, and the zipper is ALMOST perfect, but there is a tiny bubble at the bottom. I’m trying to decide if it bothers me enough to rip it out and fix it. Eh. It looks pretty bad in that picture!

Ginger Skirt - chevrons

But, you know, issues aside – it’s a fun skirt! And it’s fun to wear, although I do feel like I’m exposing myself every time I bend over to pick something up. Bias cut rides up all kind weird.

Ginger Skirt - chevrons

Ginger Skirt - chevrons

This fabric was also kind of weird, amazing as it is. When I first grabbed it, it felt like a great bottom weight – slightly stiff, a bit of body, a subtle sheen. After the prewash, however, the fabric majorly softened up and weight-wise, it felt a lot more like quilting cotton. I was hesitant at first, as I wanted a stiffer shape to my skirt, but I’m pretty happy with how the drape of the fabric looks with the bis cut. The only drawback was that those bias sides stretched a loooooot. Like, so much. That’s probably a good part of the reason why the side seams don’t match up so nicely.

Ginger Skirt - chevrons

Ginger Skirt - chevrons

To give the waistband some structure, I interfaced the outside with my normal fusible interfacing, and sewed hair canvas to the facing. While this particular waistband isn’t quite as high as the other views on the pattern – and it’s not shaped, either – I still didn’t want it to crumble when I bent over. Not a good look!

Ginger Skirt - chevrons

Ginger Skirt - chevrons

Oh yeah, I used the bicycle fabric left over from this dress to face the inside of the waistband. It’s a cute little surprise!

Ginger Skirt - chevrons

I also used the last of my yellow lace hem binding for the hem. Side note – the packaging for this stuff (it’s from the 70s) boasts that it’s “Like Pretty Underwear!” which makes me laugh every time.

Ginger Skirt - chevrons

So that’s it! Simple skirt, simple fabric – but I love the results! I guess I’m on a major skirt kick right now; I’ve got anther one cut out waiting for assembly as I type this.

As a side note – the shirt I’m wearing is my button down from this outfit. I LOVE this shit and I’ve worn it soo many times since completing it! The reason why I’m pointing it out, though, is because this is what the shirt looks like after a wash with no ironing – I just shook it out and hung it to dry. It has some subtle wrinkles, but nothing crazy – it kind of reminds me of linen with how the wrinkles just look relaxed and natural. Except it’s cotton! Pretty cool; I love getting away with not ironing my clothes 😉

Completed: Runway-Inspired Separates

25 Mar

So, everyone at the Mood Sewing Network decided a couple of months ago that we would challenge ourselves to make pieces that were inspired by the Spring 2014 runway. Real talk: this shit sent me into a panic. Runway? I can honestly say I have never even so much as glanced at a series of runway photos, let alone determined an outfit based on what I saw (I’m not saying this in an ~ooh, I’m so cool I just don’t even pay attention to fashion~ way, more like, yo clueless!). Furthermore, it’s difficult for me to grab “inspiration” from something without just blatantly copying it. I spent an entire month agonizing over designers, pouring over runway sets at style.com (holy crap, there are a lot of them) and wringing my hands over what to make.

Butterick 5526 & Kelly skirt, made with Mood Fabrics

Then I discovered Alberta Ferretti.

Alberta Ferretti Spring 2014

I still don’t know who this designer is, exactly, but the entire runway show is magical. Bright, saturated colors! Crisp white accents! Flowers! Stripes! This is the kind of inspiration I can get behind! I decided to make myself a *wearable* (emphasis on wearable ;)) version of my favorite look.

Butterick 5526 & Kelly skirt, made with Mood Fabrics

Figuring out the fabric and patterns I would use was almost as difficult as picking a designer! I knew I wanted to make a striped skirt with pleats similar to the runway version, because I just really love how that turned out (plus, who doesn’t love a good striped skirt?), but finding a good striped fabric on the Mood Fabrics website was haaard. I mean, they have all sorts of good stripes to choose from – but very little in that specific combination of wide, irregular stripes in bright saturated colors. I know, I know – this is supposed to be an inspiration, not a literal interpretation. But dangit, I wanted those irregular stripes!

Butterick 5526 & Kelly skirt, made with Mood Fabrics

I’m not going to tell you how long I spent picking through the Mood website with a fine-tooth comb; let’s just say I probably know every apparel fabric they sell now. I did finally find my big prize, though – this amazingly bright orange stripe cotton sateen is the clear winner. Woohoo! Of course, it clashes with my hair like big time crazy bad, but whatever, I picked all this shit out pre-blue LT. Anyway, I just love love LOVE the bright colors of the stripes – it’s not quite the same colors as the inspiration skirt – it’s way more happy springy! Yay spring colors!

Butterick 5526 & Kelly skirt, made with Mood Fabrics

I was originally going to make the fabric in a skirt that is more similar to the runway inspiration – no button front + pleats all the way around – but at the very last minute (like, right before I cut into the fabric, lolz), I changed my mind and decided to go with a pattern I knew I would actually wear and love. Enter the Kelly skirt! Cutting that shit took forever, btw. I agonized for a long time on how to cut the stripes – where each color and wide stripe should hit. I used the inspiration photo to help me decide how to cut the waistband (it was originally going to be a mess of stripes on it’s own, but I like it as one solid, thick stripe!), and was careful to match up the stripes along the side seams, the button front, and the pockets. Like I said, it took forever, but once I got the pieces cut, the actual assembly took no time at all.

Butterick 5526 & Kelly skirt, made with Mood Fabrics

The fabric is described as a lightweight cotton sateen, but it’s weighty enough to work as a bottom weight. There is definitely some texture in the weave, and it stretches quite a bit. I made sure to stabilize the waistband and button placket so the fabric would keep it’s shape in those areas, and used a long stitch on my machine for all the topstitching. It presses very well – really easy to get a sharp crease in there, yeah! – but it also tends to leave pin holes. For areas that needed to be pinned together and topstitched (such as the button band and inside of the waistband), I fused the pieces with a long strip of stitch witchery instead of pinning; this keeps everything in place and makes topstitching SO much easier! Especially if you tend to miss spots and only discover them after you’ve finished topstitching the seam, which means they gotta be ripped out and restitched so you catch the entire fold (er… not that I would know anything about that…). That shit’s not a problem at all when you’ve got Stitch Witchery on your side. Yay, Stitch Witchery!

Butterick 5526 & Kelly skirt, made with Mood Fabrics

Since my skirt is so bright and colorful, I went the boring route with my top and made a classic button-down shirt. I seriously considered adding embellishment – or even making it into a crop top, because, why the fuck not? – but in the end, I stuck with the classic tried and true. Mainly because my wardrobe is sorely lacking a solid white button down with sleeves, so I know this shirt will get quite a bit of wear with other pieces to mix and match. I used this Theory lightweight cotton shirting – which, if you were wondering, took almost as much agonizing as find the perfect stripe. There are SO MANY WHITE SHIRTING FABRICS available at moodfabrics.com! SO FUCKING MANY. Like, how do you even choose? I figured that I’ve had really good experiences with all the Theory denims I’ve bought, so the shirting fabric must be just as excellent. Which ended up being true – this shit is soft as angel’s wings, presses and stitches beautifully, and it’s right along that line of being *almost* sheer because it’s so lightweight. A skin-colored bra is a must with this fabric. The only drawback is that since it’s 100% cotton, it does wrinkle like crazy. Like, when I pulled it out of the dryer, it was a hot mess of wadded wrinkled ball I don’t even know what. Good thing it presses well! 🙂

Butterick 5526 & Kelly skirt, made with Mood Fabrics

For my pattern, I used Butterick 5526. Like I said, I knew I wanted a classic button-down shirt but nothing in my stash was exactly what I wanted – everything was either a relaxed fit, or had something twee like a peter pan collar or an abundance of ruffles cascading down the front. Which is fine – clearly I like these patterns enough to even have them in my stash – but I wanted something super basic. Butterick 5526 perfectly fit the bill – I went with the princess-seamed version with 3/4 sleeves, and I’m actually a little surprised at how much I like it. I made the size 6 with no muslin, with the hopes that the princess seams would give me enough room to play around with the fitting. It actually came out perfect straight out of the envelope – I KNOW, RIGHT? – although next time, I will shorten the sleeves because they are stupid long. They’re supposed to be 3/4 and they come to right above my wrists – in that weird spot that’s not quite long sleeve, but rather looks like I measured my arms wrong. Wah wah! I’ll just wear these rolled up, I guess. I also may reduce some of the ease out of the sleeve cap in the next version; these were pretty hard to ease in smoothly and there are still tons of wrinkles. But, for the most part – it ain’t bad!

Butterick 5526 & Kelly skirt, made with Mood Fabrics

I did try to jazz up the shirt a little bit by adding topstitching, but for the most part – it’s just a plain jane backdrop to an awesomely loud skirt. I love it!

Butterick 5526 & Kelly skirt, made with Mood Fabrics

Ok, now I have to tell you my secret – I didn’t start sewing this until Saturday morning! On top of that, it had to be finished and photographed before dark on Sunday – and I had a wedding to attend on Saturday night. I spent so long agonizing over my designer inspiration, then the fabric, then the pattern – that by the time I had everything (mostly)figured out, it was time for me to get on a plane and head to NY. When I got home on Monday, I had another more urgent deadline that needed to be taken care of asap (more on that later), which put this project on the backburner for a few days. Needless to say – I was pretty stressed come Saturday morning! I like to think I’m pretty efficient when it comes to making things quickly, but even that’s a stretch for me, especially two garments. I’ll be honest – I was tempted to half ass this one, just for the sake of time, but I decided early on that it wasn’t even worth my while if I didn’t end up making something that would be wearable past this photoshoot. Which means I forced myself to slow down – I made time for fitting, for the details like topstitching, for fixing mistakes (oh yeah, I totally sewed that collar stand on backwards the first time NO BIG DEAL), for eating lunch. But hey, look – not only did I actually get it done, but I actually made something nice without cutting corners.

Butterick 5526, made with Mood Fabrics

Butterick 5526, made with Mood Fabrics
I mean, check out that topstitching!

Butterick 5526, made with Mood Fabrics

Kelly skirt, made with Mood Fabrics
Lots of topstitching on the skirt too, woohoo 🙂

Kelly skirt, made with Mood Fabrics

Kelly skirt, made with Mood Fabrics

I know my outfit isn’t quite as fashion forward as what I could have done, but I am elated with how both pieces turned out and I can’t wait to give them some proper wear to welcome spring in with loving arms. Come on, spring! I know you’re lurking back there somewhere, time to come out of hiding!

Butterick 5526 & Kelly skirt, made with Mood Fabrics

One last thing – most of y’all are probably aware by now, but just in case you weren’t… By Hand London is going to start printing fabrics on-demand! How freaking awesome is that?? They need some help with costs to get production started, so they’ve got a Kickstarter going to raise funds. You can get some pretty sweet loot in exchange for your money – from tote bags, to coffee mugs, to free patterns, to private sewing lessons – but even $5 helps. Every little bit adds up! I am so so excited for this new venture that the BHL ladies are seeking out, and I really hope they meet their goal so it can become a reality (especially if it means I can start printing wildly tacky fabric to my heart’s desire). You can check out the Kickstarter here – watch the super cute video, and I dare you not to fall in love. I dare you.

Completed: The Ensis Tee

13 Feb

I feel like such a bad friend, but I’ve hardly managed to make a ding in my stack of Constellation patterns from Papercut Patterns. Not for lack of inspiration – I have plans for almost every pattern in that horde – but a lack of time. Well, I guess time isn’t such a bad issue now, huh? 🙂 YAY TIME TO GET SEWING.

Ensis Tee - stripes

So here’s the first of the series – the Ensis Tee! Actually, hush hush, but this is the second Ensis Tee I’ve sewn – the first one, I tried to use pieced fabric scraps to make the yoke up and it just ended up a mess of mismatched seams. It’s super comfy, though, so I wear it as loungewear 🙂

Ensis Tee - stripes

Ensis Tee - stripes

I really love the colorblocking effects with this pattern – I have so many ideas that I want to put into action! Like making it into a colorblocked turtleneck or cutting the yoke out of lace. Such a great little basic pattern!

Ensis Tee - stripes

For this particular Ensis, I used more my stripey ponte from the making of my Stripy Lady Skater, and the matching ivory ponte for the colorblock at the top. I also managed to cut out a Renfrew with the tiny bit of remaining yardage left, so expect one more garment out of this amazing fabric. What? Don’t look at me like that.

Ensis Tee - stripes

I cut the size XXS and the only alteration I made was a nip the waist in just a tiny bit for some added shape. My original Ensis was made using a very drapey Merino wool and the unaltered size is perfect, but when the fabric has a bit more body, you may need to add a little bit more shaping or else run the risk of looking boxy.

Ensis Tee - stripes

Ensis Tee - stripes

I also shortened the sleeves a little, as the originals were too long with the addition of the cuffs. You can’t see too well in these pictures, but the hem is slightly curved. I finished that with a simple twin-needle stitch – the rest of the shirt is sewn entirely on the serger. Yess!

Ensis Tee - stripes

I mostly like this top because I think it makes my boobs look big. There, I said it.

Ensis Tee - stripes

Ensis Tee - stripes

Ok, FINE, I reckon we can now address the elephant in the room – my hair! What is UP with my hair?!

Ensis Tee - stripes

I told y’all it was bright orange!

Ensis Tee - stripes

So, this is phase 1 of a two-part hair makeover. I had it bleached out last week at the salon (my salon does a training program that needed a bleach model, which means I got this done for a STEAL. srsly, srsly cheap), but I haven’t had a chance to deposit my color on it yet – hopefully this weekend. YES, it’s very orange – I had old box color already on my hair, which makes for unpredictable bleaching results. This was as light as we could go without really damaging my hair, and it’s fine for what I have planned. YES, I am aware that orange is not the most flattering color for my complexion, and I don’t intend to leave it like this for forever (although it’s kind of fun right now, not gonna lie!). I’m now working a job that doesn’t require a natural hair color as part of the dress code, so I jumped at the opportunity to do something weird with my hair. It’s just hair, it’ll grow back!

Ensis Tee - stripes

Also, say hello to my sewing room! The winter has been wretched cold, but with enough random warm days scattered throughout so I was able to squeeze in some outside photos from time to time. We’re right in the midst of another below-freezing week, so I’m back to shooting in my sewing room 🙂

Completed: A Stripey Lady Skater

31 Jan

Oh my god, you guys. I am so sorry to do this, but I’m about to dump another Lady Skater on y’all.

Stripey Lady Skater

Actually, you know what? I’m not sorry. This dress is damn cute!

Stripey Lady Skater

Since I’ve posted about this pattern a few times already, I’ll spare y’all the repeat drivel about my sizing and construction. I used this really amazing grey and white striped medium weight knit from Mood Fabrics – which has apparently already sold out (wah! I was planning on going back and ordering ALL THE YARDAGE), sorry guys! This ivory knit is the closest thing I could find, at least weight-wise, although it’s sold out too (and yes, I totally bought some of dat).

Stripey Lady Skater

Anyway, the fabric is fabulous and I plan on getting a lot of wear out of this little dress. I think it will make a nice backdrop to a variety of colors – I’m wearing it with red here, but I think it will look equally fab with yellow, or navy, or hell – even green. It’s super comfortable and the fabric does not wrinkle, which means this will be great for traveling*. Since, you know, I travel all the time and everything . Ah well, a girl can dream!

Stripey Lady Skater

This dress was also SUPER fast to make. I am not kidding when I say it took me an hour to assemble – and that includes cutting the fabric! Yeeeeah buddy, this is why I love knits!

Stripey Lady Skater

So, realtalk: this Project Sewn has been sucking up a LOT of my sewing time lately. Fortunately, we were given the challenges a bit in advance and encouraged to start as early as possible, so I’ve managed to knock out quite a chunk of my work over the past few weeks. Which means, less stressed Lauren – but also, less time to work on other things! So, unfortunately, this blog has had to suffer a little bit as a result.

I’m happy to say that the contest officially starts on MONDAY – so I can finally start showing y’all what I’ve been working on! Yay! I’m also hoping this will free up some personal sewing time for me, because I’ve been staring at my fabric and pattern stash and just been getting that itch.

Stripey Lady Skater

With that being said, now you know why I’ve been sewing up a lot of knits 🙂 What can I say – they’re a great little palate cleanser when you want to work on something else but don’t have a lot of time to devote to it.

Stripey Lady Skater

Plus, I don’t know about y’all, but a cute knit dress is ALWAYS welcome in my closet! Expect to see more of this fabric… I bought 2.5 yards, so I’m hoping I can squeeze another top (or two!) out of the remaining piece 🙂

Stripey Lady Skater

Now, can we please get the weather to warm up again so I can go back to not wearing socks? And maybe get some greenery back in my pictures as well, that would be nice!

Stripey Lady Skater

* Oh, hey, and speaking of traveling… I just booked myself a plane ticket for a weekend jaunt in NYC with my blog bestie/super babe Clare (AND I’M SO EXCITED OMGAH)!! I’ll be rolling in March 14 – March 17 (lucky Clare gets to stay a bit longer than I do, boo!), and I’m thinking maaaaaybe we should try to for another epic meet-up on Saturday 3/15? Who wants to go fabric shopping??? 😀

Completed: A Manly Striped Sweater for Landon

19 Dec

Guys, I’m such a mess. It’s December 19th and this is literally the first Christmas present I’ve come up with – I made Landon a sweater!

Men's Sweater made with wool sweater knit from Mood Fabrics

Or, I should say, I SEWED Landon a sweater. Ain’t fuckin’ around with no Sweater curse.

Men's Sweater made with wool sweater knit from Mood Fabrics

Y’all know I don’t do much sewing with men’s clothing… I think I average about one piece per year, so here’s 2013’s edition! I don’t know what the hang-up is, because every time I get started on a new Landon-garment, I realize that I really enjoy the process of men’s sewing because it’s so straightforward. No weird fitting (I mean, there’s fitting, but not like fitting a woman’s body with boobs and a butt), no frills, and lots of exact topstitching and mitered corners and fun things like that. It’s also very safe.

Men's Sweater made with wool sweater knit from Mood Fabrics

We found this navy/pea striped wool knit on Mood Fabrics and Landon immediately pointed out how much he loved it. I’m not surprised- like 3/4 of his closet consists of these colors, or stripes, or this particular cut of shirt. So I’ve basically just created the holy trinity of sweaters for him, I guess.

Men's Sweater made with wool sweater knit from Mood Fabrics

Anyway, I was iffy about the fabric when I ordered it, but a sweater was promised and I’m a girl who keeps her promises (plus, like I said, I didn’t have to knit is, sooo..). The fabric is actually quite lovely in person – it’s a nice, stable knit, sort of like a ponte, so it holds stitches beautifully without getting all weird and wavy. It’s also wool, which means it steams up beautifully and doesn’t get that weird shine that you sometimes get when you stick a hot iron on ponte. I sewed this up on my serger – because it’s fast and durable (and this is a dude sweater, after all) – but this is totally the type of fabric that can handle a standard sewing machine making the seams, so fear not if you’re part of the serger-less population.

Men's Sweater made with wool sweater knit from Mood Fabrics

I’ll be straight with y’all – this was a very last-minute project. My original plan for December was the glorious plaid coat I’m working on, but I’ve had some issues with time management this month (and hand-tailoring takes foreeeever, and no, I don’t care if Peter can make a beautiful coat in a week STOP COMPARING ME TO A LITERAL SEWING MACHINE), so the coat, while still in the works, is not quite ready for her debut. Fortunately, knits sew up pretty fast, so I had this finished in a couple of hours – just in time to take some pictures and send the man off on a week-long business trip.

I did not use a pattern for this (see above: time management), but simply traced off an existing sweater that already fit him. From there, I sewed up the main pieces (front, back, and sleeves), tried it on him, and then added the binding for length. I somehow messed up the length of the sleeves (pretty certain that the original traced-off sweater had too-short sleeves, since these were exactly the same length, gr), but I was able to adjust the ribbing width and they turned out fine. Speaking of the ribbing, I tried to source a good navy but ended up with nothin’, so I just used this navy ponte knit from Mood Fabrics, left over from last month’s dress. The color match is perfect, and the lack of visible ribs actually looks pretty polished. So there’s that!

Men's Sweater made with wool sweater knit from Mood Fabrics

To get the neckline ribbing to lay nice and flat, it needs to be short enough to stretch perfectly within the opening. Even a fraction of an inch too long, and it will wave and flap out. Not a good look! Since I was working pattern-less and didn’t feel like getting my math on, I switched up the sweater construction so the neck ribbing is applied flat. It’s really easy – see my tutorial on the Papercut Patterns blog. I pretty much get perfect results across the board every time when I use this technique, and it doesn’t require any intense maths or measurements. This is what I love about knits!

Men's Sweater made with wool sweater knit from Mood Fabrics

I also topstitched the ribbing at the neck with a twin needle, making sure to have the seam exactly between the two needles. I just like the way it looks!

Men's Sweater made with wool sweater knit from Mood Fabrics

Men's Sweater made with wool sweater knit from Mood Fabrics

Since I had quite a bit of wool knit left over, I made a quick scarf for Landon as well. Super, super quick – just cut two lengths of fabric, sewed them together down the long side, turned the tube right side out and then closed up the open ends with a bit of Stitch Witchery. Landon loves his scarf, and he promises not to wear it with the sweater like I forced him to in these pictures.

Men's Sweater made with wool sweater knit from Mood Fabrics

I don’t know why I thought modeling the scarf in a bush was a great idea, but it sure seemed hilarious at the time.

Men's Sweater made with wool sweater knit from Mood Fabrics

So, I guess the moral of the story is, when in doubt, make a sweater! Or if you’re super short on time, make a scarf! Either way, my knit scrap stash has just made itself incredibly appealing to me…

Completed: A Stripey Belladone

29 Jul

Oh noes, you guys – I’m running out of fabric from the huge haul I bought at Mood in NYC. Can you believe it? I only have two pieces left! What happened! WHEN DO I GET TO RESTOCK?

Belladone Dress

I am happy to say that the striped cotton I bought finally found a home in a new dress. Yay!

Belladone Dress

I actually had different plans for this fabric, but then Eléonore sent me the Belladone dress pattern and my plans immediately changed. Stripes are PERFECT for this dress – you have so many fun stripey placement options! And y’all know how much I love playing with stripe direction 😉

Belladone Dress

I can’t even begin to tell you how happy I am with how this dress turned out. Sometimes when I’m going crazy with my stripe (or plaid, for that matter) directions, I start to wonder if I’m going to end up with a giant clusterfuck in the end. Fortunately, I think this one turned out pretty perfect – there’s plenty of interest, but it won’t make you dizzy if you stare at it too long!

Belladone Dress

My Belladone is a size 34, with no alterations except a few tucks at the back to get it to lie flat (I’ll talk more about that in a minute). I went with the invisible bias trim – which is topstitched in white – as I didn’t want a bunch of contrast competing with the stripes. The upper back pieces are cut on the cross grain because I liked that stripe placement better, and the waistband is cut in four pieces on the bias, and then pieced together. I also interfaced the waistband because I was afraid the bias would distort over time – it’s pretty fitted. Otherwise, the dress is basically sewn straight out of the envelope -length and all!

Belladone Dress

I love this dress! Look, it has pockets!

Belladone Dress

And a cool back cut-out!

Belladone Dress

Belladone Dress

The stripes made some cool chevrons down the sides, ha.

Belladone Dress

This is a fairly simple pattern to make, but be warned that the back may take a little finessing to get a perfect fit. You want it to lie perfectly flat – no gaping! I’ve noticed that most reviews tend to not need any adjusting, so I think I may be a bit of a rarity in needing it – I also have a pretty small back (I wear a 30 band, fyi), so most stuff is big on me anyway.

Belladone Dress - Adjustments

I made a muslin of the bodice – zipper and all – and pinned out the excess at the upper back when I tried it on. Obviously, this is kind of difficult to do without assistance – but it’s totally doable, I mean, I did it. I just kind of eyeballed it, took the top off, pinned at my guesstimate, and tried it on. Over and over (ok, it was like twice, haha). A dressform would be helpful for this, but mine has a bigger back than I do sooo I had to do it the hard way. Anyway, once I pinned out my excess (and then sewed up tiny darts and tried it on a final time), I measured the amount I needed to take out.
(Also, I just realized I was drinking out of an American Pride coffee mug while working on a French pattern. lolz.)

Belladone Dress - Adjustments

To make the adjustment to your pattern (since you don’t want darts in that piece, you want it nice and smooth), just slash right up the middle of the piece and leave a little hinge. Overlap the edges by however much you need to take out (I think mine was 1/4″, not much) and then tape it down. Make sure the line is smooth and straight, and you’re done!

I also ended up overlapping the upper back pieces an additional 1/2″, as well as taking about 1/4″ out of the center back seam (along the zipper).

Belladone Dress

The back looks pretty good, though, yeah?
Ignore the lump at the waist of the zipper, I had a lot of bulk there, so the zipper doesn’t want to lie flat! Wah!

Belladone Dress

Stripessss!! 😀

Belladone Dress - Necklace from Chatter Blossom :)

Oh, and check out my new necklace! This is from ChatterBlossom, my newest sponsor! Jamie has some of the prettiest reclaimed vintage pieces I’ve come across (and enviable hair to boot, I mean, ugh, that’s EXACTLY what I wanted mine to do when I cut it short!!), and I love that she gives each of them a story. I picked a couple of pieces from her shop – and that was hard, there are soo many things in there that I need – and I am so happy with what I got. This necklace is Egyptian, circa 1880-1918. I’ve really gotten sucked into Egyptian history lately (the pyramids! Nefertiti! The Spinx! Aliens!! lol just kidding on that last one :P), so I’m really excited about this little treasure. Fair warning: I’ve worn this every day since I received it, and I don’t plan on taking it off. You’ll be seeing this necklace a lot, jsyk.

Anyway, back to Belladone…

Belladone Dress
Belladone Dress

Even though my bias tape is invisible from the outside, I still wanted it to be pretty – so I used polka dot bias tape 🙂 I used the bias tape left over from my Blue Lace Robson (and I still have more of this stuff, it’s like the gift that keeps on giving haha). I also faced the waistband with a piece of navy cotton sateen (also from that same lace coat, gah), since I didn’t want the interfacing all up in my biz. Unfortunately, the sateen is a bit heavy, which is why the zipper is lumpy at the waistline. Oh well, live and learn!
Oh god, ignore that rogue navy thread on the upper back btw.

Belladone Dress

I’m pretty happy with how this dress turned out – it’s fabulous on it’s own, and I think the navy stripes will also look good with different colors, such as yellow and kelly green. The dress is perfect for bike riding, even if it does give me a funny tan line 😉 Ha! Worth it 🙂

Completed: Hummingbird Separates

8 Jul

I hope everyone had a good weekend – holiday or not! I celebrated by basically NOT leaving the house, except to get an oil change (for my truck) and donate blood (from my body). It was rainy and cold all weekend, which is really abnormal for July. No complaints here!

I didn’t get too much sewing done, surprisingly (rain makes me want to lay on the couch, which means that I knit!), but I did make myself a new outfit to wear over the weekend – using the new Hummingbird pattern.

Hummingbird Set

Every time I sew up one of this patterns, I am reminded of just how much I loooove Cake (not the food, the pattern company! Although, I’m not one to turn down the food, either…). These patterns are basically my dream patterns – easy to customize the fit, easy to adjust during sewing, easy to sew (but with just enough challenge to keep things interesting), basic & wearable for all occasions. Not to mention, Steph recently changed up the paper patterns to include sizing lines in different colors. It’s like a party in the envelope, guyzzz.

Hummingbird Set

This is the whole set – both the top and the skirt. This is my second top from this pattern (and no, you haven’t seen the first because I never blogged about it. It won’t be in this post either because it was in the wash while I was taking pictures! Soon!), and my first skirt. I wasn’t sure if I would even make the skirt, since a fitted/straight style isn’t really something I wear much of – I like to be able to mooooove… ride my bike, sit on the floor, crawl under tables, you know, the usual – but it’s surprisingly comfortable! These pictures were taken after a full day, so pardon my wrinkles.

Hummingbird Set

We can discuss the top first. I cut the size 30 bust/26 waist (Cake patterns are based off your measurements, not standard sizing) with a 17″ length (this ensures that the peplum hits the right place – I think it does! What do you think?). This is exactly how the pattern is written, with NO alterations. Can you believe how good it fits straight out of the envelope?!

Hummingbird Set

Unfortuately, I don’t think I’ll get much wear out of this top. As cute as this stripey fabric is, it’s kind of tragic – loosely woven, and stretches like a mother (it also unravels. A KNIT. I can’t even…). It’s the same fabric I used for my Stripey Tiramisu, and it just sags and bags after a couple hours. I don’t know why I bought sooo many yards of it, but ugh, I did. So I’ll just enjoy the top while I can, I guess.

Hummingbird Set

To make this work with my fabric, I had to drastically shorten the neck and arm bands to keep them from being floppy (this is super easy, since you sew those on while they’re flat, instead of in the round – you can just cut the excess off). Instead of using interfacing to stabilize the shoulder seams, I pulled out the big guns and used 1/4″ elastic. I also used the same elastic at the waistline; hopefully this will keep the weight of the peplum from pulling the shirt down too much.

Hummingbird Set

Ok, skirt’s turn! This is a 26 waist/35 hip (the measurements closest to my own, obviously). I actually ended up needing to take in quite a bit during the side seam fitting – about 1″ off each side of the waist. Fortunately, this pattern is made to allow for fitting during that stage of sewing, so it didn’t mess up my pocket placement or anything.

Hummingbird Set

Be warned that this skirt is a bit on the short side – I only hemmed mine 1/2″, and this is the length I got.

Hummingbird Set

I used the same denim leftover from my Peter & the Wolf Pants – I think the stretch is key to making this skirt super comfortable. And bonus, this skirt barely took any fabric – less than 7/8 yard!

Hummingbird Set
Hummingbird Set

Sooo these pictures were taken with my new camera, btw. I think they look pretty good, but it’s obvious that the close-ups need better focus. I also discovered that I do not like the self-timer on this camera; it takes the pictures rapidly with no time between. Good thing I ordered a remote last week!

Hummingbird Set
Hummingbird Set

Ok, I’ve officially run out of things to say about this set. Here’s some flat shots!

Hummingbird Set

Hummingbird Set

Hummingbird Set

Hummingbird Set

SURPRISE FANCY POCKET LINING, YEEEAHHH!!!

Hummingbird Set

Hummingbird Set

Hummingbird Set

I took a close-up of the fabric so you could see how awful it is. It is literally a knitted fabric – that’s stockinette right there. Isn’t the macro feature on my camera delicious, though? Expect lots of close-up shots, I can’t get over it.

Hummingbird Set

I can’t wait to try the flouncy version of this sucker. Gonna shake my tailfeathers all over the place 😀

Psst! I have a couple announcements, real quick!

– My awesome sponsor, Sweet Little Chickadee, is moving to NY and closing shop for a month or so to handle the move – but in the meantime, she’s having a quick sale to empty out stock. Use the code MOVINGSALE to get 15% off your total purchase (this includes sale items!) through Tuesday, July 11. I know the blog post says Sunday 7/7, but Juli just informed me that she is extending the sale, soooo… shop your hearts out! But hurry! 🙂
– Speaking of shopping, I’ve started the mind-numbingly awful process of preparing some of my handmade and vintage clothes to be put up for sale on Etsy. I took tons of pictures and measurements over the weekend, and I’ve been slowly adding them to my shop. I thought it would be real awesome to have everything up and running by the time I wrote this blog post, but obviously that hasn’t happened yet. Check back at the LLADYBIRD shop if you are interested in buying a little piece of my history – I plan to have them all in the shop by the end of the week (and I’ll mention on the blog and/or Twitter when that’s said and done).

I hate the idea of selling my beautiful handmade clothing, but none of this stuff fits me anymore and it’s too much of a size change to take in. Rather than hoard it for no reason, I’d love to see this stuff go to a loving home where it will actually get worn. I’m not trying to make a huge profit here, so I’m pricing everything pretty low. Proceeds are going to fund some upcoming medical expenses I have, if you’re curious. Also, I am NOT trying to turn this into a big blog about how everyone should buy my shit, so don’t worry about that. Again, if you’re interested – check out my shop!

Hummingbird Set

Ok, I guess that’s it!

Completed: A Striped Hoodie (by way of sacrifice)

18 Feb

Man, I love me some hoodies. I wear them year-round – even in the summer (because some people like to crank their a/c up to “frigid,” eep). I love how a well-fitted, soft hoodie can be the most comfortable piece of clothing in my closet. Here’s my sacred secret, though: my go-to hoodie was a ratty pile of SHAME. I really did wear it for everything – from cleaning the bathroom to keeping warm on a drafty airplane – and it showed. It showed in the form of faded, pilled black, bleach spots, paint stains, ratty edges, and a giant hole at the neckline (that was from a fight. Also, that’s all I’m going to say about that). I loved the way it fit, which is why I kept it long after it’s sad sorry state should have sent it to Hoodie Heaven (that’s my other sacred secret: I don’t repair my ratty clothing. That hole stayed in the neckline for OVER 6 YEARS. Yeah!!).

Sooo I ripped it up and made me a new hoodie, using the old one as a pattern!
Striped Hoodie
HA!

Striped Hoodie
It has a pocket!

Striped Hoodie
Scratch that, two pockets!!

Striped Hoodie
I’m afraid I don’t have a pattern to share, as I literally ripped up my ratty-ass hoodie and traced each piece onto paper, adding 3/8″ seam allowance. I didn’t make any changes to the pattern as I liked the way the hoodie fit pre-rip. And boy, did that hoodie want to be ripped up – the pieces were falling apart in my hands. Damn!

Striped Hoodie
You’ll notice my stripes don’t *exactly* match up – on one side, and also at the top of the zipper. That’s ok, I’m not totally heartbroken over it. This is what happens when you push yourself to finish a project long after the mojo has dried up – you get sloppy. Usually, I put everything away and try to revisit the next day with a fresh outlook. I was cold, though, and since my hoodie was laying in pieces on the cutting table… I soldiered on. At the expense of a little stripe-matching, but hey, shit happens.

Striped Hoodie
Sorry about the wayward stripe over my rear – it’s straight, promise!

Striped Hoodie
Figuring out the order of construction required a little forethought, since the length of certain areas (the neckline where the hood fits, the front where the zipper goes) need to be pretty precise. In case you are thinking about traveling down the same path of hoodie rebirth, here’s the direction I took:
1. Sew band to pockets, attach pockets to front
2. Sew front to back at shoulders
3. Insert sleeves
4. Sew up side seams
5. Sew hood seam, attach band to front
6. Sew hood to neckline
7. Attach bottom band
8. Insert zipper
9. Attach sleeve cuffs

Not too hard! It’s just like sewing a tshirt (in fact, I bet one could use the Renfrew pattern as a jumping off point, although you’d have to raise the neckline), just with an added zipper and hood 🙂 If you are adding a hood, make sure the measurement of the bottom of the hood (where it attaches to the neckline) is the same as the measurement of the entire circumference of the neckline, minus the zipper. Otherwise, it won’t sit right!

Oh yeah, mine does have a hood!
Striped Hoodie
Striped Hoodie

Striped Hoodie
Man, you can really see my mismatched stripes here. I’m sorry.

Striped Hoodie

Striped Hoodie
The pockets have the usual knit band at the top (cut slightly shorter than the measurement, then stretched to fit), topstitched with a twin needle. I sewed the zipper in using the twin needle because I liked the way it looks – we’ll see how well that holds up, since it’s not usually the strongest seam 🙂 Surprisingly, the zipper went in quite easily and I didn’t have to stabilize the seam like I thought I would. My knit was pretty stable, it might not work as well with really stretchy fabrics. If you are having trouble getting your zipper lump-free, sewing on a piece of ribbon or even fusing a stripe of interfacing really helps, fyi!

Striped Hoodie
Oh yeah, I reused the zipper from the old hoodie! What’s old is new again, or some shit.

Striped Hoodie
Just for fun – I stabilized the shoulders seams with neon yellow twill tape, and added a little cycling tag. Aw I miss my bike! Summer, where are youuuuu

Ok, now I’m going to show you some shots of my sorry old hoodie. Don’t you dare judge me.

Striped Hoodie
Bleach, paint, and weakened seams. You can’t tell too well in this picture, but the sleeve band was so ratty it was all split and frayed.

Striped Hoodie
The rip I never repaired. And look at how dull that black is! Yeech!

Striped Hoodie
This is so, so much better ♥

NOTE: Today is the last day for the Drape Drape Giveaway! I will be closing the entries at midnight, so get yer comment in!