Tag Archives: knit fabric

Completed: The Pavlova Wrap Top

25 Mar

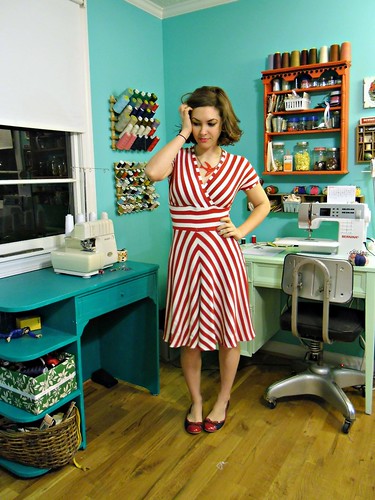
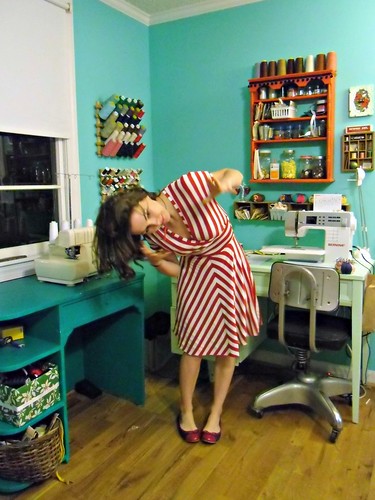
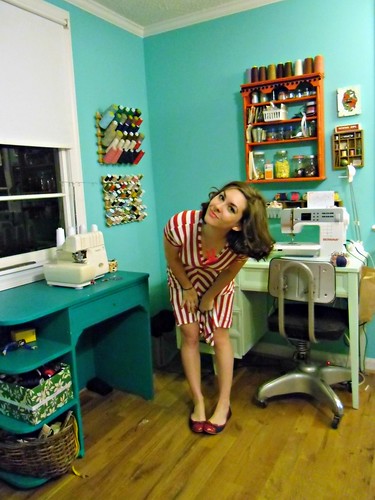
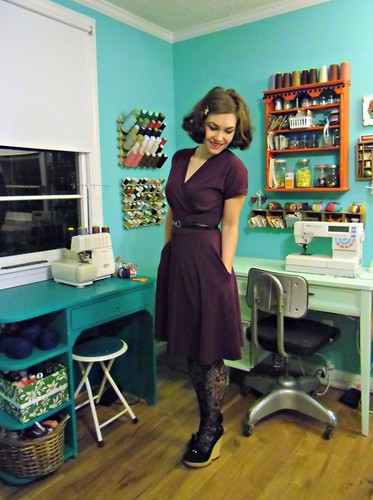
Well, you guys. I done goofed. I put this outfit together in hopes of the emerging spring – and oh, it is indeed emerging… so much that Landon had to mow the freakin front yard a couple weekends ago because it was sooo lush and green and, like, springy – but today is heartbreakingly gray, freezing, and the windiest of windys. I don’t know why this didn’t occur to me before I left the house this morning, but a giant circle skirt is NOT appropriate for this kind of wind. I managed to learn this lesson immediately after I flashed everyone on West End Avenue. Hope someone out there was nurturing a stockings fetish! Ahhh!

Pavlova Top/Circle Skirt

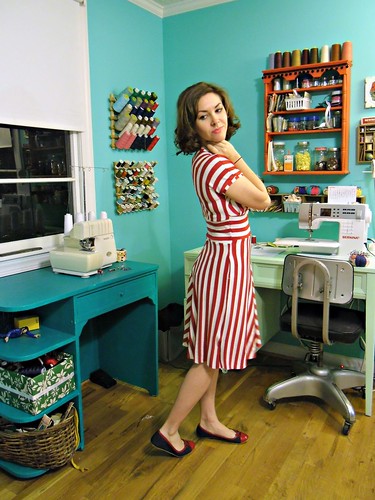
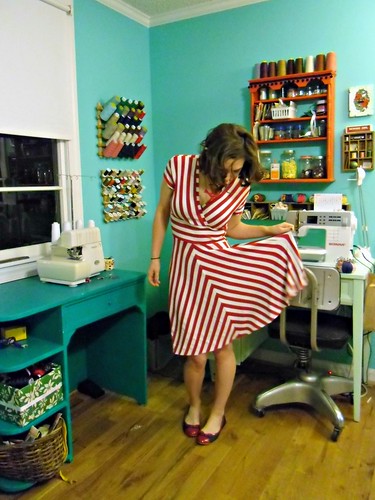
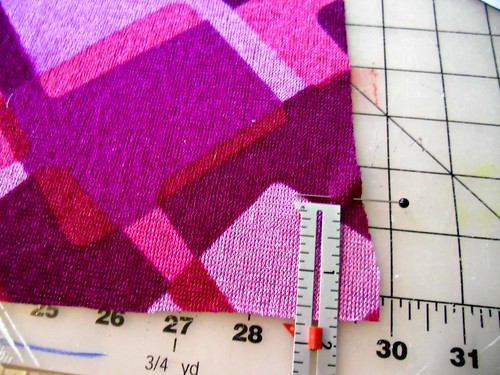
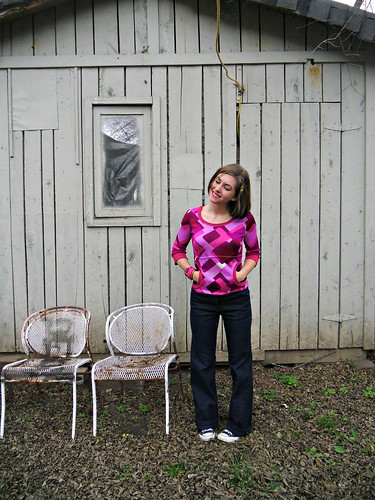
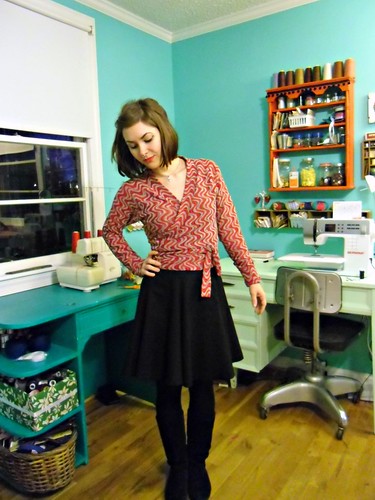
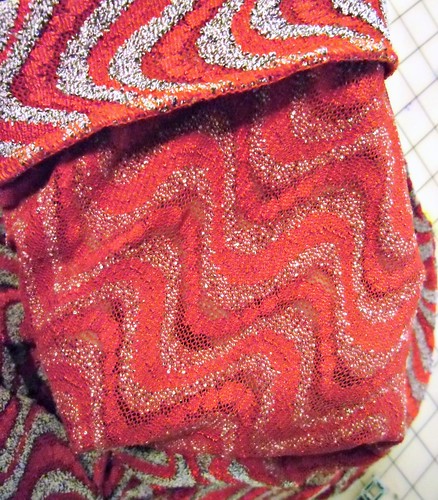
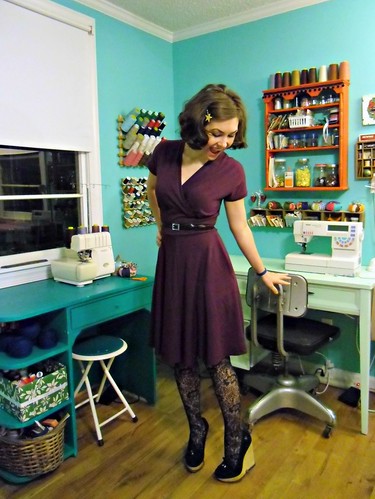
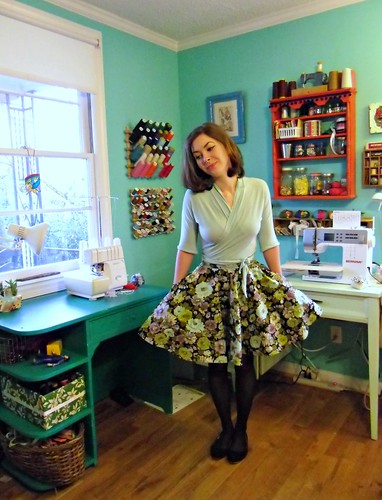
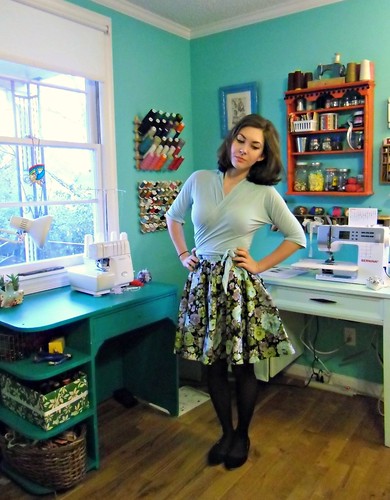
Anyway, I think this skirt fabric is a pretty amazing floral for the weird transitional months – it has those pretty, bright, springy flowers, but they’re smashed up against a black background so it’s still a little srs bsnss. And it looks great with black tights (I always get all weird about what color tights to wear with my spring dresses, ok!). I got it at the flea market last year and I’ve been hoarding it ever since.

Pavlova Top/Circle Skirt

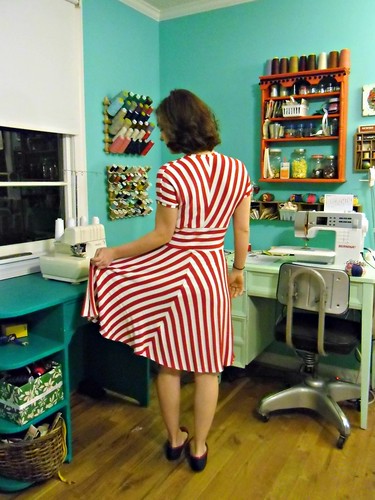
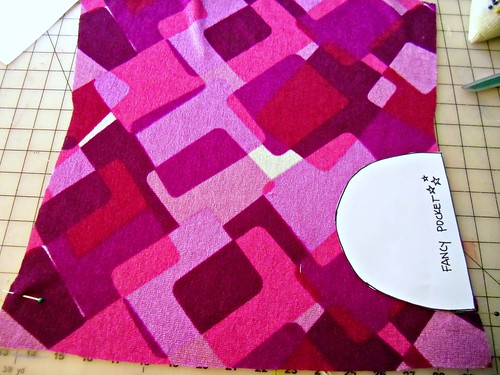
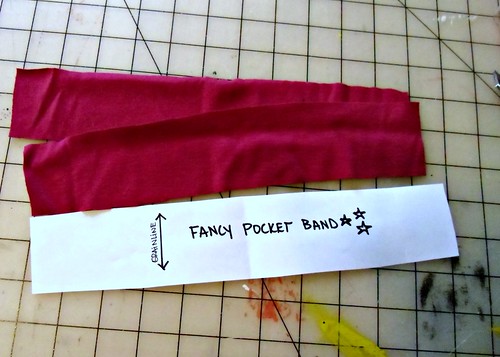
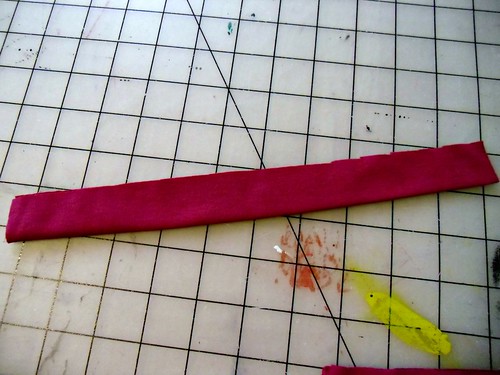
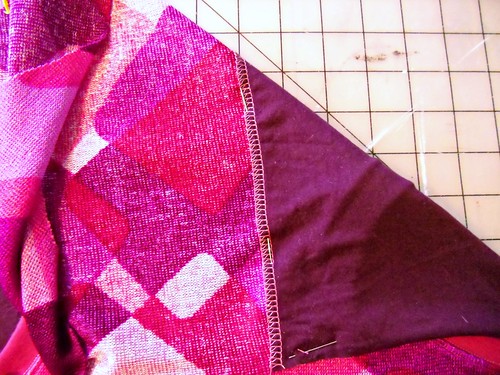
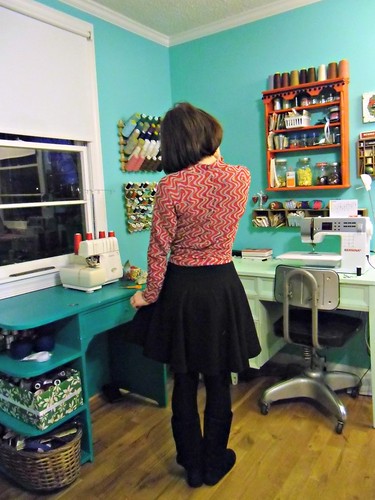
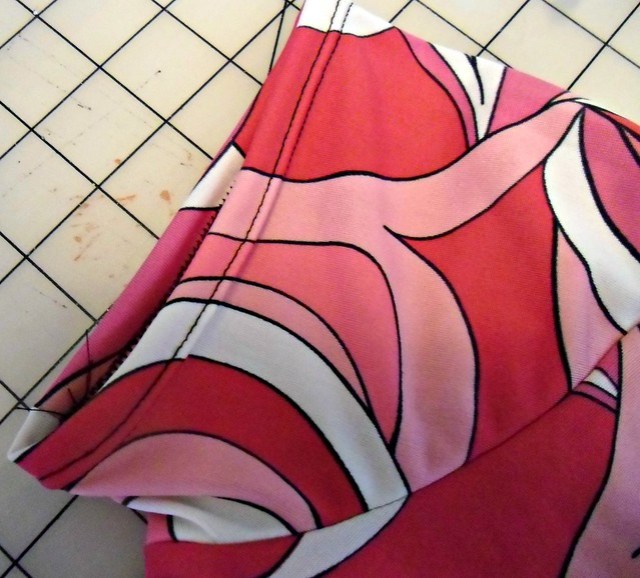
I originally cut this skirt out a couple of months ago, during an afternoon sewing date with my boo Lauren W. My fabric was large enough for me to cut a full circle, but hers wasn’t, and I wanted to be a good friend (and also get an idea of wtf I was doing before ripping into her fabric), so we pieced the pattern out so it has 4 skirt pieces, and then added pockets. You can’t see my skirt seams because my fabric is so robust and floofy, but trust me, they’re there.
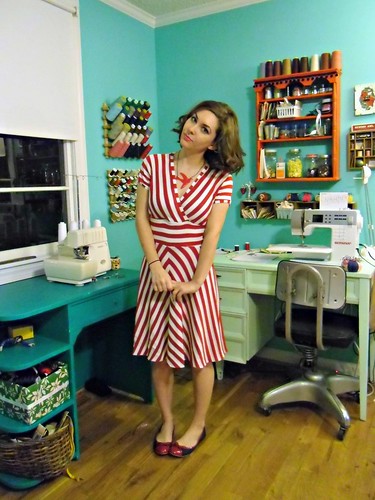
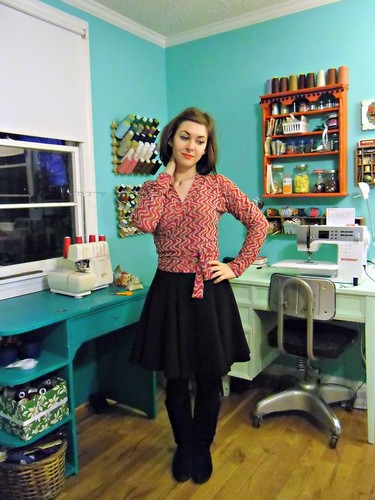
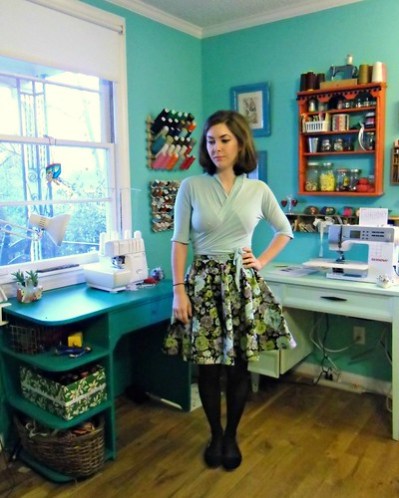
Anyway, the sewing-date ended with a fully seamed skirt with pockets, and then it sat in my sewing room for… well, until last Friday. Lauren has been making progress on her own skirt at home (aw yay!!) so I decided to finish mine up, so I could wear it with my new wrap top. Don’t they match so well?! Like it was ~meant to be.

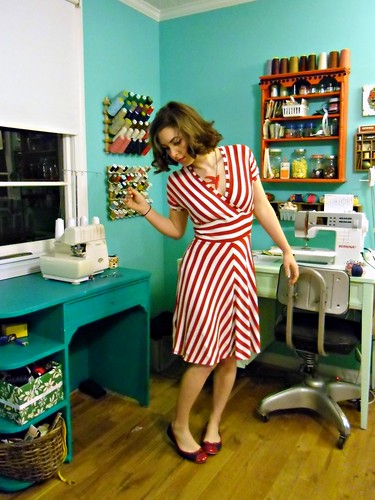
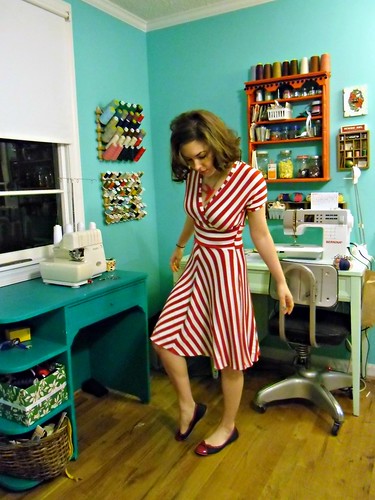
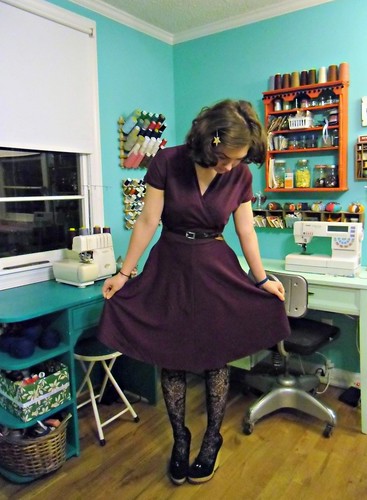
You probably guessed that the skirt is not the Pavlova circle skirt – it’s just my standard, self-drafted circle skirt pattern. It’s like a sneaky Pavlova, since it was cut into 4 pieces. Also, it’s not hemmed with anything but a very simple narrow hem. The fabric has a lot of body, so it stands up pretty well on it’s own. Which is great, because I don’t have any horsehair braid right now 😛

Pavlova Top/Circle Skirt

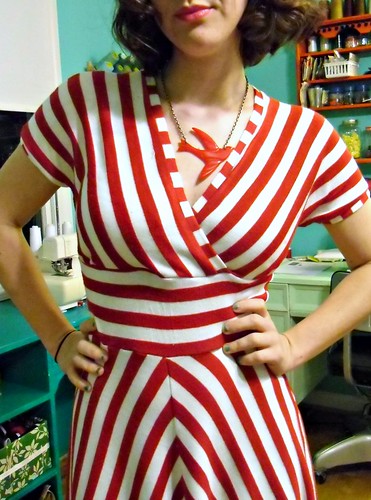
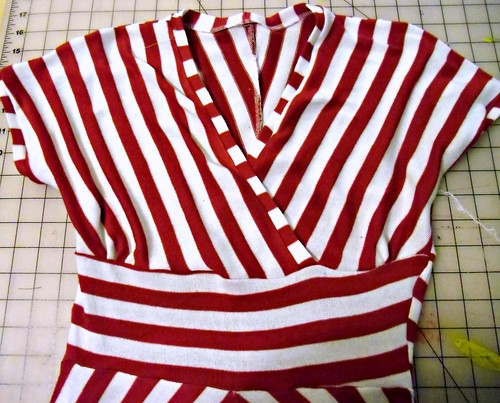
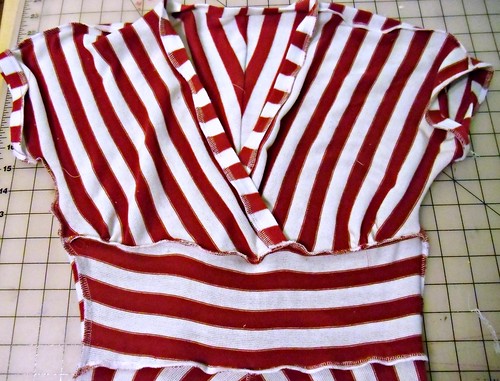
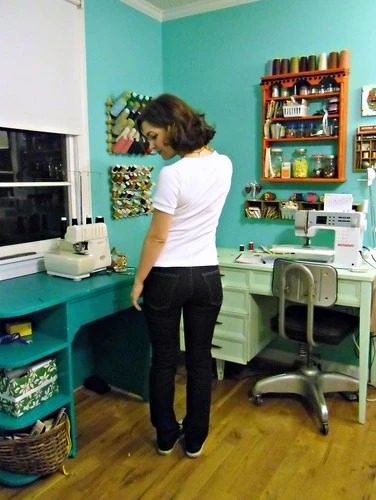
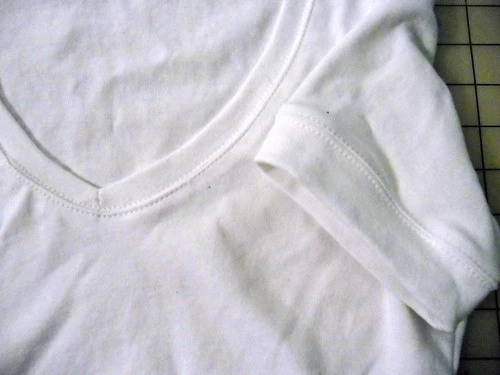
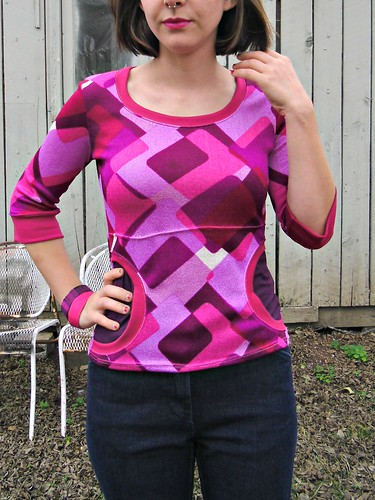
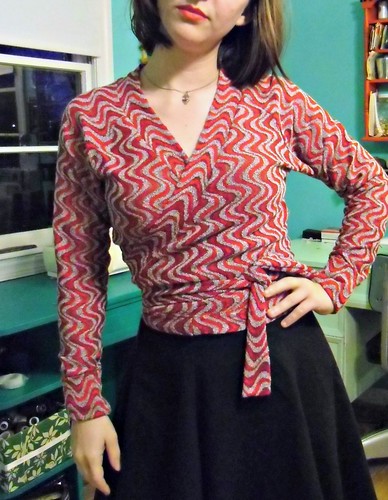
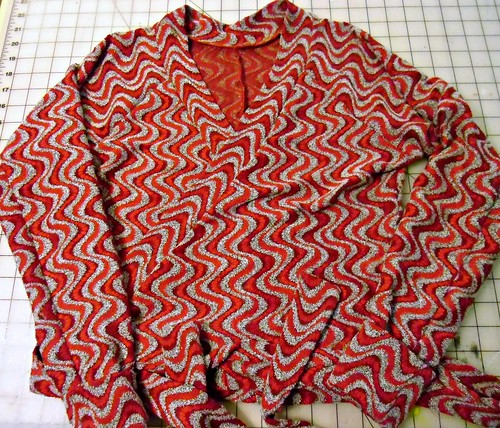
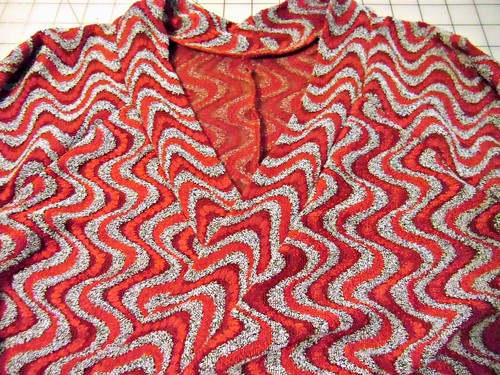
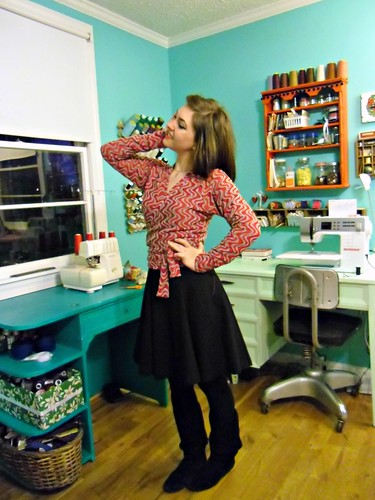
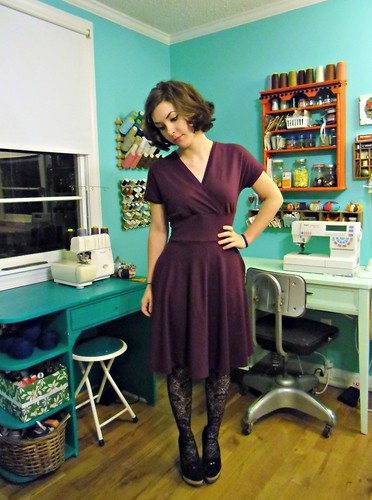
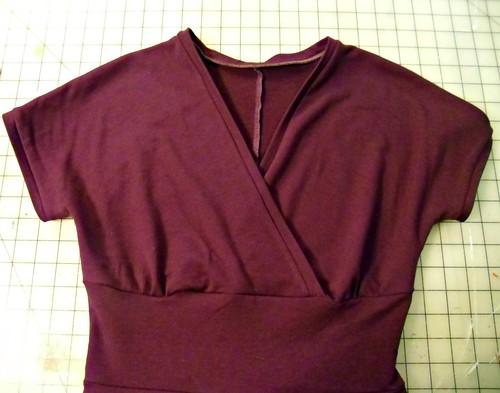
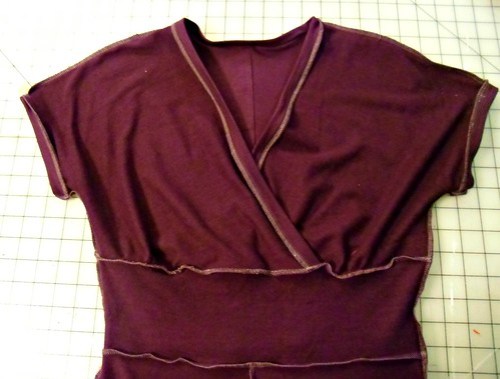
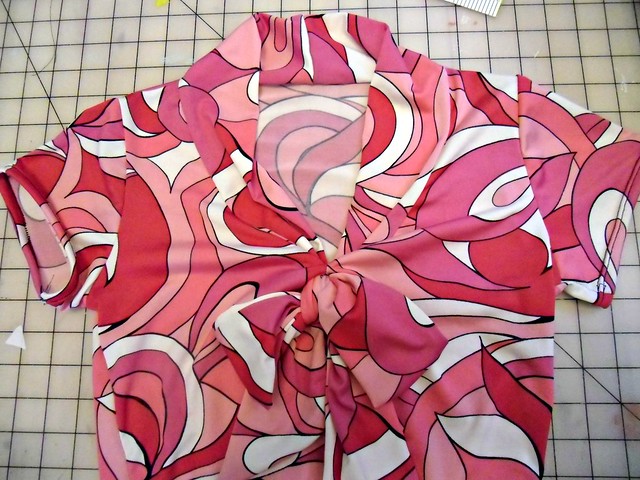
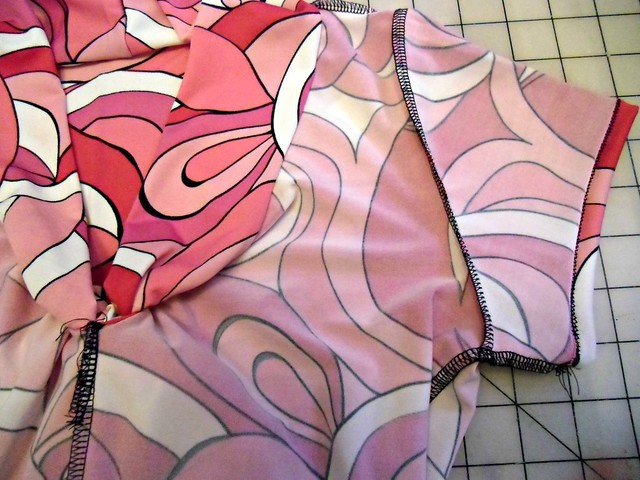
Anyway, let’s talk about the top! This is the wrap from the Pavlova pattern. I’m not even going to lie, I was a liiiiiittle apprehensive about sewing this pattern – something about that lapped seam on the neckline, not to mention the shoulder darts, looked intimidating! I really shouldn’t have worried, though – Steph has an incredible way of relaying instructions that makes them sooo easy to understand. The only problems I had with making this top was my topstitching – and I fault that to my fabric and lack of fusible hem tape to keep shit in place. I sewed a size 30 and made no alterations to the pattern.

Pavlova Top/Circle Skirt

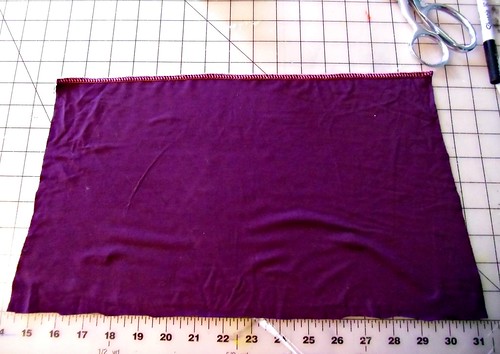
My fabric is from NY – I bought it at Fabrics For Less. This was my very short, very solo return to the Garment District on Monday afternoon. Yes, after 2 full days in that madhouse, I WENT BACK. And I bought more fabric. Honestly, I was very upset about the lack of knits in my suitcase, so I got this mint cotton jersey as well as a matching red, and also the french terry for my Avocado hoodie. What? Why are you looking at me like that?

Pavlova Top/Circle Skirt

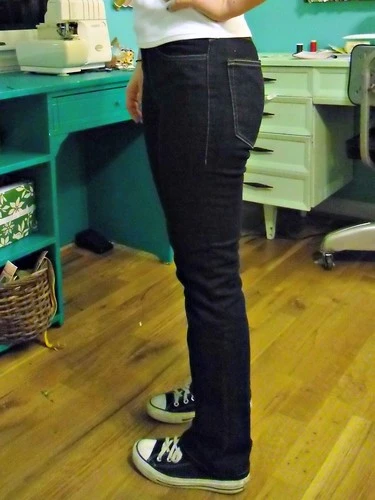
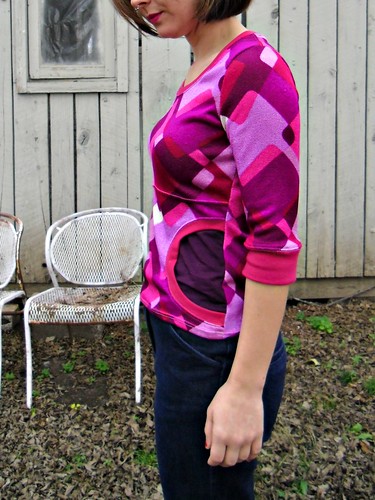
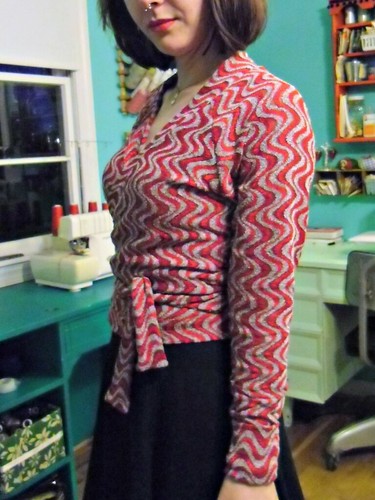
I don’t know if this jersey was the very *best* choice for this top – you can see everrrrrry single little lump under there (fyi, the line across my chest is actually from the hem of the wrap top, not my bra. Just so we’re clear ;)), as it’s super drapey and tissue thin. I just love the color though, and it goes with a huge chunk of my wardrobe! Word of warning – this is a short top. The front barely clears my waistband (which comes above my navel), and all my pants are too low to wear with it. The back is nice and long, though, which is sweet.

Pavlova Top/Circle Skirt

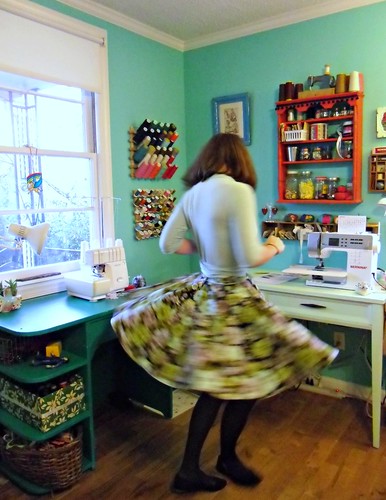
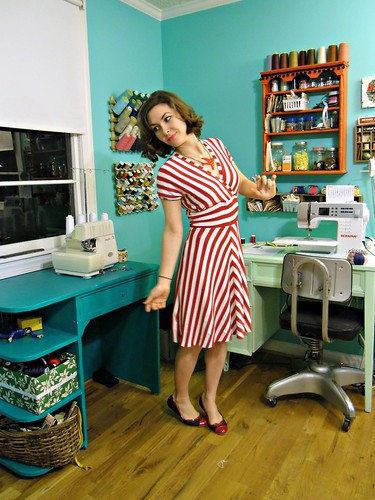
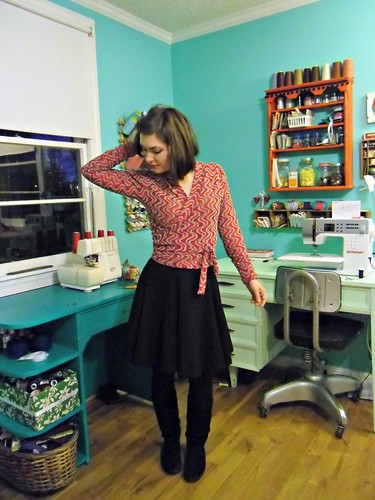
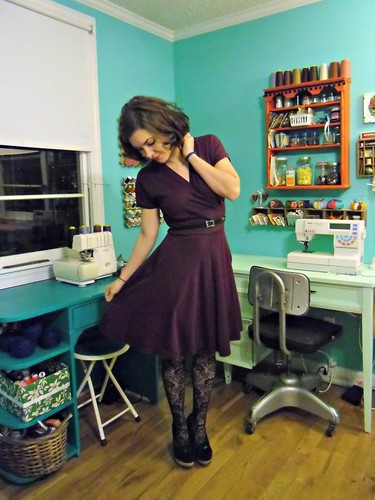
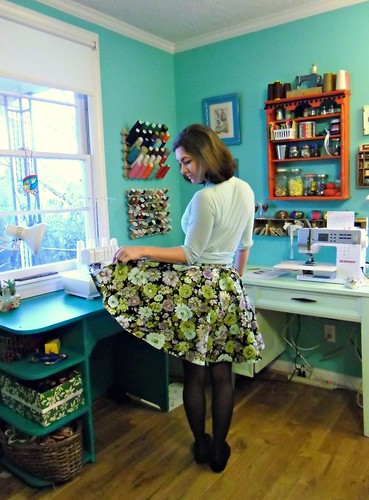
Also, this is one hell of a twirly skirt.

Pavlova Top/Circle Skirt

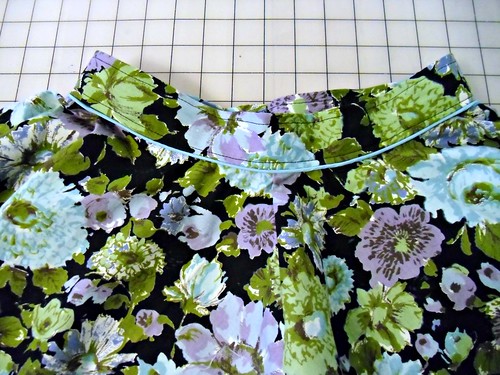
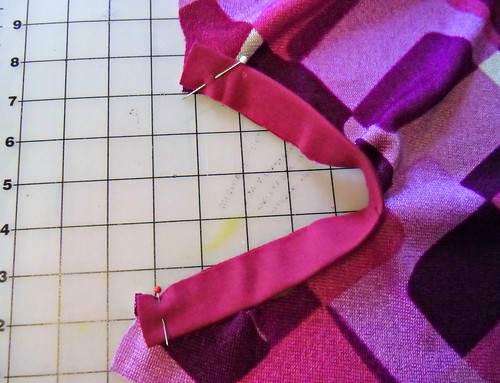
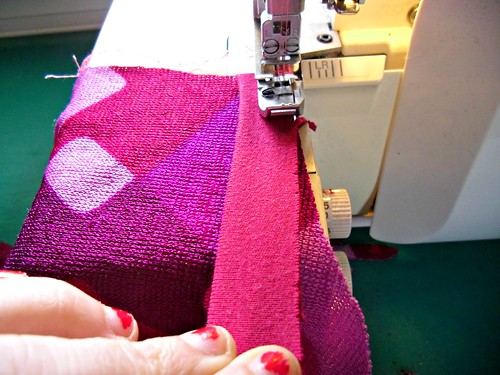
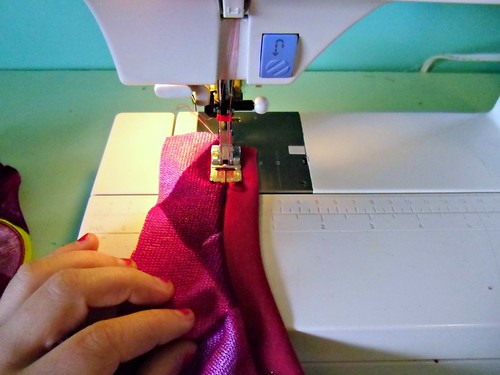
I forgot to mention – I added a thin line of mint piping between the waistband and the skirt, using a perfectly matching bias tape I had in my stash. Yes! I love it when these things work out!

Pavlova Top/Circle Skirt

Soooo… what’s next? Do I need plead a special case to the Sun God or what??

Completed: A Stripey Tiramisu

8 Feb

It’s no secret that I love knits – I love sewing them and I love wearing them. Sometimes when life throws you a big shit sack full of bummer, the only way to get back on the horse is with a good ol’ TNT. All knits are TNT as far as I’m concerned (so. freaking. forgiving!), but I especially love my purple Tira, because it goes the extra step of actually looking pulled together. Which is nice, especially when you just wanna feel like you’re wearing comfy pajamas.

As much as I love purple, though, it’s pretty winter and no duh I need a stripey summer Tiramisu now, right? No shame, I totally ripped off both Steph AND Penelope, because I am shameless and awesome and secretly hoping we can be twins(triplets?). Ladies, pls.

Stripey Tiramisu
Anyway, who doesn’t love stripes?! It’s like wearing a circus ON MY BODY.

Stripey Tiramisu
This fabric is from the giant sale at my local fabric store, where I totally cleaned up last month. I actually have this stuff in black/white stripes too (and I think I bought some crazy amount, like 4 yards of it haha). It’s so stripey and soft and awesome. It’s also kind of not really suitable for this kind of dress; it’s VERY stretchy, 4 ways, and super drapey. I had to make a few changes to the pattern to get it to work – which ended up ok in the end, but please heed my warning: you need something more stable for this dress, unless you want to futz with the fit all night like I did.

Stripey Tiramisu
Still, it turned out pretty cute, if I do say so myself! And it looks so good with my new shoes 😀

Stripey Tiramisu
Anyway, let’s talk about the changes I made:
– I reduced the size of the bust to a C on the pattern tissue, but once I basted the top together to test the fit, it was still a bit low (as the fabric was pulling under it’s own weight. And this was before the skirt was attached!). I removed another 3/4″ from the underbust, although looking at these pictures, I could’ve stood to remove a little more.
– I reduced the waist by 3/4″ before sewing; once sewn up I had to take in the side seams another 1/2″ or so. I’m telling you – this fabric is soo stretchy!
– I shortened the neck and arm bands and stretched them to fit when I sewed them on; without stretching, they would have ended up floppy.
– I shortened the hem twice – first hacked about 3.5″ off the pattern tissue, then another 2″ when the dress was sewn up as the skirt had stretched under it’s own weight.
– I left out the pockets – I feel like they add a lot of bulk with fabric like this.

Stripey Tiramisu
I tried to match up the stripes, but I didn’t do the best job. They match up on this side…

Stripey Tiramisu
… but not the other side. This is partially because the fabric was a PAIN IN THE ASS to cut (so shifty!), and partially because I had to keep sucking in the side seams after the dress was finished, to get it to fit. Also, please note that the waistband is not cut straight. Again, shifty fuckin fabric.

Stripey Tiramisu
The shoulder seams also do not completely match up. Oh well!

Despite my problems with the fabric, the gape factor is pretty non-existent:
Stripey Tiramisu
Stripey Tiramisu
I think the key to this is shortening the bands and stretching them to fit the neckline. It kind of sucks everything in, and allows it to curve to your body.

Stripey Tiramisu
If you have your heart set on sewing this pattern with a very drapey fabric, make sure you are vigilant about pressing every seam. It really makes a huge difference, especially on the bands.

Stripey Tiramisu
Stripey Tiramisu
Sorry about all the loose threads; I had literally just finished the dress before I took the pictures 🙂

Stripey Tiramisu
Now then, let’s have a bit of Spring up in here, pls?

Completed: White Tshirts. Yes, Tshirts.

1 Feb

At the risk of really beating this dead horse to the ground- I like making solid, every day basics. Boring shit like plain pants, tshirts, solid knit dresses, and I’ve got my eye on making underwear as well. I mean, making a bunch of party dresses is super fun, don’t get me wrong – but there are only so many frilly/froofy dresses I can fill my closet with before I start pulling my hair out on Saturday morning whining that I don’t have anything to weeeear. And I, too, have read Overdressed, which basically punched me in the face the same way that Fast Food Nation punched the rest of the world in the stomach. I can’t even walk in the mall anymore now without yelling about polyester and stitch lengths. It’s insane and no one wants to go shopping with me these days… not that I do much “shopping” as it is.

So, I’m ok with sewing my own basics. I like that I make a tshirt for roughly the same cost as something from the mall, except I can control the fit as I like it and I also know the hem stitches aren’t going to fall out the first time I throw it in the wash. Maybe making tshirts is simple and the exact opposite of exciting, but sometimes I’m having a bad day and I just want to make something without thinking to much about it – and for me, that perfect something is the tshirt. Some people bake when they’re in a bad mood. I make tshirts.

A couple of weeks ago, I was contacted by Organic Cotton Plus and asked if I would like to sample some of their organic fabrics. Yeah! I chose the white interlock knit and set to work making some basics. In organic because, yeah, I be fancy.

Organic Renfrew- V-Neck
I used my beloved Renfew pattern and made two tops. Here’s the v-neck -probably could have stood to make that v a little more, uh, v-like, but it ain’t too bad for a first attempt. The secret, I’ve learned, is to sew the neck band on a regular sewing machine first, and then serge the edges after. Otherwise, the blades of the serger will chop a big ol’ hole in the middle of your tshirt when you try to pivot (and disabling the blades just makes a huge mess, oh god). I know this because I actually tried to do the v-neck version several months ago, and it failed. Also, I realize I just lied to y’all about this being a first attempt. I’m sorry, I’ll never lie to you again~.

Organic Renfrew- V-Neck
I made no changes to the pattern (other than my initial fitting changes), except I did not add the hem band. I just hemmed the bottom with a double needle and used my walking foot.

Organic Renfrew- V-Neck

Organic Renfrew- V-Neck

Organic Renfrew - Scoop Neck
I also made a scoop neck!

Organic Renfrew - Scoop Neck
Making tshirts is FUN!

Organic Renfrew - Scoop Neck
I actually really really love this fabric. It is the *perfect* weight for a basic Renfrew – super soft, a bit of stretch (but not all slinky like jersey – which I love, but there is a time and a place for slinky jersey) with a good hefty weight. Even though it’s white, it’s actually quite opaque – the scoop-neck top has neon yellow twill tape on the shoulders. Can you see it? NOPE. I’m pretty sure I could get away with wearing a neon bra under these and on one would be the wiser.

Organic Renfrew
Plus, the fabric is less than $9 a yard. So yes, a teeny bit more expensive than F21 – but it’s also light years nicer, as well as ethically-sourced. Which I’m totally willing to pay extra for.

Organic Renfrew

Organic Renfrew

Organic Renfrew

And while we’re on the subject of paying extra for ethical fashion… didja see my new jeans?

Imogene Stretch
WELL LOOK AT THEM.
Before you get all excited and start freaking out, I didn’t make these. As much as I wish I was a jean-making-master like Taylor Tailor, I can’t make a good pair of jeans to save my life. I don’t even think it’s a matter of fit anymore – I just don’t like the denim that is currently available. As much as I love love love my Thurlow jeans, I rarely wear them because the fabric just sucks. They stretch out so much over the course of the day, they are huge and baggy by the time I take them off – and I’ve sized them down twice now. Ugh. So I give up. Jeans, you win. I will buy you from now on.

Imogene Stretch
So here’s the deal – like, I dunno, every single woman I know, standard jeans just don’t fit me right. They are too big in the waist, too tight in the thighs, and the length is always much too long (and I’m too lazy to hem my own jeans, let’s be real here). I guess I could fix the waist issue by wearing a belt, but I hate wearing belts with pants, not to mention I don’t even own any belts that fit around my hips. Plus, the denim is just shitty. I bought some GAP jeans a couple of years ago and they’re already getting holes – and I barely even wear them! So I recently got rid of all my jeans – I had almost a dozen pairs – and bought one pair. I only own one pair of jeans now, and here they are.

Imogene Stretch
These are made by Imogene and Willie, and they are the Imogene Stretch. I’m not going to sugar coat – they were fucking expensive. Actually, these jeans are the most expensive piece of clothing I have ever owned. This is also the first piece of new/non-sale clothing I’ve bought in several years (and yes, I bought them with my own money. Ha, I WISH I+W would give me free jeans!). So, why would I spend $200+ on one pair of jeans, you might ask?
– They are made here in Nashville, TN, by a small business. I like supporting small businesses. I like knowing my money is going back into my community.
– The materials are amazing. The denim is high-quality and wears beautifully (and it’s woven in the USA! Yeah!). I also get 3 free repairs, should I happen to gouge a hole in them or some shit.
– The fit is better than any pair of pants I’ve ever owned. I dunno about you, but I’d rather own one pair of well-fitting pants than a dozen pairs of ill-fitting pants. I have no waist gap, the legs fit perfectly, and the length was hemmed to my exact measurements when I bought them.
– THEY LOOK DAMN GOOD ON ME.

Also, the workmanship is just beautiful-
Imogene Stretch
The topstitching is three different colors. Can you see it?

Imogene Stretch

Imogene Stretch

Imogene Stretch

I’m not posting this because I secretly want everyone to stop shopping at fast fashion places (ok, I kinda do – in a perfect world. But that’s not really attainable right now, and not everyone has that kind of budget! ;)). I mean, I just bought a pair of Keds the other day. Whatever. But… know when to pick your battles. Know what matters to you, and what you can let slide. And personally for me – I’ll make what I can, and buy local when I can find and afford it, and not feel bad if I occasionally have to buy shoes at Macy’s. Small changes eventually equal big changes.

Organic Renfrew

Organic Renfrew

~*~Disclosure: I was not financially compensated for this post, although I did receive a fabric sample from Organic Cotton Plus to review & keep. All opinions on this product are my own.

Tutorial: The Paulie Pocket Top

18 Jan

stretch yourself header
This post is part of the Stretch Yourself Series hosted by Miriam of Mad Mim and Miranda of One Little Minute. This two week series is ALL ABOUT the love of knits, so go check it out!
I’ll be showing y’all some embellishment twist on a classic, along with Jessica of A Little Gray

Here she is – the Paulie Pocket Top!
Paulie Pocket Top
I KNOW. The name of this top is totally ridiculous & tacky – but what part about my life isn’t? 🙂

Paulie Pocket Top
You will need 3 different kinds of fabric to make this – something for the majority of the shirt (in whatever yardage you need to make your top), something to line the back of the pocket with (half a yard or so should be enough), and scraps for the pocket binding. For the binding, you don’t want to use anything that is too thin/floppy, or it’s not going to sit right – try something with a bit more body, like ribbing or a cotton knit.

Don’t forget your pattern! You can download it here. The edges of the paper are part of the band pieces; the lines just didn’t transfer over during the scan.
Be sure the test square prints out to 4″x4″ (or 10cmx10cm, if you fancy). The stretch guide is there for the binding fabric – you just want to make sure the 4″ piece stretches up to the length provided (or else your binding will not fit in the cut-outs). If it stretches more or less, that is fine, but you will need to adjust your pattern pieces accordingly.

Paulie Pocket Top
Cut all your pattern pieces from the main fabric as normal. For this tutorial, I am using the Renfrew pattern. Sew the shoulder seams as instructed (you don’t *have* to sew the shoulder seams first, but I like to because it helps with pocket placement – you can pull the shirt over your head and double-check in the mirror).

Now push the back of the shirt out of your way. We won’t be touching it for the rest of this tutorial.

Paulie Pocket Top
On the shirt front, measure on both sides the distance from where you want the bottom of your pockets to hit, keeping seam allowance in mind. I usually go with 1 3/4″. Mark this with a pin.

Paulie Pocket Top
Align the bottom of the pocket template with the pin and cut from the front of the shirt only.
(pst! I know my template has different wording – while putting together this tutorial, I hadn’t decided on a ~name~ for my pattern embellishment yet ;))

Paulie Pocket Top
Give the pocket piece to your cat to play with, idk.

Paulie Pocket Top
Cut 2 pieces of pocket ribbing, using the pocket band pattern piece.

Paulie Pocket Top
Fold in half lengthwise, wrong sides together, and press.

Paulie Pocket Top
Pin the pocket band to the pocket opening on the outside of the shirt, matching raw edges, notches, and ends. The pocket band will be smaller than the pocket opening – this is good, we are going to stretch that band to fit and give our pockets a nice curve. Do not overpin this – 3 pins is plenty.

Paulie Pocket Top
Start by anchoring one end of the pocket band to the pocket edge, and stop with the needle in the down position.

Paulie Pocket Top
Sew the band to the edge, stretching the band to fit as you go (don’t stretch the raw edge of the pocket- just the band! It’s much easier if you position it so the band is on top). Sew slowly and take your time. We ain’t in a hurry here.

Paulie Pocket Top
Once the band is sewn down, you can topstitch it on your sewing machine – using a twin needle or a regular ol’ zigzag stitch.

Paulie Pocket Top
You should end up with something like this. Ain’t that fancy! Let’s put a back to those pockets so our sides aren’t hanging out in the glory of the sun – unless you’re into that kinda stuff, eh, no judgement here.

Paulie Pocket Top
Measure from the bottom of the shirt front to about an inch above the pocket band. Mine is 9.5″, which is approximately how tall I need my pocket lining piece to be.

Paulie Pocket Top
Measure that same measurement from the bottom of your shirt front pattern piece and cut that from your pocket back fabric.

Paulie Pocket Top
Finish the top edge of your pocket back fabric – this is optional as we all know jersey doesn’t exactly unravel, but it’ll make the next step a little easier 🙂

Paulie Pocket Top
Lay the shirt front over the pocket lining piece you just cut, matching all raw edges. Pin along the pocket openings and shirt bottom to keep everything in place.

Paulie Pocket Top
Now, using your fingers to feel the edge of the top of the pocket lining underneath, carefully pin across the front of the shirt so both pieces are pinned together.

Paulie Pocket Top
Flip back periodically to make sure you catch both layers.

Paulie Pocket Top
Topstitch (again – you can use a twin needle or a zigzag) along the line you just pinned. Baste the side and bottom edges together.

And that’s it! You can go ahead and sew your shirt together as instructed by your pattern – treat the pocket-ed front as one piece.

Yay for embellished shirts!

Paulie Pocket Top

Paulie Pocket Top

Paulie Pocket Top

Special shout-out to this awkward picture:
Paulie Pocket Top
No idea why I look so emo here haha

Paulie Pocket Top
There! That’s better 😀

Completed: A Slinky Red Butterick 5078

15 Jan

This doesn’t really warrant much of a post – it’s a knit dress, I’ve already made the pattern before, wah wah – but I thought it warranted at least a mention, after I made the changes I was musing over.

Butterick 5078 - slinky red
This is my second version of Butterick 5078 – and way better! So much better!

Butterick 5078 - slinky red
For one, the fabric is better. I wish I could share a little piece with all of you because it is SOOOO SOOOOFFFTT. It’s a rayon knit that I picked up at my local fabric store’s 40% sale (I should go back. Should I go back? ARGH), and it’s even softer than the purple bamboo knit that I used to make that Tiramisu (which, ps, I’m wearing right now. Actually, I wear it like once a week. THIS.DRESS.IS.THE.BOMB.). The color is a rich vibrant red, and it is slinky as all get-out. So, perhaps most people wouldn’t want a slinky red dress. But I like! Slinky and feels like pajamas, yeah!

Butterick 5078 - slinky red
I used the same sizing and everything as before – the 8 – but I did make a few changes:
– Lengthened the bodice to cover all my boobs and not cut across the middle of them. To do this, I put on my first incarnation of the dress and measured how much I needed to add, and then just added it to the bottom of the pattern piece. It was somewhere in the realm of 3″, FYI.
– I removed 3″ of the skirt length from the pattern pieces, so I didn’t waste any of my precious fabric.
– I changed up the construction sequence of the dress, to make it easier and more, uh, knit-friendly. Most everything was constructed flat (the pattern has you do everything in the round, including the sleeves. ewww), and then I zipped up the side seams at the last minute. This was extra convenient, as the super drape powers of this fabric made it a bit big when I first sewed it. It was very easy to take in the side seams!
– The biggest change I made was to eliminate that runched drape deal at the waistline. I considered adding it – even cut out and assembled the pieces – sewed the dress up, thought, “Oh God, I have made a huge mistake”, pulled the runching back on over the dress and realized I would have made a bigger mistake by adding it. I dunno, that runching just looks weird on me. Sorry.

Butterick 5078 - slinky red
I am fully aware you can see, like, everything through this dress. NO CARE – it’s like a slinky, sexy pajama. Ooh ooh!

Butterick 5078 - slinky red
I also think it’s interesting to note how different the neckline looks with a drapier fabric. Unfortunately, this one isn’t so gape-friendly. I do have to be careful when I bend over (and wearing a tank underneath to counteract isn’t an option: see above re SLINKY).

I guess there’s not much else to say about this dress. I do think knit dresses are my new go-to for cold weather, though. I can cozy them up with tights and boots and a handmade sweater, and I feel polished while still being totally appropriate to roll up on the couch. I need to dig into the rest of my knit stack from Textile; I’ve got a few stripey pieces that I’m dying to play with!

Butterick 5078 - slinky red

Butterick 5078 - slinky red
Kitty approved? Sort of.

Completed: the Coppélia Cardy

2 Jan

Happy New Year, everyone! I hope the holidays left y’all with plenty of relaxation, time with friends, wonderful gifts, and of course… alcohol. Can’t forget the alcohol 😉 So sad, January 2nd is now upon us so I guess it’s time to revisit the Real World, take down my Christmas tree, and dive back into my nine to five job. Wah!

I’m going to kick this year off with the very first thing I made in 2013- the Coppélia from Papercut Patterns
Coppélia Cardy
YUM. That’s my short-list review of this cardy, if you must know.

Santa (or maybe Jesus?) must have been following my wishlist something fierce, because Katie generously sent me this pattern (along with the La Sylphide and DON’T YOU WORRY, because I have words for that one too!!). My experience with Papercut Patterns is brand-spankin’ new – I’ve long admired the sweet styles that are offered, and the delightful packaging that the patterns are wrapped up in. And you know what? I was NOT disappointed with the actual pattern – or the finished garment. I could wax poetic about this wrap all day, but I’m going to stop because I don’t want to make anyone sick. Just know that when it comes to Papercut Patterns, the answer should always be yes.

Coppélia Cardy
I know my fabric choice here is a little… different. Haha! Honestly, I’ve actually had a hard time lately pulling myself away from the looks that I see outlined on the pattern envelopes. For some reason, this isn’t too much of an issue with Colette Patterns, but something about the photography with these particular patterns just makes me want to wrap myself in pastel chiffons and roll around in a field of wildflowers. Except it’s winter here (ooh 40* brr! DON’T JUDGE ME) and I look like shit in pastels. Anyway, every time I thought about my future lover Coppélia, I envisioned her in white. Realizing that I need to make a wearable muslin for this top (since I’m unfamiliar with how these patterns are drafted), and then realizing that I had a very large yardage of this god-awful zigzaggy sheer polyester monstrosity that’s been sitting my stash for at least 3 years… Coppélia The Disco Queen was born. And OMFG I KIND OF LIKE HER.

Coppélia Cardy
The fabric is kind of uncomfortable, though. What can I say? It’s a very heavy, very cheap polyester that I bought from $1/yard table at Walmart. And it’s totally sheer. But it works, somehow.

Coppélia Cardy
The size XS fit me *almost* perfectly straight out of the envelope. I had to pull a good 1″ chunk out of the center back – which, I’d already cut my pieces, so the back now has a seam – but I have a fairly small back/ribcage, so this does not surprise me. I also tapered the sleeves down to an XXS as they were a bit baggier than I prefer. In the future, I will shorten the sleeves as well – they’re a bit long (I folded the cuffs back so it’s not noticeable on this top). All in all, the fit is pretty nice, though!
Also, I have no idea what I’m doing in the above picture. Sniffing my armpit, I guess?

Coppélia Cardy
I love how cozy and snuggly this top turned out! I can only imagine how much I’ll love it in a nicer fabric – especially something with a bit more drape. This is an actual wrap top – which means when I untie the ties, the whole thing opens up in the front like a cardigan (i.e., not a mock wrap!). Surprisingly, the gape factor here is pretty much nonexistent. I spent all day in this shirt and never once worried about exposing more than I intended. Yay!

Coppélia Cardy
If you’re wondering how I already made a top this year and we’re only 2 days in – it was a SUPER fast make! I used my serger to sew most everything (except a small bit of topstitching along the bottom hem for the band), and I think my total sewing time came in around 45 minutes. I didn’t stay out late on NYE – I’m an old lady when it comes to my bedtime, I was out by 10:30PM! – so I was up by 10AM, had a leisurely breakfast and quickie sewing sesh, then made it to Gallatin to eat black-eyed peas and collard greens with my parents by 1PM 🙂 Yay for New Years!

Coppélia Cardy
The pattern instructions are great – they are brief and to the point, without a lot of unnecessary hand-holding (although they are not so brief that a knit n00b would have no idea what is going on). Same with the pattern markings – there are notches to match the pieces, but not a metric shit-ton. This is perfectly fine and dandy with me. I don’t need a bunch of notches to match up a sleeve seam, you know? Just tell me how to get it on the bodice, I think I can figure it out from there!

Coppélia Cardy
I also really love the construction method for this top – it was very straightforward and intuitive, very very similar to how to like to sew my knits. So maybe I’m just a little biased haha 😉

Coppélia Cardy
Here’s a good look at the sheerness of the fabric – the zigzags are solid on top of a knit mesh (that’s my hand behind it). It’s not so noticeable on this top, especially since I am wearing a nude bra, but it would definitely show in something like a dress. Hence why I had so much yardage and never did anything with it – the fabric is heavy enough on it’s own, and adding an underlining just makes it even worse. So I’m glad I figured out a use for it 🙂

Coppélia Cardy
I definitely plan on making more of these – I actually skipped my lunch break today to take advantage of the semi-annual sale at Textile Fabrics (which, if you live in Nashville: GO. 40% off everything, yo!). I only let myself buy knits, but I got some awesome stuff – stripes, silky drapey rayon, and a lovely woolish sweater knit that is turning into Film Noir Coppélia STAT. Which I’m hoping will be easier to match with bottoms 🙂 Haha!

Hopefully a first successful sewing project means all of 2013 will be successful sewing projects too! HAHA ok, maybe that’s a little optimistic – but optimism is good, yeah?

Happy 2013, y’all!

Completed: The Tiramisu!

13 Dec

WHOOOOOOOOOOO LOVES CAKE? I’m talking about the new pattern line, the brainchild of our beloved StephC (although the food is all kinds of delicious too, mmm). Tiramisu is her first offering – a knit dress with a mock-wrap front (in cup sizes A-D), short kimono sleeves, and pockets.

I was actually part of the crew of ladiez who were initially chosen to test the pattern before it went to print. There was a small snafu with the tester printing (so it goes), which is why you see my dress at the same time you are (hopefully!)holding your own copy of the pattern. I’m still treating this like a test pattern, which is why I actually paid attention to the instructions and made notes as I sewed. I also made a muslin. I never make a muslin for knits – are you proud of me? ARE YOU?

Despite treating this like a test, I’m sorry to report that my pictures are still total shit. You know, winter, lack of light, I’m not getting up early, blah blah. Also, my hair looked REALLY good last night and I need to take advantage of that. Them’s the breaks!

Anyway, check out my new dress!

Purple Tiramisu
~So in love!

Purple Tiramisu
It looks totally different in a solid color, yes?

Purple Tiramisu
For this lil guy, I used a gorgeous purple bamboo knit that I bought at Vogue Fabrics while I was in Chicago. I actually bought it specifically to make this pattern; I’ve been holding it for a few months haha. I wish I had a big enough piece to send every single one of you a little swatch – it is the softest thing I have ever put on my body ahhhh!! And the color… none of these photos (mine or the ones from Vogue) do it justice. It is the most beautiful eggplant purple in the world.

Purple Tiramisu
Basically, I never want to buy another knit that isn’t bamboo again. Ever.

Purple Tiramisu
So let’s talk about the pattern! The sizing is pretty brilliant, and in fact my favorite part – you pick based on your high bust measurement, and then corresponding cup measurement (which is more of a measurement of proportion rather than the actual size bra that you would normally wear). The waist band is chosen based on your actual measurement (rather than the usual, “Well, if your bust is x, then your waist is y.”). It sounded confusing at first read, but once I actually got the pattern in my hands and looked over the sizing information, it was pretty easy to determine what size I should cut.

The size I ended up with was 30D, based on my measurements, and the waistband was cut for a 25″ measurement. I had to make a couple small changes to get my preferred fit, but even straight out of the envelope it was looking pretty good!

Purple Tiramisu
The changes I made were actually pretty mundane:
– I took about 1/2 off the bottom of the front bodice, as it stretched a little too low in the muslin (PROTIP: When making a muslin for this dress, you only mock-up the bodice & midriff. Since the skirt weighs down the whole top and thus affects the fit, it is pretty important to pull down the band to mimic this if your fabric is on the heavy side. Otherwise, you may end up with a longer bodice once you sew the skirt on!)
– I took at least 1″ off the side seams, for a much more snug fit
– I took 3.5″ off the hem, as below-the-knee doesn’t look so hot on me. The skirt is 20.5″ now.
Ok, looking back, I realize that those bust changes mean I actually ended up with a 30C. WHATEVA.

Things I love about this dress:
Purple Tiramisu
DAT SKIRT.

Purple Tiramisu
SOFT POCKETS.

dancin
NO GAPE.
Seriously, the bodice engineering on this thing is a thing of beauty and wonder.

Purple Tiramisu
One thing I did note with this particular dress is that the pockets do add a bit of bulk at the hips. I think this is unique to my particular fabric (it’s quite clingy due to the 4 way stretch), as it’s not apparent on Steph’s version (or the bonus version), but I think it bears mention if you are concerned about that kind of thing. I’m not, personally, so the pockets will stay.

Oh, here are some pictures without the belt, btw:
Purple Tiramisu

Purple Tiramisu
It’s still pretty! I just like to belt, well, everything 🙂

Purple Tiramisu
The only thing I would change next time I make this is to sew the sleeve binding on after the side seams are sewn. It’s a personal preference – I know why the pattern has you sew the binding on before (so you can test and tweak the fit – and yes, it comes in handy!), but I just like the way it looks as an, er, uninterrupted tube. It also may or may not have anything to do with the fact that I sewed the sleeve binding to the bottom of the midriff on my first go (and no, I’m not bitter or anything, why do you ask?).
Another thing I’ll mention is that the fabric estimates are generous. I only used 1.5 yards of my 60″ fabric. Even at $15 a yard, that’s a pretty cheap dress!

Purple Tiramisu
I know my threads look as white as I am, but I promise they are purple! Also, this picture is boring as hell.

Purple Tiramisu
Anyway, super happy with this one! I can see this in lots of different fabrics – it’s so comfortable, especially since you don’t have to worry about THE GAPE.

With that being said, if you haven’t already done so – you really need to pick up a copy! And OMG so excited about the upcoming Pavlova!!

Completed: Butterick 5078

13 Nov

Whenever I finish up a big project, I like to ease myself back in with something short and sweet (also, I had a really bad muslin disaster with another pattern and I don’t want to talk about it, except to say that woven kimono sleeves are clearly my Kryptonite). Knit fabrics are especially good for this, since most of the fitting works itself out in the form of stretch fabric.

I’ve had Butterick 5078 lurking in my stash for a couple of years now – it’s out of print; I picked it up during my local fabric store’s annual “Buy $10 Worth Of Fabric, Get A Free Out of Print Pattern!” sale (yes, that is a real thing. It is hell on my bank account, if you want to know the truth.). I liked the line art as I reminded me of a dress I used to own – until it went the way of the Tragically Cheap Buffalo and died in the wash one day – but I never got around to making it because it sucks up a surprising amount of knit fabric, which I never seem to find significant yardages of at the thrift store.

Butterick 5078

But hey, this fabric is pretty cool, yeah? It was given to me by an awesome blog reader, Heather (yo girl, if you got a blog PLZ LINK ME UP), who hit the motherload of vintage fabric at an estate sale and sold a big wad of it to me for stupid cheap. This stuff is perfect for this dress – fairly stable with a slight stretch, a nice thick warm fabric for winter. The print has flowers and butterflies, which isn’t exactly my thing, but the grey on black kind of cancels out the extra girly girly. I had about 1/4 yard less than I actually needed, but I was able to get everything cut out on grain with some clever cutting layouts and a lot of screaming and cursing.

Butterick 5078
Speaking of the cutting layouts… this shit is weird. The bodice front & waistband drape (the runching around the waist) are actually cut on the bias, not the straight grain. For some reason, cutting my knit fabric this way caused the pieces to lose most of their stretch! I KNOW. I’m still having trouble wrapping my head around that one. Obviously I can still pull the dress on, but it’s a tight fit.

Butterick 5078
The runching on this dress is so weird. I initially thought it might look better with a lighter, more fluid knit – but I scoped out a few on pattern review, and I actually think my stable knit looks a little better, even if it is bulky. There is a whole ‘nother waistband underneath the runched one, so the drape could easily be omitted for a smooth waist.

Butterick 5078
I sewed this up in a straight size 8, with no alterations other than shortening the hem about 3″. For future makes, the front bodice definitely needs to be lengthened – it cuts straight across my boobs. Not really a good look! And I think the runching could stand to start a little lower than it does right now. The bulk is kind of making me look thicker than I am.

Butterick 5078
I like the skirt, though!!

Butterick 5078
I tried to take a ~twirly picture and instead, I got this. This is the second most awkward picture I’ve ever posted on my blog (first awkward obviously being the teeny peeny I neglected to mention I had… haha, forreal, though, I am so delighted to see so many people have their mind in the same gutter as meeee!). It also made me laugh really hard when I saw it, and I thought it would be cruel to NOT share it with the rest of the world. God, I’m so generous, you guys.

Butterick 5078
Here you can see that unfortunate bodice-meets-midriff-right-over-my-boobs seam. Also, this dress needs some bra snap holder things.

Who am I kidding, I’d never be arsed to sew that kind of shit on a KNIT DRESS.

Butterick 5078
I sewed the entire thing on my serger, minus the hems – which I sewed on my machine with a double-needle. Overall, I think this dress took about 2 hours to sew.

To be honest, I didn’t like this dress after I pulled it on. The bias cut made it really difficult to pull over my head, the runching covered what I feel like is one of my better assets, and the horrible bust seam placement made me feel like I had these super weird high and flat boobs. UHM.

However, it is comfortable. Like, the kind of sneaky comfortable that makes you feel like you’re getting away with wearing pajamas. And Landon likes it – his words, “That looks like you bought it at a store. That’s supposed to be a compliment!” And it’s polyester knit, which means I don’t ever have to iron it. I would like to make this again, provided I can find the right knit.

Butterick 5078

Completed: The Taffy Blouse!

21 May

I don’t even know if I can legitimately call this the Taffy blouse. I mean, yeah, I used the pattern pieces for the front & back… and I cut the front on the bias. That’s about where the similarities end & the mad scientist in me started cooking up something entirely different.

Floral rayon
I started out with this fabric. Isn’t it so pretty? Approximately 1 yard of floral rayon, I found this at the Goodwill for a whopping $1.99 YESH. I envisioned it as the Taffy Without Sleeves and promptly cut the front piece out of my fabric.

… and then it was time to cut the back piece, and that’s when I realized I had made a huge mistake. I may be a small person, and I may wear my clothing very fitted, and this may be ~just a top~, but uhhh… it’s still a bias-cut pattern, and it needs more than a yard of fabric! I frantically tried to fix my mistake by moving the back pattern pieces around the sad flap of fabric that remained. I tried cutting the back pieces with a seam (as opposed to on the fold). I tried piecing them. I tried making only the bottom of the back floral with some kind of backwards contrasting yoke. No dice. I half-heatedly checked my stash for a lone piece of black fabric I could cut the back piece out of, thinking I’d do a two-tone look, but I didn’t see anything that even remotely matched. So, I did what any self-respecting seamstress would do – I got pissed off & chucked the top & all the little fabric scraps in the scrap bin. BYE.

In the meantime, I brainstormed until I had an epiphany. Do y’all ever get stumped by something sewing-wise & end up having an epiphany later that perfectly fixes whatever ails you? Or maybe that’s just me. I usually get them right before I fall asleep haha. Whatever, I ain’t complainin’!

Taffy

So anyway, I ended up cutting the back piece in a black knit fabric, figuring the stretch of the knit would complement the stretch of the bias on the woven side (so if you’re wondering – the black knit wasn’t cut on the bias. It was cut on the… stretchy knit grain, or whatever you call it, I dunno). I did cut off a half inch or so of the back side, since it was extra stretchy. It still does not have negative ease, but I think it drapes pretty nicely.

The front (woven) part of the shirt is cut in a 2. I did have to pull up the shoulders quite a bit as the neckline was originally pretty freakin’ gapey, but I think it worked out in the end. It is still gapey & kind of lumpy in the back, but ehh… it’s the back, I don’t have to look at it. Haha!

Taffy - Back

Taffy - Front
So obviously, my Taffy does not have sleeves. It also did not get the bias tape treatment – I decided to use some of my lace stash instead. Pretty black lace around the neckline & arm holes! Looove it.

Taffy - Side
The lace at the bottom was an inspired afterthought – I barely had enough black knit to get the full length out of the back piece (I know, I’m such a mess); it ended up getting cut about 3″ short. So I shortened the front piece to match & sewed this pretty wide lace around the bottom. I love the way it looks!

Taffy
So that’s it! A pretty simple top that almost didn’t happen. I really like the way it turned out and I think this is a great way to use up smaller yardages of woven fabric that you might not have enough to cut both the front+back with – just sub a knit in there! 🙂

In other news – today is my birthday! Yay me, I made it all the way to 27 🙂
And I got some new fabric (and more is on it’s way – I placed an order with Mood this morning ;))

Yard sale score
Sorry this picture is so bad – the plaid in the second bolt is actually really beautiful & colorful. Blame it on the rainbad lighting. Anyway, my mom found this at a yard sale on Saturday – the woman holding it had been an heirloom seamstress, so there was promised to be lots of batiste! I told my mom to let me know what she found. She called me as she was leaving and said, “Yeah, I saw quite a few bolts of the stuff. I didn’t buy anything, though.” WUT. I made her turn around & go back & buy… all of it! Hahahahaa! What you see here is something like 15-20 yards of batiste. She got the entire stack (including about 10 more yards of that blue on top – I took 2.5 yards & let her keep the rest haha) for $15! Which is awesome because I was totally about to buy more batiste, except I was going to spend $16 on 2 yards. Soooo, needless to say, I’m pretty thrilled with this find. And I love that it’s all on bolts; it makes me feel extra fabric-hoardy.

Buttons!
She also bought me all these buttons… I think they were a quarter apiece. Aren’t they sweet? I especially love the lemons & the flies (my mom says they’re bees. Whatever, they will always be flies to me). And if you creep the right corner, you can see some of the wooly nylon she also got. Fifty cents a spool! Uh huh, I love me some yard sales!

And on a final note… Morgan sent me some gorgeous fabric all the way from Skopje, Macedonia.
Fabric from Macedonia :D
It is the most beautiful cotton I think I have ever seen! And she sent me two entire meters – which she purchased speaking only Macedonian! I am so proud of her & totally dying over this fabric. I have no idea what I will make out of it – I’m thinking it needs to be a maxi dress, though. The paisley repeat is just so huge & awesome. What do you think?

Oh, there were also hot dog flavored chips in the bag along with the fabric. I haven’t summoned up the courage yet to sample them (that will be tonight, after I’ve had a couple of birthday drinks hehe), but I’ll let y’all know how that goes down…

Happy Monday!

Completed: An Oddly Psychedelic Jalie 2921

8 May

I’m no stranger to little indie pattern companies – I loveeee Colette & Sewaholic patterns, and I LOVE when I can get away with not buying current Big 4 patterns (yeah! Stickin’ it to the man!). However, I’ve never sewn with a Jalie pattern before – and I honestly wasn’t planning on it, really, until Mikhaela had to show me up in her amazing scarf collar knit top, the top that made me so jealous I actually saw red for about 3 seconds. The pattern was Jalie 2921 and I NEEDED IT. And, so, uhm, I bought it. Pattern ban? What pattern ban? It’s (almost)my birthday, I deserve this.

I’ve actually been sitting on this pattern for about 2 weeks – blame the delay on my Bombshell-frenzy. I was finally able to sit down last night & start cutting… and sewing! I finished this lil number in record time, forreal! And it barely used any fabric. Hey-o, new favorite pattern!

A couple of thoughts on Jalie – while the pattern was easy-easy to put together into a cute finished shirt (and the finishing is sooo coooool, you just wait & see!), the instructions were extremely short & sparse. The pictures were difficult for my pinhead-brain to decipher, although obviously I was able to figure it out eventually. I also do not like the way these patterns are packaged (sorry!) – it came in a shrink-wrapped plastic sleeve, with a large color photo of the pattern front, and the pattern pieces printed on heavy white paper & folded neatly. There was no actual envelope to store the pattern pieces in. Not a huge deal – since I ordered this from fabric.com, I just used the envelope it was shipped in. But it did give me pause, since normally envelopes aren’t something I just happen to have on hand. Also, the sizing/yardage information was difficult to read, since it’s in both French & English, and the sizing varies from baby to big momma. But hey – at least it was easy to cut out! And no, I didn’t trace this sucker AT ALL. No hate for the pattern tracers, I just don’t want to put for the effort and anyway, I don’t mind buying another pattern if I need another size (it’s a small business! I support y’all!). I did save the rest of the sizes that I cut away, so I guess I can tape it back together if I need to. Not that I plan on sewing this for anyone else, heh heh heh.

For sizing, I cut an R & tapered out to a T at the bust & lower armhole, then back down to an R at the shoulder & neckline. I think it fits pretty perfectly with no other alterations! Yeah!

Jalie 2921
Of course, Landon thinks the fabric is too loud. I guess it is kind of hiddy, but I love it anyway!. It’s some super stretch polyester I bought from Walmart like 5 years ago. We are considering this my wearable muslin.

Jalie 2921
I do love the tie-neck, but my fabric is a bit too heavy so the bow droops pretty bad. Next time I make this, I will use something lighter… and probably shorten the ties, as I think they are a bit long.

Jalie 2921

Jalie 2921

Jalie 2921

Jalie 2921
The construction on this top is pretty cool (once I figured it out, I mean). It leaves a nice clean inside at the neckline- no seams! So pretty!

Jalie 2921
I hemmed the sleeves & the bottom with a twin needle on my regular ol’ sewing machine.

Here is your photo-story for the day:
Notice those pretty rosebushes in my background? Weeeeell they belong to my neighbors, and I’ve been eyeballing them pretty hard since they started blooming. They smell AMAZING, btw (and I have lots of honeysuckle on the other side of my house – so, despite living in a shitty neighborhood, it smells delicious right outside my front door lol). The light has always been way too harsh right there, though, which is why you get porch pictures. Today is overcast, so I thought I’d take advantage of those roses!

Jalie 2921
Until I heard a car driving down my (dead-end)street.

Jalie 2921
And then I realized they were not turning around, but actually parking.
Right next to the rose bushes, that they were going to trim.

Jalie 2921
“Well, this is awkward.”

Picture me high-tailing the fuck back into my house (they were STARING at me!).

AWKWARD.

So, sorry about the lack of decent pictures.

Jalie 2921
Here I have photoshopped out the wrinkles in my skirt, I hope that makes up for it.